
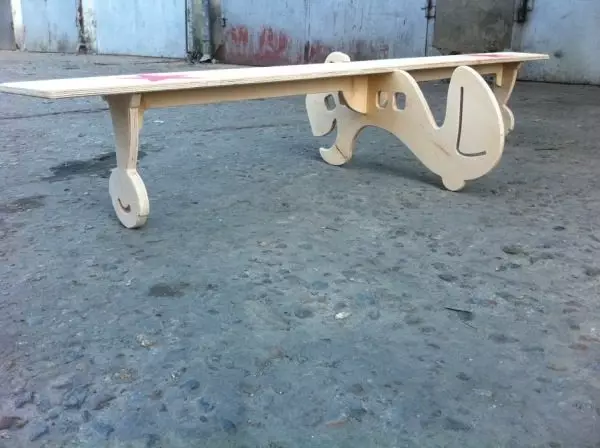
The theme of this article is the construction of a shop with your own hands for the gazebo. As the main material, by us will be chosen plywood. General principles of material processing and stages of the shops of the shops us, in fact, and to be discussed.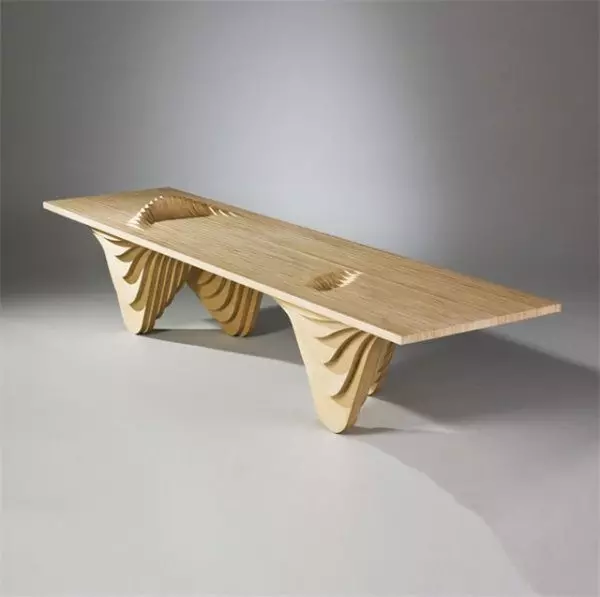
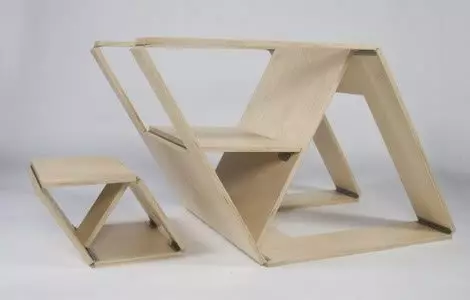
Plywood can serve material for the most unusual designs.
Preparation
Materials
Why will the material become the plywood?
There are several reasons.
- With the same with a board, the thickness of plywood is much stronger . Therefore, benches can be made lighter.
- Another favorable difference from the lumber of natural humidity is that plywood is not deformed and does not crack during the drying process..
We clarify: Of course, the wood of chamber drying (especially noble breeds) it will give way to all articles.
But the price of such wood makes it material, little suitable for the garden gazebo, and it is not possible to find a qualitatively dried board everywhere.
- Material is easy to handle And requires a minimum of tools and skills, in contrast to metals.
- At the same time, the appearance of the finished product will be quite presentable . Plywood first and second varieties looks great after varnishing; Low-core material can be placed under painting. It is clear that the gazebo with benches should be combined with stylistics and color.
What kind of plywood can be used? FSF, 15-18 millimeters thick.
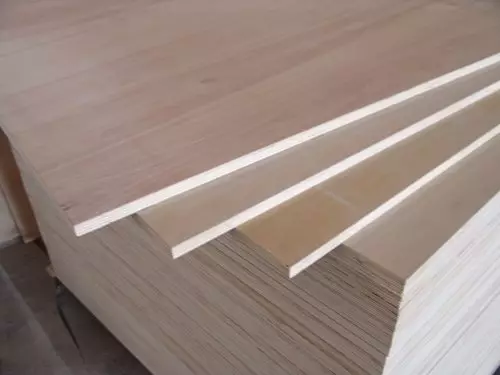
In the photo - waterproof FSF plywood.
It is the FSF - due to its increased water resistance compared to the FC intended for interior. Evaporation of phenol formaldehyde resins used for gluing layers of veneer, we are not terrible - it's about the outdoor room. Thickness from 15 mm will allow you to collect details of future shopping shops, without using the carrier frame. (See also Article Furniture for Arbor: Features)
What else will need for the manufacture of benches?
- Galvanized screws with a length of 50 millimeters.
- For plywood of the first or second variety - a yacht polyurethane varnish (it is extremely racks to atmospheric influences). For lower-grade material - acrylic spacure on the tree and paint PF-115 (alkyd enamel for outdoor work).
- For the sealing of the screws of the screws, you can use acrylic putty tinted under the wood or, it's easier, Cashitz from sawdust remaining in the process of work, and PVA glue.
Article on the topic: Sewing the door with plasterboard
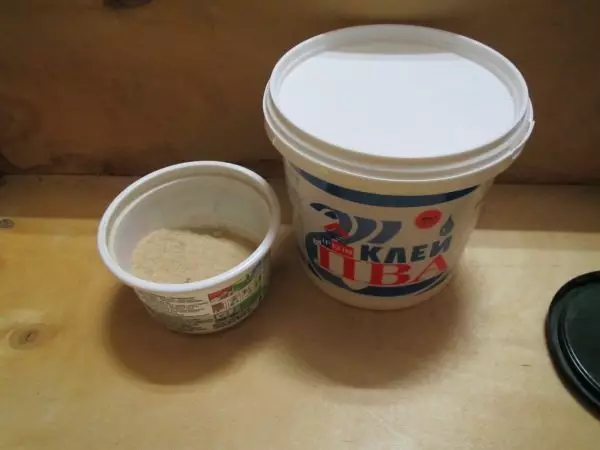
Mixing these two components, you can get a solid putty exactly under the color of plywood.
Instruments
The absolute minimum of tools - drill, hacksaw, roulette, ruler, pencil, sandpaper and screwdriver.
However, several additional devices will greatly facilitate our work.
- The disk saw from the guide will make the cuts when the plywood sheet is cutting on the details perfectly straight. A more affordable option is an electrolovka: straight lines of this tool are given worse, but it will also greatly reduce the costs of time and strength.
- Schlifmashinka will simplify the grinding of the surface of plywood during primary preparation and in the process of color. It is quite suitable for the simplest vibration tool, less than 1000 rubles.
By the way: the grinding grid may well be used instead of sandpaper.
- The screwdriver will help quickly assemble the items in the finished product.

Rechargeable drill screwdriver.
Getting to work
Pattern details
It begins with sheet marking. It is better not to be lazy and pre-sketched sketch markup on paper. This operation is highly likely to reduce material consumption. (See also the article Table and Gazebo Claws: Features)
The next operation is actually cutting plywood.
As in any work, there are a number of nuances.
- For the jigsaw, a tree leg is used, with teeth looking up. The saw saw is clamped in such a way that the teeth rotate from the bottom forward. In this case, the cutting will create an effort, pressing tool to the sheet; If you do on the contrary, there is a high probability to lose several speakers of the body.
- A hand-hack leaf is sewn from the front side of the details. Electrolzik and disk saw - with rear.
The instruction is directly related to the previous advice: if when working a manual saw, the worker will turn down tool, then when using electrical tools - up. Accordingly, the last layer of veneer will rise in the form of chips, and it would be better for her not to be on the front side of the finished part.
- When use the electroller, lead at risk to the canvas, and the label on the sole. It will require preliminary calibration: You may have to reorient the sole of the jigsaw or apply an additional risk on it, allowing to cut exactly on the markup.
Article on the topic: How to repair the bathroom in Khrushchev
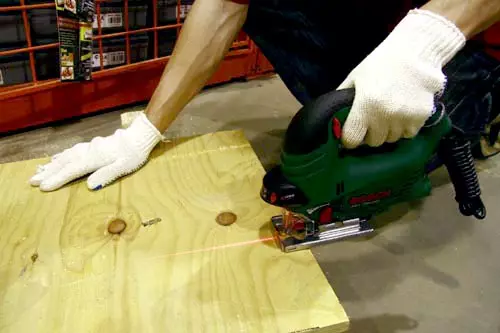
Work will noticeably simplify if you are using a labzik with a laser. The line-highlighted line is aligned with the risk.
After they were taken out, their edges and frontal surfaces are grouped. The material should not only leave the offence, but not to be rough to the touch. When grinding, sandpaper or grinding mesh is always moving through the fibers of the top layer of the veneer; This is especially important when processing edges.
Assembly
As already mentioned, fat plywood can be gathered. However, let the reader in no hurry to take for a screwdriver: an attempt to screw the self-taking place to the end of the sheet without preparation guaranteed to spoil it.
Here you need a special technology.
- We are placing the line of the joint center on the part that will be fed to the plane to the end.
- Drills along it holes with a diameter of 4 millimeters in 20 cm increments.
ATTENTION: At this stage it is very important that the holes are strictly perpendicular to the sheet plane.
- We divide the holes with an 8-mm drill and slightly block them. The self-suite hat should be immersed by about a millimeter relative to the surface.
- We combine the details and drills directly through the first holes made by the second part with a diameter of 3 millimeters. Better, making the first hole, pull the details with one self-tapping screw: this will prevent their accidental mutual displacement. And it is very important to keep the drill perpendicular to the plane so that the drill does not go beyond the part of the Block.
- We tighten the details along the entire length. The connection can be additionally enhanced by applying along its line before assembling the PVA glue band. It is precisely it - simply because the drums that will inevitably perform, after drying will become transparent; At the same time they will be lying and varnish, and paint.
For connections at angles, different from the direct, it is better to use galvanized lining and screws of 4x16 mm.
Final finish
A bench for a gazebo is done by hand. It can already be sitting on it; However, the appearance of the product is far from the ideal. In addition, the top layer of the veneer over time is inevitably dirty.
Article on the topic: Stains on the wallpaper fired after sticking: how to remove and output
After assembly.
The final finish begins with the elimination of surface defects. Mixing sawdust with PVA glue to the state of thick casher, gently smear the hats of self-tapping screws. In the event that the shop will be painted, work can be made by the usual acrylic putty; She equalize the knots, potholes, lumets of connections and cracks.
Attention: both PVA, and putty decrease in the volume when drying.
Place will have twice with subsequent grinding.
Then the coating is applied - varnish or paint.
There are nuances here.
- If two or three layers are enough for PF 115, then the varnish will have to apply at least five.
- After applying the first layer, the surface of the finished shop is re-grinding with a null paper or shallow mesh. Moisturizing a veneer will raise a pile on it, and the product will be rough to the touch.
- PF-115 is necessarily diluted to the consistency of fatty milk with solvent or White Spirit. Otherwise, each layer, contrary to the assurances of the manufacturer, will dry at least three days.
- It is better to paint each surface in a horizontal position. In this case, it will not appear on it.
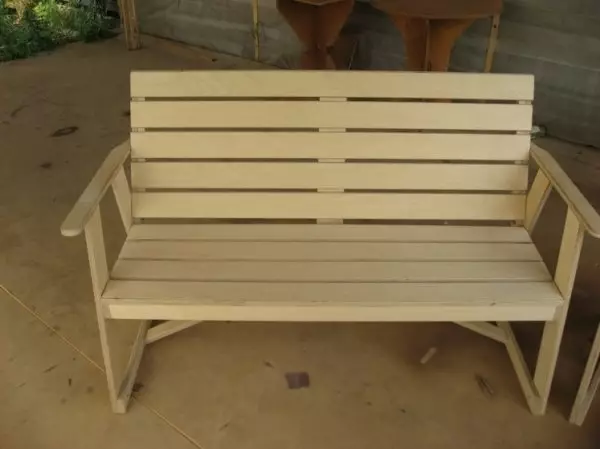
The finished product after drying varnish.
Conclusion
We hope that the operations described by us will not cause difficulties from the reader. Of course, we did not describe the only way to make a shop in a gazebo with their own hands. Video in this article will offer you alternative solutions. Successes!