
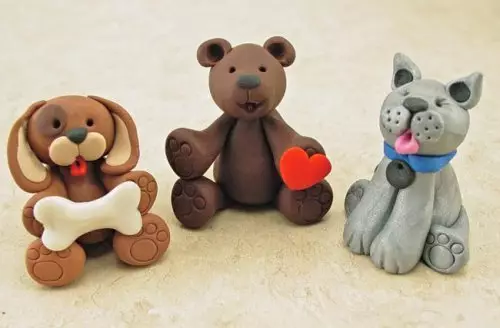
Many people, regardless of their age, like the modeling, regardless of the level of skill, sooner or later the idea comes that toys from polymer clay can be an excellent gift that comes to any celebration or just as a sign of attention. In the store, designer products from this material will have a very high price, with independent making, depending on the complexity of the work, it may be necessary to take several days, but the financial part is more profitable. When the decision to create with your own hands is accepted, it remains only to find simple, but beautiful toy options, so below we look at a few of them.
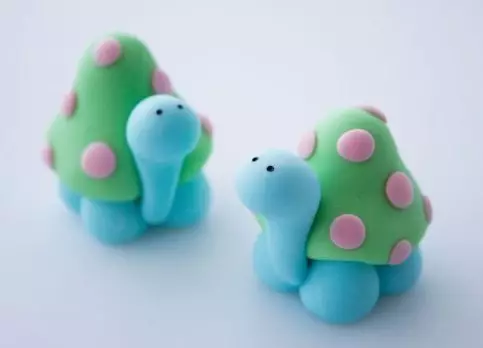
Cute turtles
If this is the first experience of modeling polymer clay, it is worth starting with light variants of figures. Let's start learning to work with the material with the creation of pretty turtles.
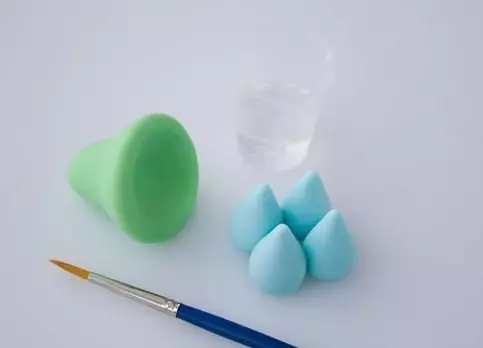
Required materials and tools:
- Blue polymer clay;
- Green polymer clay;
- Pink polymer clay;
- Wand (you can use a brush);
- Water (to make fingers);
- Master Class.
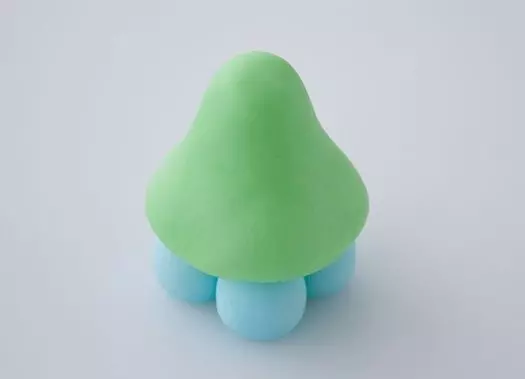
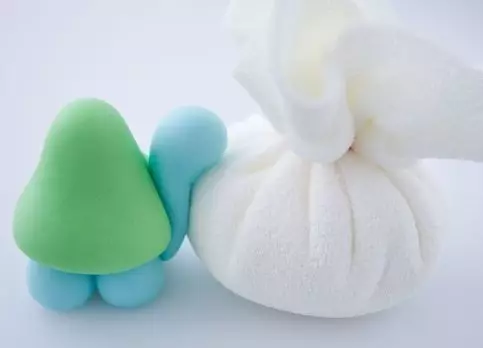
We take a blue clay and roll a smooth ball from it, after which you give it the shape of the droplet.
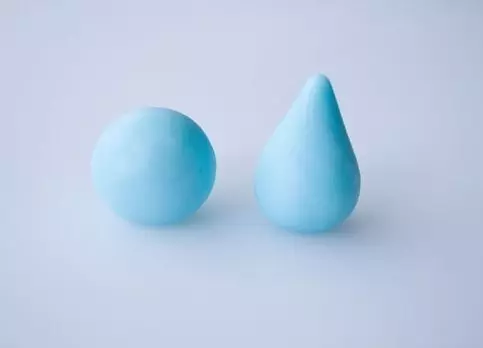
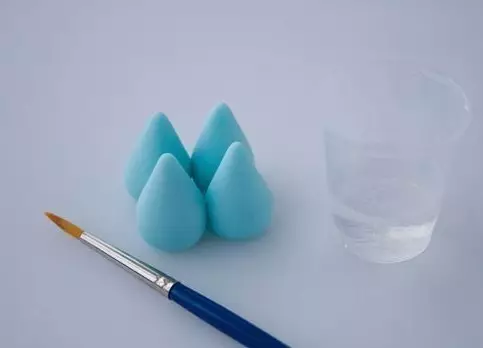
Thus, we make four droplets - these are future legs of the turtle.
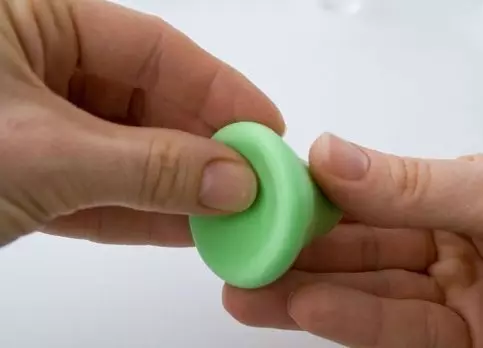
Now we take the green polymer clay and rolling the bulb of a larger diameter, after which you make a dome from it with a notch at thenime - this item will be a shell.
As a result, five blanks are obtained for the body of the future turtle.
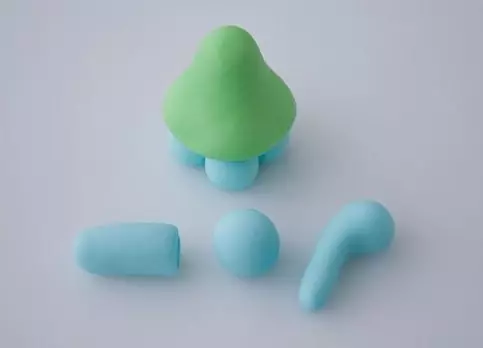
Now we put all the details of the legs nearby and put the shell from above, after which we press it a little on it.
Now you need to make the head of the animal to make it necessary, roll the ball and cylinder, after which it is to combine them together - it will be a head and neck.
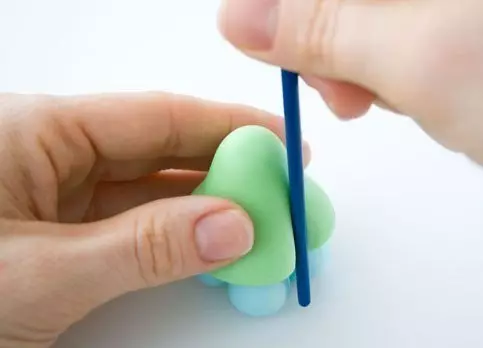
After that, it is necessary to make a place to fix the neck, for this we take the brush and make a vertical furrow, as in the photo below.
Article on the topic: Radi-hook for beginners: master class with video
We apply the neck into the resulting furrow and temporarily fix it using the remedies.
Now we take clay pink color, roll small balls, squeeze them and obtained circles decorate the turtle shell.
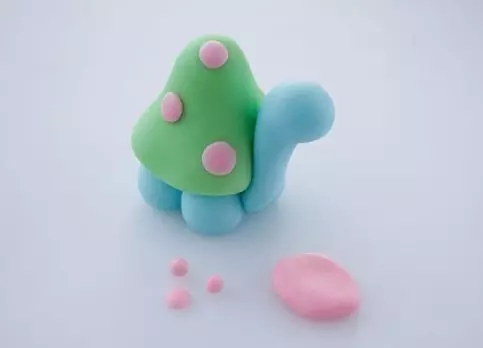
Now draw your eyes using gouache, or make them from beads. After this turtles can be baked.
Cute penguin
It is not difficult to make such a pretty and cute penguin, and then you can use it as a toy, statuette or christmas decoration.
Required materials and tools:
- White, black, yellow, pink, lilac polymer clay;
- Tools for modeling: rug, rug.
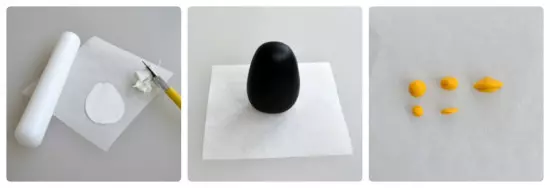
Take black clay and roll a ball out of it. For any work, it is advised to start with the creation of balls, as of them, as a result, it is easier to make a blank of any form and it turns out more carefully. In this case, give a form resembling an egg if there is no specialized carpet for modeling, you can take parchment.
We take the white clay and on a separate parchment sheet roll it off with a rope, then cut out from it and you need to make a notch.
We take the clay of yellow and roll two balls for the beak of different sizes, we make the top from the larger ball, and from the little bottom of the key.
Now you need to take a white item, attach to the penguin tent and smooth out. After that, fix the beak, take black clay and make two small balls that set the eye. Then make small sausages from the clay of yellow and make two depressures on them - these are Penguin's paws, fix them to the calf. Now from black clay make wings and also attach them to the body.
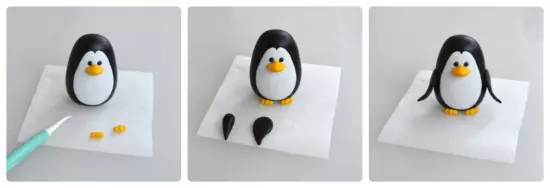
From the pink polymer clay of pink and lilac color rolling the strips, the purple strip then cut into small rectangles and laid with the same gaps over the pink plate. After that, slightly pass by the resulting part of the rolling pin and cut out an even strip from it, it will serve as a pingguin scarf. For a more interesting result, we take a knife and imitate the fringe at the edges of the scarf.
Article on the topic: Dress with open back: pattern of products with sleeves
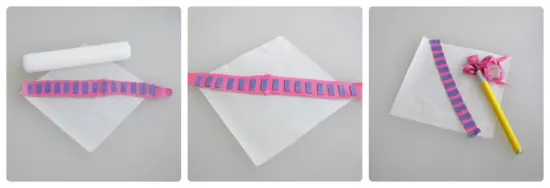
It remains only to put the scarf on a penguin and make a headphone hoop on the head of the headphones on the head, after which it is to roll a couple of balls from it, after which they put a small deepening, putting the texture to the toothpick.
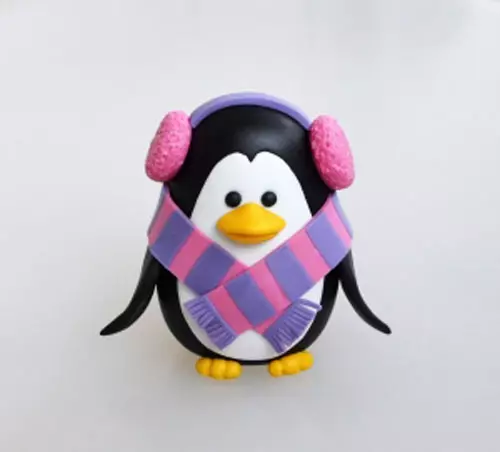
Now the toy is ready, it remains only to bake it in the oven at a temperature that is indicated on the package from clay.
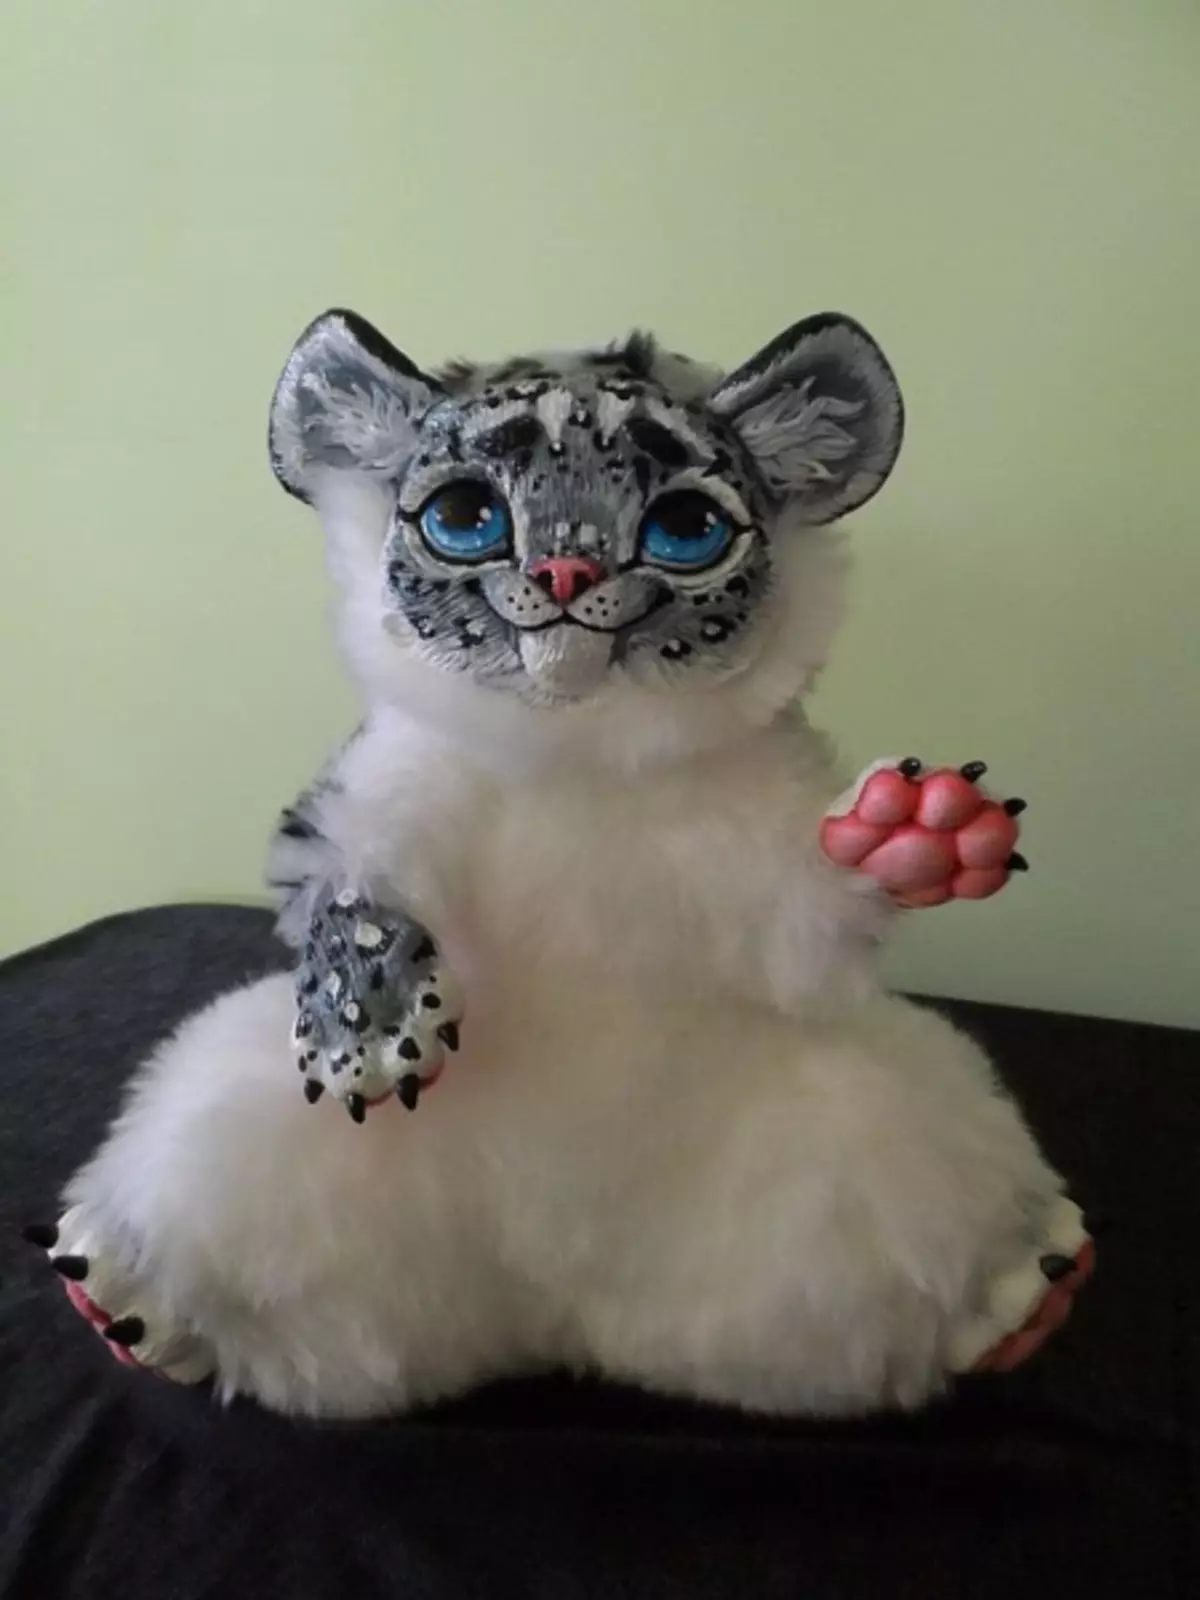
In addition to such options, you can also make toys with mixing techniques, such as polymer clay and fur. Such cute products are obtained as a leopard in the photo below.
Video on the topic
And in conclusion, several videos with detailed master classes on creating other wonderful and interesting toys from polymer clay with their own hands. And remember, in this technique you need an experience, so if the work does not immediately come out professionally, do not despair and continue to create and gain experience, then soon the product will be able to compete with the toys of professionals.