
From the cones you can make a lot of amazing crafts: from interior items to funny animals and fabulous heroes. The latter especially like children, because they can make them independently or with the help of parents. Such crafts will not only please the eyes of children, but also can become an excellent option for crafts to school or kindergarten on the autumn exhibition. The master classes offered by us are different in difficulty fulfillment, but they all are animals and characters who have fallen fabriced fairy tales. Detailed instructions will help you make any of these crafts.
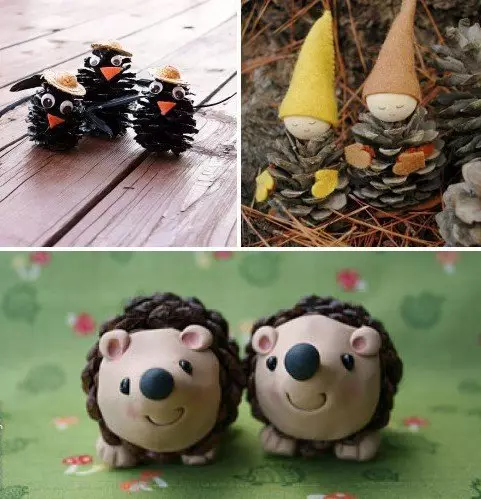
Crows from the cones
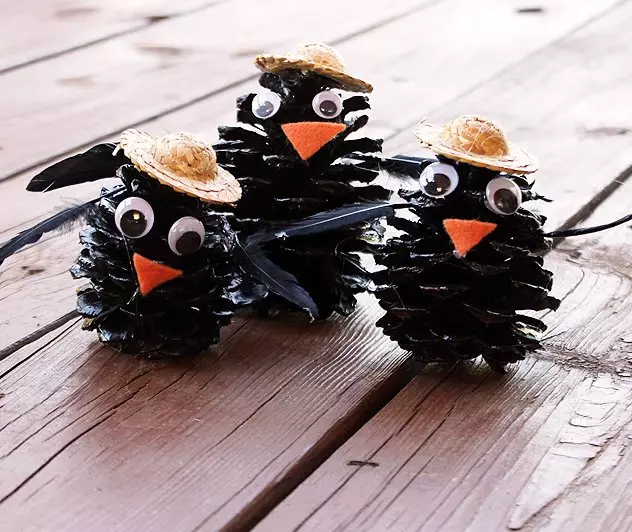
A funny blizzard from the bumps to do is so simple that even small children can cope with their manufacture.
Materials
For the manufacture of a small blizzard you will need:
- cones;
- newspapers;
- paint in the balloon black;
- Little straw hat;
- eyes for crafts;
- chopsticks of hot glue;
- thermopystole;
- pieces of felt of orange and black colors;
- scissors.
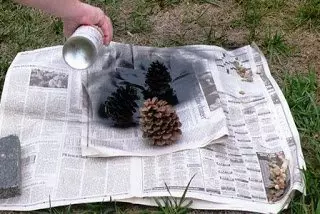
Step 1 . Before starting work, be sure to check the collided cones. In order for the craft to be such as needed, the bump should be stable in a vertical position. For a little blienenka, it is better to take the discontinuished bumps so that they resemble the bird's support. Clean the collected cones from dirt and dust. To do this, you can rinse them in clean water and dry or just brush the dust with a brush.
Step 2. . Now the cones need to be painted, use the black paint in the ballots for this. Work outdoors or indoors, which is well ventilated. Working surface or plot of land is shutting up with old newspapers so as not to stain them. Put the bumps on the newspapers, and evenly color the latter. If necessary, apply several layers of paint, in which case, be sure to dry the drying of the previous layer so that the paint does not flow. Leave the cones until the paint is completely drying.
Step 3. . From a piece of felt orange color cut out a small triangle - it will be a beak of a crow.
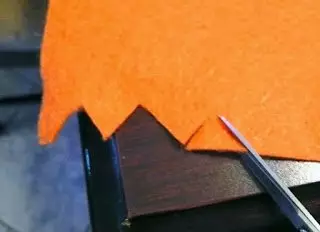
Step 4. . From the felt of black color cut the wings of the crows. So that the wings are the same, you can draw them a pre-spin on the fabric and, if necessary, to correct or cut one wing and, apply it in a mirror reflection to the remaining felt, cut and second.
Step 5. . Using hot glue and thermopystole sticks, stick the crows details to the chish. On the sides of the cone, secure feathers, beak and eyes ahead. Please note if your eyes are on the adhesive basis, remove it before work. Top on the head of Voronenka, Welve a straw hat. Also stick it.
Article on the topic: 155 stencils for painting on furniture and walls
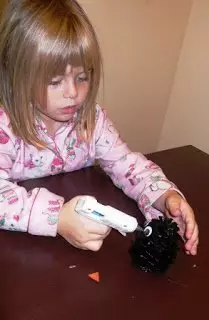
Since working with hot glue glue injuries with incorrect use, make this part yourself, not trusting children.
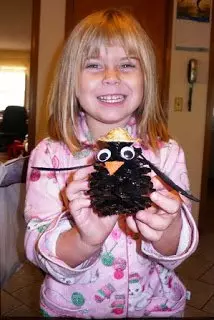
Crow is ready, she will delight your kind of you and your child for one year.
Hedgehogs from cones and polymer clay
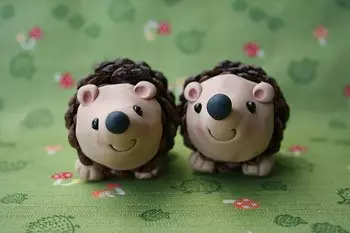
Charming hedgehogs are obtained from cones if instead of plasticine use polymer clay. As a result, the hedgehog is very realistic.
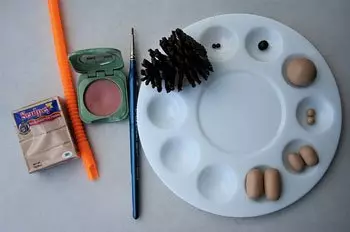
Materials
For the manufacture of such a hedgehog you will need:
- polymer clay color clay;
- polymer black clay;
- cone;
- Two black beads for eyes, 4 mm;
- crumbling blush;
- cosmetic brushes;
- tube for cocktails;
- Watercolor brushes;
- toothpick;
- Board for working with clay;
- glue.
This Master Class of Preschool Children will not be able to fully repeat completely, and therefore it is necessary to prepare the parts for the hedgehog from the polymer clay. Kids themselves can attach them to chish.
Step 1 . The cones for the manufacture of the hedgehog take well, so that they resemble the needles of the hedgehog. Before working a bump, be sure to prepare and clean from dust.
Step 2. . First you need to make the head of the hedgehog. To do this, form a ball made of polymer clay, then make a cone from it. Flat-side tightly press it to a chish. The base of the cone gently straightens and stretch to the edges of the bump. Top the top of the cone carefully pull up, giving it the shape of the nose of the hedgehog.
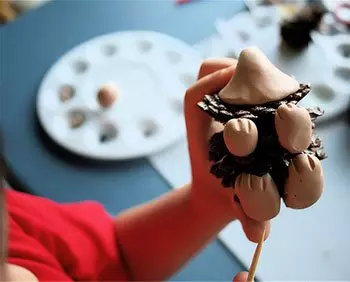
Step 3. . Shot from polymer clay four identical cylinders, press them to the side of the bumps - it will be the legs of the hedgehog. The bottom of the cylinders are a little bent and, using toothpick, give the lapes a characteristic form.
Step 4. . Form small balls from clay. It will be the basis for the ears. Place them at the appropriate location of the already formed face. The back sides of the tassel for the paints, press the ears inward, giving them a characteristic deepening. From the back of the ears, all the joints are stuck in your finger.
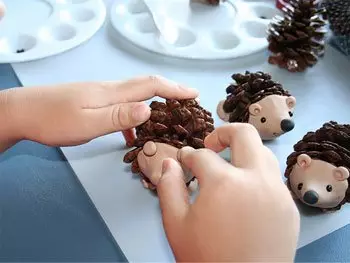
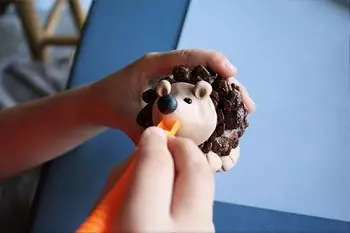
Step 5. . Toothpick the tip of the nose press to put a small ball of polymer clay black in it. So, you will finish the manufacture of nods.
Step 6. . In the area of the eye clay, press the back of the tassel. Insert into place of the resulting recesses of black beads. Insert so that the beads are not visible. It will be the eyes of the hedgehog.
Article on the topic: Fabric Canvas: Composition, Structure, Properties (Photo)
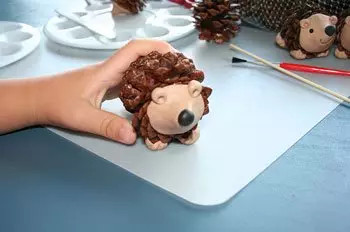
Step 7. . Take a cocktail tube and cut a small strip scissors. Sut it so that at the end of the tube it turns out the basis in the form of the letter U. Attach the cutting tube into the area of the Hedgehog and slightly pressing. So you get a smile on the face of the animal.
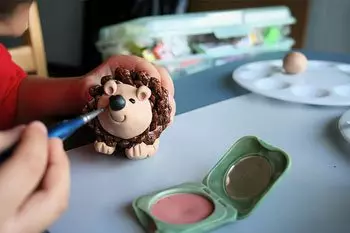
Step 8. . In the field of cheeks and on the inside of the cosmetic brush, apply crumbling blush. Rushane take pink tone so that they look natural. Surplus Rumba Clean brush wake.
Step 9. . Send a bump-hedgehog to the furnace. Bake the craft in accordance with the clay manufacturer's instructions.
Bakeing parts made of polymer clay, make sure that the room in which you work is well ventilated.
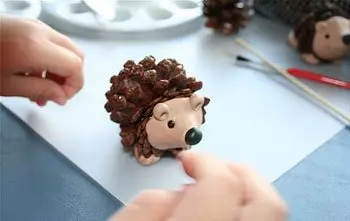
Note, when baking a bump can expand some more, and clay pieces can break down. If this happened, just glue the left parts into place after the craft is completely cooled. Do not use superclauses for gluing. He will leave noticeable traces.
Hedgehog is ready!
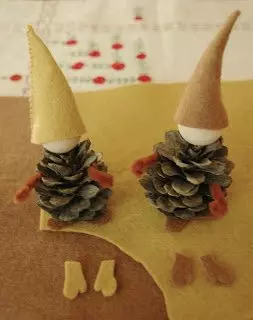
Fabulous gnomes from cones
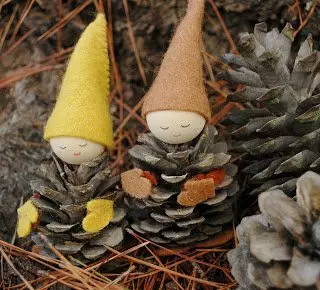
Such amazing characters like gnomes can also be made of cones. They can be not just a cradle for an exhibition or a toy, but quite a beautiful gift souvenir.
Materials
For the manufacture of small dwarves from the cones, you will need:
- Pine cones;
- large wooden beads;
- paper sheet or newspaper;
- compass;
- pencil;
- pieces of fetal tissue;
- threads;
- needle;
- acrylic paint black;
- Thin brush;
- Small brushes for washing the nipple;
- nippers;
- round-rolls;
- chopsticks of hot glue;
- Thermopystole.
Step 1 . At the very first stage of the manufacture of dwarves, you need to choose a bump. Trye take pine and ajar. Be sure to check that the bumps be integer, so the gnome will look much more aesthetically. Be sure to clean the bumps from dust and check that they are firmly stood on vertical surfaces.
Step 2. . From the newspaper, make a blank for the gnomic cap. Circle draw a small circle, cut it out and bend it in half. Figure the resulting figure in the cone. After trying on the cone to the existing wooden bead, adjust its shape. The resulting sample use both the finished pattern.
Step 3. . Attach a paper pattern to a piece of fetal fabric, circle it with a knead or shallow and cut the base for the cap.
Step 4. . The resulting foundation for the cap of the gnomer is covered with threads. Stick carefully so that the seam in the eyes is not rushed. Remove the hat. It is interesting to the felt cap seams outward. To do this, it must be sewn by hand overlocked seam and leave it in such a form without turning. If you want to make a tip of the cone, more on the newspaper pattern adjust its shape.
Article on the topic: Liquid china do-it-yourself without cooking: master class with video
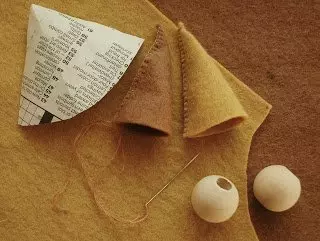
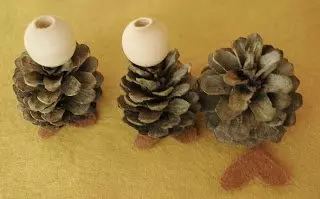
Step 5. . Beads stick to a chish using hot glue.

Step 6. . On the bead, wear a hat, for reliability you can fix it using all the same hot glue.
Step 7. . For the manufacture of handles, the gnomic need to take two small brushes. Usually they wash the nipples of bottles for kids. The handle needs to be bought off, and the wires themselves with bristles beolate with the help of round-rolls in the form of bent hands of the gnome. Most often they are sold white, and therefore you can paint them with paint from the canopy to tone with felt pieces. Paint should be applied with one layer.
Step 8. . Felt cut mittens for gnomic. Stick them to the already harvested base of brushes.
Dwarf handles can be made simply from felt. In this case, mittens need to be cut with a long base. The base should be beatened in the form of a tube and sew it a secret seam, leaving the mittens themselves directly.
Please note that the knobs of felt do not need long, they will be located directly. To get them back and make more neat, like handles from brushes, you can insert a piece of wire or bend the felt base at an angle and a loop from the thread to secure it in this position.
Step 9. . Made knobs on the end. Lubricate the glue and insert the side of the bump. Hold them a bit so that the glue grabbed well.
Step 10. . Cut the legs from the felt pieces and glue them to the base of the cones. This will help make the gnome more stable. In addition, the felt base will protect the surface where the gnome from scratches will stand.
Step 11. . The last barcode in the manufacture of a gnome is a face. Make it very simple. For this you will use acrylic paints of black and thin brush. Draw half-closed eyelids of the gnome and smile. If you desire, the face of the gnomic you can portray the way you like, drawing him open eyes, cheeks and so on.
The fabulous gnome from the cone is ready.