
The tag do it yourself is a completely feasible idea, whether it is attached to clothes, a product, a gift, etc. This product is made from all kinds of materials, with the help of various techniques and for any case. The article will describe not only how to create a tag, but also ideas where you can apply it.
On clothes
Buying things in stores, we meet the tags where information about the specific clothing is indicated. And it takes on the note novice designers or seamstresses that are made to order. For clothes, tags can be ordered in printing houses, but you can wonder on your own.
To create you will need:
- thermotransfer paper used for light fabrics;
- one meter of satin tape light color 1-2 cm wide;
- Printer;
- scissors;
- a small cut of the tissue;
- lighter.
To begin with, using a graphic editor convenient for you, create a layout of the desired logo. Image of rules of care and composition of fabrics can be downloaded on the Internet. It is desirable that in the picture used to two colors.
When everything is ready, you need to translate the image into the opposite one. This is done for comfortable printing. Then the resulting picture is located on the A4 sheet, how much will fit.
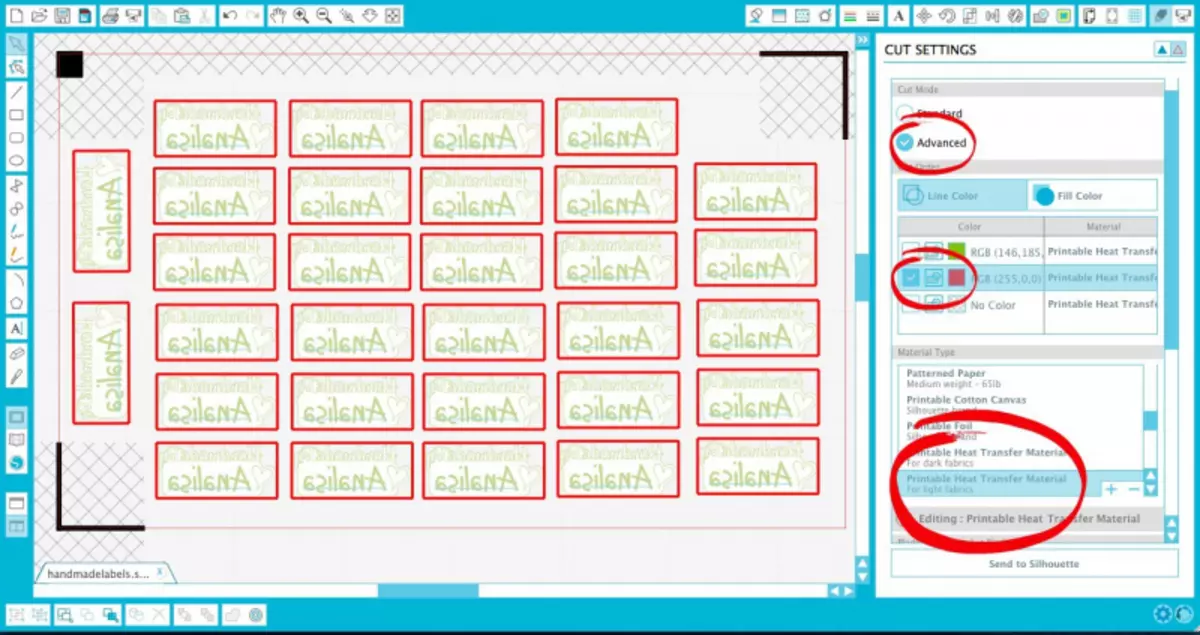
Now print the layout on thermotransfer paper and cut the rectangles with logos.
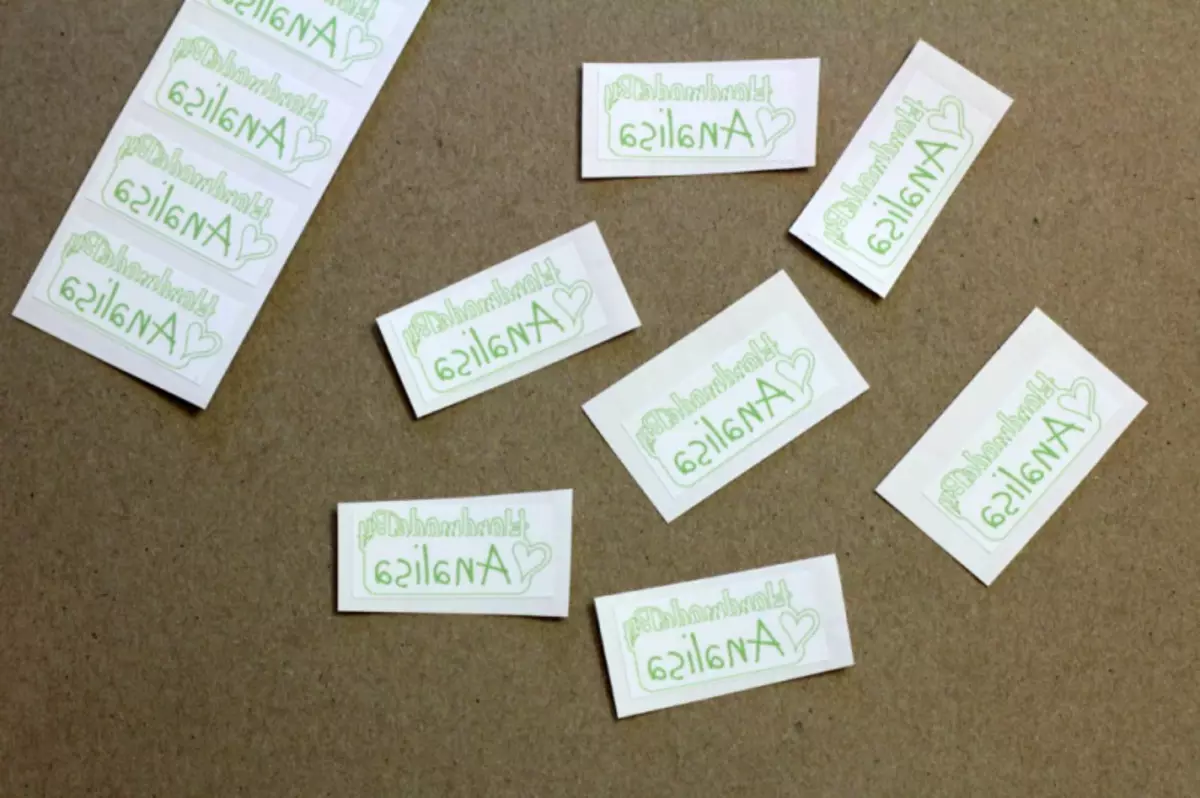
We take the satin ribbon, retreat from the edge of 1.5-2 cm, lay out the cut logos. Then cover the cloth and stroke the heated iron without steam. After making sure that everything was imprinted, we remove the fabric, turn the ribbon down the face side and stroke again to secure the drawing. Tag is ready!
Next, it can either sew or glued to clothing.
For a gift
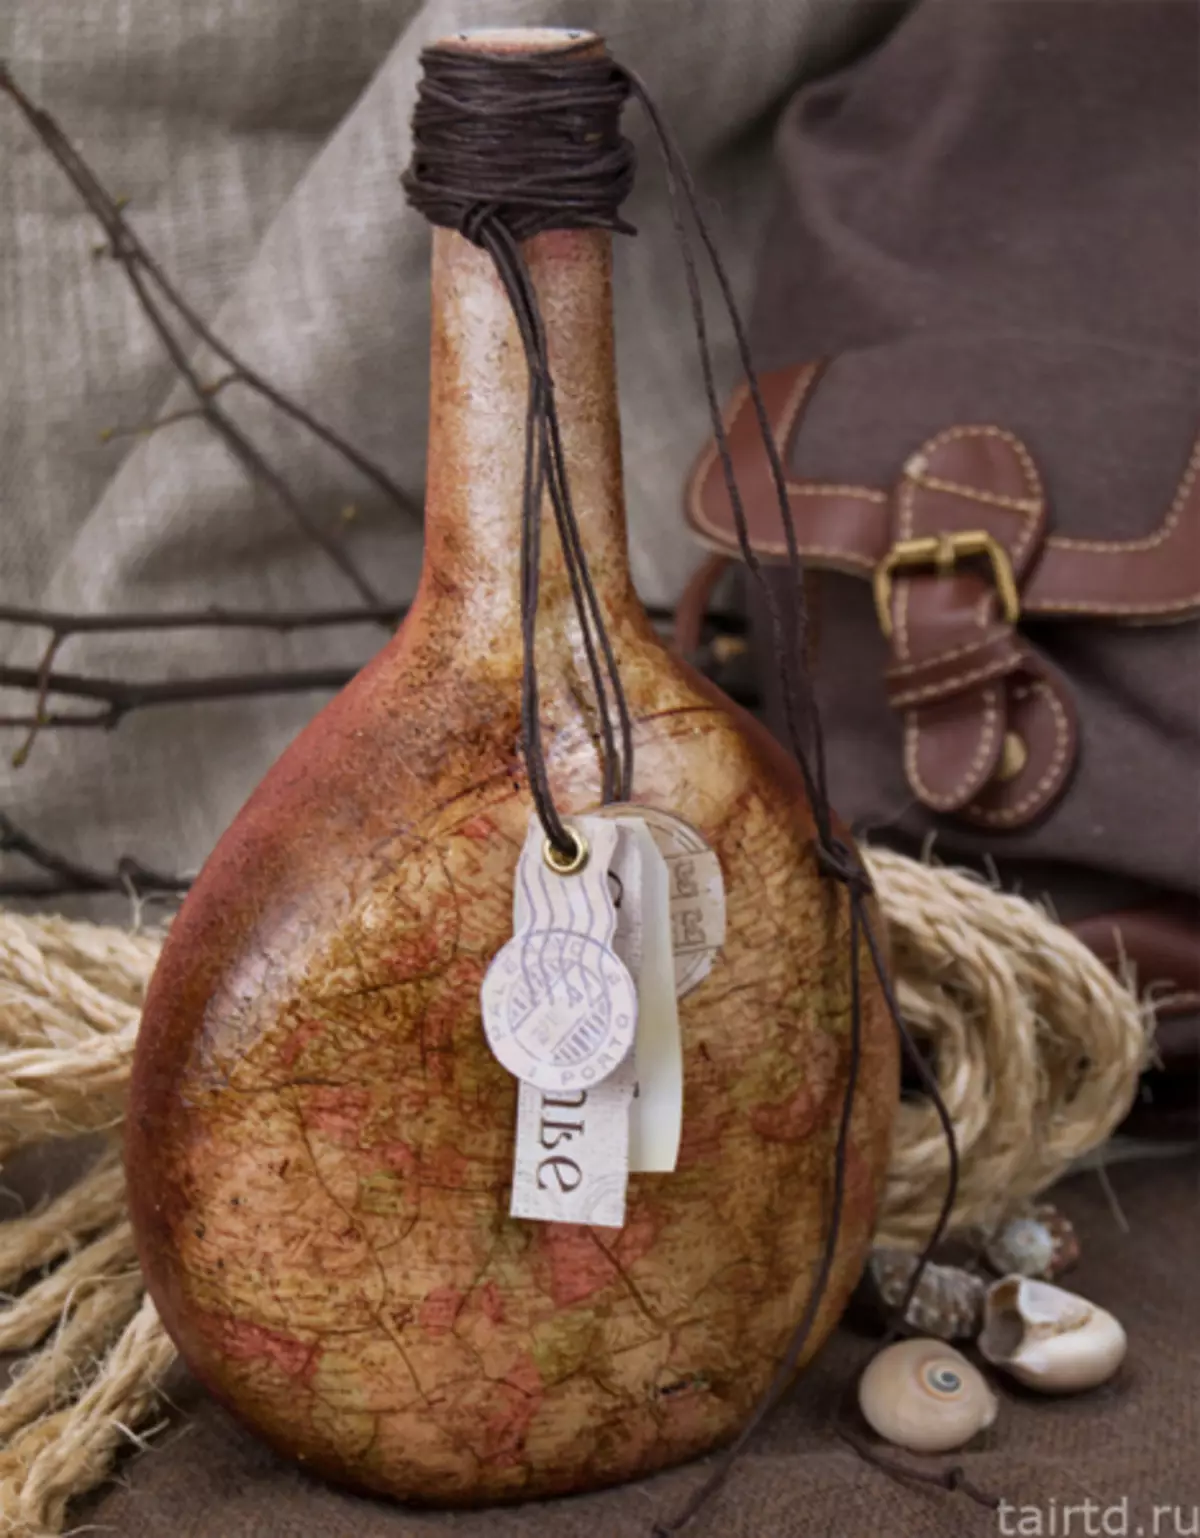
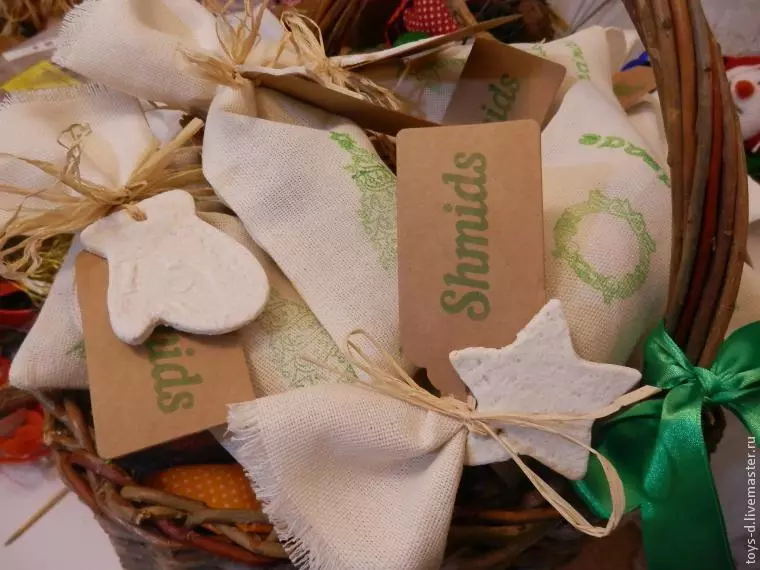
Tag for products Hand-Made is not limited to clothing only. Such an addition can be decorated and gifts. For example, you can decorate a bottle with a hot drink and thus congratulate a man from February 23 or happy birthday.
Artlesol Artlesol Production
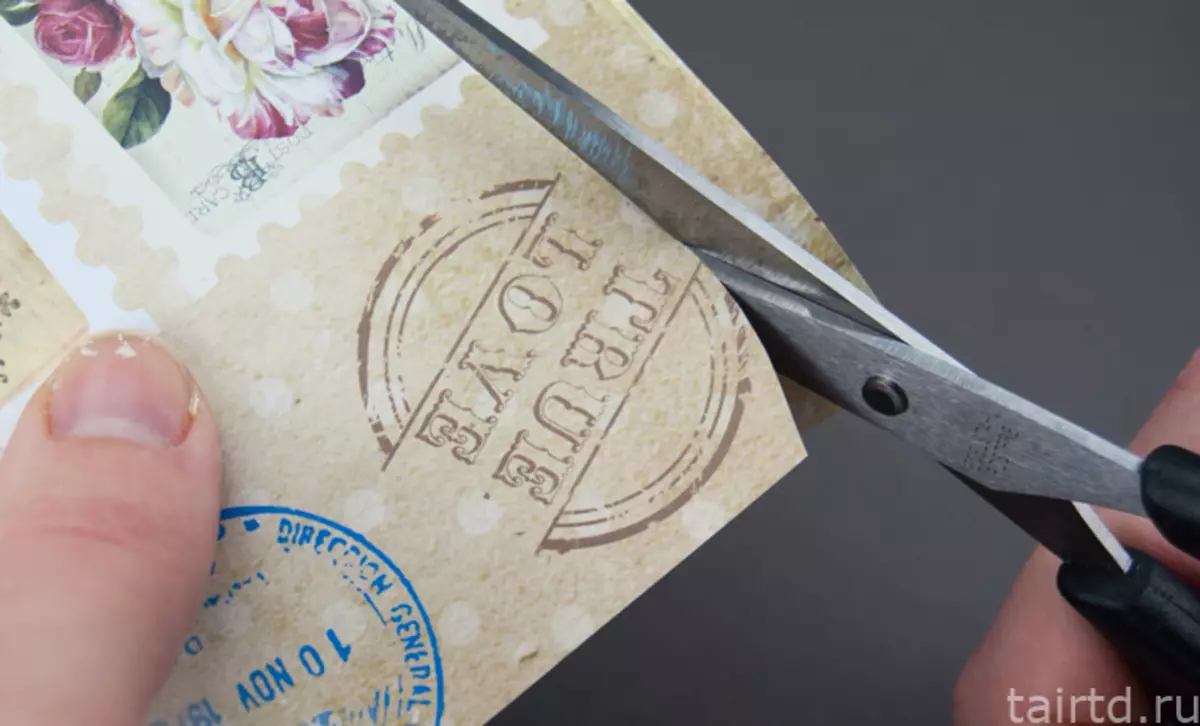
Print on cardboard suitable template.
We put on them chalks.
And attach to the bottle.
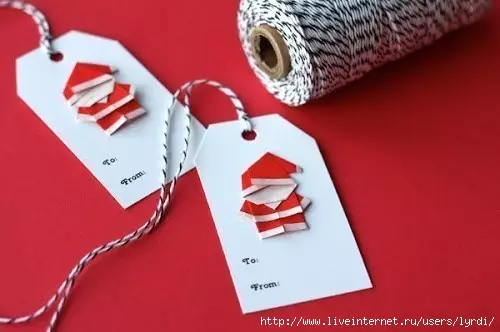
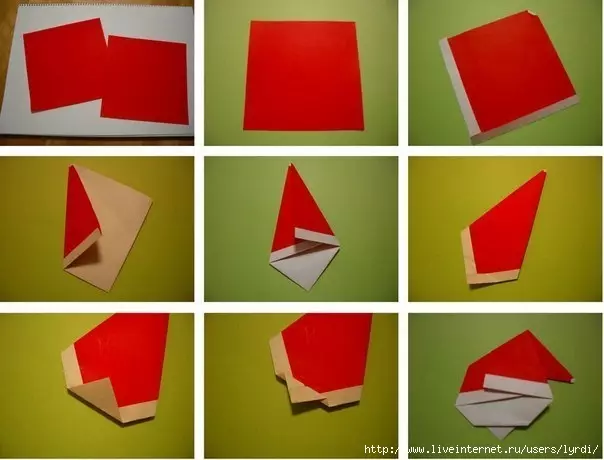
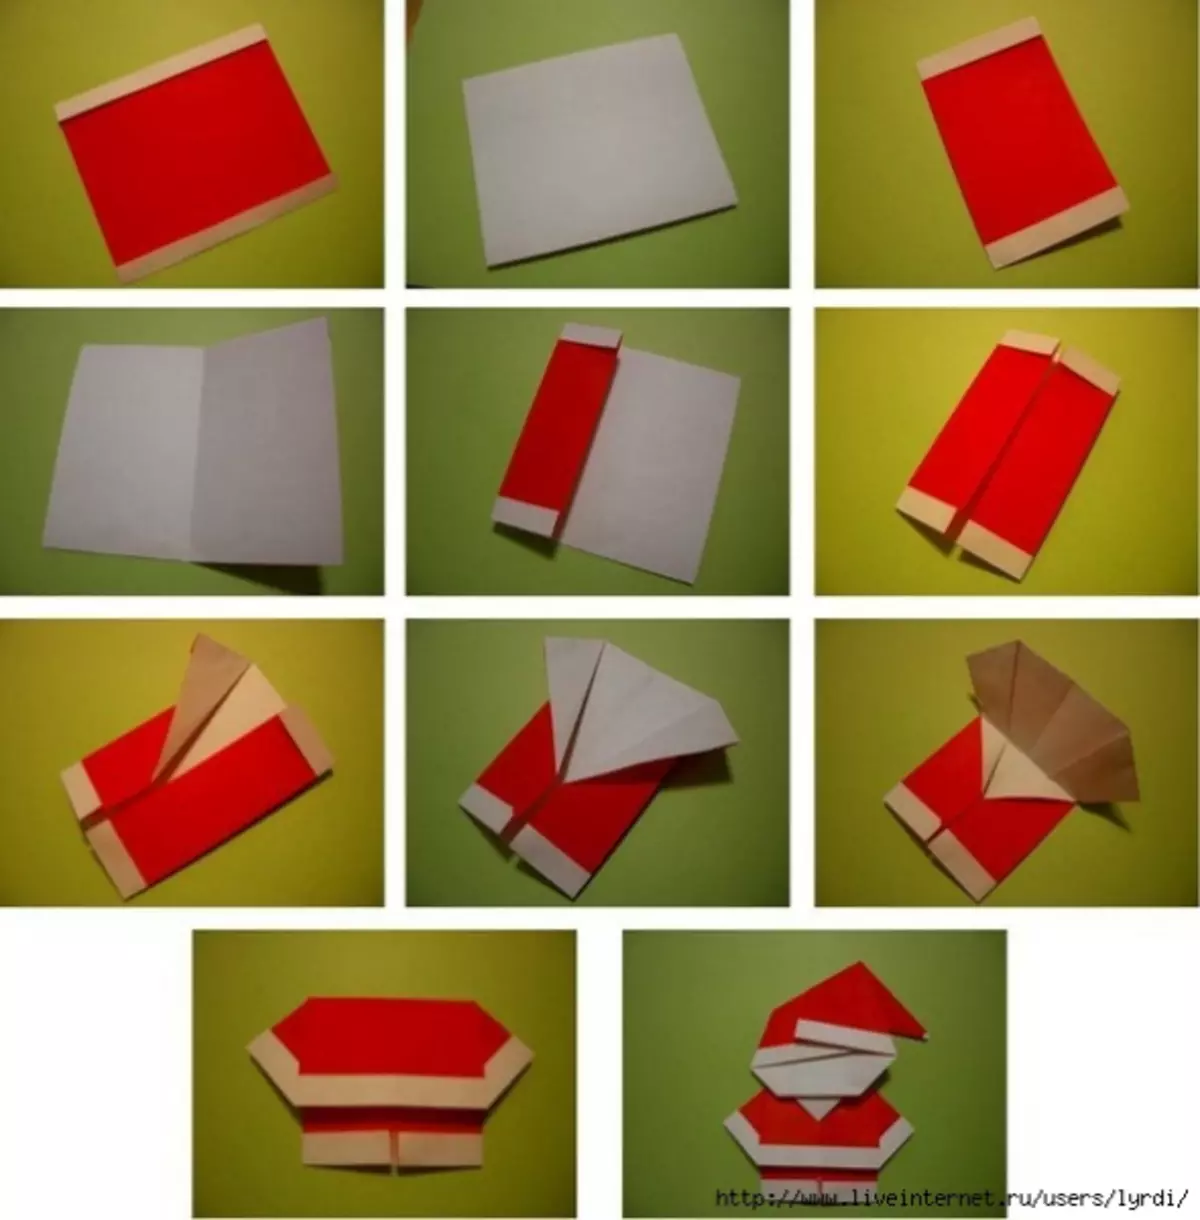
And the presentation for the New Year can be this tag with the origami Santa Claus.
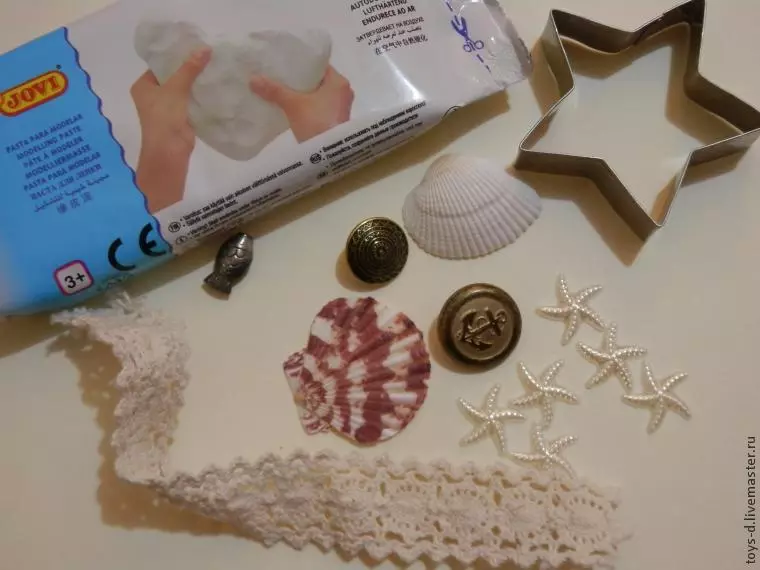
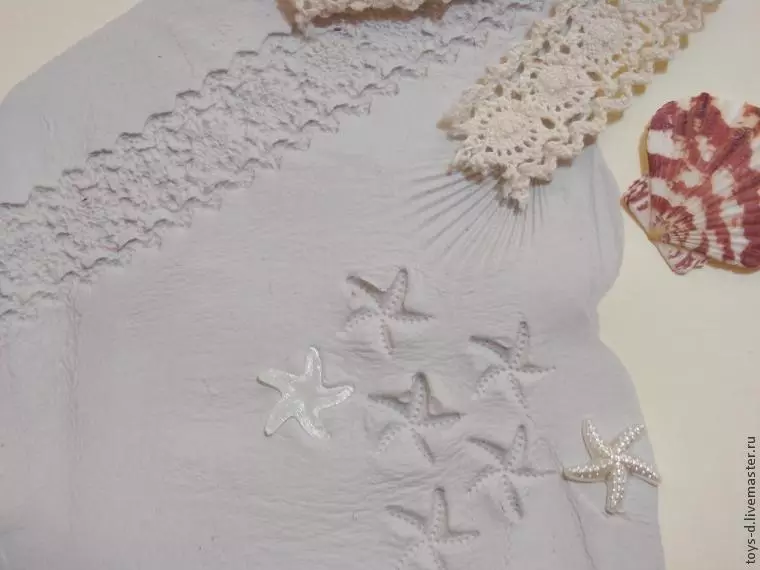
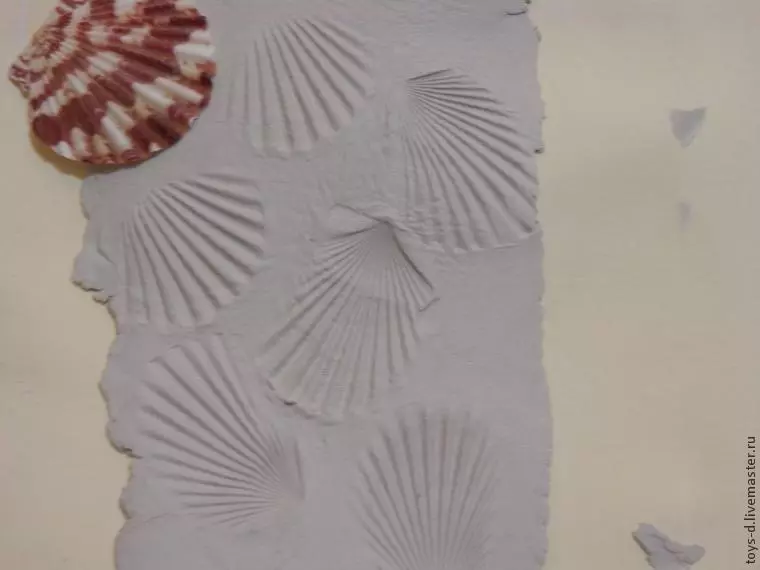
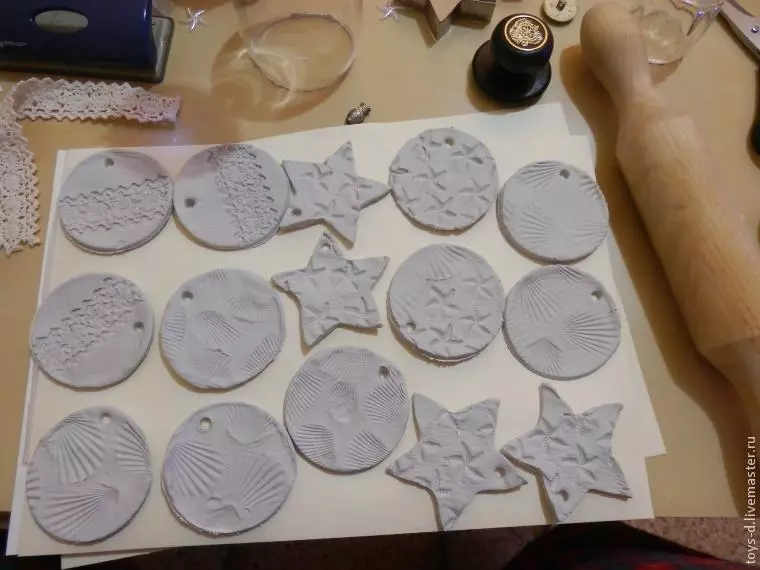
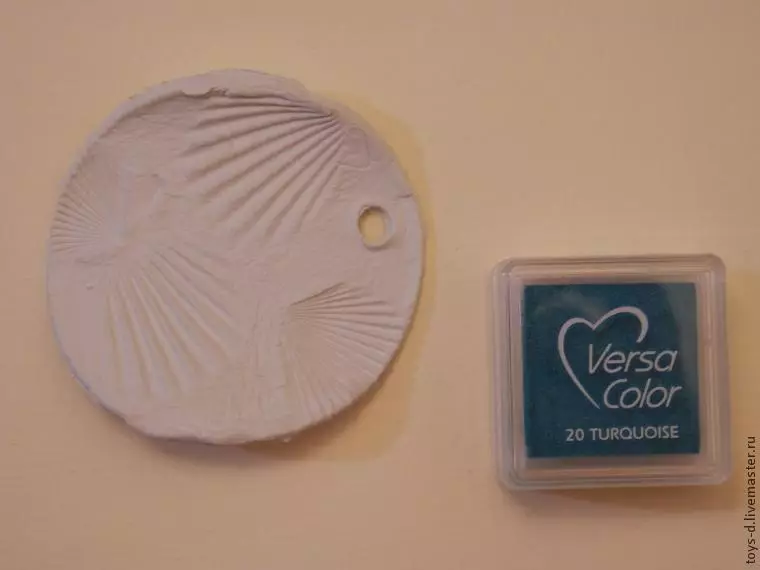
You can also make tags made of salted dough or self-sitting clay.


On toy
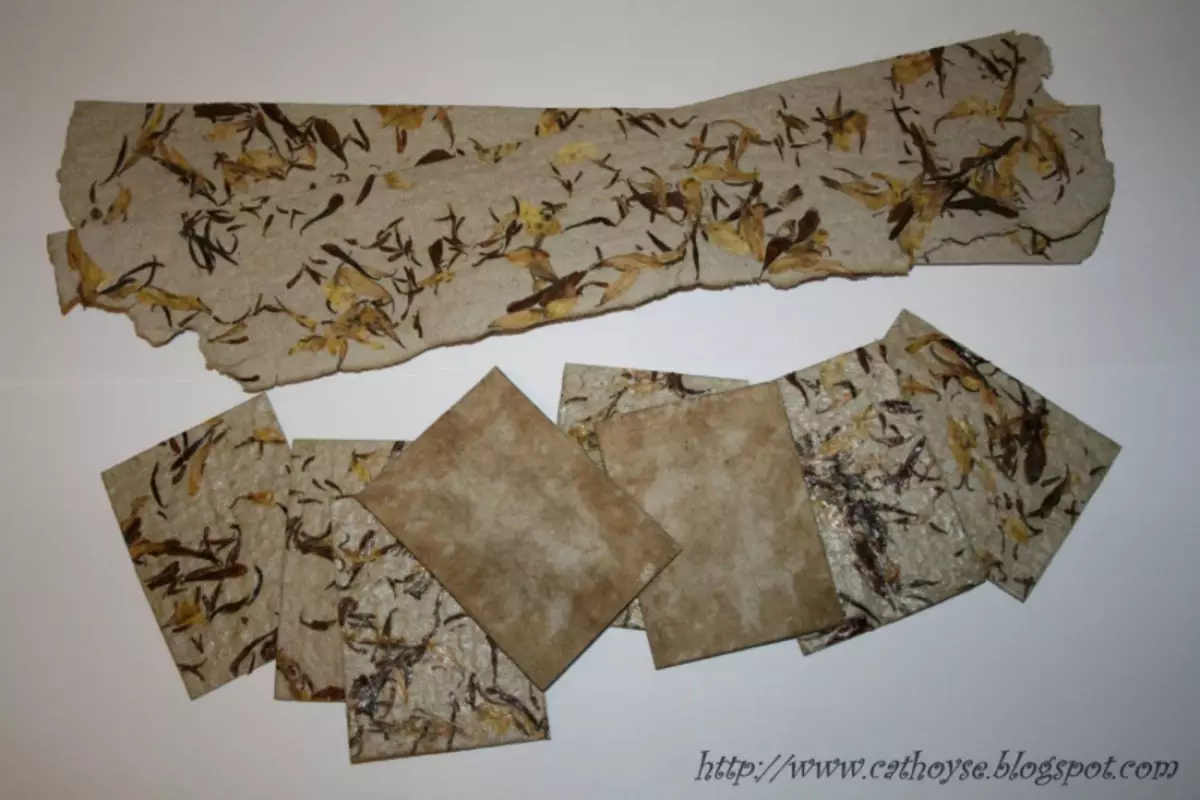
Very many needlewomen are engaged in making toys. We offer to make a tag for such products, and starting with the production of the paper itself.
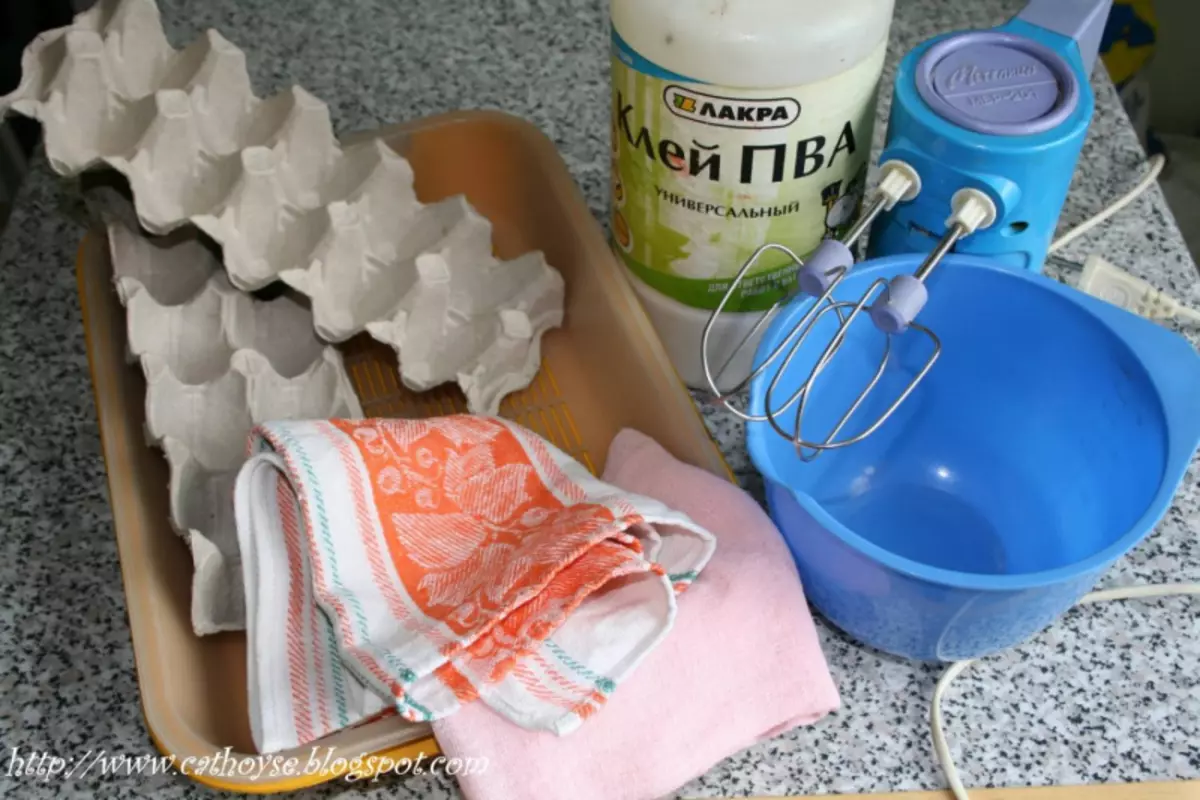
Needed:
- trays from the eggs;
- PVA glue;
- Bowl for mixing;
- mixer;
- rectangular tray;
- gauze, towel;
- sponge for washing dishes;
- napkins;
- Two boards, you can cut down.
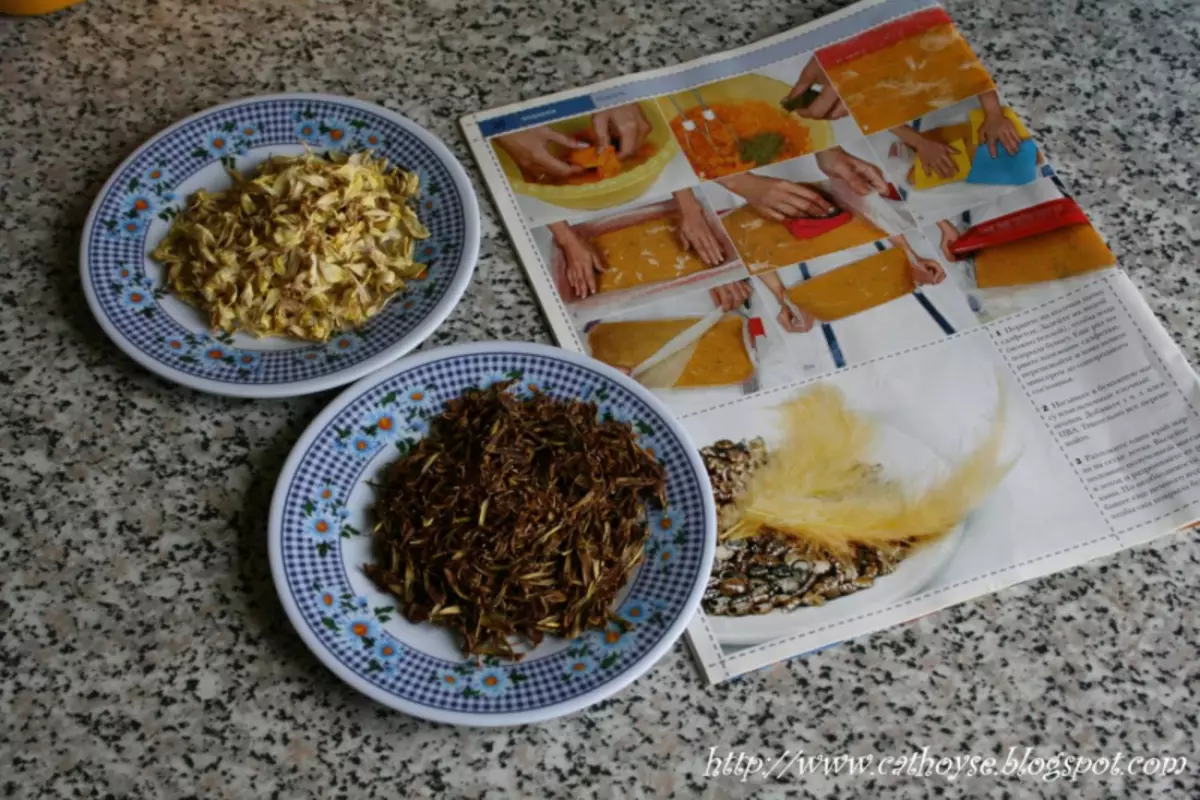
As a filler, you can use dry herbs, petals.
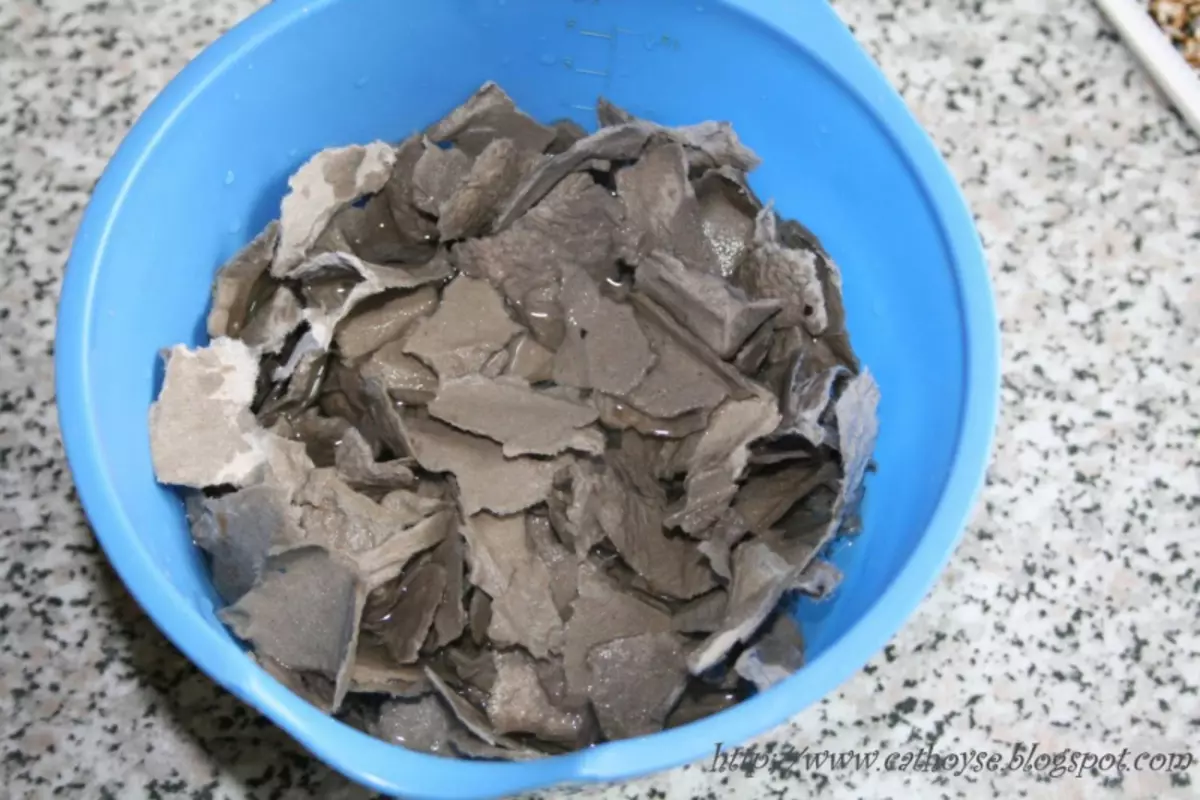
We are rotten an egg tray in the bowl and pour water so that the liquid slightly covered the paper.
Now we will work the mixer.
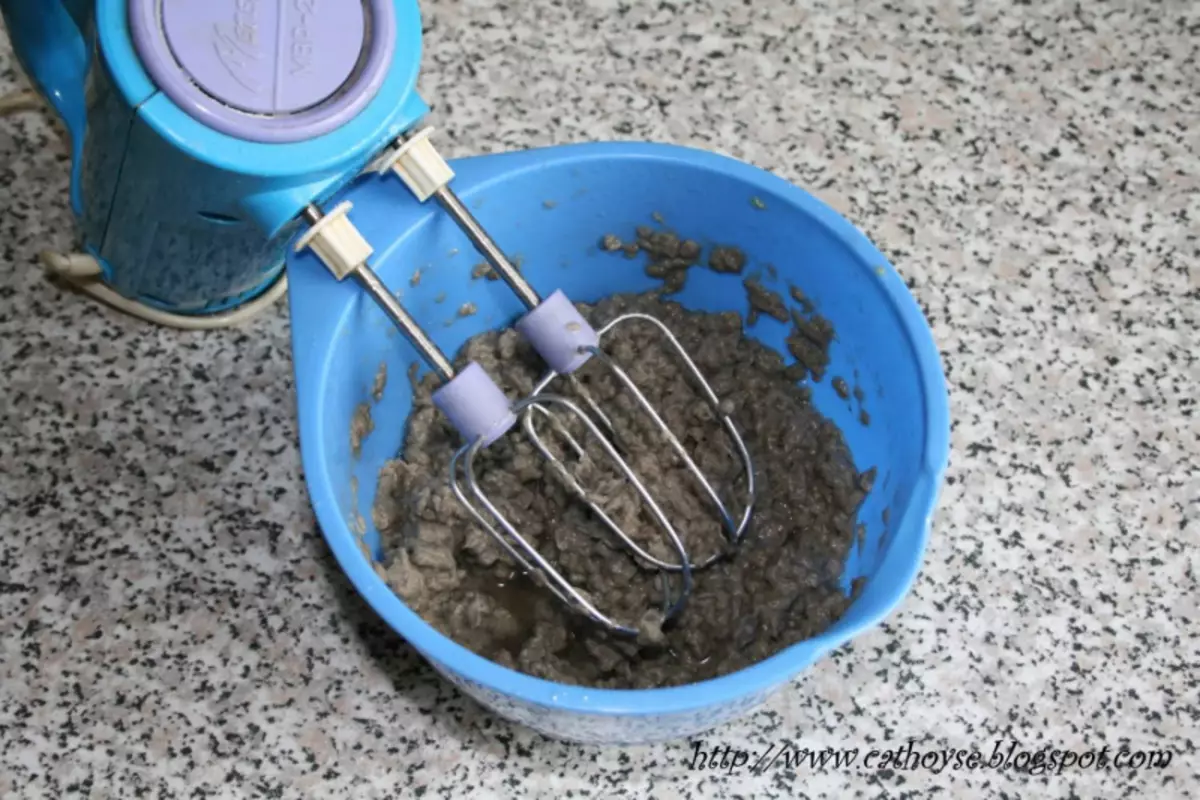
Add four teaspoons PVA. Mix.

On the tray, it is stealim marlu and pour the mixture, roll up.
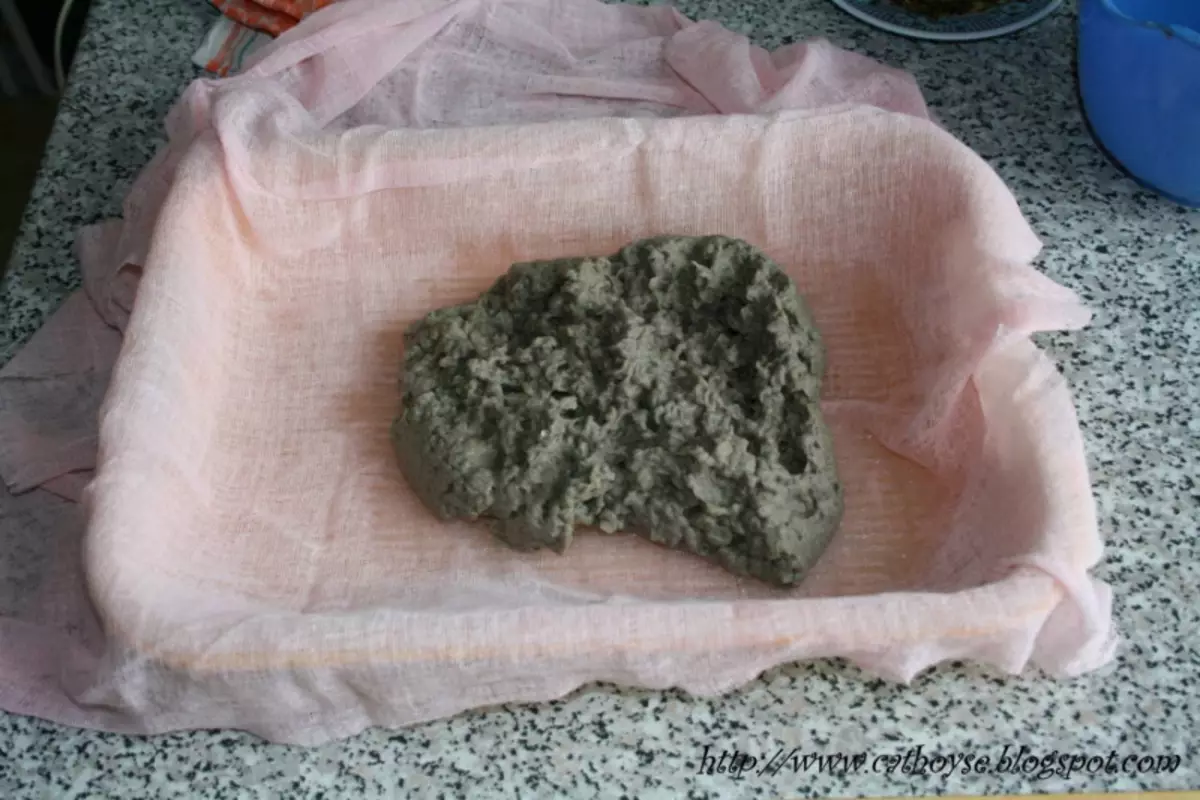
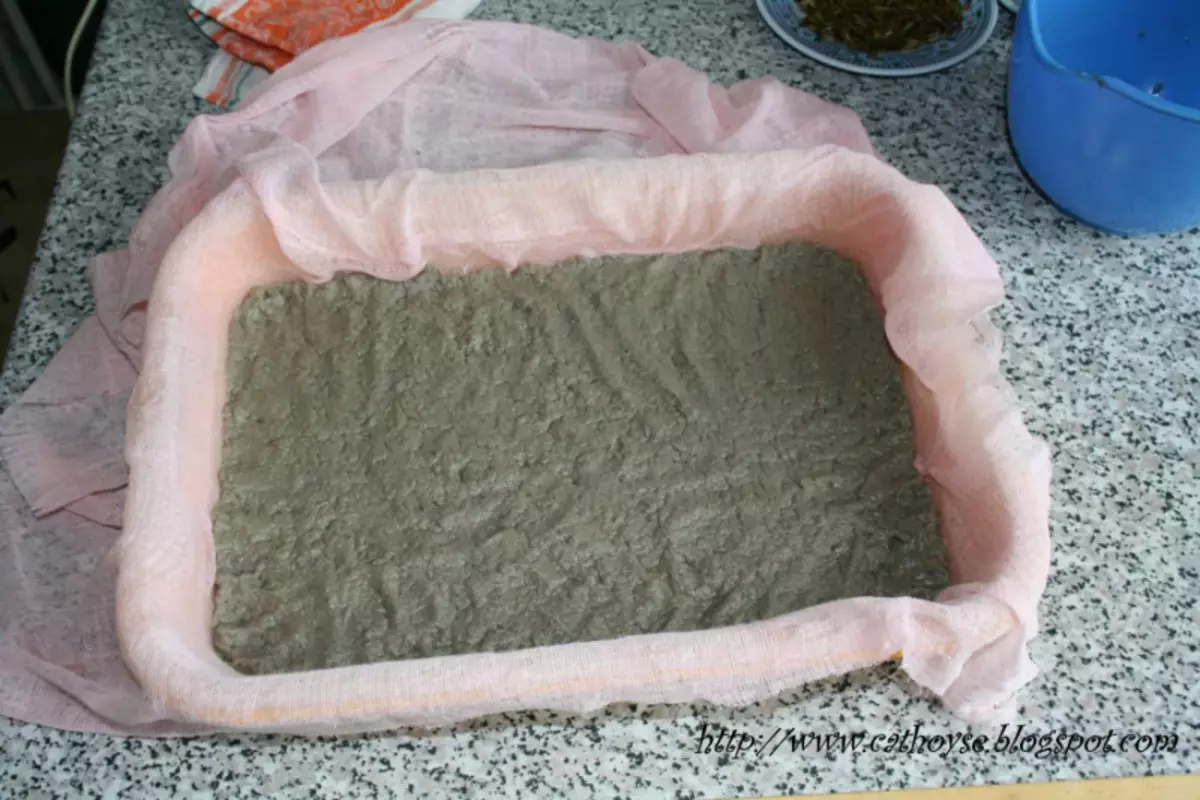
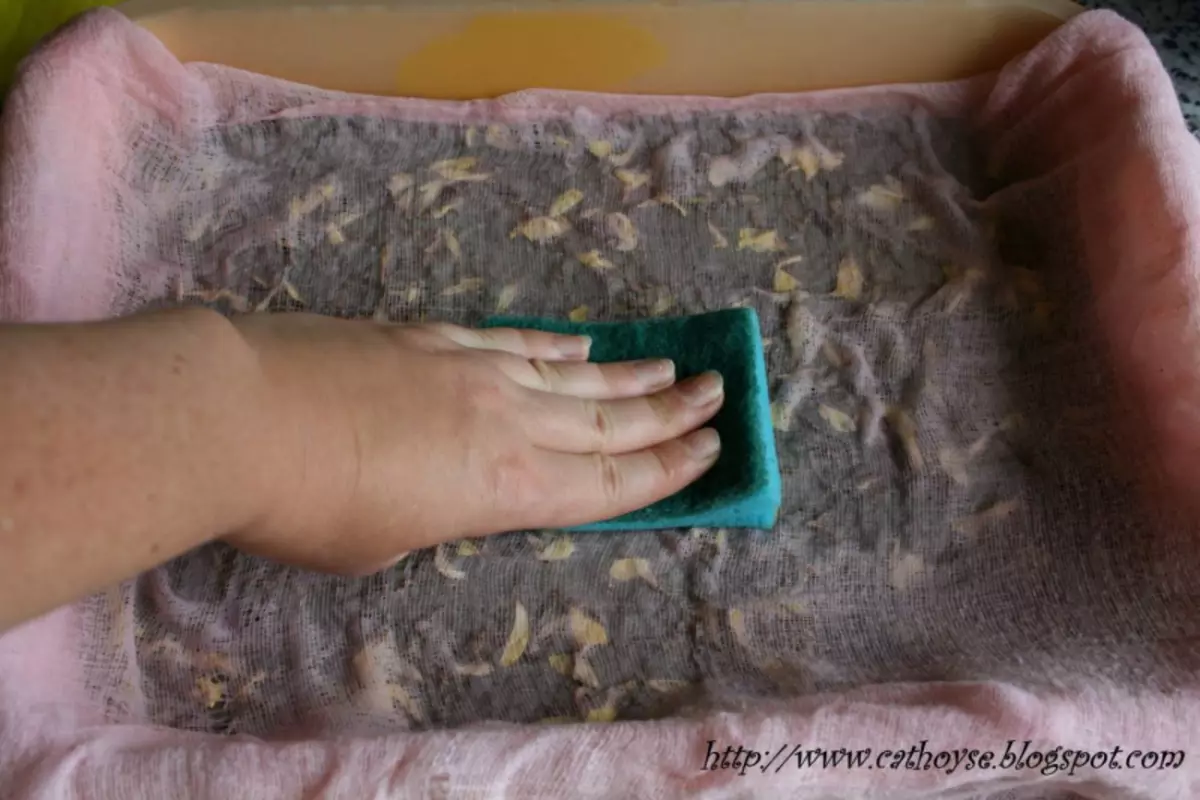
We sprinkle the layer of grass, petals and cover the second part of the gauze.

Now an important point. It is necessary to remove with absorbing napkins and sponges all moisture. Maximum as possible. Otherwise, paper will not work.
At the very end, when the moisture is not pressed from the sponges, you can try the harvesting iron.
Then we cover one of the boards with a towel and gently turn the contents of the tray on them. Again wet.
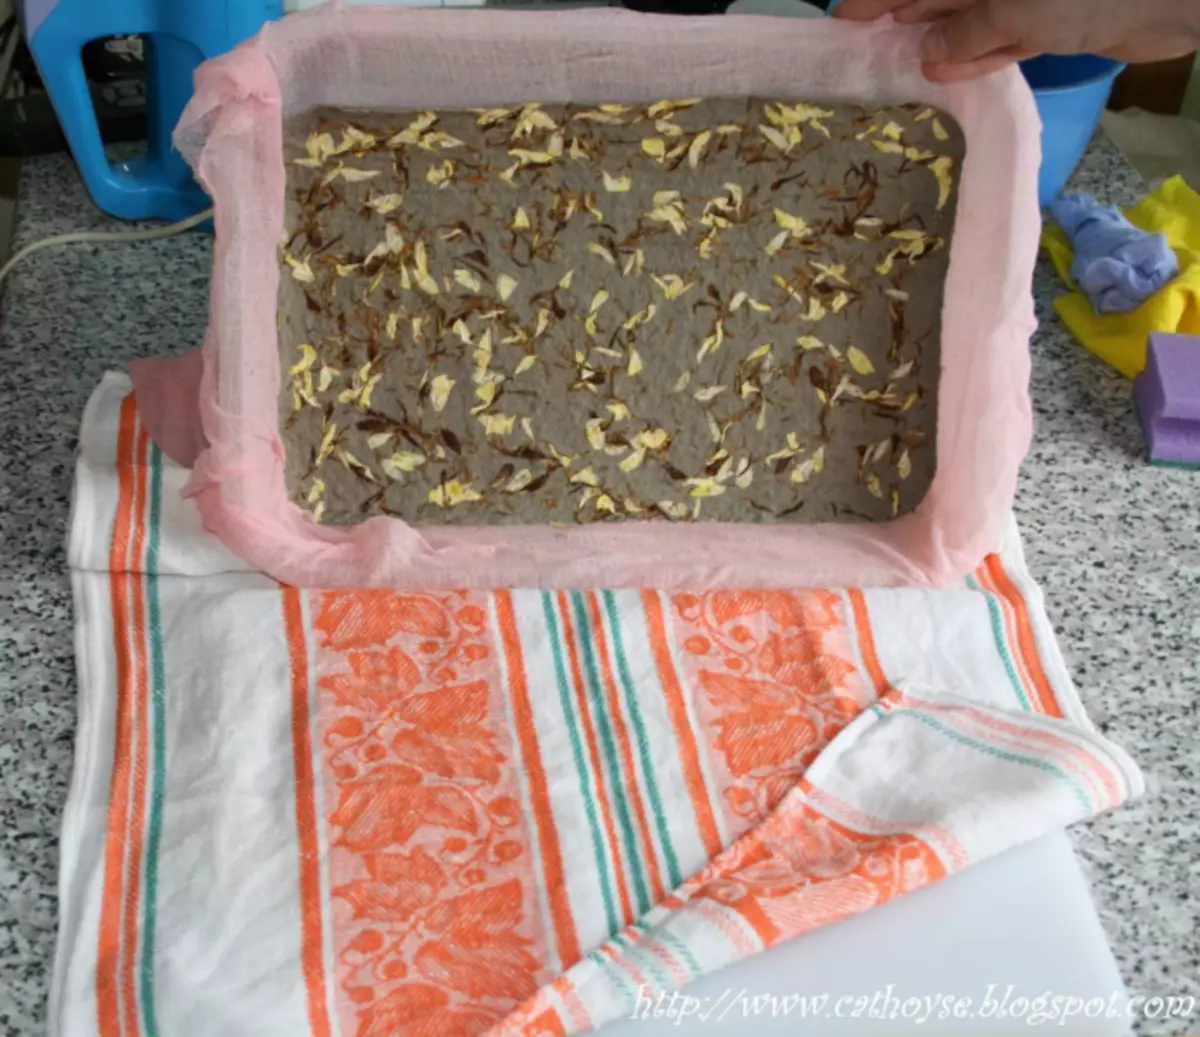
After covering the paper with a towel and a second board, put the cargo on top. Towels periodically change. So keep until complete drying. If you pull out before, the product can go by waves.
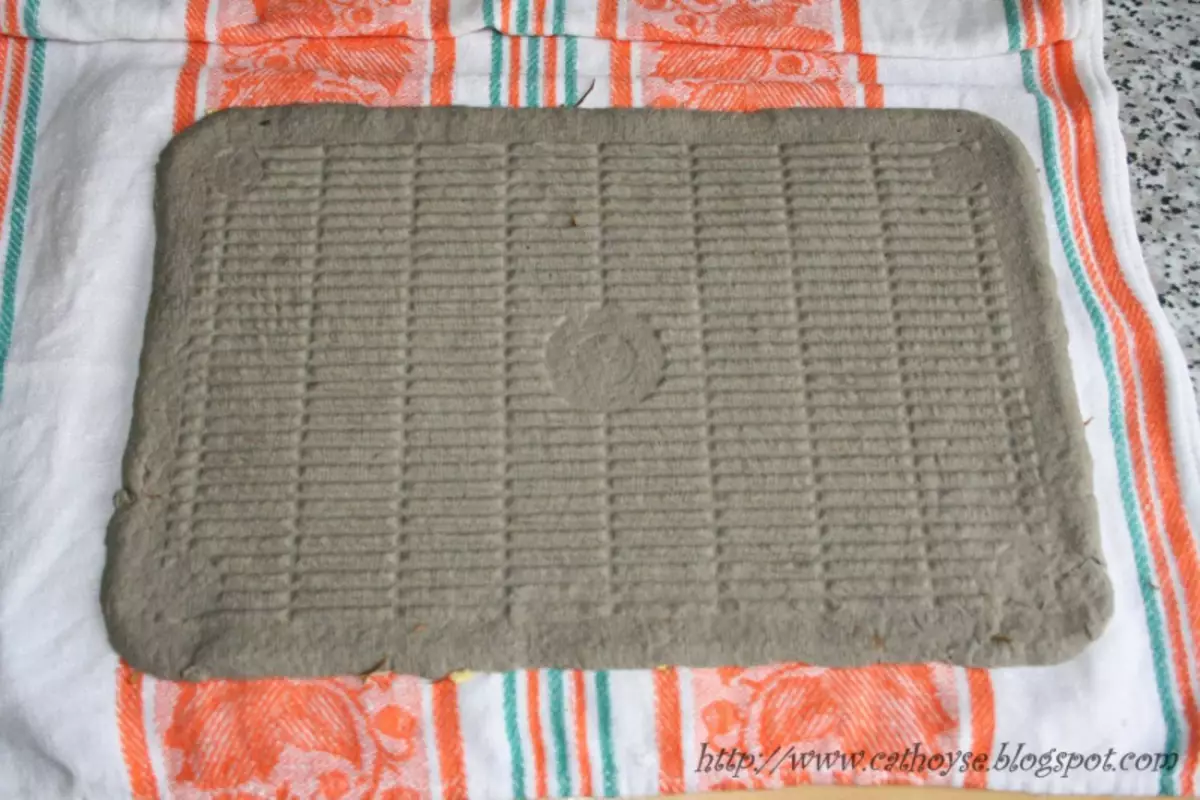
From dry blanks, cut the tag.
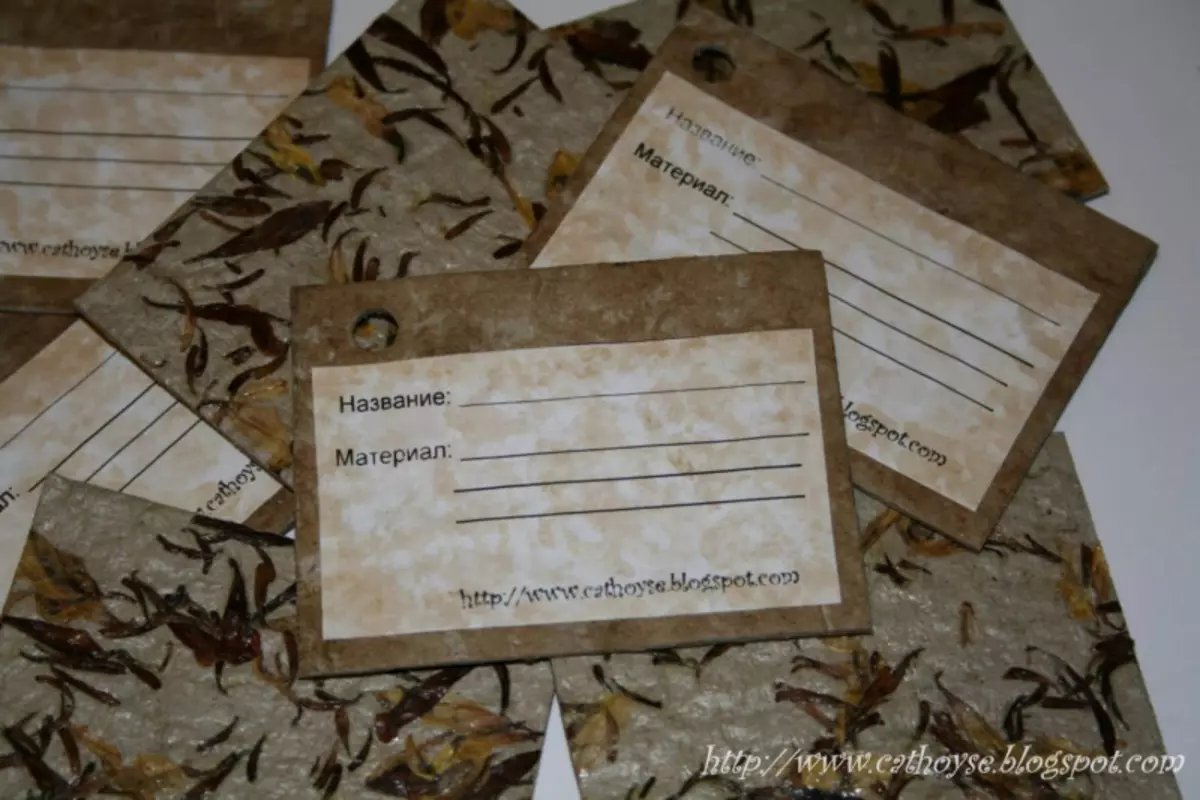
And if on it to write the name and the story of the toy, then it will undoubtedly become even more interesting for the child.
On a photo session kid
Now it is very fashionable to take a photograph for a newborn. Use a variety of scenery, costumes and the like. One of these jewelry can be a tag on the baby handle.
Article on the topic: Rubber Crochet in a circle: Scheme with description and video
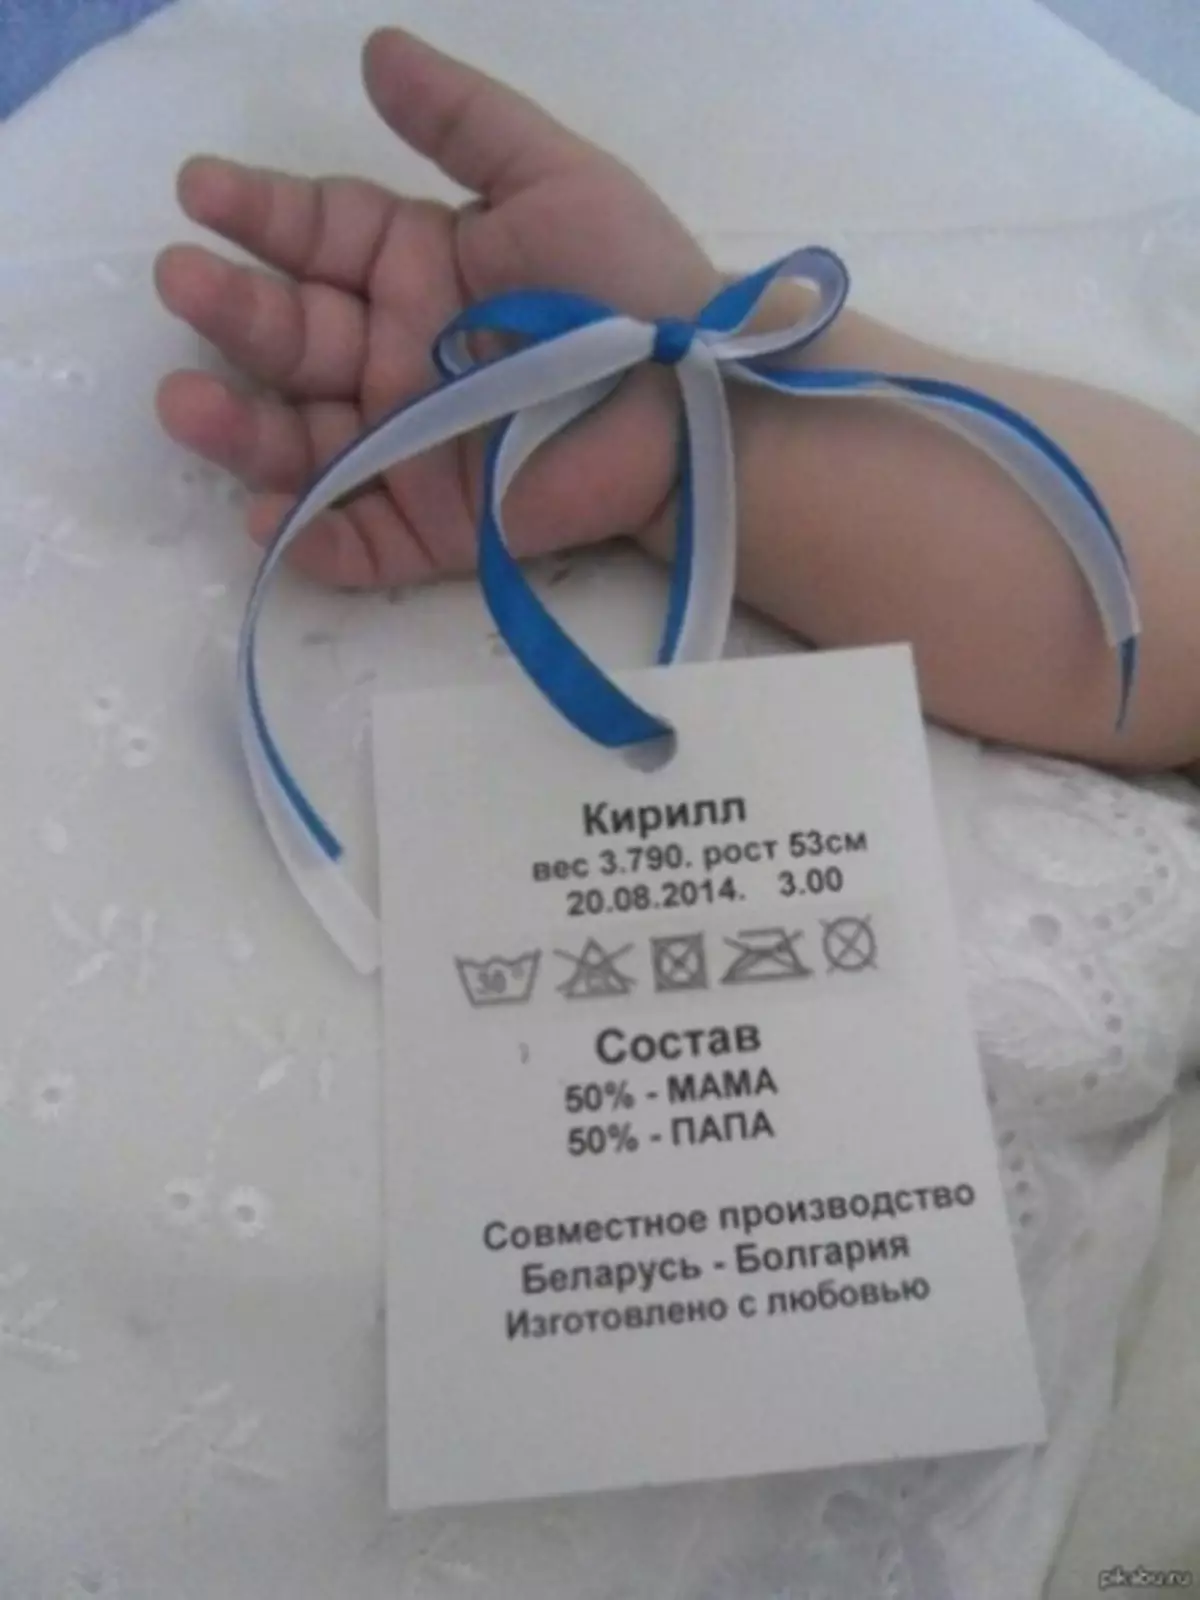
According to the image it is clear that you can print text on a computer, print and make a cardboard tag. Bring to the hand baby can be on satin thin ribbons.
Tags for identifying the owner. They are used, for example, for baggage and even for the dog, so those who have found lost, can report this to the owner.
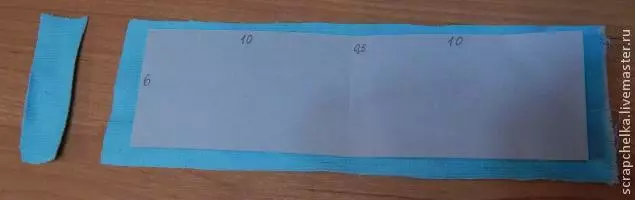
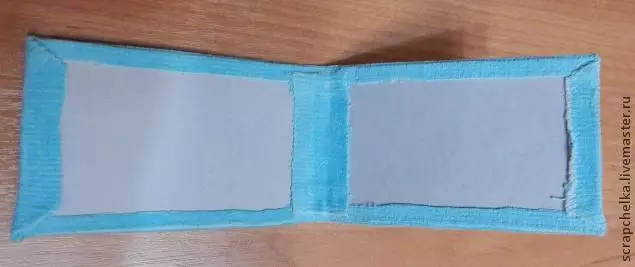
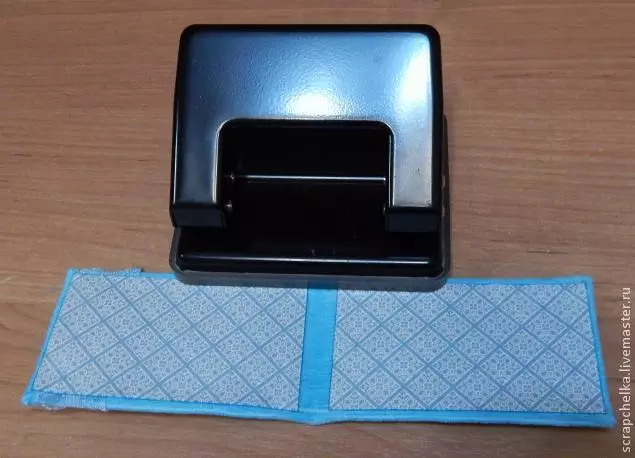
Here is such a tag on the suitcase with your own hands.
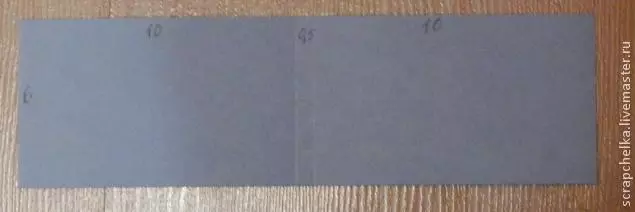
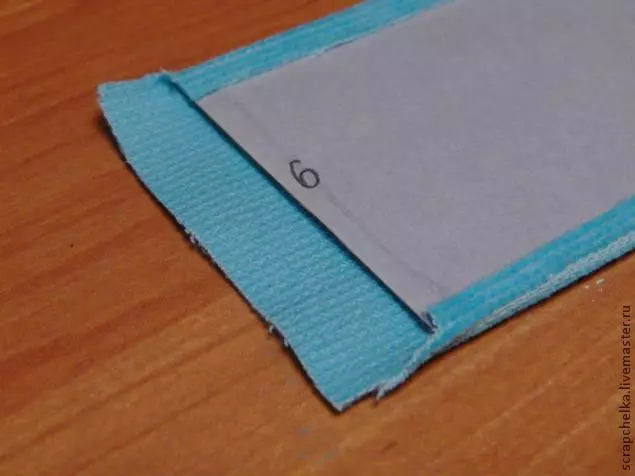
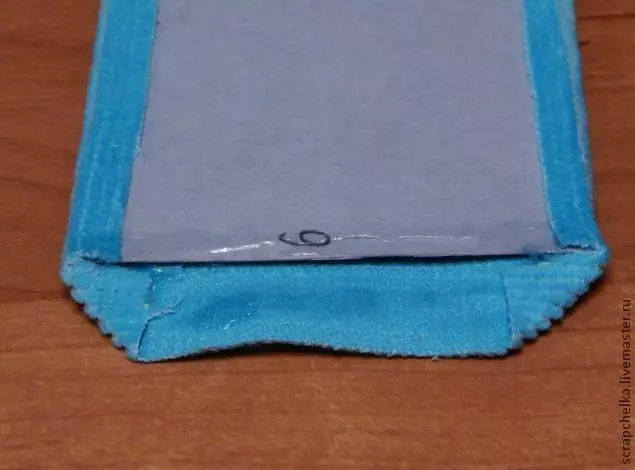
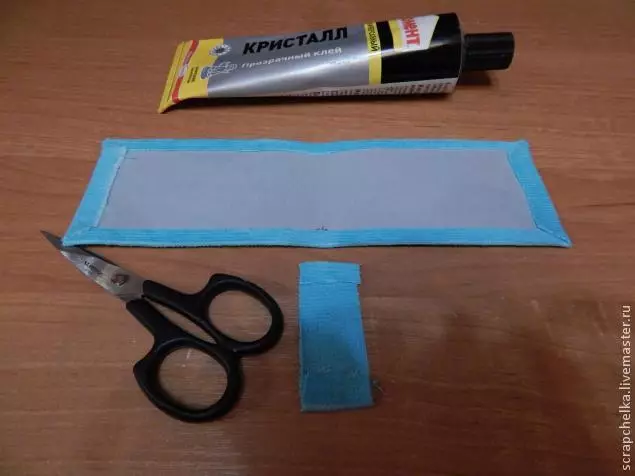
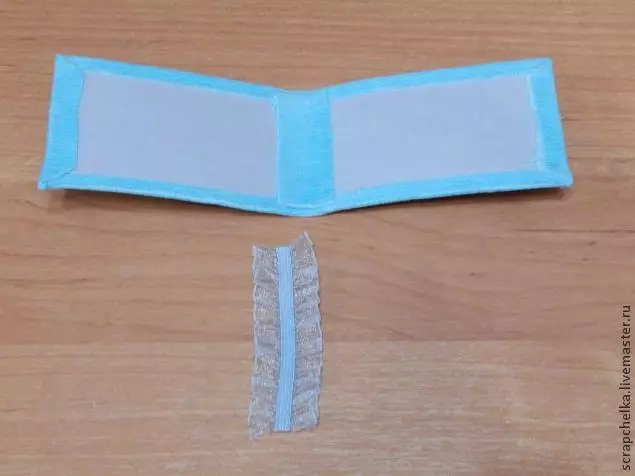
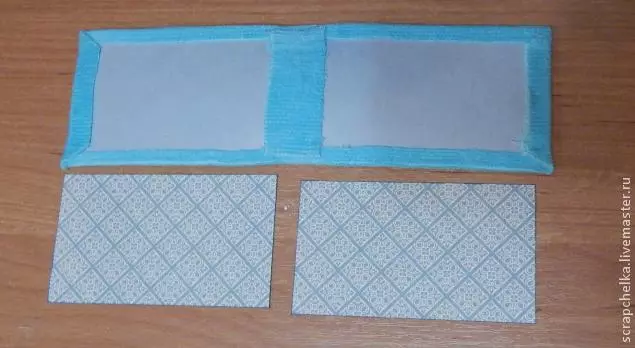
Cut from cardboard strip in size specified in the photo. Cutting fabric should be slightly more paper.
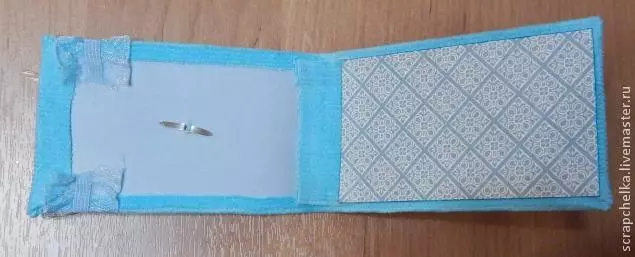
We glue the edges of the fabric, as shown.
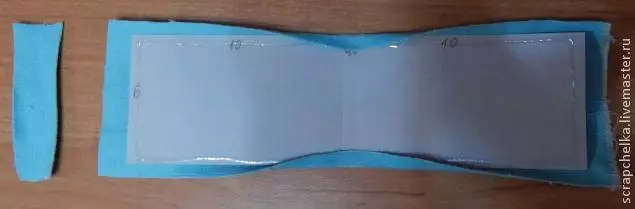
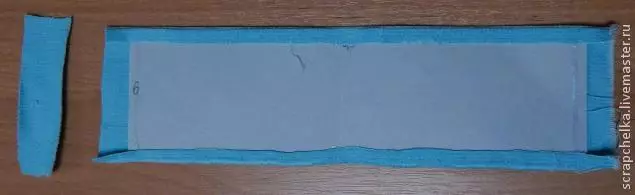
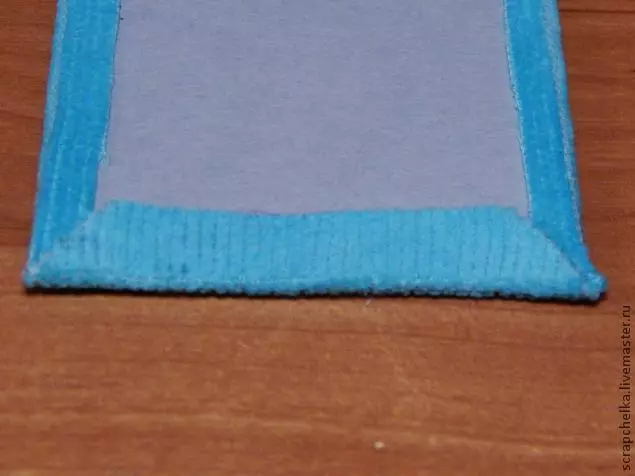
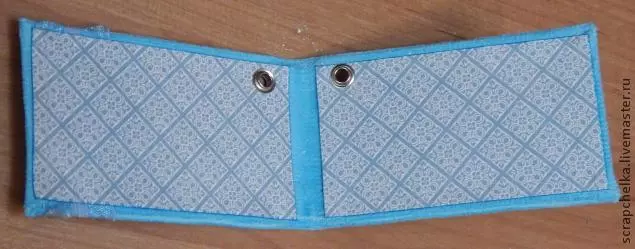
From one edge of the workpiece glue a decorative gum.
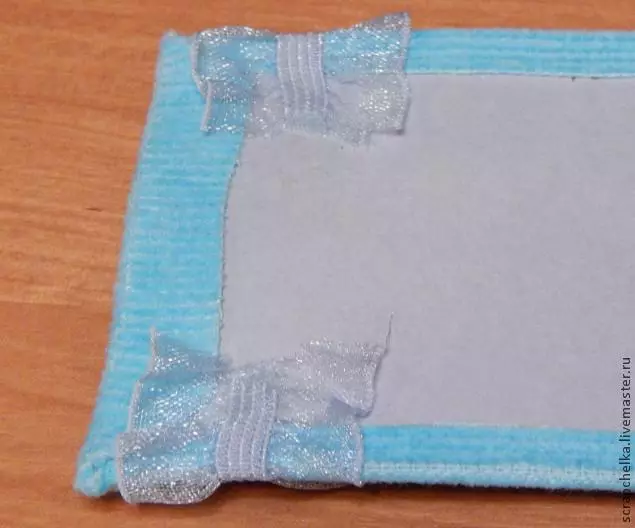
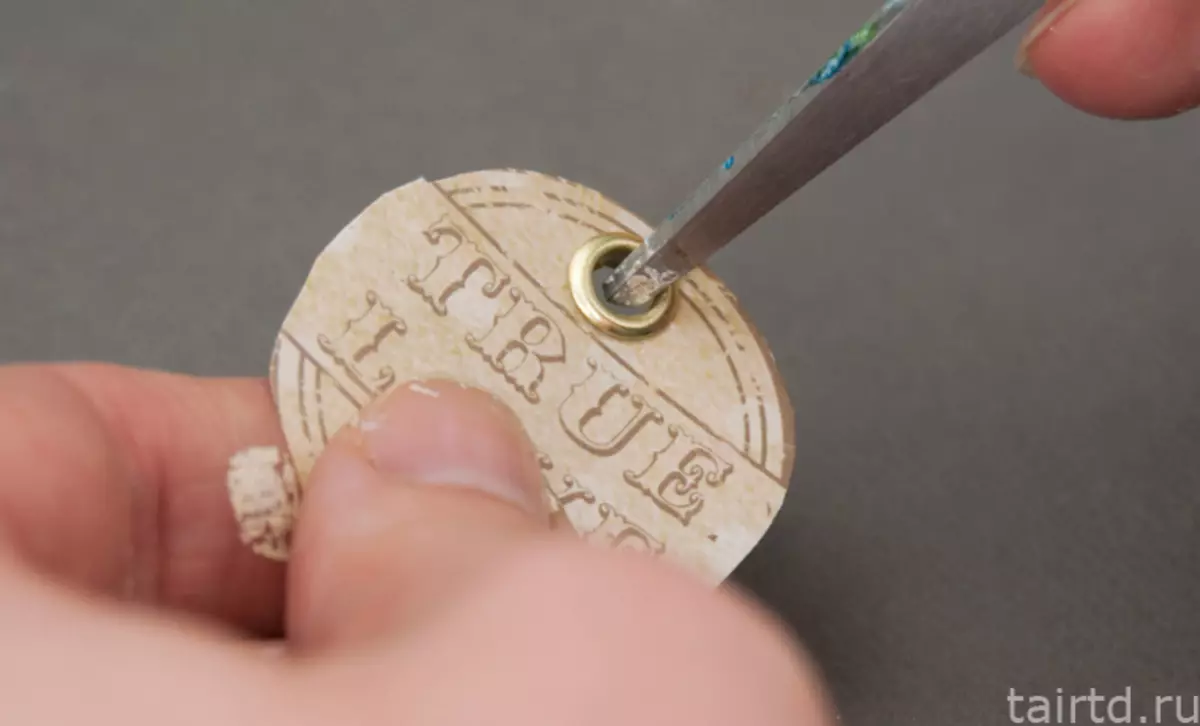
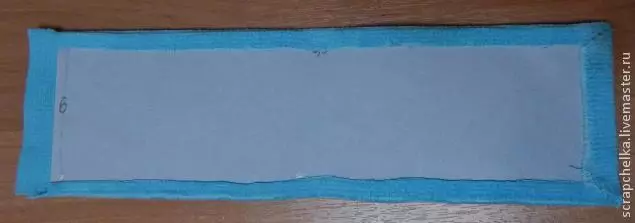
Internal parts make up beautiful paper. Previously one side with the facade decorate the decor and fasten it with Brads.
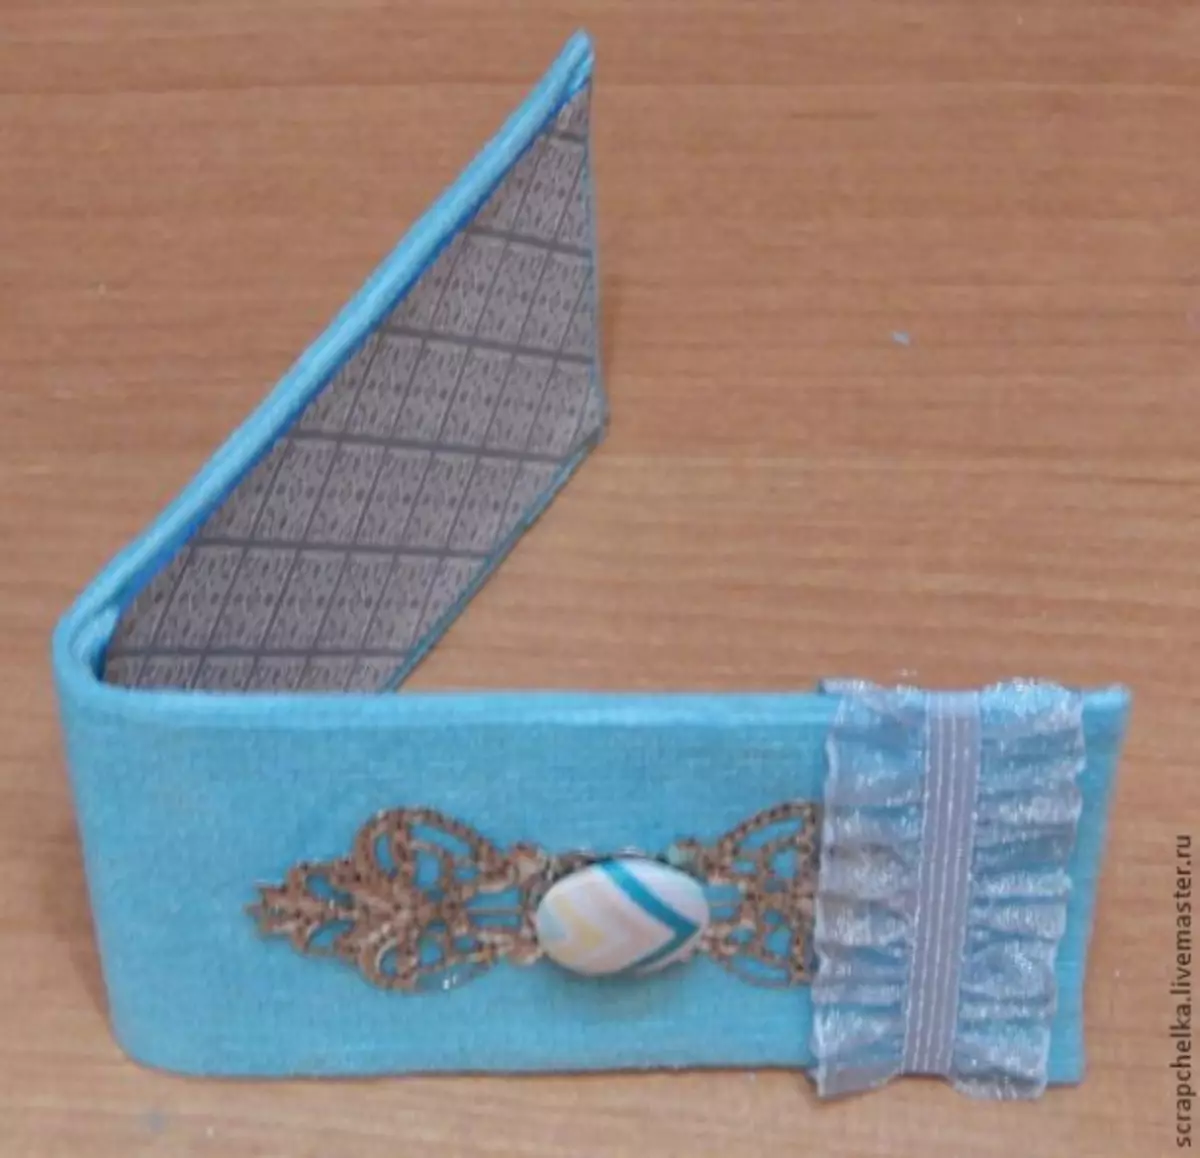
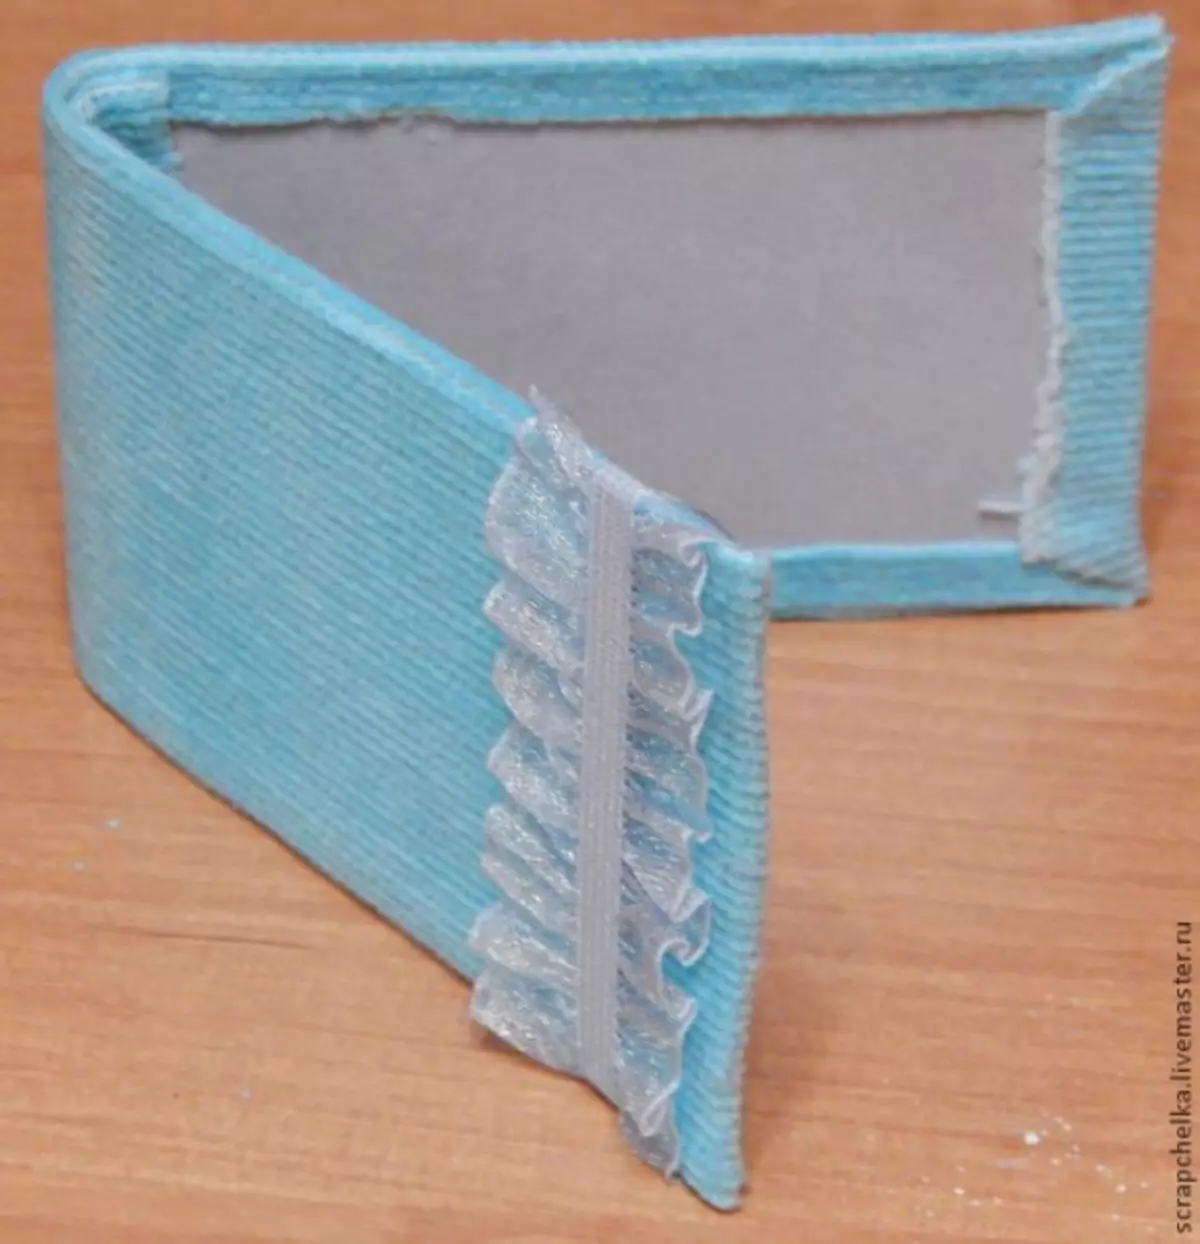
On the bend we make holes and install the recordings. Turn the lace through the holes.
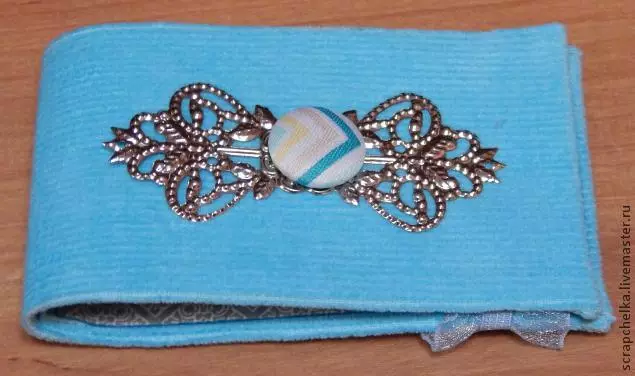
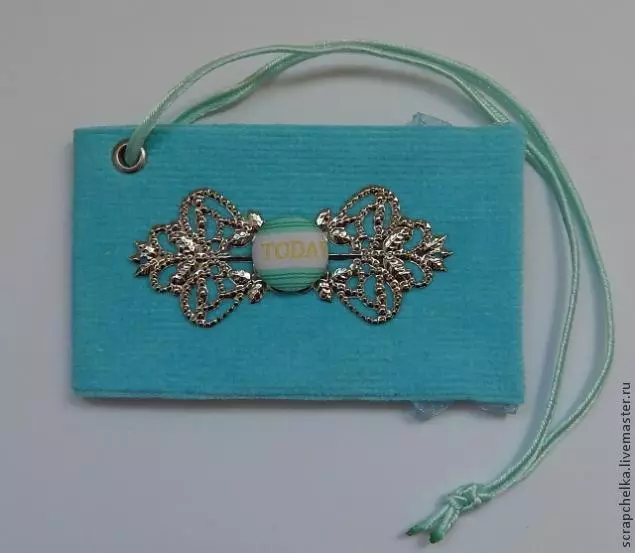
A tag, which is unlikely to have someone else, will make your baggage notable. Inside it is necessary to write your data.
Tags for handmade products will attach your creation value in the eyes of the buyer, who you give it. Such an add-on will definitely make a highlight in the cradle.