
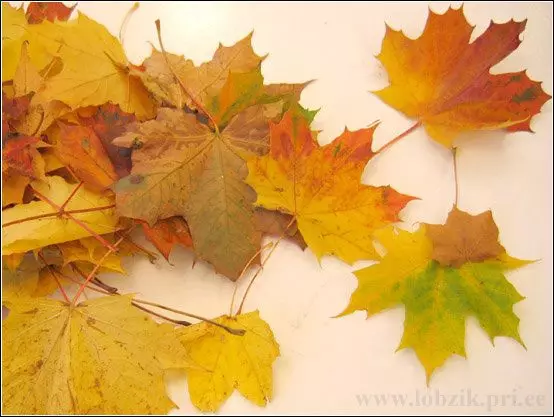
Autumn - golden time. The fallen leaves are covered with a magic carpet of land. Who among us brought leaves home? However, they, although unusual in color, will be much more interesting to create an autumn bouquet of leaves and decorate their home.
We offer a master class with a description of several options for creating with your own hands of such a product. It will not only make a highlight to your home, but also in the autumn photo session.
Memories of autumn
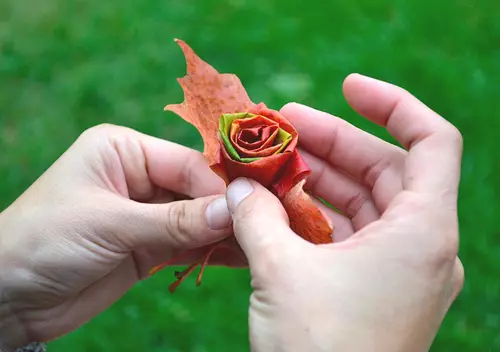
We will need maple leaves of a variety of colors and threads.
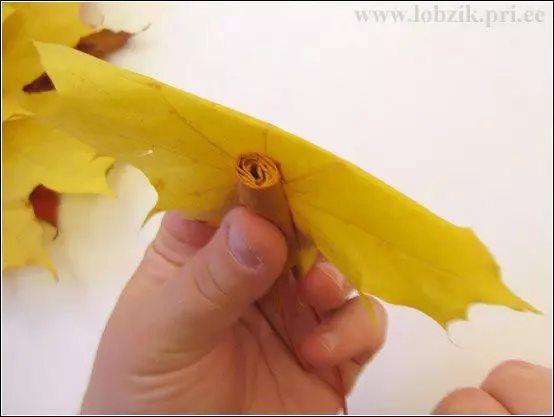
We fold the first sheet in half across. And we turn into a dense tube.
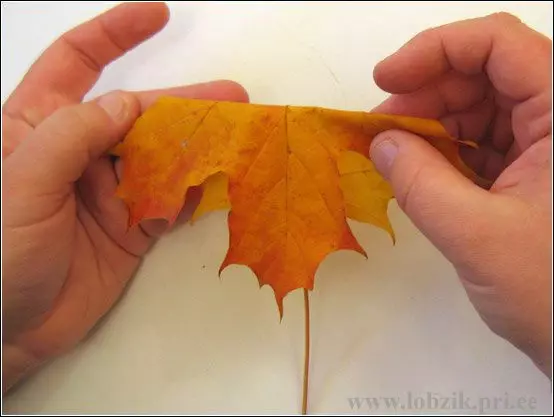
It will be the middle of our flower. Now we take the second sheet, apply the front side of the billet. We also fold it in half, you can 1/3.
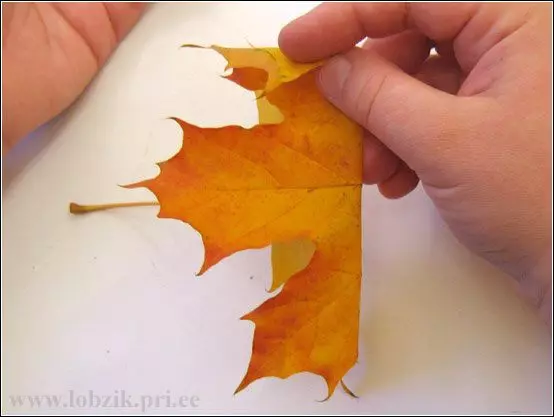
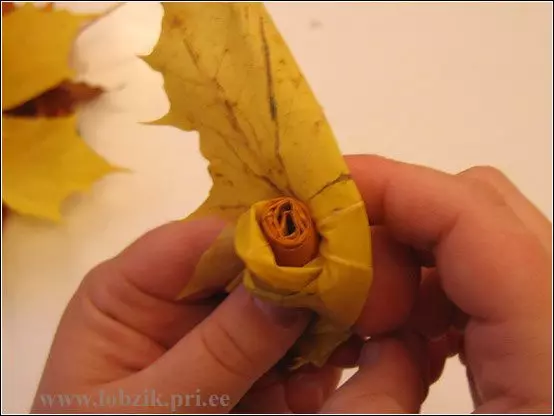
Then slightly turn the top of the second petal and turn around the bouton. On the contrary, we attach the same third sheet.
So form the whole flower, and each subsequent row should be a little loose to the previous one.
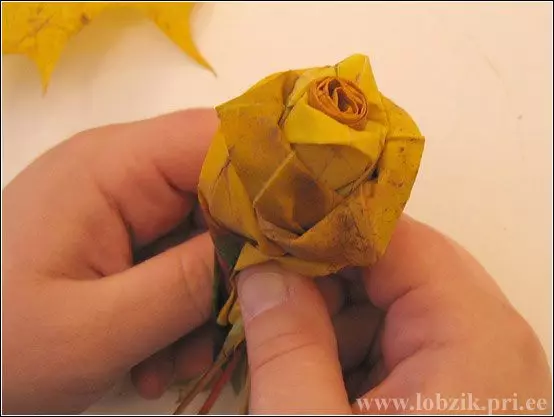
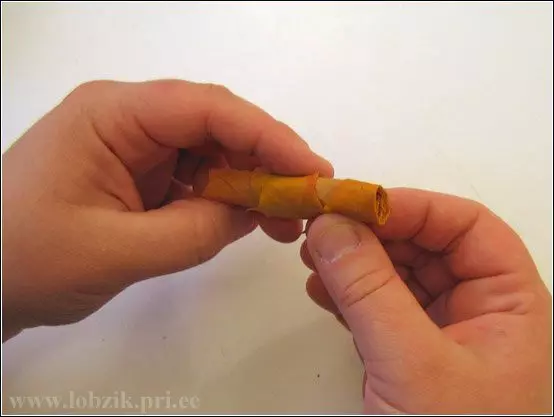
Fix the thread at the base.
For your confidence, if you make such a bunch for the first time, you can mount each sheet to sew.
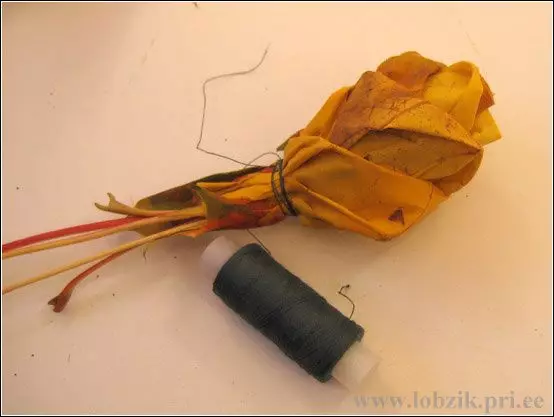
Wrap a bouquet with a lot of more than you left on the flowers, also secure thread.
You can wrap in beautiful paper, and you can leave so.
Another variant
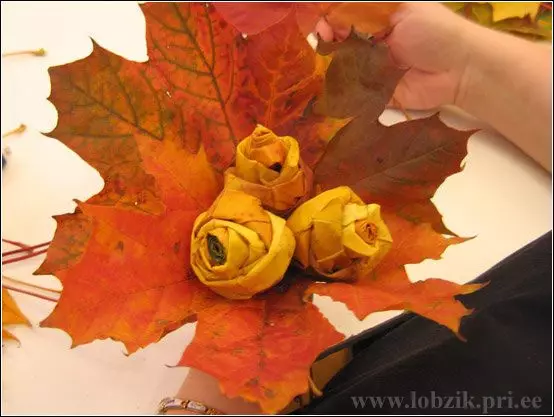
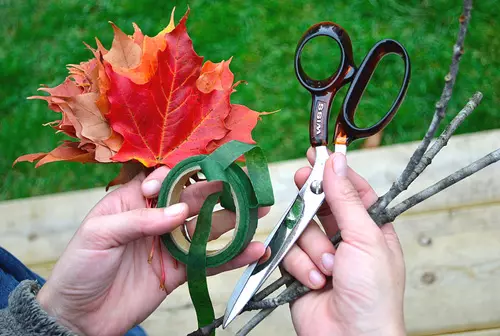
This option also consists of roses, however, the folding of the leaves is different.
That's what we need:
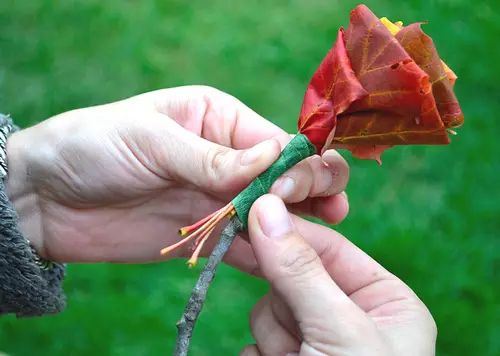
- There are 10 maple leaves of different sizes and coloring on one flower. They must be slightly angry, even freshly, as they will be more plastic;
- Immediately in the forest you can score twists, they will go to the stems;
- teep-tape of green color;
- scissors.
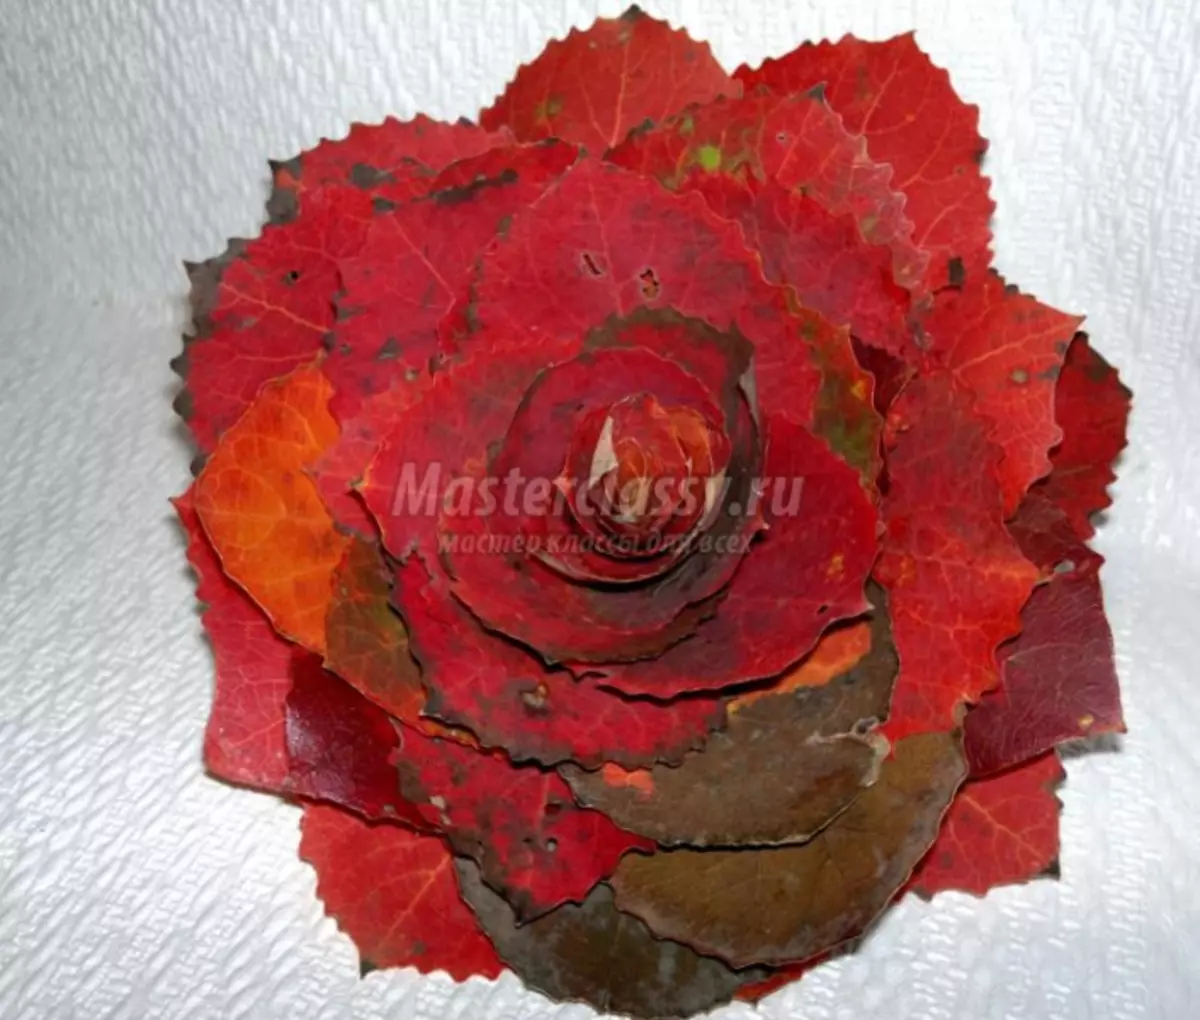
We take the smallest sheet, turn to your inside. Bending the tops, wrap in a roll. We get the middle of the flower, as shown in the photo.
Article on the topic: Crochet mat: Detailed master class with a scheme and video
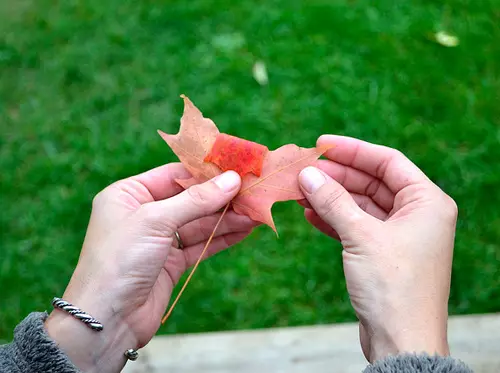
We take the second sheet, bend the middle top and apply to the bouton. Then, in turn, bending the edge of the sheet, turn it around.
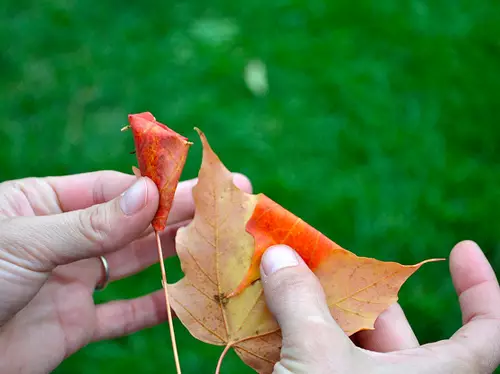
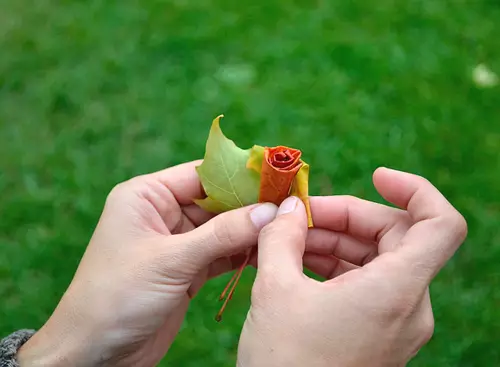
Thus attach the leaves. It is better to impose them in order to increase size and brass.
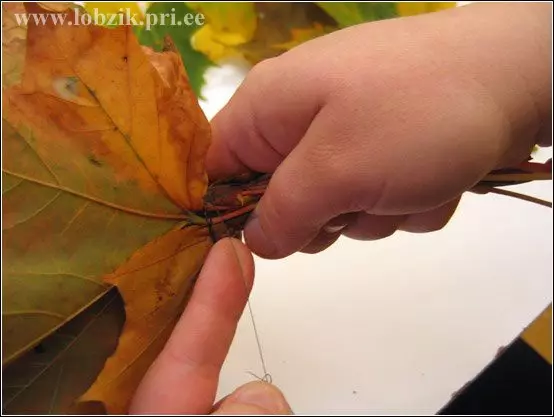
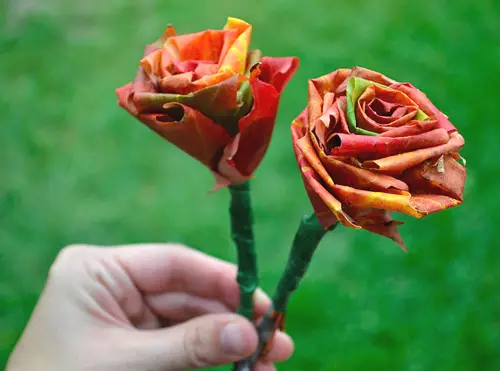
Ready flower can fasten the thread. We attach a twig to him, wind from the base of the flower and along the entire length of the Tape-ribbon stem.
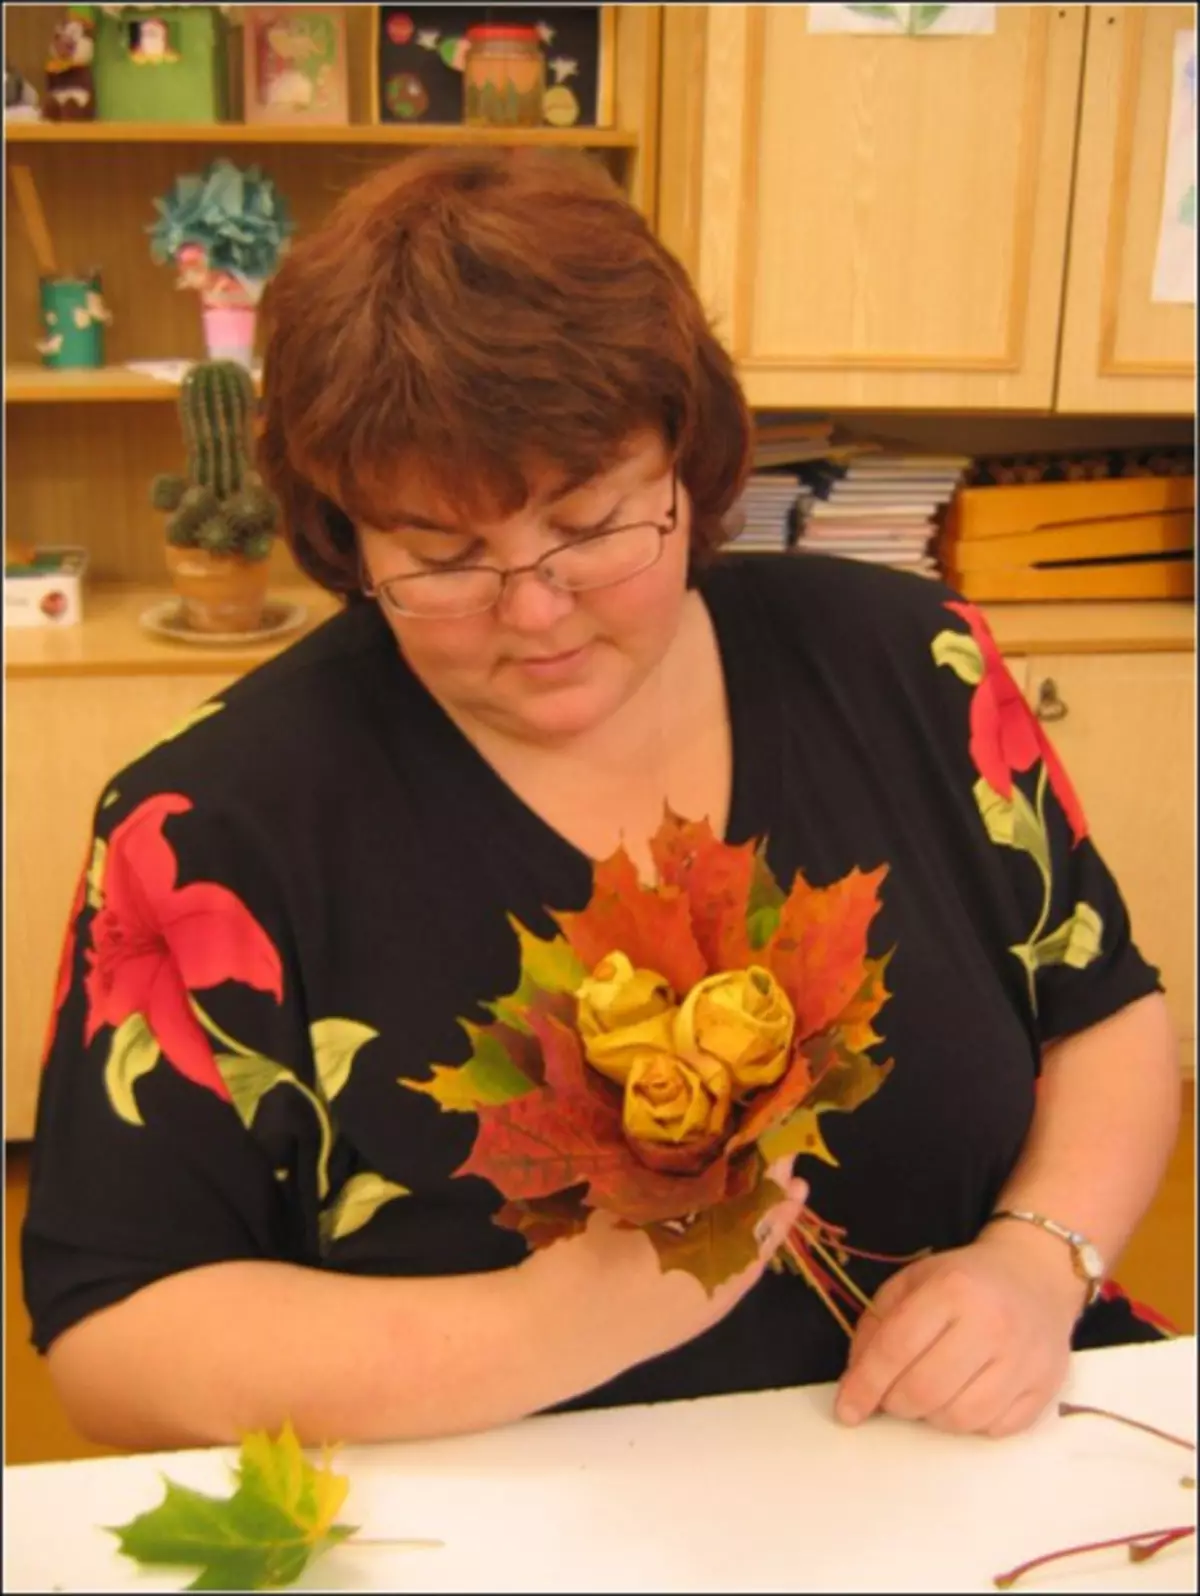
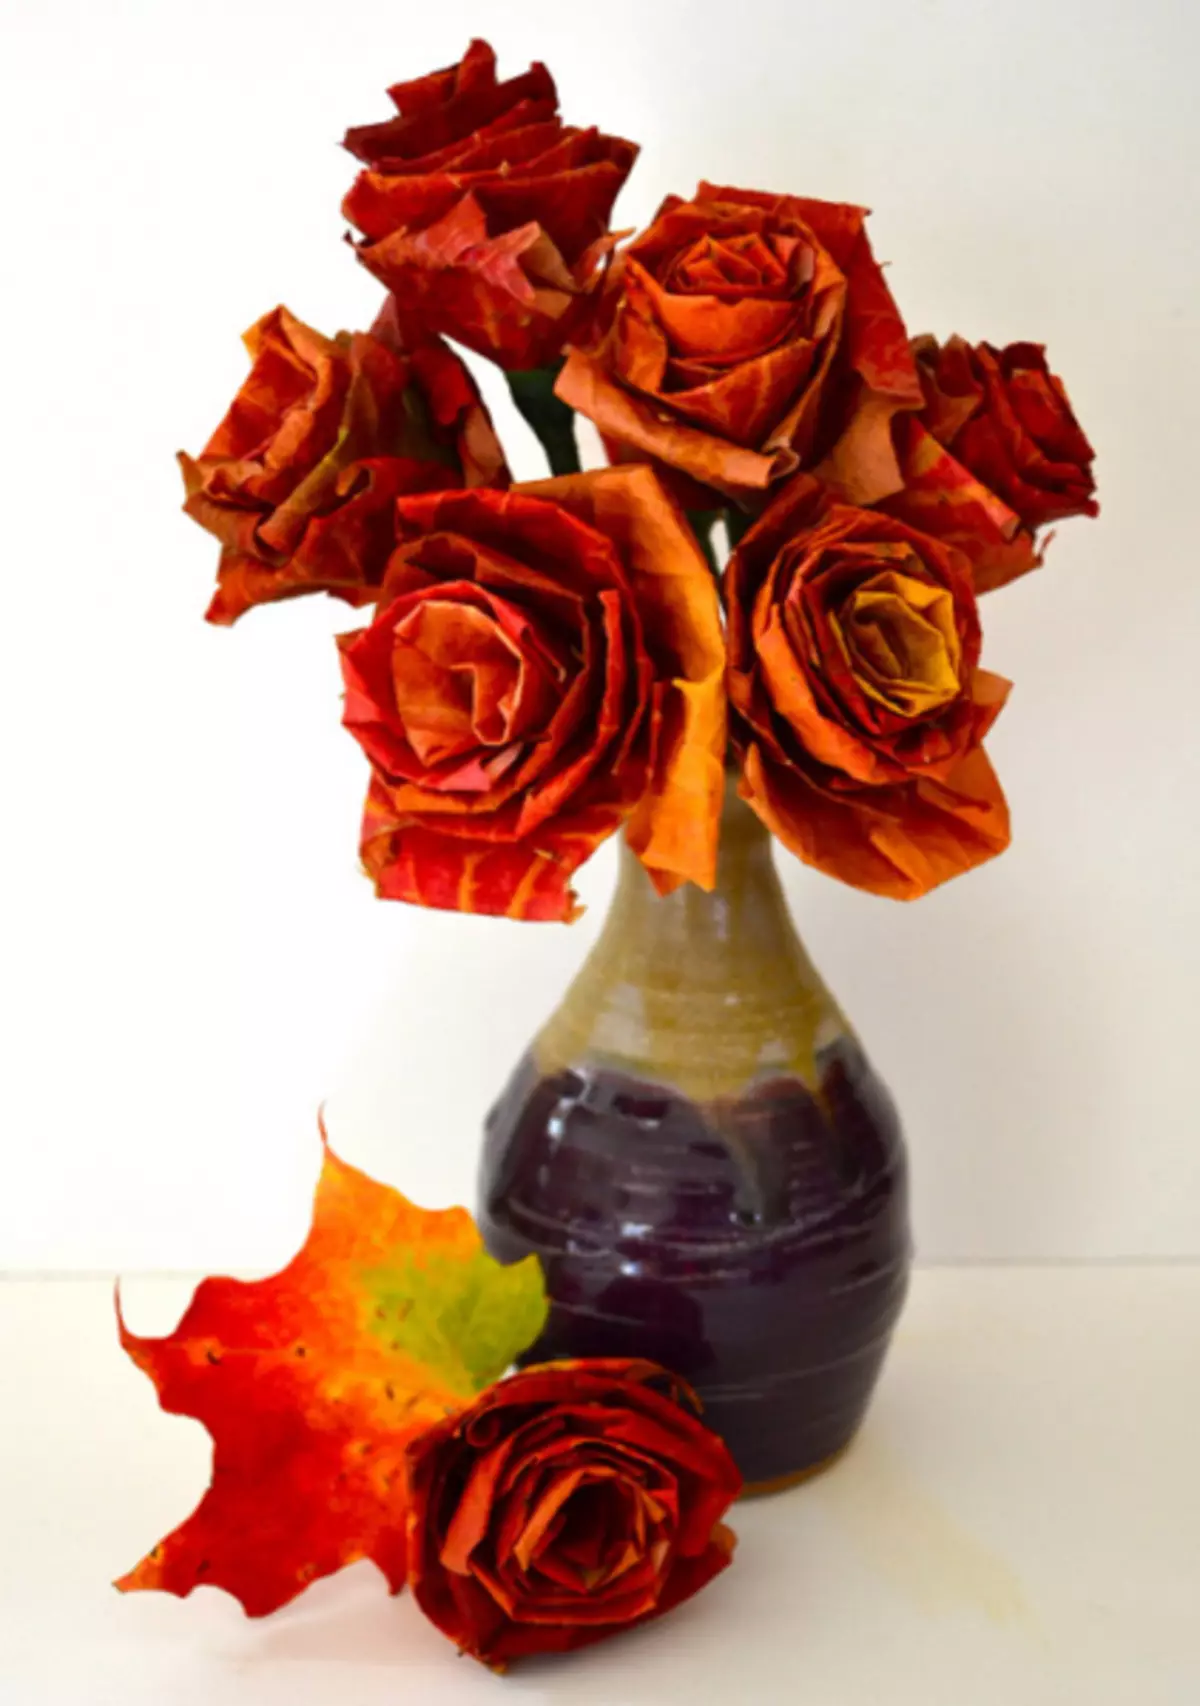
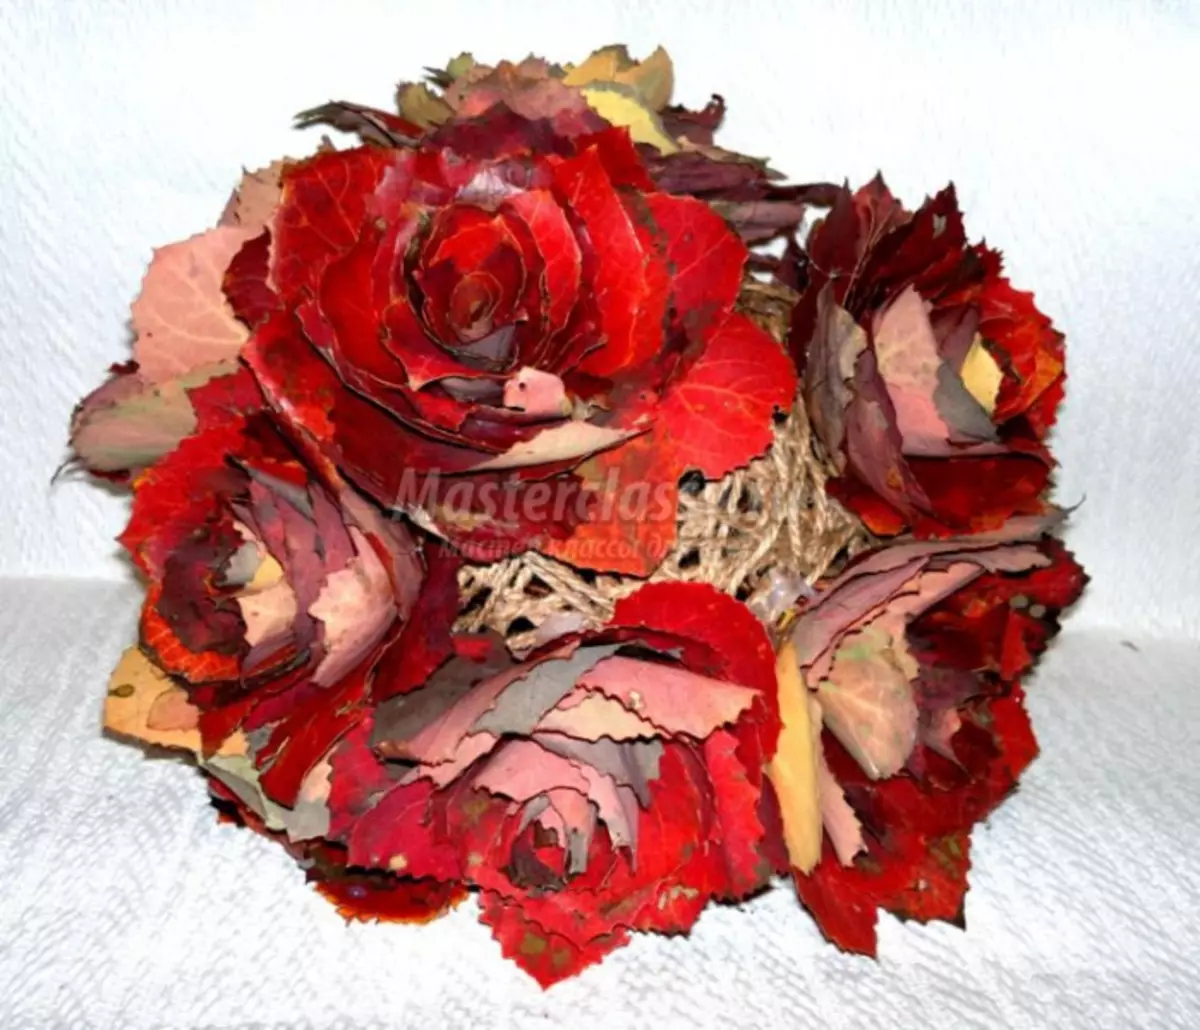
We connect all the resulting flowers in the bouquet. We can decorate at your discretion.
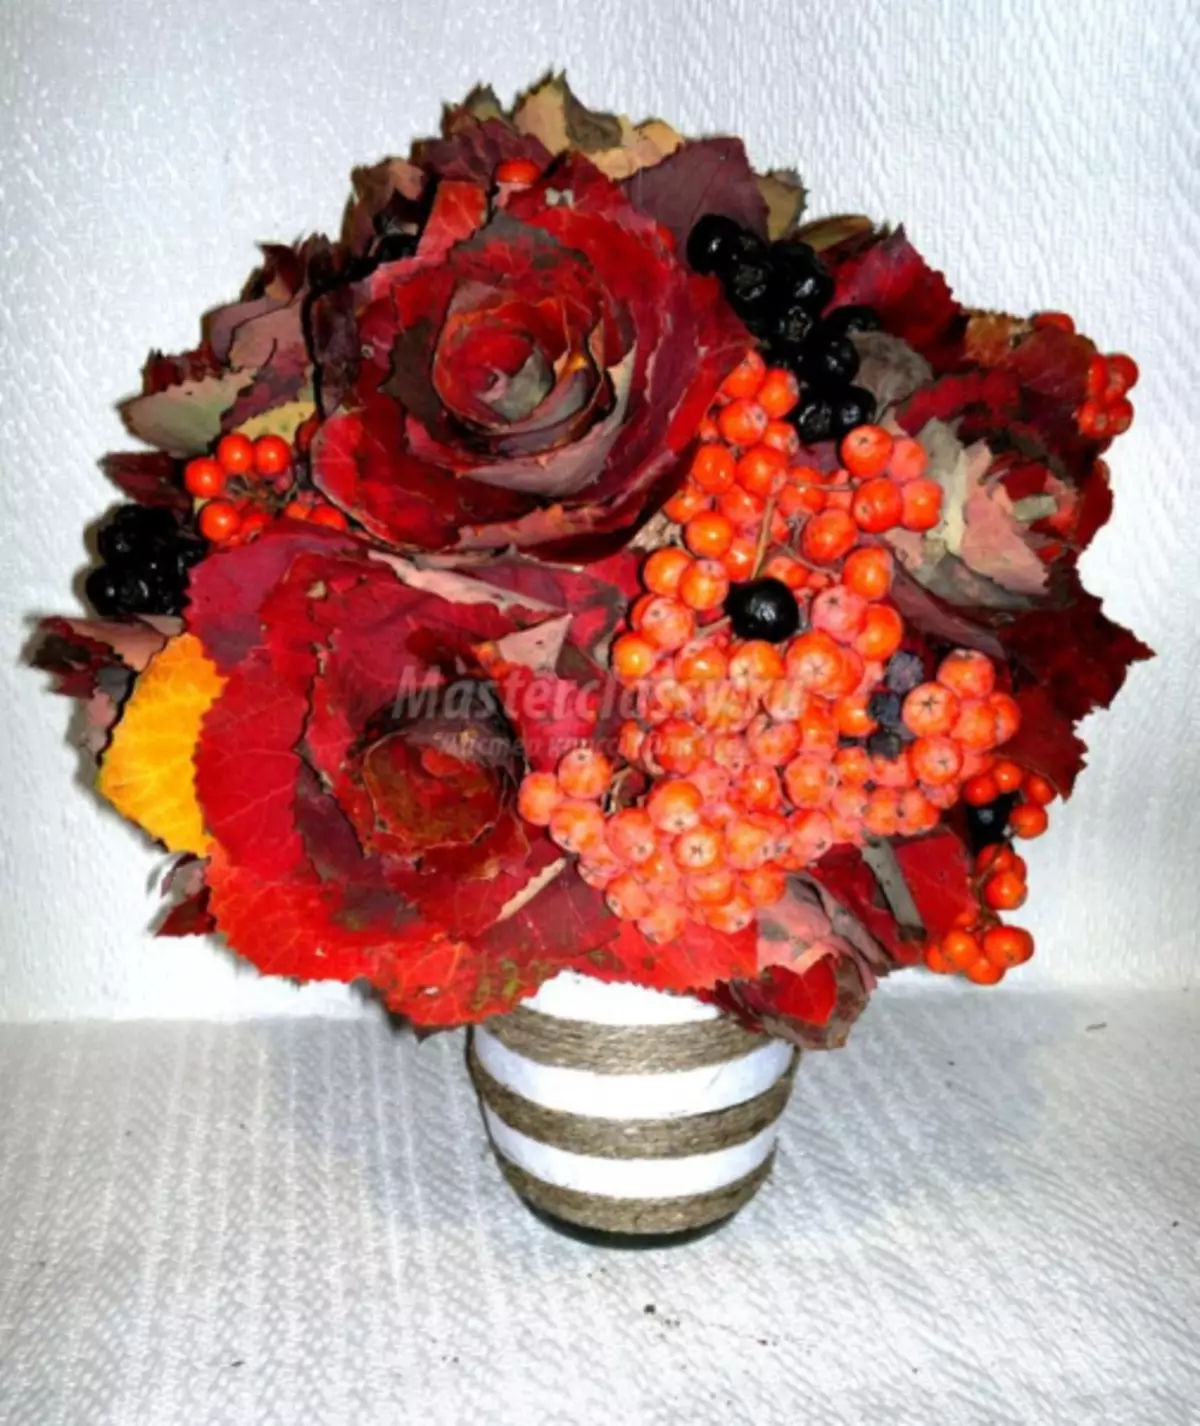
Add diversity
We will need:
- slightly dry birch leaves, aspen, etc.;
- jute rope;
- balloon;
- PVA glue;
- glue gun;
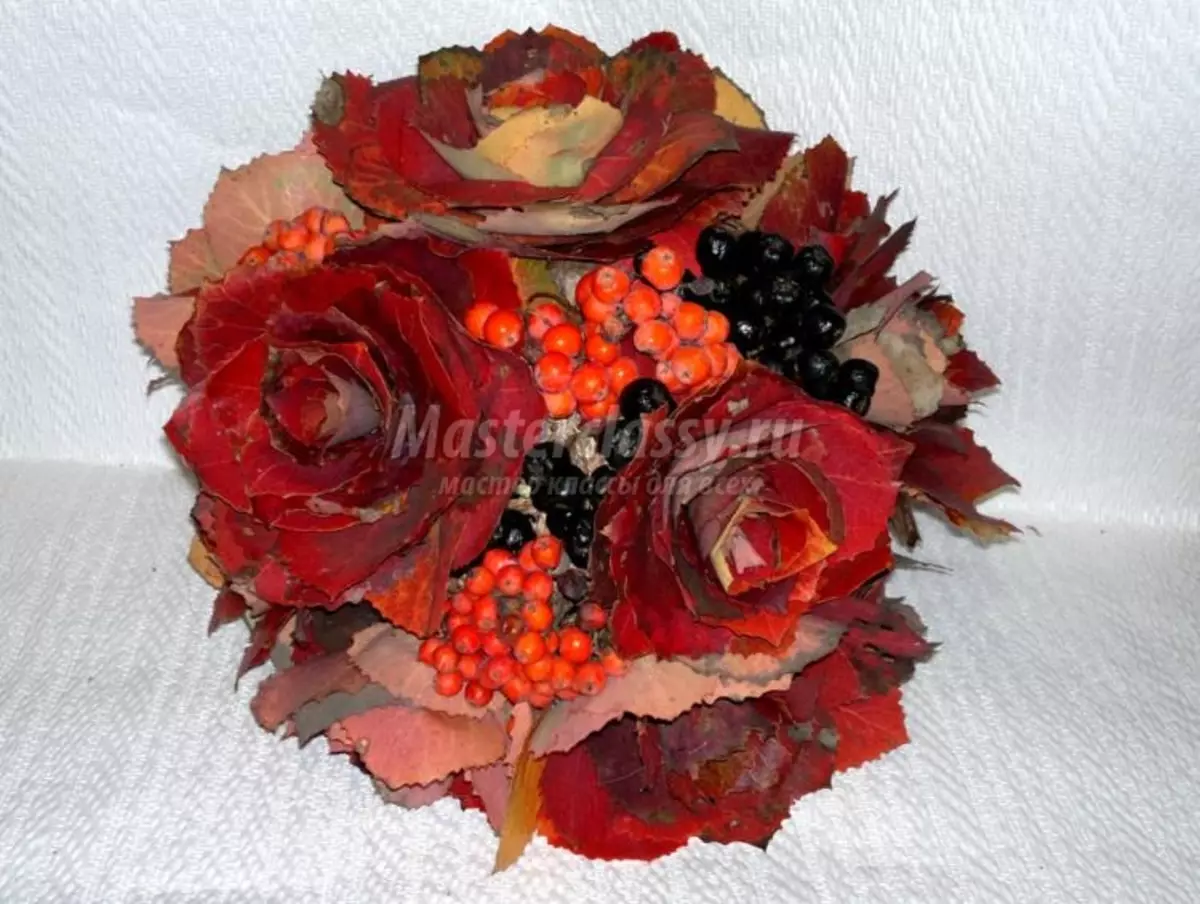
- Branches with rowan berries.

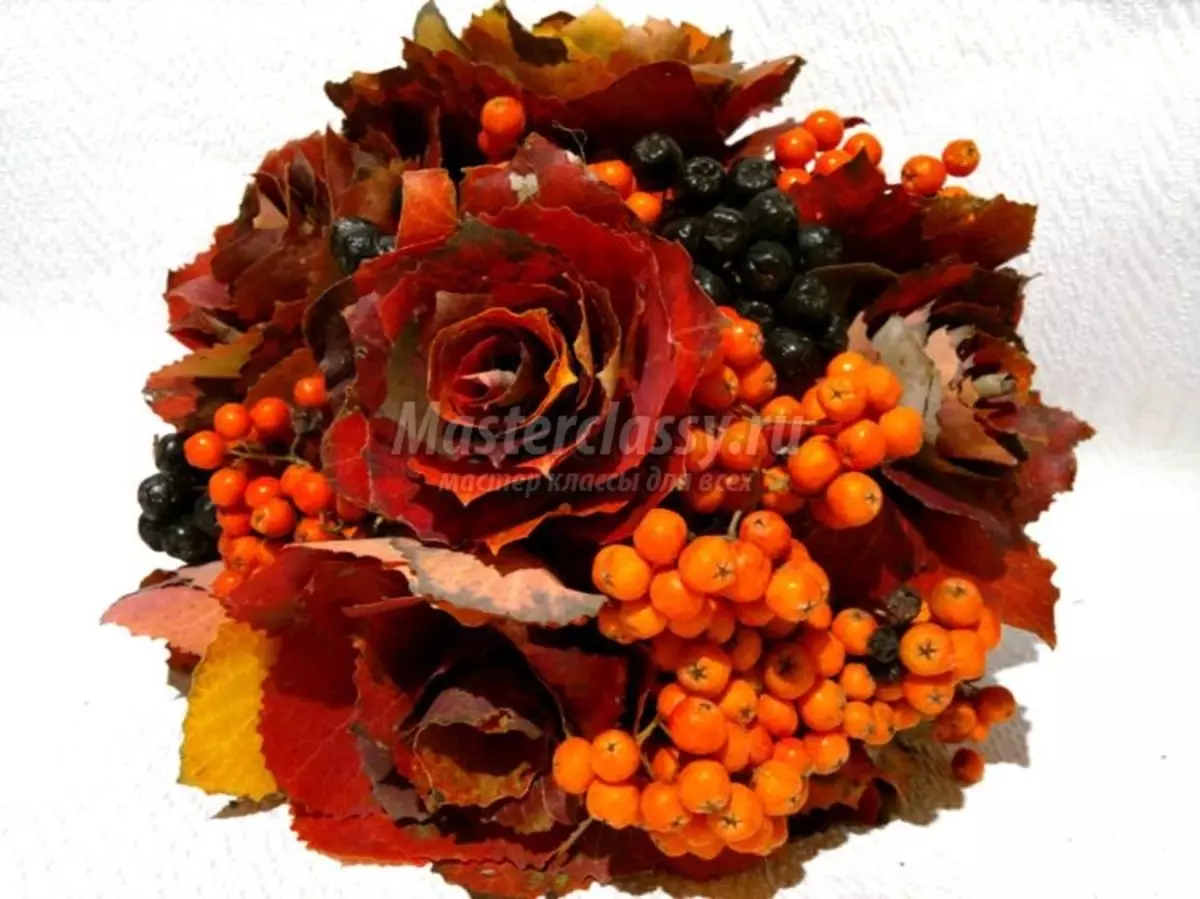
As you can see, a ball is needed from the jute thread. We take the air ball, inflate it and wind by jute, while abundantly lubricate the pva glue (you can use the wallpaper). We are waiting until he dries. Sanctuate and remove the ball.
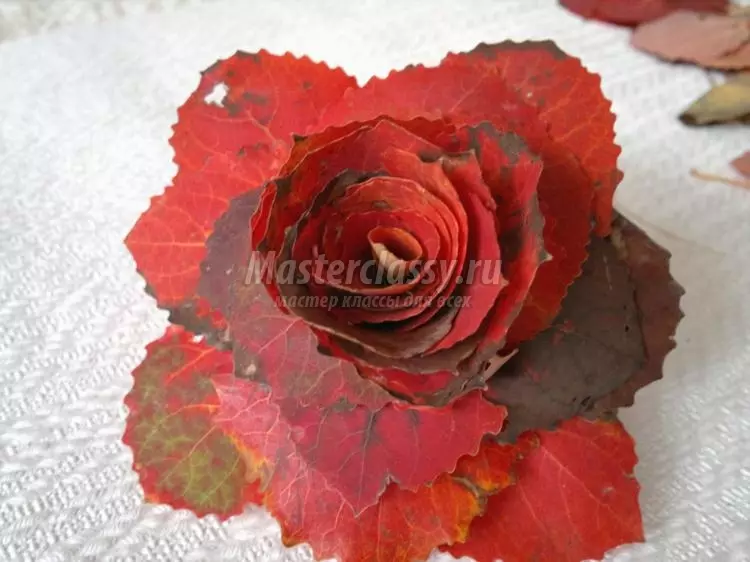
Now proceed to the manufacture of colors. To do this, we take the leaf and turn it into the kulek, the edges fasten with hot glue.
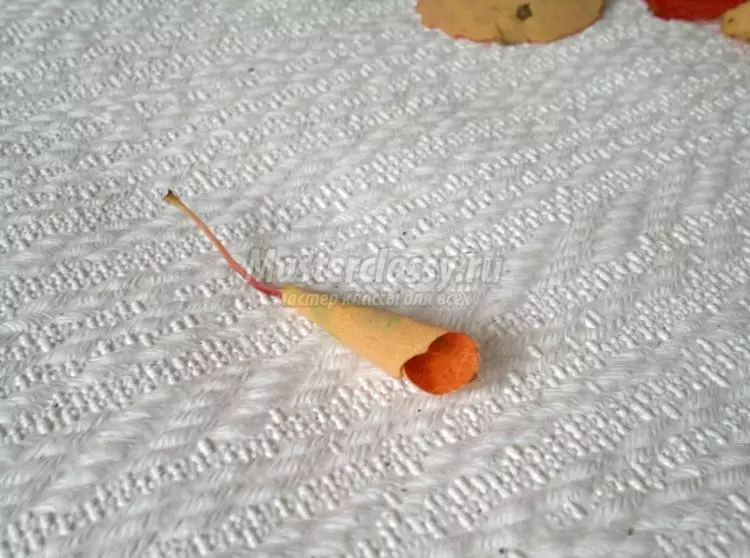
Wrap the next sheet around it, also use glue. Thus, fasten all the leaflets, with each subsequent should be equal to a little more than the previous one. We form a rose bud.
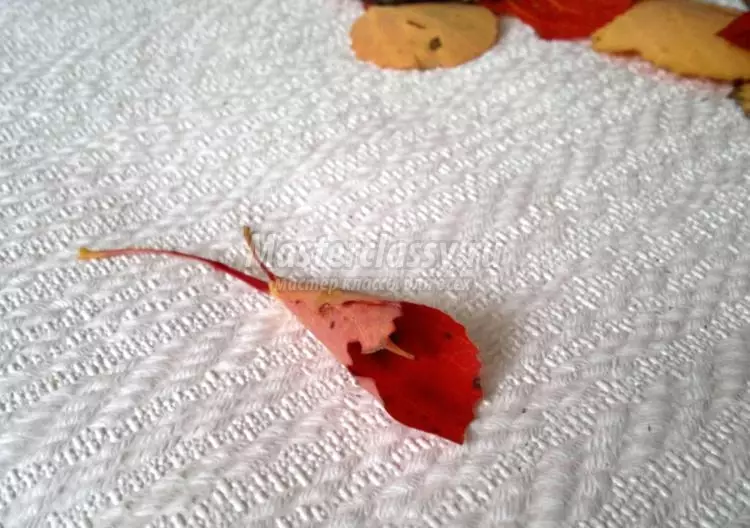
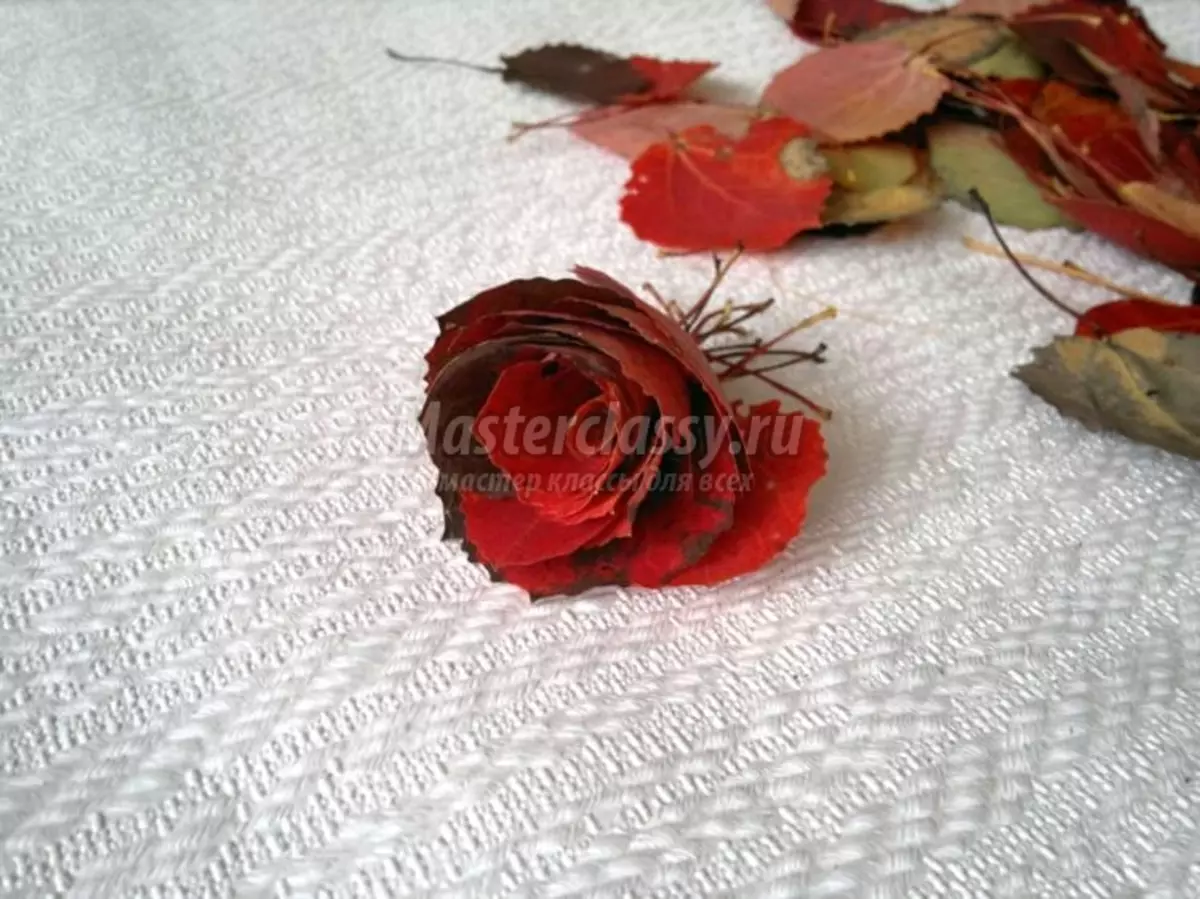
Recommended the last rows to attach for the base and bend outward. So the rose will succeed. You can make several colors of different sizes.
You can apply thermo glue on the petals by imitating the dew. Now we insert the flower into the jute ball, fasten with glue.
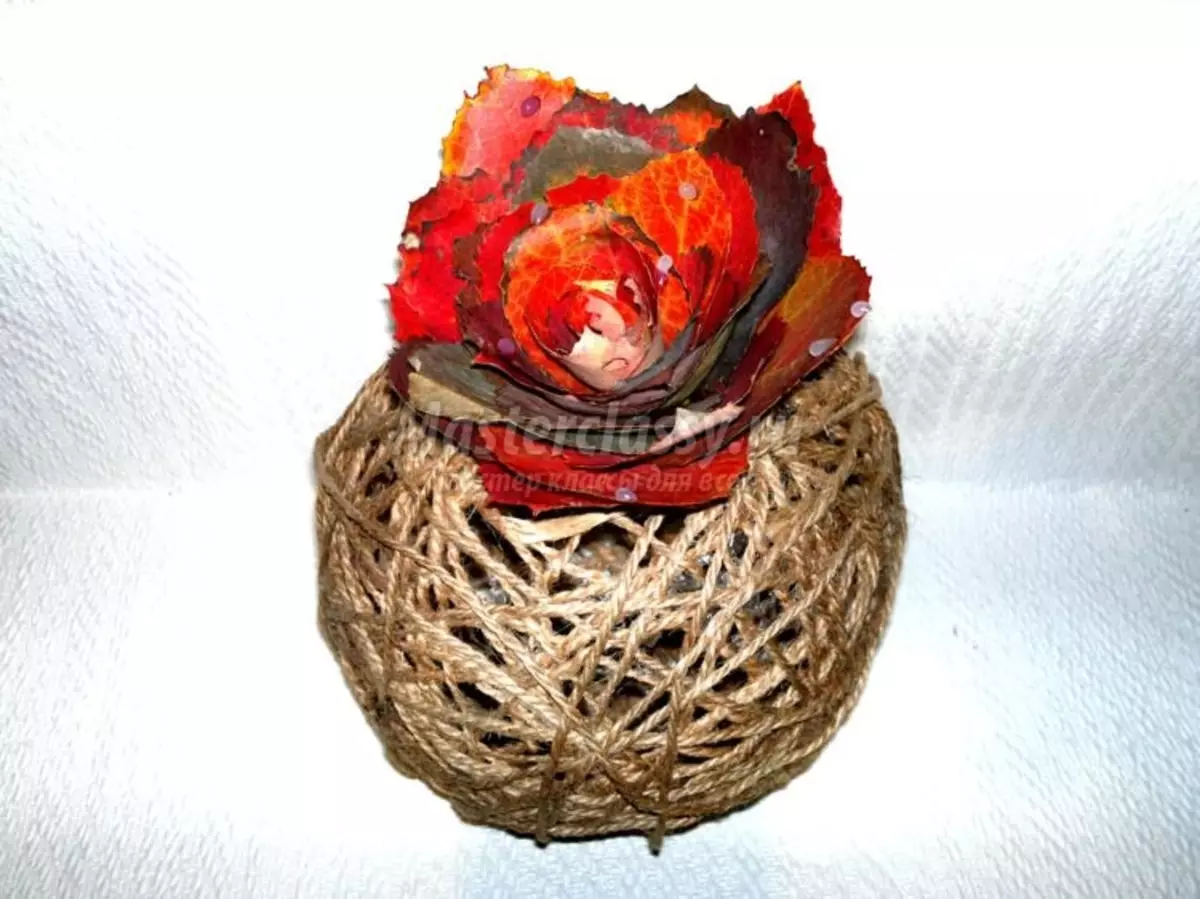
So make out the whole ball.
If desired, at the stage, while the jute ball is still wet, you can make a flat bottom and decorate only a convex part.
Now fill the empties with rowan berries so that the jute is not at all visible.
Here is such a non-standard bouquet can fit on a vase, but you can provide a loop and then hang it, for example, on the door.
Article on the topic: Hexagon Crochet: Scheme for beginners with photos and videos
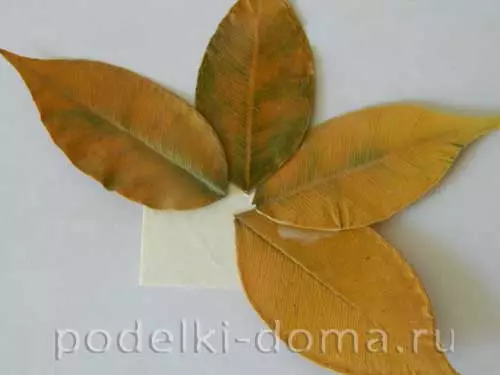
Fourth fashion
It is most likely suitable for joint creativity with a child, because it is very simple and does not require special skills and skills.
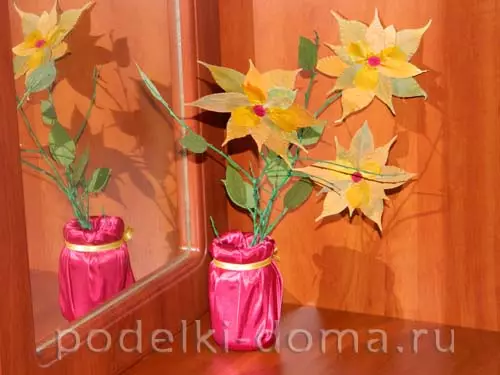
Material and tools:
- leaves (children will be interested to collect them with you);
- Thin twigs for a stalk;
- cardboard;
- PVA glue;
- The paint is green, better acrylic, but also gouache, watercolor will also fit;
- brush;
- Glass jar half-liter;
- Cutting fabric;
- rubber;
- Tape from satin.

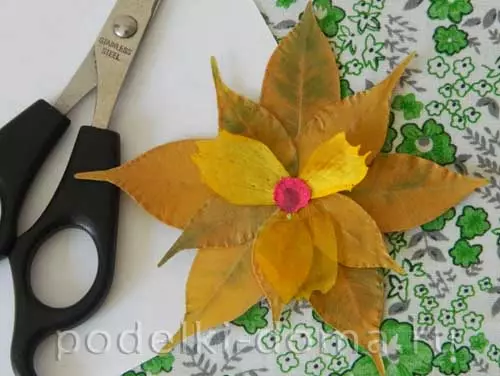
On a piece of cardboard, we glue the leaves in a circle of the mustache, and choose the largest.
The leaves for the next row take a little less and place them in a checker order relative to the previous ones.
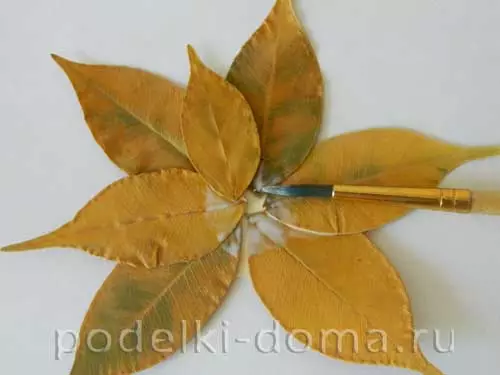
The third, for our example, the latter, can be folded from three small leaves, and we can take the petals of dried flowers.
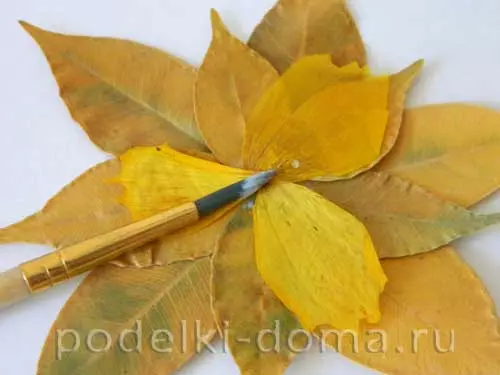
The middle can be closed by a bead, rhinestone, and we can glue a very small leaf and paint it. Here is a piece of fabric.
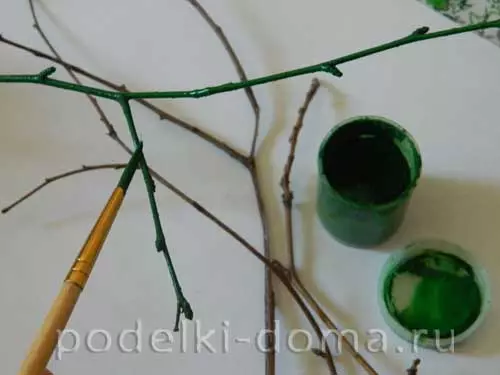
While our flowers dry (choose the quantity yourself), we paint the sprigs in the green color.
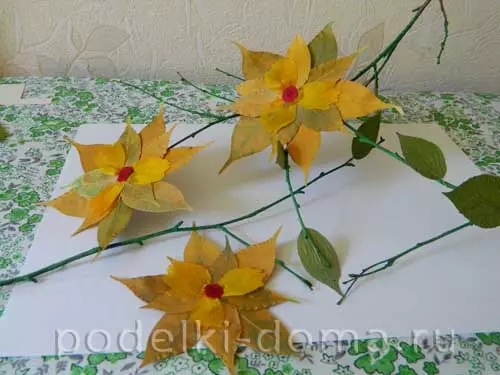
When all parts are frozen, we attach flowers and separate sheets to the branch.
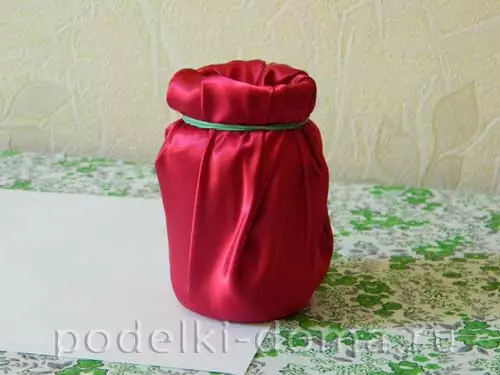
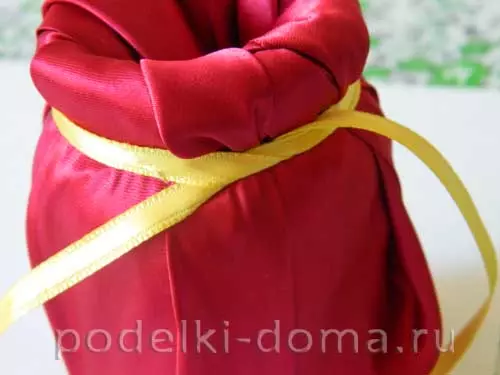
Now we will deal with a jar. We decorate it with a cloth, fixing the neck with a rubber band, and cover the fastening of a satin ribbon.
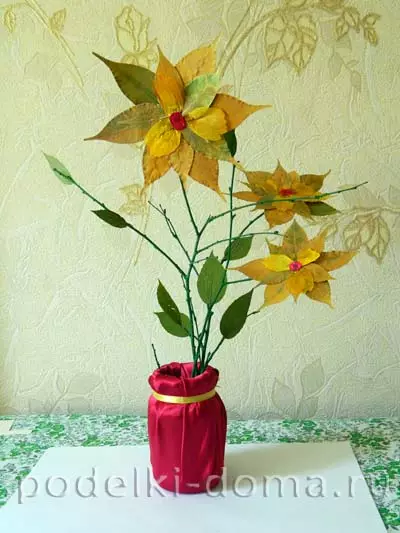
We place our flowers in the transfigured jar. Although, if desired, it can be replaced with a beautiful vase.
As you can see, in the autumn foliage the mass of the potential. You can create amazing bakery compositions by adding an additional decor in the form of berries, dry herbs, cones, etc.