
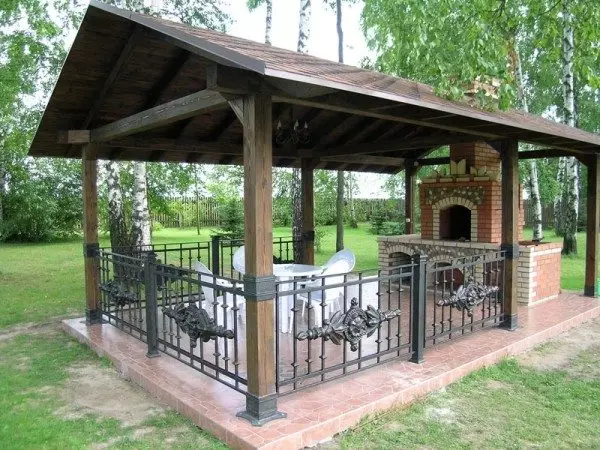
The construction of the arbor includes not only the construction of the foundation, the installation of the frame, roofs and walls, but also internal decoration. Moreover, it is impossible to say that this stage is less important than everyone else. Therefore, let's look at how and what is the finish of the arbor do it yourself.
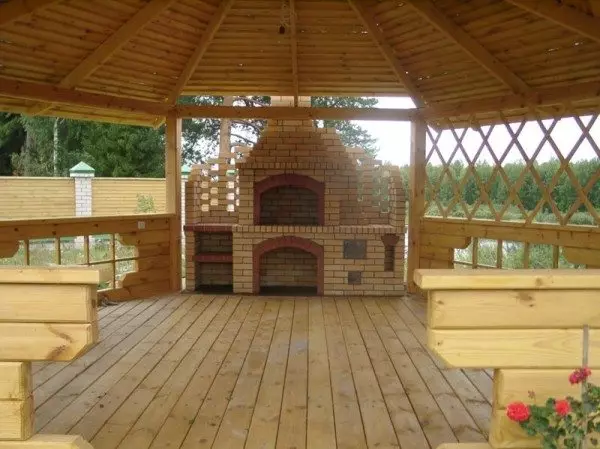
Tree Gazebo
Material for finishing
Before separating the gazebo, it is necessary to determine the material that is needed for the arrangement:
- Floor;
- Walls;
- Ceiling and other design elements
And despite the large variety of options, wooden panels remain most popular. This is due to the decorative peculiarities of wood, as well as its high indicators of both finishing and building material. Therefore, then we will look at the features of the facing board - lining.

Lining
Crack for finishing
General
The lining is a calibrated board with a puzzle double-sided compound designed specifically for the premises of the premises. Thanks to this connection, the boards are firmly adjacent to each other.
Of the advantages of the wallboard, the following points should be highlighted:
- Low value of material;
- Ease of installation;
- Good sound insulation properties;
- Attractive appearance of a natural board;
- The lining is a natural natural material that creates a pleasant microclimate, which is relevant for closed rooms;
- The lining can be performed both internal decoration of arbors and external.
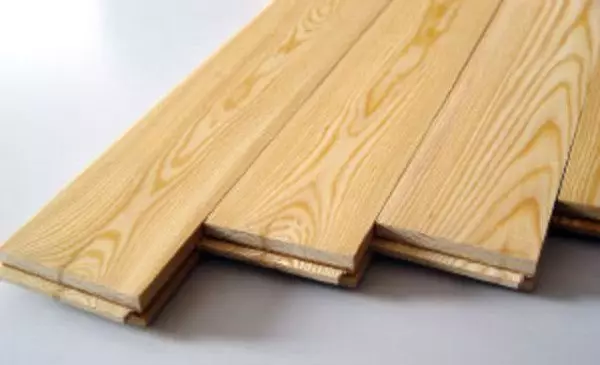
Lining from pine
Types of lining
The inner finish can be made from the material of various wood species, however, the cheapest and at the same time a sufficiently high-quality option is pine. It has a very beautiful texture.
There are also more expensive types of lining from:
- Linden;
- Alder;
- Oak;
- Cedar;
- Larch;
- Aspen.
In the market, the lining is represented by different shades, ranging from the brightest, and ending with dark. In addition, all sorts of tintings allow you to give a tree any color.
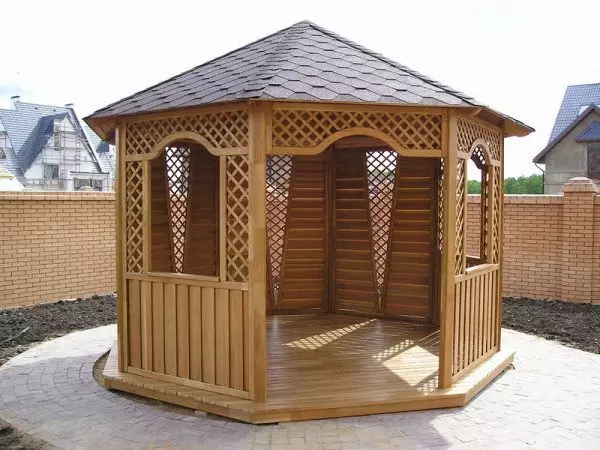
Gazebo triggeted
FEATURES OF MONTAGE
Camping can be mounted in several ways:- Vertically;
- Horizontally;
- Diagonally.
Article on the topic: How to beat the wallpaper of two types in the hall: 35 photos
In addition, a combination of these variations is allowed, it looks very interesting. However, if the gazebo has small sizes, it is better to use a horizontal location, as it expands the space. For a low arbor, you can position the material vertically, which visually increase its height.
Tip! Before performing the decoration of the arbor, it is necessary to determine whether electricity will be carried out. If so, at first it is necessary to perform all the wiring, install the lamps and sockets, check their performance, and only after that proceed to finishing.
Finishing technology Cutting
Instruments
In addition to the finishing material, you will need the following tools to fulfill the facing:
- Level;
- Roulette;
- Nails with small hats;
- Transparent mounting brackets;
- Screwdriver;
- Screws;
- Drill;
- Hacksaw;
- Wooden hammer;
- Perforator.
Tip! Pre-installation of the material, it must be impregnated with an antiseptic, which will prevent the rotting and will cause material from fungus and mold. And also need to be processed by the flame retardant. After that, the boards must dry completely.
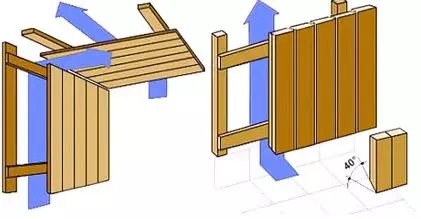
Laying layout scheme
Laying clapboard
In most cases, it is required to perform a wooden slat with a wooden slat with a warehouse with a pitch with a pitch of about 0.5m. It should be borne in mind that the facing boards are mounted across the crates.
Note! The better the lamp will be performed, the easier it will be a gazebo of the clapboard.
Stacking should be started from one of the angles of the arbor. It is necessary to do it very carefully, since further laying of cladding will depend on the installation of the first boards.
Installation instructions Looking as follows:
- Fixation of boards is carried out using self-tapping and nails.
- After laying the first boards, the remaining parts should be mounted as soon as possible, but not very tight. The gap between the panels is not more than 2 mm.
- Uniformity and flatness of laid boards need to check the construction level.
- After performing the work, the lining must be covered with varnish.
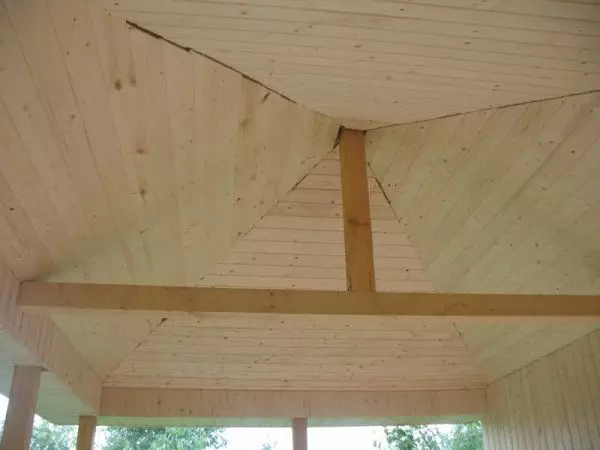
In the same way, the ceiling finish can be performed.
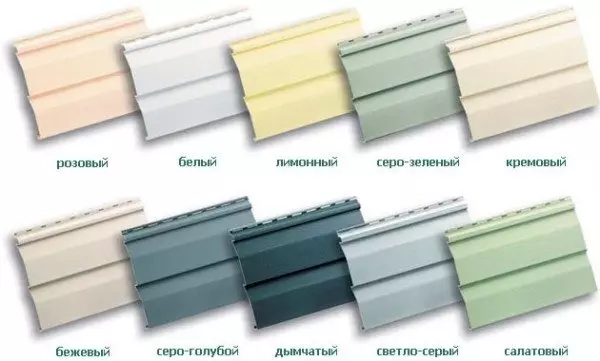
Siding in different colors
Articles on the topic:
- Than to sheathe arbor
- Interior Arbor inside (photo)
- Finish arbor
Article on the topic: Bits for a screwdriver: how to choose their views?
Siding for decoration gazebo
Recently, no less popular material than lining is siding, which is also called plastic clapboard.
It has many positive qualities:
- Comes in a variety of colors and shades;
- It has resistance to moisture;
- Thanks to fire-resistant reagents, which are available in its composition, is a fire-resistant material;
- It is easy to clean and dirt and dust and dust will not accumulate on it;
- During operation, it does not distinguish harmful substances;
- Resistance to temperature drops;
- Durability;
- Ability to use for inner and outdoor decoration.
Tip! Included with the material you can also purchase accessories for it, for example, spare parts for compounds, angles, elements for windowsills, etc.
The principle of finishing the arbor siding does not differ from working with the clap, so we will not consider this process.
Sand floor
Floor finish methods
Sweep
For open-type gazebo, the most simple option for finishing the floor is the rammed ground, covered with sand, rubble or small gravel. For example, you can use the material that remained after the swelling of the tracks.
Tip! Through the flooded ground, the proportion of the weeds can not have happened, the soil geotextiles should be closed.
Gulled floor
Gulled floor
A more interesting option is global floor. It has an attractive appearance and does not require any costs, as it is performed from clay, water and straw sch. Pre-on the soil is poured a layer of rubble, after which a thick clay solution is applied with a thickness of about 7 cm.After applying the solution, the surface is rambling and align. To increase strength and moisture resistance, a lime solution is applied on top to the coating and rub it.
Wooden floor
This coating option is the most common. The floor finish with wood can be performed both in open and in closed gazebos. The flooring is performed from edged boards with a thickness of about 20 mm.
Floor
Note! Boards are not recommended to be allowed too tight. The distance between them should be about 3-7 mm to ensure air circulation. Thanks to this, they do not crack and will be less susceptible to rotting.
It is possible to fit the floors by boards before the construction of the roof in the gazebo, after performing the upper and lower strapping. To protect wood from fungi, insects and mold, the floor must be covered with several layers of antiseptics.
Tip! So that the wooden floors served longer, they must be covered with an antiseptic at least once a year.
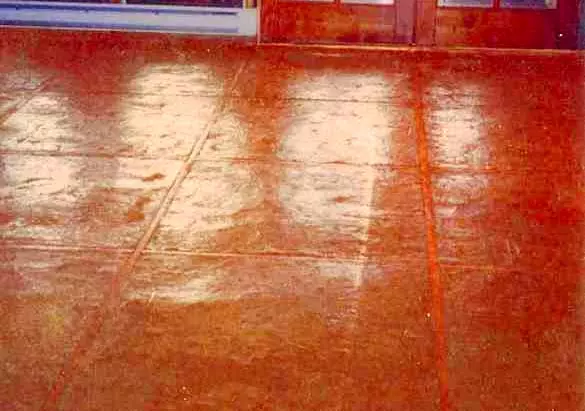
Paving tile
Another common way to finish floors in gazebos is the coating of paving slabs. The only disadvantage of such a solution is that the material is quite slippery, especially in winter. Therefore, for the gazebo, it is better to use a tile with a corrugated surface.
Article on the topic: how to make a plinth on the floor with your own hands: cutting, drilling, installation (photo and video)
The advantages of paving slabs can be attributed to an attractive appearance, durability and simplicity of laying.
To install it, you must perform the following actions:
- Float the soil with a layer of sand;
- Grab sand;
- Moisten the surface of the soil.
After these uncomplicated manipulations, you can start laying tiles.
In the photo - the floor was separated by a porcelain
Ceramographic
A good solution is the use of porcelain tile. It has all the advantages of ordinary ceramic tiles, but due to the addition of granite crumbs there is greater durability.The only one, such a method is sufficiently costly, since it is predefined to perform a concrete tie of the surface. In addition, the price itself is also not small.
For installation of porcelain, you should use a special adhesive mixture that has high adhesion. After the adhesion of the adhesive solution, the remnants of glue are believed from the tiles and rub the seams with a special cloud mixture. By this floor, you can walk already a few days after the installation.
Output
If the appearance of the surrounding landscape and the design itself depends on the appearance of the arbor, the interior decoration affects how cozy and comfortable will be your holiday. Therefore, it is necessary to approach the choice of finishing materials and performing the work than to the construction of the design itself.
Additional information on this topic can be obtained from the video in this article.