
A cozy summer canopy is considered a mandatory attribute on any summer cottage or in a private house. The concepts about the beauty of each of their own, but the classics have always been considered hexagonal gazebos. It is the opinion that only a professional can collect such a design, but it is not true and further we will tell about the types of hexagon engineering structures, plus you will get the arbor assembly technology for 6 steps.
Easy hexagonal perlog organically fits into the design of any plot
Types of designs and design options
Structurally, all such structures are similar, geometry is the same everywhere, so we are talking about style, sizes and selection of the material from which the gazebo is built.Worn canopies
Openwork wrought design from the side looks elegant and easy. To collect it, now you do not need to be a blacksmith, ready-made elements are sold on the market. You just do a sketch and further select everything you need according to your size. But for construction you will need a welding machine and the skills of the welder.

Openwork forged design will decorate any cottage.
| pros | Minuses |
| Absolute fire safety, metal does not burn, so under such a canopy you can safely put the brazier. | Sports exclusively summer, winter lattice design will not protect any of the cold or from the wind. |
| Durability - if you regularly paint the design, then it will simply flash one dozen years. | Metal is subject to corrosion, respectively, the gazebo will have to paint every year. |
| Openwork forging looks very effectively and fits into any landscape. | Expendable wrought elements are not cheap. |
Corn from profile pipes
Compared with forged structures, the arbor from the profile pipe is much easier. Pros and cons of these structures are the same, but the profile pipe is cheaper, in addition there is an option to build a frame on studs and bolts.
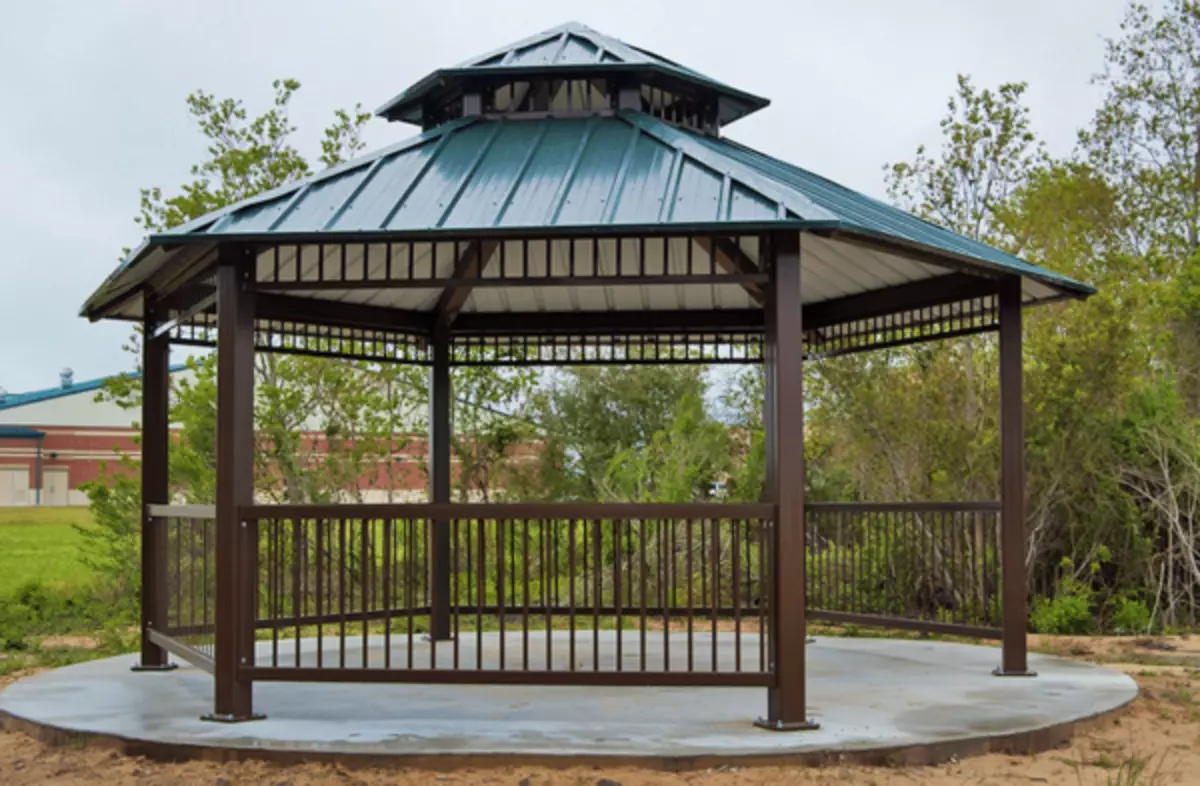
Canopies from metal products are easy to assemble and cost inexpensively.
Brick structures
Arbors from bricks are winter and summer, it all depends on the desire and financial capabilities of the owner. But such structures are desirable to choose those owners who have a house also made of bricks, because on the background of a wooden log cabin, a brick gazebo will look alien inclosure.
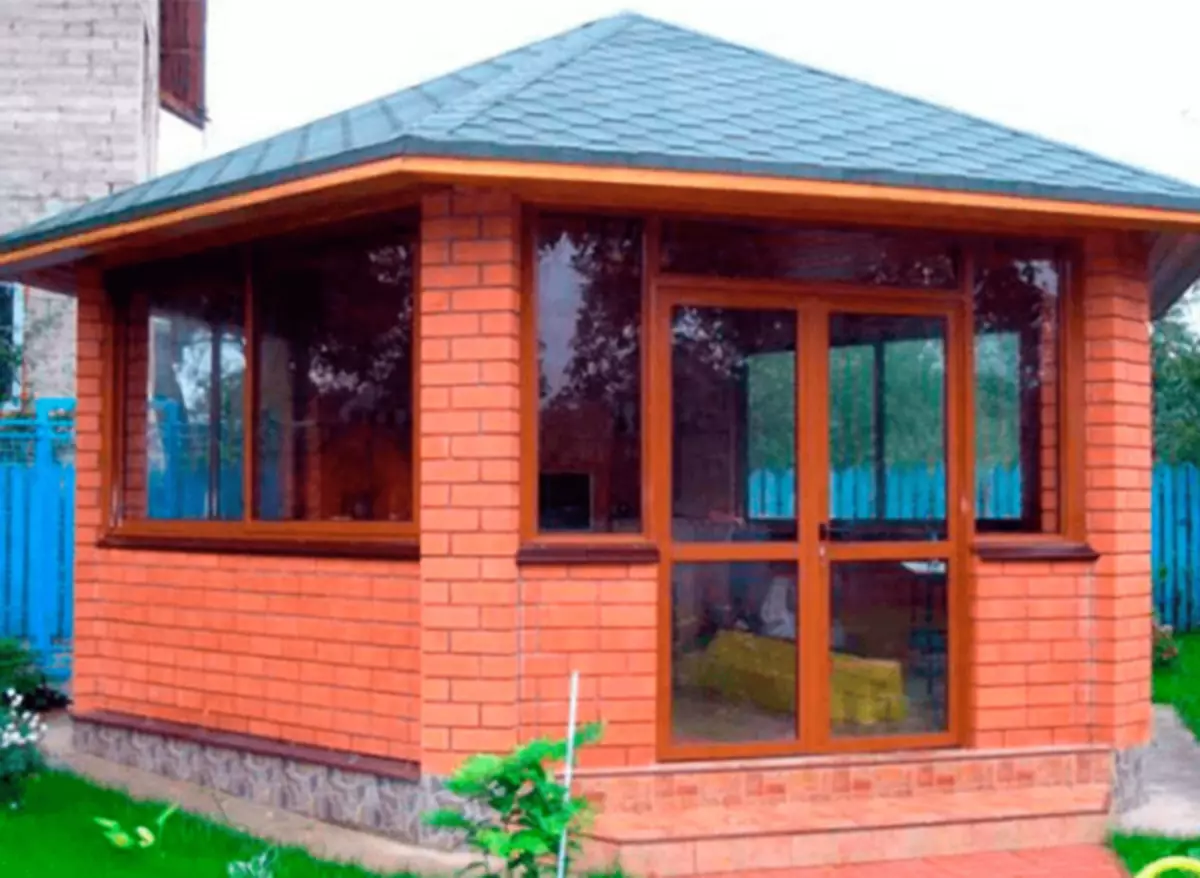
Brick canopies are considered the most durable and reliable.
| pros | Minuses |
| Durability - the brick does not rust, does not rot and will serve dozens of years. | Buildings from facing brick cost expensive. |
| Unpretentious - facing brick does not require any care. | Brickwork arrangement requires skill. |
| Winter canopy is well holding warm. | Temporary costs - to build quickly will not work, there is a schedule. Even with a big desire and the presence of money, on the construction of a brick gazebo turnkey will take 2-3 months. |
| If you don't like brick walls, then the basis can be chosen by natural stone or some decorative tiles. | Capital foundation - a ribbon or tape-column foundation is poured under brick structures. If you need to equip the foundation very quickly, the foundation blocks of the FBS type are used, but the base will be twice as expensive. |
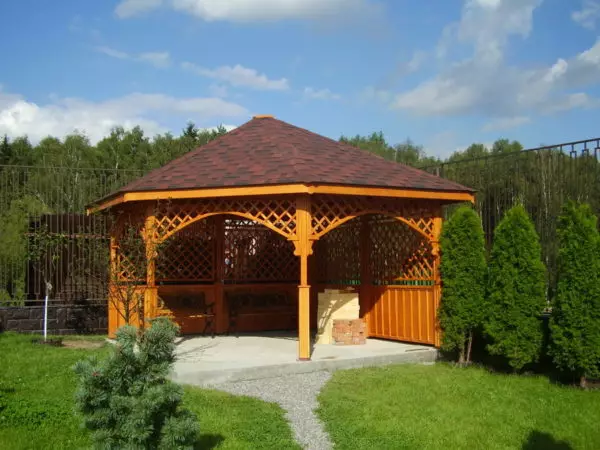
Wooden designs
Wood is the most common and affordable material. There are 2 types of wooden arbors - these are structures collected from the bar and log cabins.
- A wooden canopy from a bar can afford most owners. For construction, fundamental knowledge and expensive tool are not needed;
Article on the topic: Independent connection of electric furnaces to the network 220 V, 380 V
Isometric hex gazebo from timber.
- The log is used less often. Because it is not possible to catch it with your own hands, but the finished material costs serious money. Plus, the assembly of a log fire is an order of magnitude more complicated than the construction of the arbor from the bar.
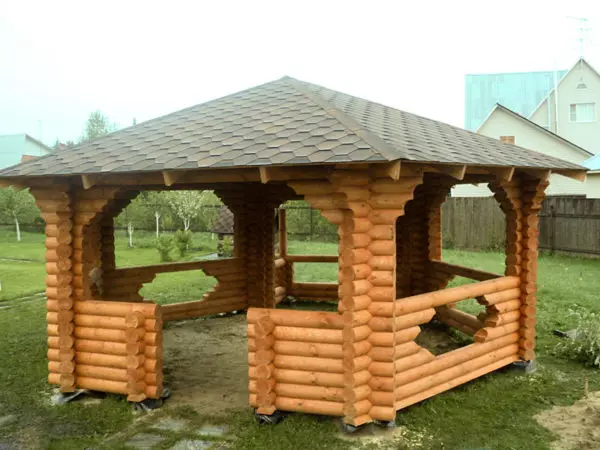
Log cabin can only build a professional.
| pros | Minuses |
| Absolute environmental purity material. | Wood is spoiled, so regular processing of protective compositions is necessary. |
| Beautiful appearance. | The design is fire hazard. |
| Easy assembly. | |
| Under the wooden gazebo does not need capital foundation. |
Hexagonal mangal arbors
Hands with a brazier are incommensurable practical and more convenient than ordinary designs. The easiest way out here is to install a brazier on one of the sides of the hexagon, while no radical design changes do not need to make, you simply build a standard gazebo and cut a brand on some part.
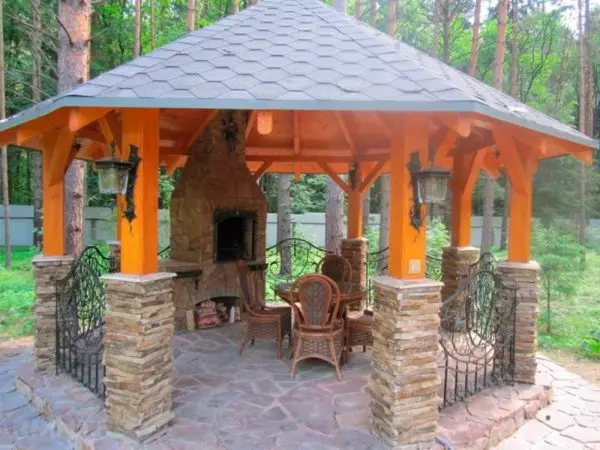
The mantal installation on one of the structures is considered the simplest option.
But all symmetric canopies, the foundation of which fit into the circle, have a tent roof, which allows you to install a round barn in the middle of the canopy. True, with this approach to the top of the roof, it will have to cut a chimney pipe, and the dome is mounted above the brazier.
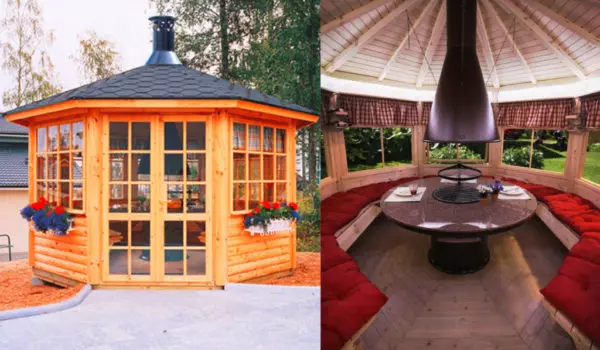
For the mangala, installed in the center, the chimney with the smoke collector dome is mounted.
Stages of preparation
First of all, you need to decide what material will be your gazebo, after which you find a suitable place and draw yourself or somewhere to find detailed shed drawings.Choosing a place
- As practice shows, carports in the far corner of the site are popularly popular with couples and people who prefer privacy. For family holidays, they are absolutely not suitable, to walk far;
- Place the gazebo close to the house is also not the best way out. The design has a separate tent roof and organically enter it into the architecture of the building, will not work;
- The optimal option is the construction of a gazebo at a distance of 3-5 m from the house or summer kitchen. In this case, it will not have to walk a lot to, for example, cover the table under a canopy, and those who love privacy I would advise you to plant around a shrub or to equip the wall of grape trellis.
Article on the topic: Mouse died under the floor: how to get rid of smell
Build a gazebo too far from home is not the best option.
Drawings and counting costs
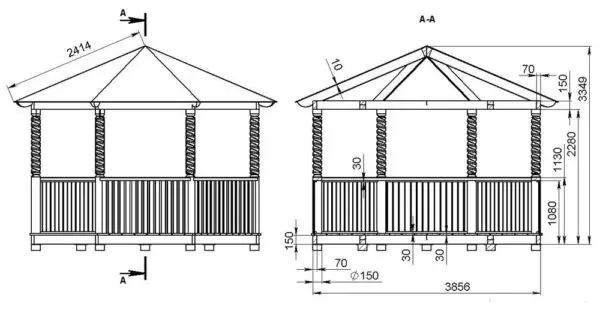
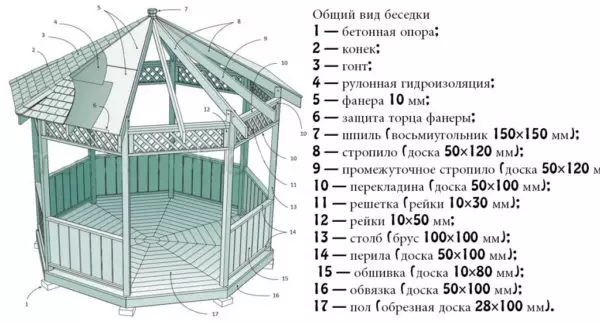
The drawing is a lesson for professionals, a fan is easier to work with a good sketch, the main thing is that the sketch is detailed and all the designations are well read. The height of the structure from the floor to the top of the roof is about 3 m, while the height from the floor to the ovel of the roof 2 m.
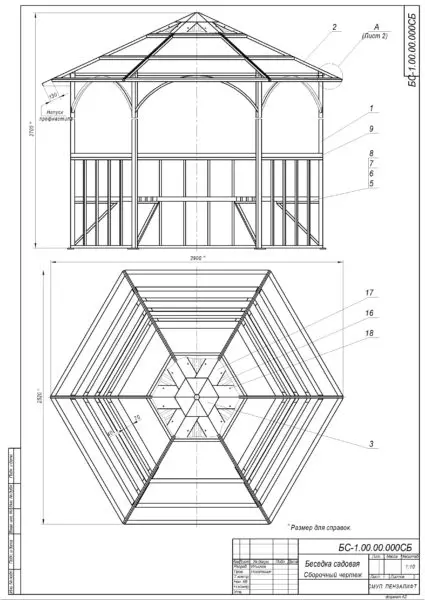
Professional drawing of a frame of a hexagon arbor.
Dimensions can be changed at their discretion, but this is the optimal option, it is designed for canopies with a circle diameter of up to 4 m. Only the height of the roof changes in large conversations, and the distance from the floor to the sink remains unchanged.
A good sketch can replace a professional drawing.
To unambiguously say, how much construction will cost it impossible, but if we proceed from the fact that the minimum price for the finished design starts from 130 thousand rubles. Materials on a similar gazebo collected with their own hands should be in the area of 50 thousand rubles.
But again, all this is approximately. The roof can be covered by inexpensive asbetic slate, and you can spend on a soft roof or metal tile, while the price will differ at times.
Selection of materials for wooden design.
Articles on the topic:
- Gazebo 6 to 6 meters
Step-by-step description of self-assembly
In this case, a lover is better to stay on the most simple design of a wooden bar. Although if you have a welding machine and you can contact him, everything else can be made from the metal, the step-by-step plan will be similar.Step No. 1. Foundation
| Illustrations | Recommendations |

| Marking. First you need to place the territory under the foundation poles. Make it just:
|
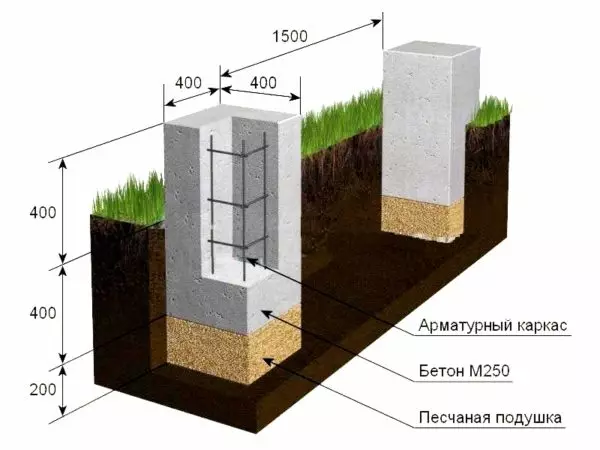
| Pillar scheme. It does not matter the round you will make pillars or square, the scheme does not change from this. |
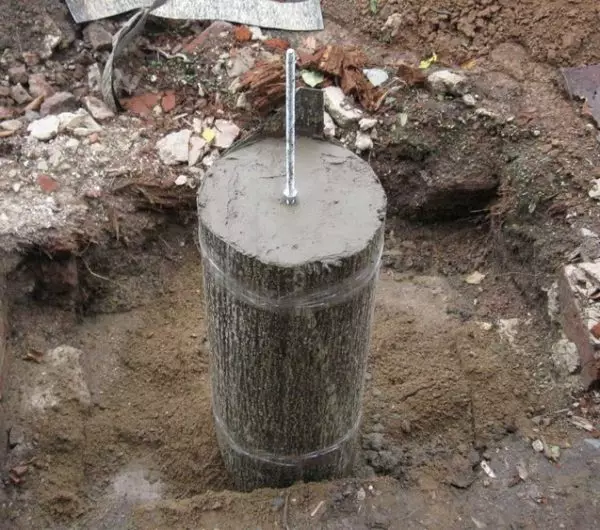
| Detailed algorithm arrangement. Round poles do easier:
|
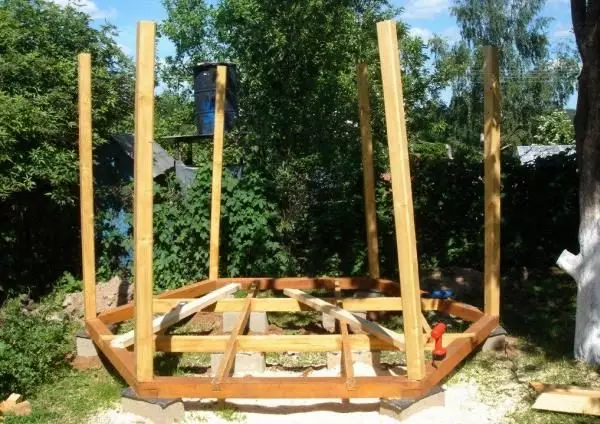
Step number 2. Base
| Illustrations | Recommendations |
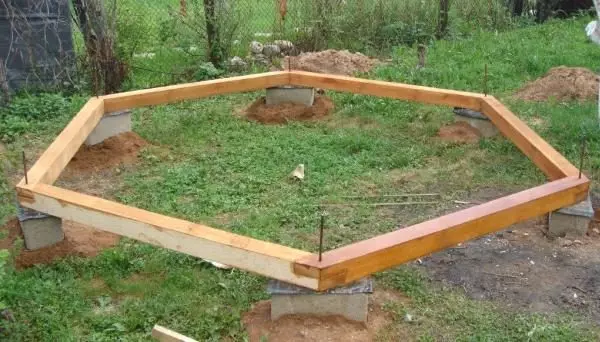
| Vent..
|

| Laggers for the floor. Inside the strapping, lags for floors from a bar 50x100 mm are mounted. The bar is immediately prepared, which will go on the base of the rafter system. The cross section of a bar is 50x100 mm, and the dimensions are similar to the base. |
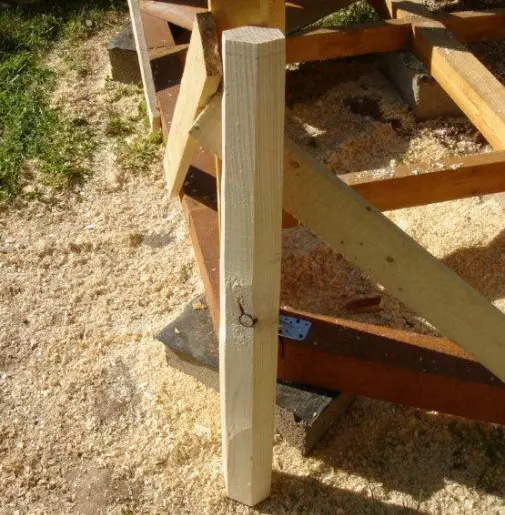
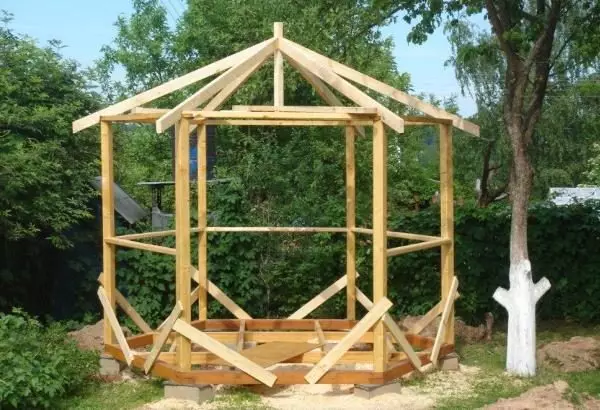
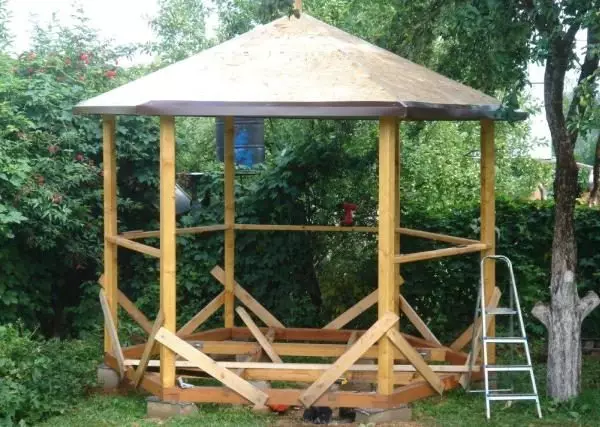
Step number 3. Frame
| Illustrations | Recommendations |
| Exhibit racks. Bearing racks in the corners It is advisable to make a cross section from 70x70 mm. To the base, they are screwed with metal corners. |
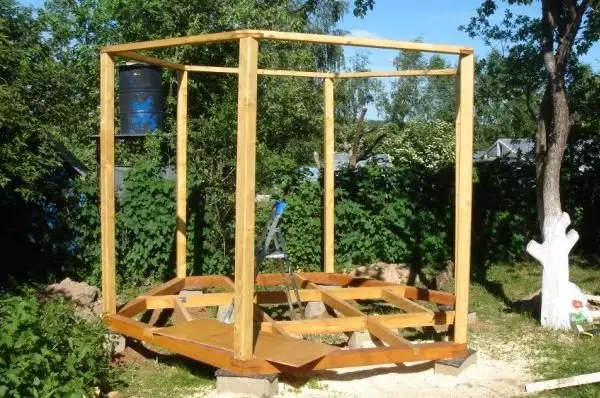
| Roofing. On top of the carriers of the racks attacks the lining system. Installation is performed all the same metal corners. In the corners of the bars are joined in the paw. |
| Planck under the fence. Under the plate for the fence at an altitude of 110 cm horizontally to the racks are attached to the cross section of 50x50 mm. |
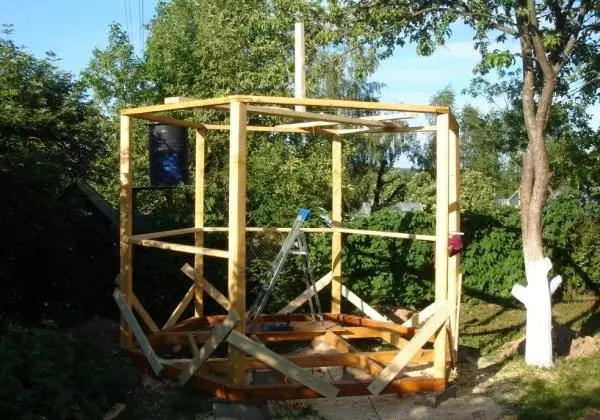
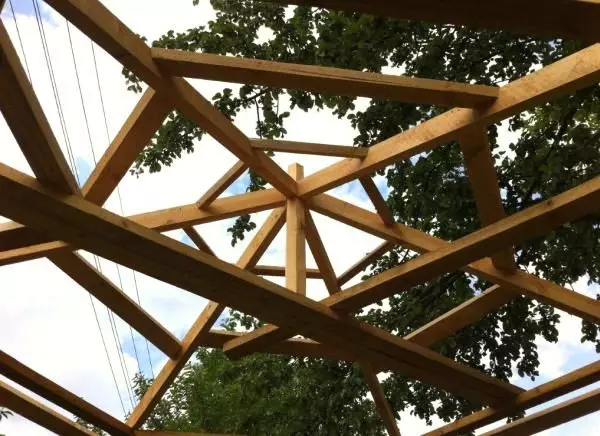
Step number 4. Rapid and roof
| Illustrations | Recommendations |
| Axial bar. The base for the rafter system is the central hexagon axial timber. The size of the faces is 50 mm, the height of the bar is equal to the height of the roof design. |
| Installing timing.
|
| Cructured doom. On one parallel with the roofing of the roof, each sector is sewn with bars in a step of 30-40 cm. For a sheet material of the type of metal tile or asbotic slate, this is enough, and under the soft roof you need to equip another solid crate. |
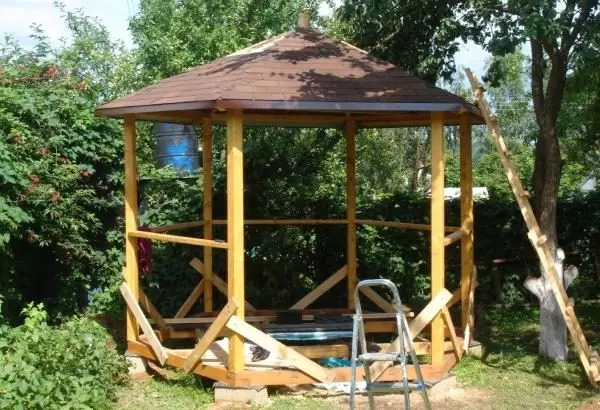
Step number 5. Roof covering
| Illustrations | Recommendations |
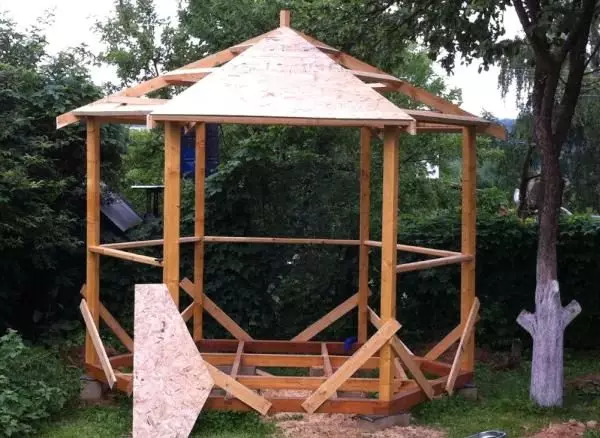
| Sheetting sheets. A solid suit is made from the sheets of waterproof osp with a thickness of 10 mm thick, you can take waterproof Phaneur, but it is more expensive. In the size of the sector on Earth, the sheet is cut out, after which it is screwed to the rafters with self-drawers. |
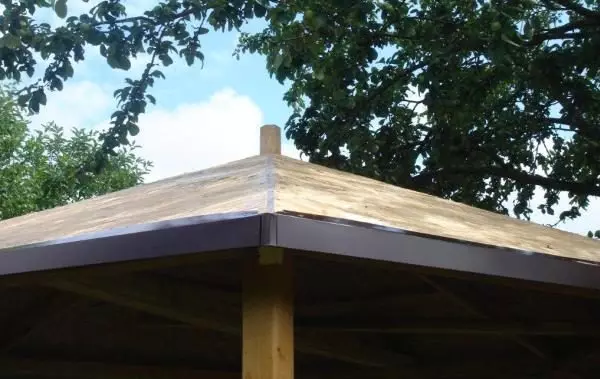
| Arrangement of Svezov. Under the bituminous tile, metal sills are produced, they are attached to self-edges around the edge of the roof. |
| Seeling junctions. The joints between sheets of OSP are close to silicone sealants. |
| Sheaving. The elements of the bitumen tiles are nailed with special nails to sheets of OSP Van. The two-color finish is now particularly popular when elements of different colors are mounted in stages in checkers or rows. |
Step number 6. Floors and fences
| Illustrations | Recommendations |

| Batten. For a gazebo, it is not necessary to take a tipped board, you can do the usual plane, the main thing is that its thickness was at least 40 mm and the wood is well saturated with antiseptics. |
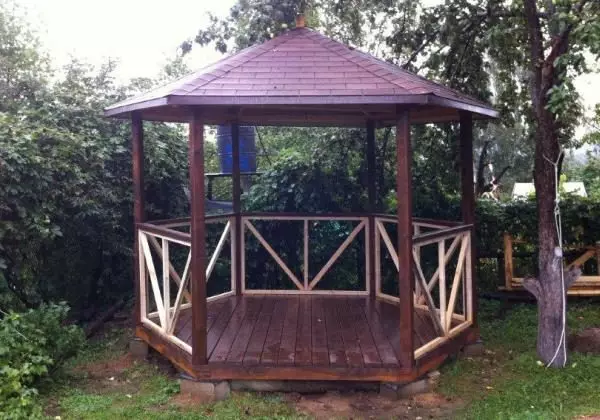
| Fencing. Mount a solid stakenat or to do, as it is shown in the photo on the left, decide for yourself. But, in my opinion, a solid fence is still better, less draft. |
Tiles for hexagon
| Illustrations | Recommendations |
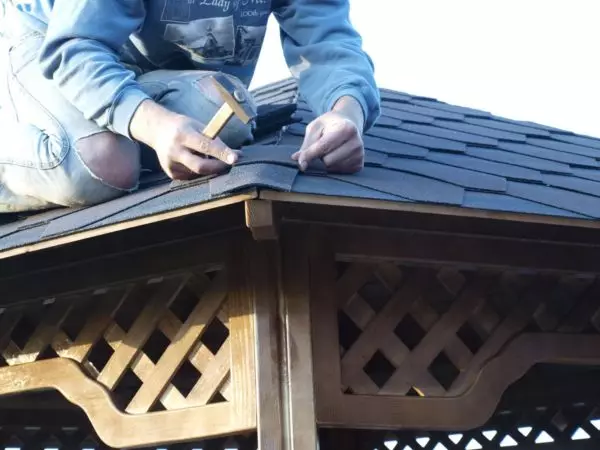
| Bituminous tile. Practice shows that multifaceted roofs easier to equip with soft roofing material. Plus, during the rain there will be no drum fraction. |

| Metal tile.. A solid doome of this coating is not needed. Sheets are attached to bars using self-tapping screws with a press washer in the lower part of the wave. |
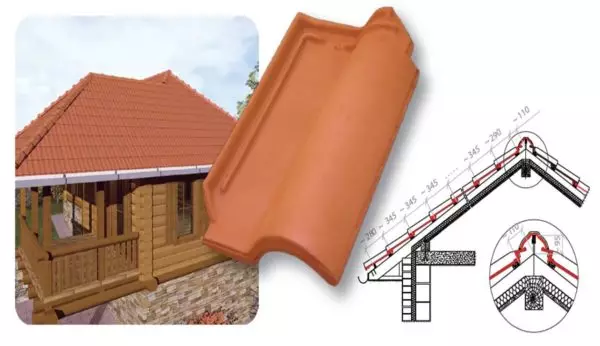
| Ceramic tile. The most expensive material, but he is the most durable. The warranty period is from 50 years. Ceramic tile is mounted on a rarefied crate. |
Output
According to the planned plan to build a hexagon design is easy, an amateur usually goes to it no more than a week, a professional will cope in 2-3 days (without taking into account the time to arrange the foundation). On the video in this article, the wizard shows all the stages of the construction. If you have any questions write in the comments, I will try to help.
Article on the topic: All about doors from DVP: species, features, application