
Having some free time and desire, you can easily figure out how to tie a cocoic tubing, a scheme and a description, of course, will help it. First of all, you need to understand the basic principles.
The first is to carefully read the description of the scheme. Often, for beginners, you can find a master class with a photo where the process photos are detailed. You can also find video instructions, which often helps at the initial stage. There are a lot of tunic models: with coquette and without coquette, knitted from the neck and knitted parts, there are tunics where knitted motifs are used. Any work has a description of the whole process.
Greek drawing
Here, for example, you saw a dress in the network. And it liked you insanely. And you would like to connect such a wonderful dress so much. But immediately a lot of questions. Or maybe this strong desire was not a dress, and such a black tunic?
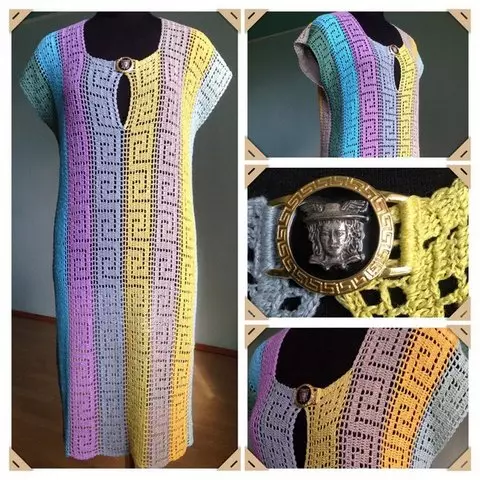
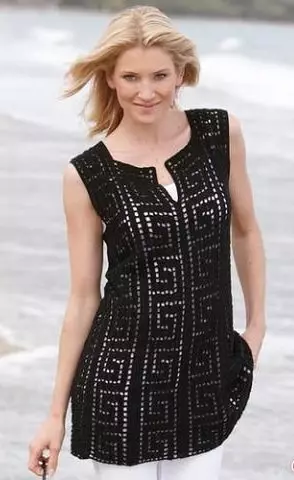
Slightly searching for information, we saw that it was a tunic bounded by the Greek pattern.
The Greek pattern fit on the basis of the fillet knitting, which is a mesh with filled or empty cells, which are called filile cells. Such a fillet knitted dresses, tunics, tops, sundresses.
The base of the fillet knitting is the alternating columns with nakid and air loops. Empty cell is a column with nakid and 2 air hinges.

Here is a dress connected in the technique of a fillet knitting:
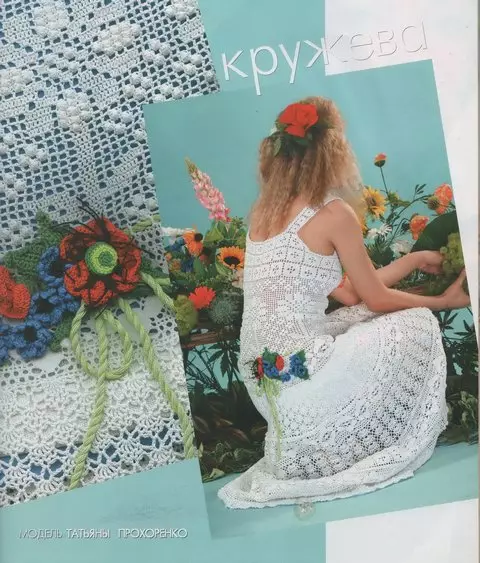
Or this dress is also associated in this technique:

This is a scheme of Greek drawing:
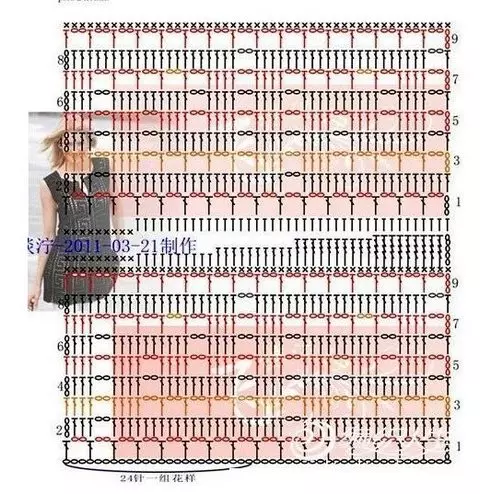
To start knitting, a chain of air loops is recruited, the first row ties the columns with Caid + 2 air loops, and so on is alternating. The second row fit according to the scheme in order to be easier, look at the scheme, we see there many columns with an attachment in a row, then 2 air loops and again many columns with Nakud.
Article on the topic: How to tie women's mittens: Schemes with a description
And so knit in the drawing. He is simple, but very pretty.
Convenient and fast
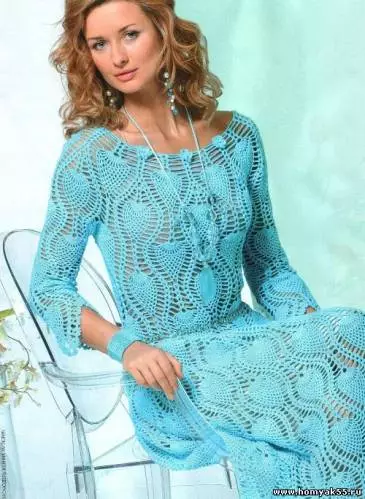
But we saw such a magnificent tunic with an orange belt.

First you need to understand that the main element of this tunic is the Pineapple pattern.
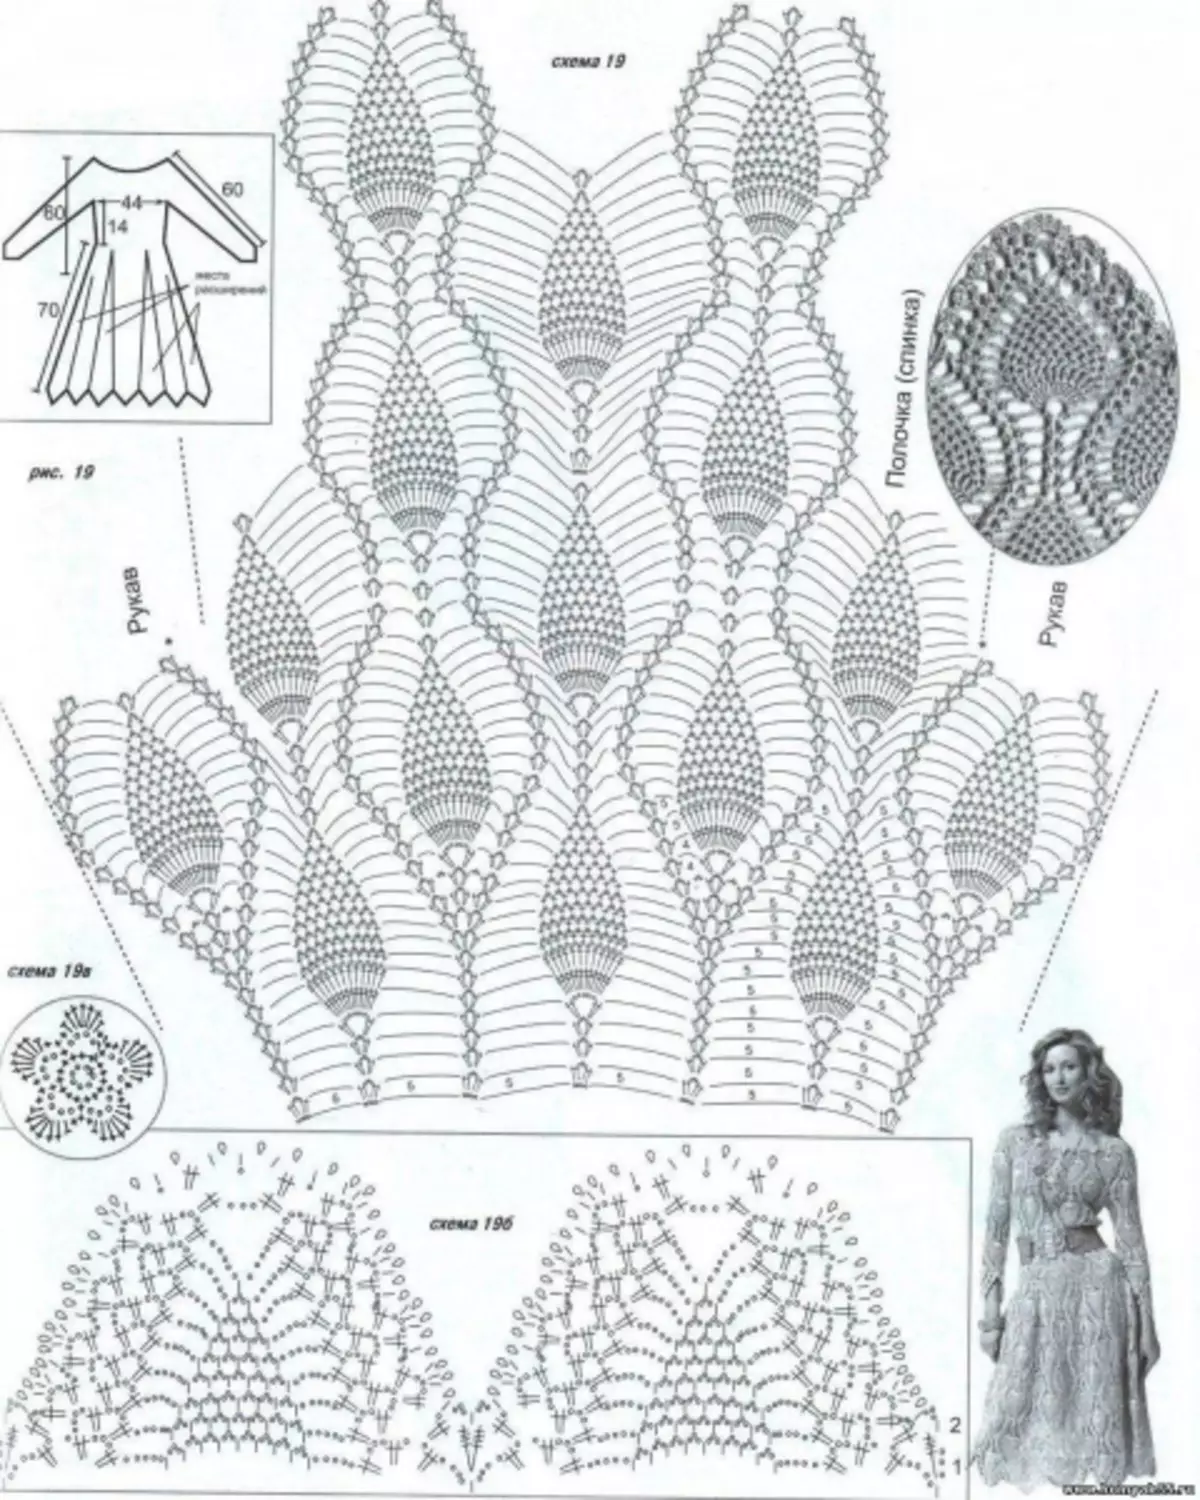
Such tunnel fit in a circle and it does not have seams. It is very convenient. From the coquetka there is an extension of the tunic. The calculation here is given for 46 sizes.
For this knitting, it will take 700 g of 100% cotton yarn, 400 m / 100 g of turquoise colors, beads for decorating 3 pieces, hook №3.
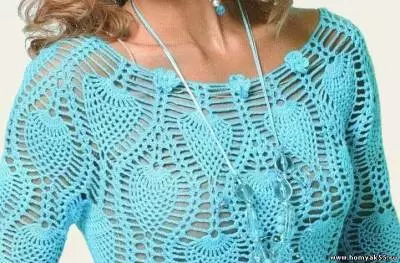
We begin knitting in a circle, in the direction from top to bottom. Crochet need to dial 180 air loops and start knitting coquettes according to the scheme:
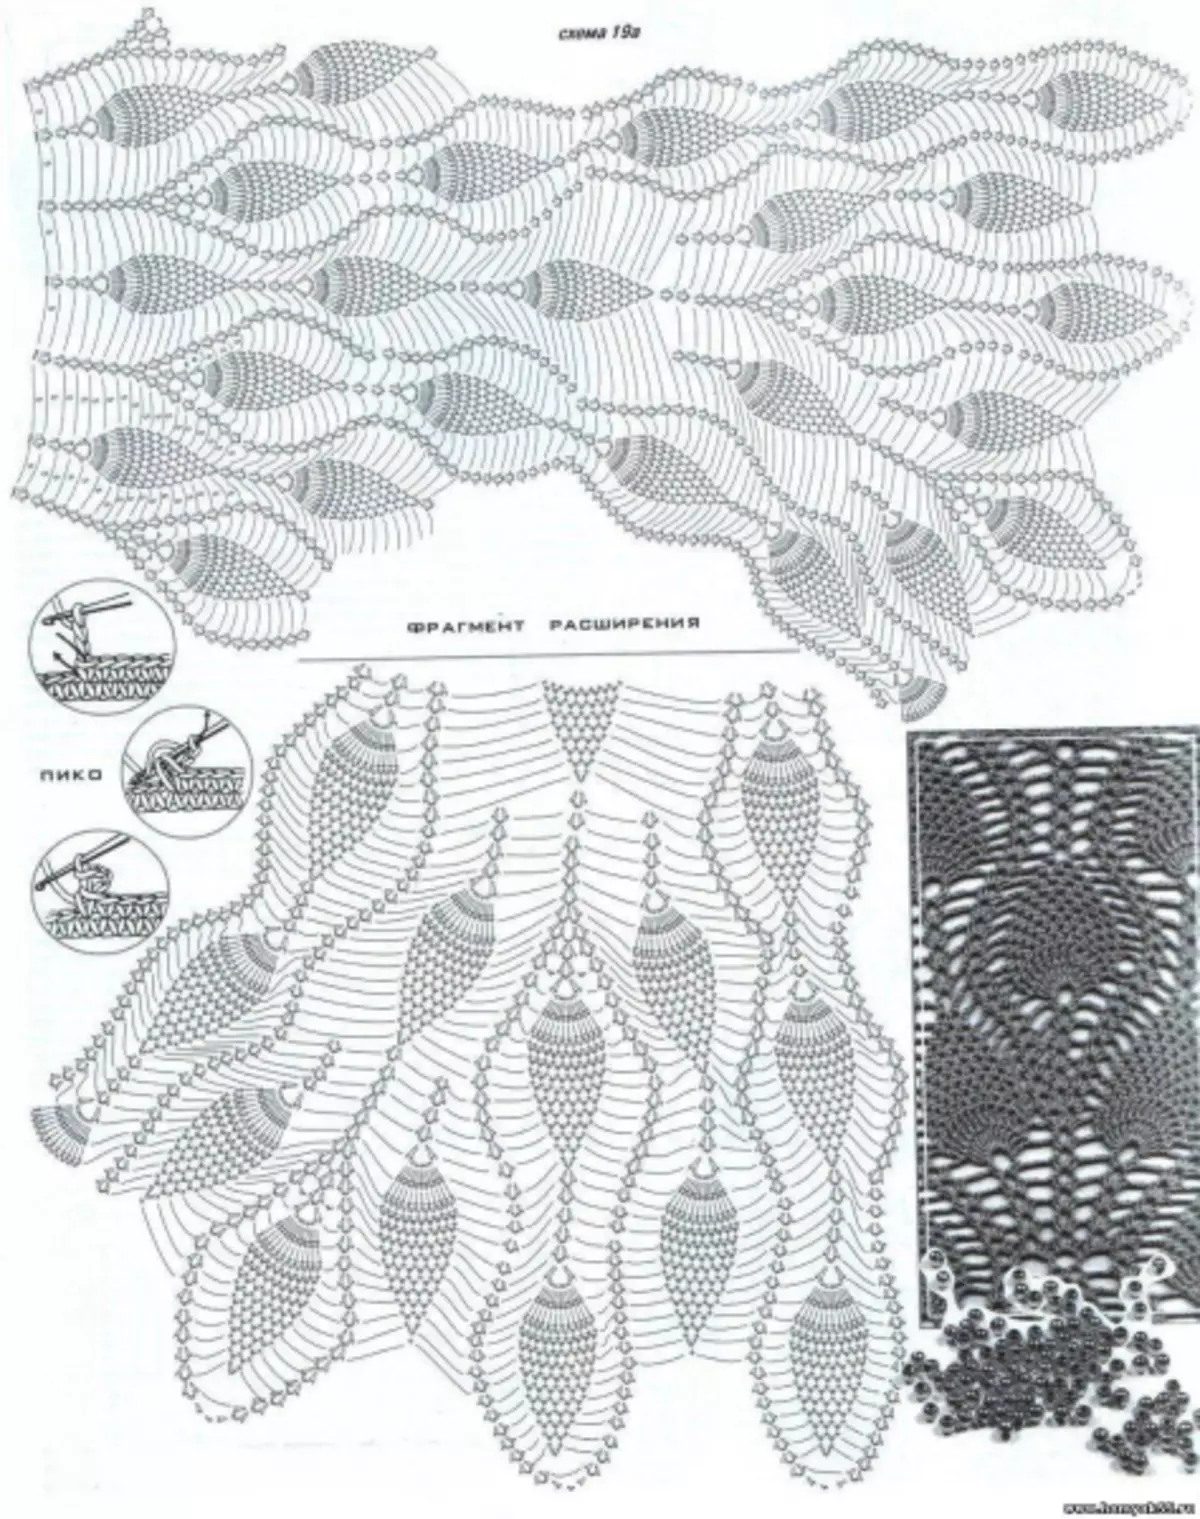
Now you need to divide knitting on the front, the back and sleeves. Knitting the front part and rear parts need to knit in a circle. When you connect to the waist line, you need to start doing the extension of the tunic according scheme. The length is already necessary to determine depending on the growth - these are individual measurements of each woman.
After the length of the tunic is confined, the pineapple fragments end according to the 19B scheme, it is located below the scheme presented a little higher. The sleeves also fit in scheme number 15. The bottom of the sleeves end the same as the bottom of the dress, and the neck is tied up with flowers according to the 19V scheme - it is a flower. In the middle of each flower sew a bead for decor.
You can draw inspiration on the site "Osinka". There you can find a lot of master classes for knitting, schemes, inspiration, look at the work of other knitters, discover something new.
Stand under hot
But I wanted to link the coasters under the house cups with the paws, and you do not know how. You can also easily learn.
Article on the topic: how to tie an openwork angel crochet
To begin with, we look at the scheme:
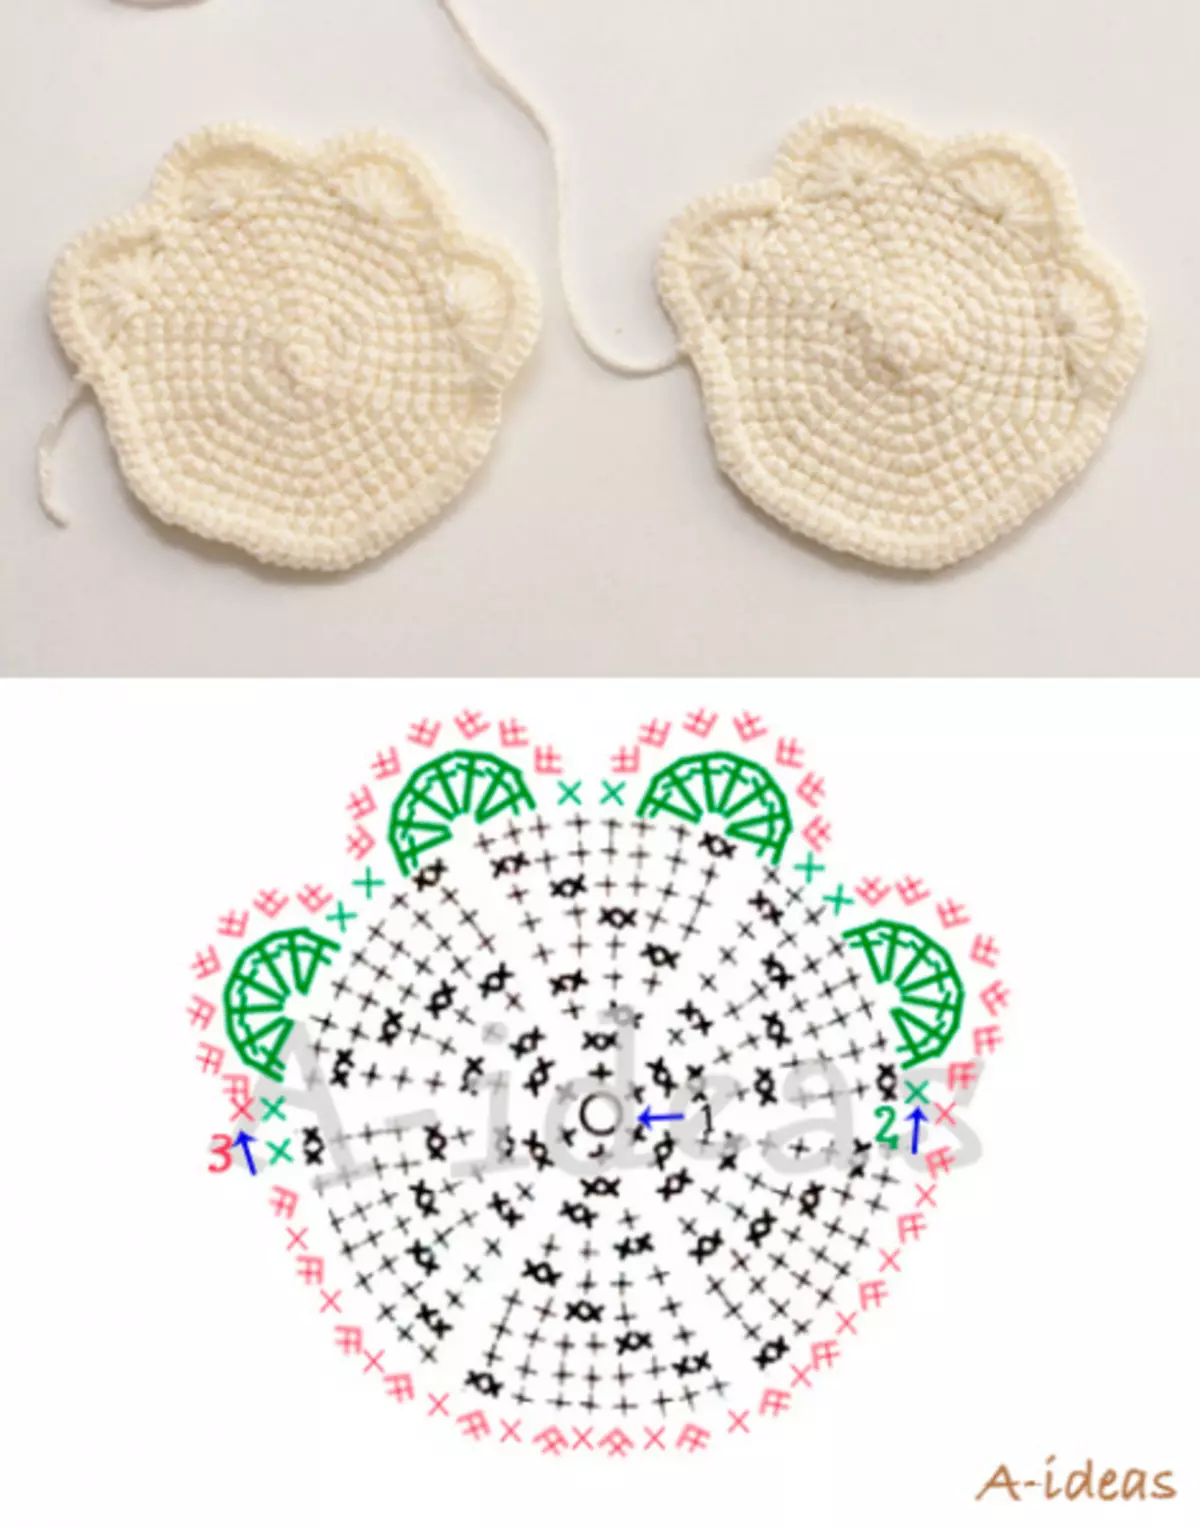
On it we will knit the basis. Knit white color in a circle. These basics need to tie 2 pieces. They must be the same.
Pads and paws will also knit according to the diagram of brown yarn. We need to tie four circles for finger pillows.

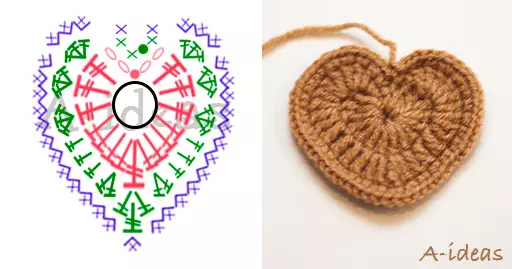
And you need to tie a large, central pillow in the form of a heart. We will be knitting it according to this scheme.
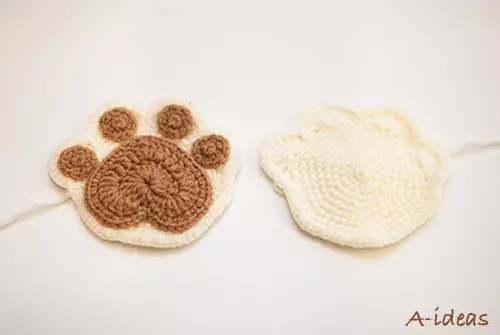
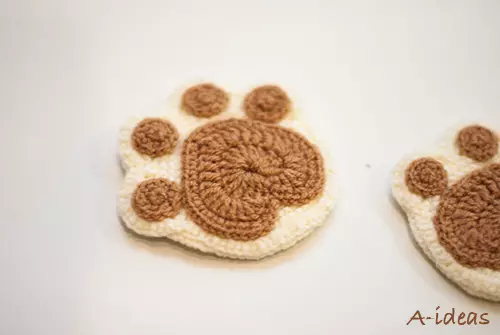
When all individual elements are ready, sew to our white base and get a stand under hot. For the base, you need two white identical details knitted, otherwise the stand will be fine and will not perform its own functions for protecting the table or furniture from hot mugs.
We saw that it was actually easy to understand the schemes. You just need to want. Each knitted thing consists of a scheme. Therefore, let you not frighten the complex tasks, each complex task consists of a plurality of small. Each big binding consists of a variety of different columns with Nakud and without Nakid, and if you wish, you can figure it out. Crochet will give you freedom, unique style, calm and pride in your work. Create, and you will succeed.