
Beautiful and original handmade products always enliven and decorate the interior, and can also become an excellent gift to relatives and friends. Many needlewomen are trying to make such objects independently, with the help of lessons and master classes. In this article we will get acquainted with the ways of knitting a rectangular napkin with crochet.
Learn to read by schemes
To learn how to knit such elegant and thin products, first of all, you need to be able to read the knitting patterns of the napkins. And here are some advice on competent reading:
- Figures are divided into even and odd rows. So even rows should be read from left to right, and odd right to left. An even row will be designated on the left, and an odd row - to the right;
- Usually read from below, if we knit a simple straight canvas with even and reverse rows.
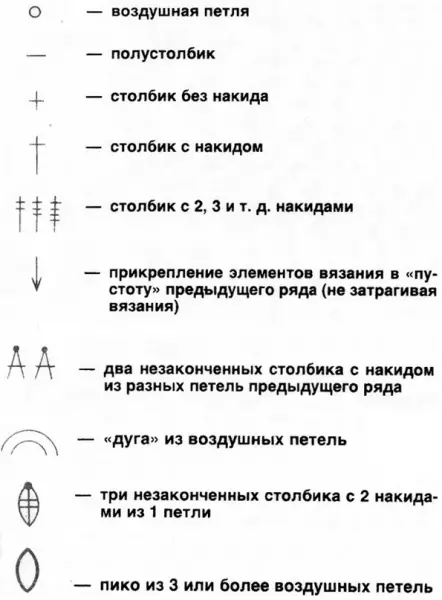
We list the elements of the plan. Part of the pattern that is repeated is usually denoted by two asterisks, (**) or square brackets. Such a repeating part is called rapport. Oval is a loop that is obtained after stretching the thread through the previous one. Cross or point - a column, which means the completion of the row. The wand - the column without a Nakida, which is done like this: the hook is introduced into the loop of the previous row, and the loop itself, dressed on the hook, remains in place. Working thread is stretched and captured. As a result, two air loops are obtained at the tip of the hook. After that, again captures the thread and stretches through these loops, and only the loop-thread remains as a result. Long stick - a column with ancad.
If you see and other designations, then this napkin is already more difficult. You should not take immediately for the complex products, it is better to start with simple.
In the following drawing, you can see signatures with signatures:
Article on the topic: Magazine "Knitting - Your Hobby №8 2019"
As for the choice of the material of the future napkin, here the preference is given to the cotton yarn, such as snowflake or iris. Good products are obtained from acrylic. Motkey always indicates the number of meters and grams in one unit. Thread thickness can be different. Experienced masters knit the finest openworks with thin threads and hooks of 0.5. But for beginners it is better to use threads and hooks of medium thickness, for example, hook No. 1.5. When you master the aza, you can easily knit from a wide variety of threads with thin hooks.
Elegant options
Such napkins can be made in different ways: you can immediately do a one-piece napkin, and you can make a modular option - separately knit several parts (modules), and then connect them into one napkin.
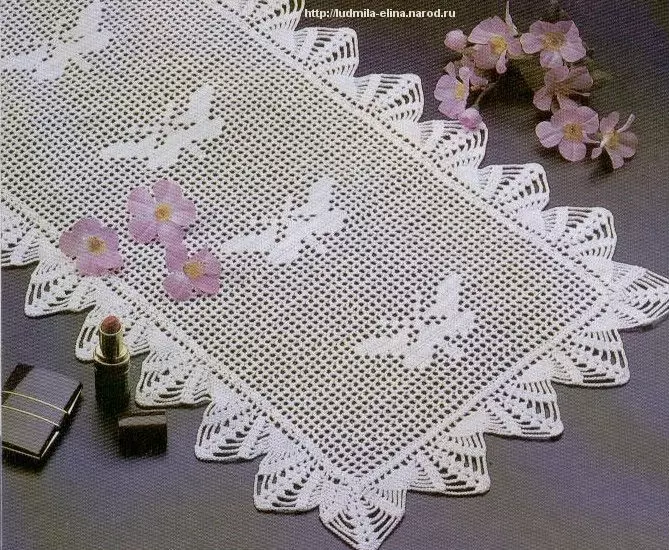
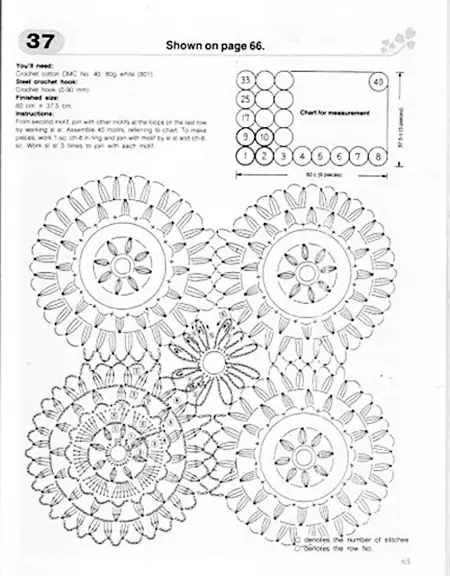
The following figure shows an option of a simple rectangular napkin with a size of 15 × 20 cm:
To work, you need to take cotton threads of medium thickness and hook №1.5. If you finish work on the implementation of the second stage, a square napkin will be. The length of the product can be increased if the number of rows is increasing proportional.
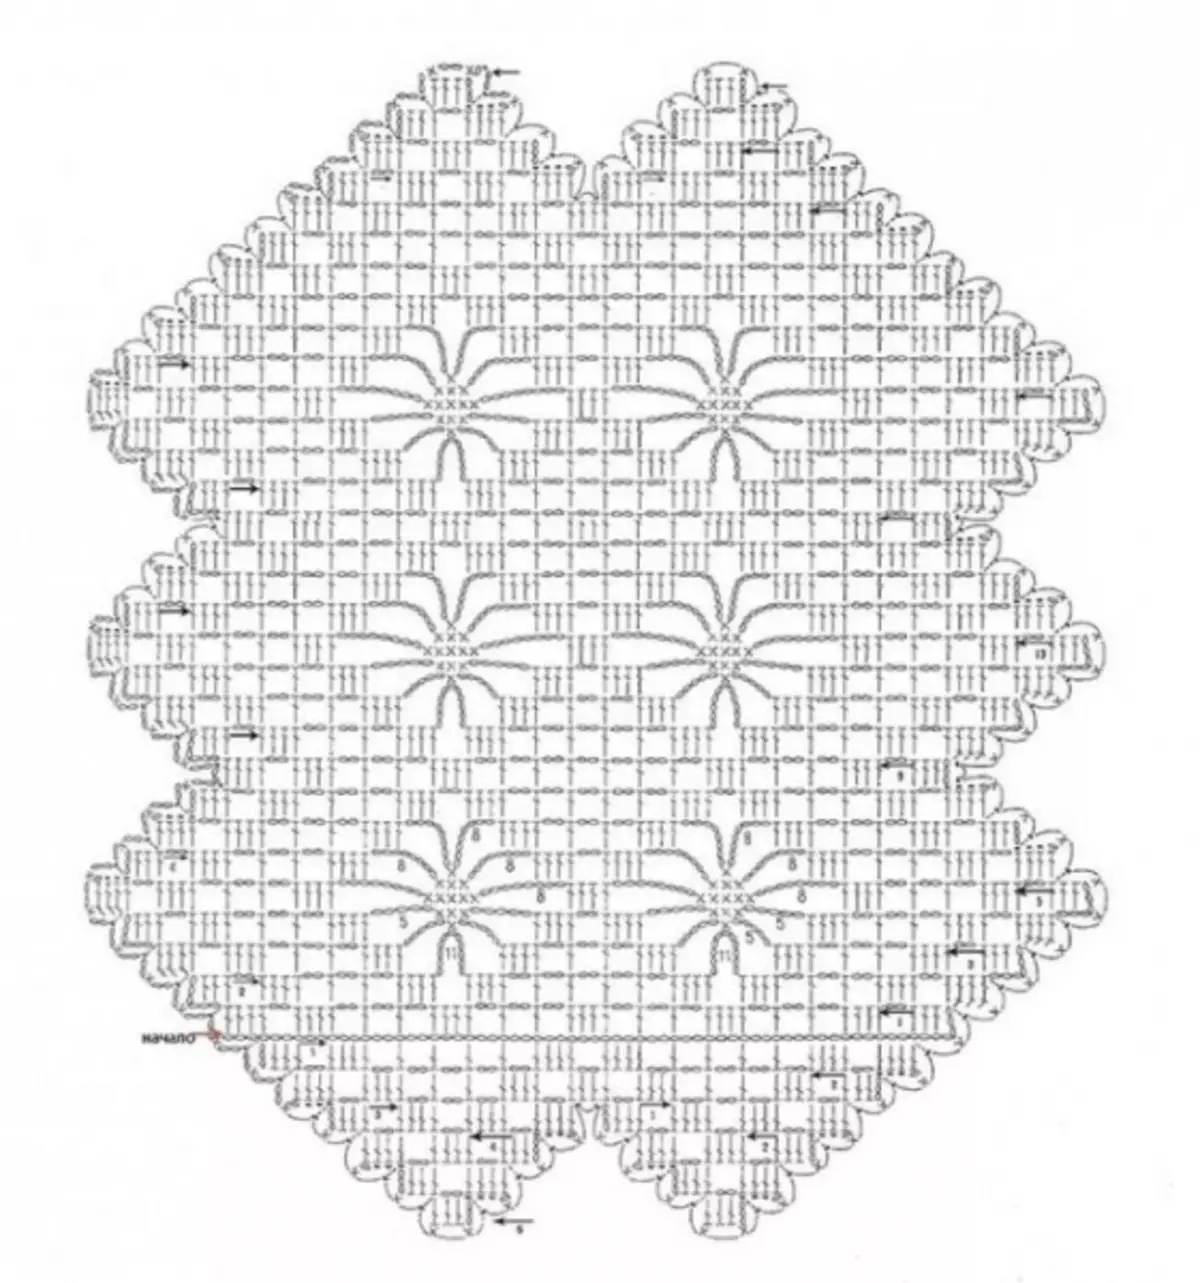
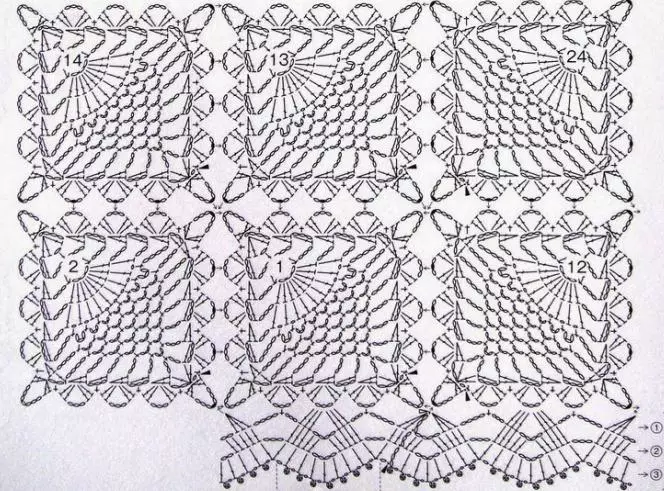
First you need to link 64 air loops, then, according to the pattern, the main pattern of the web is performed, the change of knitting directions is shown by arrows. If a modular napkin is manufactured, each module can be made separately.
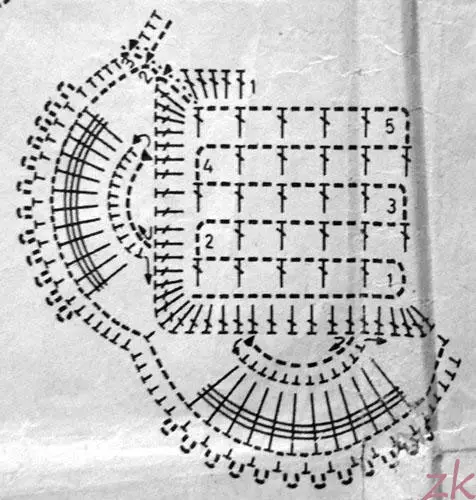
The figure shows a fragment of the module:
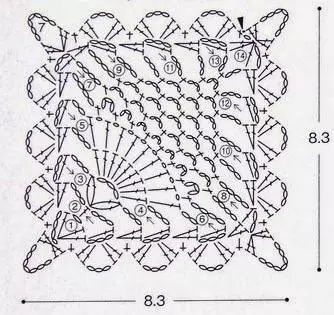
It is necessary to start knitting from the angle, but the direction of the rows is changing. The finished square is tied to the perimeter by the cutting nearby, then the modules into one will join it. The size of the product will depend on the number of fragments. After the manufacture of the required number of modules, you can start assembling the napkin. Connection locations are shown by arrows. The resulting napkin for the fortress is better to tie the three rows of finishes throughout the perimeter.
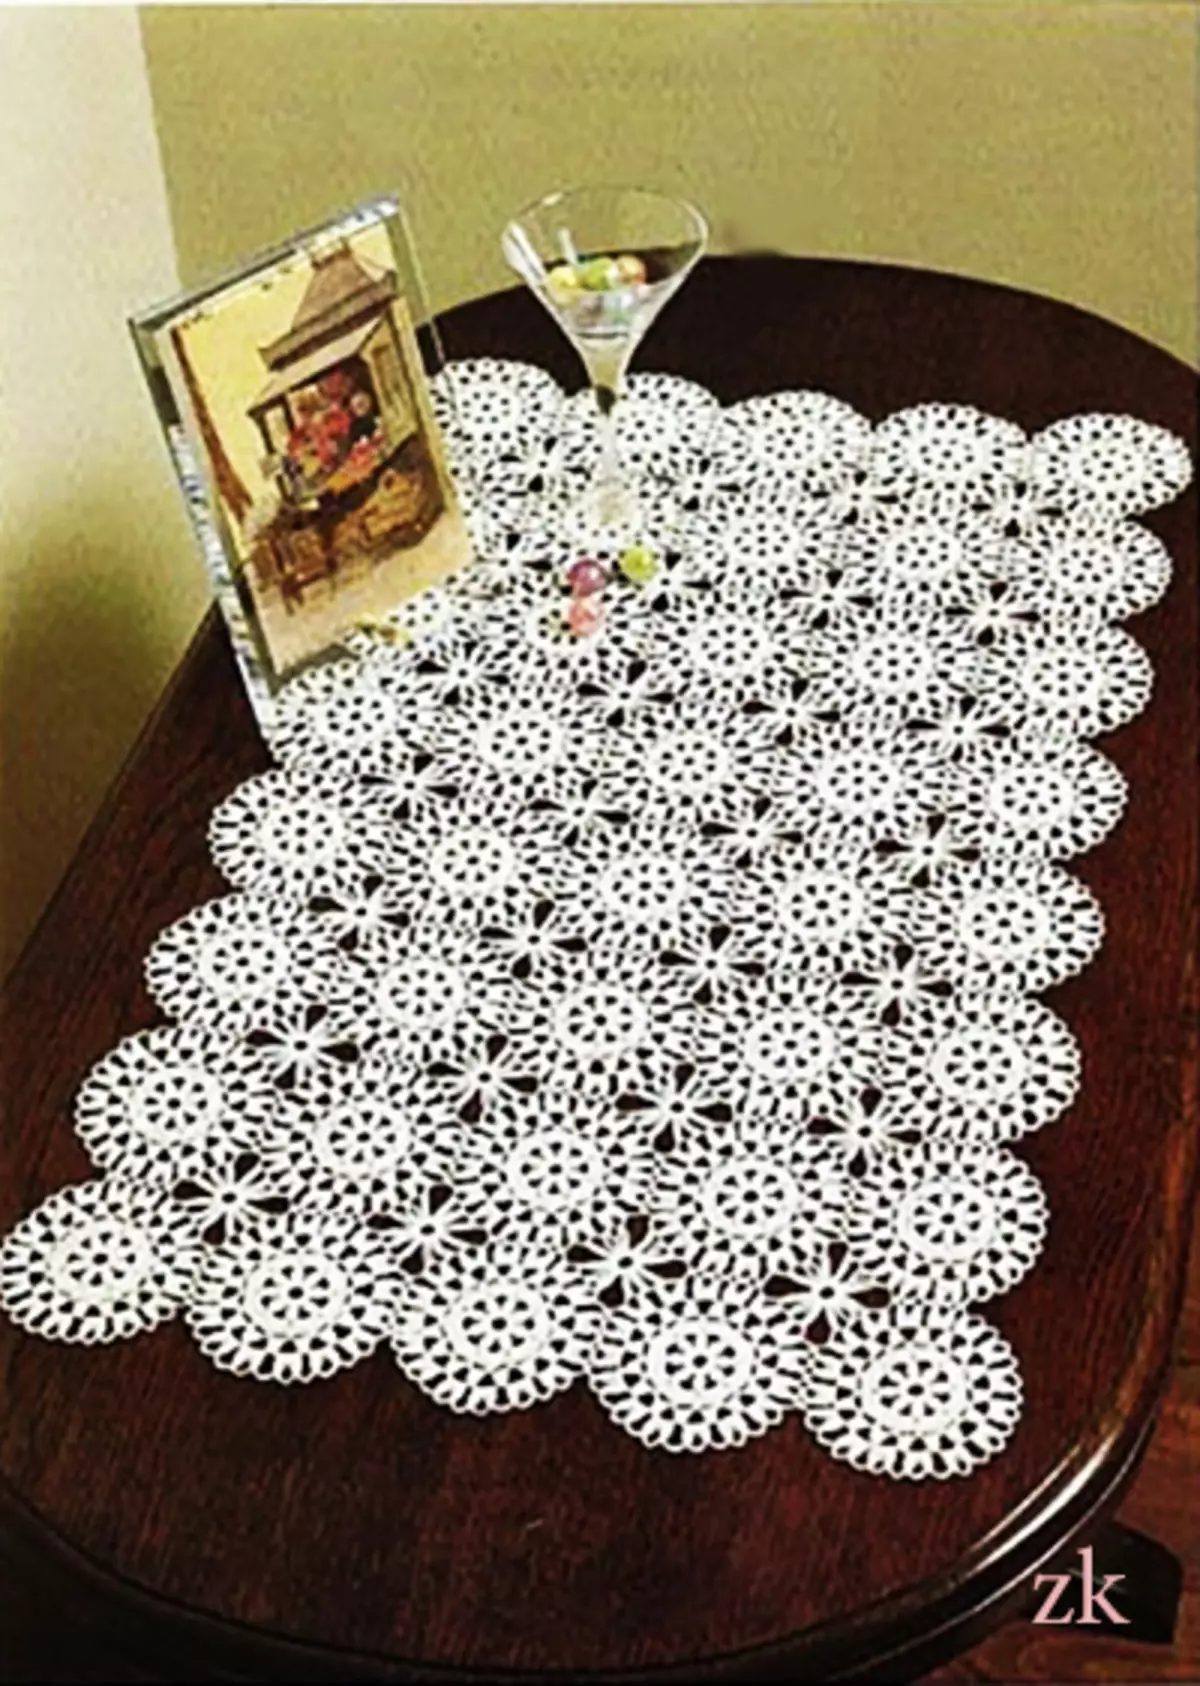
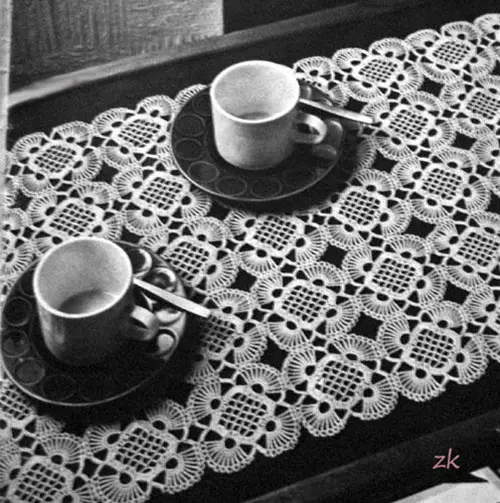
This is what an interesting model may eventually work:
Article on the topic: School skirt in a cage: Patterns for sewing Scotch skirts
Interesting in the interior are colored napkins.
Such a two-color napkin is easy to create even a beginner needlewoman.
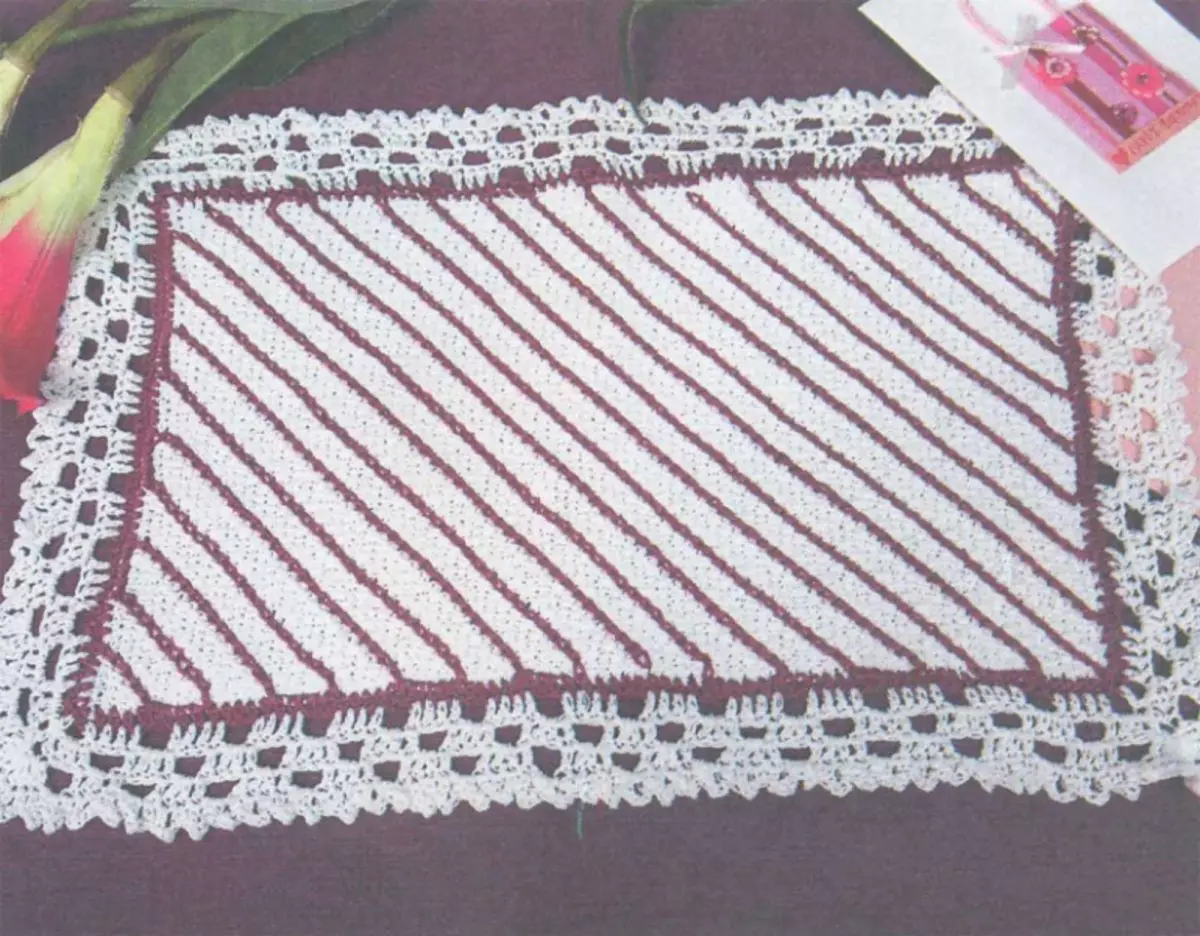
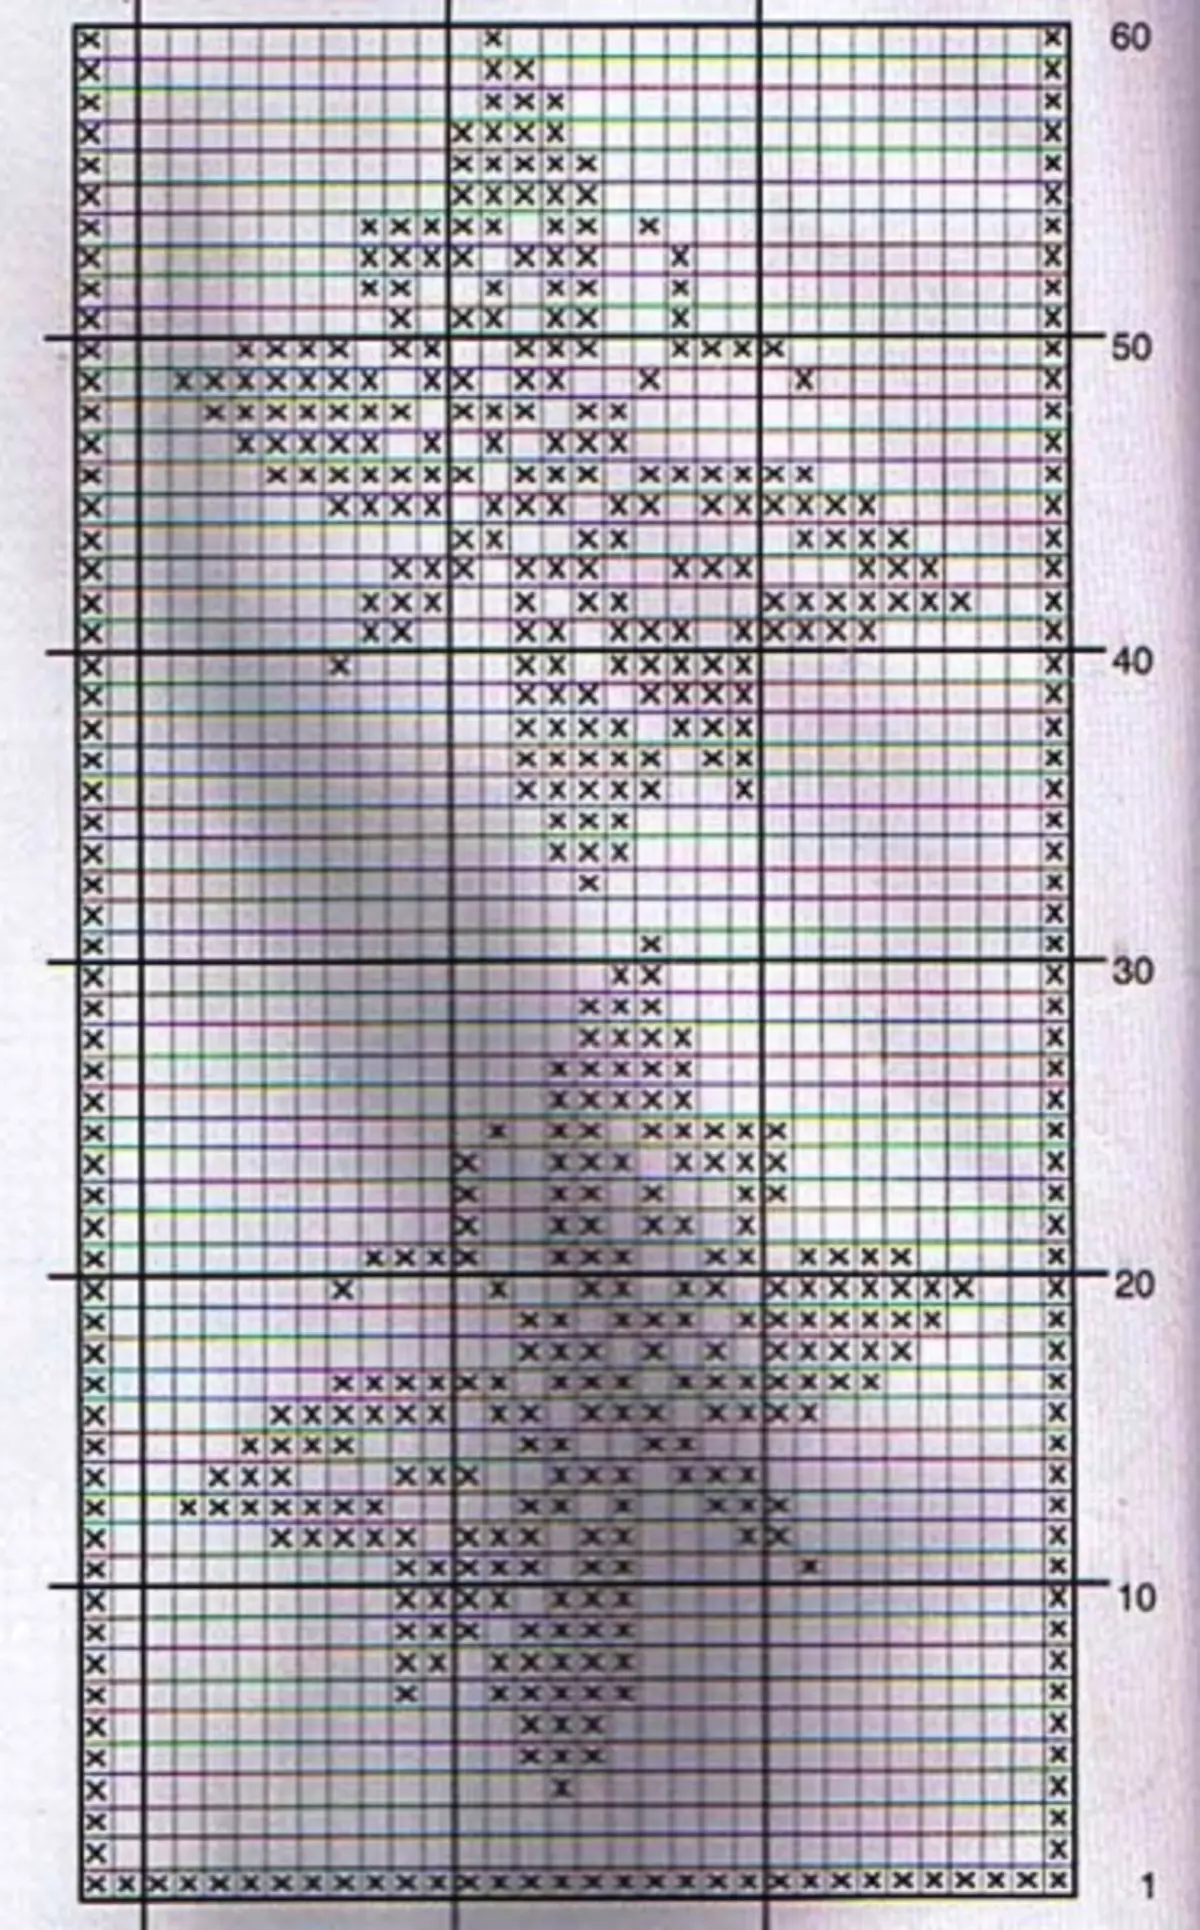
The work plan is given below:
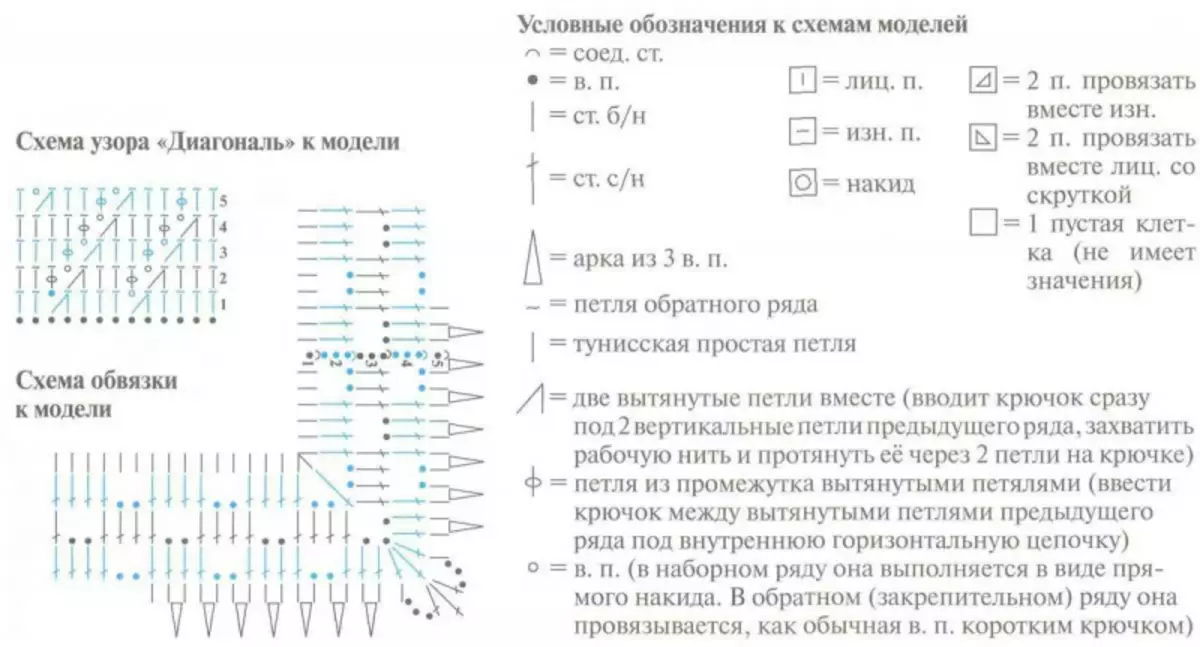
As a result, it turns out a dense napkin of two colors in size 25 by 35 cm. Such technique is called Tunisian knitting.
To knit such a napkin, you must have: white yarn "Snowflake" - 50 g, red yarn "Iris" - 10 g, hooks 2.5 (Tunisian) and 3 (normal).
Progress. The main work must be carried out by Tunisian crochet number 2.5. They need to tie 100 rows of Tunisian viscous. The usual hook number 3 is useful only for a set of 50 loops chain. Red diagonal wipes with a tambourine. When working on a white strapping, each row finish with a connecting column. In the end, we should bind the napkin with a red thread.
And some more interesting options for knitted napkins:

The finished cloth will delight the needlewoman with its beauty and elegance, but do not forget about leaving. The napkin can be starch, then it will hold the form for a long time. The finished product should be sipped or fought. Before washing the napkins should shook the accumulated dust. You can then prepare a soap solution using a liquid soap or shampoo, to hold the napkin in it, then neatly rinse in clean water.
Napkins can not be rubbed! From this the fabric and appearance will suffer. You can squeeze the napkin, wrapped it into a terry towel. It is necessary to do it carefully and slightly. To dry, you can lay out the napkin under the terry towel and put something heavy on top, or go through it with a ferry, so it will be faster.
Video on the topic
The most visual way to understand how to tie such a napkin is, of course, video. Below you will find a selection with a detailed process description:
Separately, a lesson about Tunisian knitting:
Article on the topic: Crochet gloves: Scheme and Description of the master class for beginners