
Before the holidays and special events, many people have a dilemma, which will be presented to close people as a gift. We offer to surprise friends and family members with a spectacular original surprise made by their own hands - edible ship from candy.
Create a shoe shoe
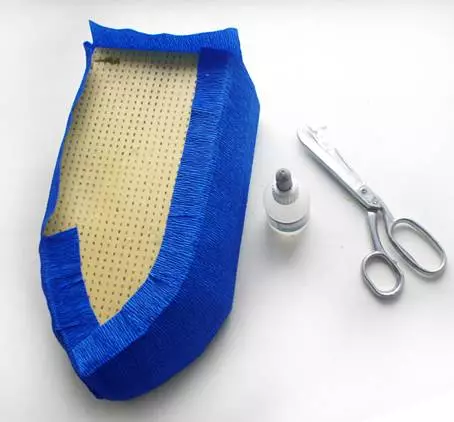
Materials and tools that will be needed:
- Two pieces of polystyrene foam of 35 × 16 cm and 16 × 10;
- corrugated paper of different colors;
- Mesh or rigid fabric size of 1 × 1.5 m;
- Two types of braids with a length of 5 m and 1 cm wide and 3 cm;
- twisted cord 6-7 m long;
- Wooden spanks for canape (small and medium length);
- glue and adhesive gun;
- Candy of different shapes;
- Gift bottle (optional);
- double sided tape;
- Sewing machine (or thread with needle).
On expanded polystyrene, you need to schedule a layout of the future ship. The size of the product depends on the selected bottle. The width of the hole in the upper part is equal to the width of the bottle, the width of the ship - at least twice as much. The third workpiece is the feed of the future ship - should be width, like previous parts, about 10-12 cm long.
Step-by-step photos will help in creating a ship.
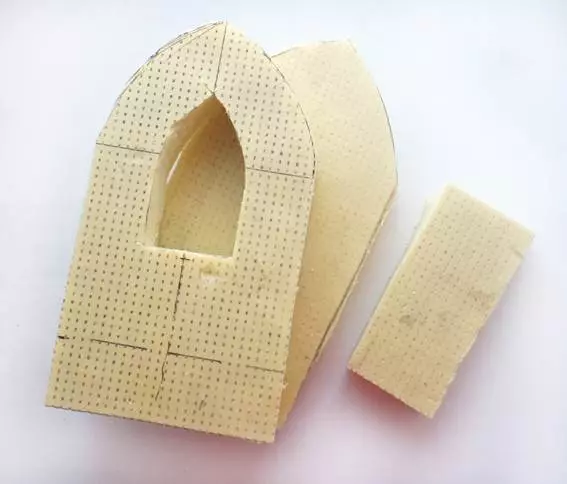
Building deck
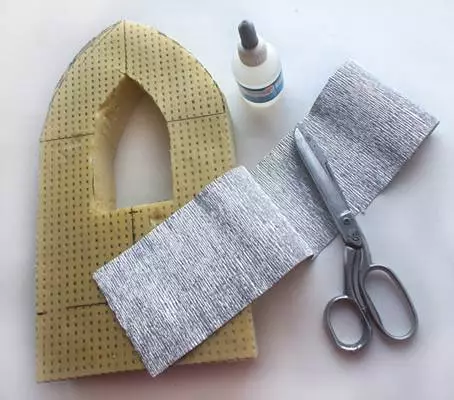
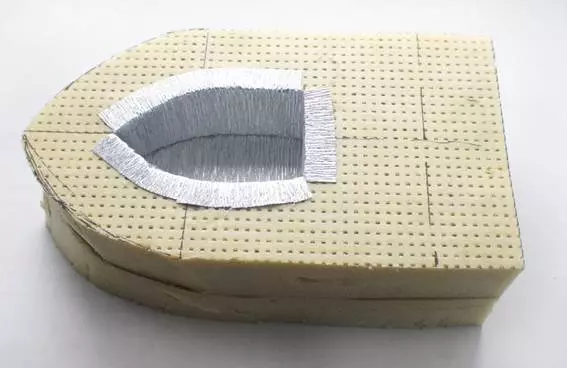
When the parts of the vehicle base details are ready, go to the decoration of the hole for the bottle. From corrugated paper, it is necessary to cut a 2-3 cm rectangle larger than the width and length than the hole. Glue the resulting workpiece to the second part. From paper of the same color cut the triangle to close the bottom of the hole.
Note! The width of the workpiece should be wider than the hole to be able to heat the edges.
With the help of scissors gently make cuts along the corners of the workpiece and glue the edges of the paper to the ship layout.
Article on the topic: Bow in Crochet: Scheme for beginners with video and master class
Align the obtained parts and carefully proceed them. It is important to give glue to dry well.
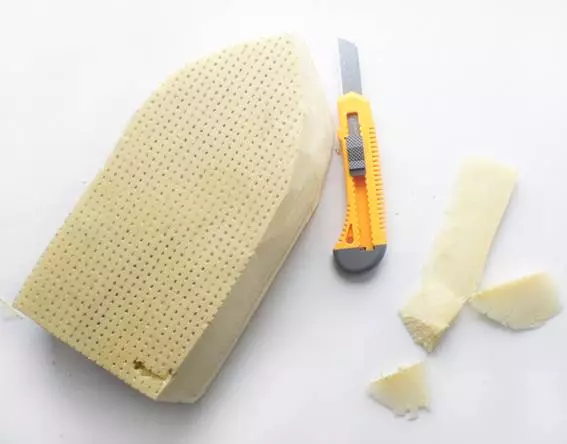
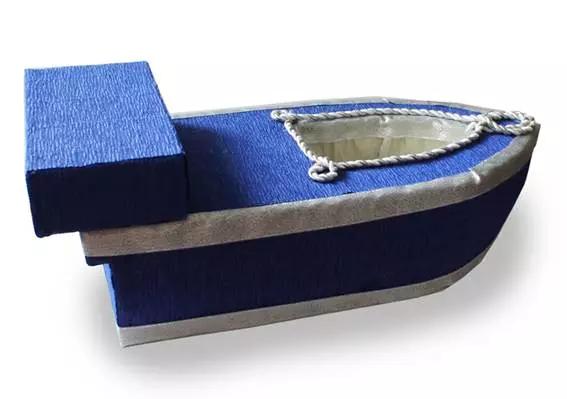
Grinding details
To give the product of the ship, take the battle knife and carefully remove the unnecessary angularity. Also neatly suzve the bottom of the stern, bringing your workshop to the real ship. The main thing is not to rearrange - the ship must remain stable.
Ship decoration
To decorate the base of the ship, use corrugated paper. In width, it should be a pair of centimeters more than the height of the workpiece.
Plug better first with side sides to make a joke on the nose of the ship. On the tails of the remaining paper, take a few cuts, carefully bend it and stick to the bottom.
From the paper of the same color it is necessary to cut the decor for the top and bottom of the ship. Note that these parts must be a couple of millimeters less than the places where they need to be glued.

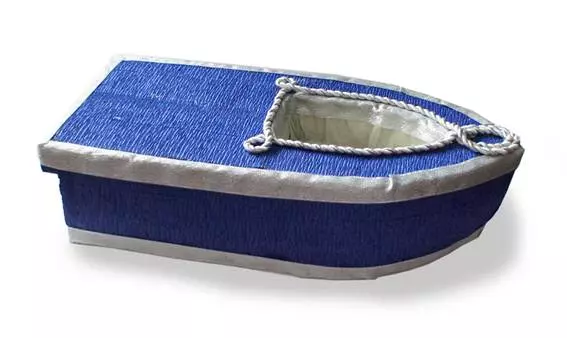
Preparation of the foundation
To hide joints, use braid. For these purposes, take the transparent glue.
The edge of the opening of the bottle can be separated by a twisted cord. Do not be afraid in the process add some interesting elements. For example, you can bizarrely lay out the cord.
After the main part of the product is ready, it is necessary to prepare a stern. To do this, the third detail will enjoy the same paper as the main layout. Then go well to the feed to the base of the ship.
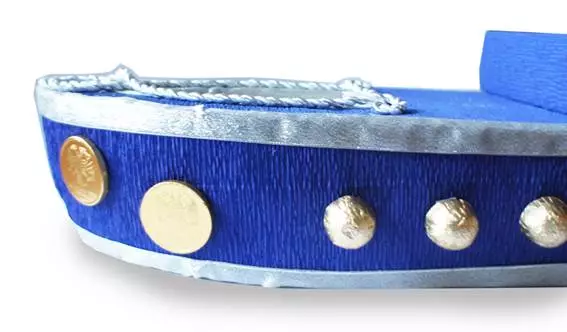
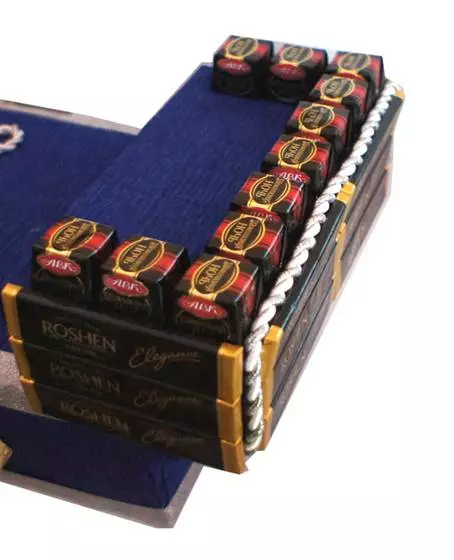
Sweet decor
We begin to the most delicious part of the master class - decorating candy. With the help of glue or double-sided adhesion, post on the side parts of your ship somewhat suitable in the form and size of candies. Ideal for sweets in the form of coins and small domes.
It is possible to fully arrange with rectangular candies, and to place small square spareths around the perimeter of the upper part.
Creating a mast
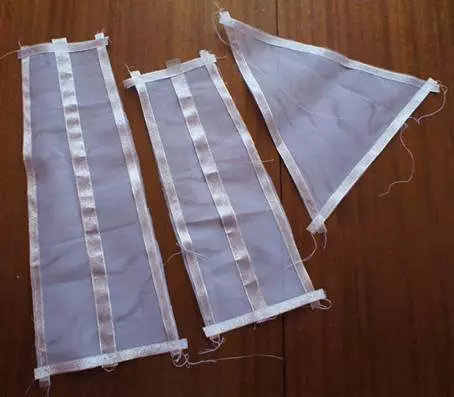
Three sails from the mesh tissue must be made, depending on the density of the material, it can be used in several layers. A large sail should be a little more wide than the ship, in a small one is approximately equal to the width of the base. The third workpiece must be cut in the form of a triangle.
Article on the topic: Ships do it yourself from paper and from salt dough from photos and video
After the mast layouts are cut, it is necessary to separate them with a tape along the edges and in the center. You can do it on a typewriter or manually, the main thing is to use small stitches.
Sails need to be folded and neatly fought. Large folds four times, small - in three, and triangular - in half. Then it is necessary to sew the triangular sail to bend, just do not forget to leave the rope cord. Another mast from the small skewer is placed on the nose of the ship.
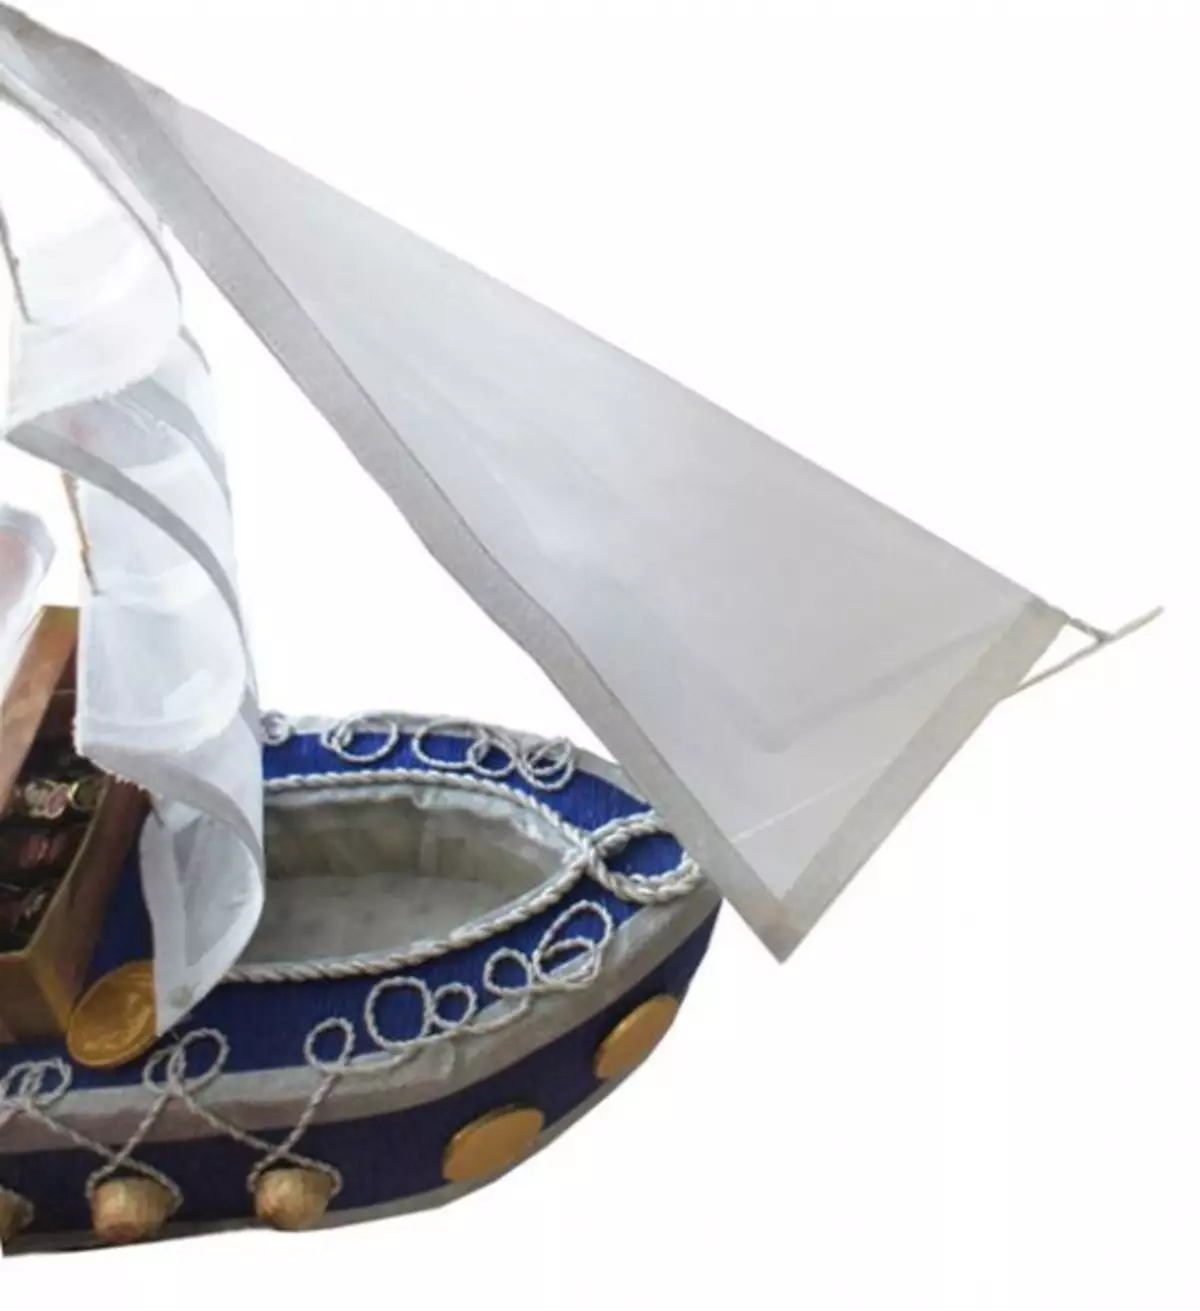
To secure sails, you must take two long skewers and gently turn them through the cloth (do it with a large and small sail). Then the big sail is placed before the feed, and the little one is immediately behind the slot for the bottle. The triangular sail must be carefully tightened with a cord from mast with a small sail to the mast on the nose.
To hide the tip of the nasal mast, you can place a small checkbox on it.

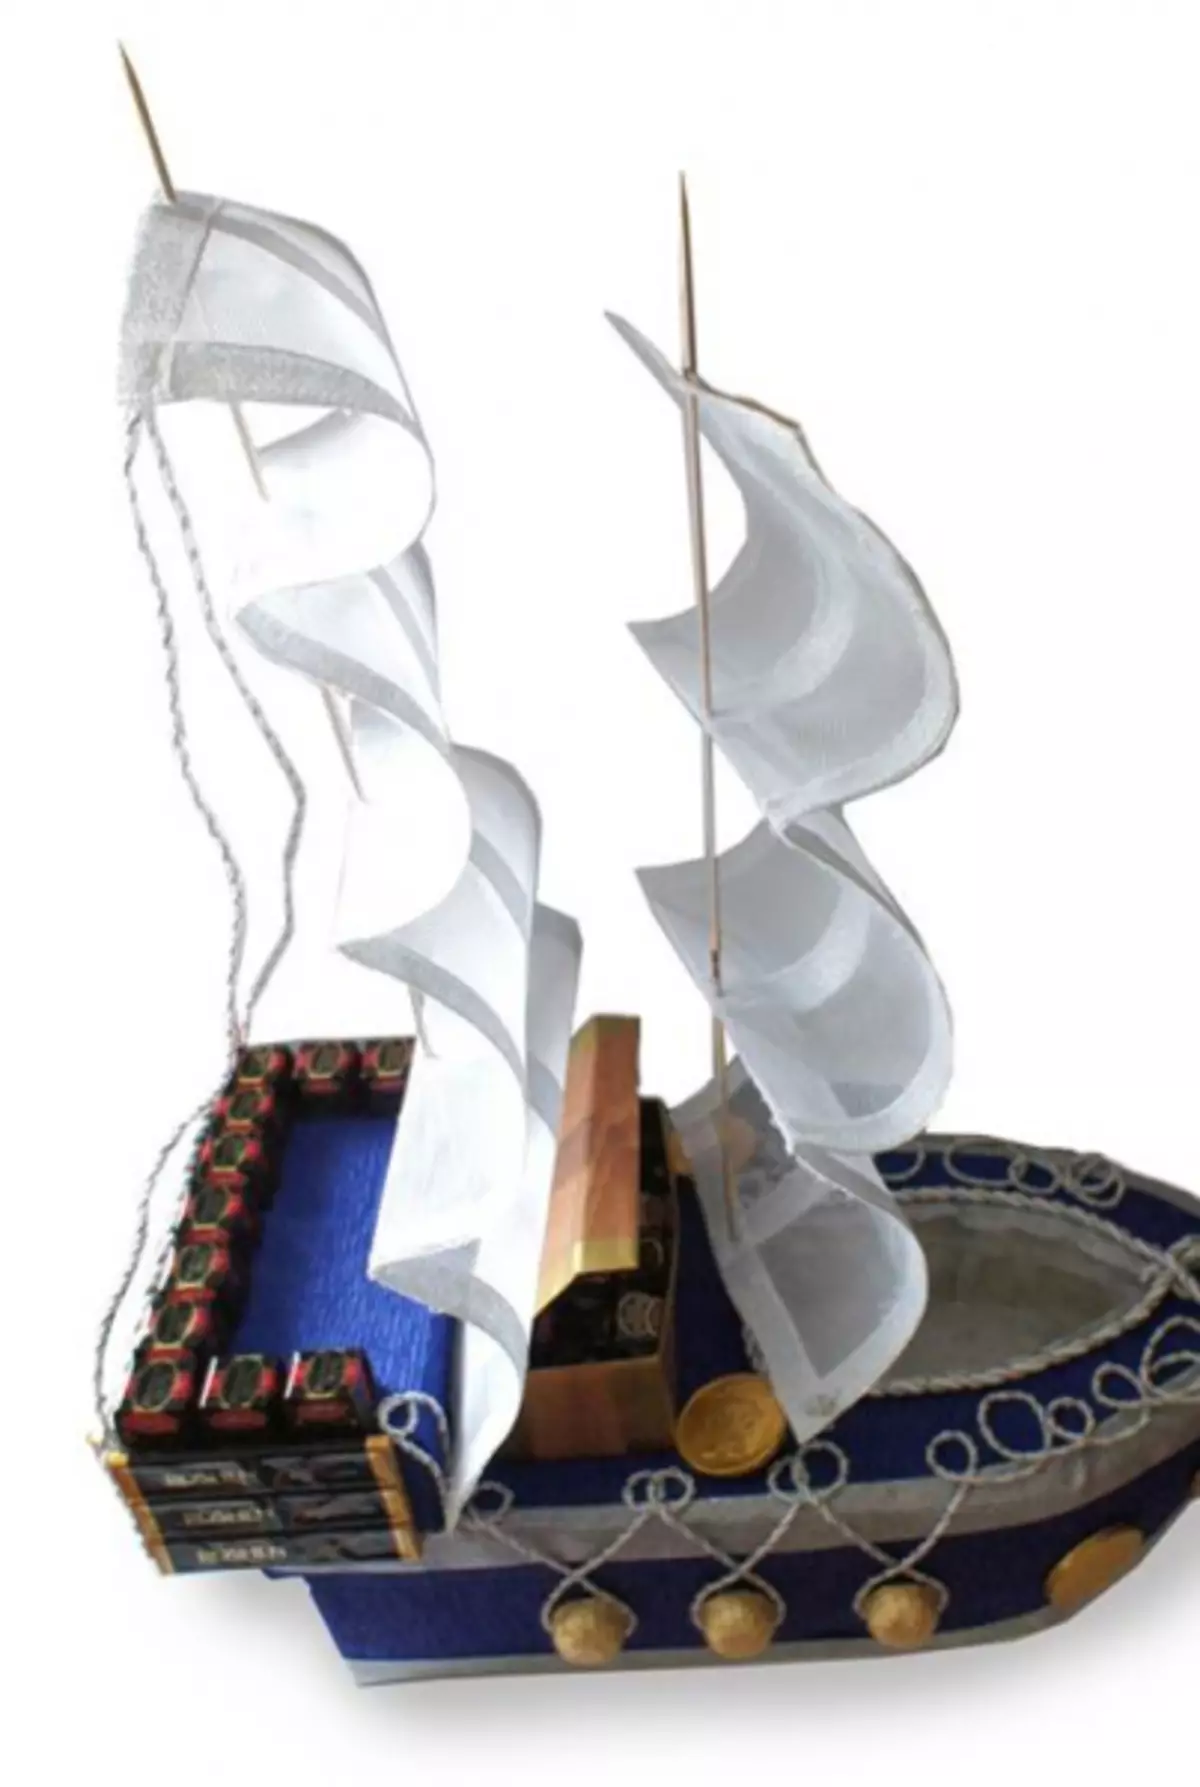
So, the ship is almost ready to go to his big swimming, it remains only to place the last details. For example, you can position on the deck of treasure chest, mimic which can chocolate coins. Well, do not forget to put a bottle in the hole allotted for it.
That's all, the ship is ready. We are confident that such a product will not be able to leave anyone indifferent.
Video on the topic
Video for the manufacture of candy ships: