
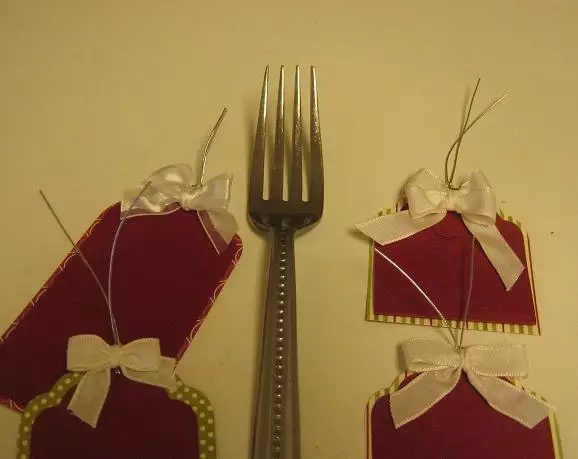
For the manufacture of decorated decorations, for example, on a banquet table, there is often a need to tie a bow on the fork, the master class of this fascinating classes can be easily found in the appropriate literature on needlework, because it may not always be easily obtained by a person who does not always have this technology.
Easy way
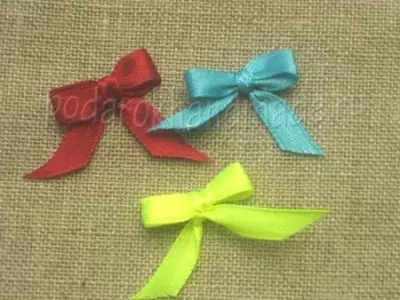
In this master class, we will talk about a simple method of making a bow and decorating them forks.
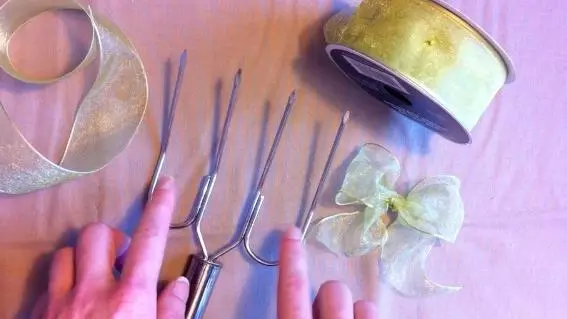
If someone has already experimented in this form of skill, it certainly knows that to construct a miniature bow from the satin ribbon, without using additional devices, it is practically no possible. Most likely, they will turn out to be insurgent and curves, and especially unpleasant - asymmetric. That is why in this article I want to touch on the topic, how to gently decorate cutlery on the example of the master class using a conventional plug and satin or gauze tape.
Thus, there will be a regular fork for the manufacture of a bow. From its magnitude will be directly dependent and the magnitude of the Bantian itself.
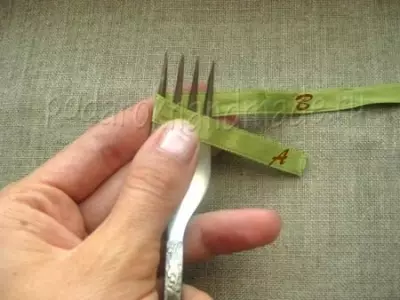
It is best to go from the ribbon of a small width, about 1 cm. If you use a tape wider than 1 cm, it will be much more complicated from it on the bow fork.
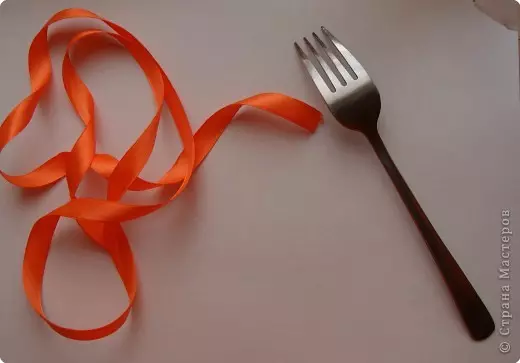
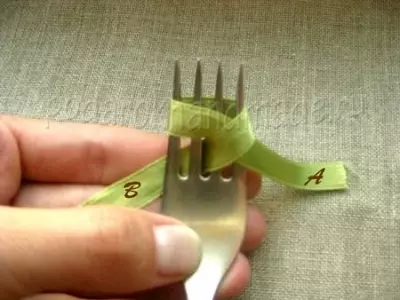
The photo below will be presented the initial acts of the process itself:
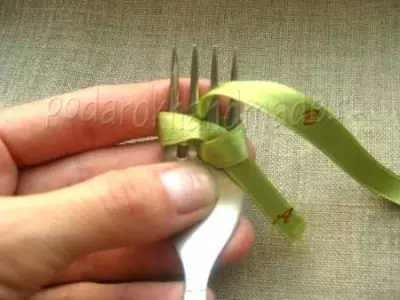
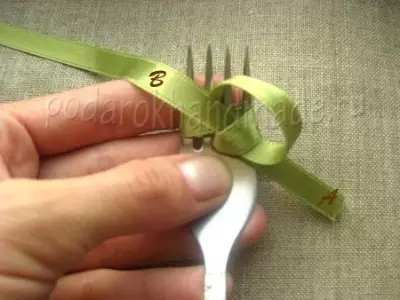
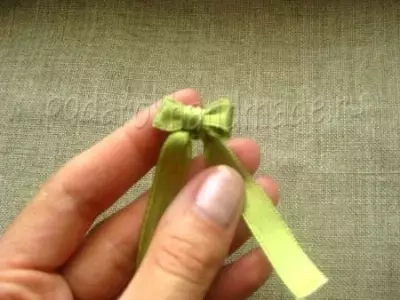
After you perform the above actions, tugging a tight node, make sure another one for better fixation of the bow. Further in the photo it can be seen that it will turn out from the reverse side of the table appliance.
Next, remove the bow, straighten the entire ribbon and cut its ends.
Recommendations for decoration
- When working on tying, be very attentive, try the tape ends do not twist.
- Before making the final version of the work, practice several times, since in the absence of experience in this matter, the bows can work out very ugly.
Article on the topic: Takes for the girl with the knitting needles: how to choose the right model of Berech
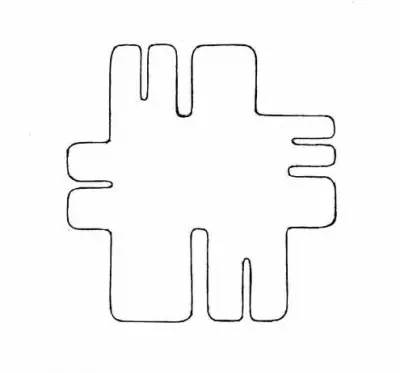
In order to get large bows, you should take a big width ribbons. It is convenient to use the template shown in the diagram. It will be necessary to print on paper, cut and paste on cardboard paper. At its edges you are free to tie the bows of any size.
Gift option
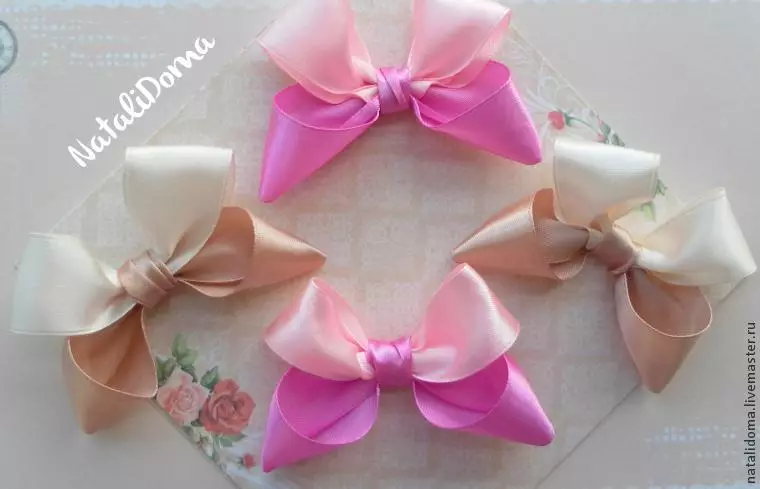
In those moments, when you present to friends and a good acquaintance of an original decorated gift, it always gives joy. And you, in turn, will make a right impression. Quickly made and neatly decorated surprise can be a bow on a fork. It will be excellent and in the form of a clothing accessory, like hairpin or for a tool for bandaging gift packaging.
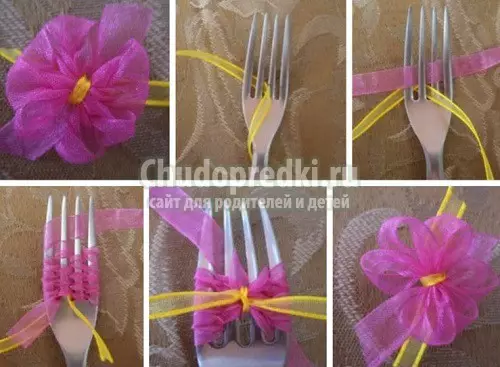
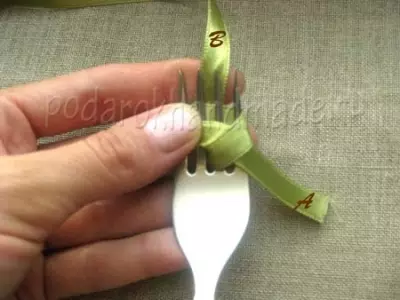
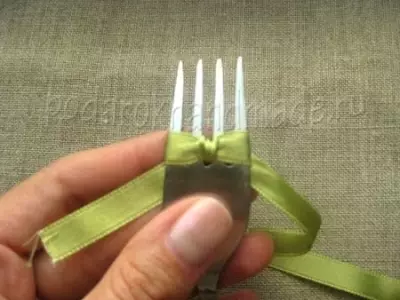
The following lesson is waiting for you a detailed description of the bantle tying process. At the beginning of the process, put a ribbon on the plug to the right left the tail of 4-5 cm long left. The long cut of the tape wrap around the fork so that it can be seen from the bottom of the short end. To get a beautiful bowl with two wings on each side, the ribbon needs to wrap around the fork one more time. Long tip Plug into the slot in the middle of the device and spend the ribbon down. After sticking it to the loop.
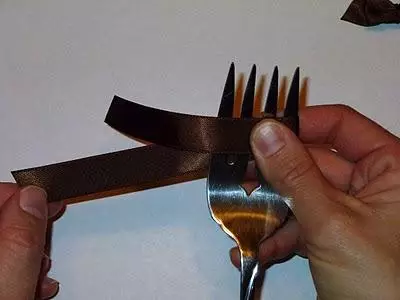
Important moment. It is necessary that the tape tip peeking on the left side. Then you should straighten your ends on the front side. Having pulling up a long end, tighten the bow.
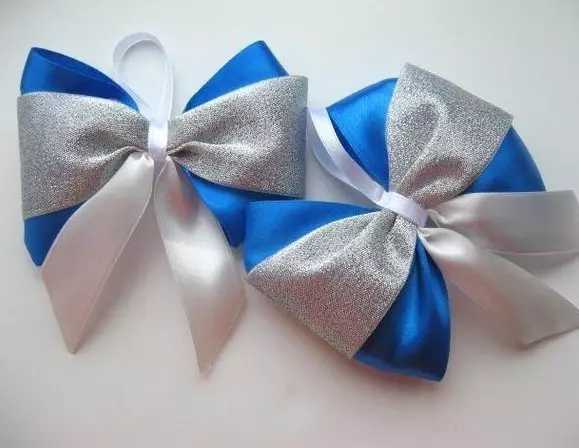
Large accessory
You can make more volumetric bows using a tape, scissors and glue.
You need to take a ribbon 5 cm wide and a length of 25 cm. Take it off the end in the middle and stick with your finger. Lock it with a thread so that the bow does not collapse. After that, the tape of the same coloring and a width of 15 cm rush with one edge. Wrap it with a piece around a bow and glue. You have to get a bow, which can be used as a hairpin or brooch.
Article on the topic: How to decorate a personal diary inside and outside with photos and video
For the manufacture of a chic gift bow, you will again need a tape from organza. From the tape of a long 20-30 cm. Screw the slice of a width of 1 cm. Set aside two segments and tapes and take the main one, then wrap it 10 times on your hand. Wound tape from your hands and clamp in the middle of your fingers. Next, cut the corners from above and below, they should be in your fingers. Now, with a free hand, take a thick ribbon and grab it with a middle to the workpiece. Wrap a narrow tape design and tie a node from the reverse side. Shave from the middle of the petals of the bow and tighten them around your axis. At the end, a slightly remember the bow, straightening the petals.
Video on the topic
As you already guessed, there is no special difficulty in the tie of the bows on the fork, the main thing is to understand the technology and follow the instructions. In the video proposed below, you can learn a lot of useful information about ways to knit bows.