
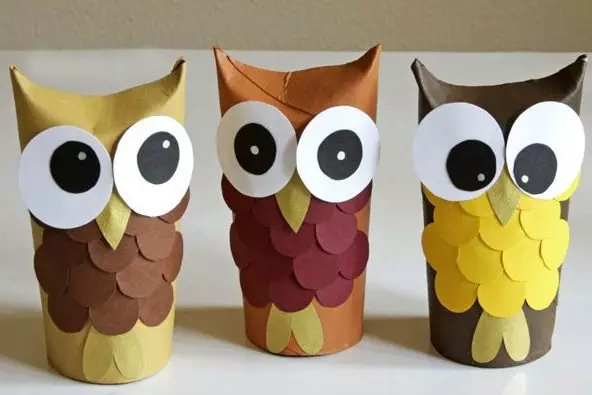
Make a pretty owl for the autumn school exhibition you can do it with your own hands from girlfriend materials and paper. It will not be just a standard applique, but a beautiful bulk handicraft. How to make a paper owl with your own hands, read and look in the master class.
Materials
To create owls, you will need:
- toilet paper bushing;
- acrylic paints;
- brushes;
- colored paper;
- PVA glue;
- scissors;
- double sided tape.
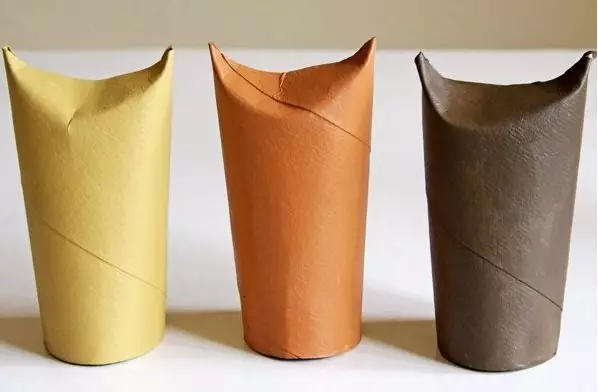
Step 1 . To start, take the sleeve and remove the paper from its surface, if any.
Step 2. . Color acrylic paint sleeve in color, which will be the background for owls. Give paint drying.
Step 3. . At one end, the sleeves start the side parts from two sides with the fingers to the middle. Fix the glue harvest.
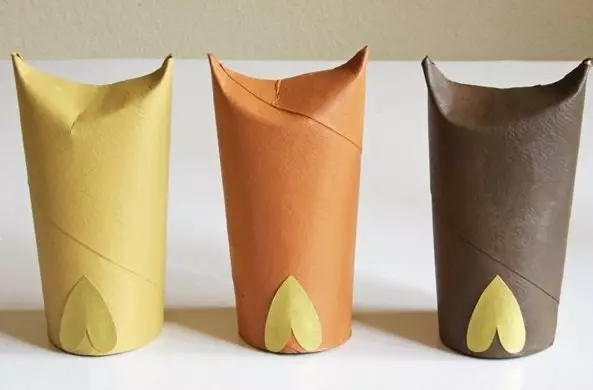
Step 4. . Cut the heart from colored paper. Turn it over and glue at the bottom of the bush. These will be the paws of the owl.
Step 5. . Cut the paper with circles. They should be the same in diameter. Stick circles on the sleeve, as shown in the photo. It will be the plumage of owls. By the way, fasten the circle with pieces of bilateral scotch so that they put the right amount.
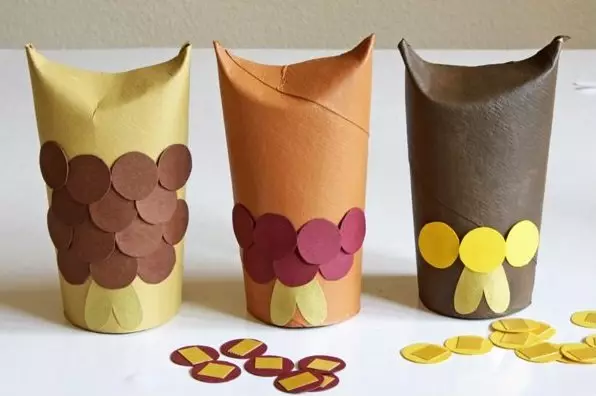
Step 6. . Cut the triangle of paper of the same color as the paws of the owl. The angles are rounded it, and in the inverted form glue it over the plumage. It will be the beak owls.
Step 7. . From paper cut two large white circles and two small black circles. These are billets for the eyes of the owl. Stick black mugs on white PVA glue and send eyes to the sleeve, securing them with a double scotch.
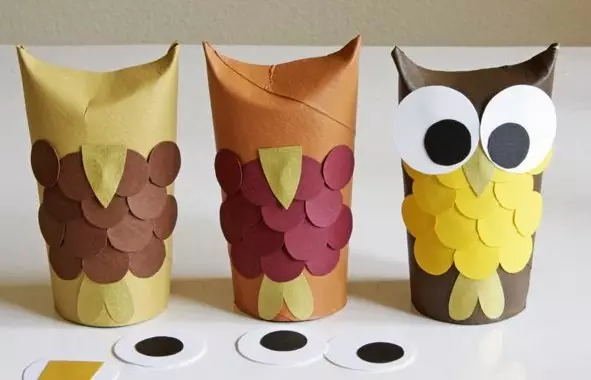
Owl from paper sleeves is ready!
Article on the topic: Easter card do-it-yourself: master class with photo