
I often ask questions about how to properly print stencil on the almitude sheet of A4 format. Frequently complain that the stencil does not fit one page, but only two or three. Of course, it is not right. Since there are quite a lot of templates in our database, it will be easier if you bother edit, only the templates that you need for work. Consider how to fit the size of the stencil template.
Usually, skillful people use to work with images such as Photoshop or Paint Shop Pro, but this software is quite expensive and not everyone has it at a PC. Thus, I will tell you how to make the desired size and print stencil using a standard program that comes with any version of Windows. This program is Paint. I will try to describe the process quite detailed, because not all people understand everything equally. You can say: "Click the" Start "button, and they will watch an hour on the screen and will not understand where it is;)
So, proceed:
- Click the Start button, usually in the lower left corner of the monitor. Next, go to the "Standard" folder and find "Paint" there. If you failed to do this, try another way: Disc C: windowsSystem32MSPAINT.exe
- Now that you launched Paint, you can proceed to the initial setup. Press the CTRL + E key combination and specify the width and height of the "1" pixel.
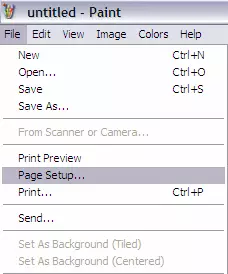
- In the drop-down menu, go: "File" => "Page options ..." (be careful you need the "page parameters ...", and not "Preview" and "Print".
In the "Page Settings" window, remove all the numbers in the fields "fields (mm)", this will allow you to expand the print area.
Article on the topic: Sandpapers for the girl with their own hands using a hook or spoke
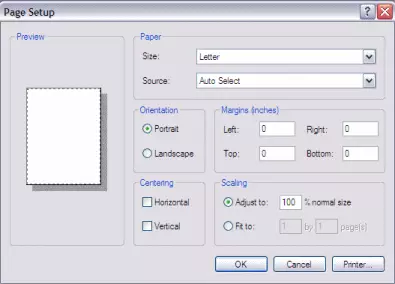
Also, you can choose to choose a sheet orientation: landscape or book.
4. Now you need to choose your template to edit it in Paint. Save it from the Internet or other source to your hard drive. Transfer it by dragging to Paint or click "File" => "Open" and select it in the Explorer. After you opened the desired image, move to the menu: "File" => "Preview" and see if the image is set per page and is suitable in size, then you do not need to rule it. If the image is too big and, or not fit one page, read the next step.
5. Close the preview. Use the Ctrl + W keys combinations, you have to jump out the window in which you have the right to change the size of the image (proportional to) in pixels or percentages, if desired.
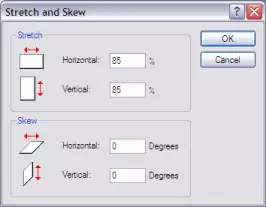
6. After you indicated the percentage and pressed "OK", go back to the preview and make sure that the image satisfies you with your size.
7. Note that the image is displayed in the center of the page, it will be more convenient for paint. If it is not entirely centered, you can again go to "Page Settings" and specify the "Centering" option, can choose horizontally, vertically or simultaneously.
8. Next, you just need to print this image.
Stencil is ready.

{jcomments on}