One of the most responsible and important days in the life of every child and parent is the first trip to school. Each 1st of September, the family in which there is a schoolboy will experience the excitement and carefully prepare for the beginning of the new school year. An integral attribute of the appearance of each schoolgirl is two large and bulk white bow. This accessory has become a tradition of many years. Of course, the modern range of stores provides a very wide selection of white bow, especially before the holiday, but the fact that you can create manually cannot do any machine. In this master class, we offer to make bows on September 1 with their own hands.
From satin ribbon
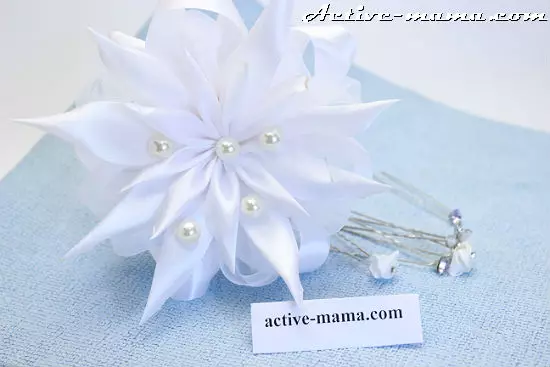
An elegant and festive solution will be the creation of round bows on September 1 in the Kanzashi technique from the satin ribbon. The technique is interesting, requires patience, but for the sake of the most beautiful result you should try.
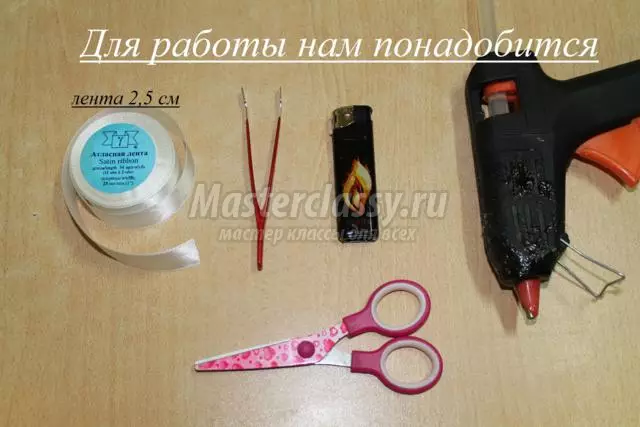
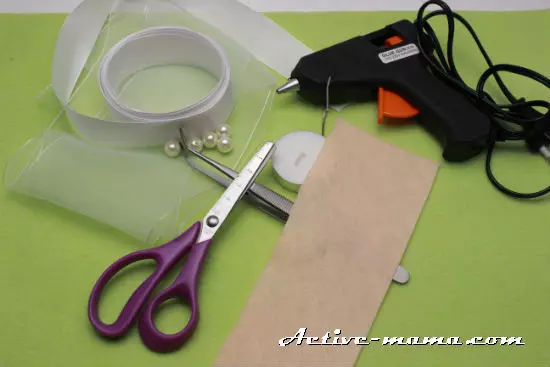
Materials:
- Satin tape white 2,5 cm wide 280 cm on 1 bow;
- Cext of felt 10 cm by 10 cm;
- scissors;
- glue gun or glue "moment";
- Lighter or candle;
- tweezers.
Let's start a detailed master class.
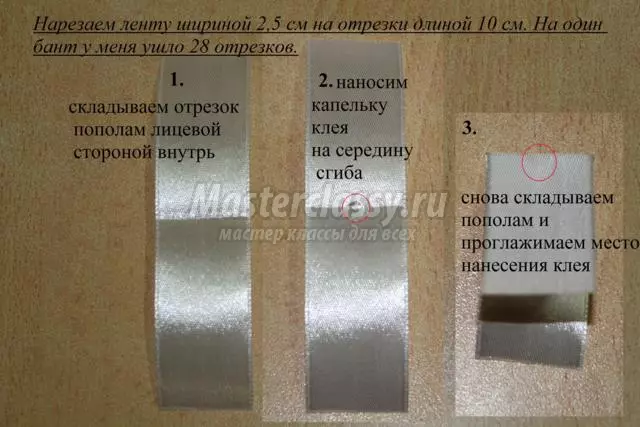
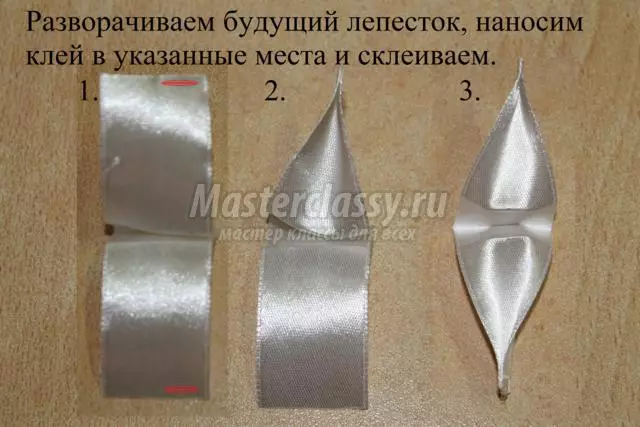
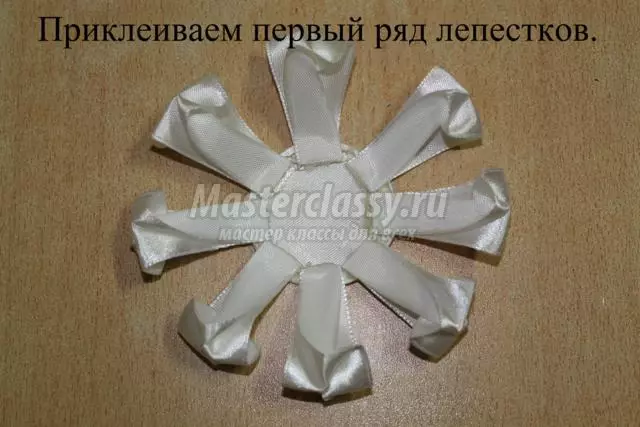
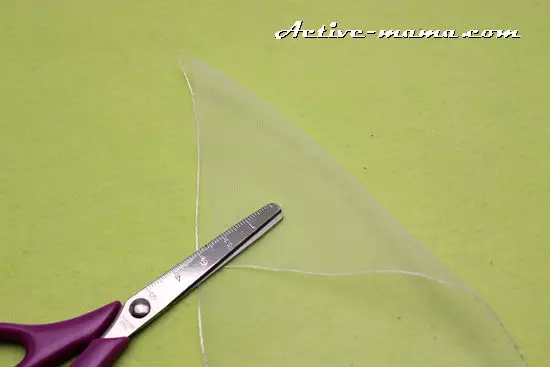
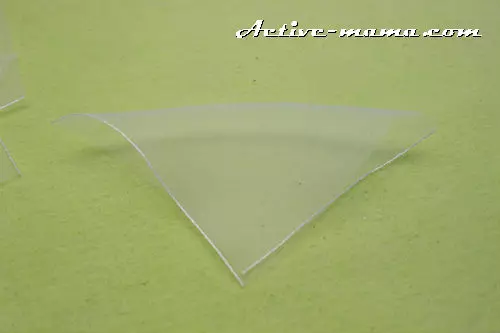
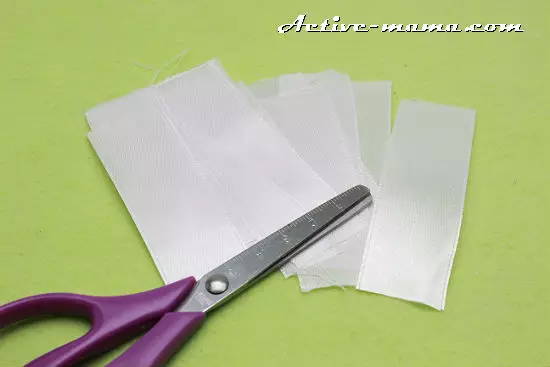
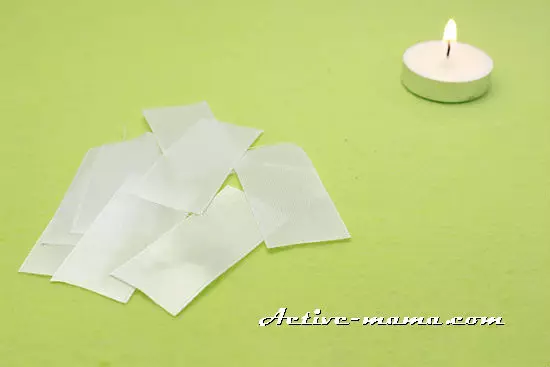
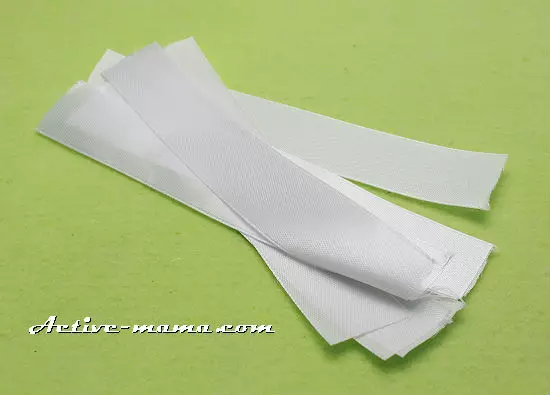
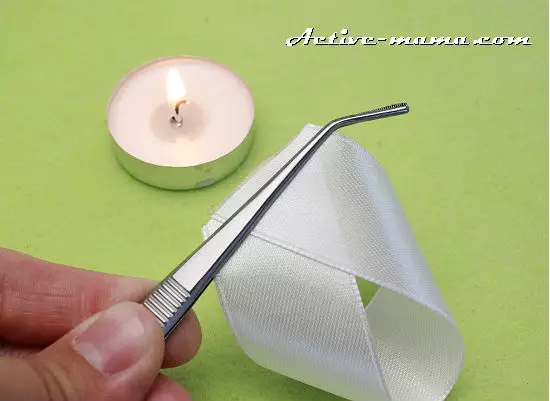
We take a white tape and cut on the 28 parts of 10 cm. We take one part, fold it in half so that the blank is to the face with the invalid side. We glue on the line of bend with the help of a thermoclaus.
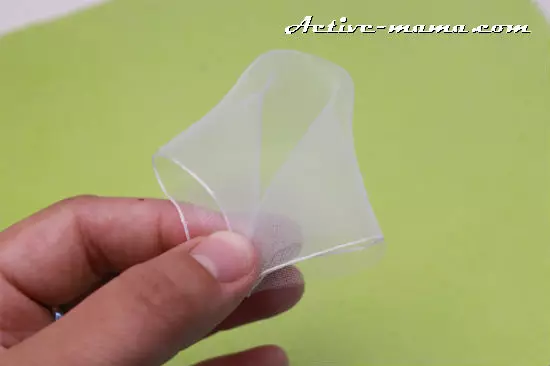
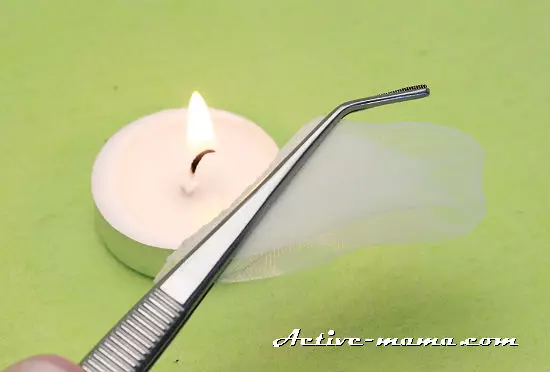
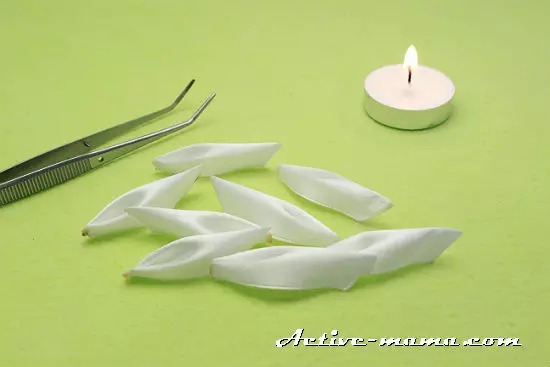
Soak the workpiece by connecting the ends using a tweezers. There should be such a detail.
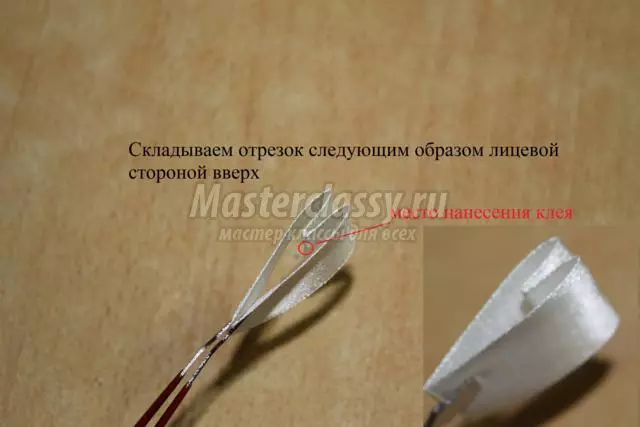
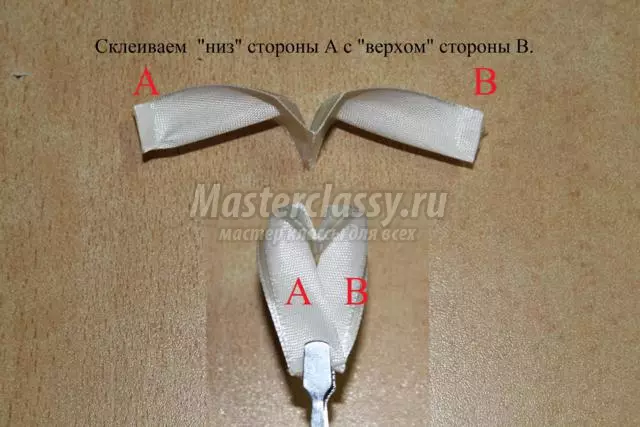
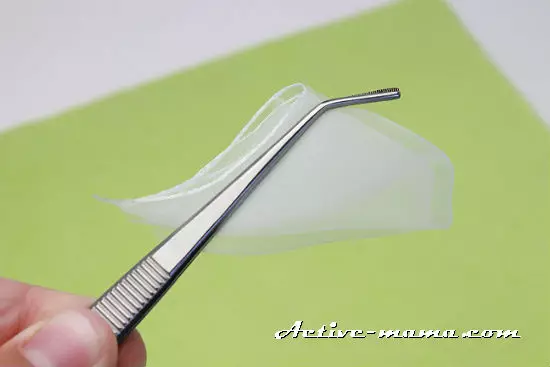
The edges of the prepared part are glued separately, as shown in the photo.
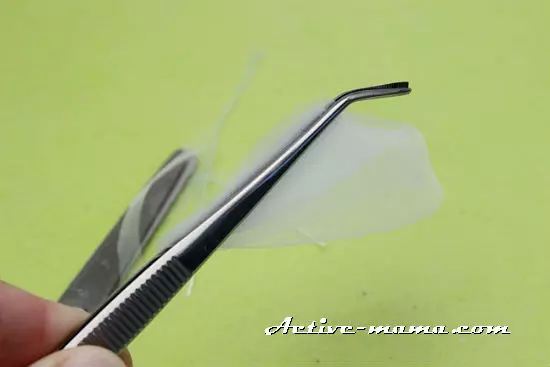
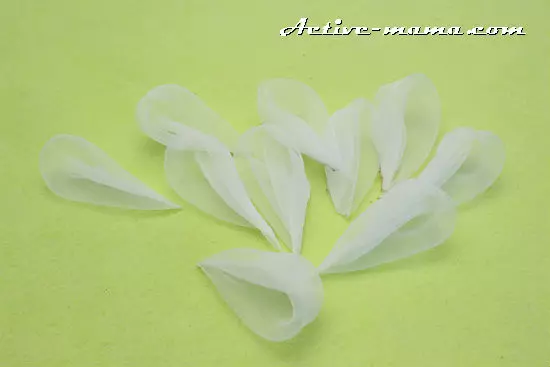
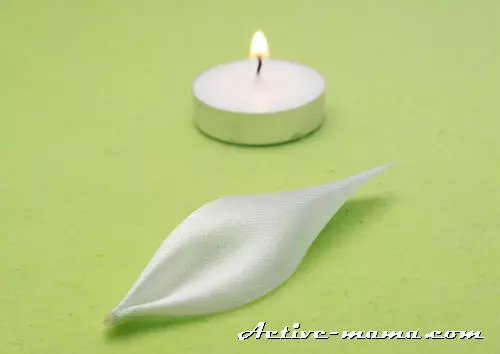
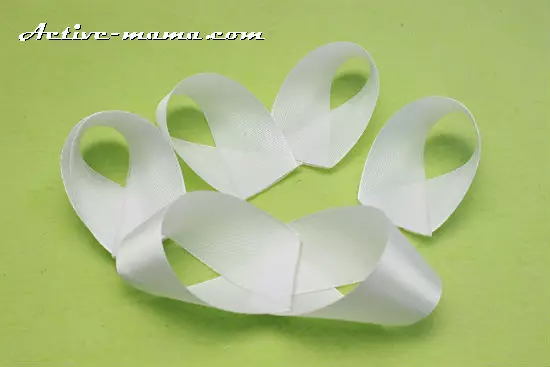
Petal is almost ready. That's how it should look from different sides.
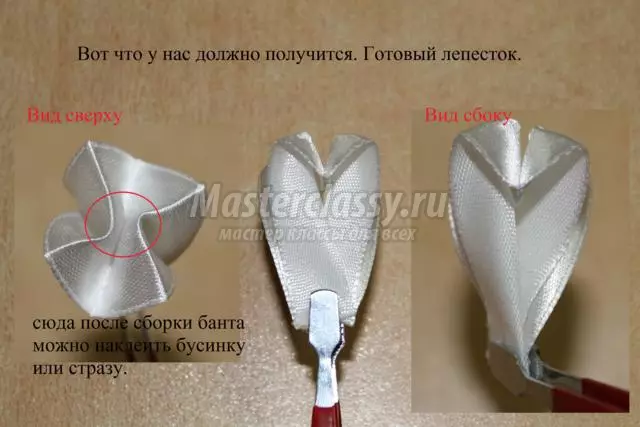
The edges of the petal we fold on each other and glue. Now the petal is ready.
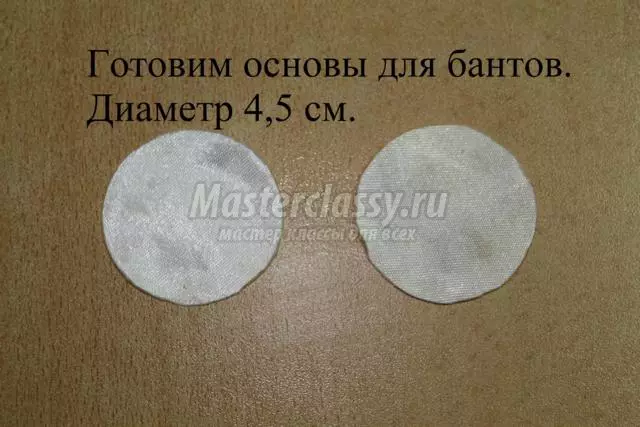
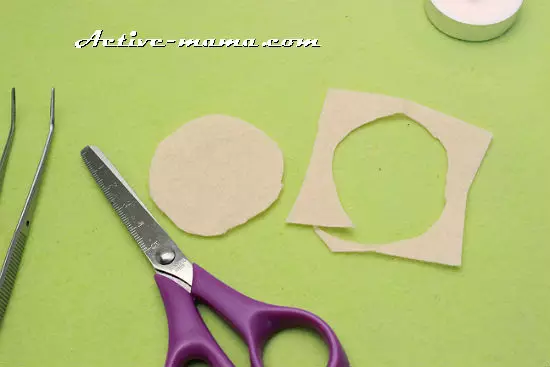
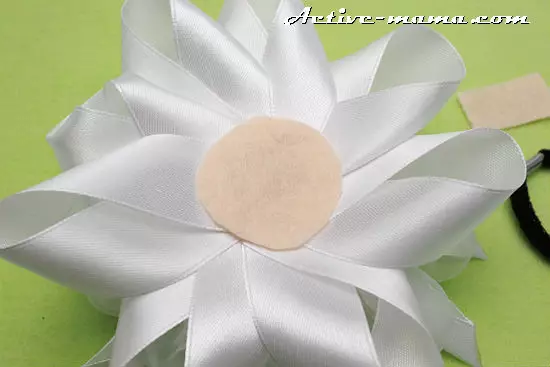
We make the foundation for the bows. From the felt, cut circles of 4.5 cm in diameter.
Article on the topic: Decoupage of New Year's balls do it yourself
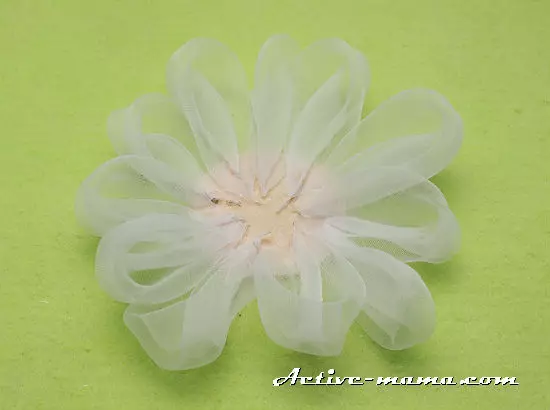
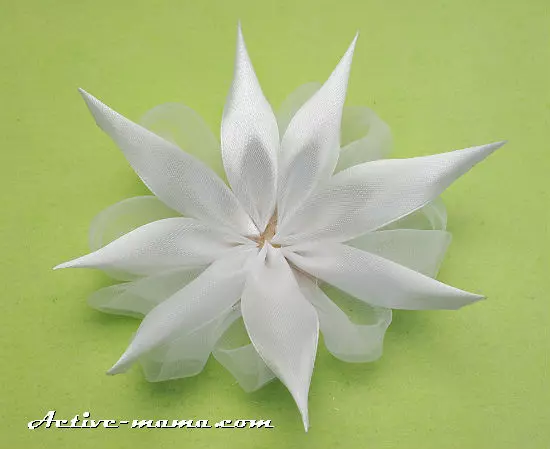
In a circle, we begin to glue the petals on the workpiece. The petal is attached close to each other without leaving the gaps.
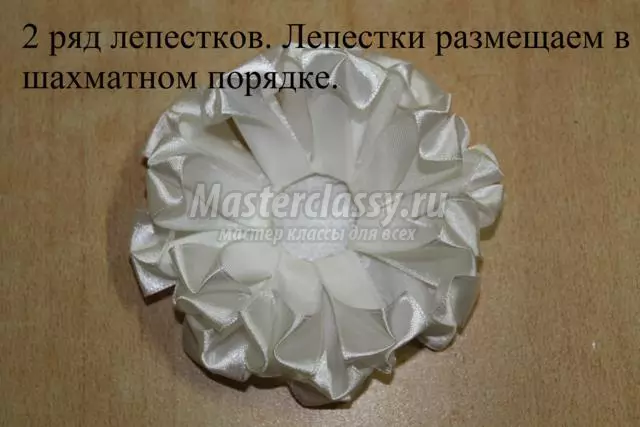
We form the second layer. Petals should be glued in a checker order.
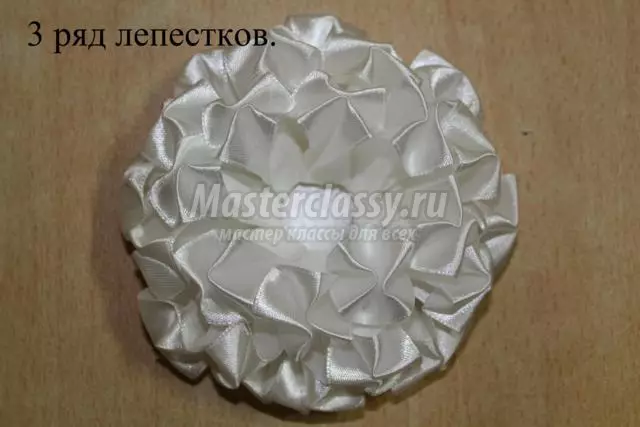
In the same way we form the third tier.
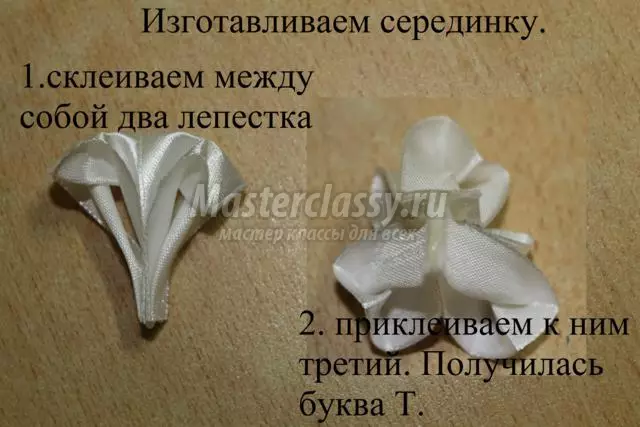
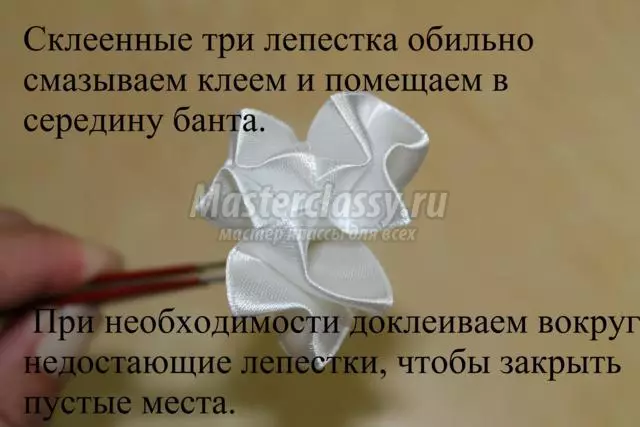
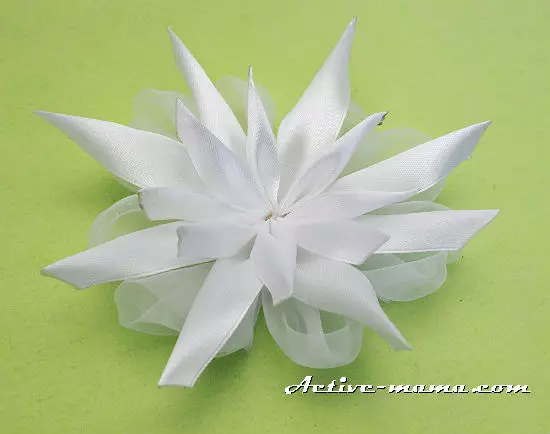
Now we should make a middle of a bow. You need to glue petals in the form of the letter "T". To do this, glue two petals among themselves at the beginning, and then we glue the third to them. It should work out as shown in the photo.
The middle is glued in the center of the workpiece.
If there is free space, the lumen, the petals should also go there.
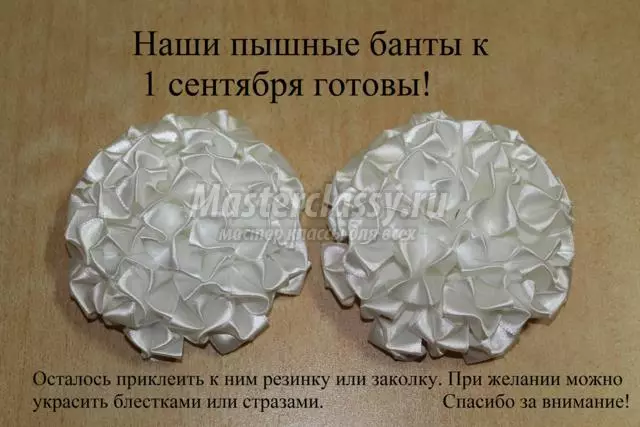
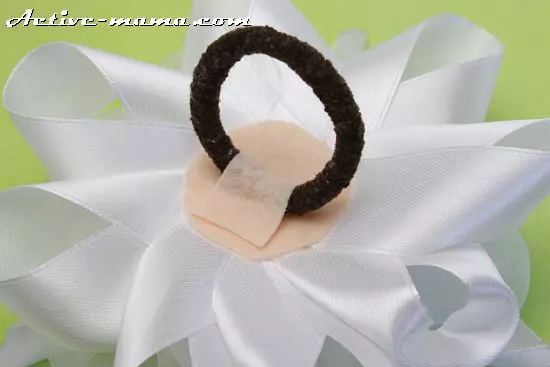
To the base of the bow we sew or glue the gum. In the same way, sew the second bow. Bows on September 1, in the style of Kanzashi from satin ribbons are ready.
Combine materials
Original unique can look a bow from different materials. In the next step by step example, we suggest considering the decoration using various techniques and material. Let's proceed.
Required materials and tools for sewing:
- A white-colored satin ribbon 2.5 cm wide and 3 meters long;
- Wide chiffon white ribbon 10 cm wide and 1 meter length;
- white felt for the base of the bows;
- White beads or semi-graysins in the amount of five pieces;
- glue gun;
- Candle or lighter;
- scissors;
- Santimeter tape or ruler;
- tweezers.
Let's start the master class of sewing bows on September 1.
From the chiffon tape you need to make 10 squares. For this, it is not necessary to measure each square centimeter or ruler. Since the sides of the square are equal, you can do as shown in the photo.
Let's start the formation of kanzashi elements from a chiffon tape. To do this, take the first square and put on the working surface in the form of a rhombus. The top corner bend to the bottom - it turns out such a triangle.
The extreme corners also bend to the bottom.
The preparation is folded in half, as if we close the open book.
Article on the topic: How to make masks do it yourself: paper templates with schemes
Qurate compress with the help of a tweezers and cut it to be smooth.
We process the edge with a candle.
If the candles were not found, you can use the lighter or matches.
We repeat the sequence of the execution of Kanzashi elements for the remaining nine chiffon squares.
Satin ribbon cut into 8 parts of 8 cm.
We take one cut and bend it longitudinally inside. On the one hand, we make an oblique incision, as in the photo.

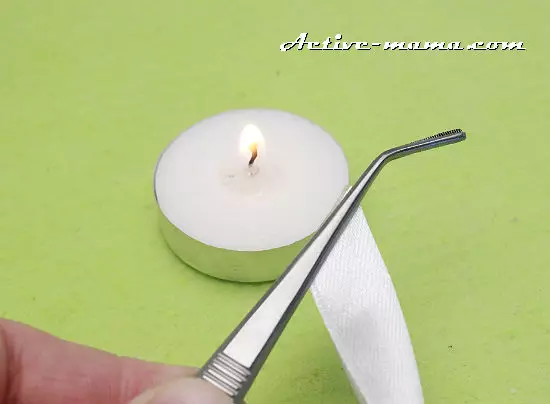
We will eat the cropped edge of tweezers and treat the edge with the help of fire. When processing the edge, it must be connected.
The opposite side bend the boat, as shown in the example, and also process with a candle so that the edges are connected.

It turns out such a pointed petal. From the remaining seven sections of the tape we make exactly the same petals.
Now from white tape should be cut off 8 pieces of 5 cm.
We make 8 petals of a smaller size in the same way as large satin parts of the bow have been made.
Eight sections of 15 cm are useful for the next bow of a bow, cut.
We take one cut and fold it with a loop, as shown in the example.

Cut the edge so that it is a flat stripe, and process with a candle.
We make seven more exactly the same details.
From felt you need to cut the base - a circle of 5 cm with a diameter.
All items to create a bow for the holiday are ready. It remains to collect them. For this, the first row of petals is on the basis of the felt. They will be from chiffon. Petals should be glued evenly and gently.
We begin to form a second tier of long satin petals. Adhesive evenly, you can use the "clock system". You need to be attentive and not fill out the entire workpiece.
The turn of short satin petals has come. Insert them into the middle of the workpiece in a checker order in relation to long satin items.
Article on the topic: Sweater English Elastic knitting needles with diagrams and video
Now we work with harvested loops. Inverting the bow and from the wrong side of the workpiece in a circle evenly glue the loop. We pay attention to what they glue the wrong side up.
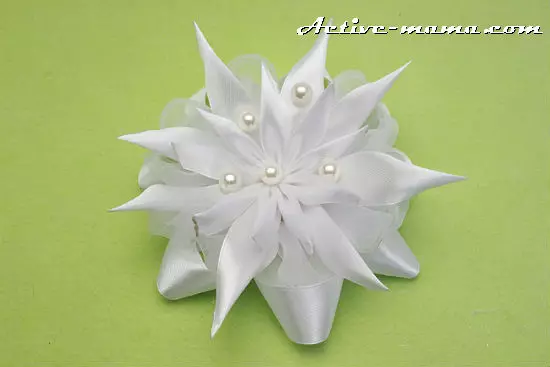
We decorate the bow and middle of the flower with the help of prepared beads or semi-graysin. The decoration can be anyone - at will.
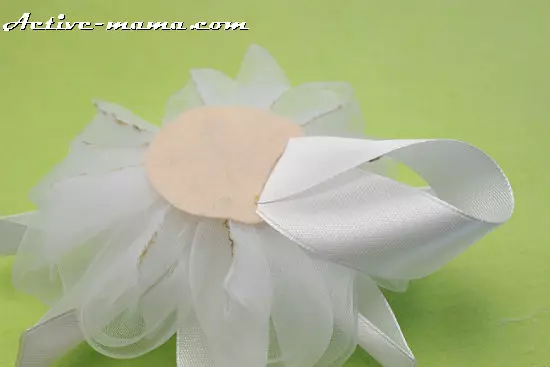
Cut out another 1 circle of felt, only now smaller diameter - about 4 cm and a small strip for fastening gum.
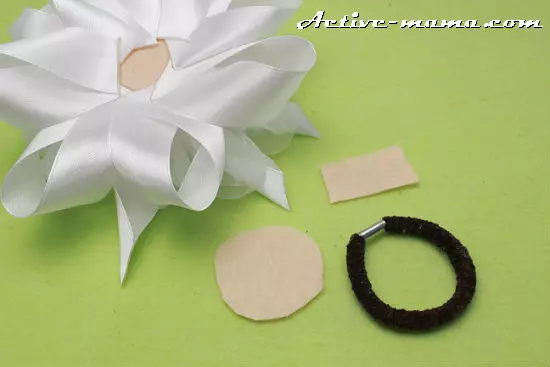
We glue a felt circle from the outbound side of the bow. It will give the opportunity to strengthen the loops and serve as the basis for attaching the gum.
With the help of glue, we attach the gum to the bow as shown in the photo.
We give adhesion to dry, and the bow for the holiday on September 1 for the girl is ready!