
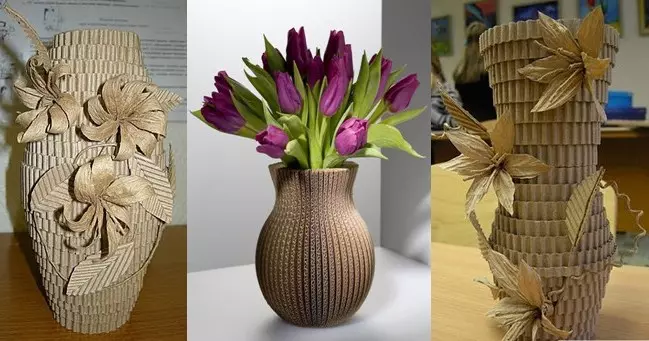
All sorts of vases are excellent for decorating the interior. Outdoor, desktop, suspended. Of course, they can be bought in the store, but most often beautiful vases can hardly hit the wallet. What to do in such a situation when I want a vase, but it is not possible to buy it? Make a vase from cardboard with your own hands!
Usually in cardboard vases do not put alive flowers, as the cardboard passes water, but for drywalks and decorative artificial flowers such vases are perfectly suitable!
A vase made by her own hands will be an interesting and entertaining pastime, and the result will delight you and your loved ones. We offer you several master classes to create a vase from cardboard yourself, the execution schemes can be found below.
Outdoor decor object
To create a beautiful outdoor vase with your own hands, we will need:
- cardboard tube;
- corrugated or dense cardboard;
- PVA glue and thermo-glue;
- scissors;
- newspapers;
- putty;
- sandpaper.
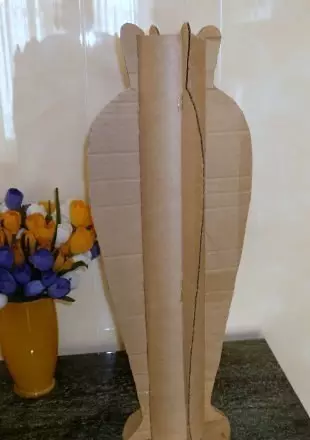
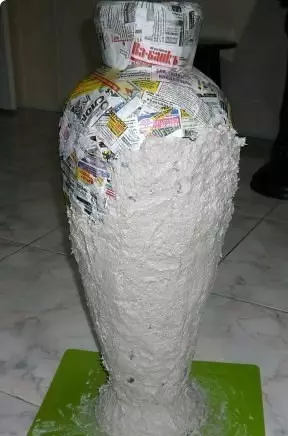
From the cardboard pipe, we create the basis of the vase. It can be cut to the desired size.
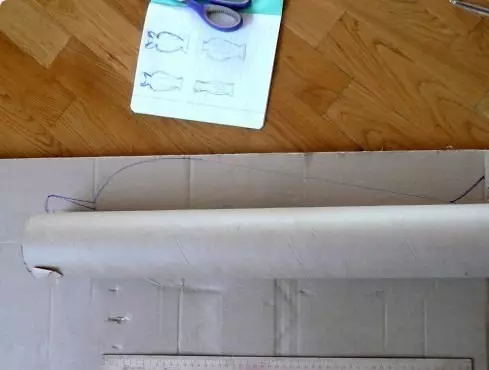
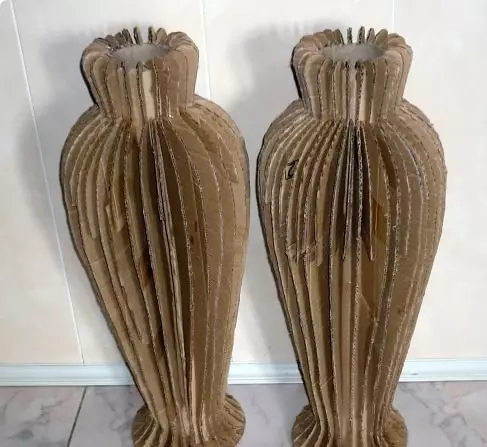
Now make curly walls of the vase. To do this, on dense cardboard, draw and cut out the workpiece. Make them need as much as possible so that the vase is solid.
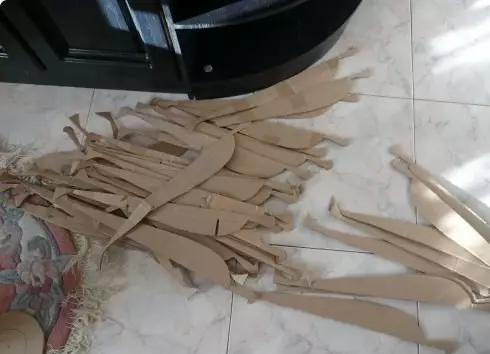
We glue the pipe to the base (cut the circle of a larger diameter than the pipe itself). Billets are glued throughout the perimeter of the vase, as shown in the photo.
Prepare newspapers. We put wide strips from them and with the help of PVA glue, let all our billets of the vase. Once again we wake glue and leave to dry. Then we proceed the shape of the papier-mache: align both the dried near the battery for at least one day, preferably more.
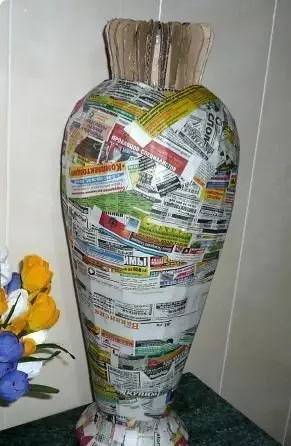
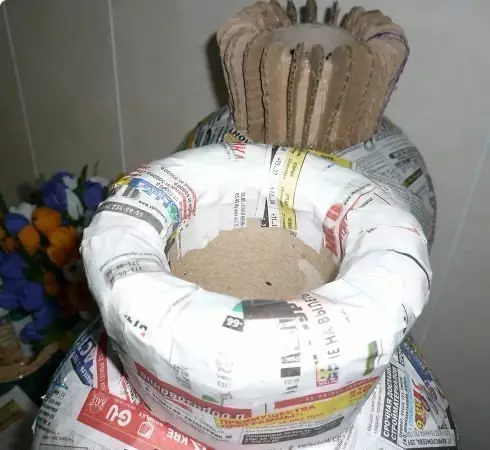
Next, we divorce putty with water and PVA glue and getting the whole vase with the resulting mass. Next, you need to align the surface with the emery paper.
Article on the topic: Origami Kusudama: Magic ball with assembly and video
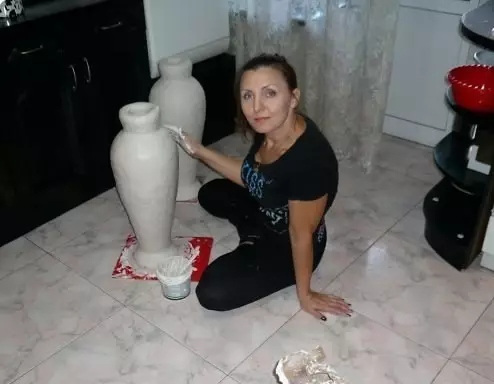
And finally, the last stage is painting vase. You can choose one or more colors and paint the vase in any way. The paint is best to take waterproof acrylic or varnish.
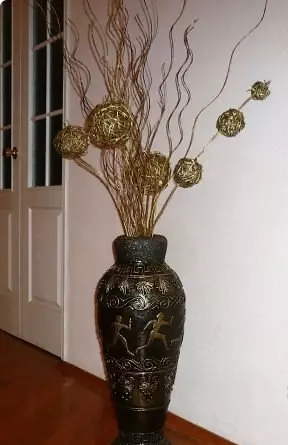
Beautiful and original outdoor vase made by hand, ready!
Interesting option
In order to make such an interesting vase, we need the following materials:
- cardboard tube;
- sheet cardboard;
- PVA glue and thermo-glue;
- newspapers;
- paints;
- varnish.
Measure the desired pipe length. You can make a desktop or outdoor vase. I cut out the bottom of the cardboard and glue the thermo-glue, let dry.
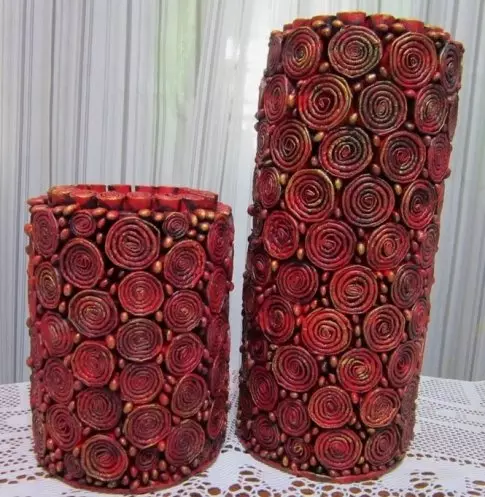
Our vase will be made of cardboard and paper, so we take the next step to take the newspaper and cut the non-screens of paper strips. We will turn each strip in half, and then twist in the spirals, scrubbing the PVA liner or thermo-glue. We glue them to the cardboard tube. The space between the spirals can be filled with beads or beads, and you can use a cereal or beans.
After all the helix is glued and glue drying, you can start painting. We apply several layers of paint on the vase, we leave until complete drying. Then we apply several layers of varnish, we wait until it dries.
Vase ready!
Little vase
Very interesting looks like a carbon vase. It is done as simple as possible, and it will take to create it:
- cardboard box;
- glue;
- compass;
- scissors;
- varnish.
First of all, we cut the box on the details to make it easier to work. Then the circle draw the circles. Their size will depend on the size of your vase. You can make a big or small, as you wish. We start from the biggest circle. Each next circle should be 3 mm less. The vase can be collected from different shapes - a narrowed to the bottom or to the top. Circles cut out. And begin to collect our vase. Depending on how you decide to collect a vase, put the circles on each other, pre-lubricating each of them glue.
Article on the topic: Owl amigurum hook: video lessons with photo schemes
Vase is ready. It can be covered with paint, and then varnish, and you can use only varnish, while maintaining the original color of the cardboard and its texture. Looks very stylish!
Especially since you can adapt such a vase not only for flowers, but also anything.
Cardboard "Rope"
To create such an interesting decorative vase, take:
- cardboard pipe;
- dense cardboard for the bottom;
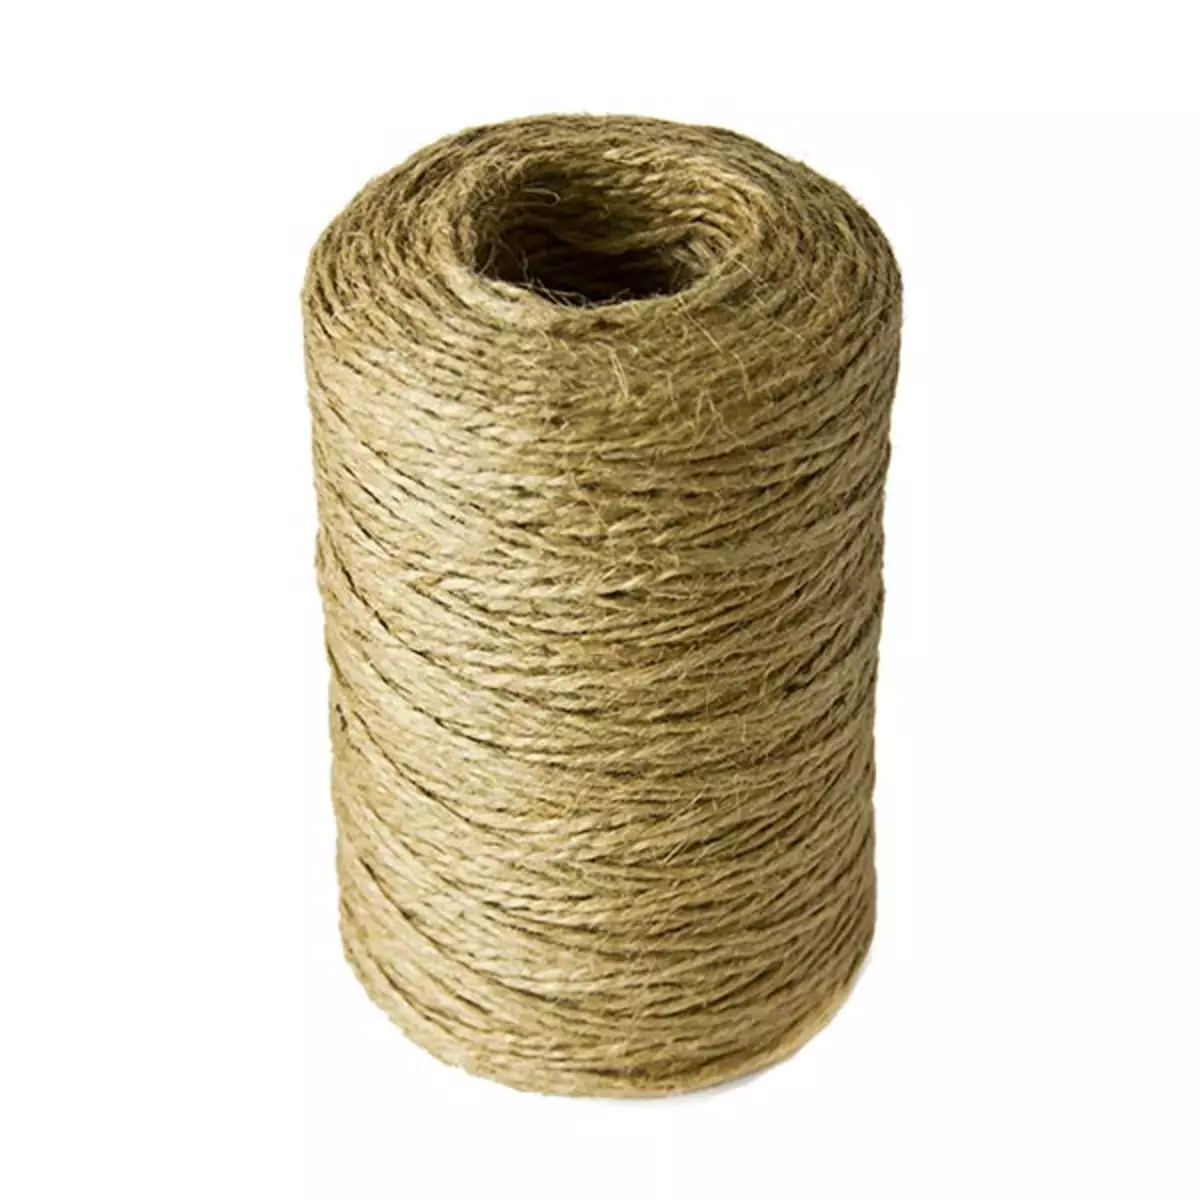
- twine;
- PVA glue;
- Acrylic spray paint of any color.
Cut the pipe to the desired height of the vase, cut the circle from a slightly larger diameter from the cardboard than the pipe is the bottom of the vase. Instead of cardboard, you can take a piece of plywood. We glue the bottom to the cardboard tube with the help of glue. It is best to take construction glue.
In the container, the glue with a small amount of water is divorced, we put the split thread into the container until the material is completely impregnated.
For such decoration, only natural twine is suitable, since the synthetic simply is not soaked and not stick.
Now impregnated threads wind the pipe from the bottom up. You need to wrap it tightly so that the gaps between the threads are not formed.
Go to staining vase. Spray-paint is best painted the product on the balcony or on the street. The surface and space around it is best to apply paper or food film, put on the hands of the gloves.
Such interesting vases can be created with their own hands using only cardboard, fantasy and some decorative elements. Healthy!
Video on the topic
Look at the video selection for inspiration.