
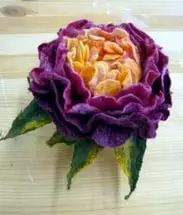
We all love flowers, not only alive, but also drawn, embroidered and so on. And how do you get flowers from wool? This is perhaps the most unusual technique, according to the results of which they are simply excellent results, the flowers made in this way look like real, that is why in this article we will give you several master classes to felting colors from wool.
Such colors have a large circle of their application. They can be used to decorate clothing or accessories (bag or bracelet, for example), they can become an independent decoration in the form of broochs or hairpins, such a flower can decorate the room or street space (for example, the veranda in the country), and this is not all use options Flowers from wool. If you include fantasy, you can come up with millions of ways to use.
Lovely Lilia
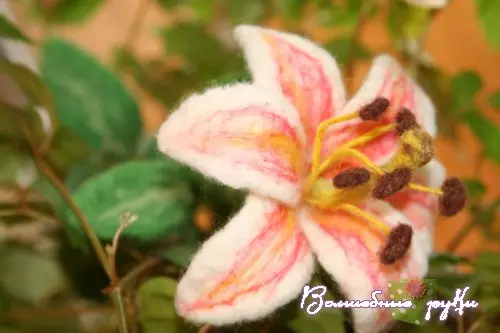
We bring to your attention a master class on filling lilies from felt on the frame. This technique is quite complicated, but our lesson will be very detailed, we will describe every step of your work with visual photos, so the work will be sought for both beginners.
To work, you will need:
- Wool of different colors and shades;
- Unnecessary sponge;
- Two wires: thin and plump;
- Thread;
- Spoke;
- Needle for felting.
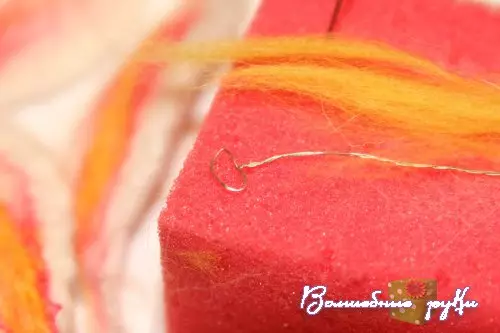
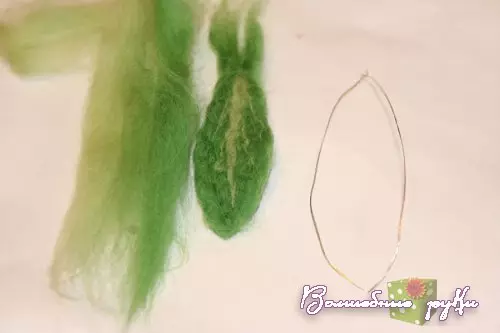
First of all, we will make the petal, for this we take a wire with a length of about twenty centimeters and screw it up onto the needles, after which we remove the wire and stretch a little.
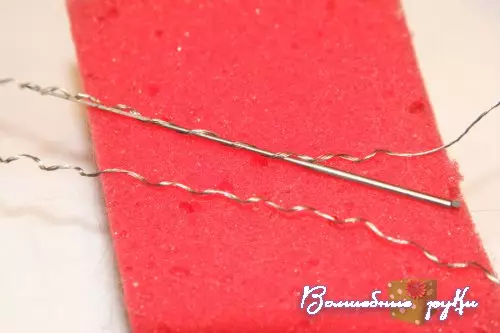
Now we put it in half and tips connect and twist each other, the resulting billet should be given the shape of the petal. For this, we make bends, but very neatly, harsh corners should not be, all transitions must be smooth.
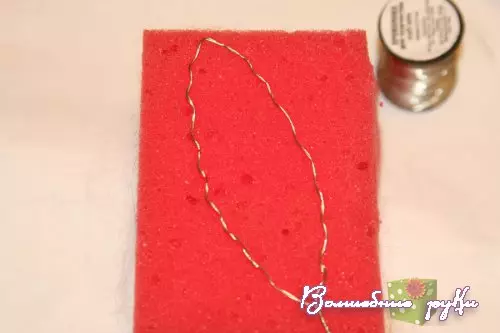
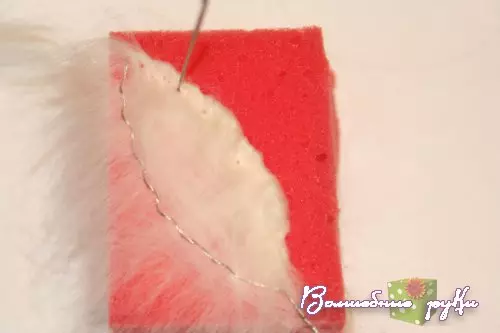
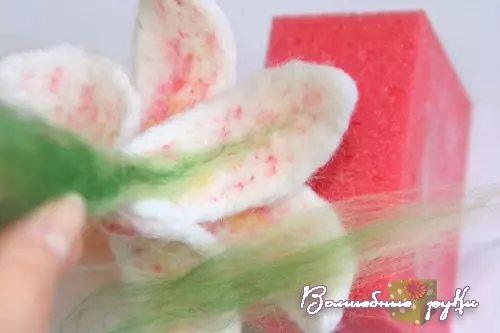
Now we take our sponge and put wool on it, and already on the wool on top we place our frame of the future petal, which we just did. By felting, we attach yarn to the wire, do it needs a special needle for felting.
Article on the topic: How to sew a scarf with your own hands - master class
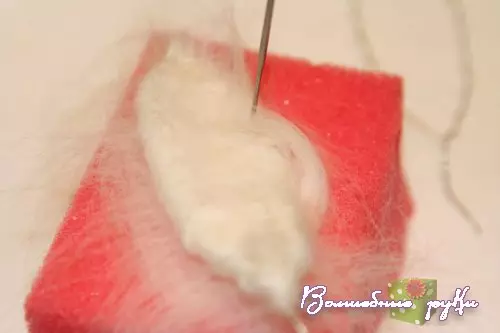
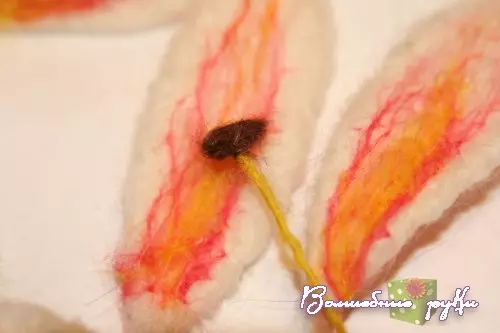
Now the petals turn over and continue to take the hair with a needle to fool.
After we finish working on the basis of our flower, you need to take the wool of other colors and lay out on the petal, so we form veins, shades and greater realism to our flower. Again, with the needle for filling, we apart these threads to the petal.
Such petals need to do six pieces. After that, go to the manufacture of stamens and pestles.
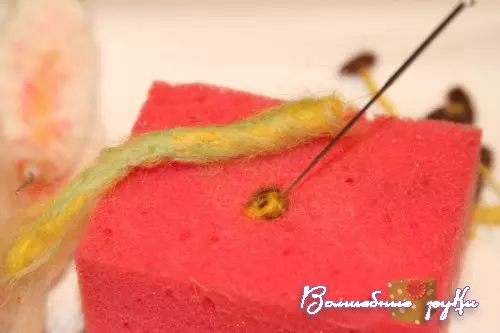
We take the wire again and we turn into a small ovalchik at the end, the stalk length should be about seven centimeters.
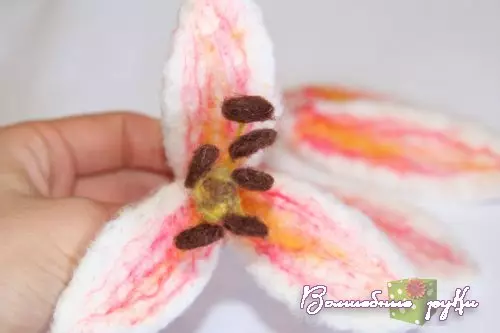
Ovalchik fill in dark hair, it is desirable that it was brown, and tightly dump it. The stalks are wrapped with a different color, more light, can be used, for example, yellow. Stamens Thus you need to make six pieces.
Now let's start working on the pestle, for this you need to mix the wool of two different colors and twist them in the so-called "sausage". On the tip, we throw small triangles.
With the help of a needle for felting, we connect the pestle itself and its top.
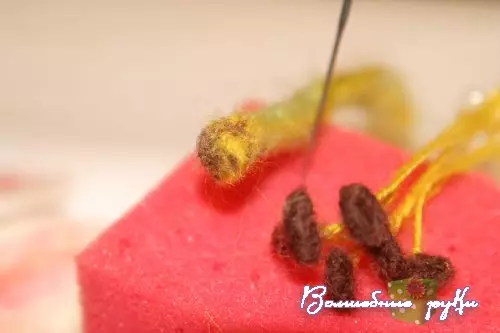
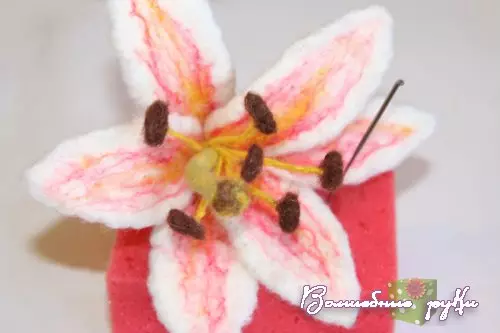
Now we connect stamens and pestle, put the pestle in the middle, and the stamens distribute around it. Then out of three petals we fold a kind of triangle, in the center we mark the design of the pestle and the stamens, we connect the whole thing to the wire.
Now we apply other three petals so that they are between the previous, and we attach them to the workpiece with the wire.
Now the needle for filling is fixed for the reliability of the petal at the base.
Note! Make it very carefully, because there is a large amount of wire, and you can damage the needle.
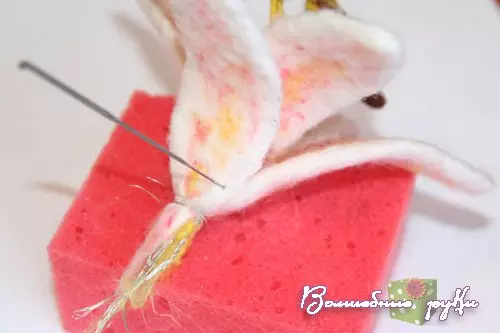
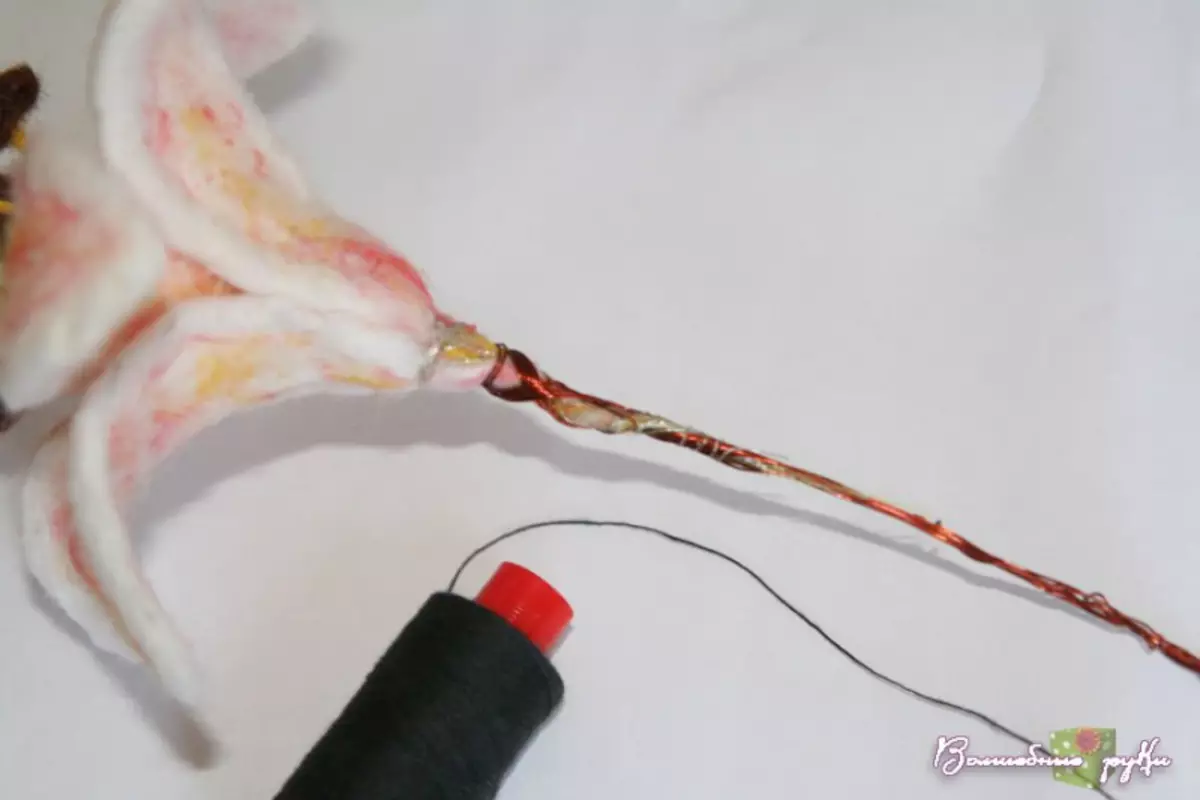
We proceed to creating the stalk of our beautiful lily. Here we will use the thick wire, we attach it to the base of the bud. Before working with wool thick stem from the wire, you need to wrap in threads.
Article on the topic: how to make a hat with your own hands
Now we will make cupboards, for this you need to take green wool and an acute side to attach to the petal and adopt with a needle for felting. Wool at the base should remain, because we have not turned the trunk of our flower.
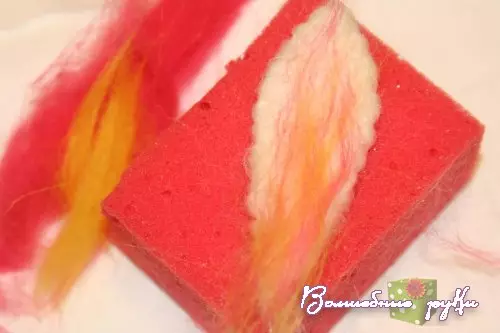
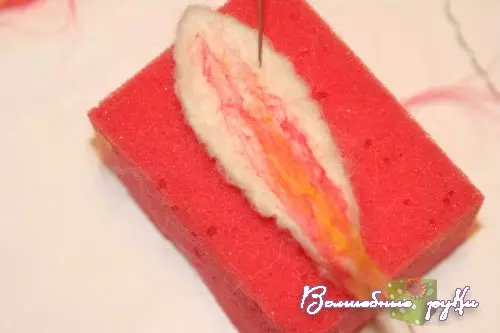
Now we will make leaves, we will do the same way as the petals, only the frame make a few other shape and use the wool of other colors. The leaf will need to make three pieces.
Now wrapping the trunk of thick yarn of green wool and take leaves to it.

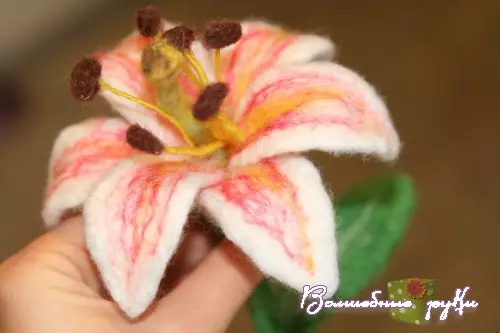
So that our flower blooms, you need to straighten the petals, and our beautiful Lilia is ready. If you do a lot of such colors, you can build a whole bouquet, which will never start and will delight you for a long time with your wonderful view.
Video on the topic
Now you can boil any flower from wool without any difficulties, we suggest you watch video lessons from this selection, and you can learn other felting techniques.