
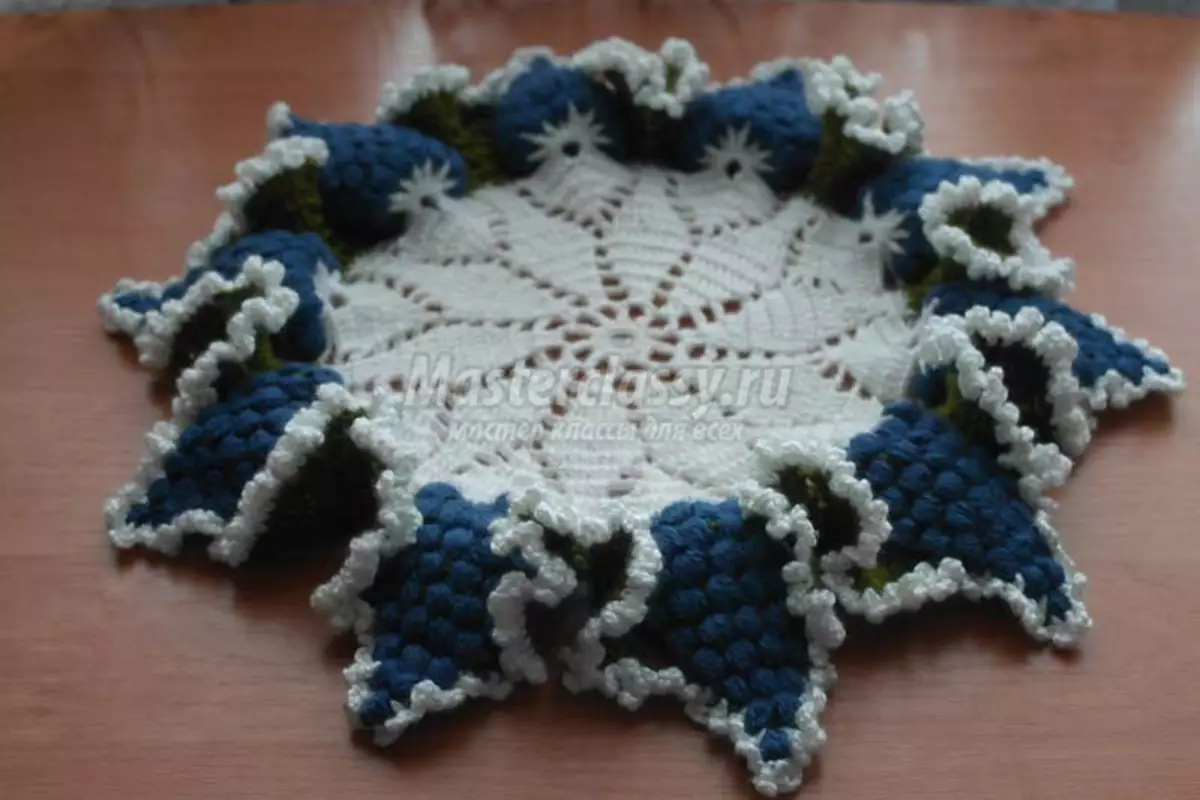
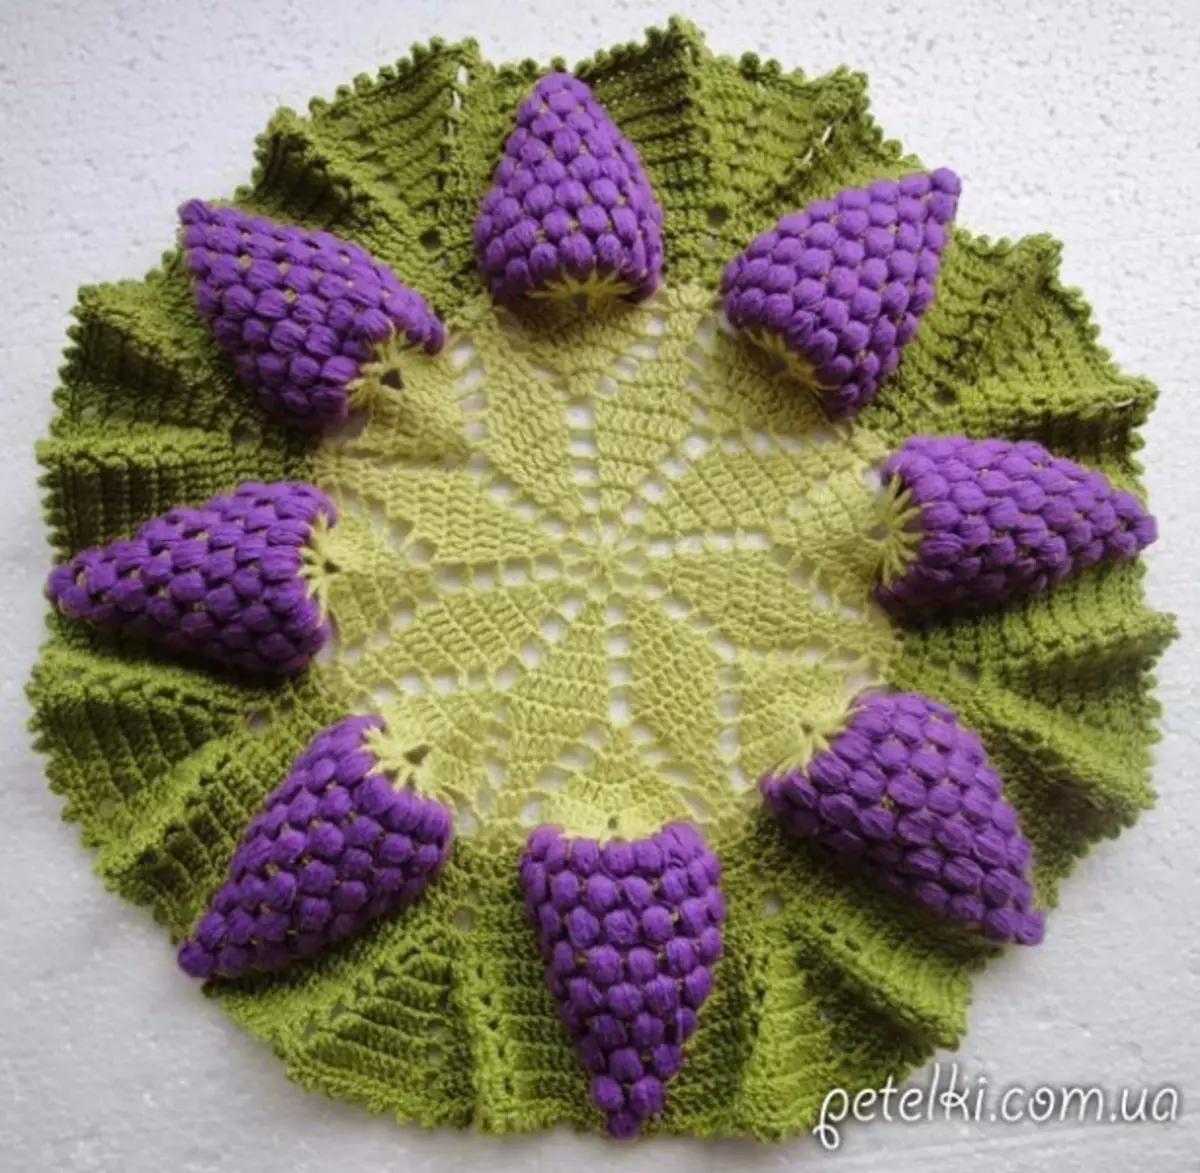
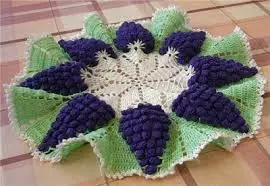
On the Internet there are more and more requests on how to make a wipe "grape cluster" with a crochet, a scheme with a description of which you can find in today's article. We decided to figure it out in detail with all the intricacies of work so that in the future you were much easier and more pleasant to work, since most of the other articles offer just one scheme with which it is hard to understand the novice master.

Go to the lesson
Description of the entire process of manufacturing the wipes of grape cluster Crochet can be traced on the example of the master class with step-by-step photos. For this work you will need to be stocking with a small amount of patience, you will also need several free evenings. If you are a professional master, then we are confident that such work will not take more than two evenings.
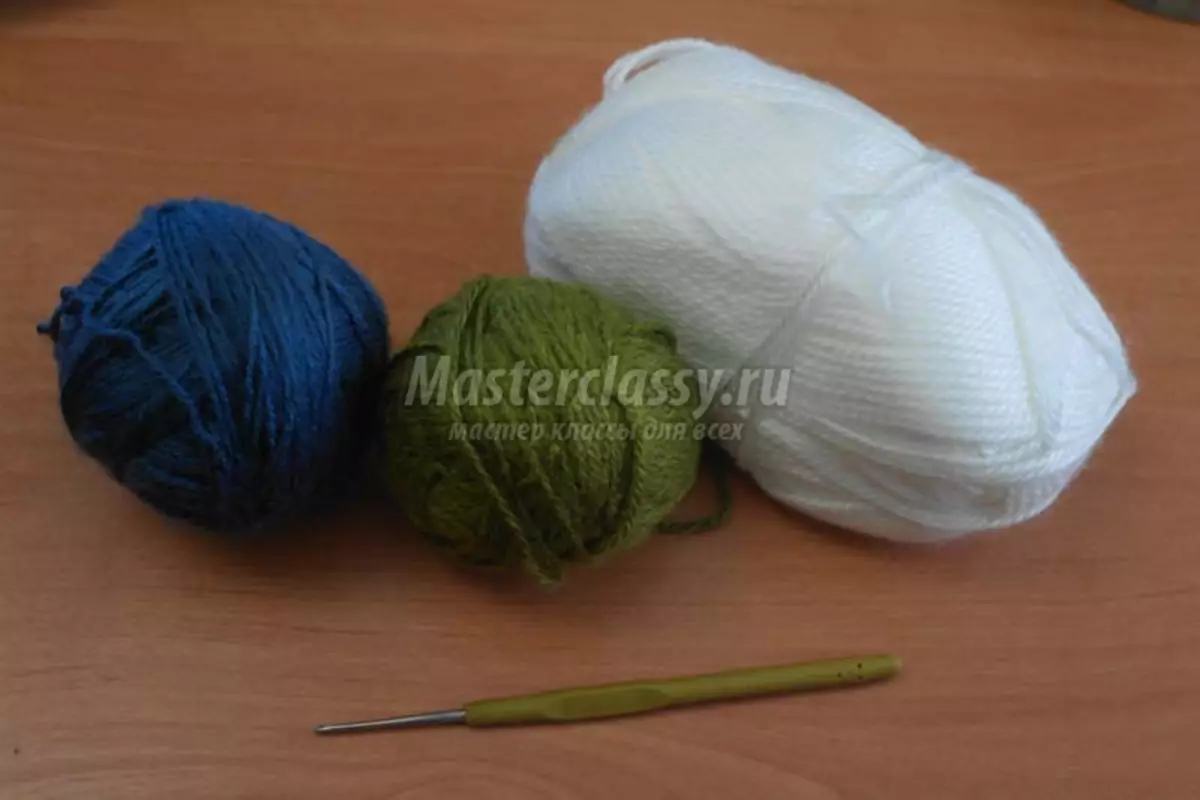
Bear the yarn, it is best to choose acrylic three colors - white, green, and purple or blue, and crochet at number three.
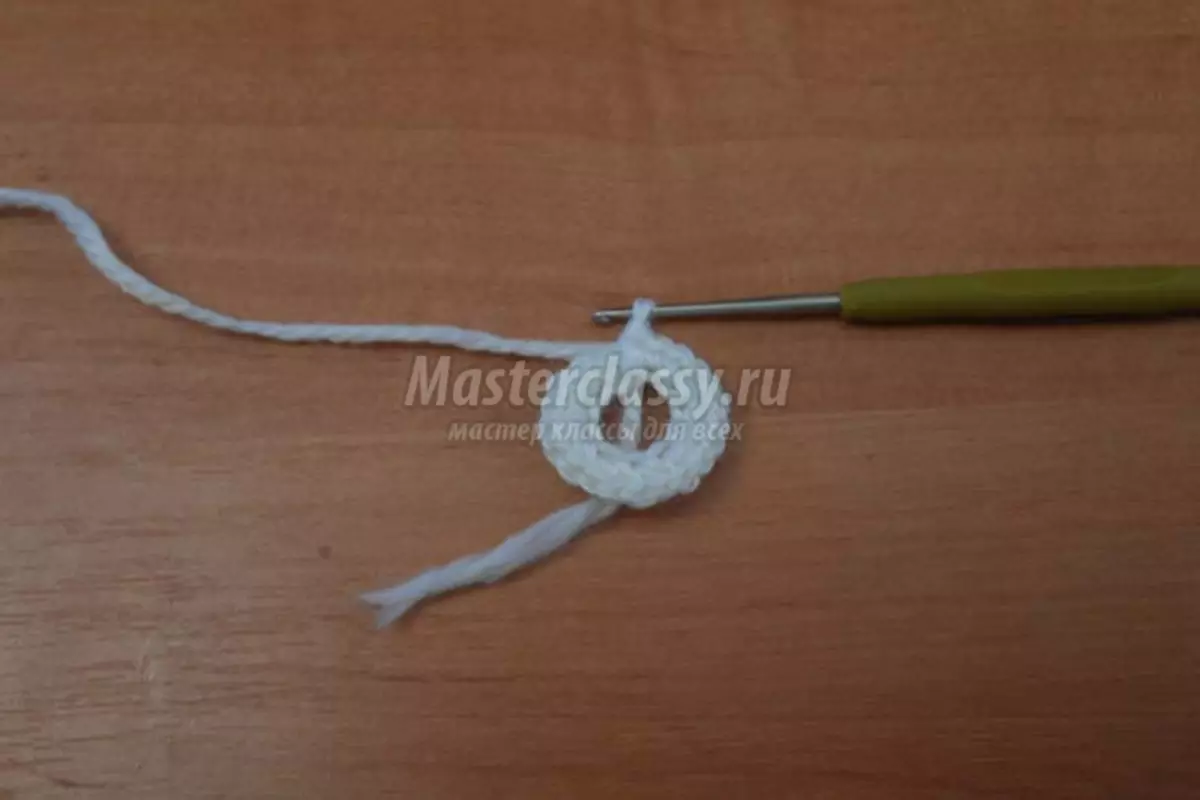
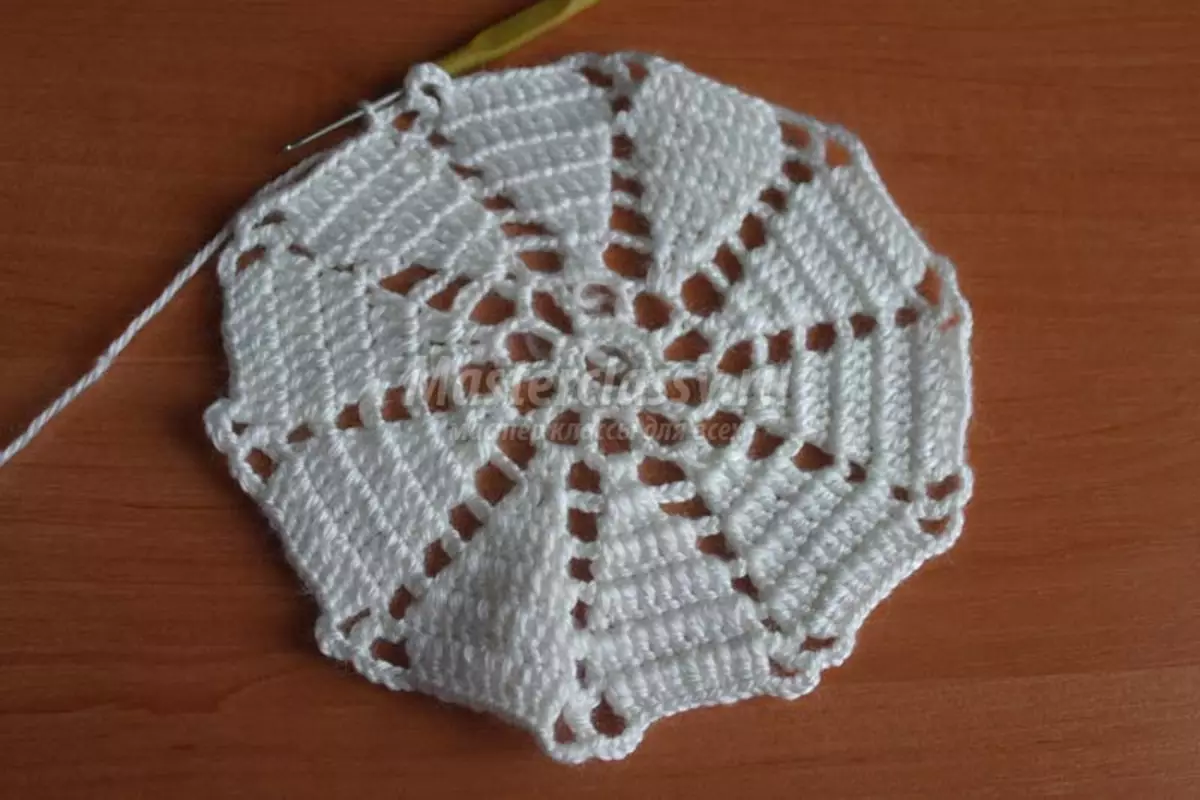
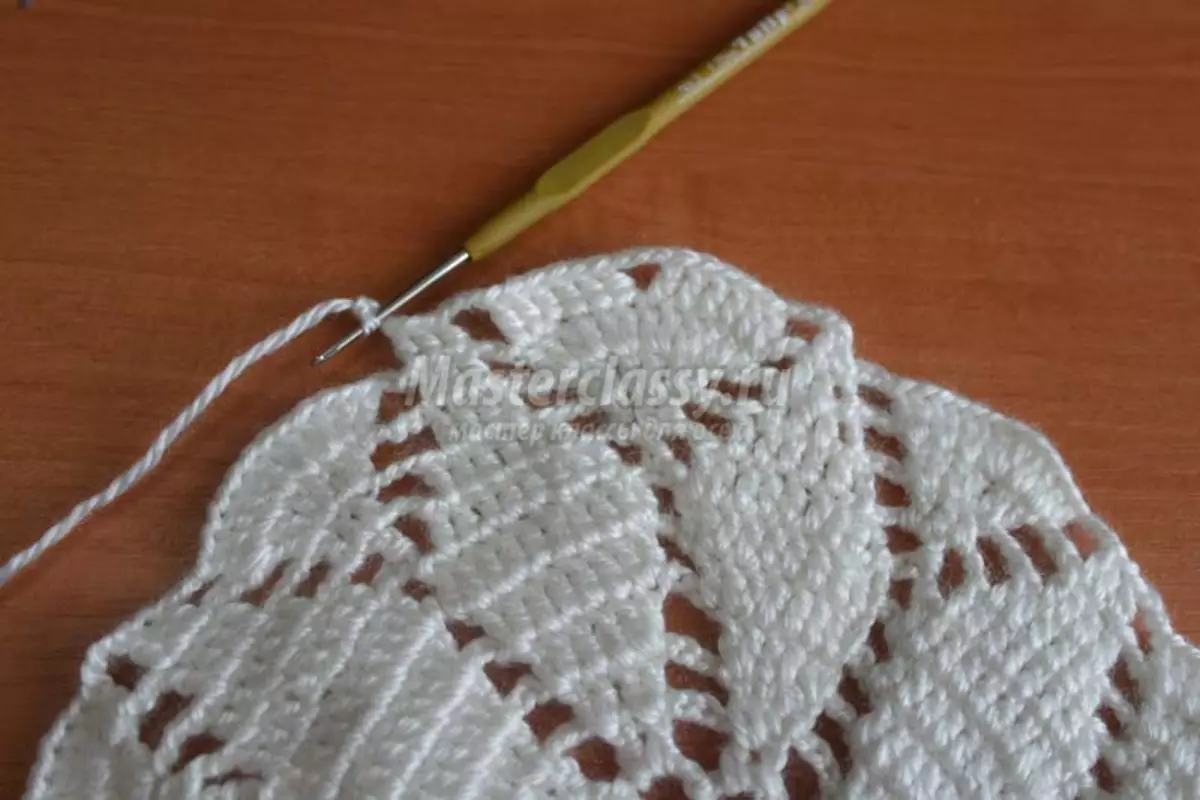
In order not to pull your time, quickly move towards the most manufacture of napkins. The first step you need from white yarn tie a chain of ten air loops, which we closure into the ring using a connecting column. The second row adopts simple columns without Nakid. You must check in each loop of the previous row two new columns. In total, we had twenty loops in the second row. Well, it's certain too simple and easy.
After that, tie a chain of ten air loops and secure it with a column with two nakida in the second loop of the previous row, that is, through one. As a result, a small arch should be obtained. In order to completely finish the third line, you need to peck back nine arches, but here the number of air loops in them should be not ten, but seven. In the fourth row, we are following two columns with Nakad into each arch, but at the same time there are four air loops between the columns. And in the next row, we, from each column with an attachment, we encourage two columns with the same Nakad. In total, four columns should be over each arch. And also insert four air loops between the columns.
Article on the topic: New Year postcards do it yourself with children step by step with photos and video
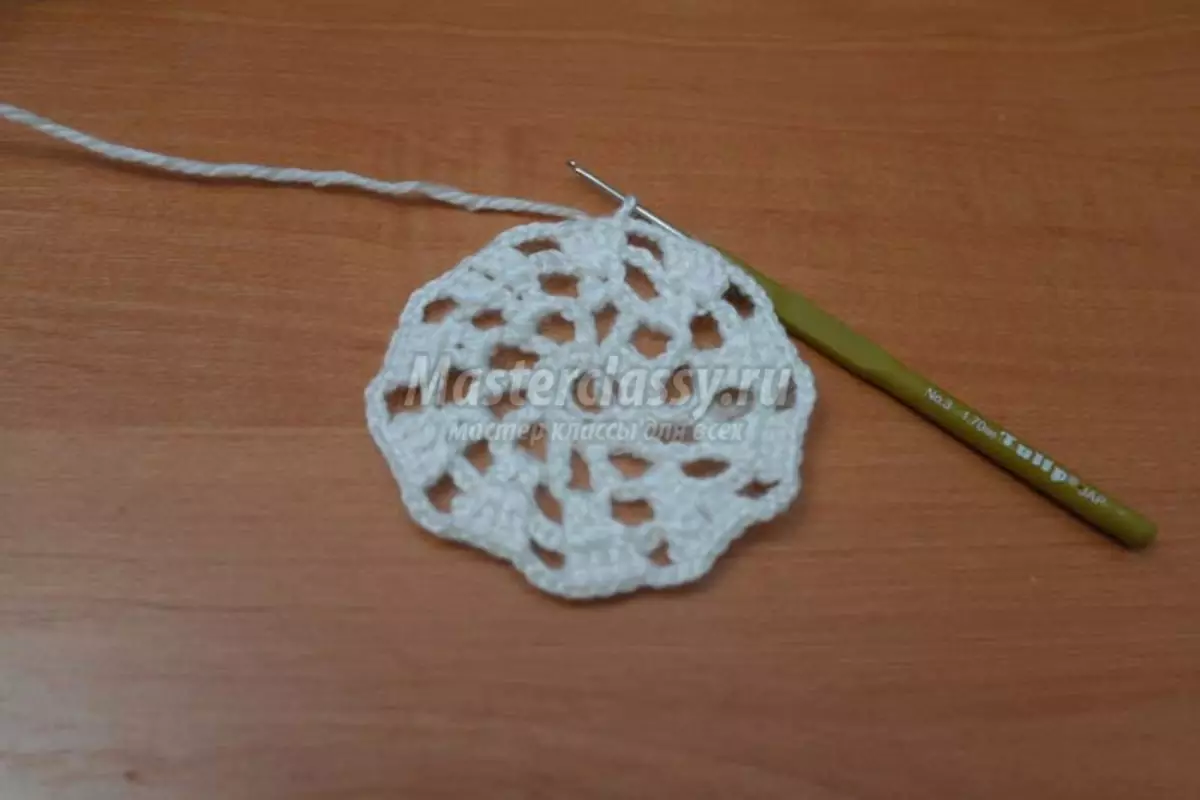
The sixth row is pronounced in the same way as the previous one, only in this case above the arch it is necessary to recover six loops (of which two columns with Nakud are considered extreme) and also four air loops. In further rows, you must add two columns in each arc.
In the case when there will be ten columns in one line, proceed to the process of the accumulation. To do this, you need to make new petals so that in the future the canvas did not pull. Instead of 10 eight columns with Nakud, and over the arch initially, instead of 4 - three air loops. After that, the column without a nakid and again three air loops.
The new series is written according to the following scheme: six columns with Nakud over a large petal, then three VPs, over the arch, we feed three columns with one nakid again three air loops. We continue to knit so much to the end of the row.
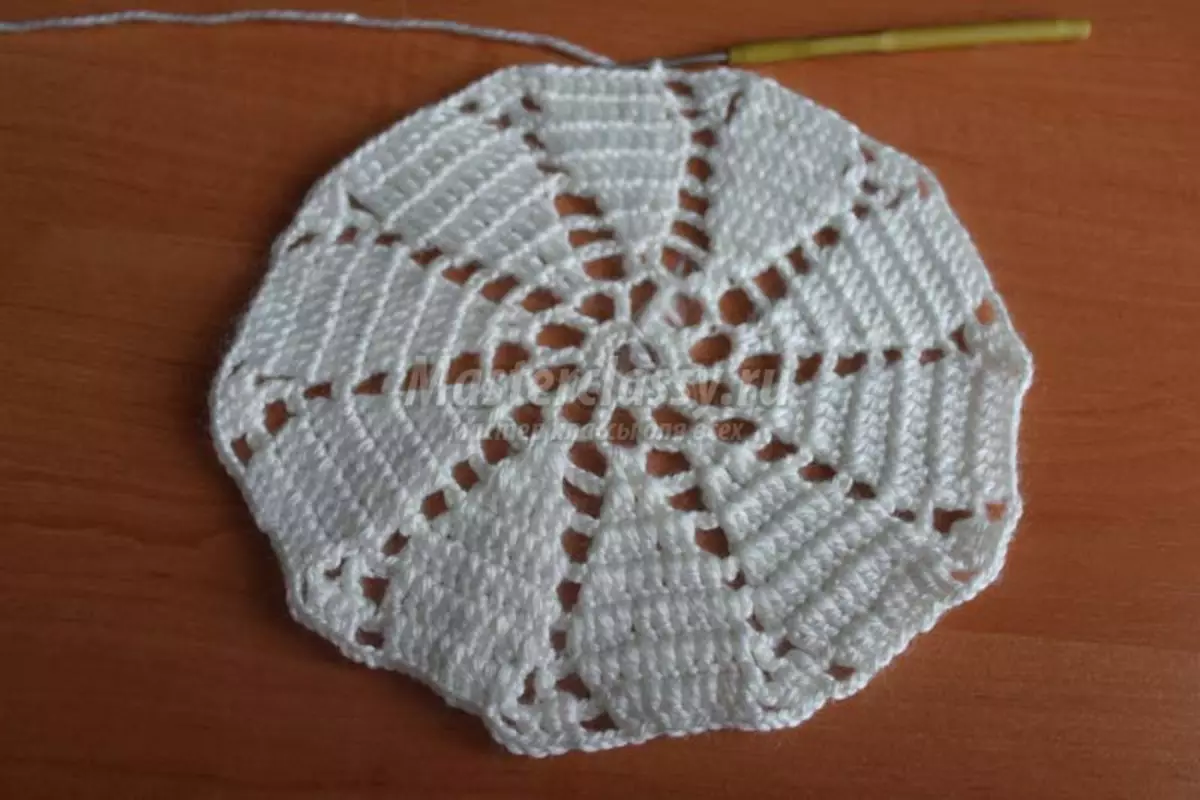
Further, we do this: there are already four columns with Nakud over a big petal, then we make three air loops, then you knit 6 SSN over the arch (we have two columns in each loop) and again 3 VP. I repeat this scheme until the end of the circle.
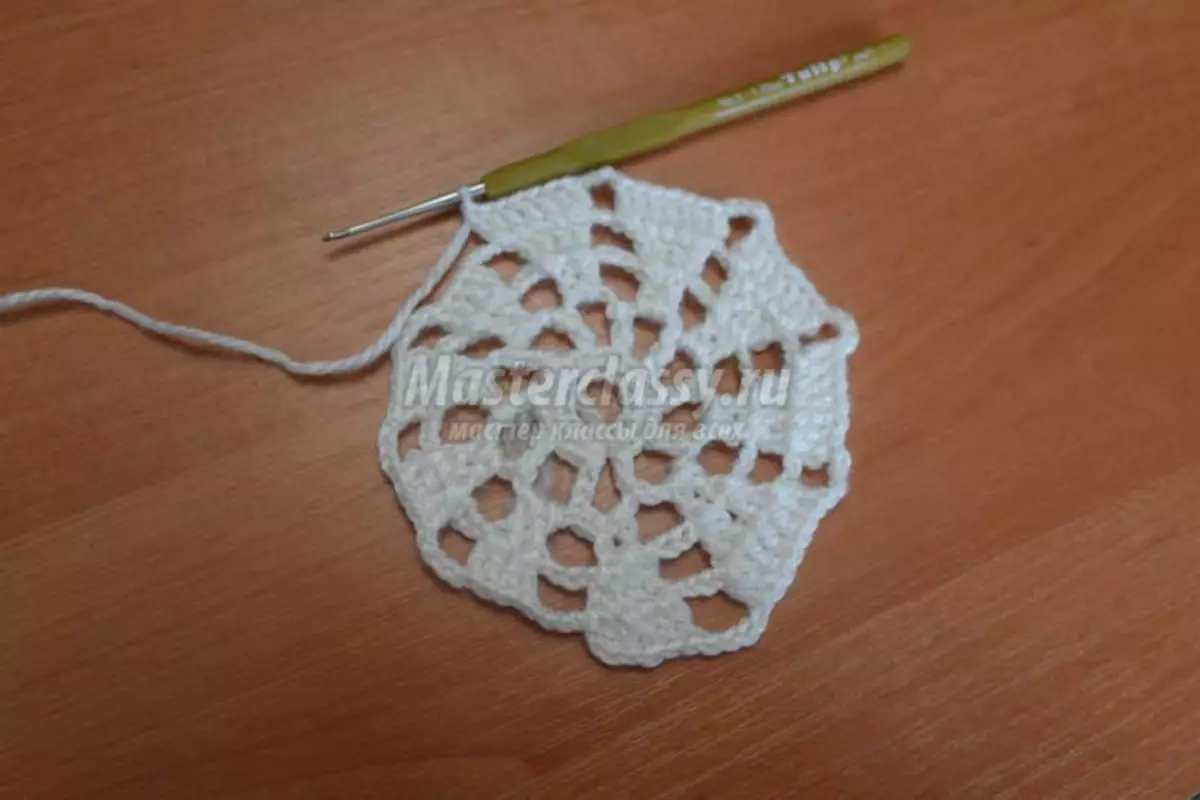
The following row: three SSNs and as many air loops, then over the arch 12 columns with Nakud, and three VP.
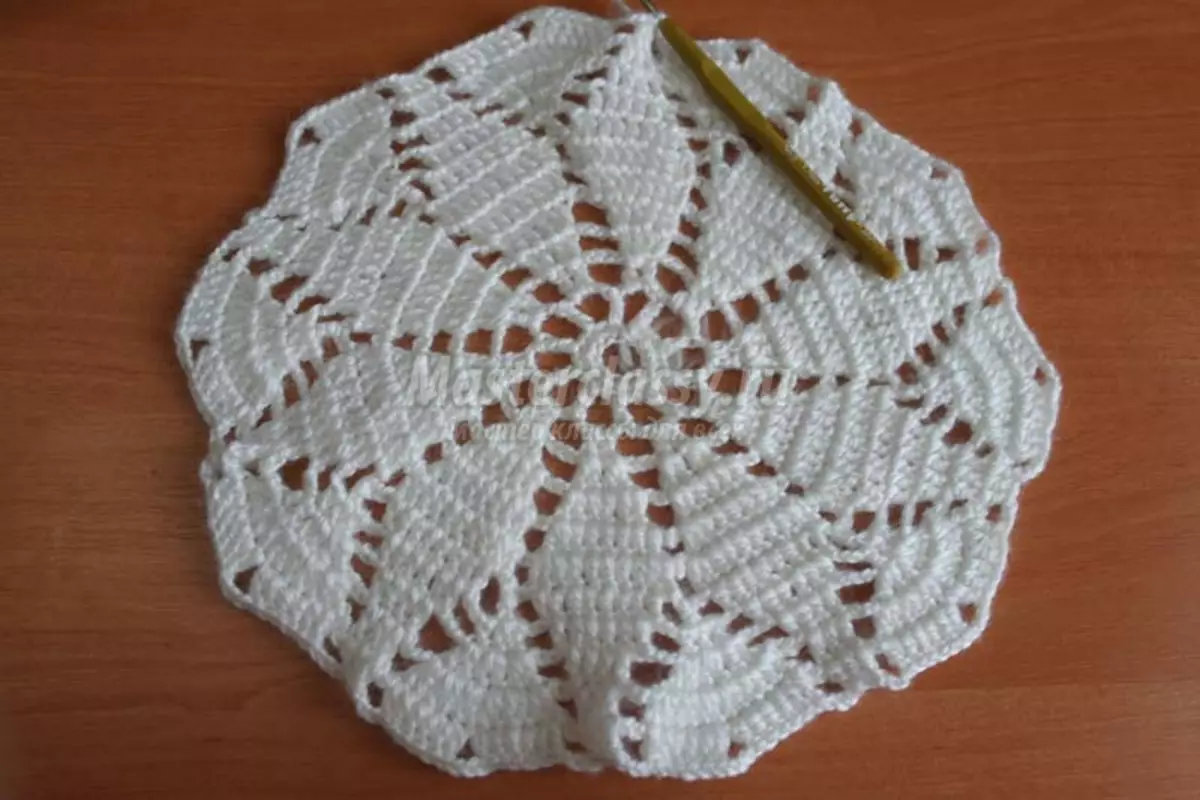
The photo shows how the napkin looks like at this stage before we started to prick the base under the borders.
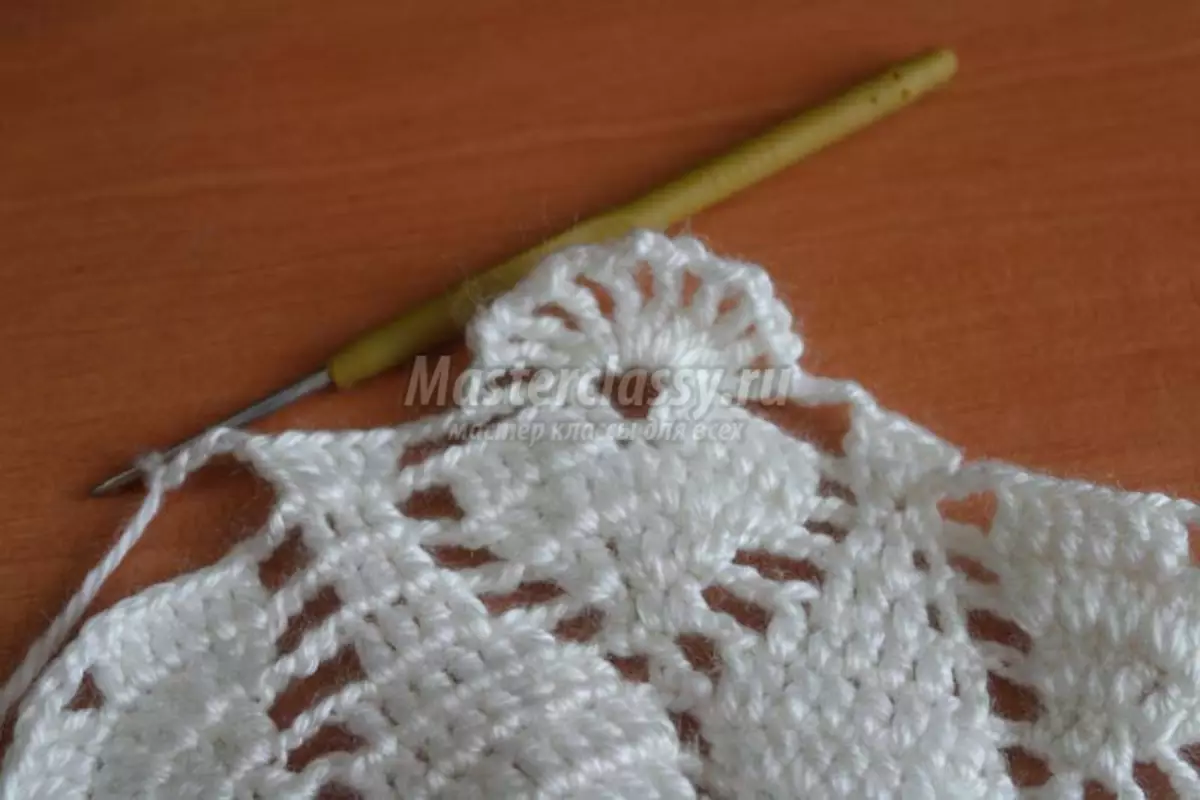
Further row in the same way as the previous one, but in this case we will unsubscribe not 12, but six columns without Nakid over the arch.
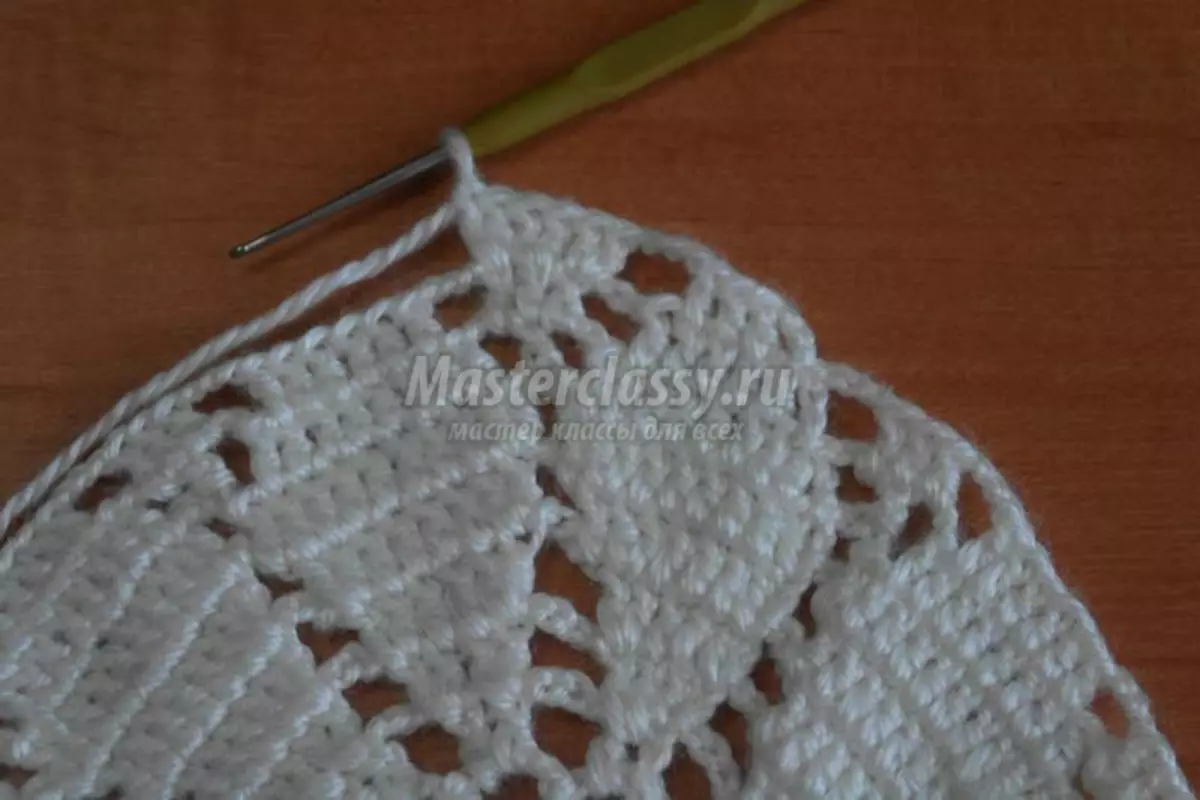
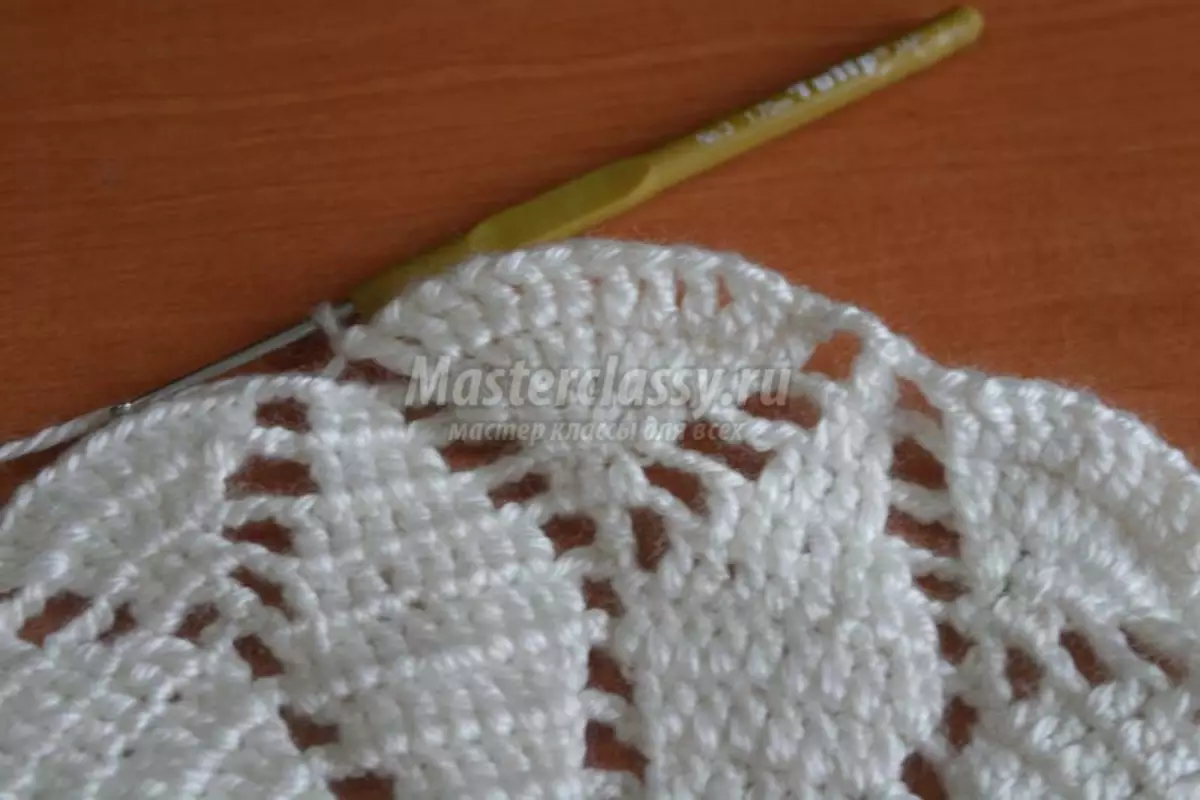
In the next row, there is ten arches out of five air loops in the next place, attach the last loop to the arc stands with a column with two nakid. Cut a white thread.
Article on the topic: Organizer for Moulin do it yourself from cardboard: master class with video
Only then take the yarn of the color of the grapes of the grapes, attach it to the arc and turn eight elbows elongated. Throw the hook through them and secure the semidolong. Check a pair of air loops and go to the confusion of a new berry.
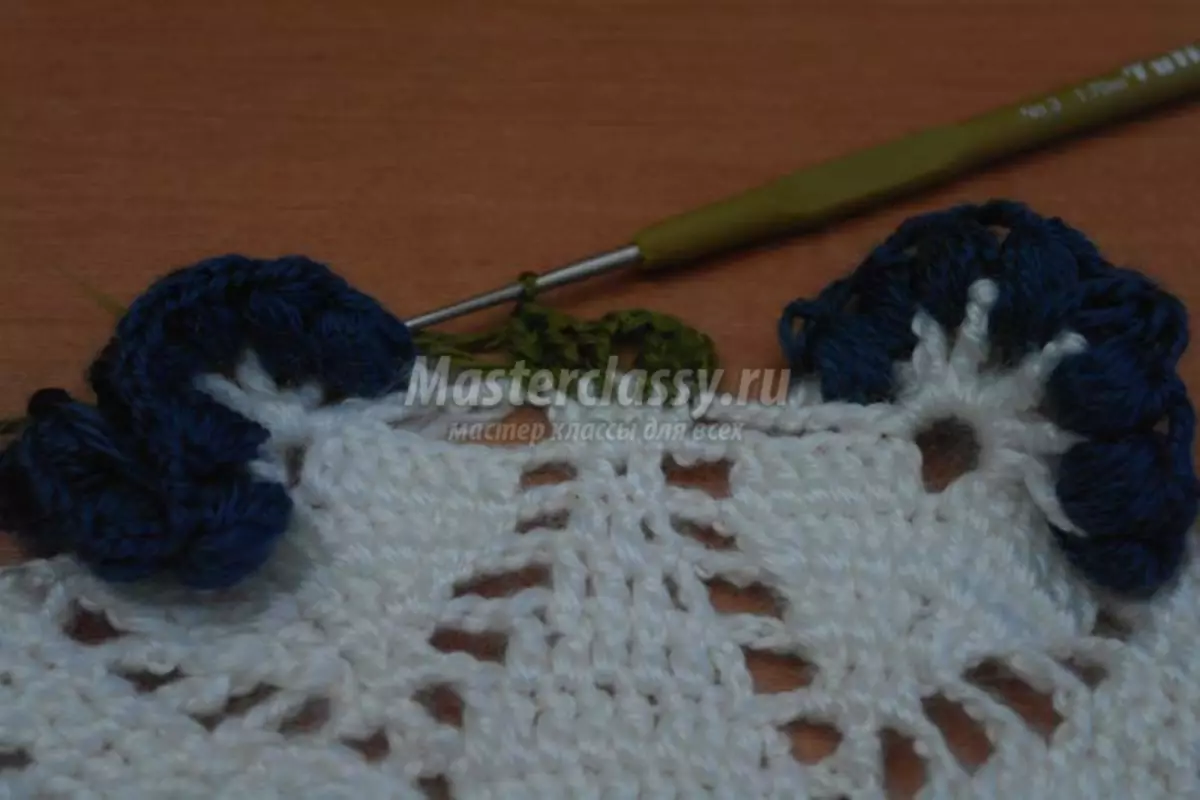
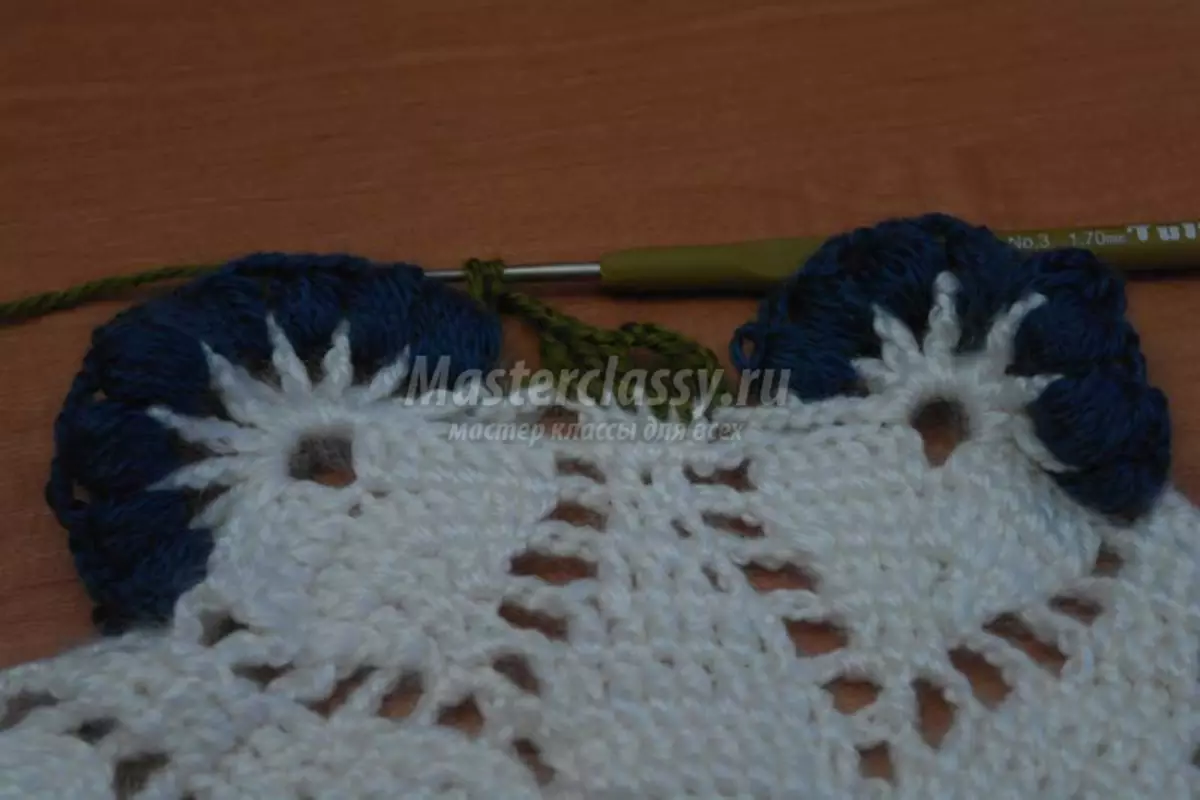
In total, nine berries in just one cluster. Cut and fix the thread.
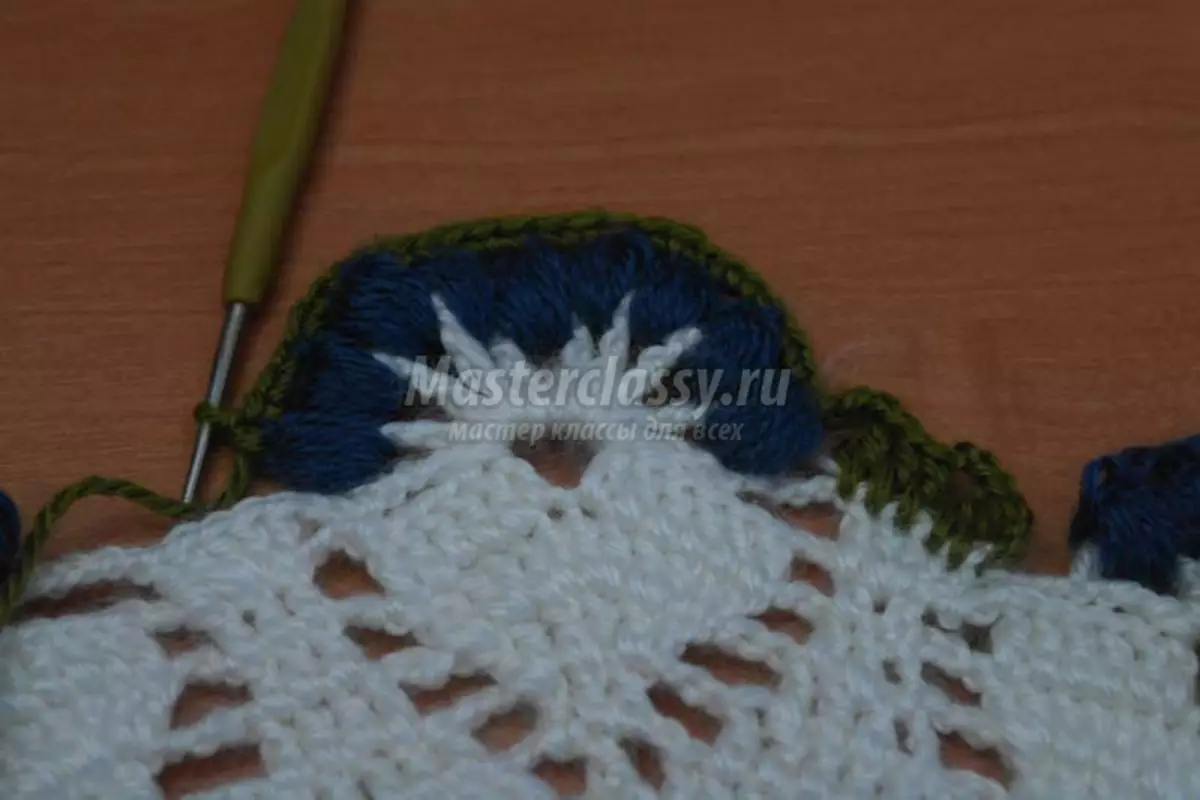
On each Ferra, they see the first tier of berries. Then, the green threads are tied by three columns with an attachment, two air loops, three columns with nakid.
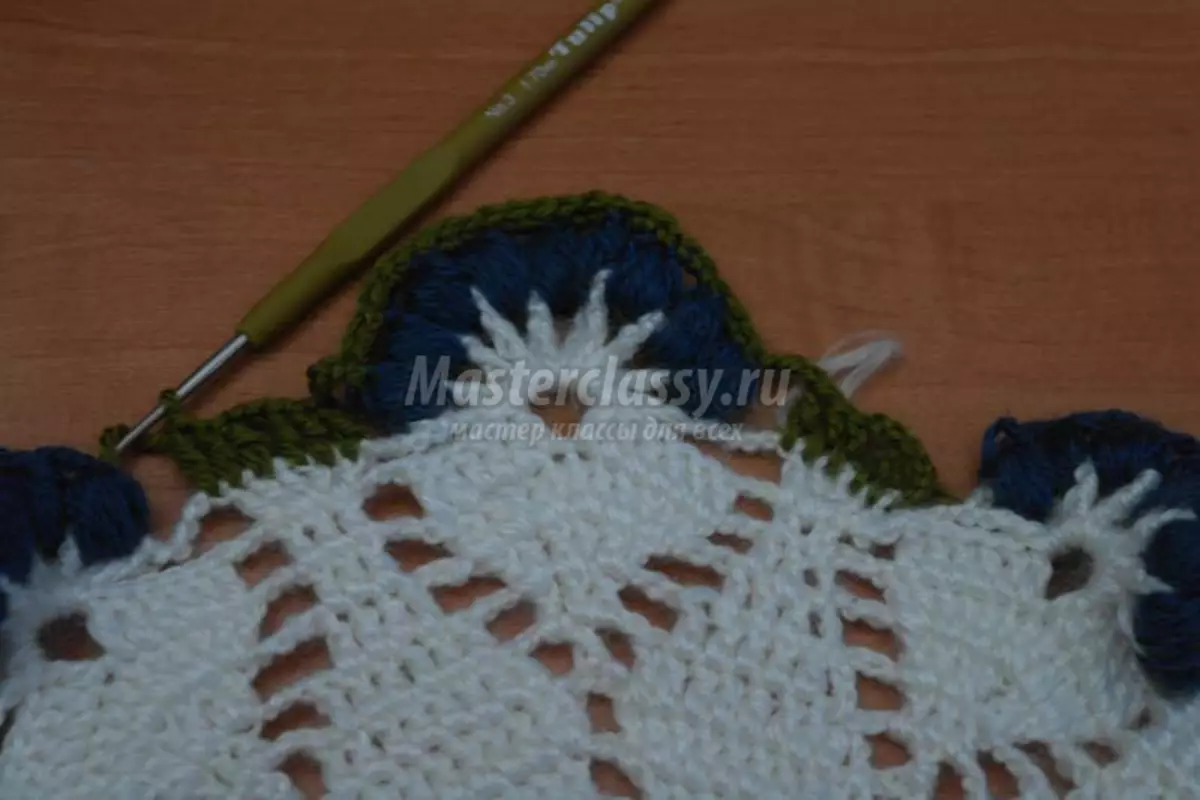
To go to the new cluster, tie three air loops. The cluster is tied up with connecting columns. They are tied between the berries themselves.
After that, make three VP, three SSNs, two VP and again three columns with Nakud. And repeat this combination to the end of the row.
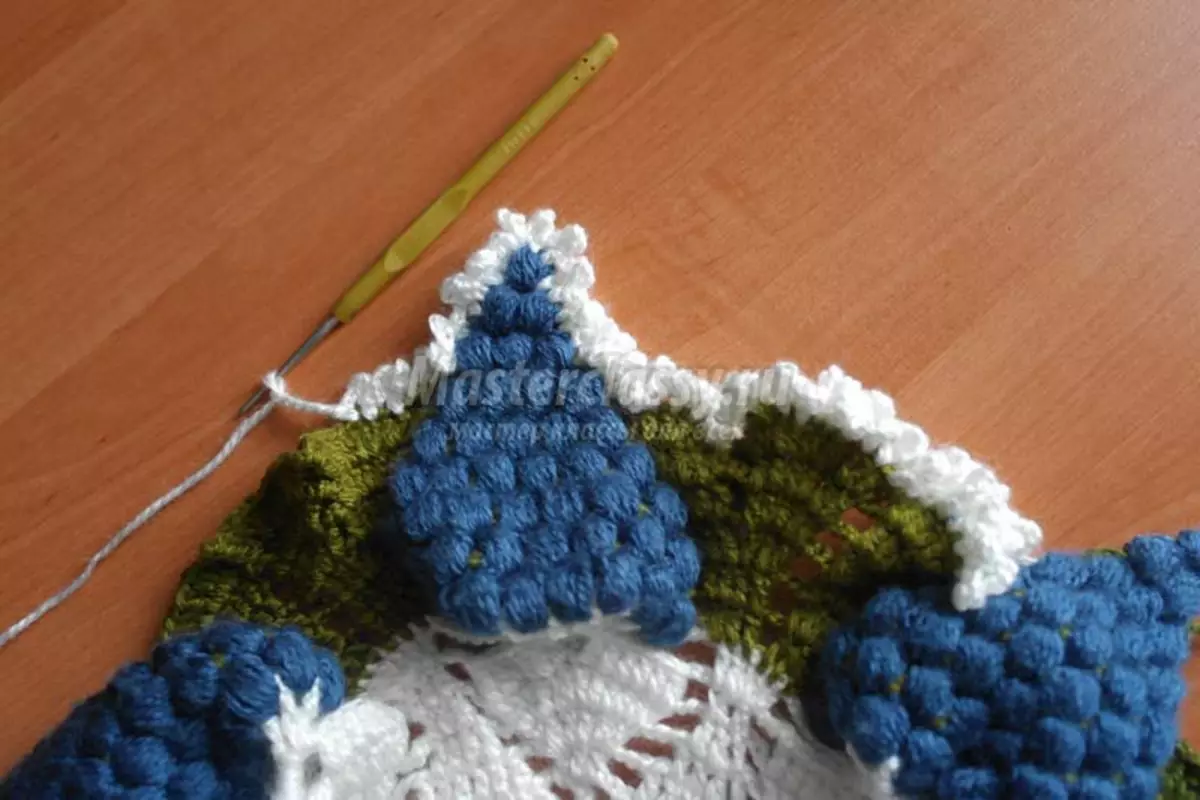
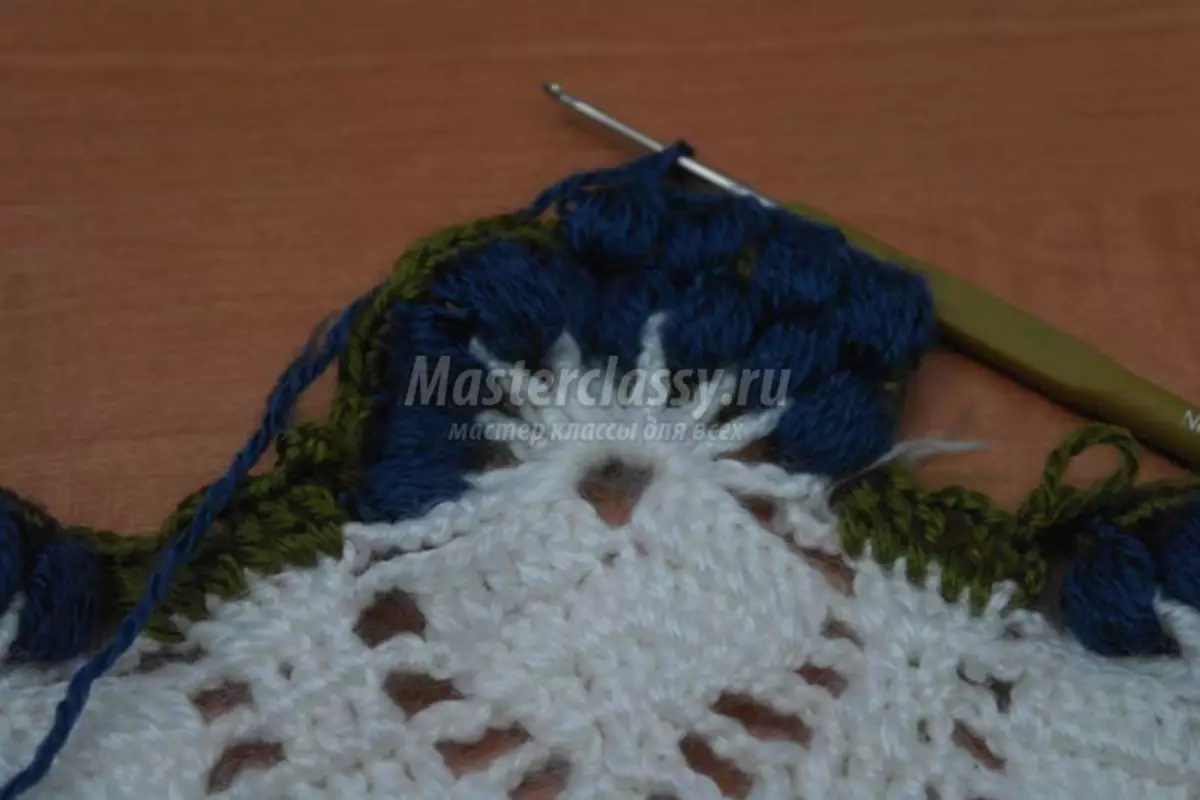
Only after that we begin to encourage the second row for each cluster.
We make it green thread, add for leaves on the column on each side. They should turn out to be wide. We do as long as we do not spread the whole bunch. All the ends of the thread cut and hide.
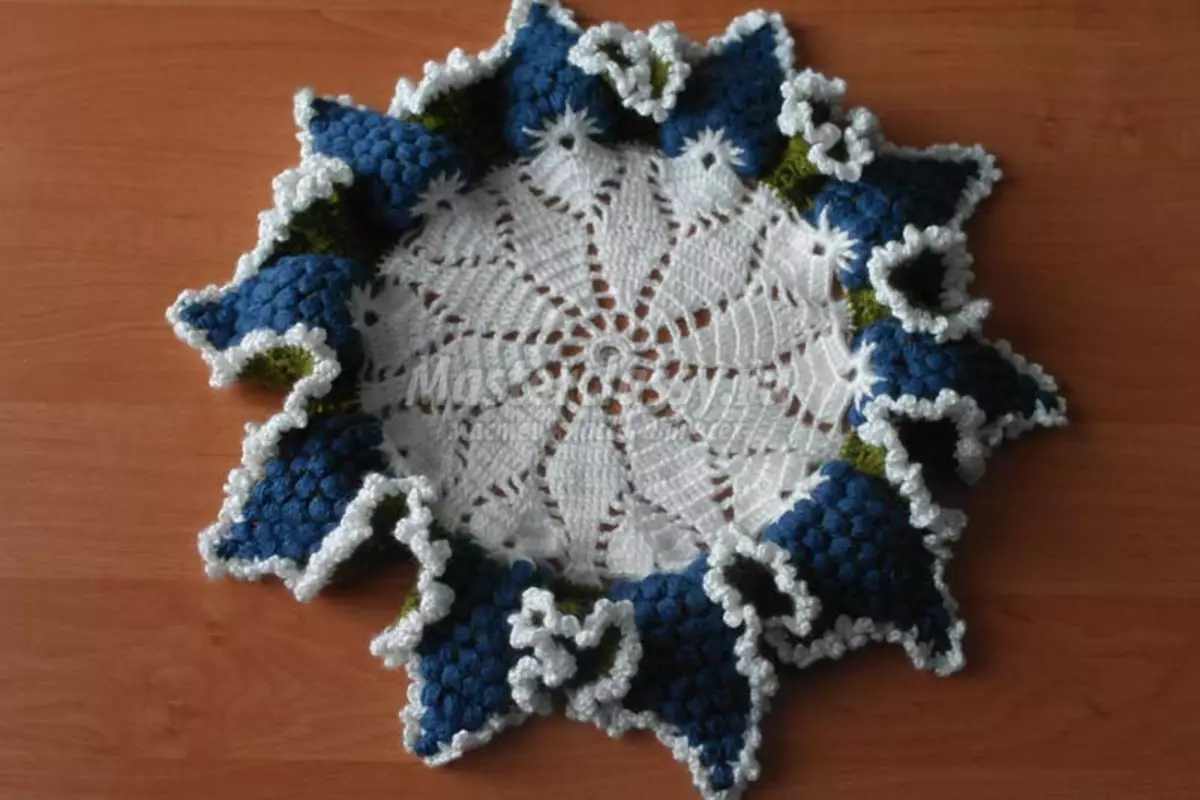
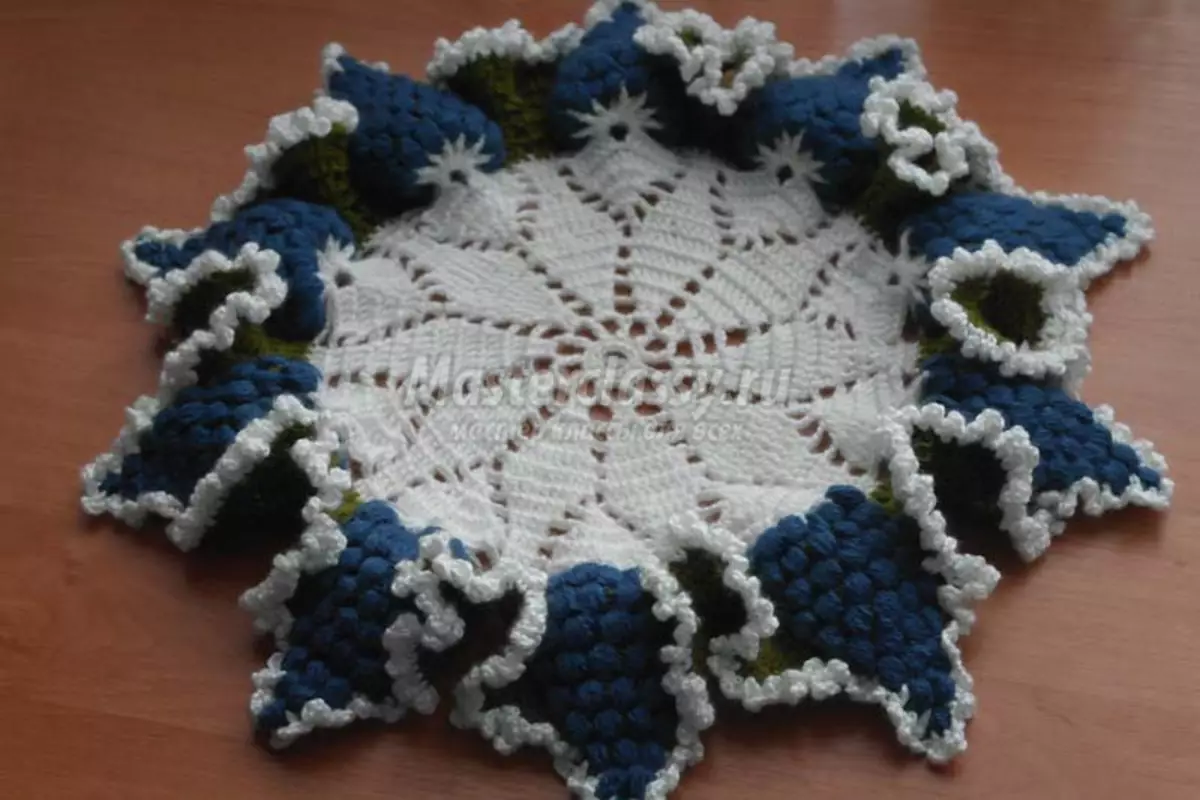
Napkin is ready.
Video on the topic
We offer to see a selection of video on how to create a napkin with a crochet.