
Points are not only fashionable at all times the accessory, but also one of the essential items for many people. High-quality and beautiful sunglasses or glasses for vision correction are the cheapest pleasure on modern standards, so this fragile accessory requires a very careful relationship. Naturally, manufacturers care about buyers, so in any specialized store you can see a fairly wide range of covers and cases for points. But despite the high functionality, they are all manufactured by one standard and cannot boast of particular originality of the idea. It will be much more interesting to make a case for glasses with your own hands, especially since the master classes presented in this article will not leave much time.
Floral appliqués
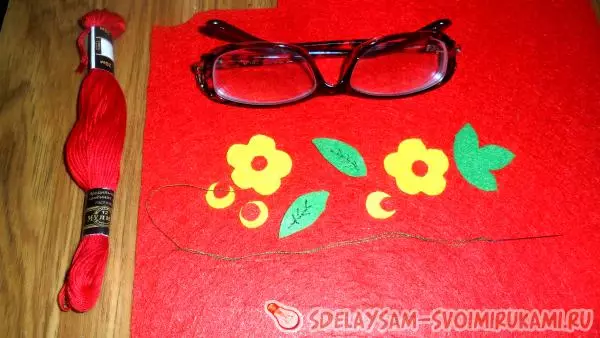
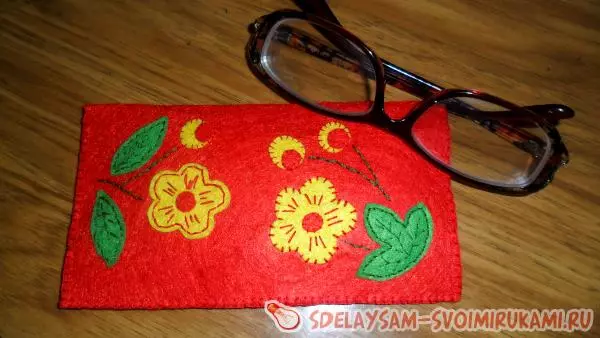
The master class on the manufacture of such a case for glasses from felt will be very useful for those who want to make an original gift to the elderly family members, because it often happens so that they have to search for their shackles around the house. The bright color of the cover is visible from afar, and it will help not to miss sights.
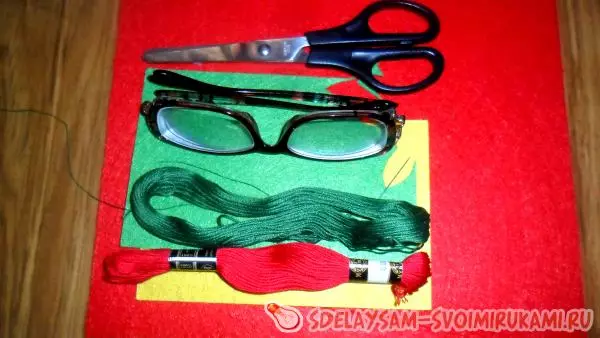
To create the product, you will need:
- A small cut of a dense felt cloth of a bright red shade;
- Segments of green and yellow shades felt for leaves and flowers;
- Threads of two colors - green and red;
- Needles for sewing and scissors.
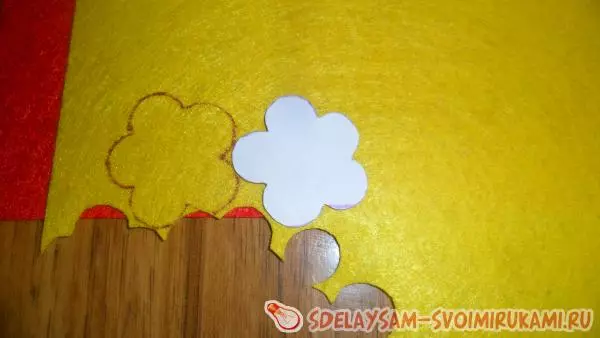
The shape of flowers and leaves can be created by patterns by copying the drawing of the pictures you like, and you can draw on your own minimalistic flowers:
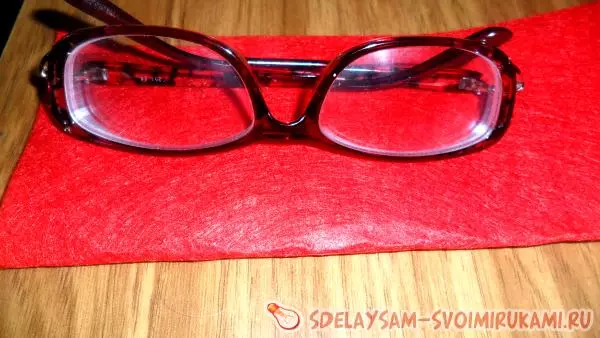
After that, we produce the length and width of the points themselves. Cut the piece of red felt. Its length is equal to the length of the glasses plus an increase in the seam, and the width is a double width of the glasses to which they also add a little to freedom.
Article on the topic: Holder for threads
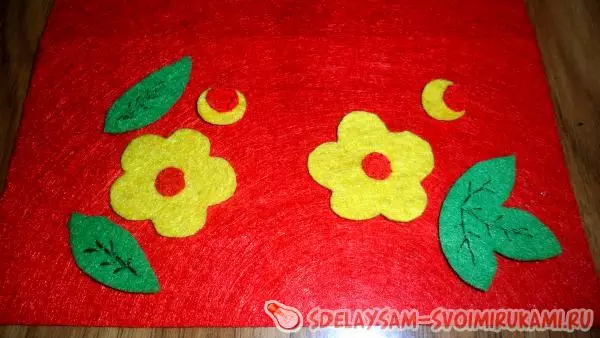
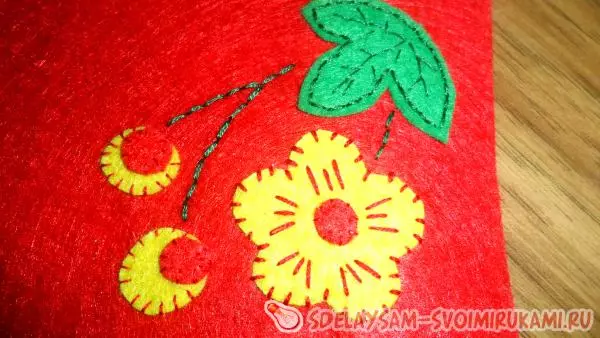
From the green felt, we cut the leaves - two single and one triple, using a thread with a needle stitches of green color form a streak on leaves.

From the residues of the red felt, we cut small circles and sew yellow colors in the middle.
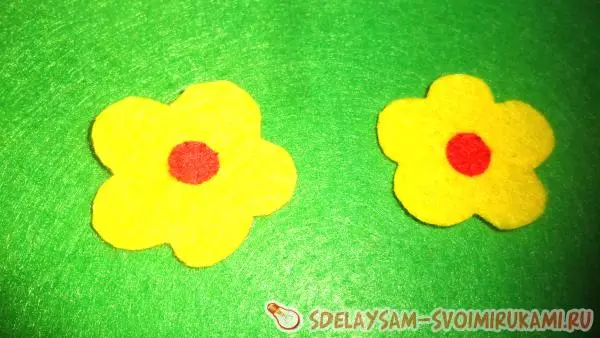
In total, the appliqué will need two flower, three leaflers and three berries made of yellow and red circles imposed one on another.
All decor elements have on one half of the large red segment of the felt.
Flowers and leaves should not be placed close to each other, but at the same time they should not be scattered around the edges of the case.
Yellow flowers are sewn with red thread stitches at some distance from the edge or register stitch through the edge.
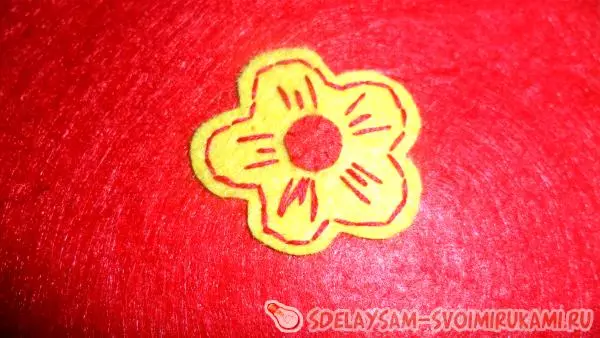
You need to try so that all stitches are the same in size. Leaves attach green threads.
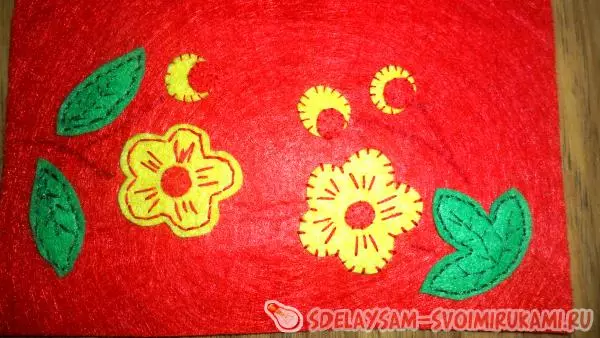
We plan the location and shape of the stems, then on the outlined lines lay the stitch chains with green thread. All the ends of the threads are refueling and fixed on the outline of the product.
Last but I connect the sides of the stitch case through the edge. If there are skills, you can speed up the stitching process using the sewing machine.
The original present is ready!
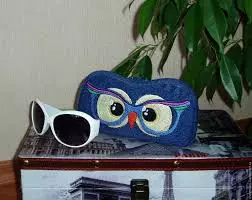
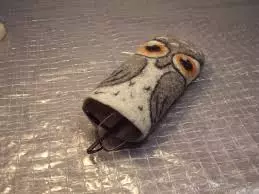
Also an excellent option for a gift grandmother or grandfather will be a case for points in the form of owls, as in these photos:
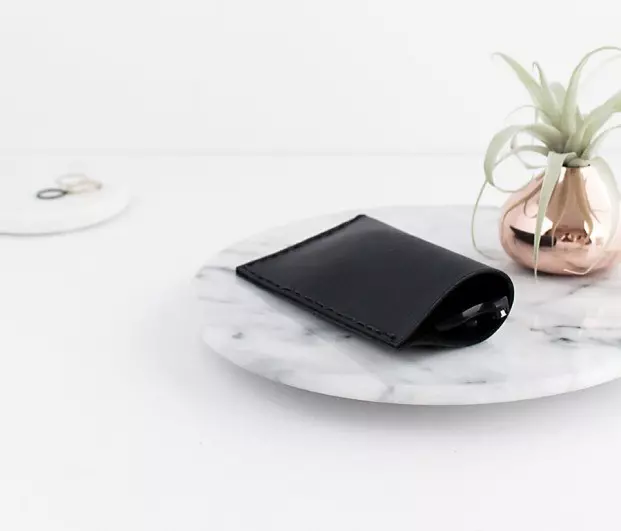
For restrained and stylish
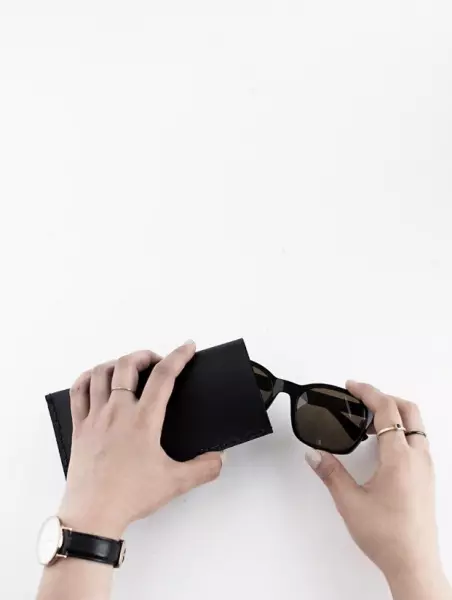
It looks very cool here is such a case from the skin of classical black. Even novice needlewomen will be able to make it a maximum in one hour with the help of step-by-step photos. Thanks to universal color, it will suit any style, and it will be able to use it both women and men.
The following materials will be required for the case:
- a piece of dense skin of black color;
- Capron or reinforced thread in color;
- scissors;
- Lighter or match.
Article on the topic: Dragonfly of beads and beads for beginners: master class with photo
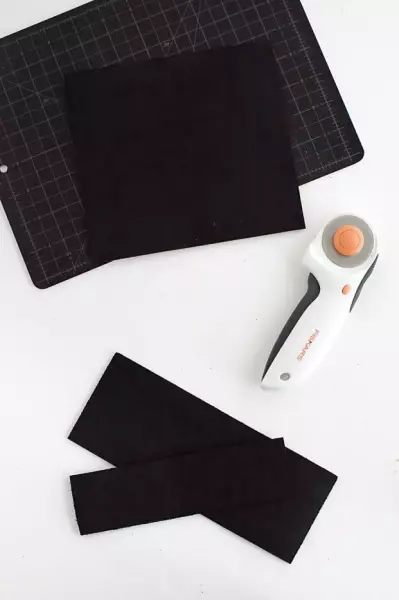
To begin with, cut out the rectangle of such sizes from the skin so that folded in half, it corresponded to the size of the glasses and still remained a small supply for the convenience of use.
Deeping a little bit from the edges, we make holes at an equal interval.
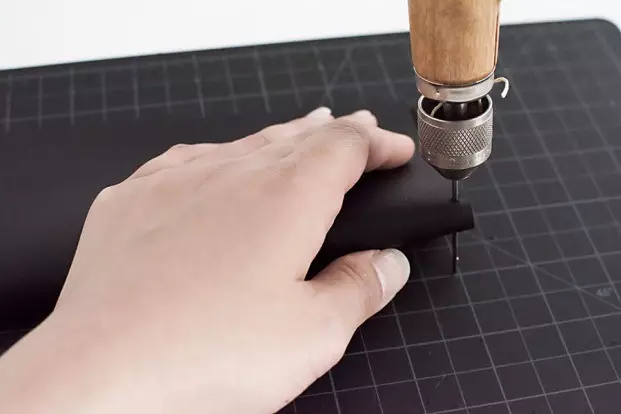
Then, in the holes, we felt the needle with the thread, connecting the edges of the stitches.
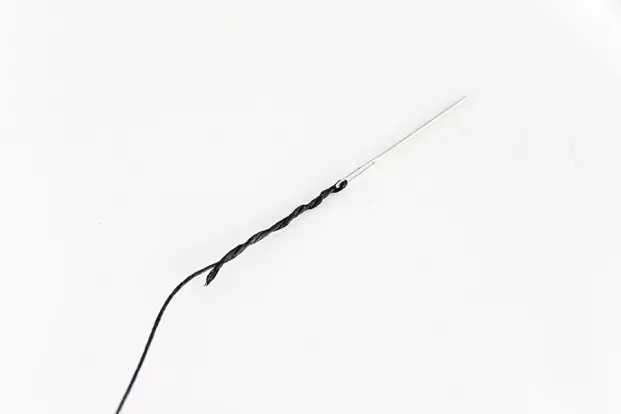
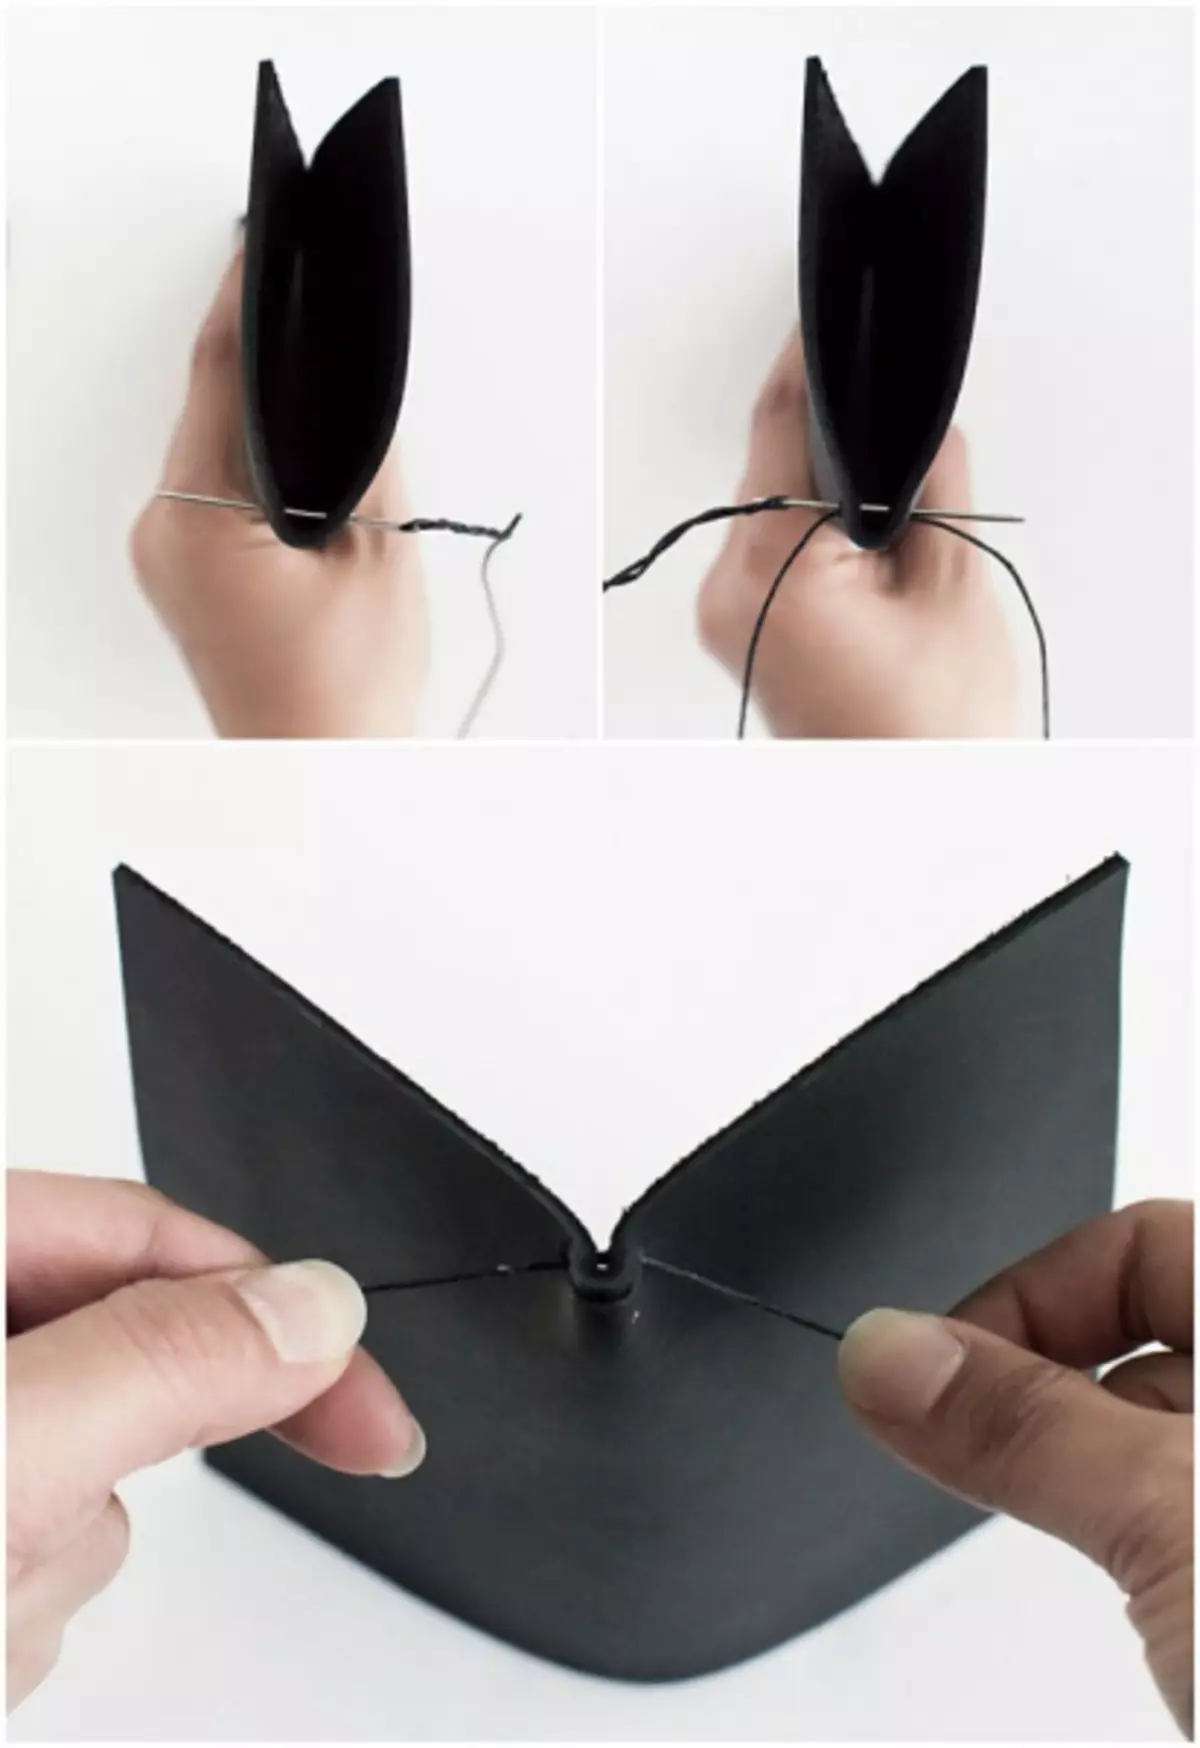
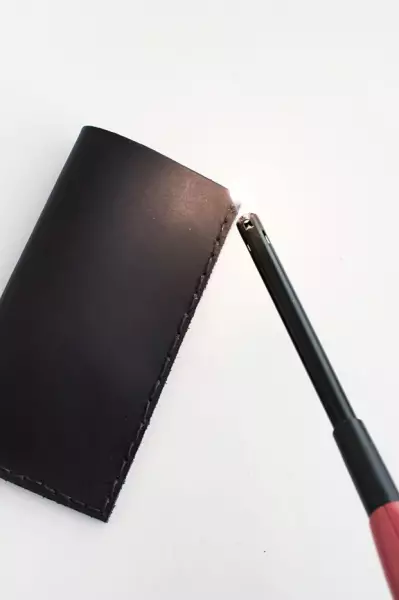
The top edge is left open, the end of the thread fix the knot, cut off and melt the tail of the lighter so as not to be dissolved.
All is ready!
With a fastener
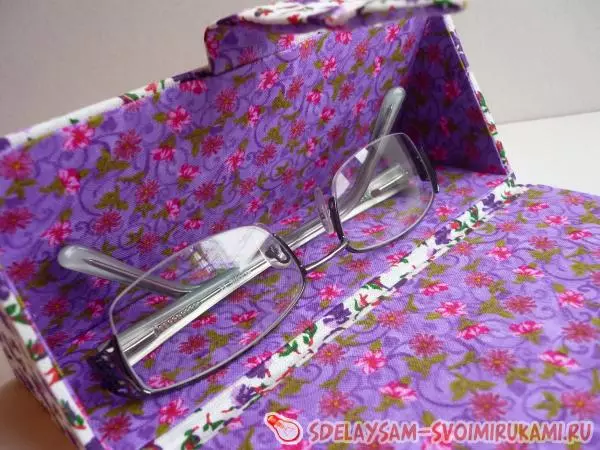
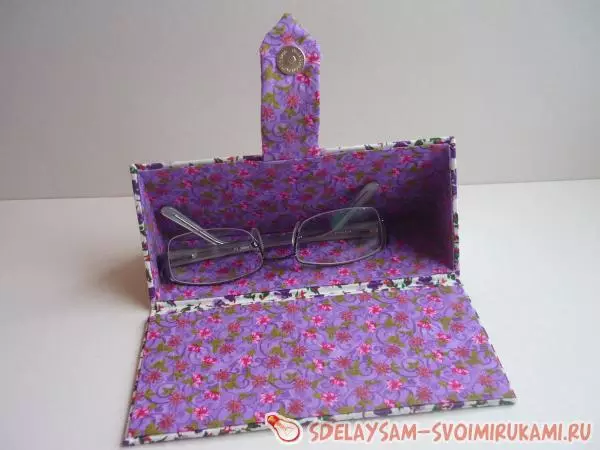
This wonderful case can be made with your hands from the cardboard as a gift to a tender and romantic girl or a woman.
To make such a case, you will need:
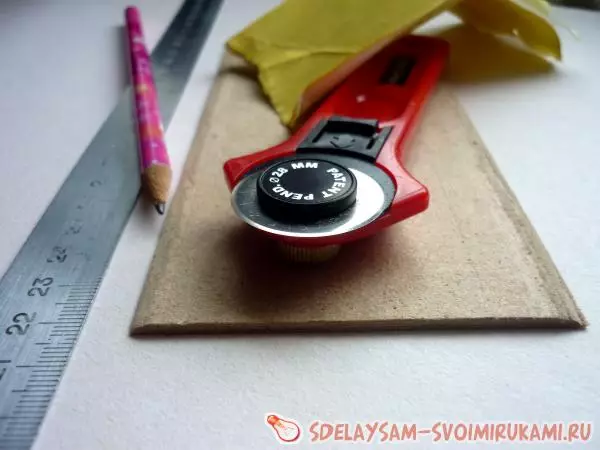
- Solid cardboard with a thickness of at least 2 millimeters;
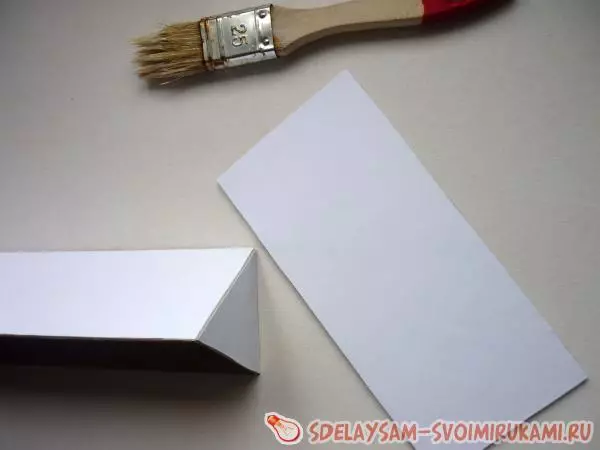
- white sheet of thick paper size A1;
- Cut color x / b fabric;
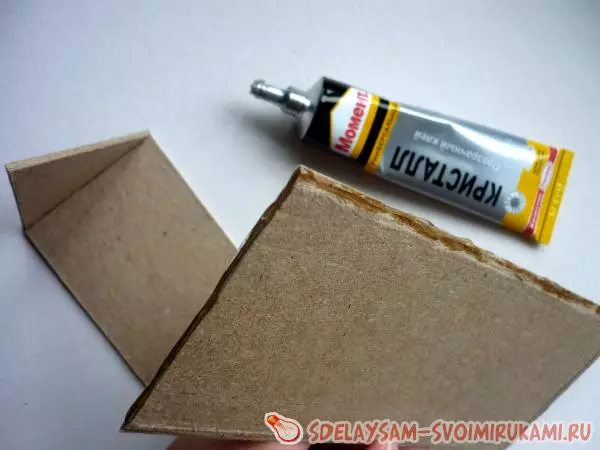
- Glue of several species - the usual PVA and the moment is universal;
- Construction (painting) adhesive tape;
- magnetic clasp bag;
- Pencil, ruler, stationery knife, brush, thread with needle, scissors.
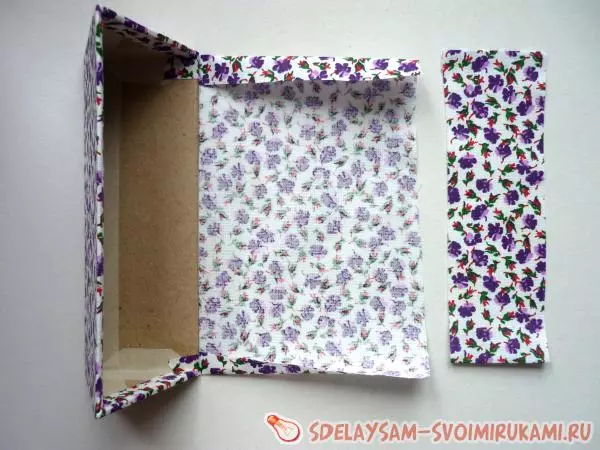
First, it is necessary to cut the composite parts of the future Cardboard case with the help of a stationery knife.
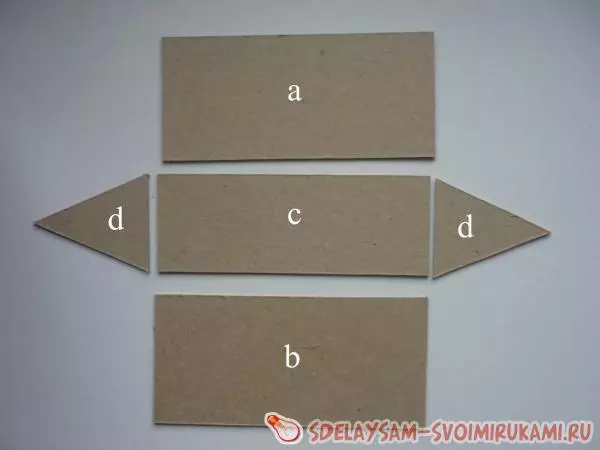
This scheme presents the design of the case and the dimensions of each part.
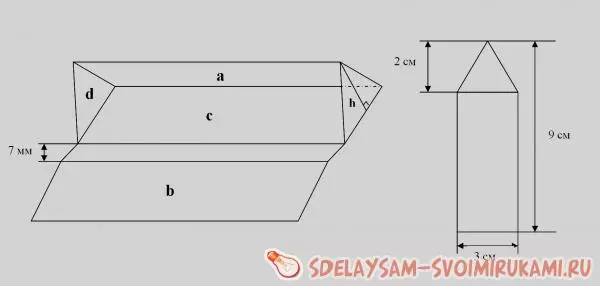
According to this scheme:
- a = 16.6 x 7.6 cm;
- b = 17 x 8 cm;
- C = 16.6 x 6 cm;
- d = 6 (at the base) x 7.8 x 7.8 cm;
- H = 7.5 cm.
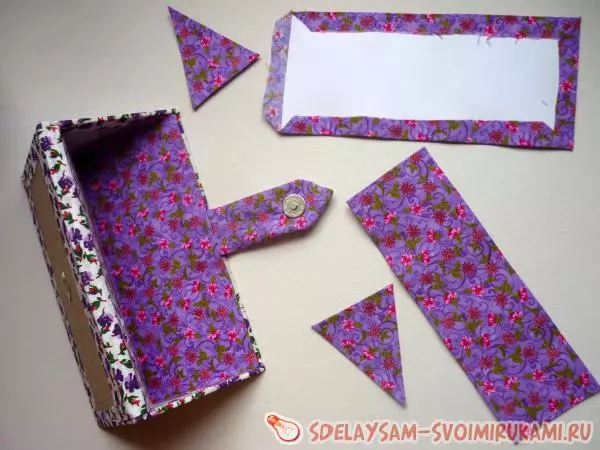
After that, you need to duplicate each detail twice, cutting the same pieces of white paper. For the parties "A" and "C" the length of paper parts from the outside should be more than four millimeters.
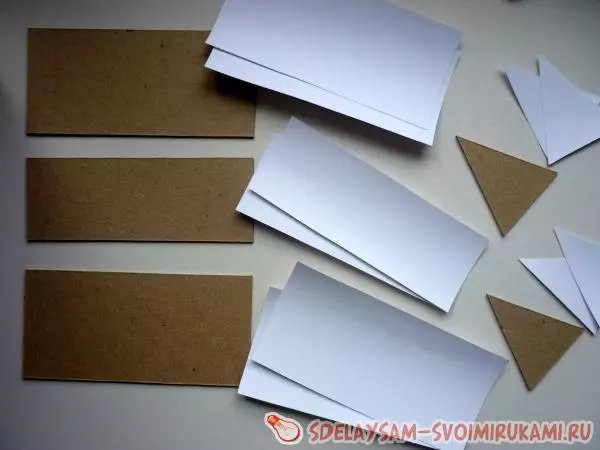
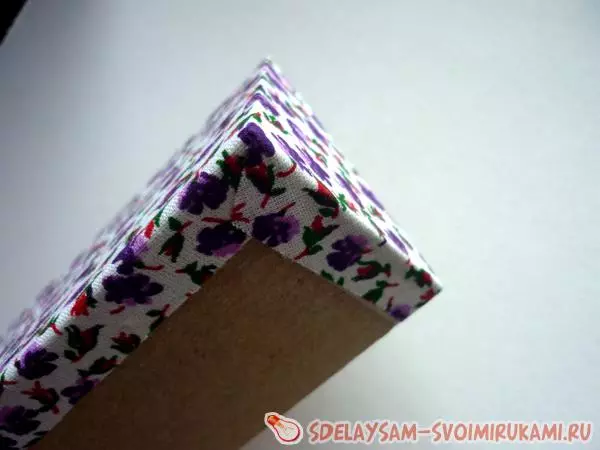
Parts cut off at an angle so that there are smooth joints in the finished product.
Triangles need to attach glue at right angles to the base.
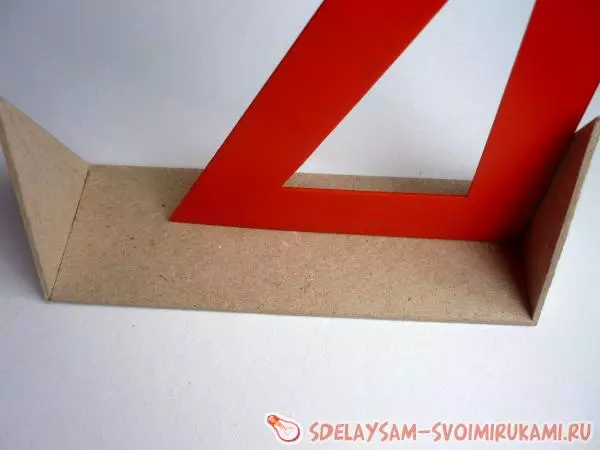
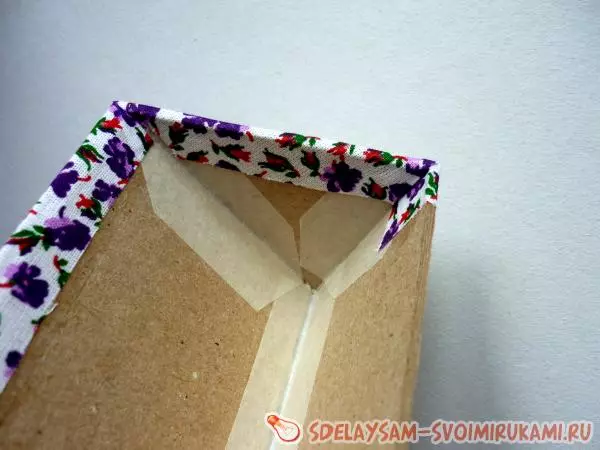
Three cuts of the details "A" with glue and securely fix it between the side parts cut into the side inside.
As a collected form should turn out an external right angle.

Next, it is necessary to smoke with a painting ribbon all the external and internal joints and corners.
Article on the topic: Panels from buttons do it yourself for children: master class with photo

For the detail "A", the two sides "D" and one side of "B" stick white paper parts.
Cut the segment of the fabric in order to cover them the sides of the details "A" and both "D". We glue the case with a cloth, aligning it with the help of a stack, cut off, we rush the corners.
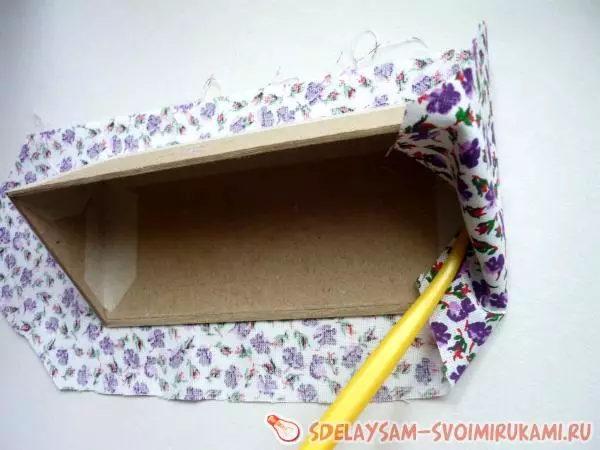
From the inside of the detail "B" cut out the recess for the magnetic fastener.
Cut the whole segment of the fabric for the details "C" and "B". For the side "C" we glue a separate piece of white watman, three sides are wearing a cloth. Confirm all this to the basis of "C".
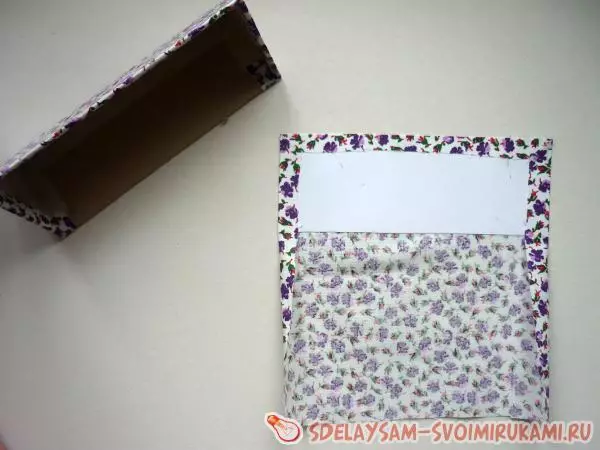
Next you need to make a clasp for a fastener. His length is sixteen and a half centimeters. Insert the detail of the paper in the stitched part and we attach the second part of the magnetic fastener to the voyage.
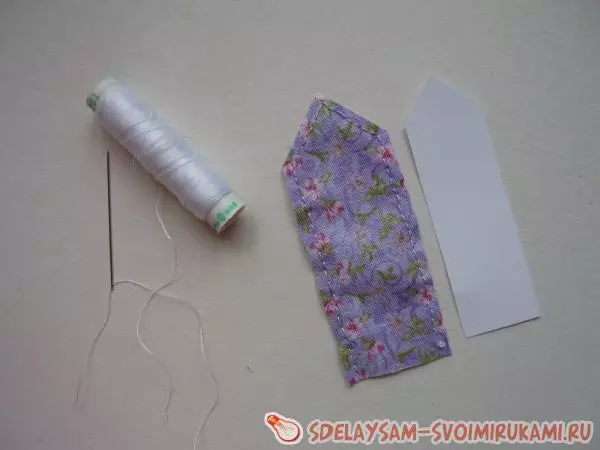
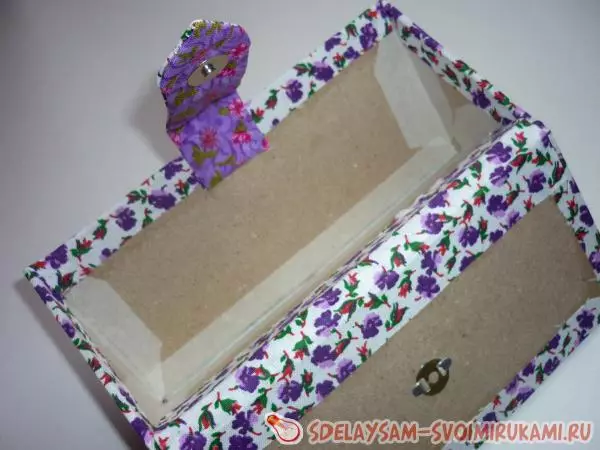
Fix the fastener on the case with glue moment. The inner sides are gluable with a fabric of a contrast color, pre-laying paper parts.
Case can be used!
Video on the topic
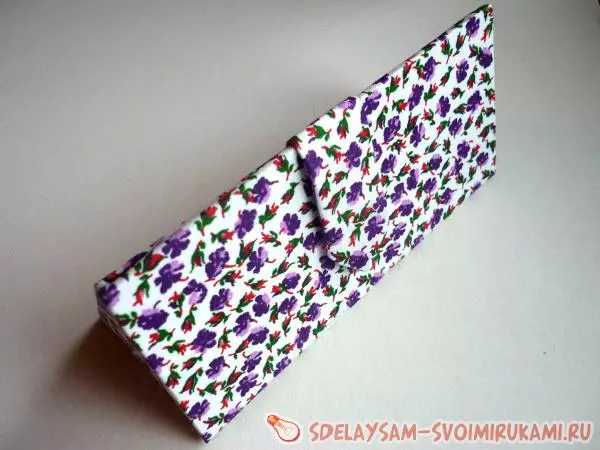
Here are also a video for creating fabric and crocheted cases: