
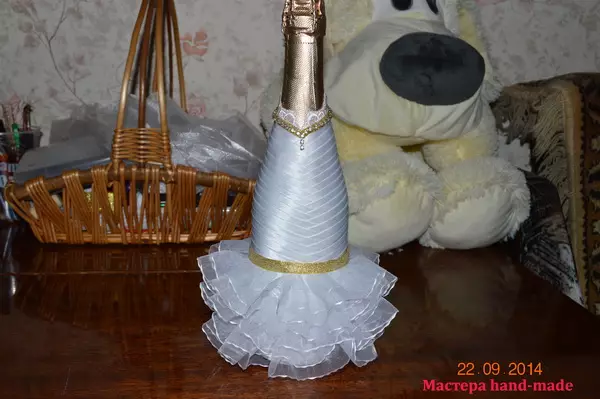
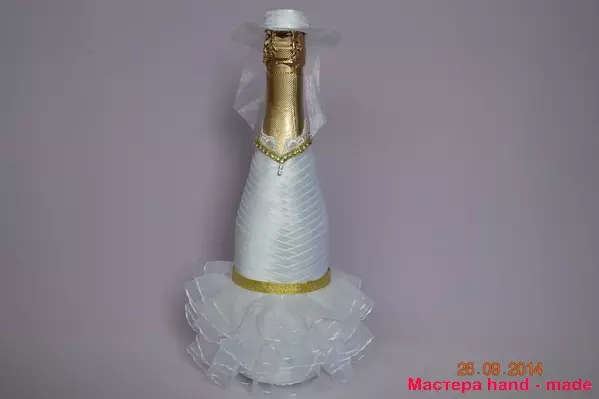
Wedding is an important day in a person's life, I want him to be unforgettable even in trifles. As a rule, newlyweds are stored wedding champagne from one year to several years, and newlyweds are nice if the bottles are unusually decorated. Therefore, we present you a master class on the decoration of champagne "Bride and Groom".

Tili-Tili Dough
For decor, you will need:
- oblique white bay (ten meters) and black (eight meters);
- lacy band - ten cm;
- Satin ribbon of black color (1,3 cm wide (for the butterfly tie and tie) - one and a half meters and twelve cm; 5 × 5 cm (for the kittel) - ten cm) and white (1,3 cm wide (for a hat " The brides ") - twenty cm; size 5 × 5cm (for the" Bride's Hat ") - ten cm);
- white organza (for the "Bride" hats) - a small segment;
- The glue material of the web - a small segment;
- white cardboard;
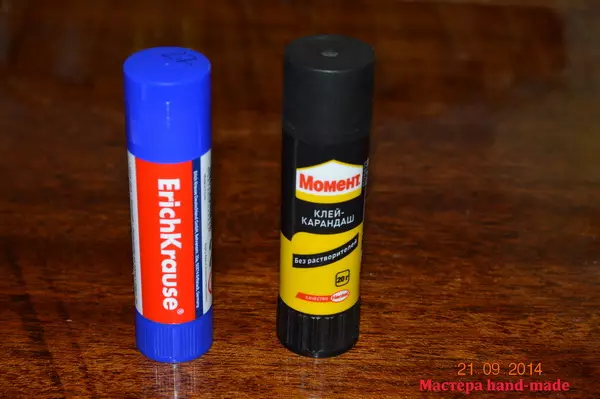
- glue stick;
- glue "moment" (crystal);
- Wide caproic tape - three meters;
- Beads and rhinestones.
Work description
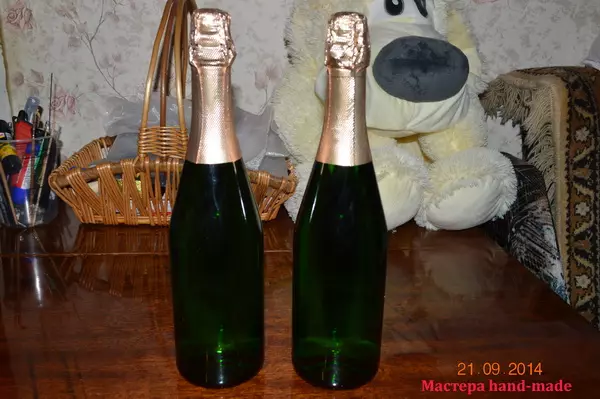
- Preparing the bottle: removal of all labels, except for foil at the end of the bottle. To do this, put the bottles into the water for an hour, and then with the help of a scraper, knife and sponge free from the label.
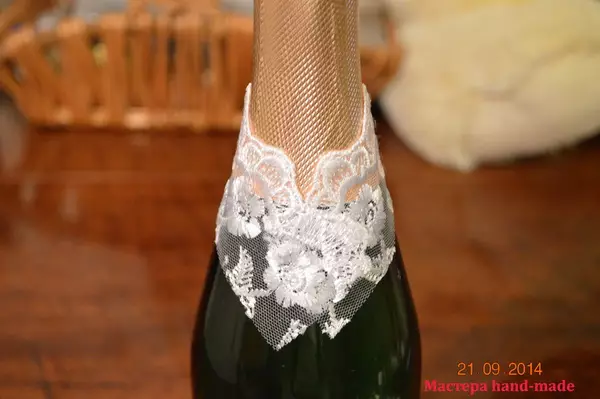
- Registration of "Bride".
The basis: a marker on the bottle is thinly to read the vertical strip, in the future try to make the ends of the glued materials converge on it. Identify the exact size of the lace band by simplying it on the "bride", cut off unnecessary. Then, neatly smearing the neck with glue, attach the lace.
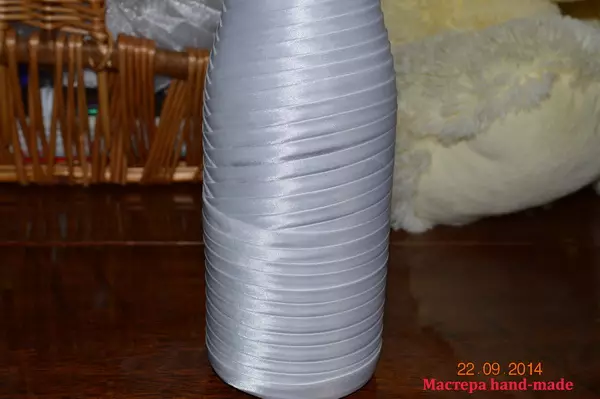
Also, try on a white oblique beyk, cutting off, paste, slightly stretching. The remaining turns of the beaks cut off, already sticking. Follow the ends of the beaks, they must be carefully glued.
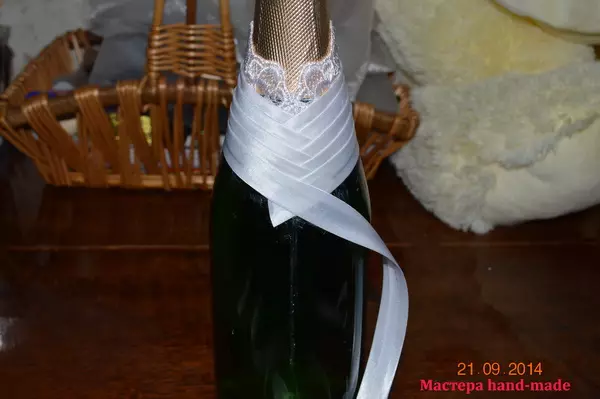

Each next round should be slightly found on the edge of the previous one. Thus, to separate the expanding part of the bottle.
Article on the topic: Pirate chest with hand from cardboard with photos and video
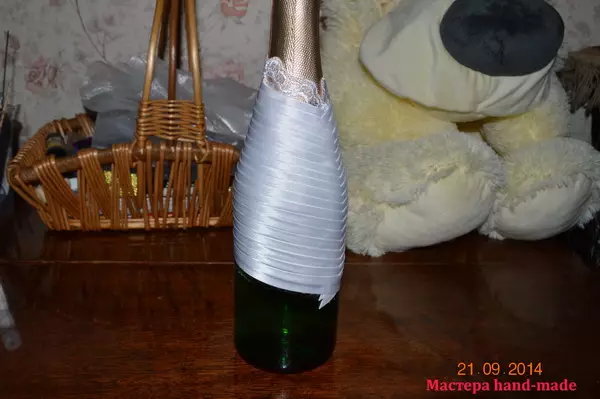
The location where the bottle width is stable, plane the bay, not squeak, trying to attach the oblique beak strictly horizontally. Before Niza, sack the bottle in this way.

After salaling the bottle, we decorate it with a skirt, decorations and a hat.
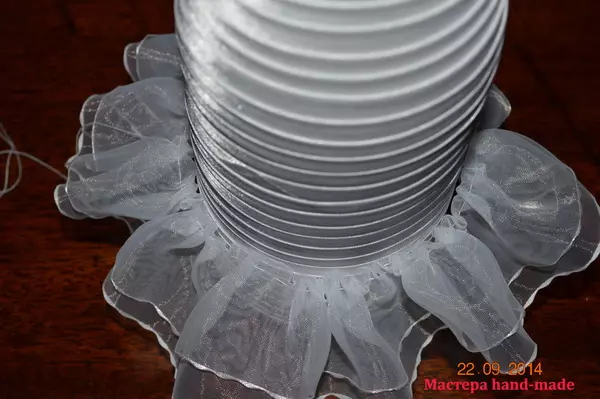
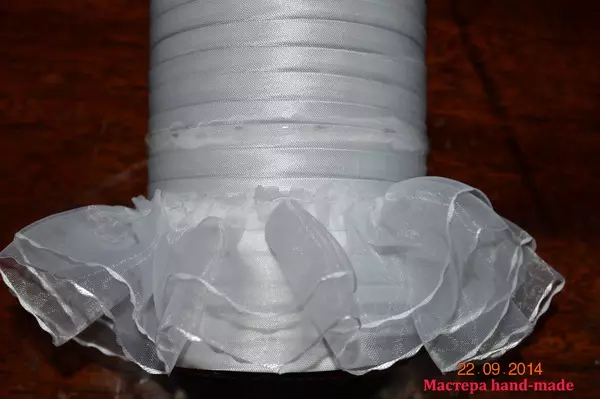
Making skirt: a wide bowl cut into three segments in a length of one meter. Ends of each segment to solder, folding them together, pressing on them with a spin or metal line and spend a hot soldering iron.
In the photo Ready blanks for skirt:

Each workpiece is folded along, but not in half, but with a difference somewhere in one see. Fix the fold of each piece of skirt with small stitches, pull.
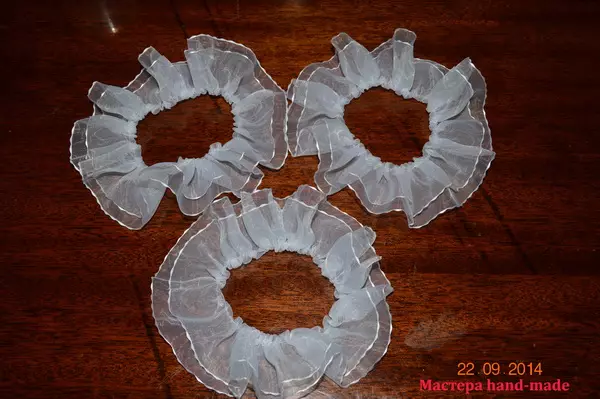
Take the workpiece to wear on the bottle, the thread does not pull a lot, as in the photo:
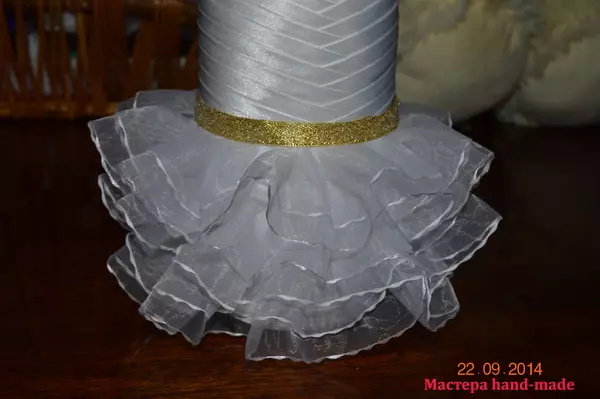
Collect all three skirt tiers. Ensure that the fabric is distributed evenly.
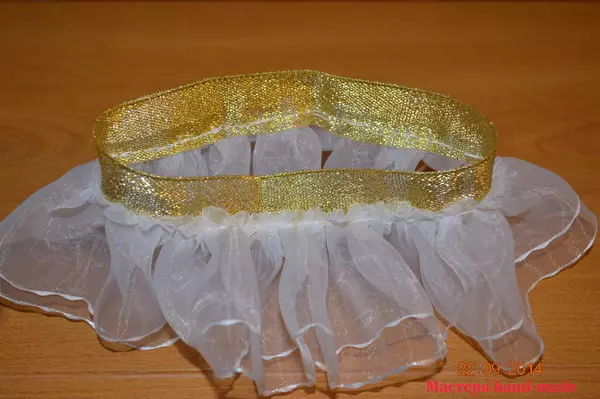
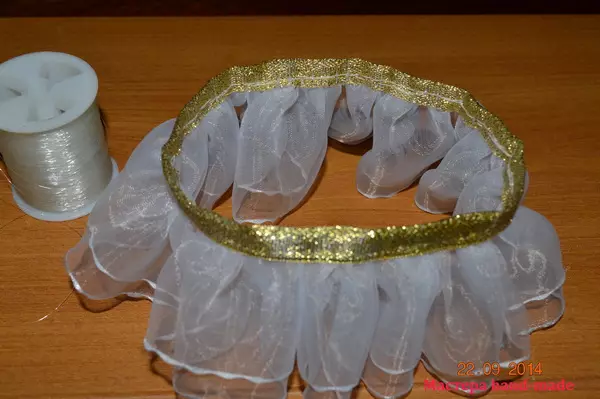
The "belt" skirts can be issued a golden braid. The width of the braid is two and a half centimeters, the length includes the coverage of the bottle plus two cm on the connection and another half astimeter on the free felting. The edge of the flashes from the inside to connect with the rolling.
After that, having folded a golden braid, hide the edge of the ruffle and fix the monoulion, thread that resembles a fishing line.
Attaching the "skirts". First, try on the lower ruffle so that it almost concerns Niza, mark the edge of the ruffles on the bottle of a dotted with a simple pencil, raise the ruffle so that you can apply glue. On the dotted line of "moment-crystal". Ruffer to lower the glue and grip tightly. Similarly to attach the average roller on two centimeters above the bottom.
The upper part of the skirt with a golden braid to sew to the bay monoulage around the bottle.
The finish of the neck: on a golden braid in half a half-meter width, to attach the thermoplastic glue of beads and rhinestones, without touching the tape by a thermoclate gun, since the hot surface of the gun leads to deformation of the braid. The decoration is also glued to the "neck" of a thermoclaim.
Article on the topic: Tissue Scotland - Types and features of material Tartan
If the braid is wide, the desired width is easy to cut off the soldering iron with a metal line.
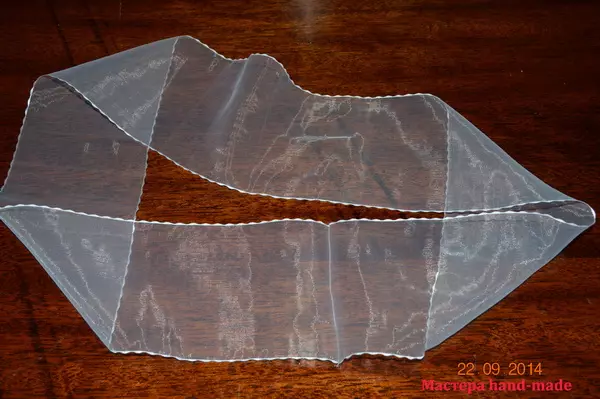
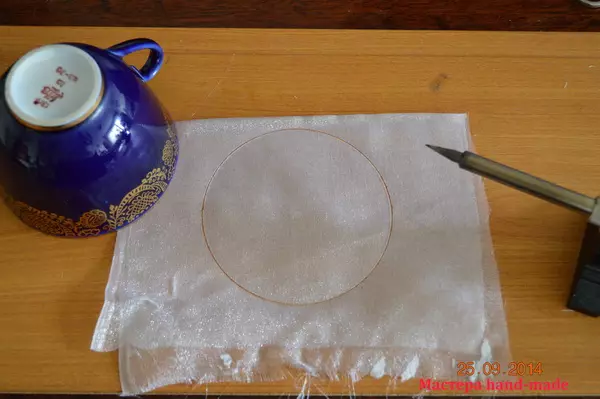
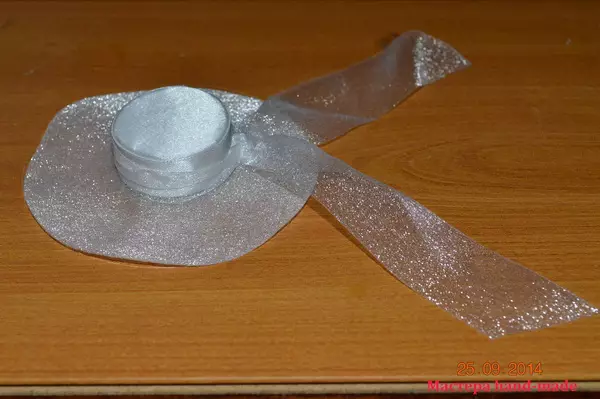
Design "Head": For the manufacture of hats, glue two loskutka organza with a glue cobweb. Pick up a cup or a glass suitable around the circumference, to circle it in an organze hot soldering iron.
Inside the fields of a hat with a soldering iron cutting out the wrap.
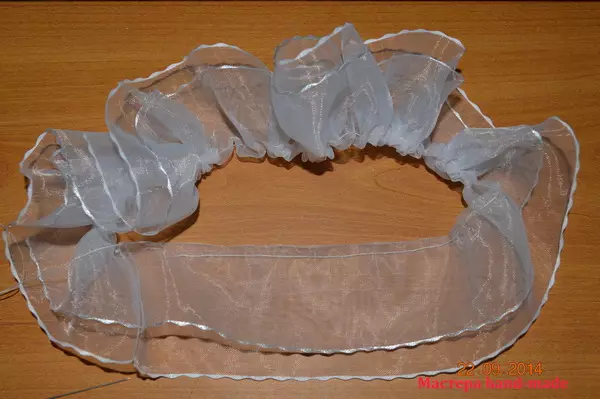
Insert the filth of the heads of the hats in the upper part and close tight.
Take a white-colored satin tape and make a circle on the bottom of the bottom of the bottom hats and a ribbon to decorate the Tula from the inside. Glue them inside.
Cut striped from organza. Attach it higher Tools to create small folds.
"Bride" is ready.
- Champagne "Bridegroom" is done by the same scheme as the "bride".
Please note that the first, second, third and fourth turns are made with the help of white bakery, and the "costume" is black. Decorated with a butterfly tie from black atlas and beads.
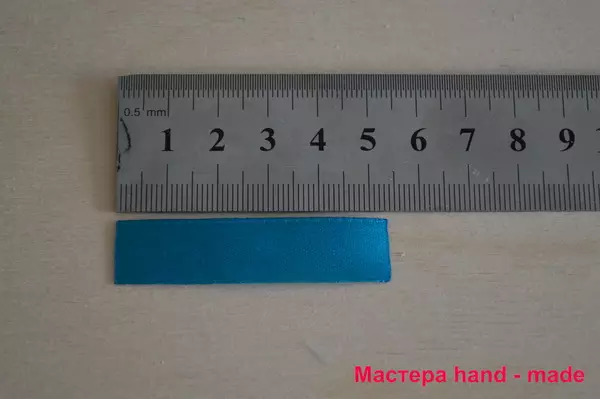
"Butterfly Tie": the length of the product is two and a half centimeters. Prepare a ribbon, based on the following: you will need two tie lengths and more plus 3 mm.
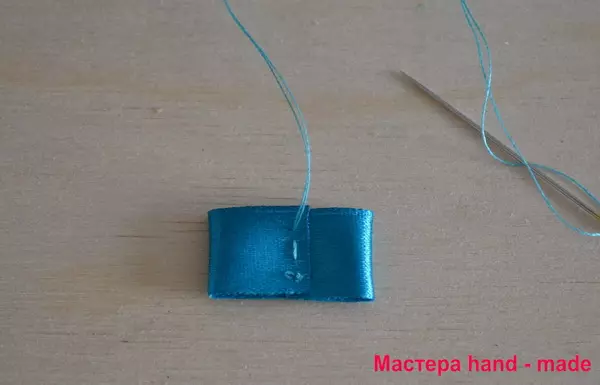
Fold the edges of the ribbon so that they come in one on the other, 3 mm, as in the photo below. In the center of the butterfly make a couple of stitches.
And pull the thread, giving birth a bow tie. Thread consolidate.
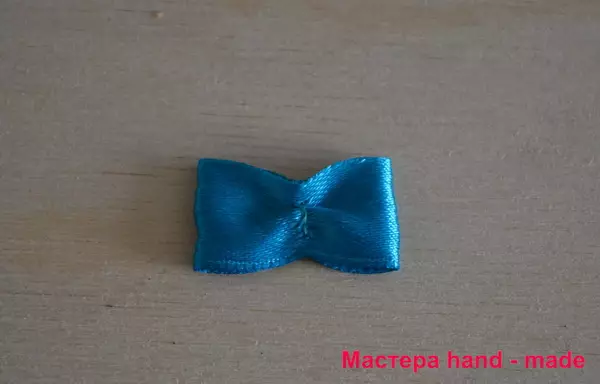
Then decorate the butterfly by a bead or rhinestone, sticking it.
Butterfly attach to the "neck" of a thermoclaim. It is below to glue three "buttons" below: Beads or Iranes. Production of "Pocket": Make a "valve" - a rectangle from a narrow tape of black color. To the inside of the "valve" to glue the "scarf", a segment of a white ribbon. Then attach the workpiece on the site of the chest pocket.
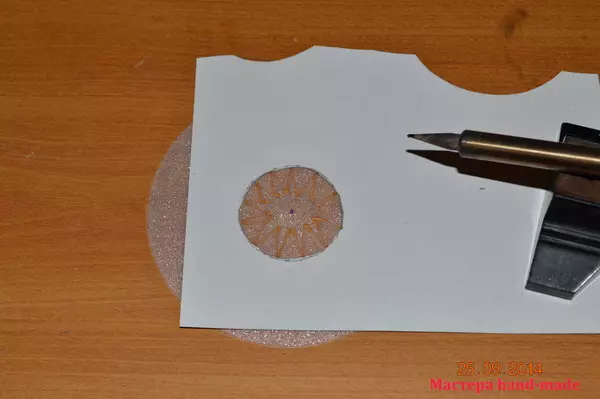
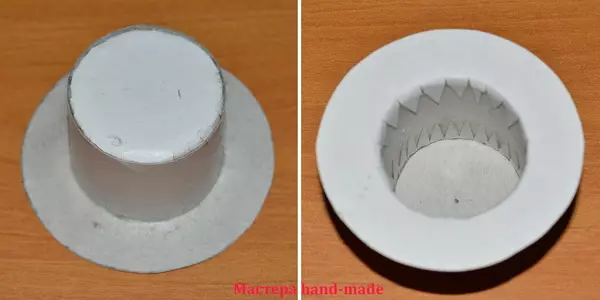
Creating a "Card" according to the scheme corresponds to the "Bride" hat: Let's start the bottom of the kitp. Make a circle with a radius of 1.7 cm, retreating one centimeter from the edge, cut it down, then cut out the cuttings on it.
Article on the topic: Plaid from Pomponov: How to make a miracle with your own hands with photos and videos
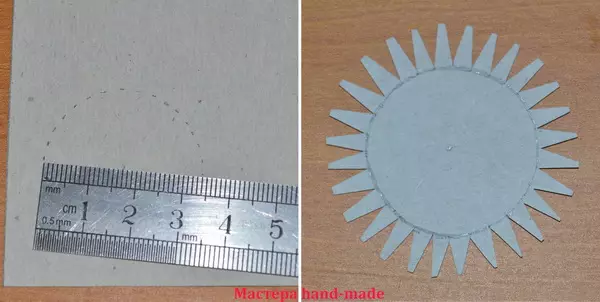
"TULA" consists of a strip of three width, and with a length of thirteen, see to smear it with glue on the one hand, glue the previous billet to the wrappers, press well. End stripes glide mustlest.
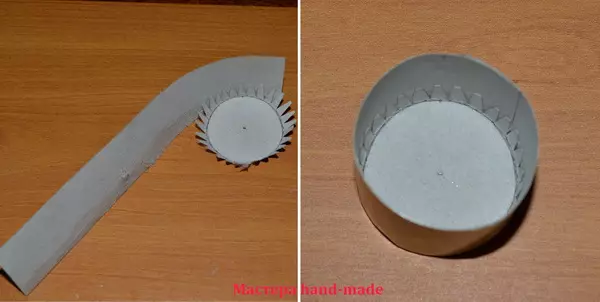
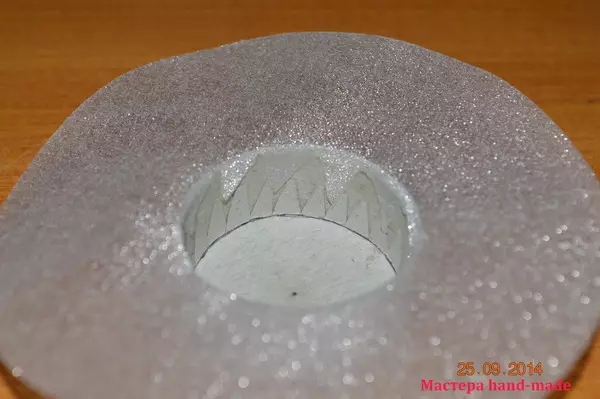
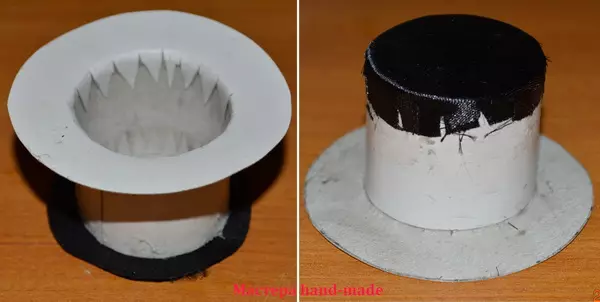
Fields Kickie. Again, we make a circle, but this time double: the inner with a radius of 1.7 cm, external with a radius of 3.2 cm. Inside to make a sweep.
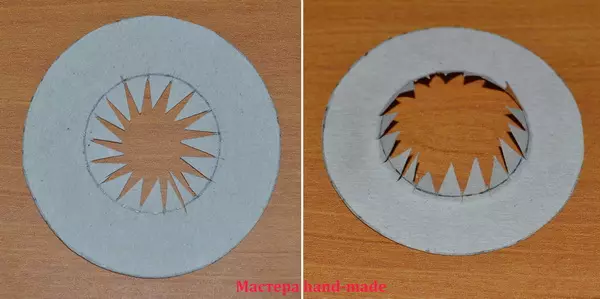
Glue the flying of the fields to Tully and press well.
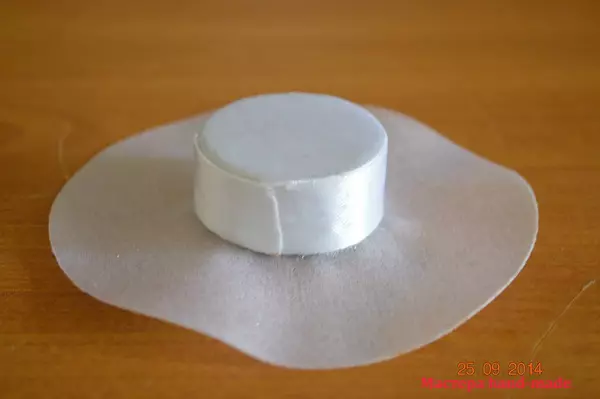
Paper bowler sack cloth. From the atlas of black color cut a large circle. Glue it to the bottom and to the top of the Tool, on the protruding edges of the fabric to make cuts and also glue.
Sixteen strips of 1,3 cm atlas tape and salary fields.
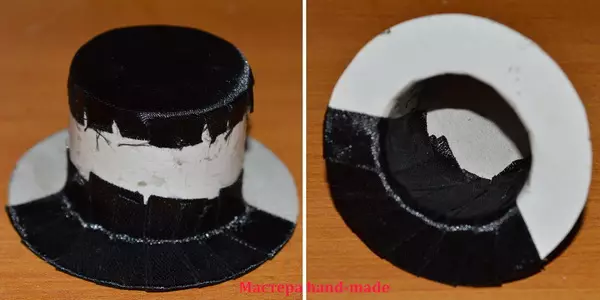
To decorate Tuli with a few turns to glue the tape to the top of the kittel. Inside the bowler, we have atlas in the size of the bottom.
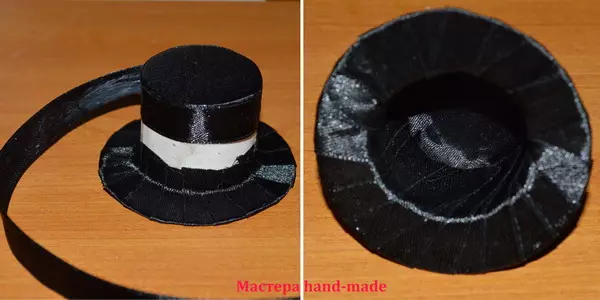
As a result, it turns out a pretty hat, which can be additionally decorated with a flower.

Video on the topic
Selection of video for additional dose of inspiration: