
In the wardrobe of each woman, the belt plays a far from the last role. With the help of a properly selected strap, you can hide the flaws of the shape and emphasize its advantages, refresh the gloomy dress and add a highlight to the everyday image. With the development of many types of needlework, a wonderful opportunity has appeared to choose, simulate and create a belt with their own hands. Such an independent accessory will emphasize your individual and creative features. The manufacture of a belt for itself beloved has its indisputable advantages: no need to run on shopping in searching for a suitable belt; You know exactly what is suitable for you and work, taking into account your personal nuances and preferences; Product done with your own hands? It costs the amount of cheaper purchased goods.
In this article, we will look at the options for creating special belts, with the help of which you can turn out absolutely ordinary and boring things in a solemn outfit.
Delicate Atlas
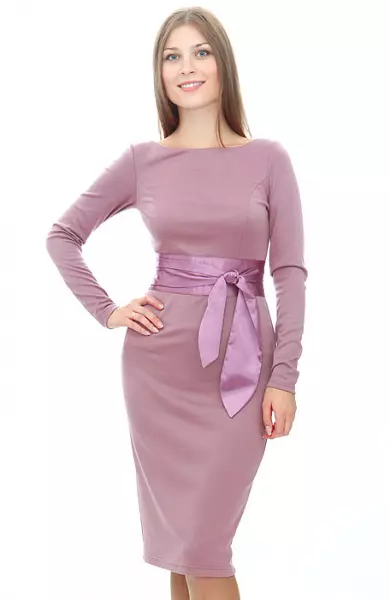
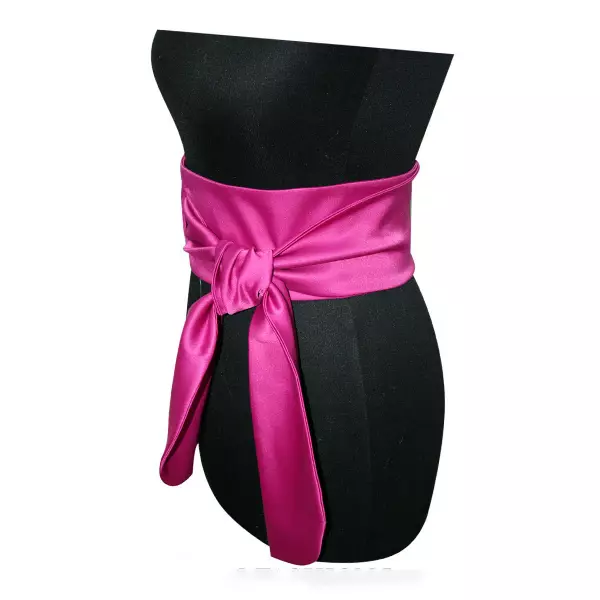
Gentle and romantic, bright and catchy, belt from satin harmoniously complement your mood and will decorate a celebration or a holiday. Even a strict and restrained case-case with such an accessory will acquire a perfect other type, turning into an elegant evening outfit.
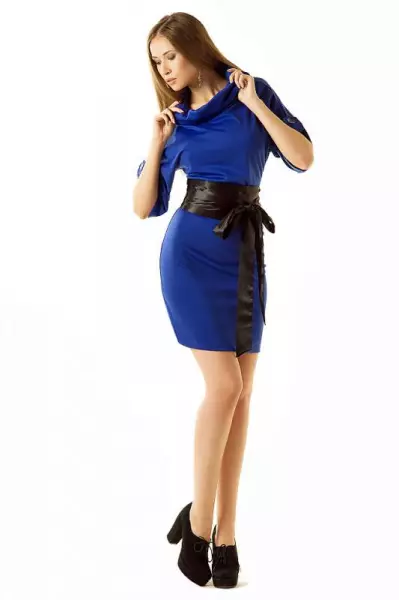

Recently, even wedding outfits are fashionably decorated with satin belts. On the inno-white matter of the bride's dress, such an accessory will look especially effectively and solemnly.


Gorgeous will look at the wedding dress atlantic belt, decorated with rhinestones, beads or bow.

In order to sew a similar subject to themselves, first need to decide what the wardrobe it will be used and what events are planned to visit it. To create such an accessory, you will need a small segment of the atlas, sewing tools and a positive creative mood.
- First you need to measure the waist and estimate the width of the future belt.
- The resulting dimensions are multiplied by 2.
- Cut from tissue band equal to the parameters that we found out in paragraph 2, plus 1 cm.
- From the edges of the strip to retreat 0.5 cm and cut lines.
- Fit the product along this line, leaving the untouched part of one side.
- Remove the product through this hole and sew it.
- In the iron.
Article on the topic: Ideas for the manufacture of buttons in the form of flowers of fabric
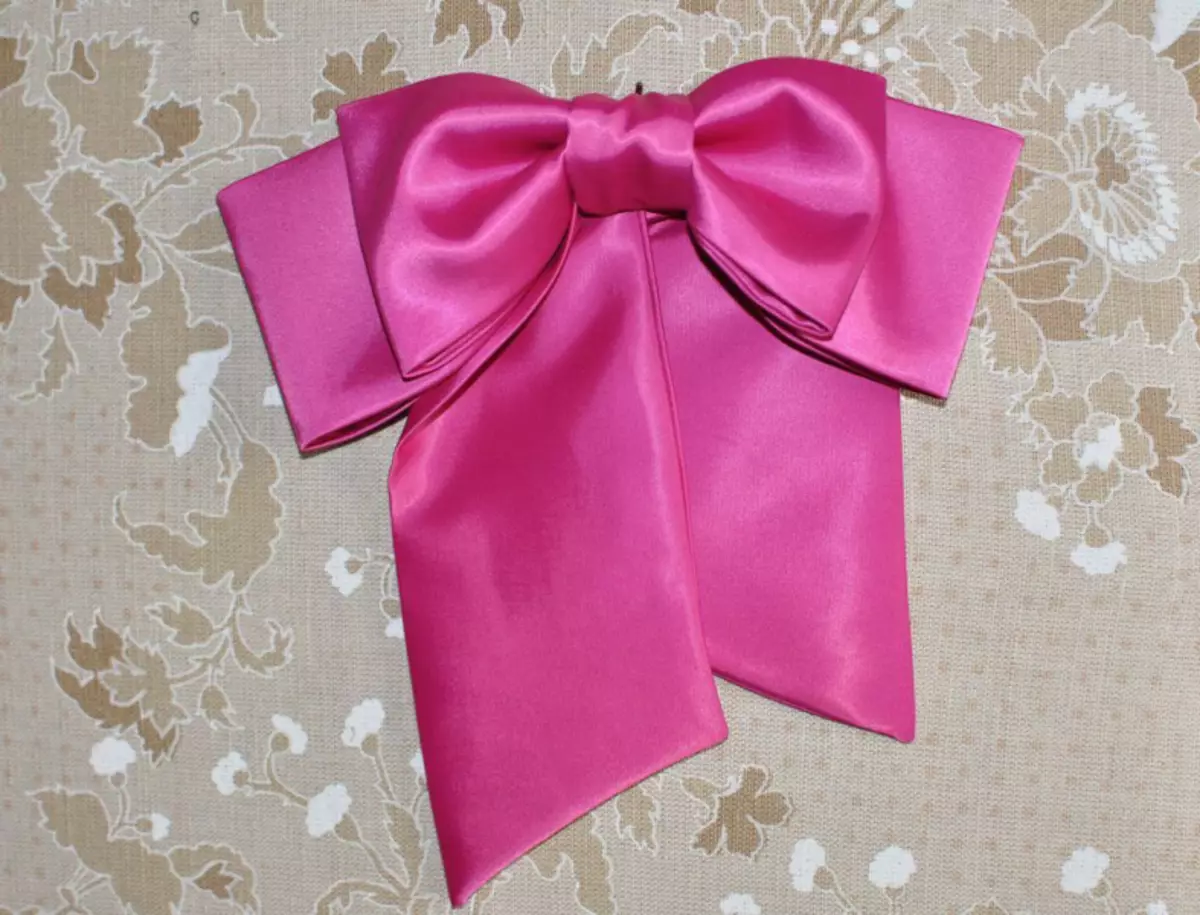
When the belt is ready, you can experiment with the option of its tying. There are 3 main ways:
- French bow (belt ends are tied by folded in half);
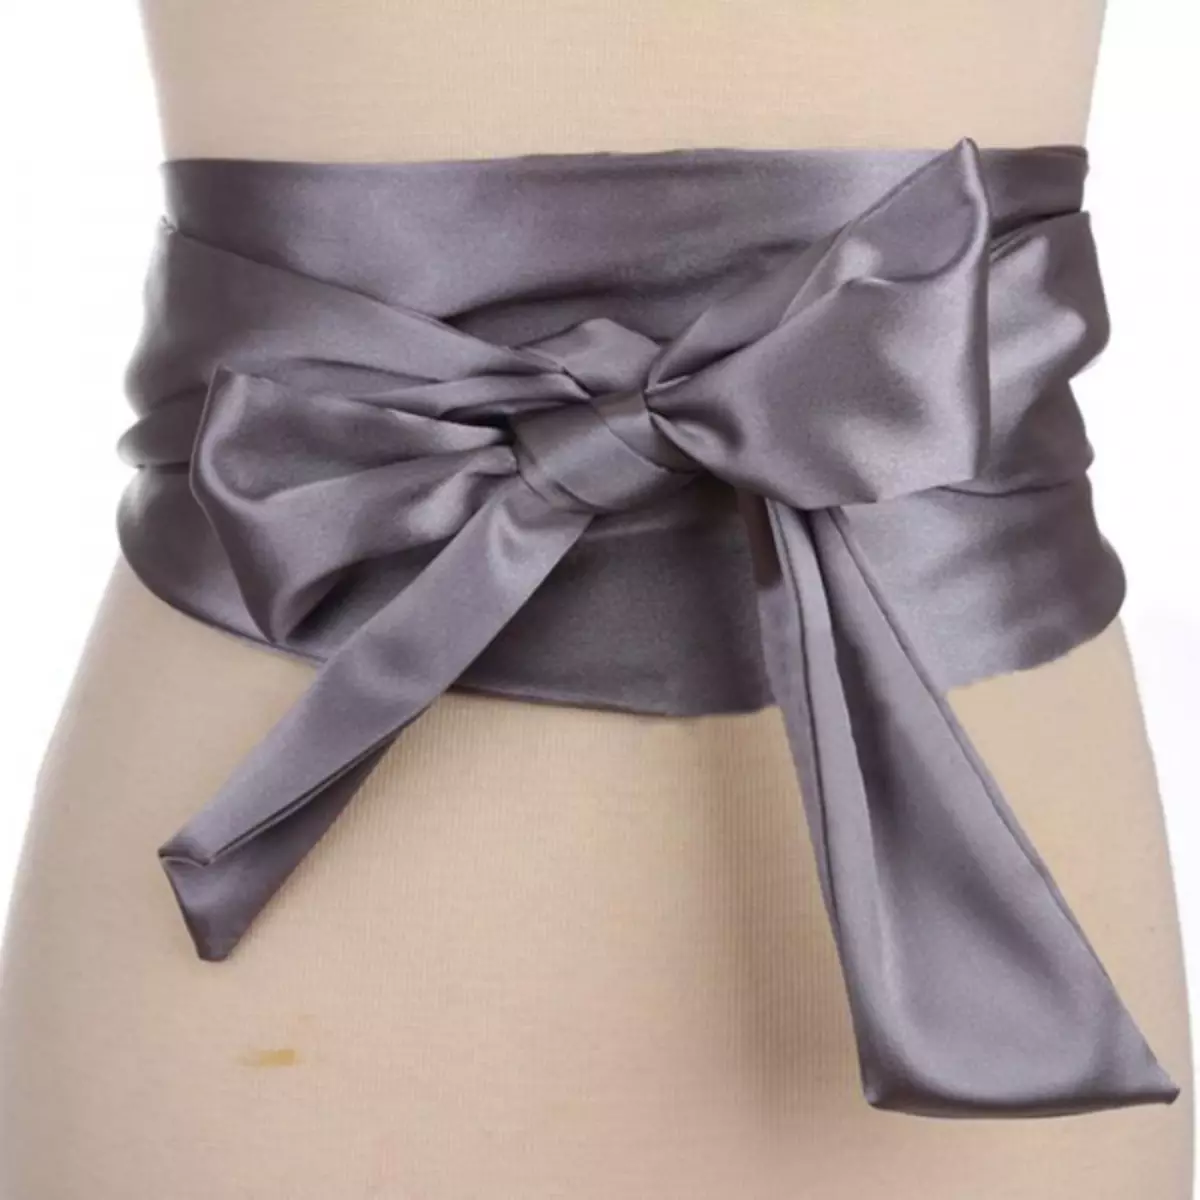
- butterfly;
- Single-counter.
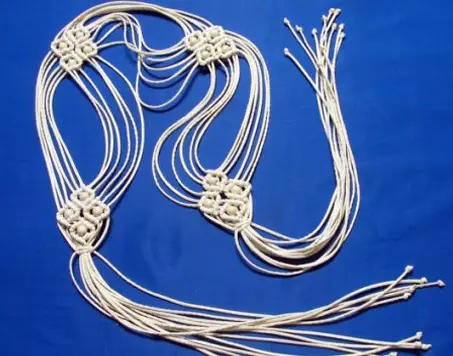
Belt from nodules
Weave the objects from the nodules is called Macrame. This is an oldest view of a needlework, which appeared literally with the first knotted knot. Initially, this technique was used for household needs, for weaving fishing networks, covers for baskets. Gradually, this craft began to grow into art, and in our days, needlewomen can create many amazing things from Macrame, such as, for example, suspended porridge, curtains, tablecloths, napkins, clothing items, decor elements and much more.
In our article, we will look at creating a belt for clothes from Macrame. Materials for weaving can serve any threads of any thickness, silk, cotton, linen, woolen, etc. You can use cords such as dense and leather.
To learn to weave the macrame, you need to have such qualities as accuracy and progress, as the work is quite painstaking and will require you a little patience.
The master class submitted below will demonstrate the option of weaving a light belt for beginners, which will not need special experience and skills.
First you need to decide what kind of clothing, in which color scheme and for what cases you will wear this homemade accessory and choose a thread for weaving.
In addition to the threads, you will need the following tools:
- sewing pins;
- scissors;
- The pad on which you will fix the pins (if the thread is too thick, you will need plywood).
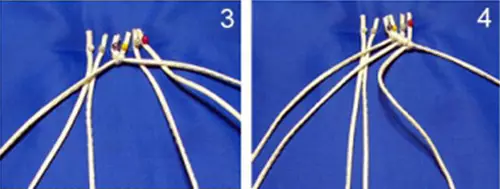
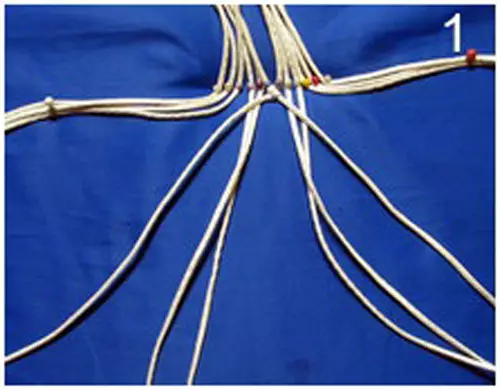
When weaving this belt, only two types of nodules are required - flat and reps. The product itself consists of diamonds, for weaving which will need 6 yarns. First you need to fix the threads with a pin, stuck in the pad, as shown in the photo 1:
Article on the topic: Narcissus from corrugated paper with their own hands with candy
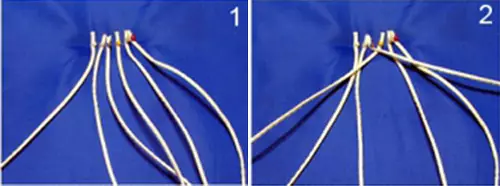
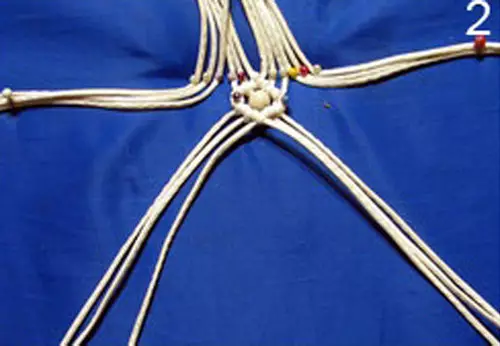
Work should be started with the third left thread, it will serve as the basis for the reps node (photo 2). This thread is twist the diagonal nodes of the three right threads (photo 3, 4).
Then you need to take a thread with the node of the first left reps node. On it, we glow 2 of the same reps node on the right left two remaining threads (photo 5, 6).
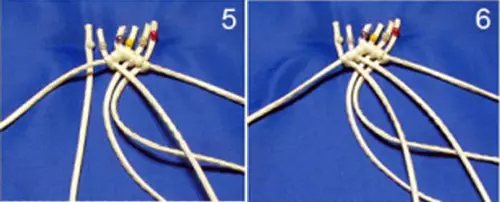
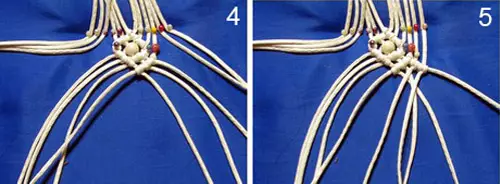
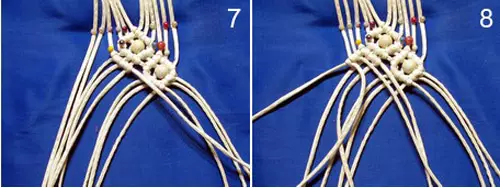
Further, it is written in a wise bead as shown in photo 9.

Now we close the rhombus as follows: the basic threads to send to the Roma center at right angles and make on each thread on two reps (photo 10).
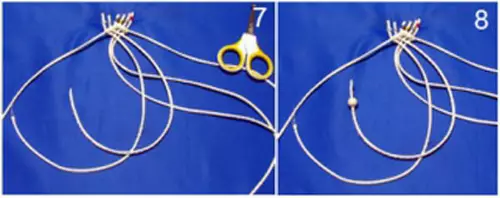
The first nodes are wearing those threads that tied extreme repition knots. The second is obtained by crossing the threads (photo 11, 12).

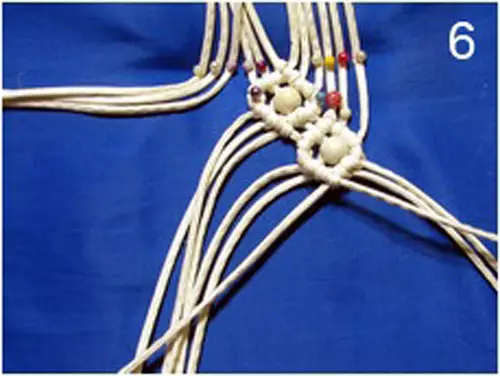
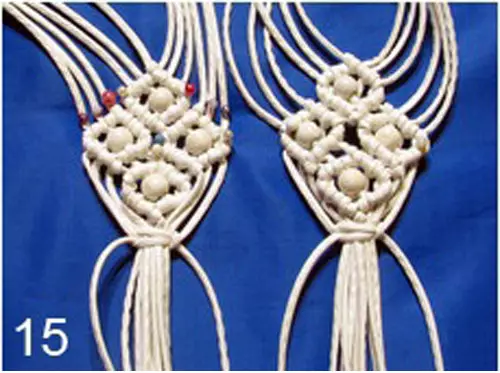
Now you know how to create a rhombus. You can go to the product itself.
Attach the pins of 12 threads so that 40 cm lengths unused left remains.
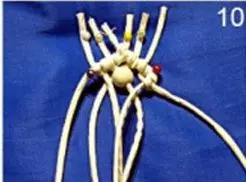
The first rhombus woves in the center of 6 threads.
The remaining threads on the sides of the gossip 2 rhombus close to the central one.
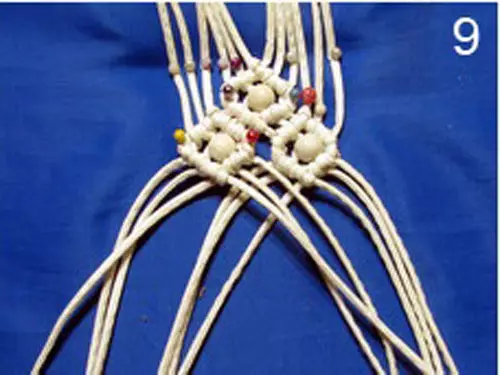
The fourth rhombus is woven according to the principle of the first.

Having received a beautiful rhombus made up of 4 small, step by 15 cm, secure the threads with pins and leaf the next figure is like the first.
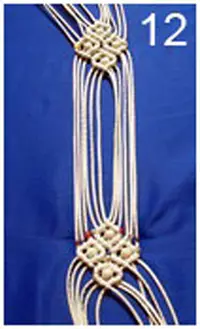
Having created 4 large rhombus, proceed to brushes on each side. The basis will be 10 threads in the middle, workers - 2 extremes.
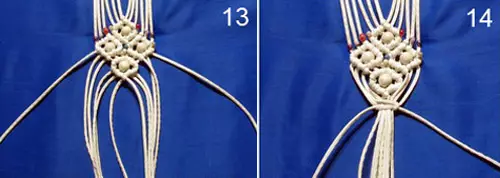
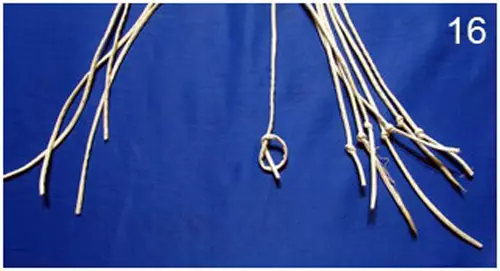
At the ends of the threads, make nodules, cut down too much and wear with pleasure!
Video on the topic
If you wish to get acquainted with a large number of options you can watch the video for the article.