
When we make repairs in the house, we pay great attention to color solutions, wallpaper, curtains. All this is wonderful. But sometimes it happens that having spent an impressive amount of time, a person is dissatisfied with the result. Such a detail like a lamp will never come out of fashion. And in this article we want to tell you about all the nuances that you will have to face with the manufacture of a table lamp with your own hands. And at the end we will show several options for products with detailed instructions.
Main principles
The first step to create a product is the preparation. It is necessary to take into account as many nuances as possible. First, find out how the light falls and where the rooms are outlets. In the same place most often your lamp will stand.
Then it is worth thinking:
- about the sketch of the desk lamp;
- Decor;
- interns and electrics;
- special fasteners;
- Free access to the outlet.
Compilation of a plan is a mandatory process in which the consumption of material is displayed. To do this, you need to measure the room and know the exact distance from the location of the device to the connection location. Never forget about security. In your arsenal there must be glasses, rubber gloves, extractor.
It is not necessary to attract it all this, otherwise the fascinating master class can turn into an unpleasant moment.
You must, if possible, foresee how the material will behave when operating. For example, if your work will pass with the use of wire, then you will need various tools for deformation of the design. When using paper, take into account its strength. It is best to use tight cardboard, rice paper. If you have to work with floating materials, then definitely check each item separately on their compatibility.
Article on the topic: Comforter for newborns do it yourself: a selection of patterns
Rush finds
When you do something with your own hands, you should not forget about the rented items that you can replace many purchased materials. Your lamps and lamps can be decorated with literally by any elements of the decor.
To process lamps, you can use:
- dense fabric, for example, jeans;
- various napkins;
- braid or lace;
- Large unusual buttons;
- All sorts of rhinestones and beads;
- Vitivated shape grape vines;
- Porcelain glass;
- a piece of jute;
- Wire of any diameter.
Often, the same tools are used in the manufacture of lamps. Despite the impressive list, they are all important and needed when creating. Here is some of them:
- pliers;
- soldering iron;
- nippers;
- metal cutting scissors;
- Tassel for applying glue;
- screwdriver with different nozzles;
- Diamond drills.
Product from Vase
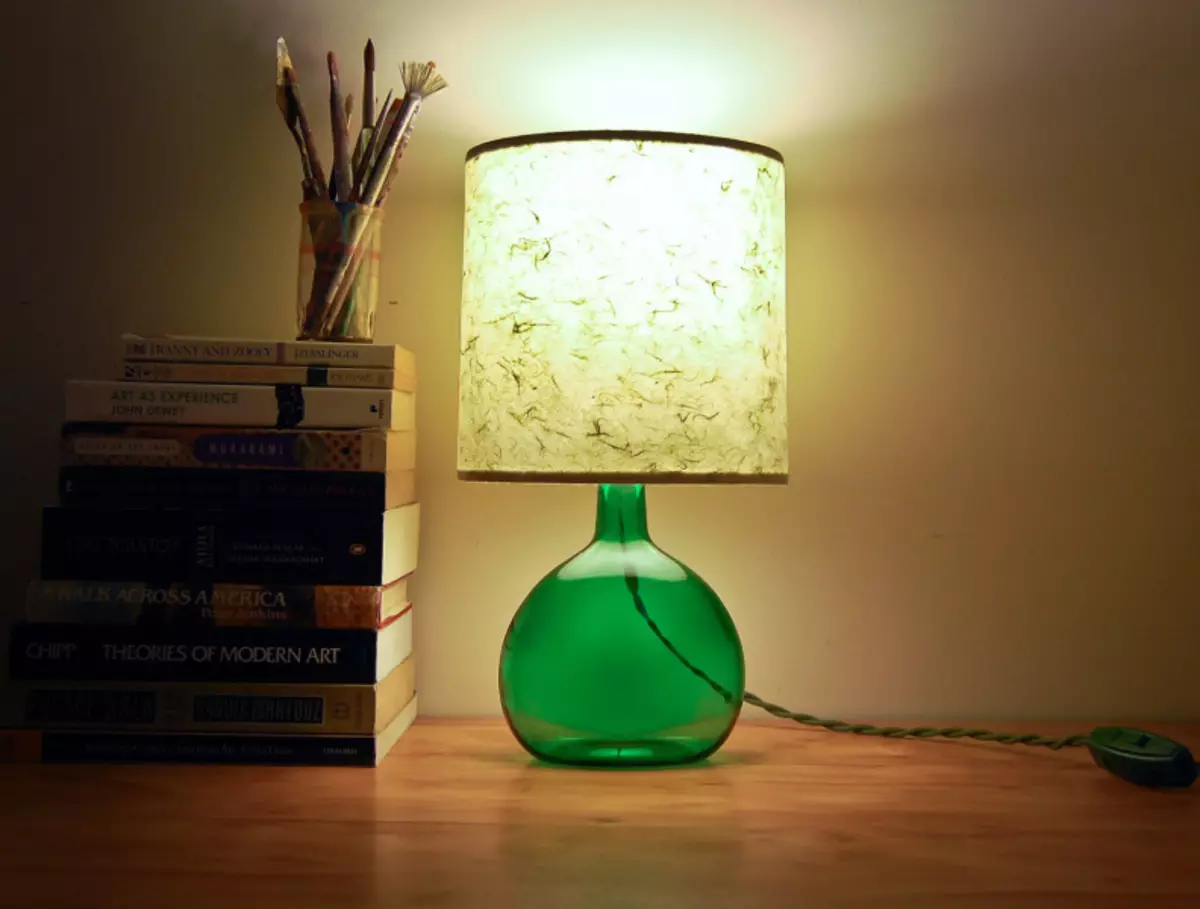
So, considering the basic principles and safety, we can proceed with the manufacture of our desk lamp.
We will need the following materials:
- The base from the vase (it should be from ceramics and have a wide base that narrows to the neck);
- Drill with a drill (drill diameter it is necessary to take 6 mm);
- Glue moment.
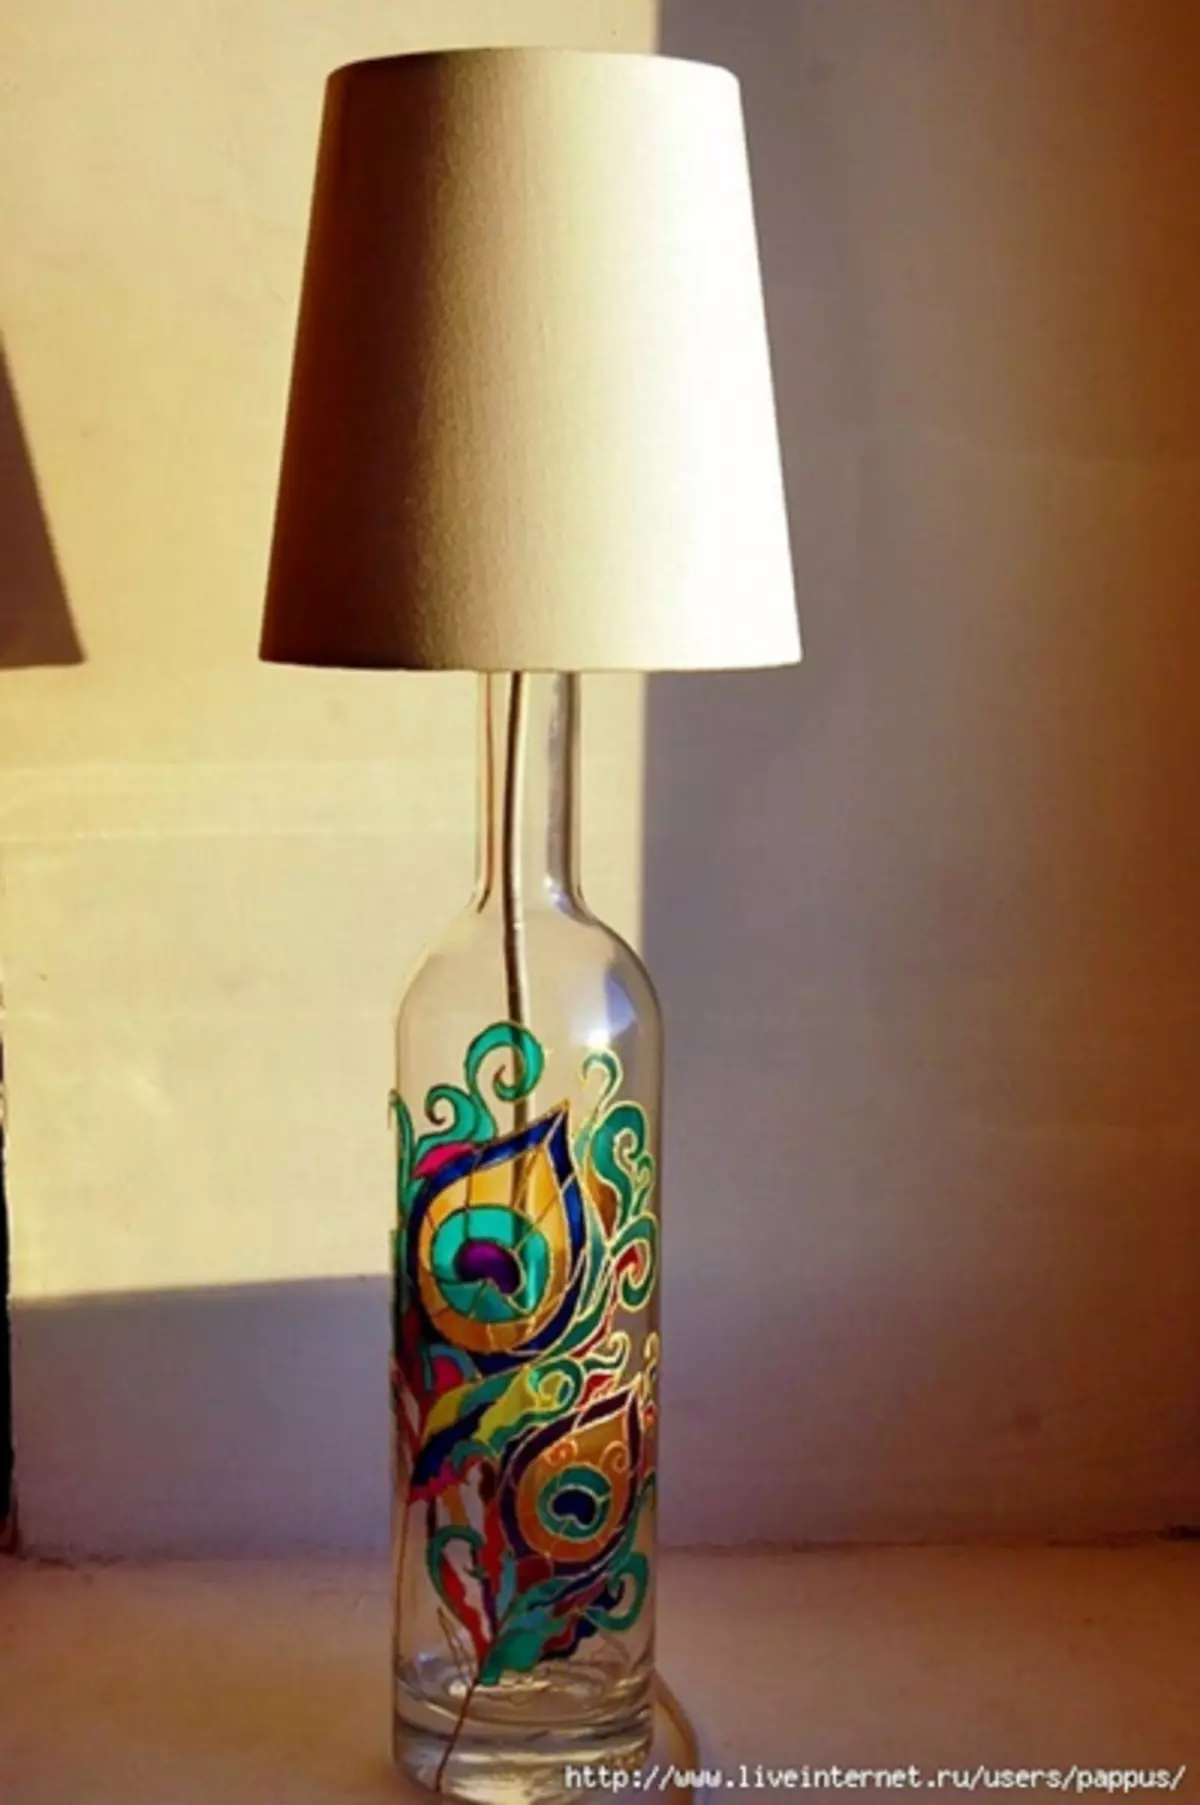
We will start work. With the help of drills, drill the bottom of the ceramic vase. Remove the cartridge and secure the wire through the hole. The most important thing is that the diameter of the throat of the vase was less than the diameter of the lamp cartridge. In order for the cartridge to be reliably "sitting" in the neck of the vase, it is necessary to deceive all the edges with glue. Give the product well to dry, ideally for about an hour. Screw your light bulb and check with a socket. Put the lampshade and lock it. If your fantasy is only flashed, you can decorate the lampshade with braid, lace and even embroidery. Table lamp ready.
Gypsum lamp
There is not much time to make this model (if you do not take into account the drying time of the material), and the product of the gypsum looks original and beautiful.
Article on the topic: Sunflower Napkin Crochet: Scheme and Description with video
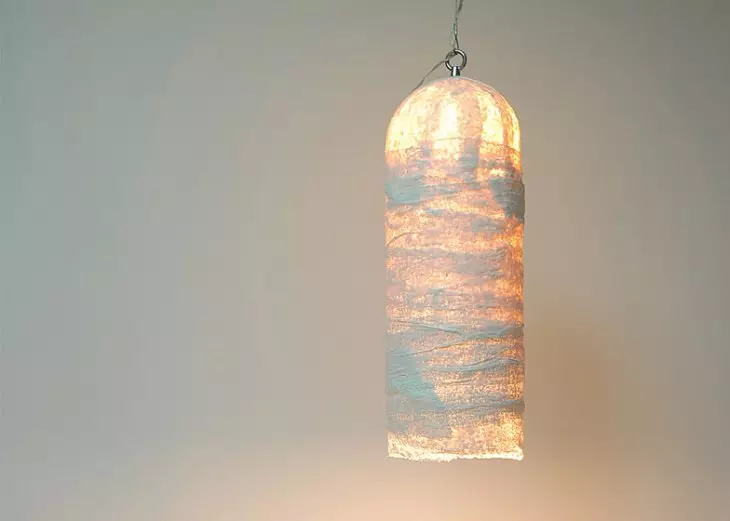
We will need the following materials:
- glass flask;
- Gypsum bandage.
Divide the plaster with water and moisten a bandage in it. Write it carefully on the flask and after 40 minutes (the time for which the plaster freezes) gently remove the finished lampshade with a glass flask. Now it is necessary to give aesthetic look to our ceiling. You can paint the gypsum acrylic paint and depict a drawing. If you do not like to mess with paint and drawing - this is not your horse, then use ready-made decoupage wipes. Pick the desired drawing and re-adjust the lampshade. Screw the cartridge, and that's all ready.
Video on the topic
Thematic video selection: