
Sometimes everything decides the case. He can push a person to certain actions. Of course, not many get tired of purchases of finished goods and try to assemble the code lock on the door with their own hands. However, this is a real radio amateur.
Homemade Code Castle
Details
The invaluable advantage of such code mechanisms is the fact that almost every radio metal differs relatively low cost and versatility. Thus, each detail can be replaced by a similar one.Design
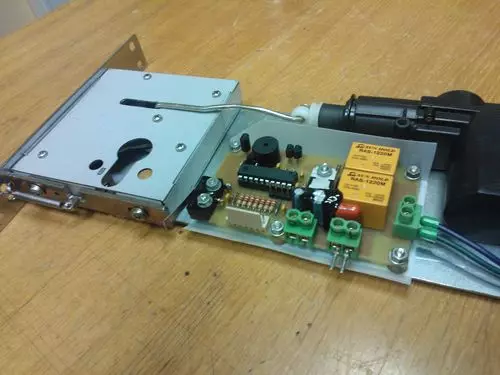
The scheme of the code electronic lock is rather simple. At the same time, it is durable and not exposed to the effect of temperature drop. She is not terrible neither heat nor cold. But the emphasis I want to do exactly that the instruction of its assembly is also no particular difficulty:
- It is enough just to purchase the necessary set of radio components, as well as a circuit board;
- Instead of the drive of an electron lock, an ordinary electric drive from the car is applied;
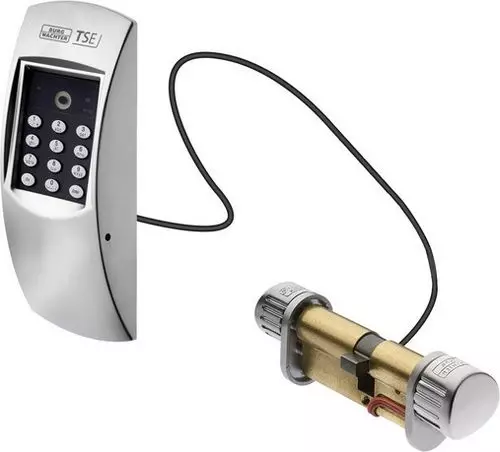
- Fastenings will need to be upgraded as shown in the following photos and video. Here the defining factor will appear the type of lock, which is used for alteration;
- As for the gearbox, then you can go in two ways. Or purchase it ready. Or make it with your own hands. This will require:
- Fasten the metal strip on the plastic handle of the lock directly with the help of self-tapping screws;
- Next from this plate to wear to the actuator, coming in a set with an activator;
- And then install the electric drive directly to the base of the door, using the same screws.
- A fee with a relay must be installed on the door design and bring the wiring;
- Instead of the housing, a plastic cover is used. It takes it to drill two holes for later editing;
- The pushbar to be used during the code set is made from the profile of the P-shaped form from aluminum. Such a profile is applied in the manufacture of furniture facades, so you can buy it in every store that sells accessories for furniture. The profile will be needed to cut, pushing out from the number of buttons. Often, similar electronic locks have 10 buttons;
- Next, you will need to drill holes for future code product buttons. Moreover, the diameter of the holes must slightly exceed the diameter of the buttons. In such a way that the button with the Cambrick is able to go into the well-done hole. Then it will be ensured by centering, which means that freedom of movement when pressed and without jamming. Such technology will also provide the lack of displacement of the buttons of the mechanical product as glue poured.
Article on the topic: High-quality furniture from shields with their own hands
Pouring buttons
Now the moment has come when you can install the buttons:
- You will need to insert the Cambricks in the buttons, pre-slip the surface with a thermoclaim, and set the design as shown in the next photo. This operation must be made extremely careful: not a single slot should appear;
- Epoxy is characterized by severe fluidity, so it can be leaked to the buttons and simply glue them. In order not to remake all the work, everyone should be done carefully;
- For the buttons to secure clearly in their place, they are previously sampled by two-component glue. It can be purchased in a construction store or in a furniture fittings store, as it is widely used in the process of gluing MDF products;
- Before the direct fill with the epoxy resin buttons, all wires are required to the LEDs. This stage is demonstrated in the following photo. Only in this case there is an unintended keyboard and a unique attractive appearance of the design. Such a mechanical device is also applicable to security systems;
- Next, you need to drill two screws for screws, with which the panel will be installed on the door;
- In addition, you will need several of the same holes for LEDs. Their diameter should peel 3 mm. The first has a greenish glow, will be located on the right and will signal the opening of the lock. The second will remain unredened. However, if you wish, you can connect it to the power source for the constant illumination of the keyboard of the mechanical device. Do not forget that you need to use a white LED, which will guide the light on the design buttons.

Power Supply
Food should be ensured by an uninterrupted block. You can collect it yourself, following a simple instruction. The scheme produces a continuous current of a small size, which is enough for the functioning of several similar devices.Let's summarize
Thus, a similar code lock to assemble with your own hands, it can be difficult for the first time, but this is a completely feasible task. The instruction described in the article is not particularly difficult. Therefore, if you figure it out and do not rush, you can build an electronic code lock, without having special skills in the field of electronics. Purchase the necessary parts, collect a mechanism, install it on the door and plug. In this case, the code of the electronic lock can be changed if necessary.
Article on the topic: Belen oak floor in the interior: Selection of furniture, examples (photo)