
Until and monotonous walks in the forest rarely fond children. In order for such a pastime to become more fascinating, it is possible to propose to collect pine cones. The occupation is not so useless, as it can be built not only a beautiful, but also a functional thing. For example, a basket created from the cones can become the basis for Iquiban, or decorating the interior of the country house as a separate composition. How the basket is performed from the cones step by step, you can learn from a detailed description of the work on it.
Natural beauty
Pine cones because of its natural form are a unique material for creating an original thing. It does not need to invent an additional decor, since the basket itself is a full-fledged finished creation.
To work you need to cook:
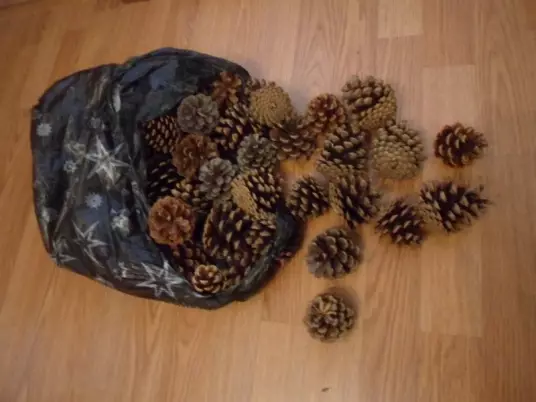
- pine cones in the amount of 50 pieces;
- hot glue;
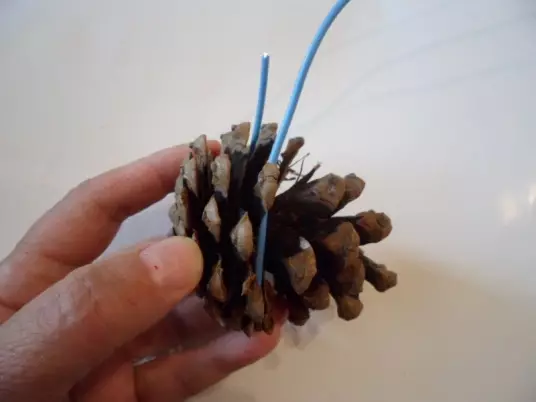
- wire two sizes;
- Dense cardboard.
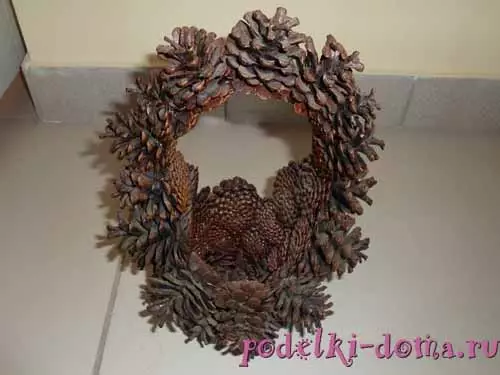
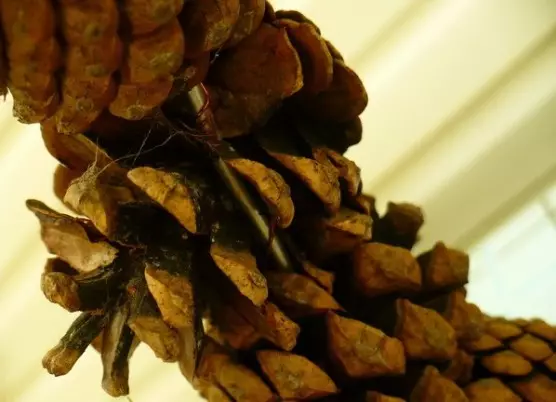
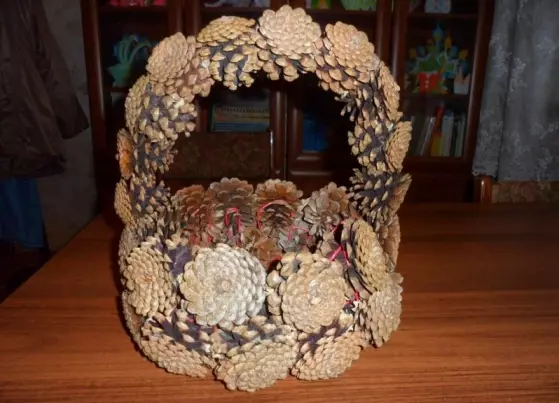
Weaving basket begins with its base. The thin wire is winding around the first bump and twisted with a free end on its own long part, as shown in the photo.
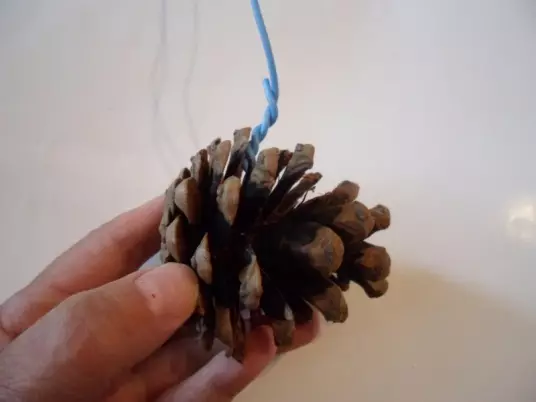
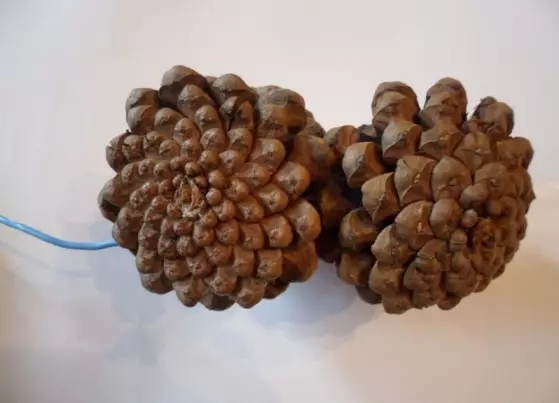
The next cone is attached close to the first, after which it turns on the wire.
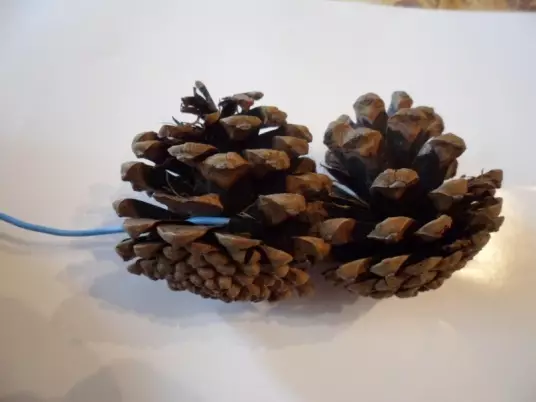
In this way, you need to create a ring of cones. At the same time, they are located "enshoy" side inside.
To build the base of the basket, it is recommended to use 10-12 cones.
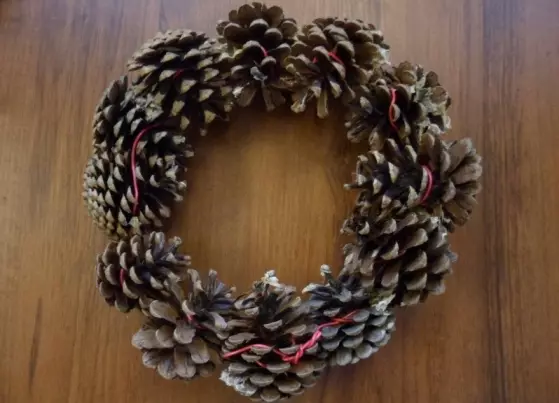
The second tier of the product is manufactured in the same way, but from a smaller amount of cones. To work you need to take on 2 cones less.
You can stay on two rows of baskets. If desired, add a third tier, where the number of cones is again reduced by two pieces.
All billets are bonded with each other with hot glue.
For the handle of the basket, it is necessary to use a frame of thick wires to which cones are fixed with a thin wire.
Article on the topic: Modular origami: Vase for beginners, assembly schemes with video
After that, the handle is connected to the main product.
The bottom of the basket is performed from dense cardboard and is fixed with a thermoclaus.
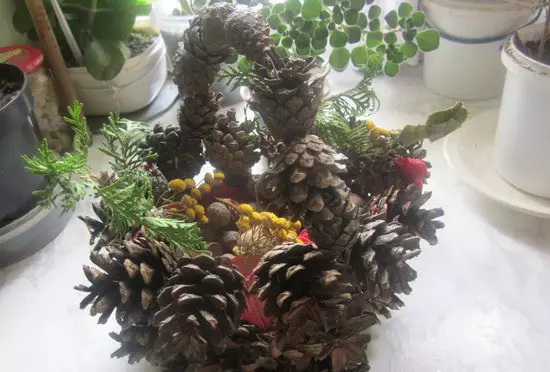
The product is ready. It remains to fill the basket in accordance with its own preferences.
It can be a bouquet of dry flowers or autumn leaves.
Tip! If an interior decoration for the new year is expected, the basket will organically look with fir branches decorated with New Year's toys.
The original handicraft, made with your own hands, will be more than one year to please householders and guests.
Pine cones can be used in operation and a little different way.
If you make a basket where the bottom of the cones is located inside, it is possible to get a new, not similar to the previous work, product.
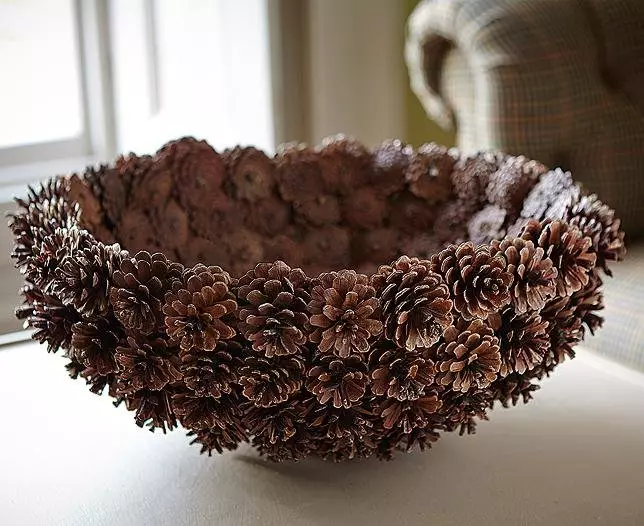
Unusual basket
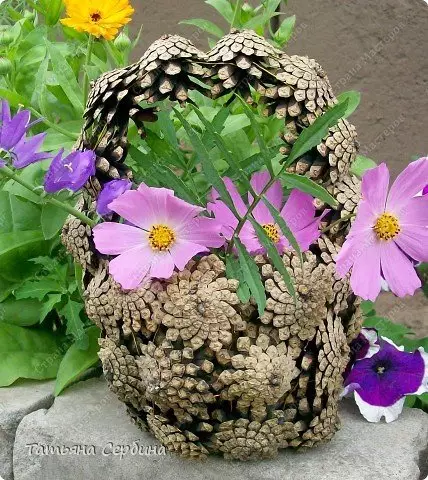
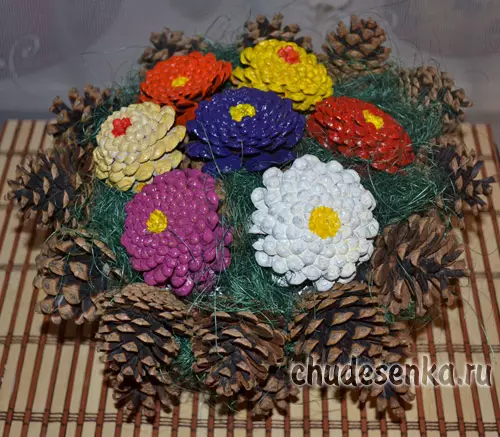
You can go further and create a complete composition of the cones in the form of a basket with flowers.
So that work looked brighter, you will have to add a few artificial dye into it. Such work is attractive in that it does not require constant change of filler recycle.
How to create a similar product will tell the thematic master class.
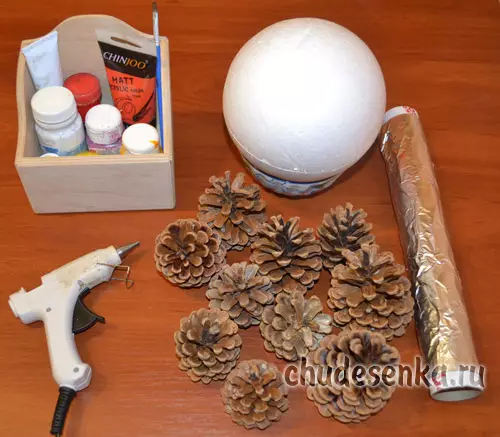
Before getting to work, you should stock:
- pine cones;
- Foam ball;
- acrylic paints and brush;
- thermoclaim;
- foil;
- Sizel green;
- varnish (you can use hair polish or colorless nail polish).
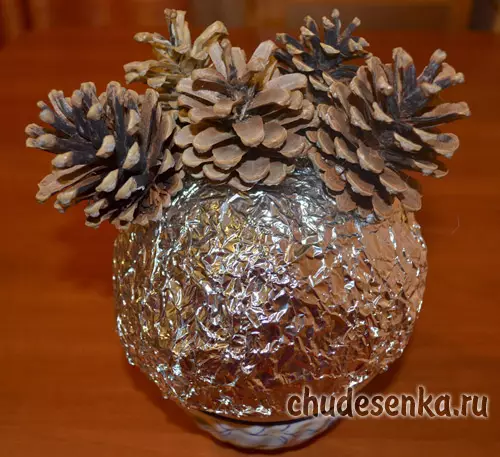
The ball should be half wrap foil.
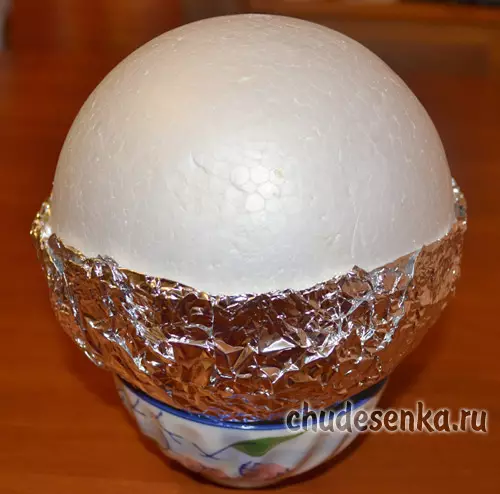
The resulting container from the foil will become the basis of the future basket.
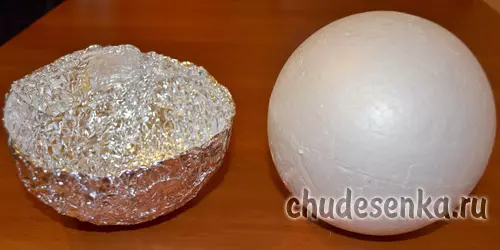
Foil should not be removed from the ball because it should be reeded with cones. And it is easier to do it on a solid surface.
Work is carried out with the help of glue pistol. At the same time, the bumps are fixed tightly to each other "the rash" side outside.
Since the shape of the cones involves the presence of voids between them on the surface of the foil, free places are closed with a sisal.
So work acquires completeness and presentable appearance.
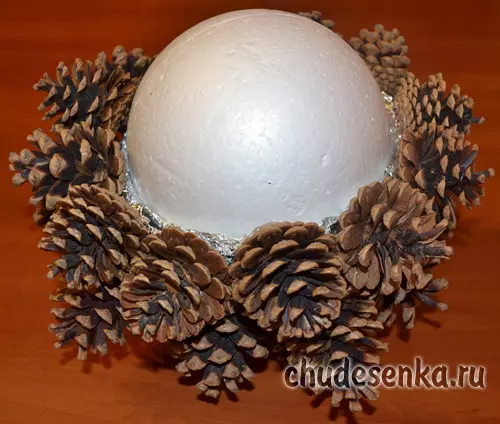
Cart is ready. It's time to do it filling.
Article on the topic: how to tie a crochet chicken
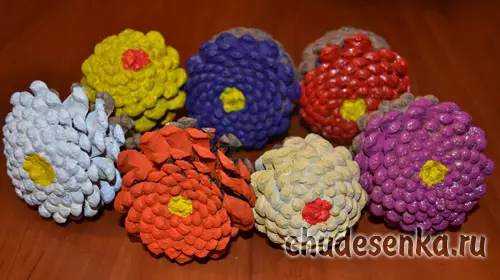
For this, several cones are taken, which on the bottom are scorched by acrylic paints into the desired colors.
The blanks are left for drying, after which a contrasting core of the flower is added to the center of each color cone.
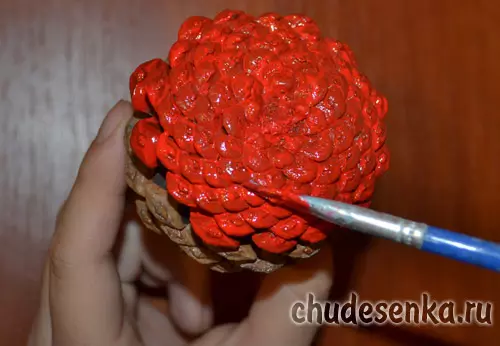
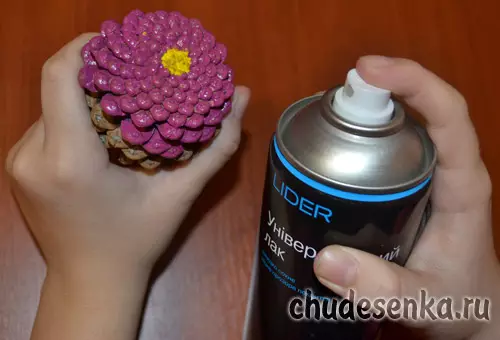
To give the gloss, each flower is covered with hair varnish.
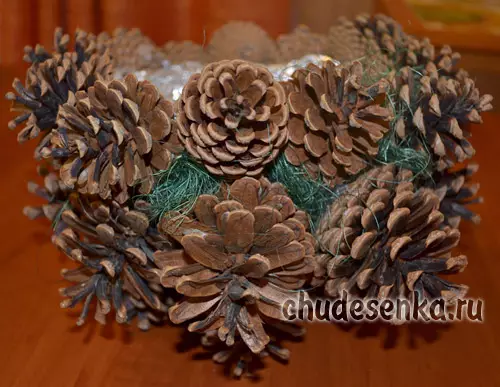
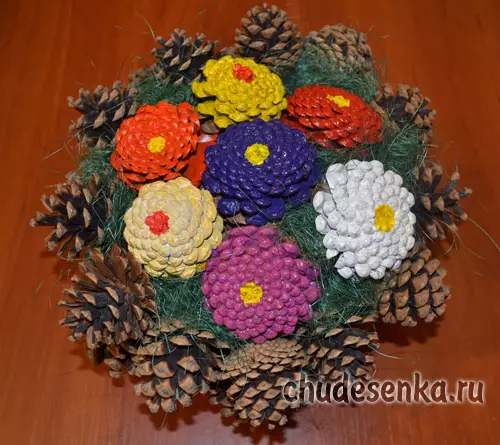
After the flowers are finally dried, they are placed in the basket of cones.
Free space between them is decorated with a sisal.
Composition is ready.
In working on any basket of cones, regardless of which instruction is taken as a basis, one important point should be taken into account: under the influence of heat, not fully opened, pine cones have a property to open.
In order to avoid the skew of the finished work, it is desirable to cover with varnish.
So the basket will look more advantaged in the interior, and the bumps are fixed in the original condition.
Video on the topic
What other options for baskets from cones can be depicted independently, demonstrates chosen video.