
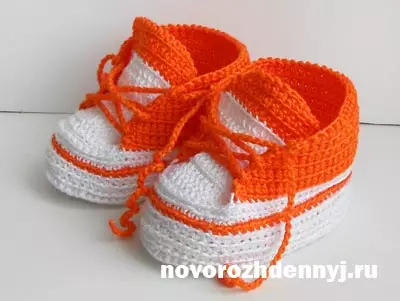
What could be better than a gift made by your own hands? And not just done, but connected? So what gift can you be given to the baby, who just learned to walk? An excellent gift of the gift for both the boy and the girl will be booties-sneakers. So how can you tie booties-sneakers in crochet? Master class will help get a decent result? This wonderful product can be associated not only for a gift, but also for your baby. Stylish shoes can not only warm the small legs of the baby, but also become an excellent addition to the suit or pants. Especially relevant wearing binetocked in winter when you need to warm the gentle legs. Even in such a small age, the shoes should be not only beautiful, but also stylish, and these sneakers can become the first truly stylish toddler shoes.
We provide your attention a master class, guided by which you already quite soon see your baby running in funny, soft, comfortable bootes.
First you need to decide how the color of the booties you want to see.
For girls, gentle shades are suitable, such as: pink, lilac, bluish, and for boys more stringent shades: blue, green, brown, orange.
In addition to threads, it is desirable to choose the yarce yarce of two colors, you should also take a hook number 2, white threads for sewing and needle. Select your own stop on white and orange.
Knit durable soles
Knit should begin with the sole. The associated sole ideal should be associated with the similarity of the scheme of the booty-ced hook:
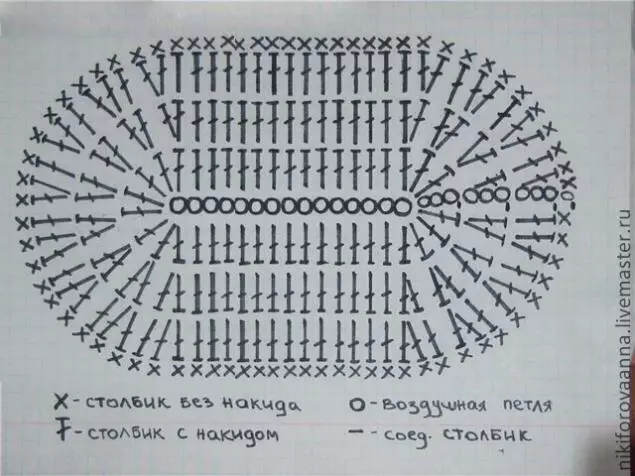
By the number of loops, it can be judged that this scheme is suitable for the legs of the kids who were approximately half a year. IN
The case, if a child, for which you knit booties-sneakers, is a little older, then you should slightly change the scheme by typing the necessary amount of loops at the very beginning and with an increase in the ranks on the edge.
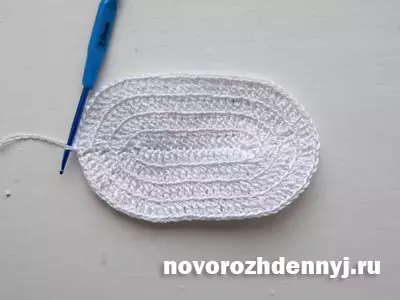
Taking advantage of the scheme and advice to increase the number of loops, as a result, this oval piece of white, this is already a ready-made sole:
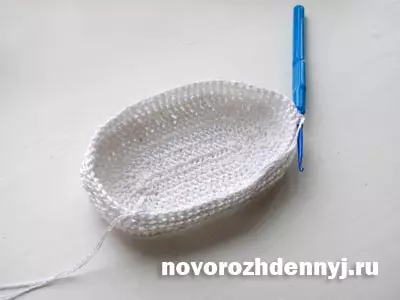
We proceed to the side of the boot
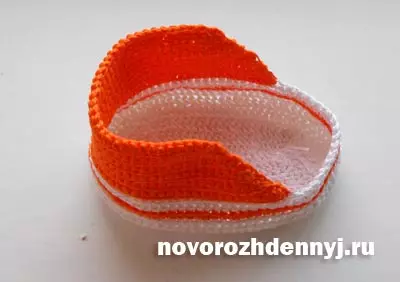
The next step will be the transition from the sole to the side parts of the booties-kample. We begin to lies on the sole of soles. We will do it with the help of loops with Nakud. To make such a loop, you need to start a hook for the rear wall near the standing loop and to stick one column with the nakid, and then the next one. Similarly, to plunge all the other loops.
Article on the topic: Magazine Mod No. 611 - 2019. New issue
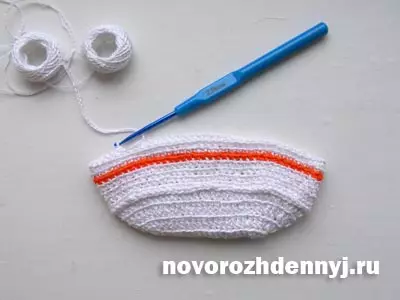
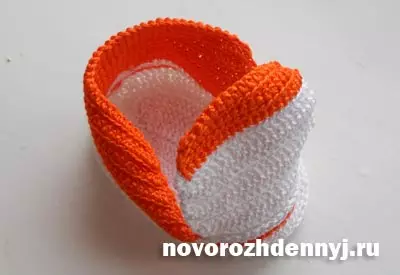
The remaining three rows knit the most common way - with precipitated columns. As a result, a kind of "boat" should be obtained.
Now it's time to make our booties-sneakers brighter. To do this, add color thread. In our case, the choice fell on orange. We take an orange thread and in just one row with a column without Nakid. This will be enough. And this is how the product should look like at this stage:
Again, we take the previous white thread and knit just two rows of columns without Nakid.
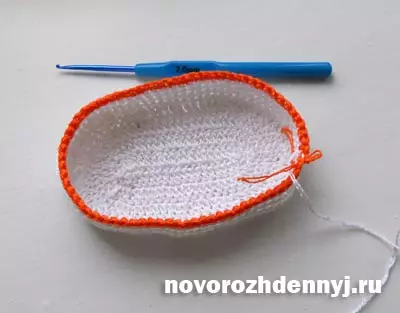
To check the side of our product, you should disconnect the white thread. After that, it is necessary to determine the average looping on the causthery, folding the knitting along.
Now, count on it 8 kettops in both directions and celebrate them. Then, to the last loop on the left, you need to attach the orange loop and penetrate one row of columns without a nakid to another latter loop.
The edge should be at an angle all the time. Therefore, each subsequent row should be finished and started with a semi-solitary. What should come out at the end, perfectly seen in the picture:
Tag for slippers
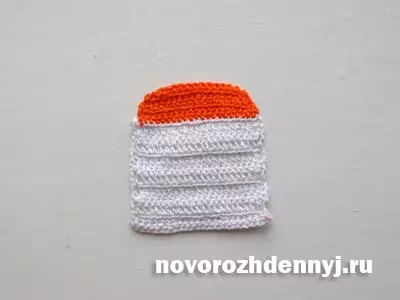
After the main part of our Ked is ready, you need to proceed to knitting tongue. First, pick up a chain of simple air loops. In the amount of about 17 pieces. We are tied by columns, but without an inlets of the canvas of the rectangular shape. This is all done with white thread, and now bind the thread of orange, and there are still several rows in the same way. Here is such a cute tongue from us turned out:
After that, we take the needle and thread of a white flower and simply sew a tongue to the sample of the sample.
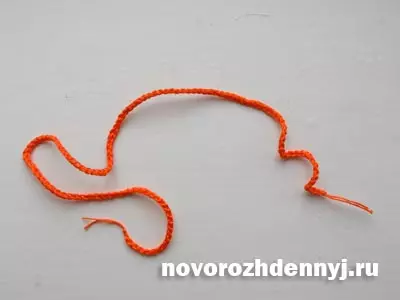
Decorating a bright shoela
The cord knits elementary. We take a bright thread, in our case orange, and make a chain of air loops. Then the resulting cords are made in specific places on the side of the product.
Article on the topic: Scheme oval crochet for beginners: Detailed description with video
In addition, there is a huge number of diverse types of bed-boys for boys with crochet. Starting from the color and ending with nominal emblems. The sneakers can be tricolor, four-color, laces can be accurate not just with air loops, as well as a full viscous. You can also apply embroidery or sew it. It all depends on the imagination of the needlewoman.
Video on the topic
To familiarize yourself with a great variety of ways to knit boxes, we recommend watching the video "How to tie the booties to the hook for beginners."