
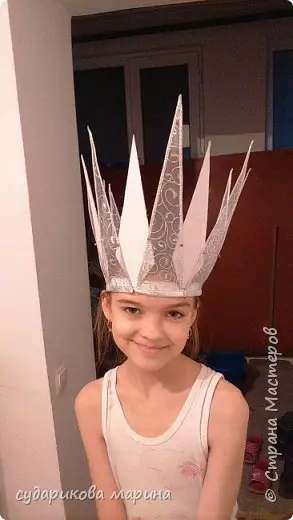
On the New Year's carnival holiday, the girls often play the role of snowflakes or a snowy queen. If for the first case it is easy to choose an outfit, then in the last version there may be a problem of searching for a submerged head-up. Unfortunately, a beautiful crown for a snow queen is rarely found in stores. Therefore, it is usually necessary to make it on their own.
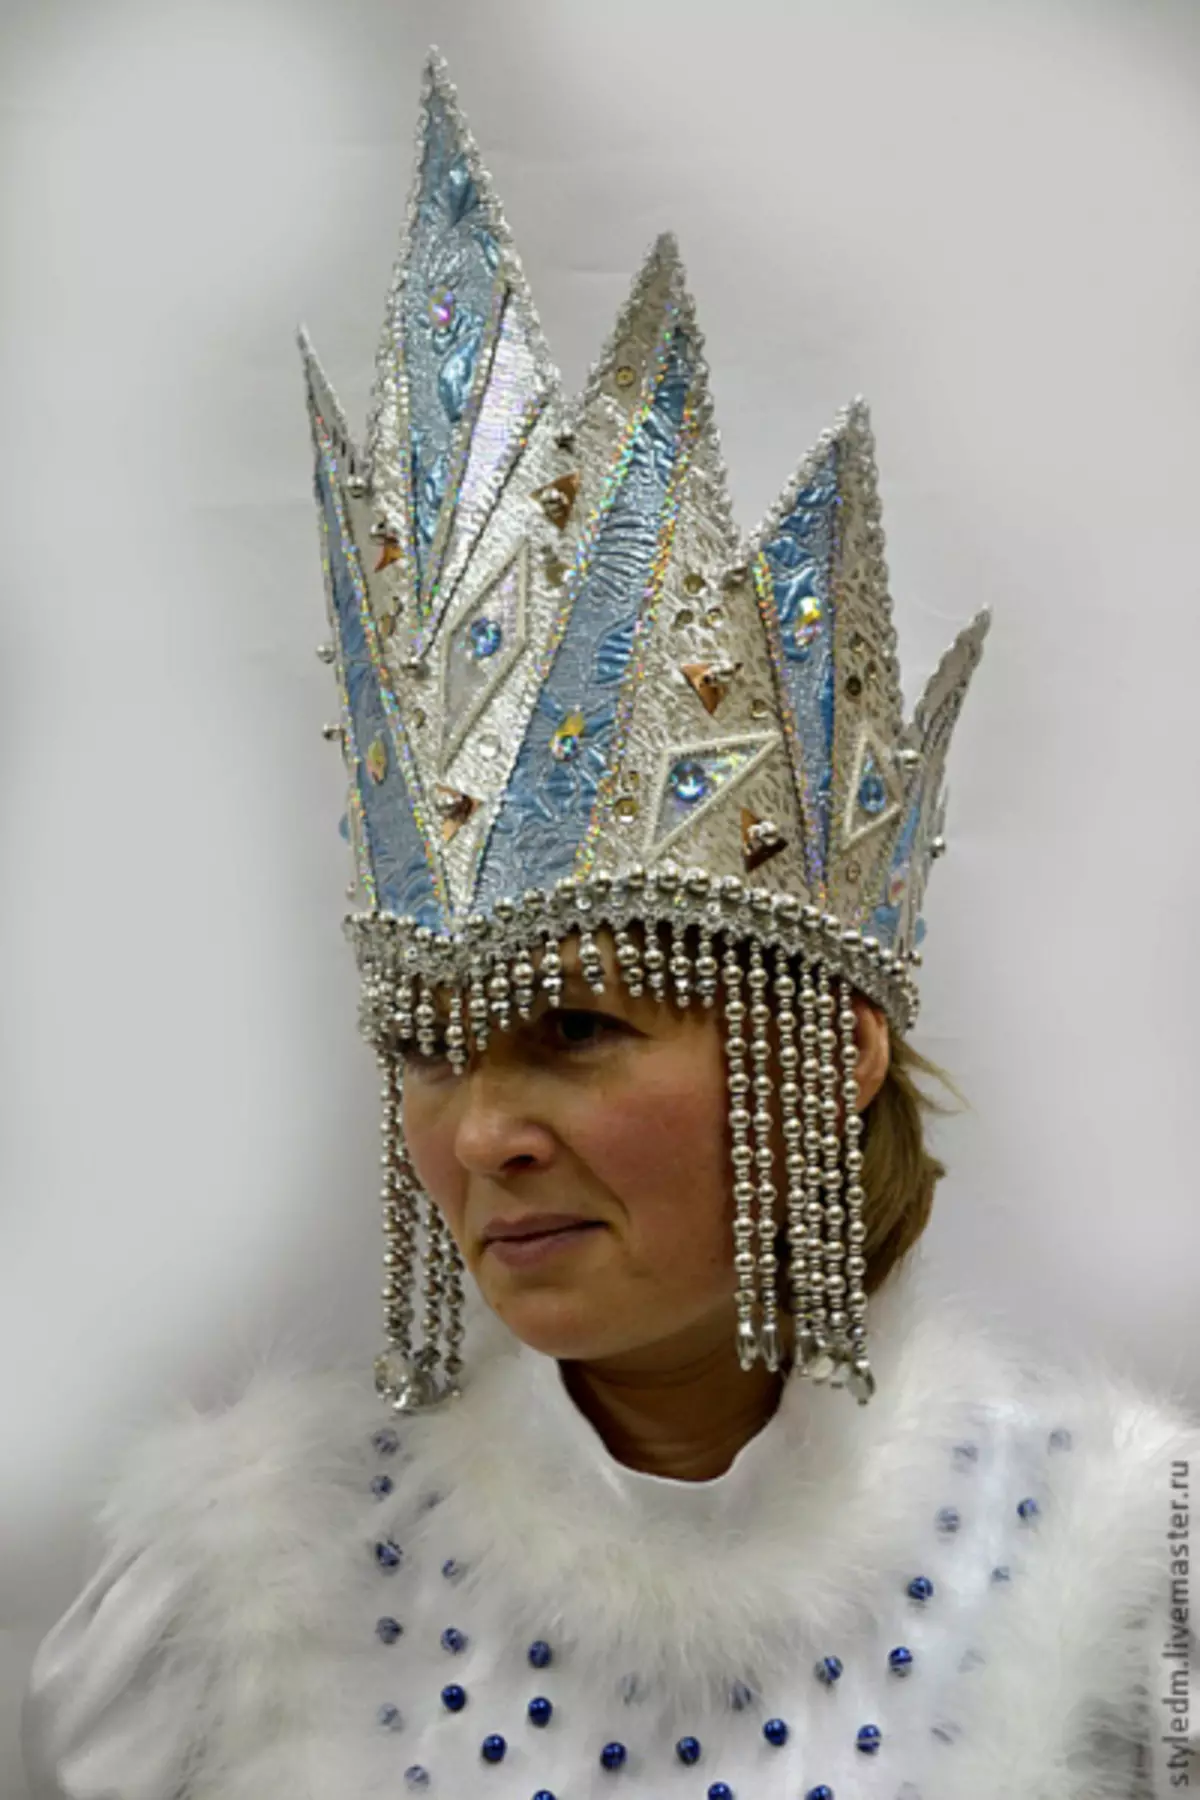
Ice accessory
Such a crown has a "candy" effect due to the use of non-standard material.

In the work on the product it will take:
- transparent PVC film or plastic (you can take old paper covers);
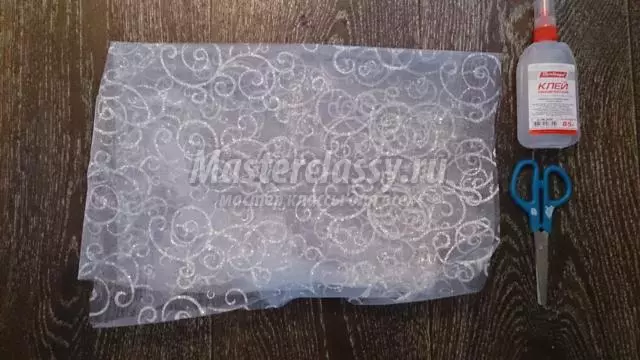
- fatin with silver pattern;
- cardboard;
- shiny cloth (under silver);
- thread, needle;
- scissors;
- thin wire;
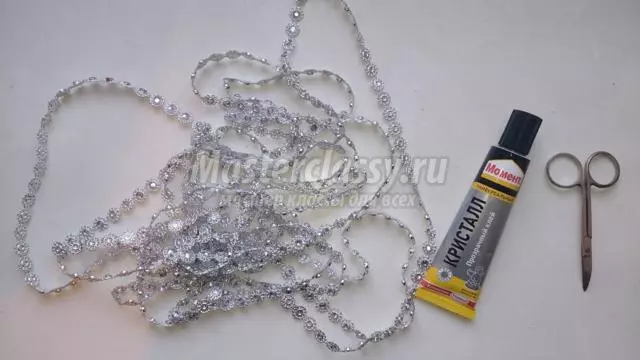
- silver braid;
- Elastic band 2 cm;
- Termoklay;
- Decorative elements (for decoration).
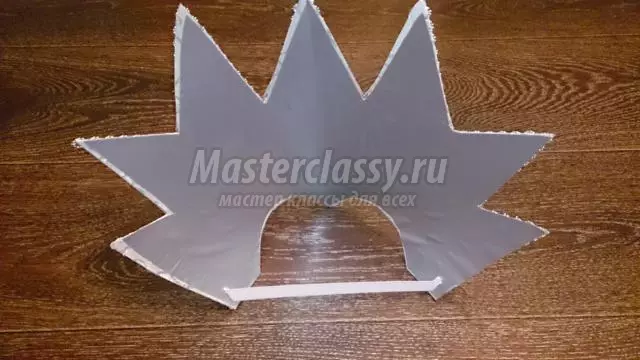
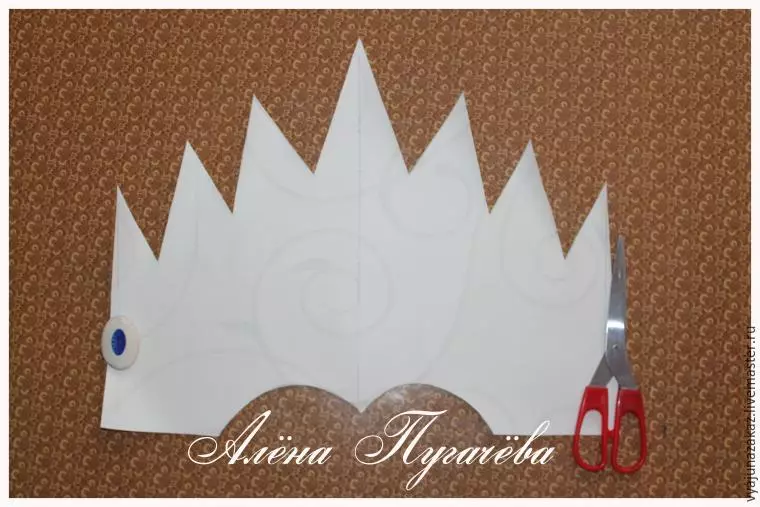
First of all, the scum is measured. Based on the resulting measure you need to calculate the width of the base of the vertices of the future crown. The products are provided by seven.
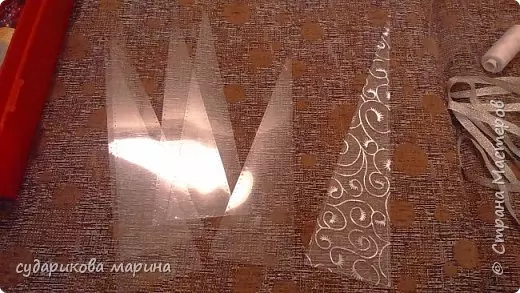
The height of the triangles is selected individually. It is only necessary to consider that the central triangle will be the highest. Details adjacent to the central part are cut by 2 cm shorter than the main one. The following two triangles are 2 cm below the previous ones, etc. Based on the above-described principle, 7 triangles are cut from the PVC film. Separately cuts the same parts from the fate.
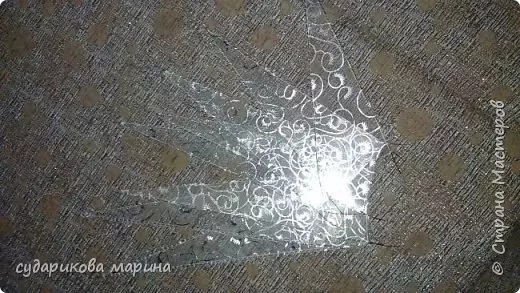
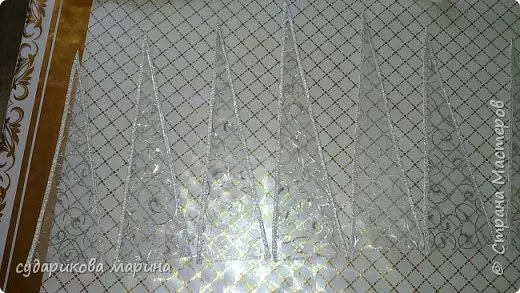
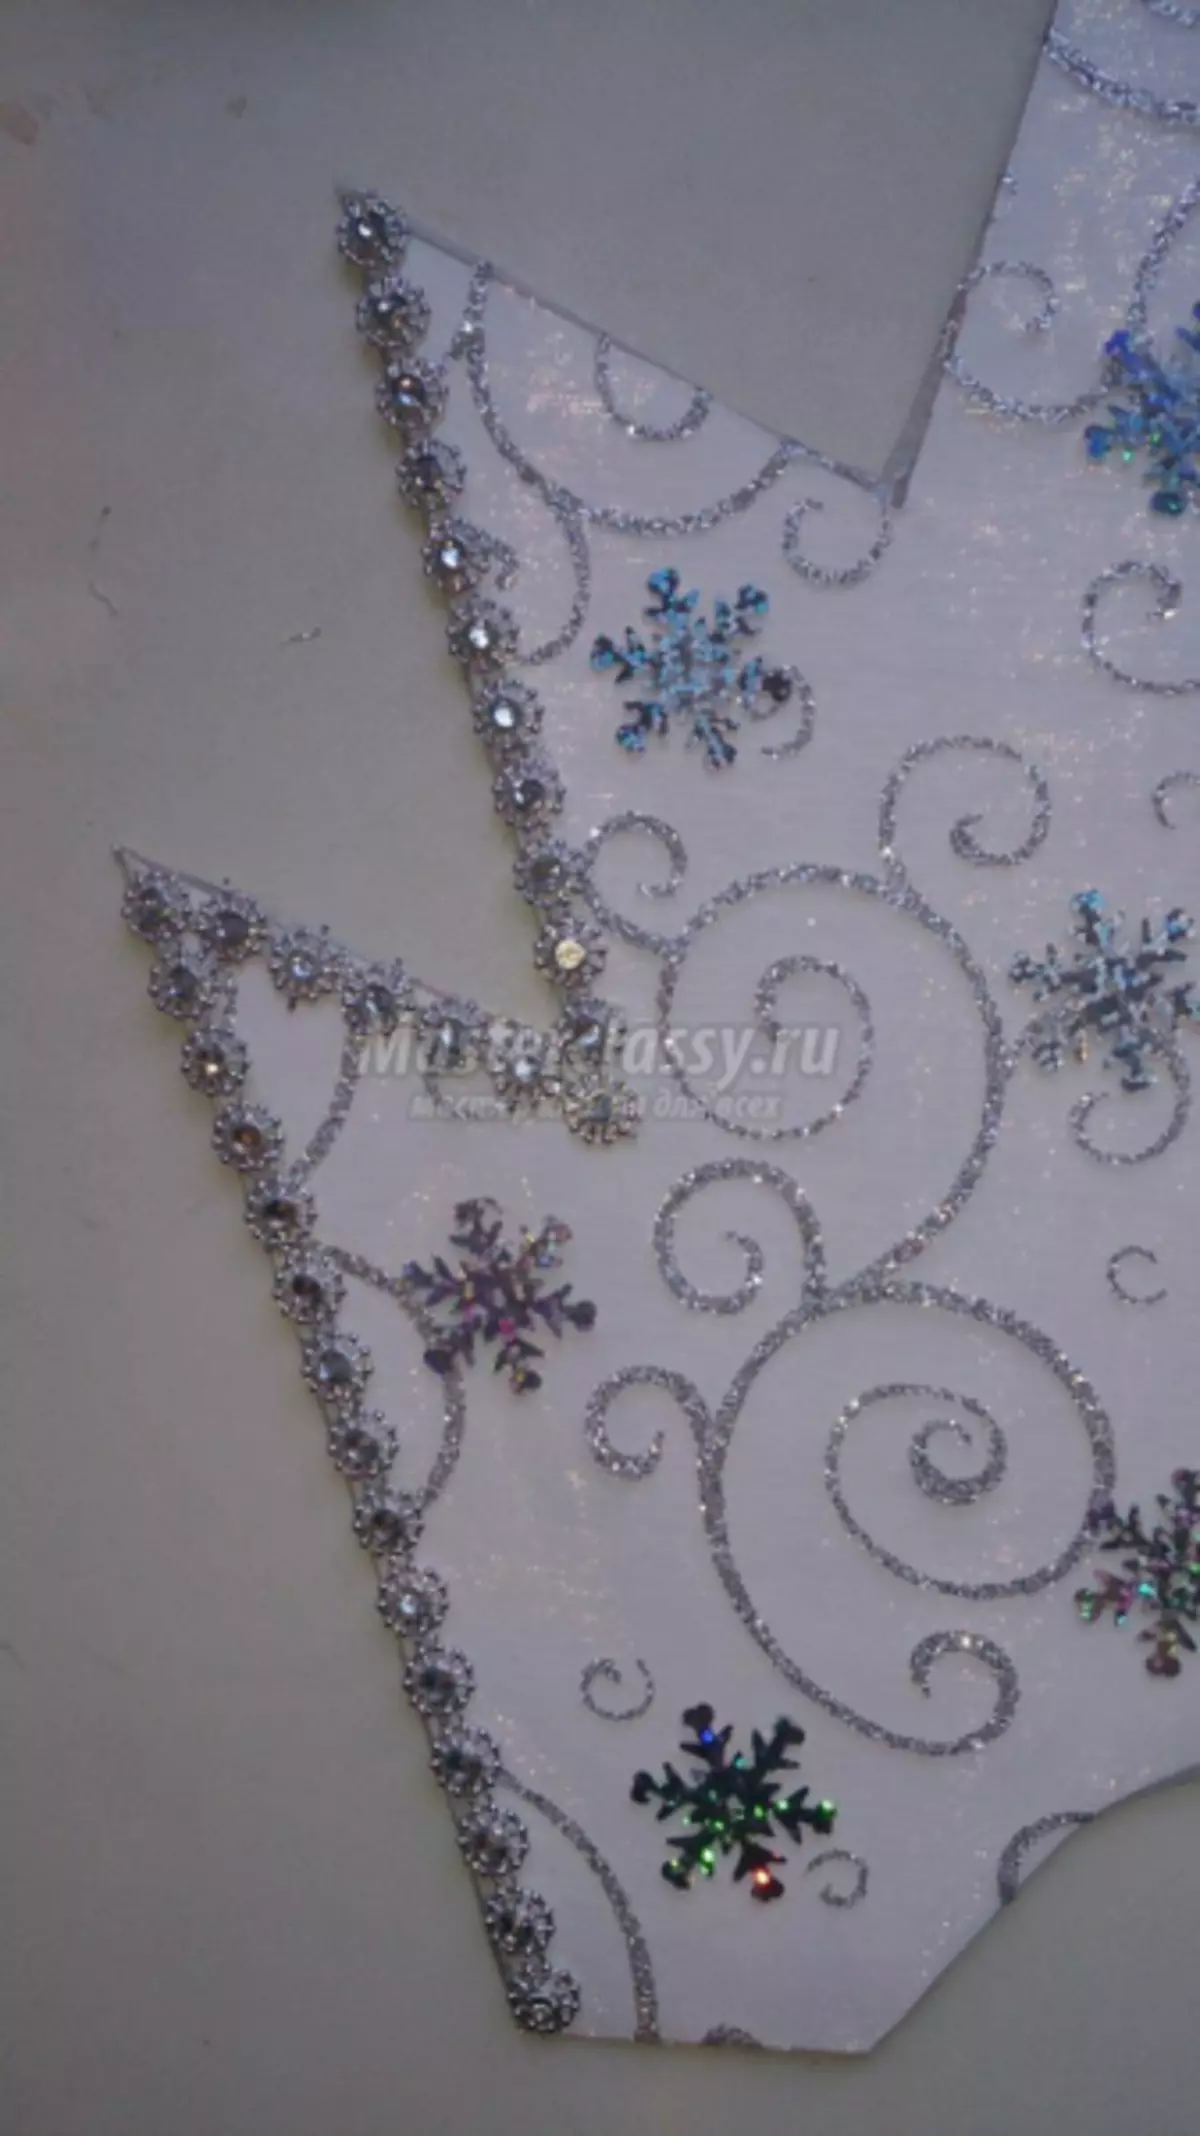
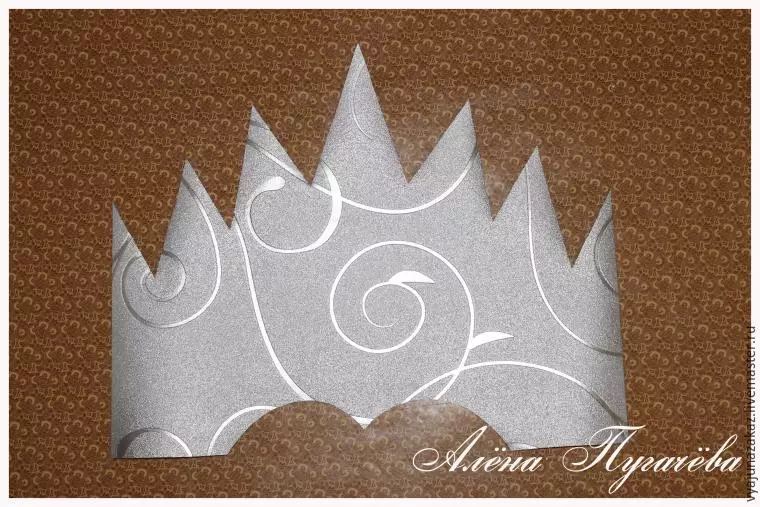
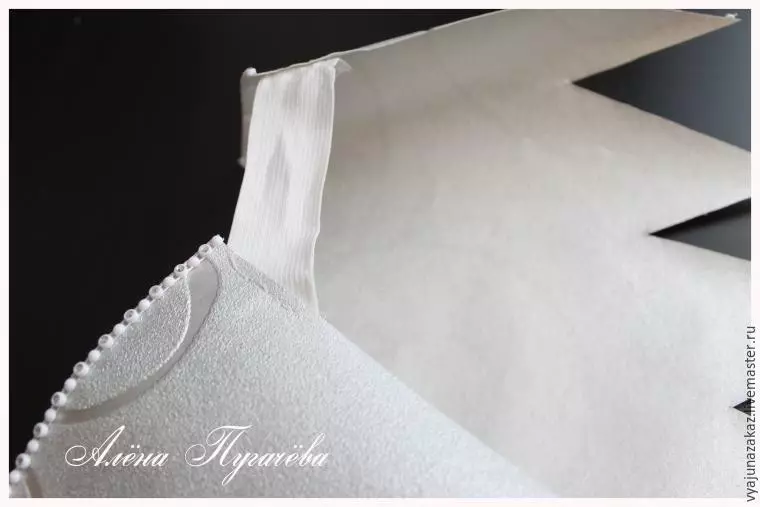
The corresponding fatal part is superimposed on each workpiece. On the edge of the blanks, the wire is sewn using a gripping seam. All triangles are framed by silver braid. The figures are desirable to be slightly bend to keep the form better. Finished transparent details are collected on the gum. It is most convenient to do it on a sewing machine. Ends of the product are connected to the ring.
To create a surround effect, it is necessary to supplement the crown with opaque elements. For this, two triangles are cut out of cardboard. Since these parts will be located on the front of the crown, their height should be slightly lower transparent triangles.
Article on the topic: Mignon hat Crochet for a boy: Schemes with photos and video
Cardboard blanks are trimmed with shiny cloth and secured by English pins to the front "ice cream", as in the photo.
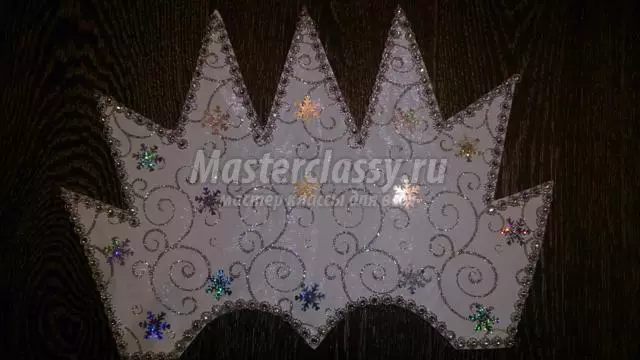
Dense and transparent details are admonished to each other. It remains to decorate the crown on your own taste. In the paper, you can use rhinestones, beads, sequins, lace elements.
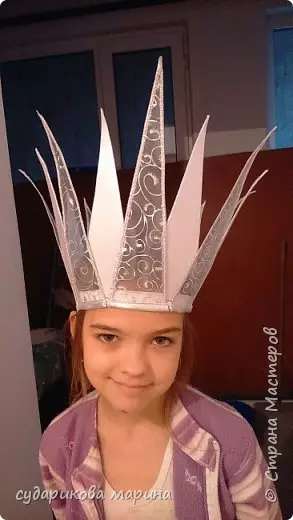
Royal Ice Accessory Ready.
Fast option
Tip! The crown is quite realistic to make faster, if you do not cut every clove of the product separately, and apply the technique of a solid pattern.

To do this, cook:
- cardboard;
- fabric packaging for flowers;
- scissors;
- elastic;
- silver braid;
- silver paper;
- threads;
- glue;
- Sequins in the form of snowflakes.
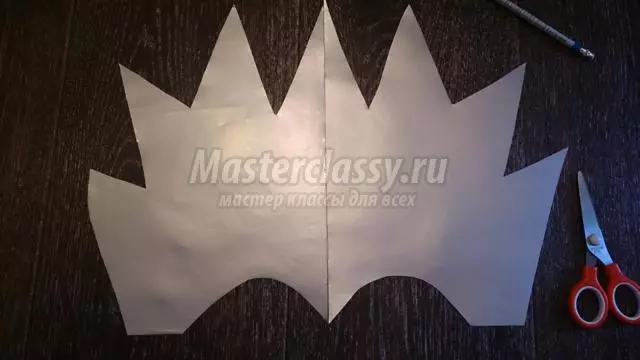
The crown pattern is drawn on the cardboard. The workpiece is cut. The leaf is superimposed on the fabric and will be worked out with the calculation of the allowance.
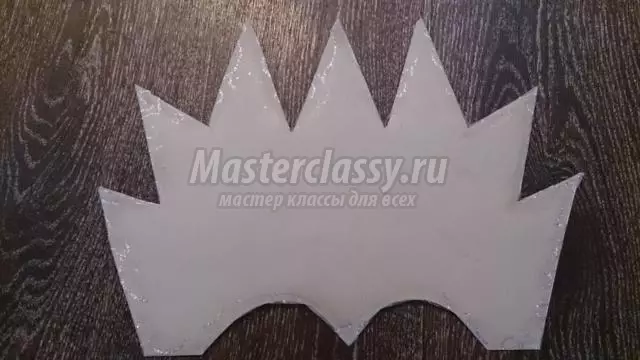
Fissure item needs to be cut, then apply to a cardboard layout. Punches are bent on the opposite direction and glued to the cardboard.
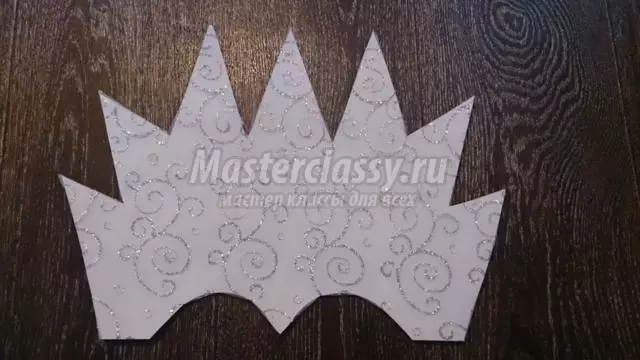
With the wrong side of the workpiece, glue is applied, after which the crown is pasted on silver paper. Thereby hiding unsightly allowances from the reverse side of the product.
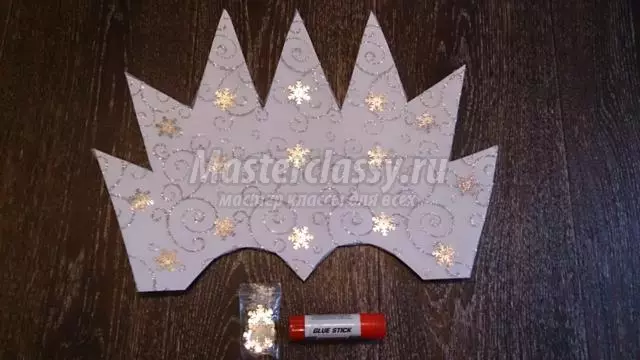
The crown is neatly cut. The product is decorated with large sequins in the form of snowflakes.
The contour of the crown is framed by silver braid. Depending on the quality of the braid, you can glue it with a teromochelery or to sew your own hands.
It remains to try the crown and calculate the length of the gum on the head. The gum is sewn over two edges of the product.
The crown is ready. If the holiday is already "on the nose" and it is necessary to urgently get a "snowy" crown, then you can try a simplified version - a piece of cardboard. So that the crown does not look "craving for an ambulance", it is desirable to replace the cardboard with a piece of blonde wallpaper with a pattern.
It draws a crown layout. The template needs to be cut.
The billet is then scored with aerosol paint silver color. Since the aerosol is used to be sprayed in all directions, it is recommended to provide for this moment and perform staining in the corridor, pre-shopping the floor with a newspaper or polyethylene.
Article on the topic: Champagne "Bride and Groom": master class with photos and video
First you should paint the wrong part of the product. On the front side you need to spend two staining stages. After applying the first layer, you need to dry the product, and repeat the staining.
When the crown is finally dried, you can proceed to her decor. The edges of the product are drawn up by edging with rhinestones or any silver braid. The crown is decorated with additional elements corresponding to the theme of the carnival costume.

The final step will be the sewing of a wide gum across the edges of the product. You need to measure the gum in such a way that the crown fits tightly.
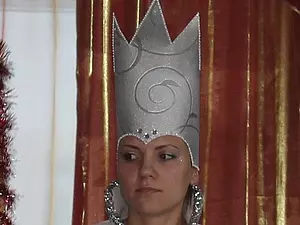
A carnival headdress is ready to delight his mistress. Any proposed master class will create an accessory not only for a child, but also for an adult. This is especially true for educators of kindergartens and leaders of theatrical circles.
Video on the topic
Video selection will help you better delve into the process and make a product faster.