Often in stores sell the most ordinary children's hats who do not affect the soul either moms or babies. That is why it will be good to learn how to knit them on their own, because as a result, the unique and high-quality designer thing will be. Cap knitting knitting for a boy can everyone. Make such a thing for your child or a gift not only interesting and exciting. This will allow you to stop your choice on better material, choose a color gamut and style. In addition, the son will overflow the feeling of pride for the fact that the hat is connected by the hands of mom.
You can decorate the finished hat in different ways. For example, to sew a picture with your favorite hero or to embed some bright element. For very small children, you can connect a hat with ears or in the form of a helmet.
At first glance, ideas are not so much, but it is worth only to look into special collections, and the Fatasia will immediately be played out, and the knitting will only be pleasure!
Ears on Makushka
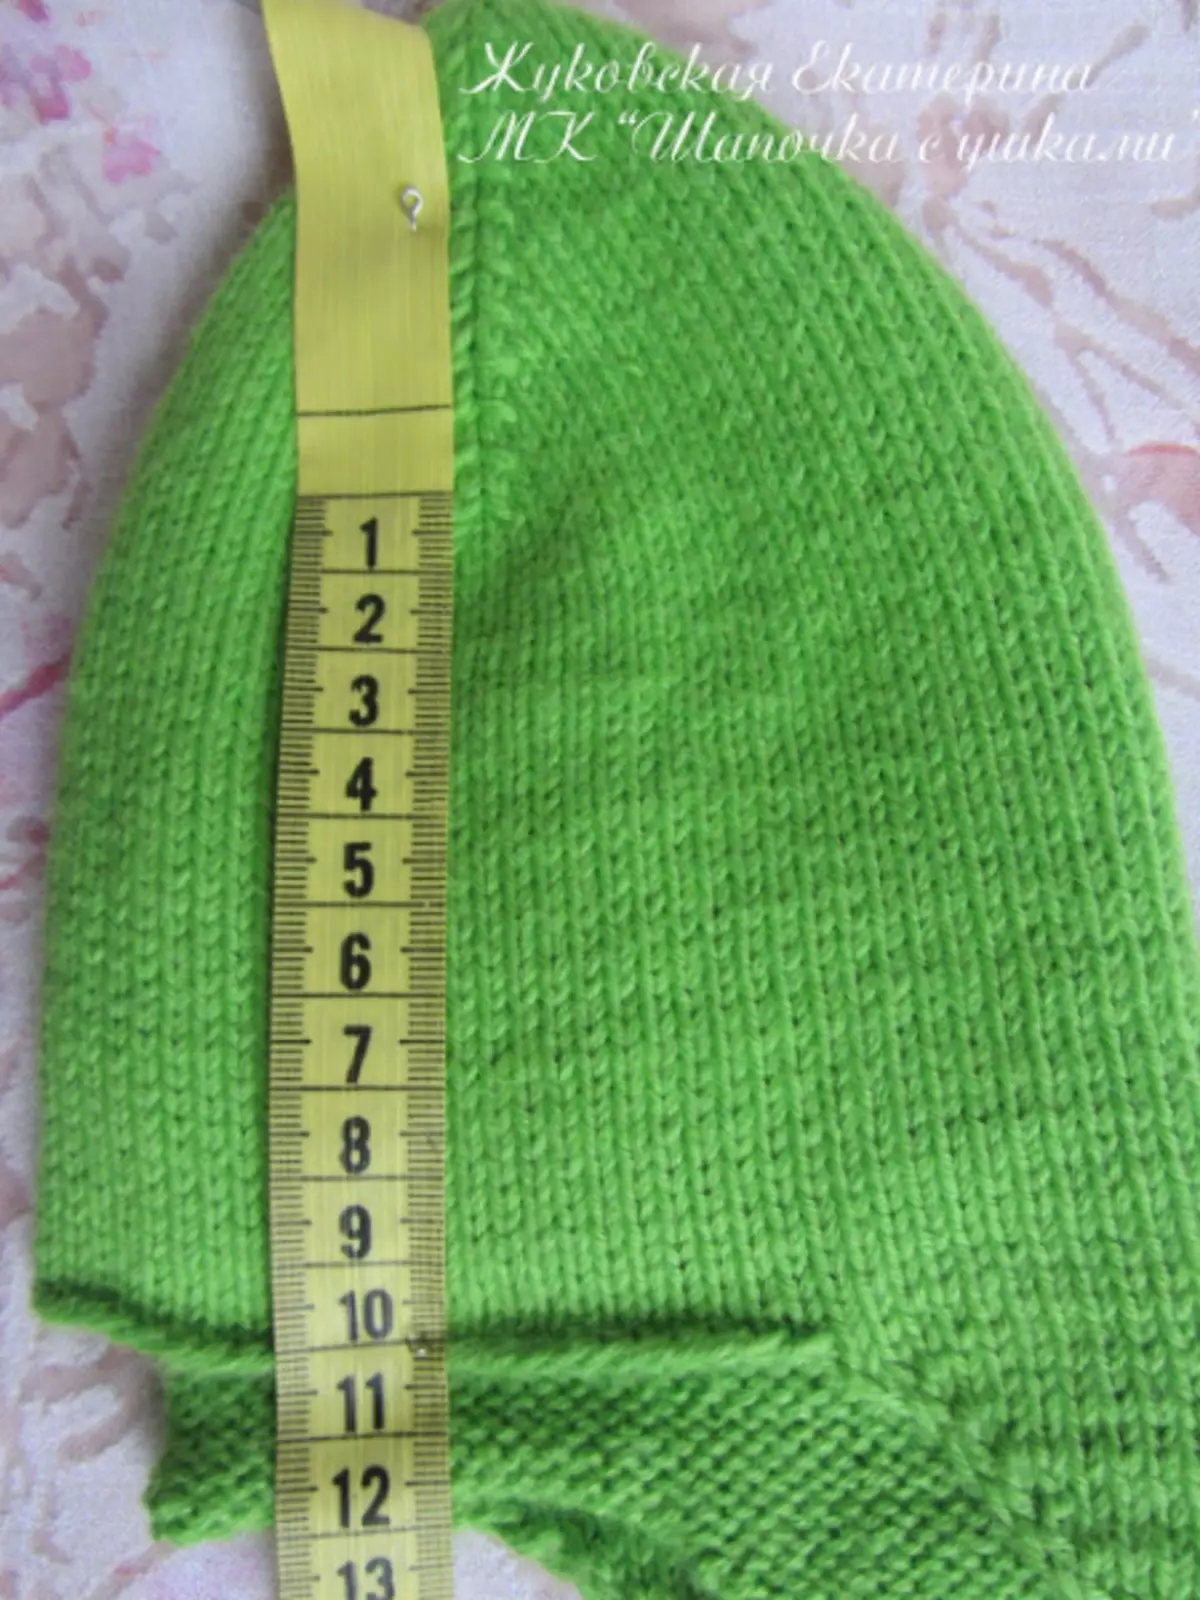
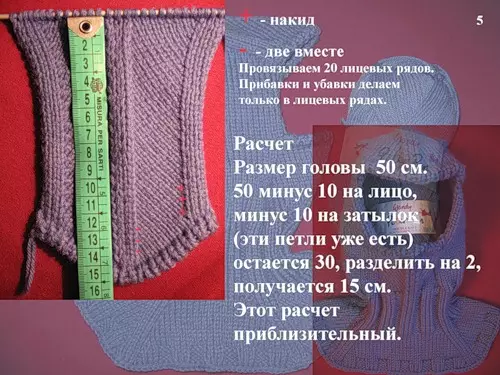
An example of calculating the cap bounded by the flare on the og = 50cm. Knitting density 2.6P = 1cm. Calculate how much you need to dial the loops: 50 * 2,6 = 130p. Split the total number of loops on 5 parts: 130/5 = 26P. Distribute loops like this: 26 loops on knitting ears, 26 loops to knitting the occipital part and 26 * 2 - front part.
If the og is more than 50 cm, or the knitting density differs from the density given in the example, the calculation is calculated by the specified formula, simply substituting its data.
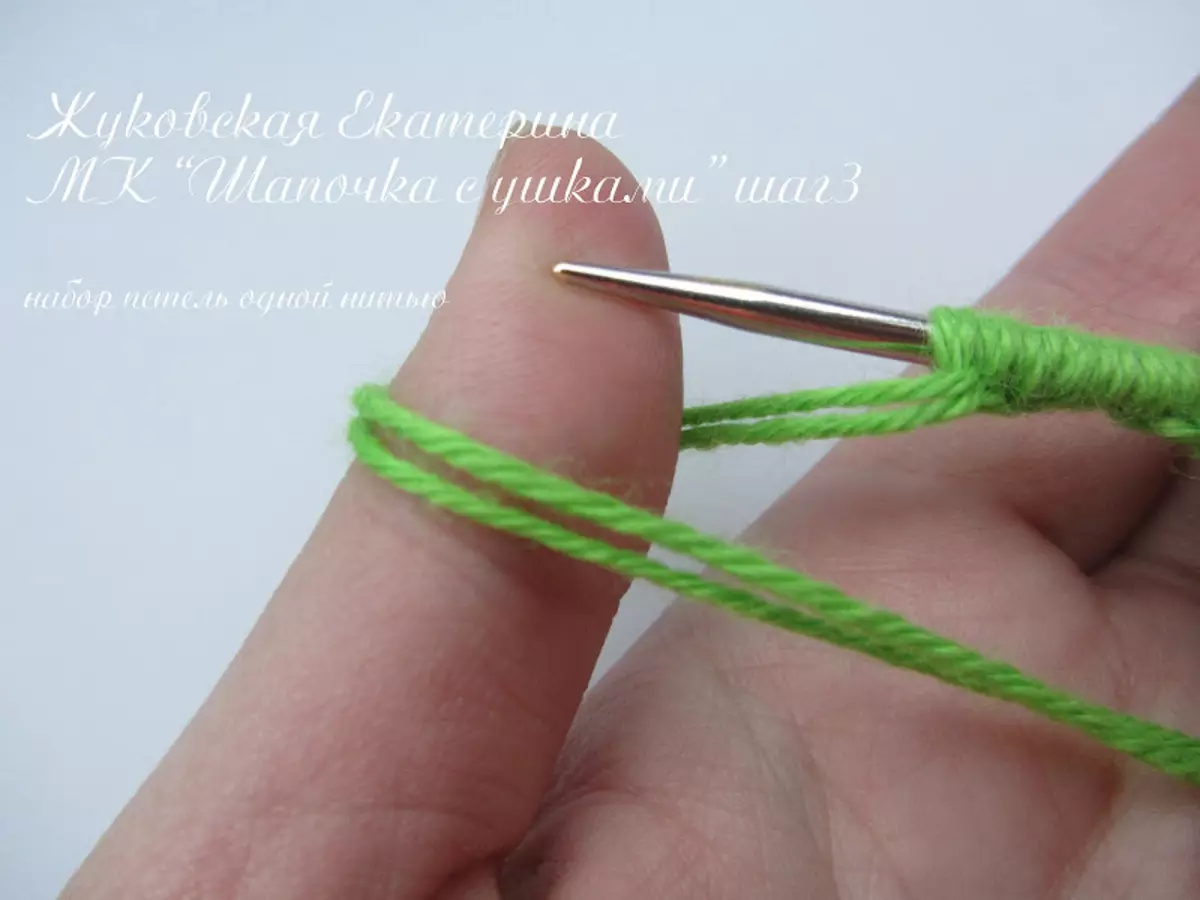
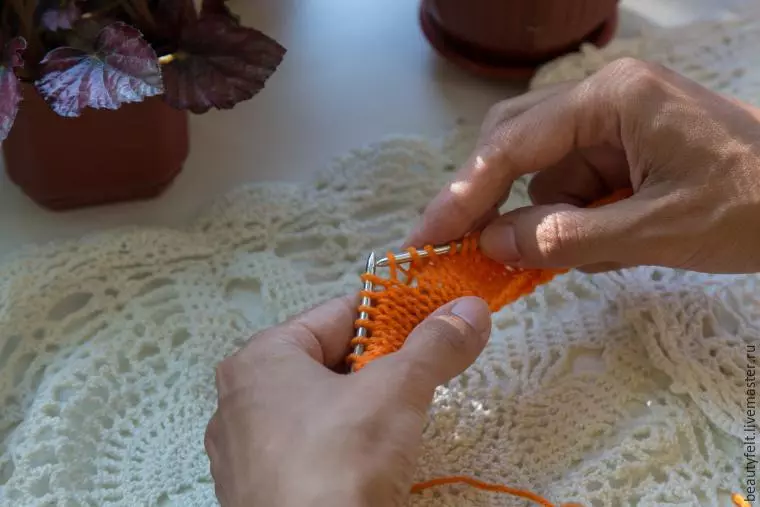
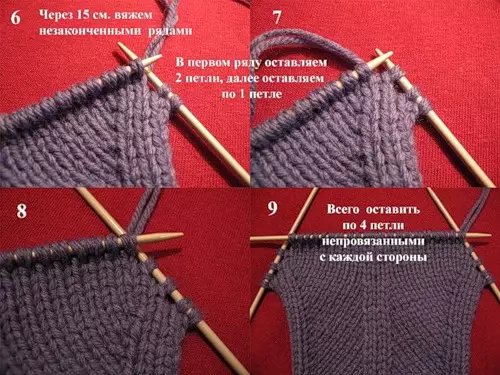
How to associate such a cute new book? Knitting to start with the ears, tissing two at the same time from two clubs. Dial 4 loops for each ear.
Make an increase in each second row of 2 loops (along the edges after the edge). In each ear add 22 loops. Plus 4 scored initially, total 26 loops.
Next, dial 26 loops between the ears for the occipital part of the header. The set is carried out by one thread, that is, after checking the front row of one ears to dial a loop, continue to knit the face row of the second ear. The same thread knit a hat to the end. The second thread can be trimmed.
Article on the topic: Copyright Polymer clay dolls: master class with photos and video

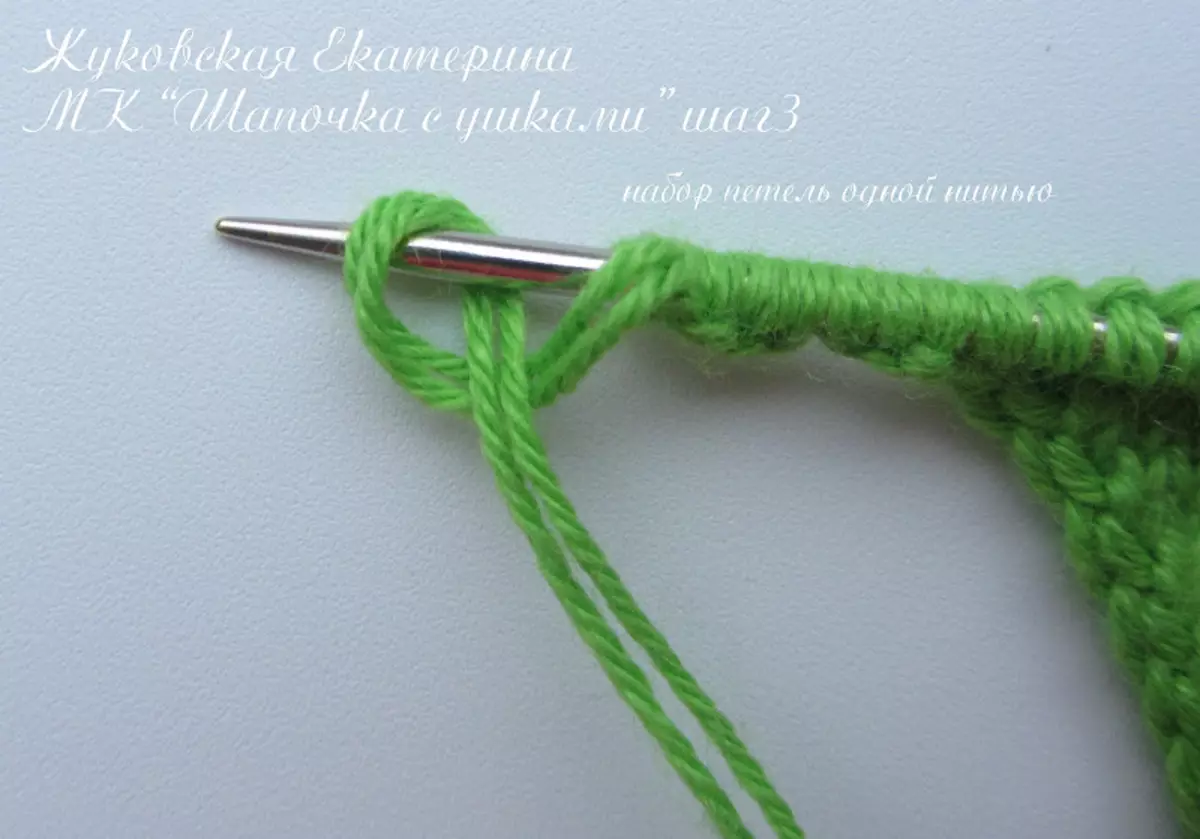
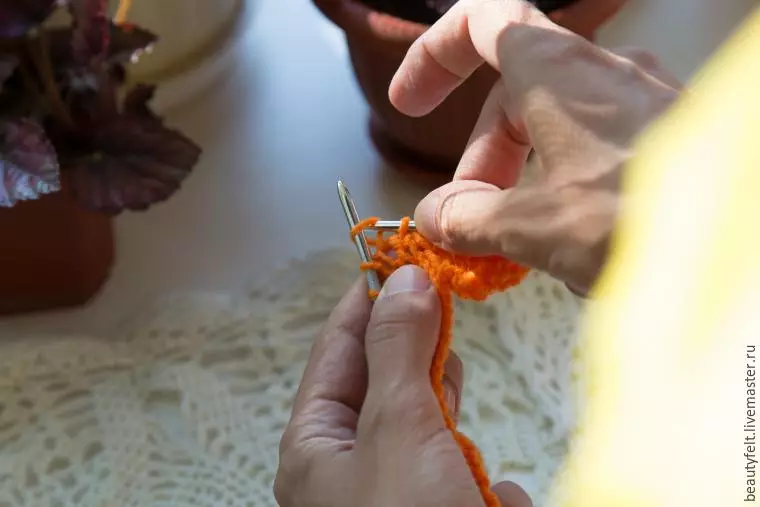
To penetrate about 2 cm in height, making the addition in the front of the ears in each second row. The ears then should be 30 loops.
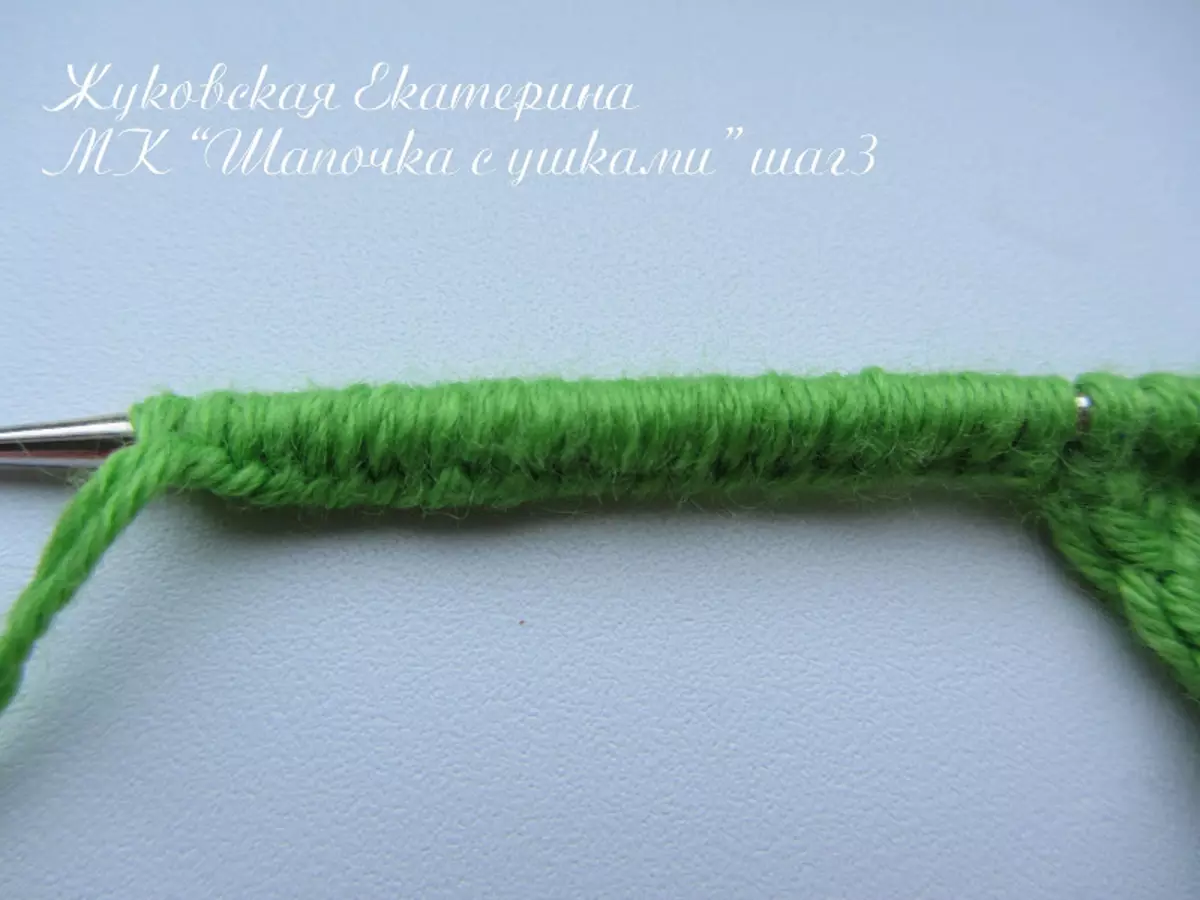
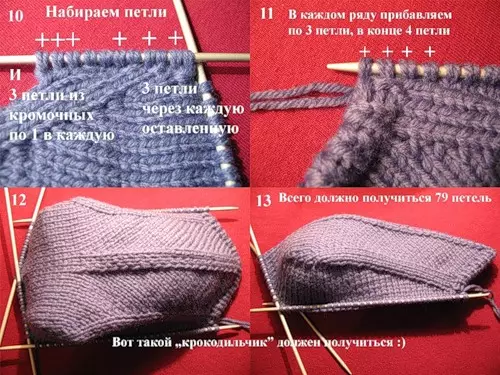
Dial the remaining loops to transfer and close the circle. Before you need to dial 26 * 2 = 52 loops; 8 loops add, having the occlault part, 52-8 = 44 loops remains to dial.
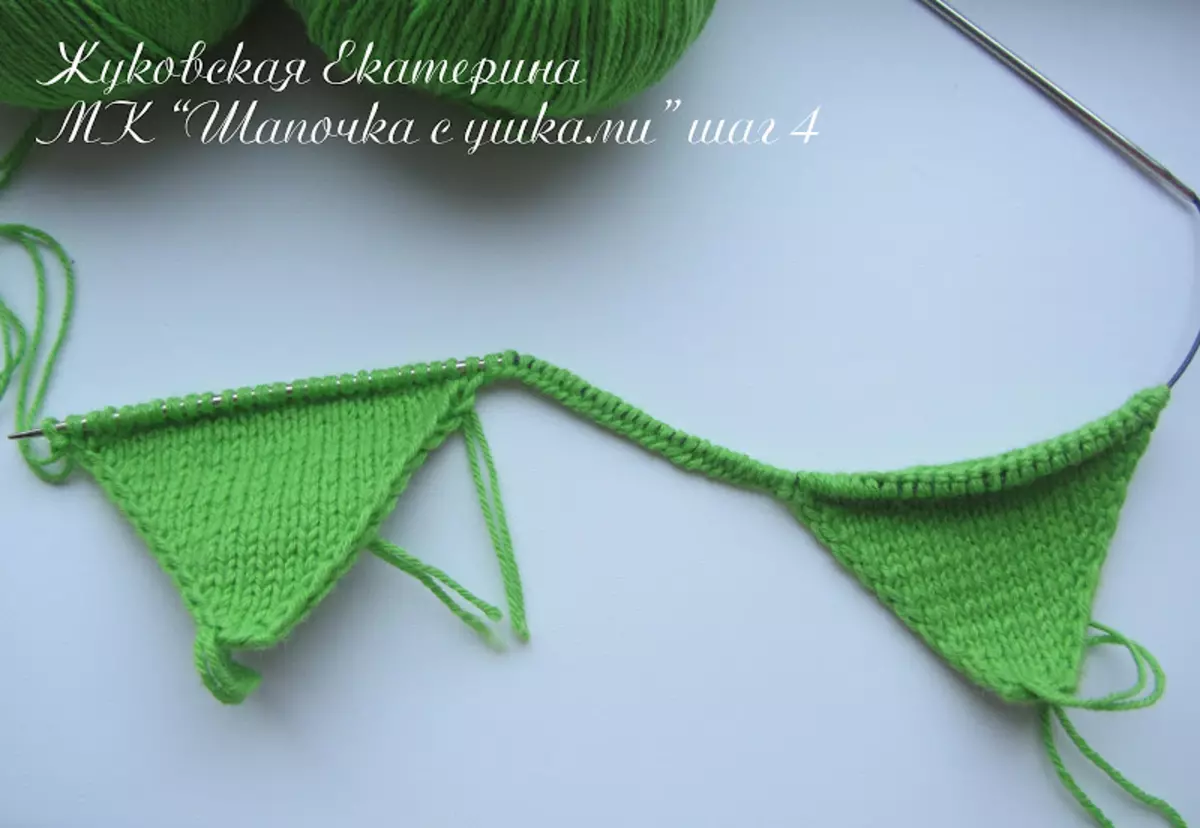
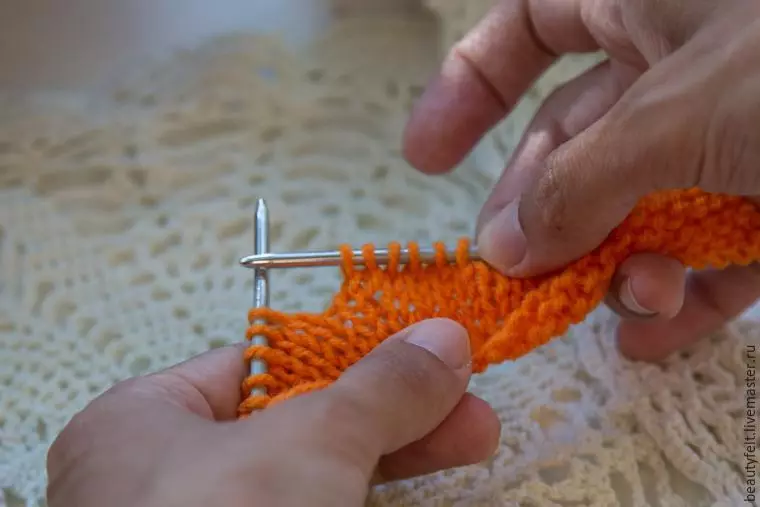
After starting to make the believer in order to formed the top. Share all the loops for five parts and drop in each second row two loops across the edges. When the loops get less, go to stocking needles. Close the top, at the end (when each sector remains about 6 loops) to divert the loops in each row, and not through the row.
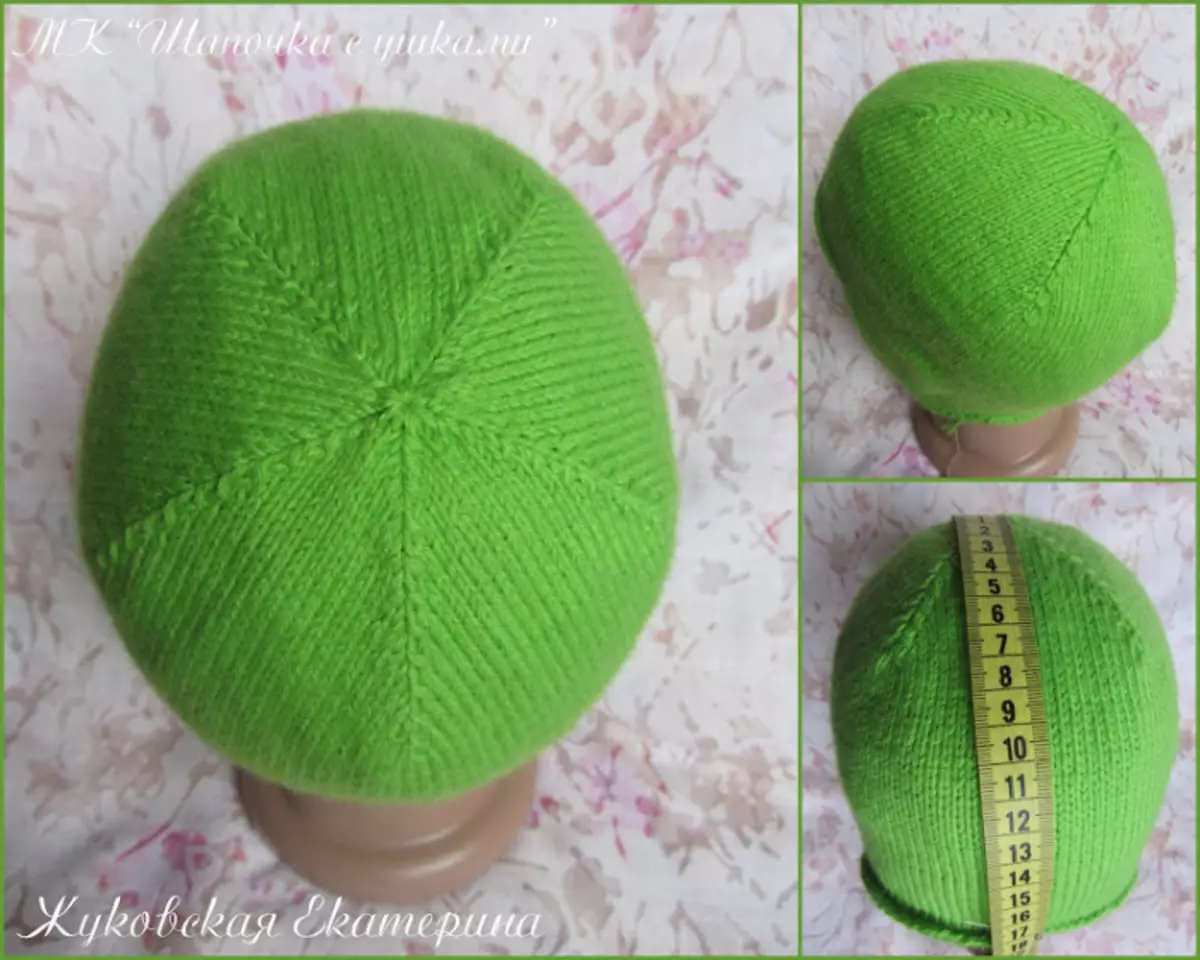
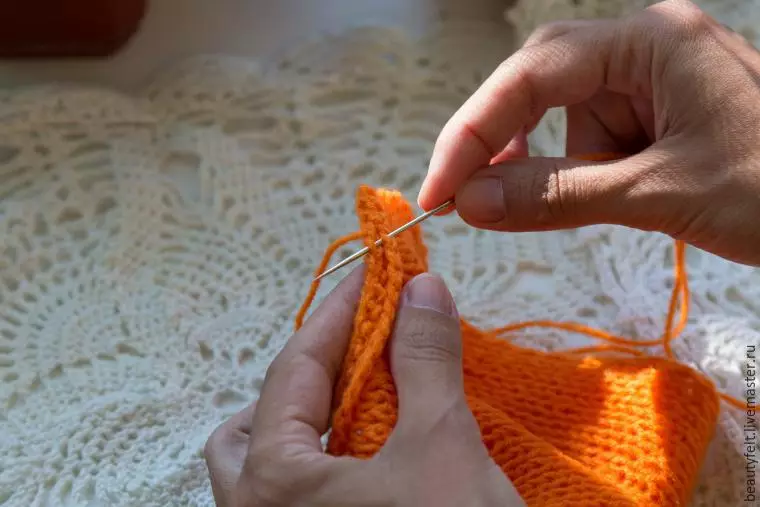
Hood is ready. Next, you need to make a lining, design, strings - in general, everything that your heart is. It depends on what I want to get in the end.
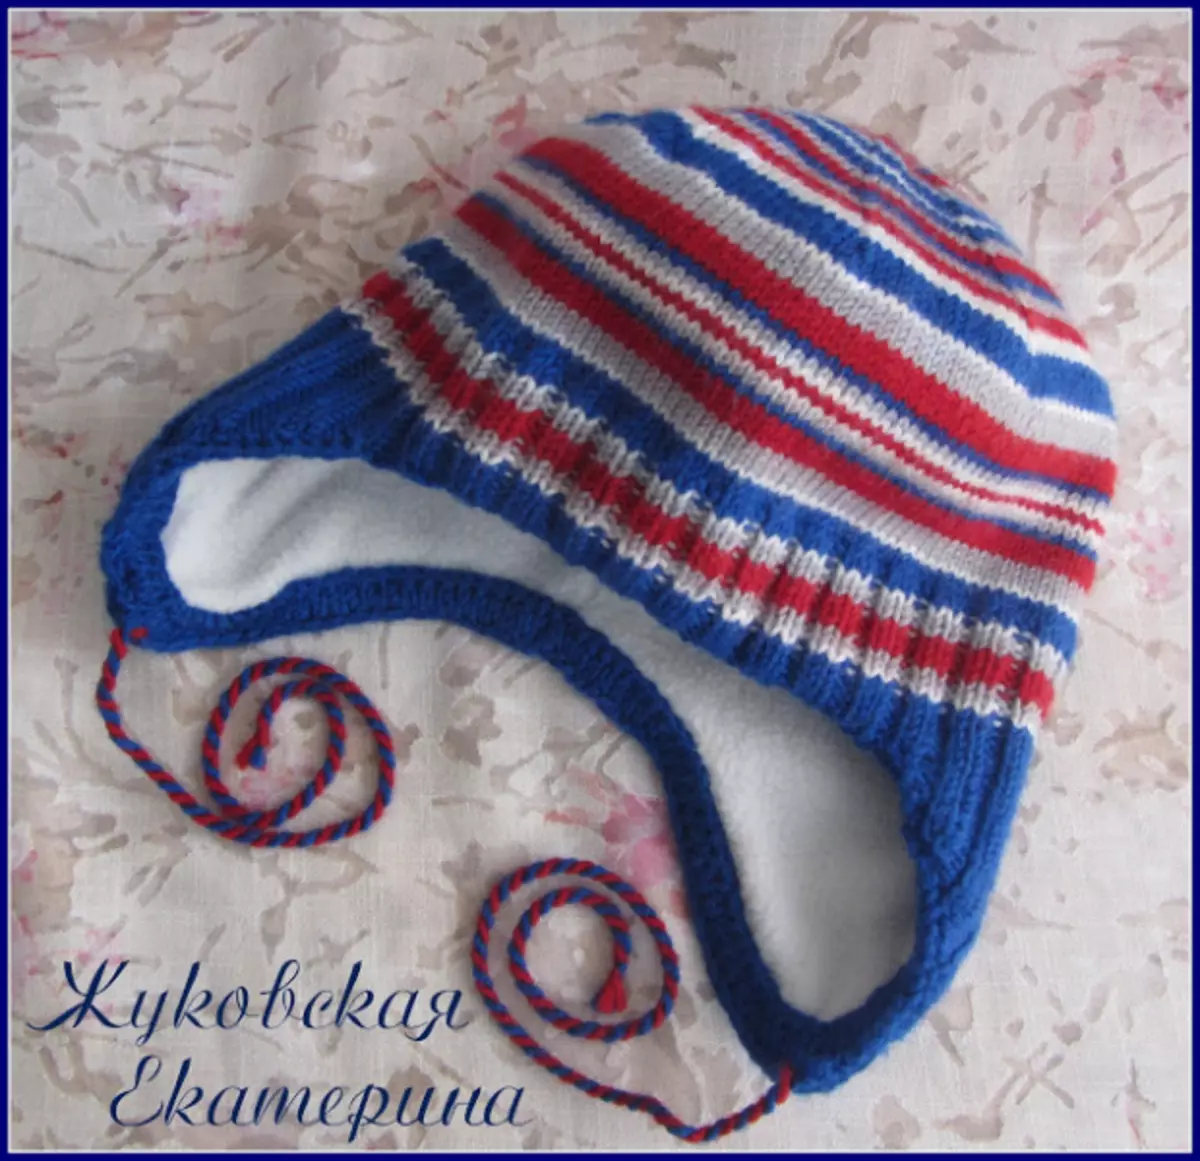
"Listenok" for baby
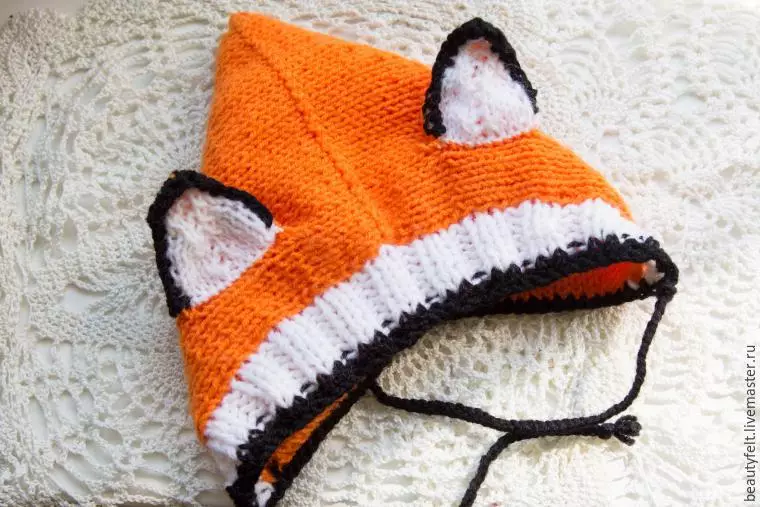
Tie such a cap will be only a beginner knitter. It uses facial and irons, as well as cooler semi-solids.
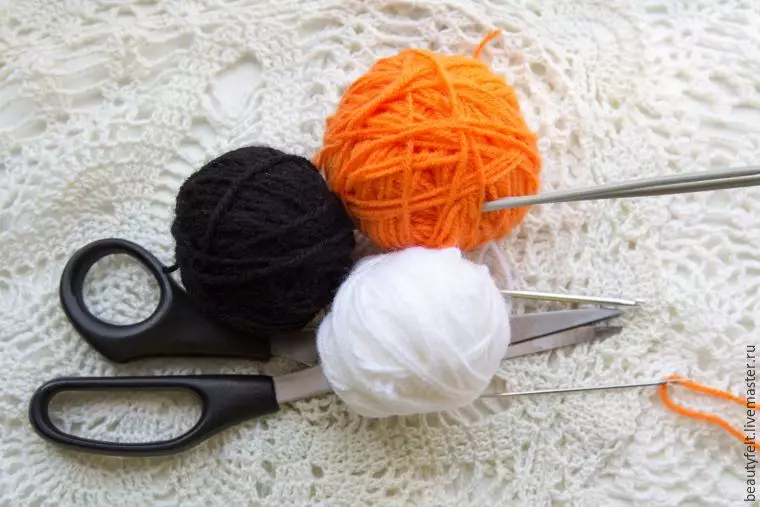
It will take orange, white and black yarn for its performance. 100% acrylic is perfect, but the fans of natural materials you can take a semide. In addition, I need the knitting needles No. 3.5, the hook No. 2.5-3 and a long needle to stitch the details.
The thread of orange color to type 38 loops (on the scuffing of the head somewhere 46-48 cm). Next, knit facechair, alternating facial and invalid (even) rows. 1st row
In the 7th (facial) row to make the first increases. Divide the number of loops in half - 19 loops. Knit as follows - 18 loops of the facial, 1 increase - the loop to eliminate from the previous row, 1 facial. And further symmetrically - 1 facial, 1 increase, 18 loops facial.
Relieve the increase: Between the 18th and 19th loop with the right spoke to pry a thread of the previous series.
Translate it to the left knitting needles and to lie for the front wall.
Thus, the loop will be as crossed and at the place of the increase will not be seen no holes.
Such boosts go smoothly in the middle of the capped caps. Gradually hooded a hood.
Article on the topic: Relief patterns with spokes with diagrams and describing
After a row with additives, the next row knit with hinges, then a series of facial, then a row again with an invalid. And again in the facial row to make an increase - already 19 facial loops, 1 increase, 1 facial loop, 1 facial loop, 1 increase, 19 facial loops. I.e Access to do in every 4th row. You need to make 9 additives. And the number of loops in the end - 56. The loops of the first part closure after 44 row are accumulated.
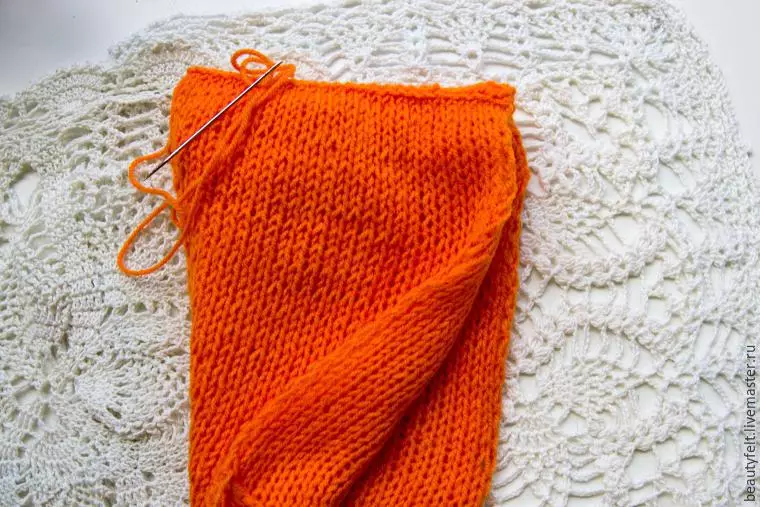
The closure of the loops is carried out by hinges. After that, you should cut off the working thread, leaving an authentic tail, folded the part in half along the lines of the increase and sew the top row.
Hood is designed double. Therefore, the second part need to raise the same as the first, with the only difference that the loops of type 36, and the part will have 42 rows in height. The number of additives is the same as in the first case.
Connect the inner and external details by inserting an exhaust to the wrong one into each other, and flash with a needle.
Now you need to check the rim. To do this, take a white thread, folded twice for more textured gum. On the edge of the hatch caps, score loops and translate them to the needle. Knit with a rubber band 2 × 2, i.e. 2 Licitse loops and 2 Pouring loops.
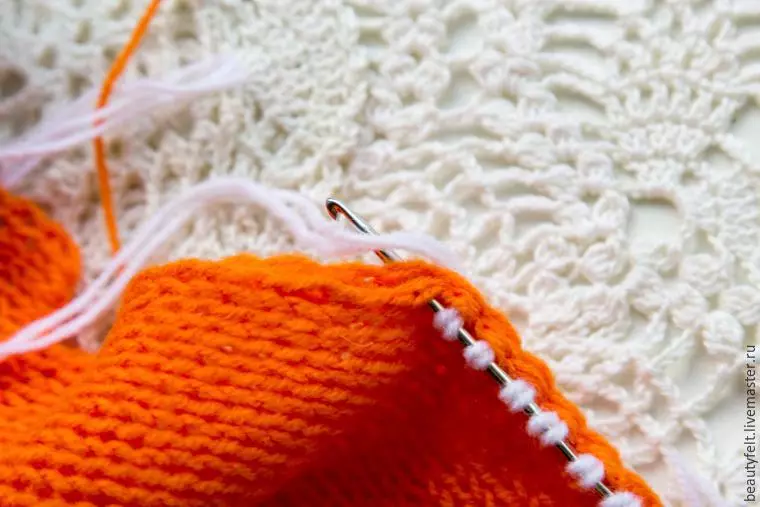
By sticking one row, further knit shortened rows, form a clove of the baby's lobika. In the 2nd row, do not take the end of 4 loops and turn knitting.
In 3rd row to do the same.
4 row - not to take another 6 loops (that is, it's all until the end of a row not to take 10 loops) and turn.
5 row - similarly.
6 row - to stick all the loops to the end.
AND Connect to work black thread. It can be knitting 2 rows of gum and close the loops in the drawing.
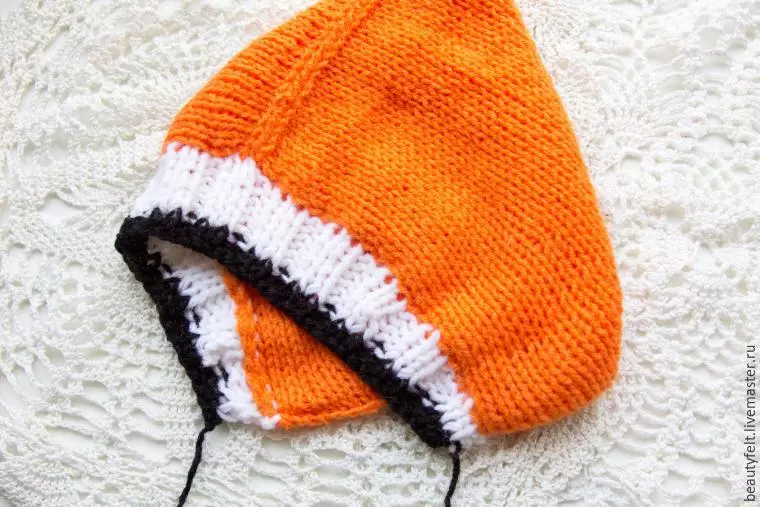
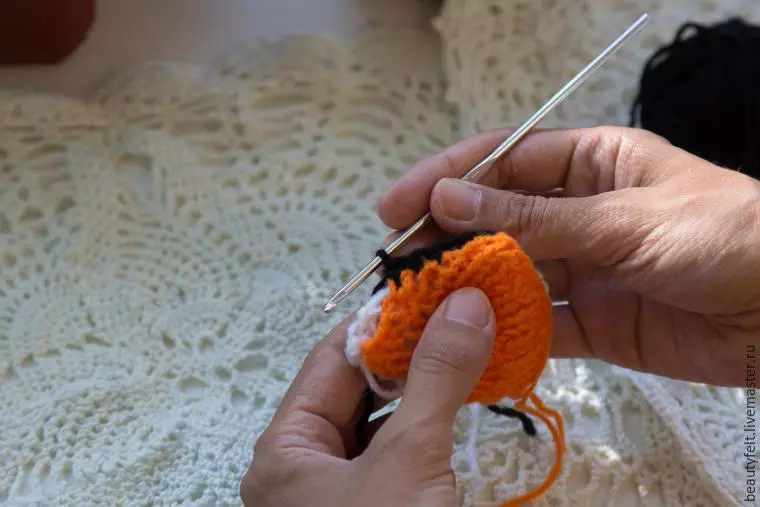
The main part of the hats is ready. Now you need to raise the ears of the fox. Make a set in one thread again. Orange dial 13 loops. This is the 1st row. Further knit like this (all even rows fit with hinges):
3 row: 4 persons. P., We make a gravel (to plunge 2 loops together by facial), 1 persons. P., 2 loops together, 4 people.
Article on the topic: Ball from paper with your own hands: Templates with video and schemes
5 row: facial.
7 row: 3 persons. P., Two hinges together, 1 persons. P., Two together, 3 people.
9 row: 2 persons. P., Two loops together, 1 persons. P., Two together, 2 persons.
11 Row: 1 persons. P., Two loops together, 1 persons. P., Two together, 1 persons.
13 row: Slit 3 sang together and finish knitting.
The second part of the earg argue the same white thread.
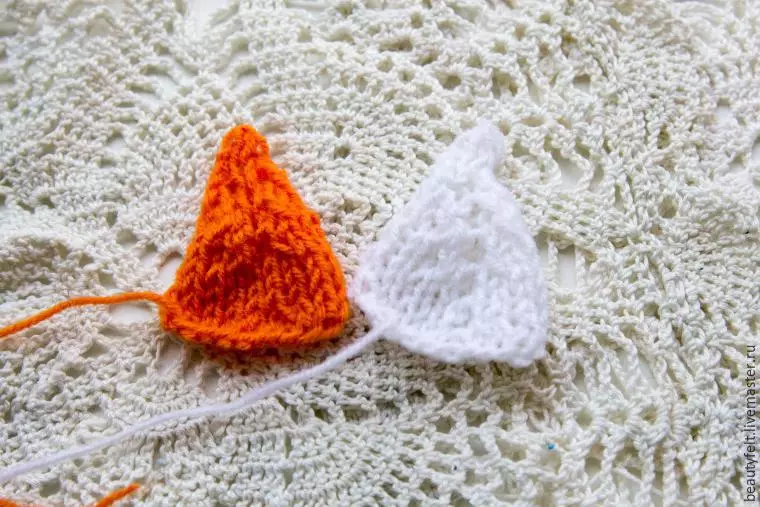
Now you need to connect two ears together. You can make it using a hook and black thread. Folded two parts of the exhaust to the wrongness and tied up with bars without a nakid. At the top of the ears, you can check the columns with Nakud so that the ear will turn out to be more elongated and sharp. Also on the top to stick three columns in one loop.
You can sew the ears with the help of threads that remain from knitting.
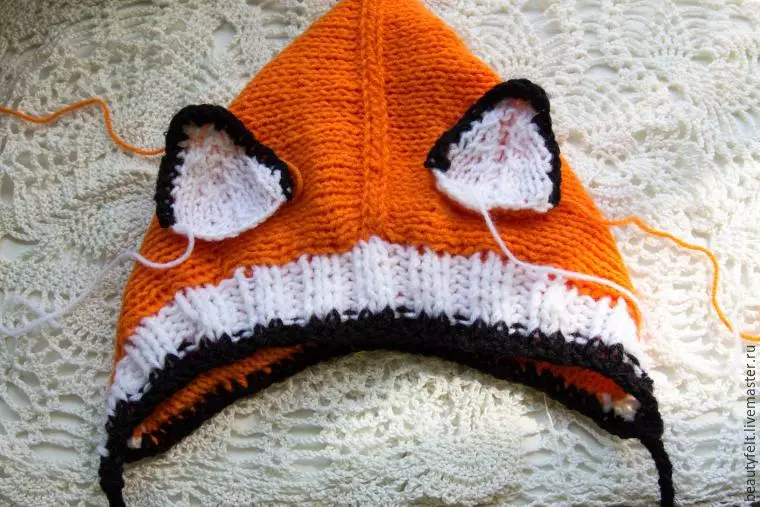
It remains for small - hide all sticking tails and make ties. Hood is ready!
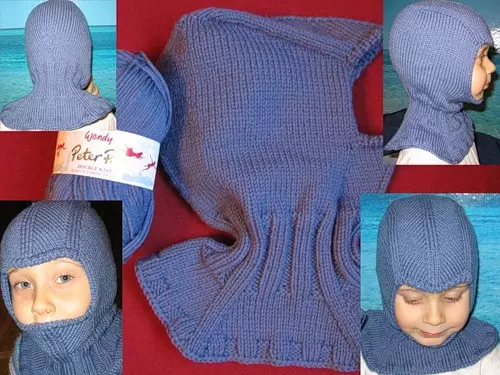
For a real man
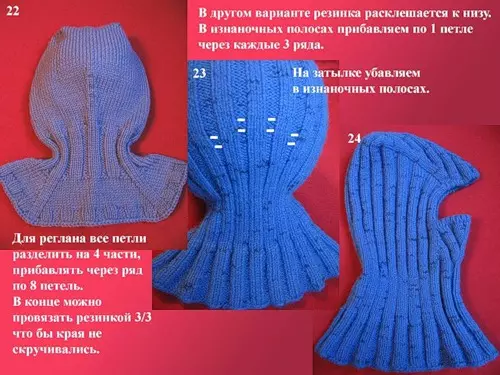
For this header, Peter Pan Wendy yarn will be required. Composition: 55 Nylon (polyamide) 45 acrylic. 50 gr - 170 meters. Recommended Spokes number 3 ¼ - 4. The helmet leaves exactly 100 grams (2 days). Knit is better in 2 threads, but not badly drag, then the hat-helmet will turn out quite dense, but at the same time comfortable in wearing.
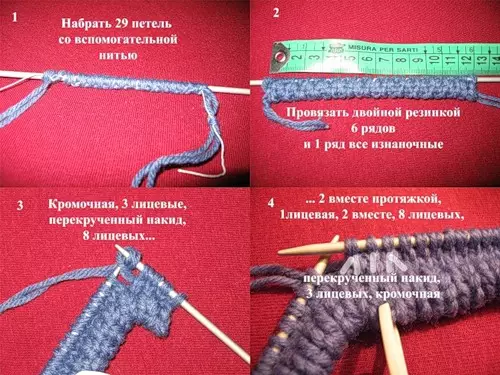
You need to start knitting from the top wedge. Calculation of wedge width: Measure the distance from the tips of the eyebrows of the child, multiply by the number of loops in 1 cm plus 2 edges. The number of loops should be odd.
The edge in this model is obtained by one on 2 rows: at the beginning of the row, remove the wrong one, at the end to penetrate the wrong one.
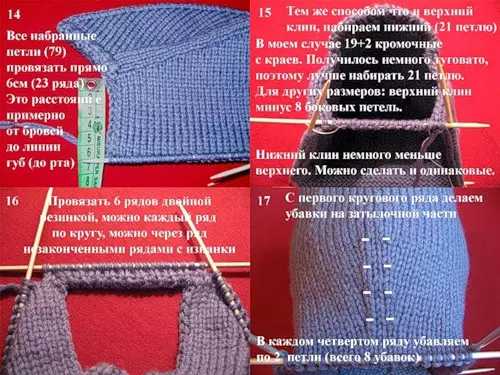
If the bottom of the child is not very pronounced, you can make less lullings. The lower wedge knits from the lip line, as it stretches on the chin, compensates for the missing length and will provide a dense fit on the ears and on the neck.
Explanation for photo №15: For the lower wedge of the last striped helmet, gain 25 loops, plus 2 edges will go here, it turns out 27 loops for the lower wedge.
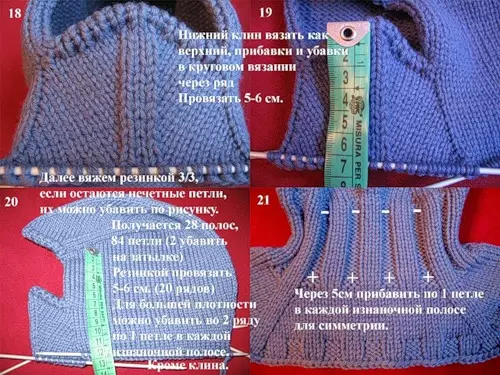
Under the granaries, it is necessary to take into account the girth of the head in order to climb the head of the child.