
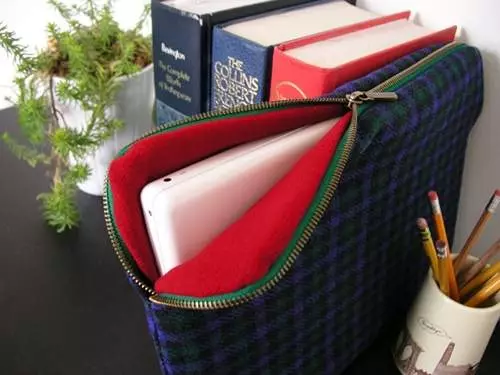
Hello, dear our needlewomen. We have prepared another equally interesting and original proposal for you to implement your creative ideas. Earlier we told how from the book cover to make an unusual "wrapper" for a laptop. Continuing this topic, we want to offer you to do the same, but from the fabric. Pick up the fabric of any coloring and please yourself or your friends with a useful gift. At the same time, such a bag-case for a laptop made by its own hands will not give up beauty and design to their "brothers", bought in a specialized store.
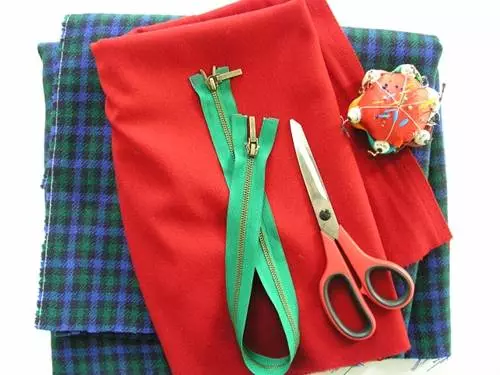
Required materials and tools:
- half meter of dense tissue (front side of the cover);
- half meter fine tissue for lining;
- zipper (depends on the length of your laptop);
- scissors;
- roulette;
- invisible;
- sewing machine.
Preparation of fabric
In order to correctly make the pattern of the bag for a laptop with your own hands, remove the measurements from the laptop for three parameters (width, height and thickness). Add 15-20 mm for the sizes to the sizes, and create an additional distance so that the cover is not quite close. Cut 4 pieces of fabrics: 2 facial and 2 wrong.Lightning for bags
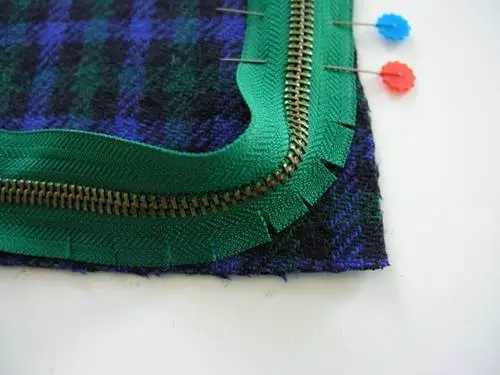
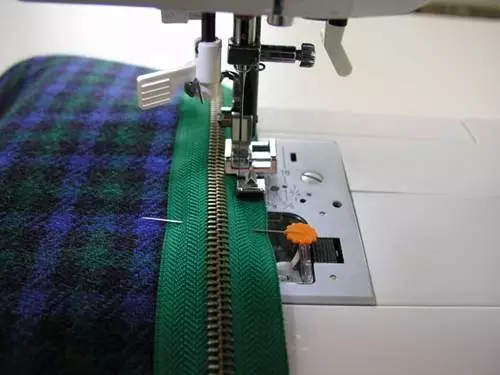
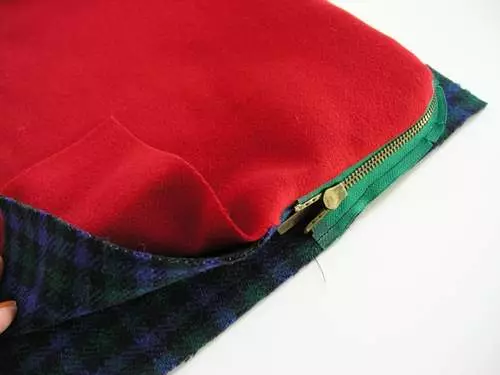
On the front side with the help of invisible, we attach zipper along the length of the fabric and with the roundabout on the sides. Tip! For convenience in lightning angles, take 5-6 small cuts through each centimeter. This will allow the zipper to overeat the angle more easily.
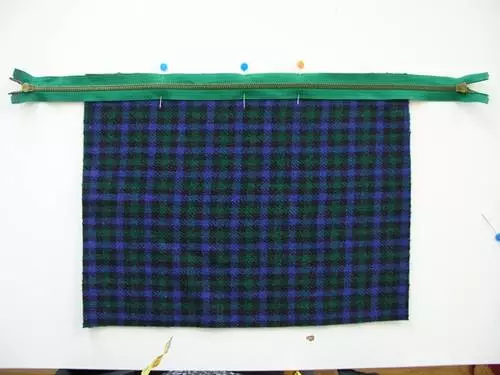

Now with the help of a sewing machine, we sew zipper on one side. Do not forget to remove all invisible when you start sewing.
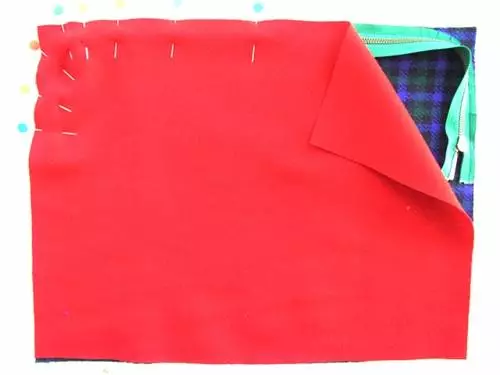
Lining
Apply an insoluble tissue on top and fix with invisible. Start around the zipper, following the accurate seam lines, as you did in the previous step.
Article on the topic: MK Embroidery with ribbons

After two sides of those who are sewn (face and lining), cut excess fabric from the corners.
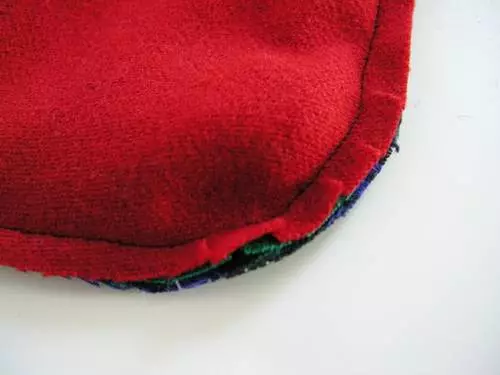
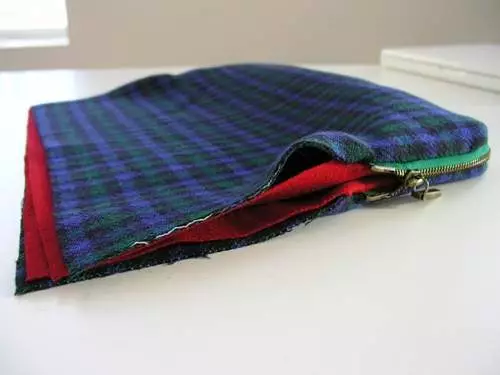
The general appearance of the first side of the cover should look like this.
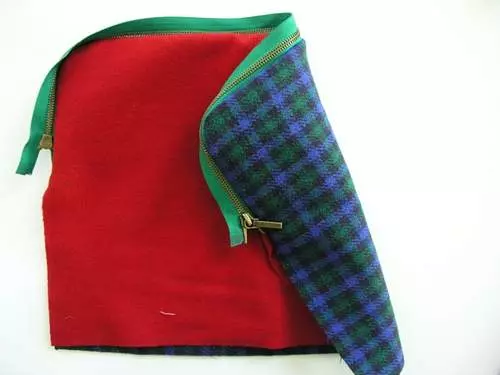
Second part of the case
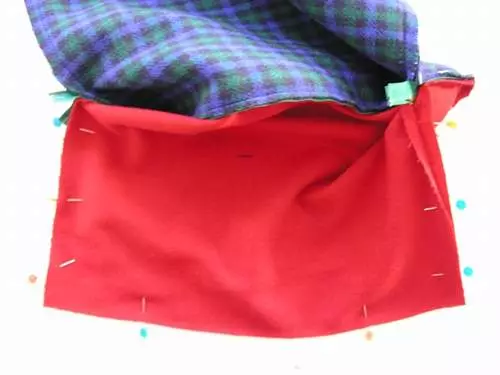
Apply a piece of facial fabric and sew to need a lightning side. You already know how to do it. Do not forget about cuts in the corner. Now you can proceed to the wrong side. We do everything in the same way as with the first side. As a result, you are ready only zipper.
Stitching around the perimeter
Remove the fabric inside out so that the lightning is inside. Lining sides should be addressed to each other.
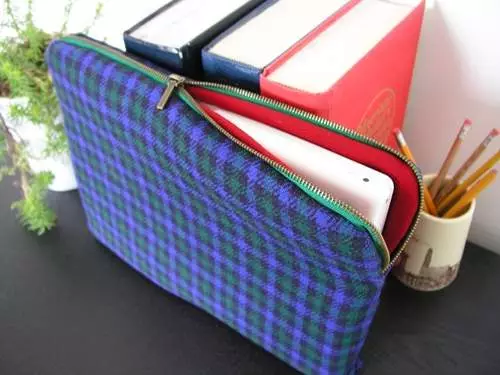
First sew them. Using the typewriter, make a line from the center of the lower edge to the place where the zipie begins. Now repeat the same, starting from the center, but in the other direction. Again, the line ends at the seam of lightning. This will allow you to get a neat and finished seam. Now make facial moans are addressed to each other and seek them, but leave below 5-6 cm so that it was convenient to recall. After the cover turned into, manually stitch or machine. That's all, the fabric bag-case for a laptop made by your own hands is ready. As you can see, work, in principle, not complicated. The most difficult for you may seem stitching details, but if you are fine with the sewing machine, it will not be difficult for you.
If you liked the master class, then leave a couple of grateful lines to the author of the article in the comments. The simplest "thank you" will give the author of the desire to please us with new articles.
Encourage the author!