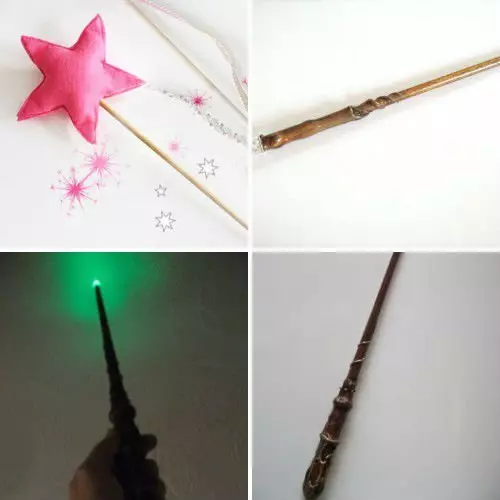
New Year's children's matinees are a costume children's holidays, at which every child has a desire to stand out. In the costumes on hand, many moments play the image: from the fabric from which it is made to accessories. Fashion on the wizards and Harry Potter did his own, and now many children want to look like that, we offer you step-by-step instructions that will help you make your own hands such an important accessory as a magic wand.
Master class number 1: how to make a magic wand Harry Potter
In the New Year costumes, such details are played as accessories. It is they who help arrange the necessary accents in the image. In this master class, we will demonstrate you how to make the harry potter's magic wand over a short time.
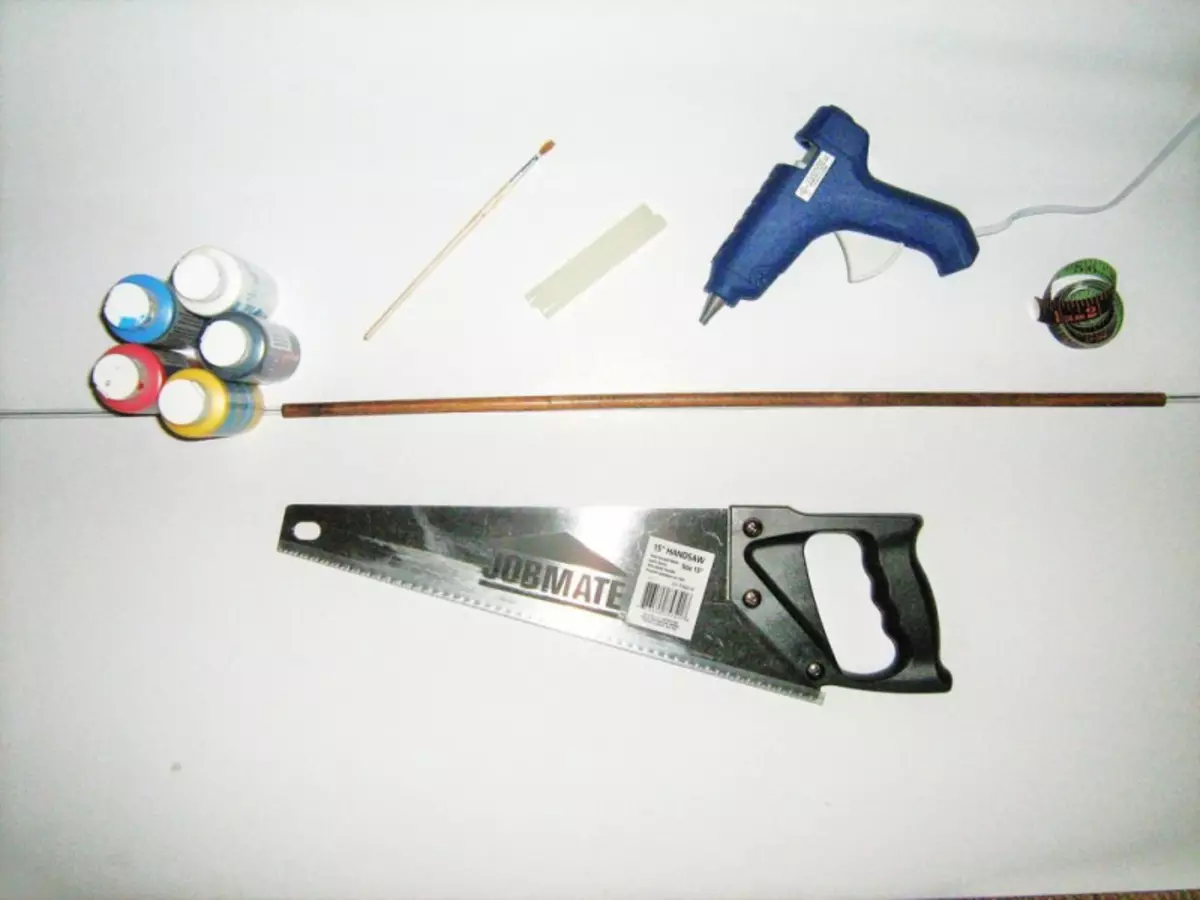
Materials
Before starting work, prepare:
- wooden dowel or long, smooth stick;
- hacksaw or saw;
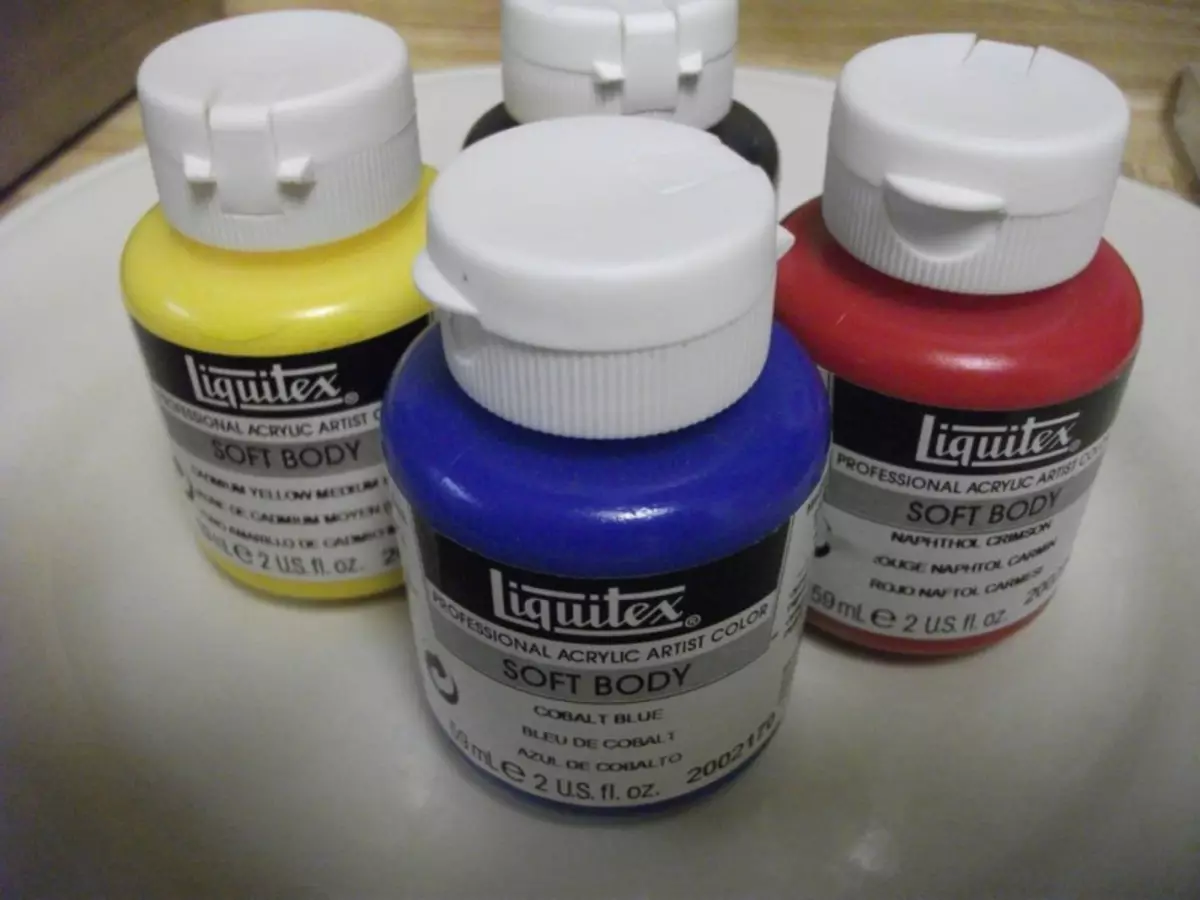
- acrylic paints;
- brush;
- chopsticks of hot glue;
- glue pistol;
- sandpaper;
- varnish (can be replaced by transparent nail polish);
- Bead in the form of a large crystal.
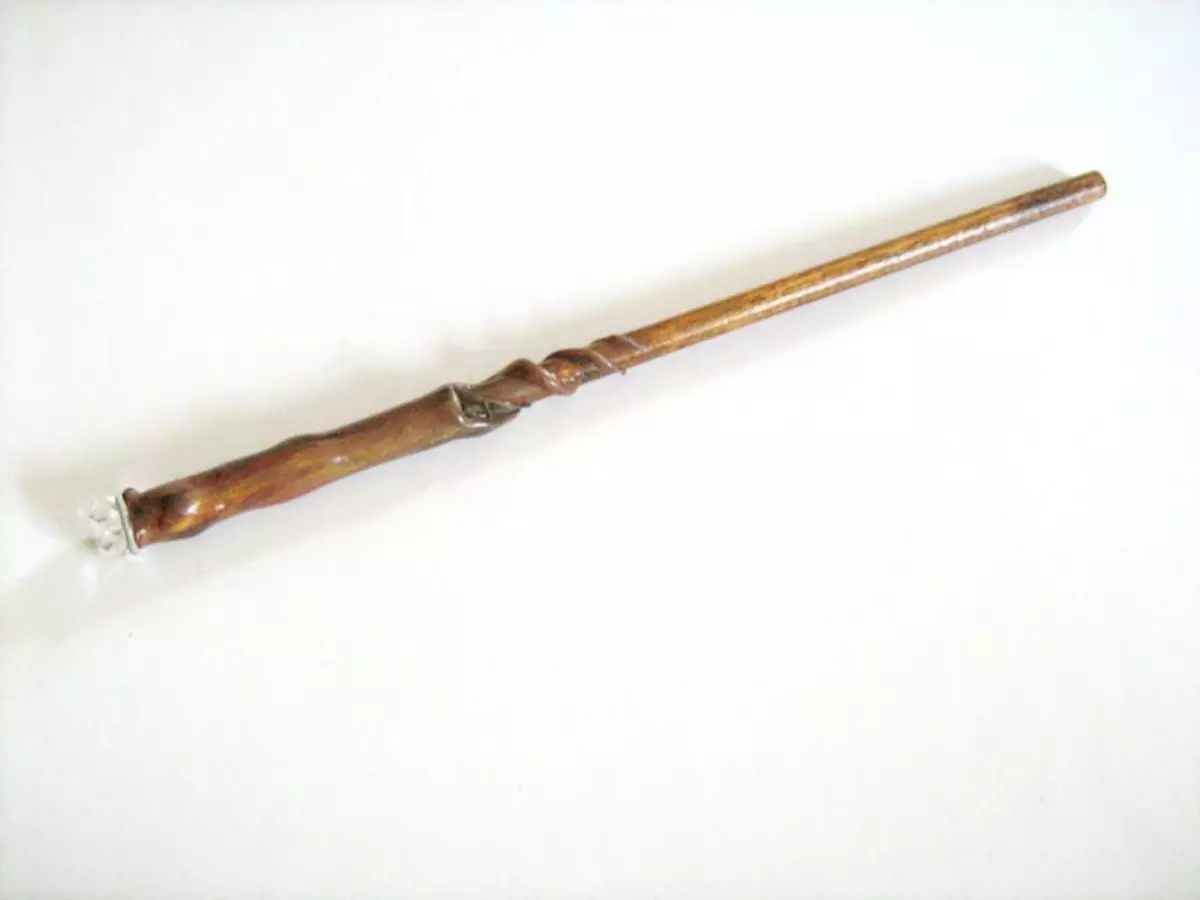
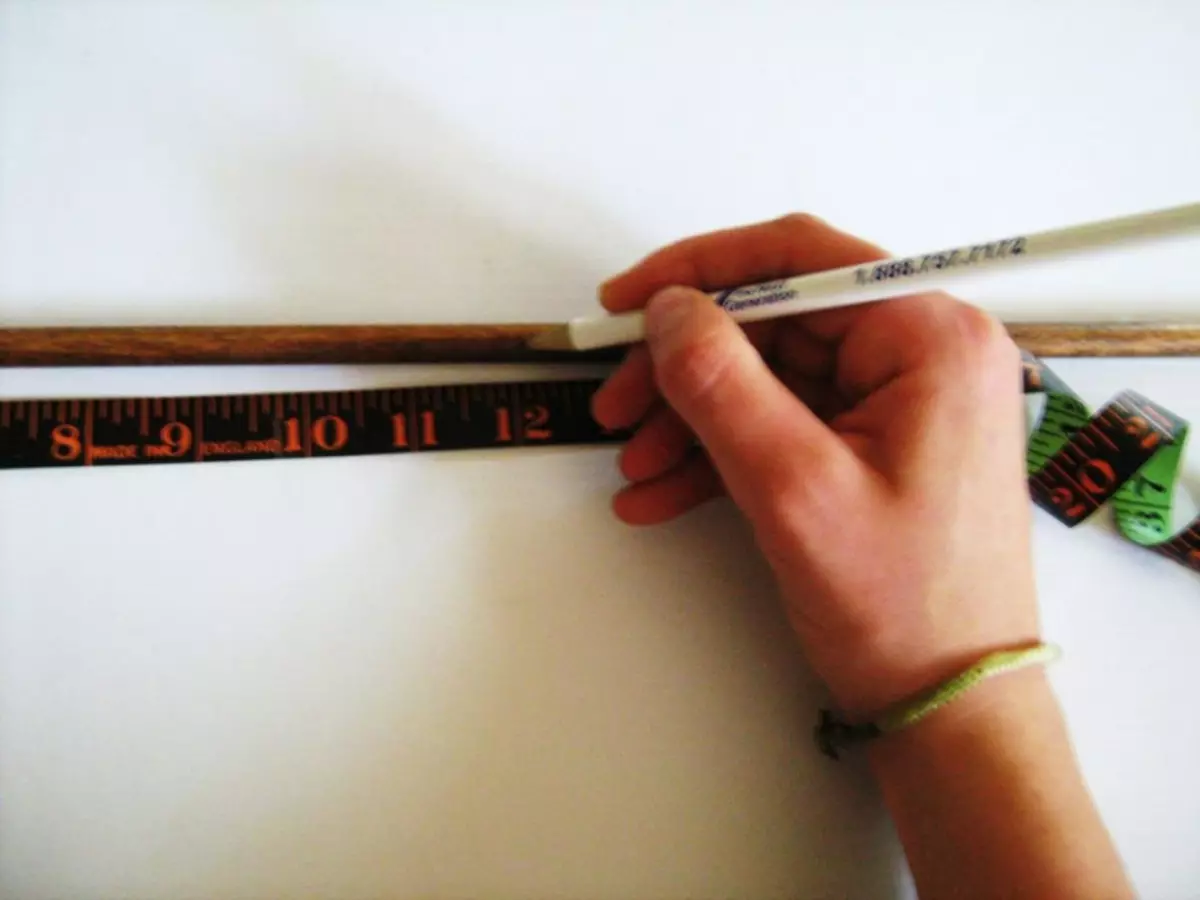
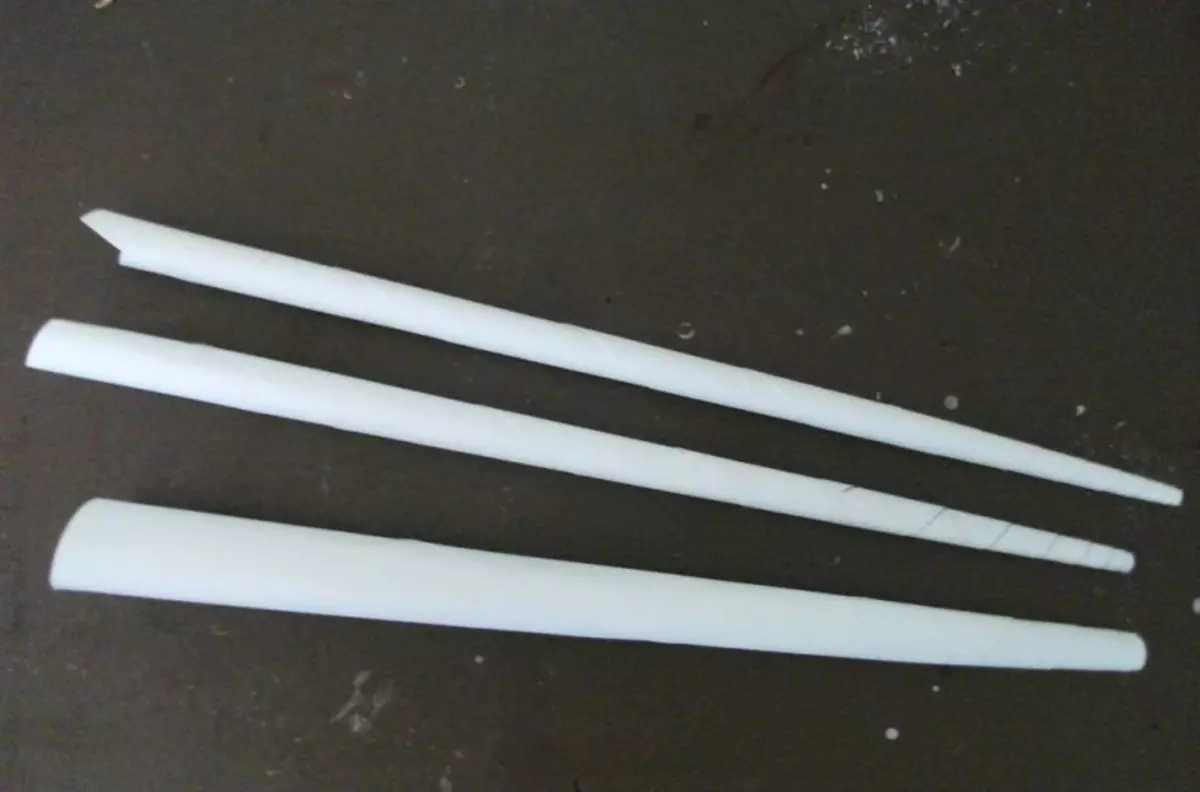
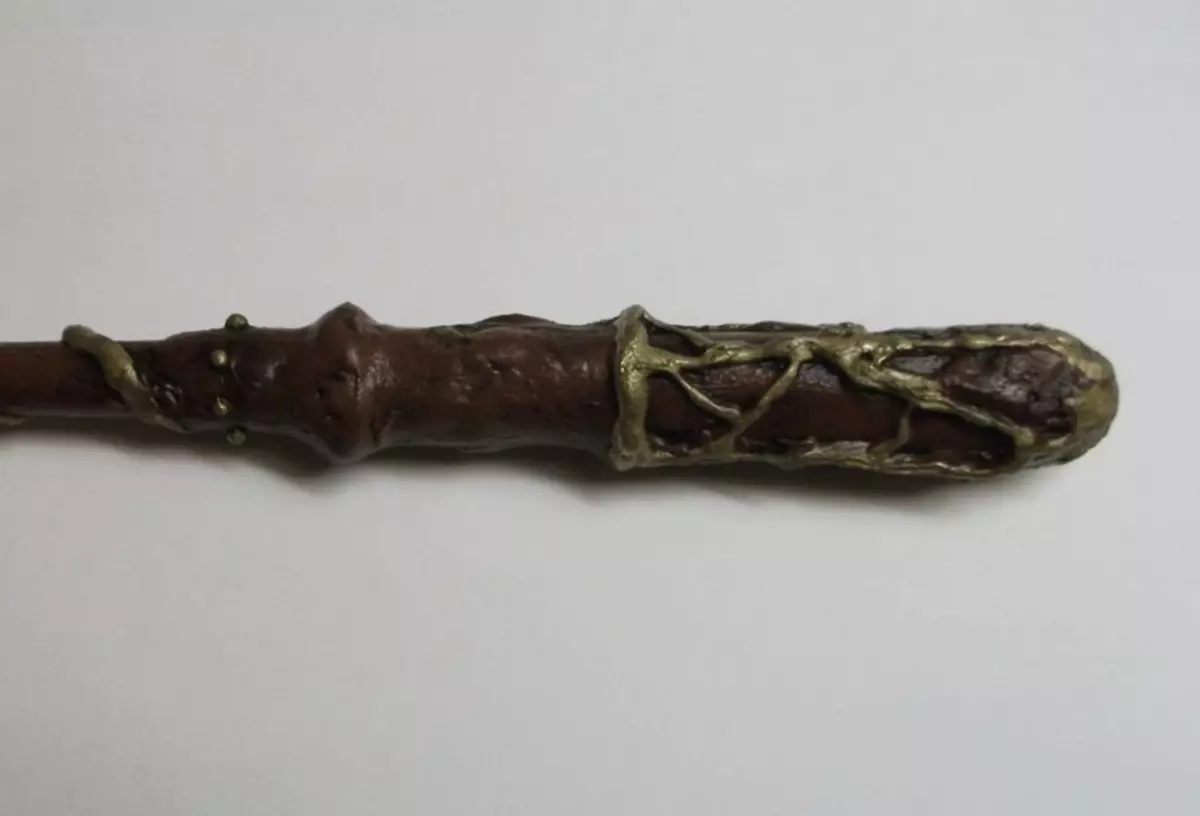
Step 1 . From a dowel or wooden stick Cut the piece of length you need. In this case, the length of the stick was 30 cm. If the dowel does not work carefully with you, the edges are treated with sandpaper. Clean them is necessary for the child to be hurt.
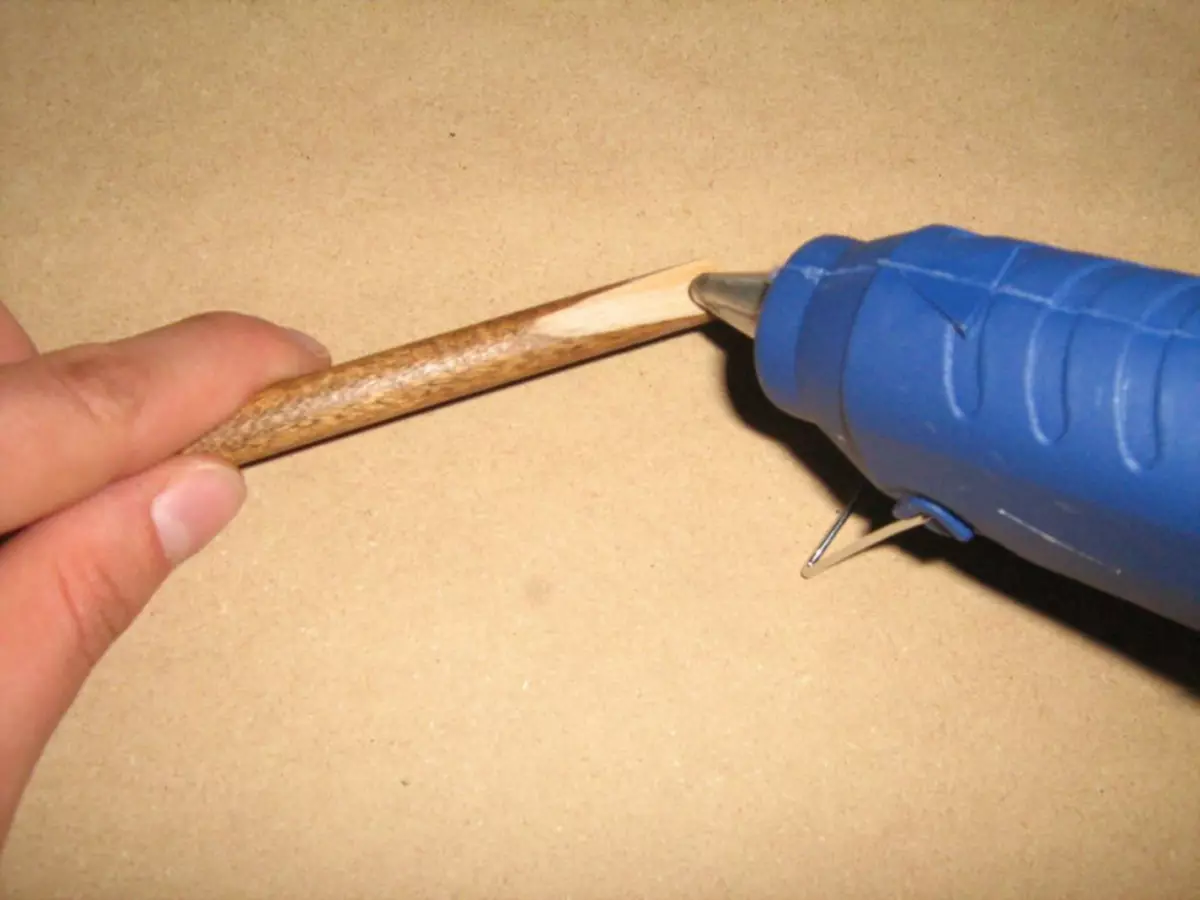
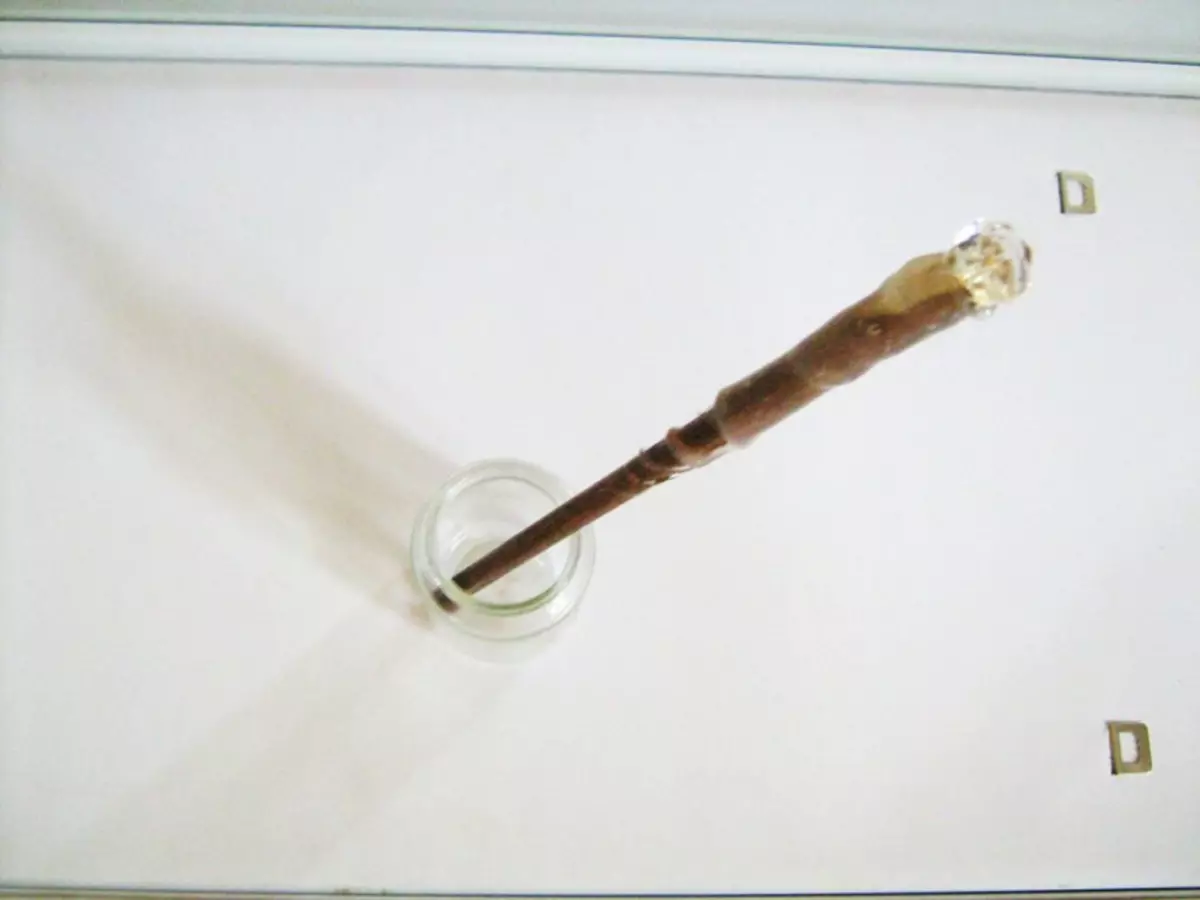
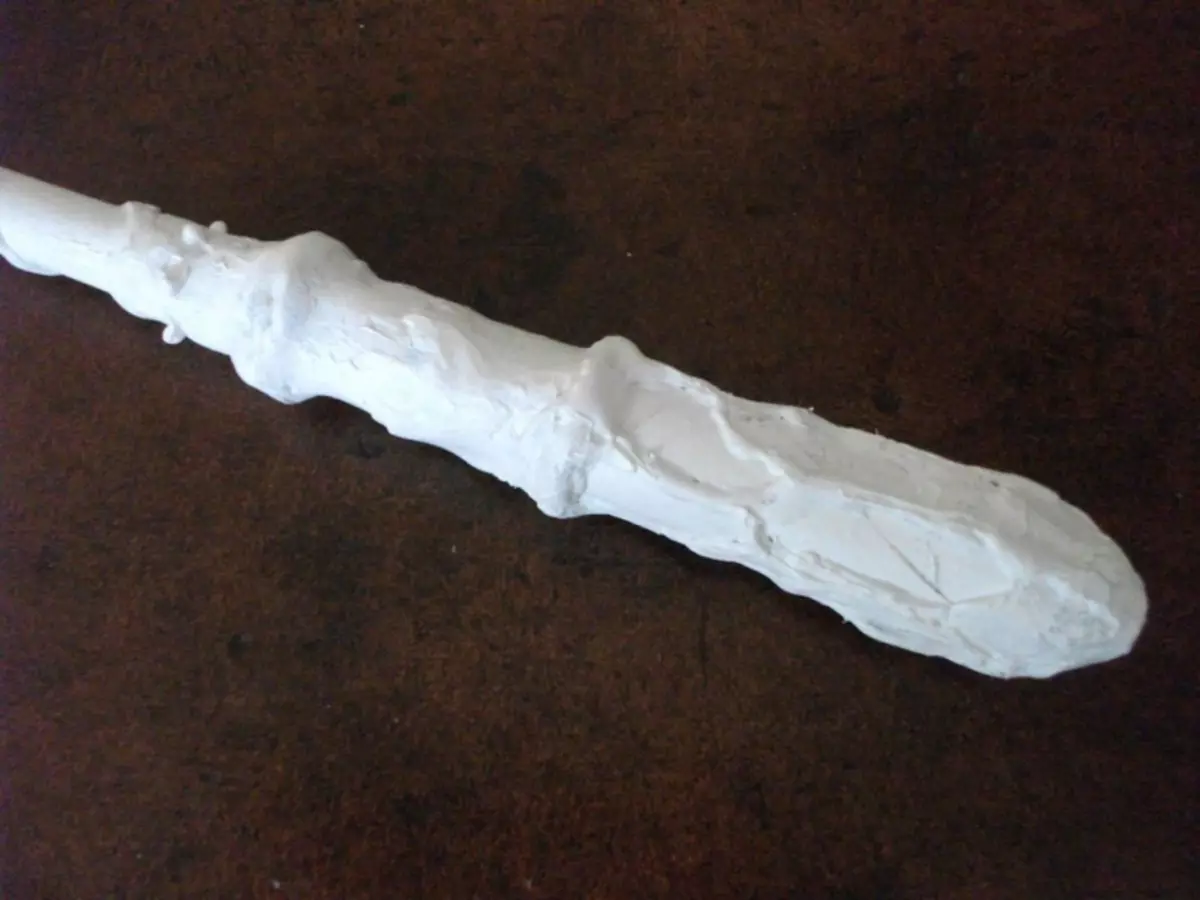
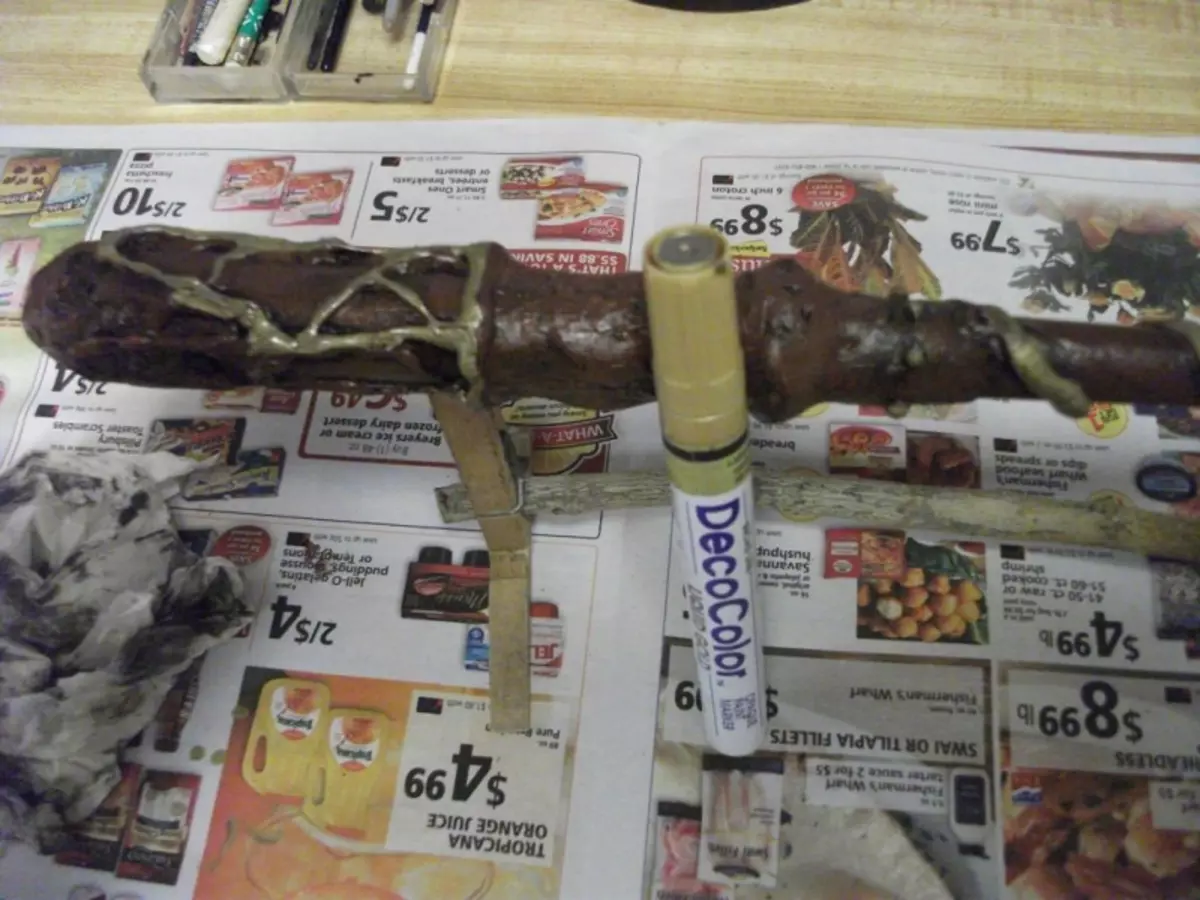
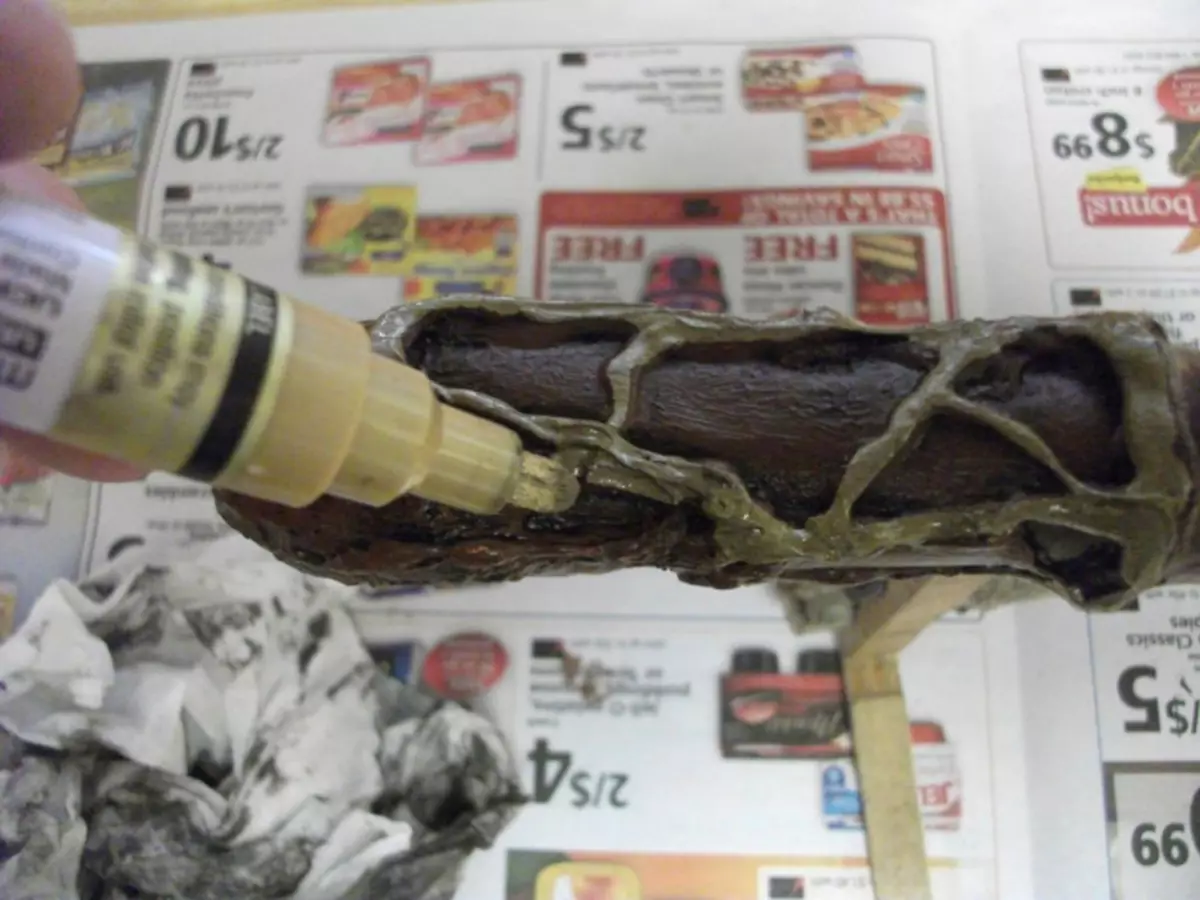
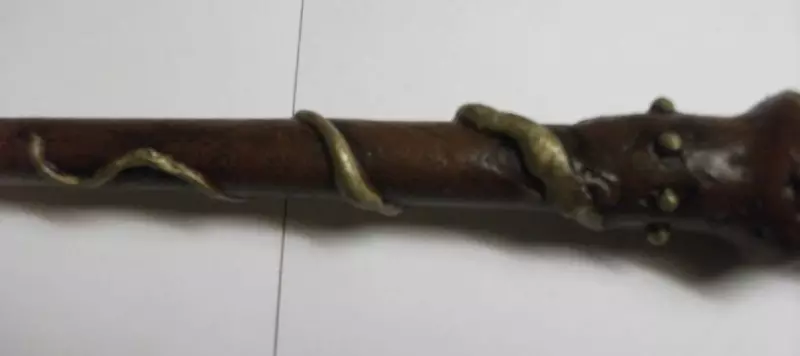
Step 2. . Billets for the future magic wand For convenience of further work, put in an empty jar. To the thicker end, begin to apply hot glue. Apply it carefully, layer behind the layer, giving it a little cool, and then giving it a characteristic form. A little closer to a more subtle end of the wand, apply glue with strips, giving the self-made characteristic vegetable relief.
Article on the topic: 9 ways to make white-white towels
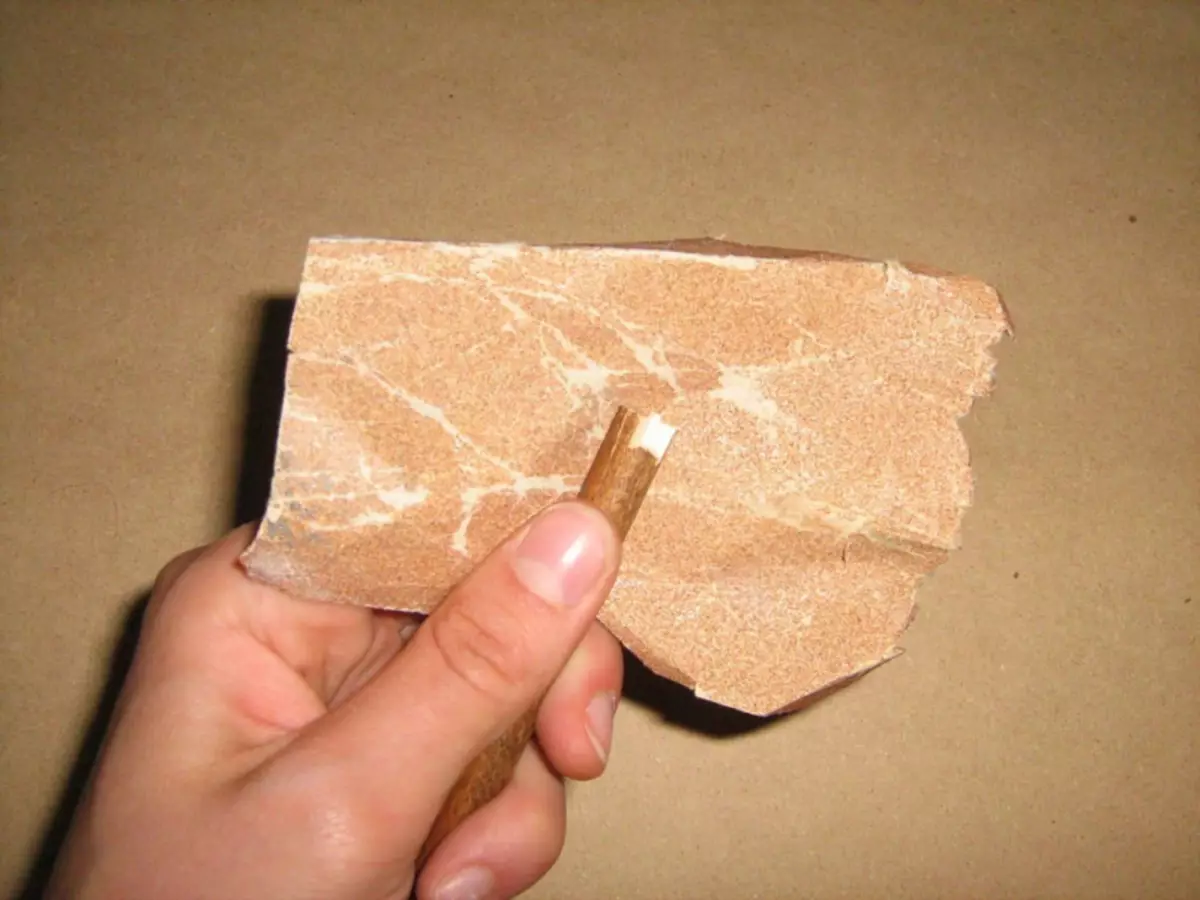
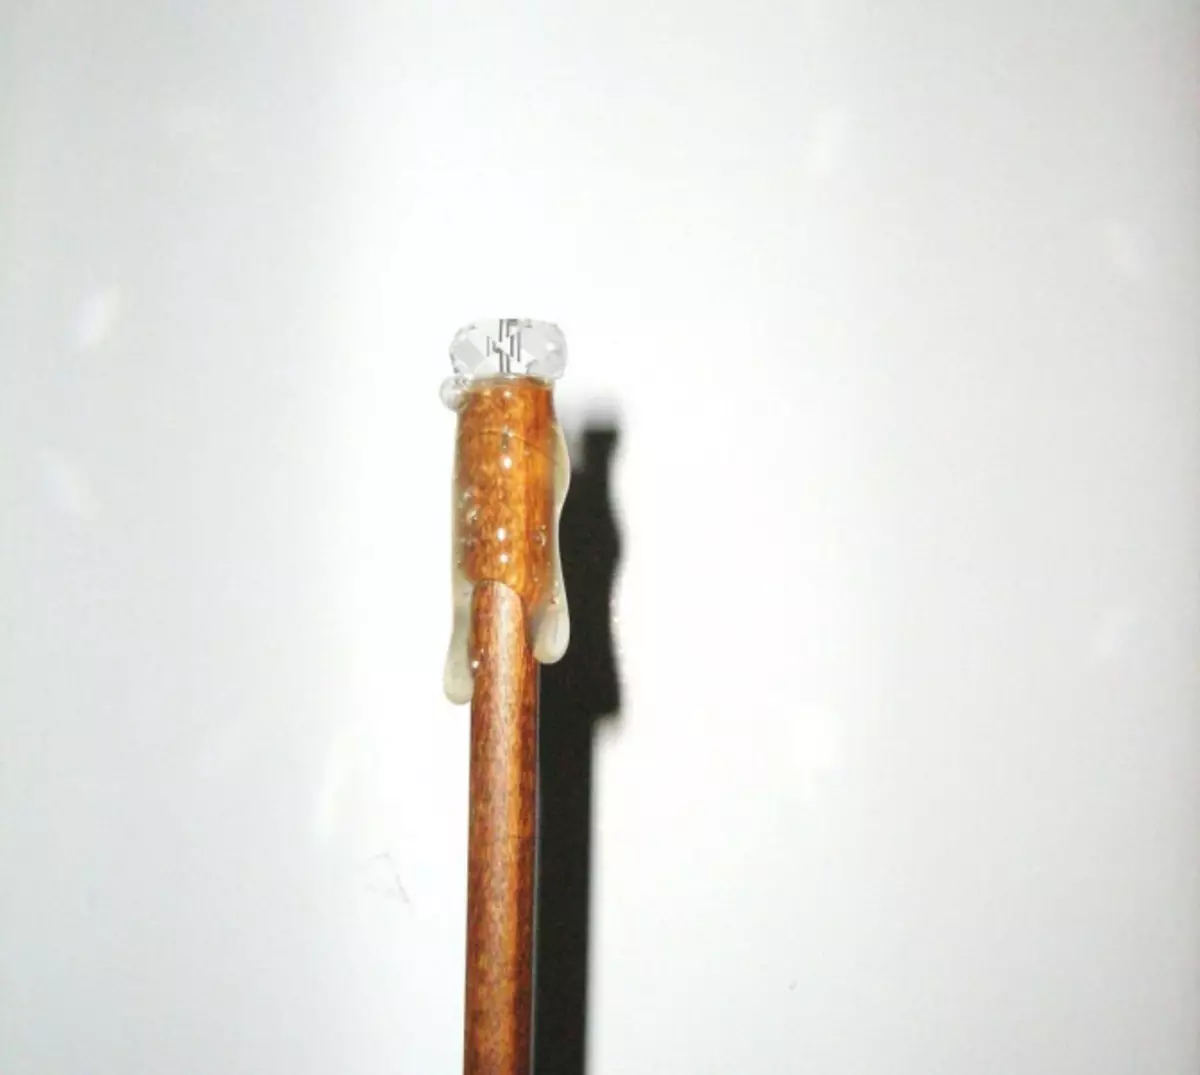
At the top of the stick, make a smooth slice right on the glue. It will be needed to glue a bead.
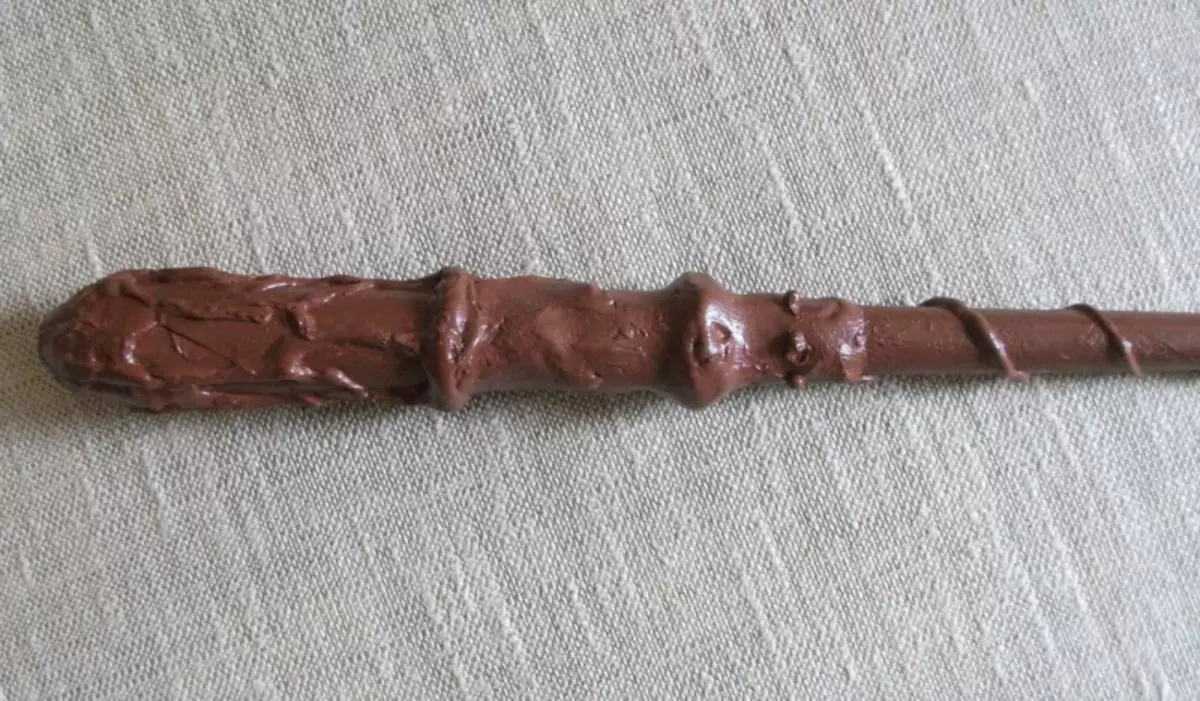
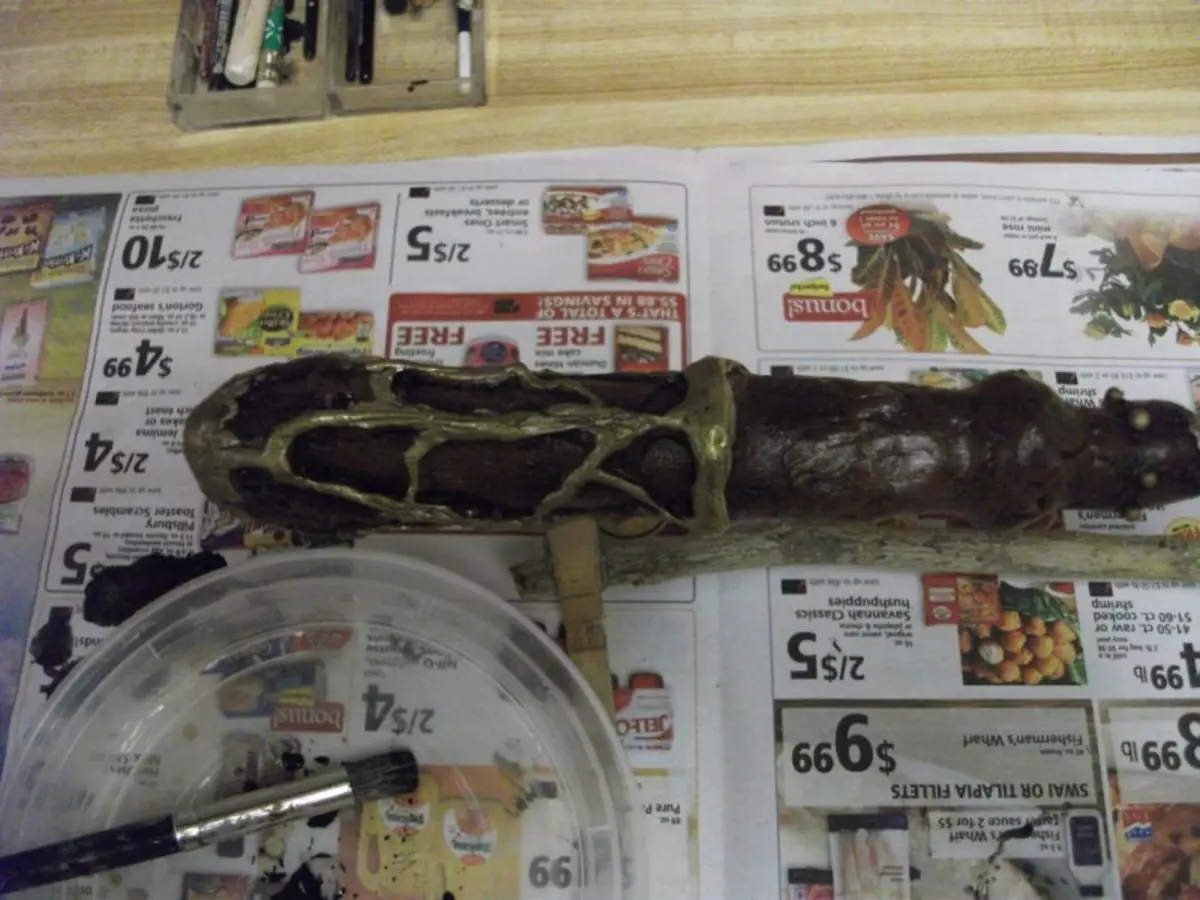
Step 3. . After complete drying of the glue, the chopstick with acrylic paints and, using different shades of brown, give the texture depth.
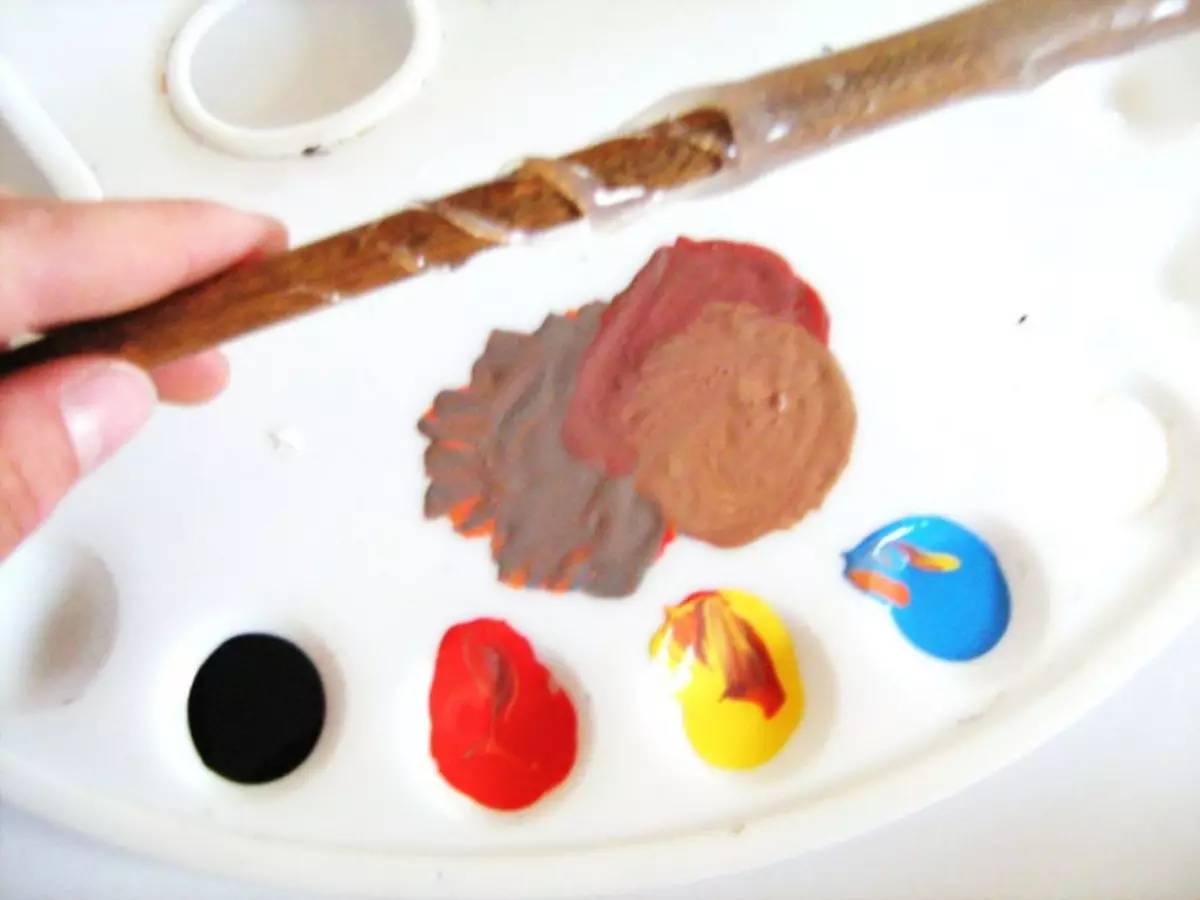
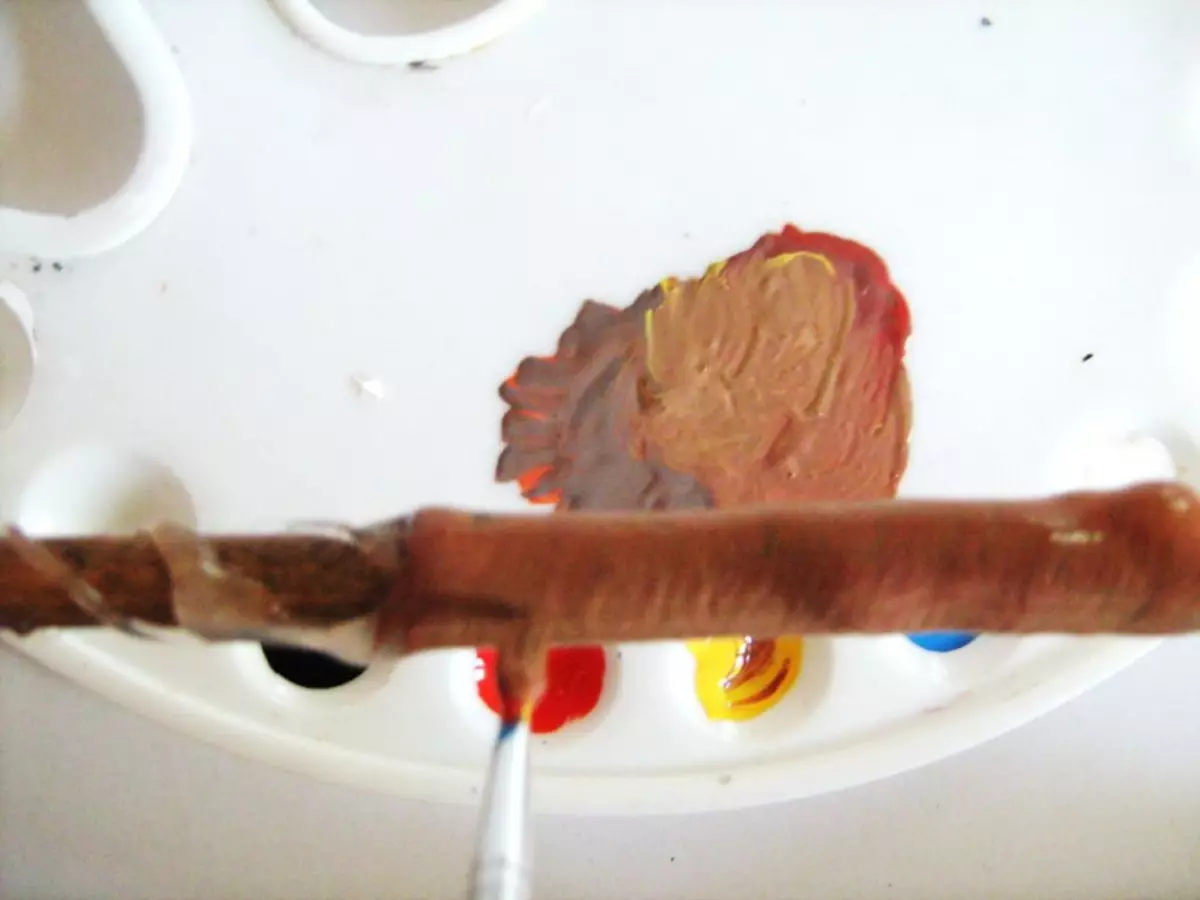
Prepared earlier flat cut color paint black.
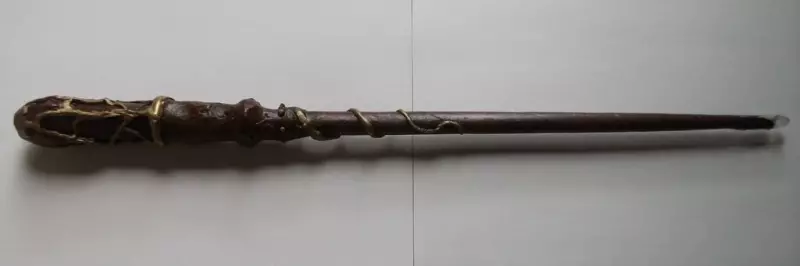
Step 4. . After drying the paint, cover the lacc wand. It is best to use varnish in the form of a spray or replace it with an ordinary transparent nail polish.
Step 5. . On the base of the magic wand, glue the bead in the form of a crystal. It is also planted for hot glue.
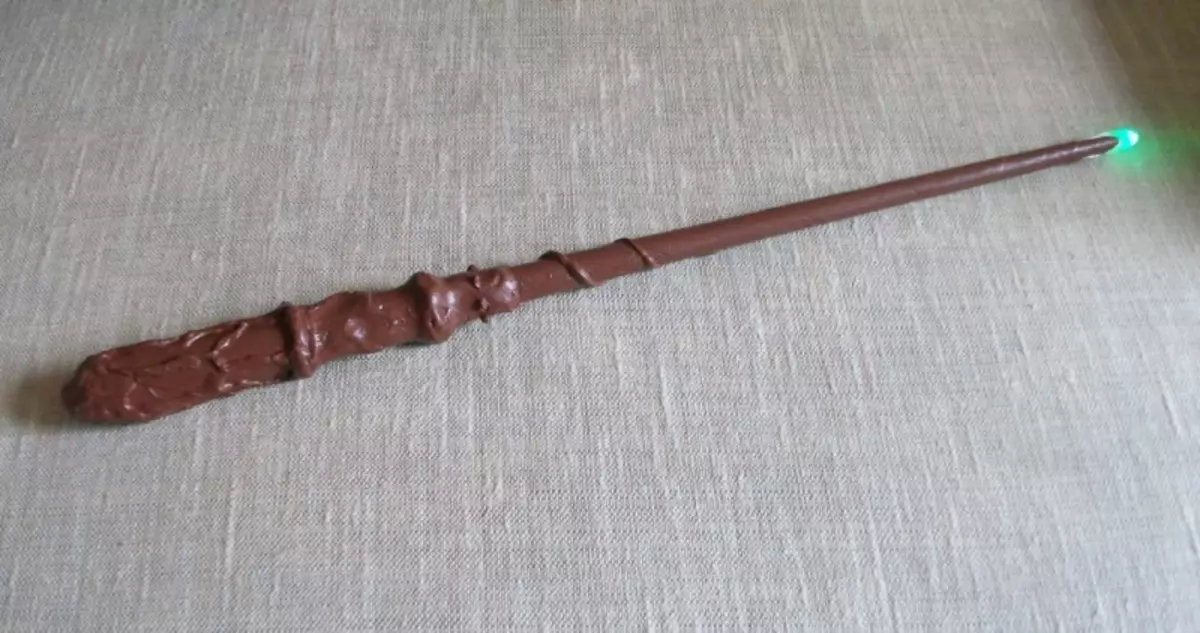
After drying the glue stick Harry Potter is ready!
Master class # 2: Luminous magic wand do it yourself
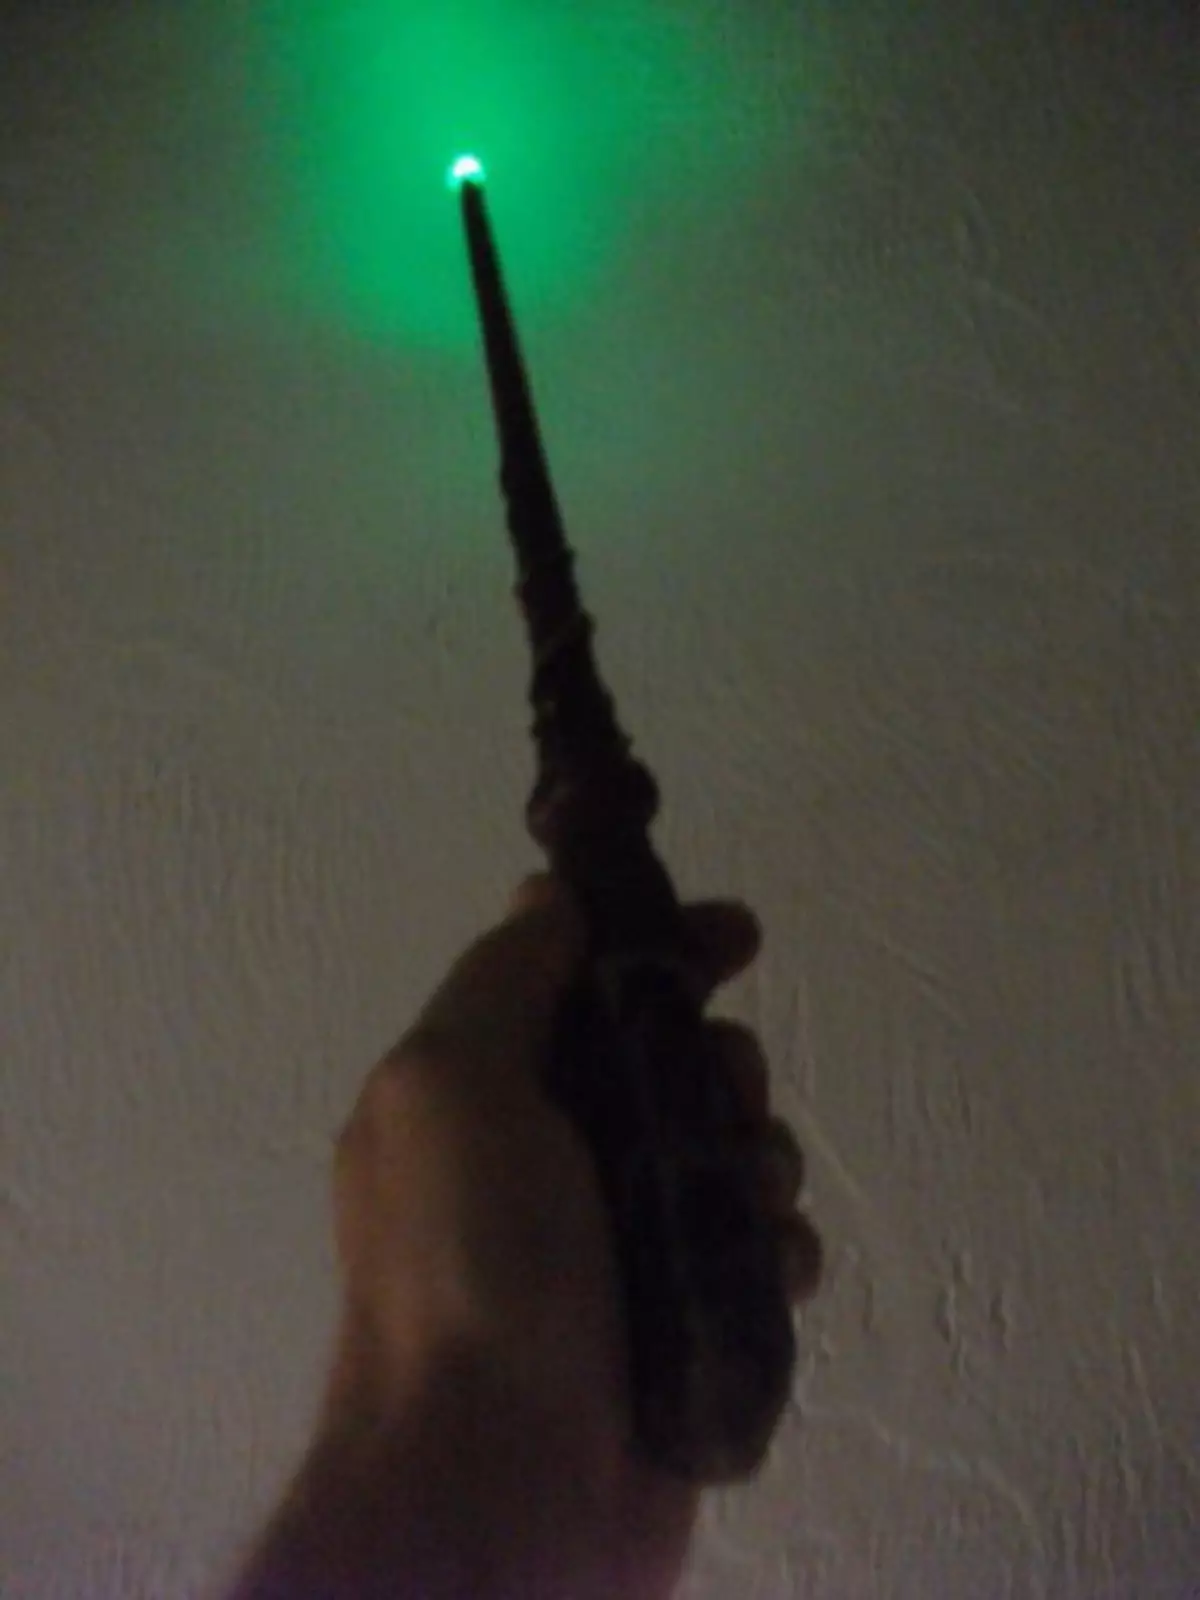
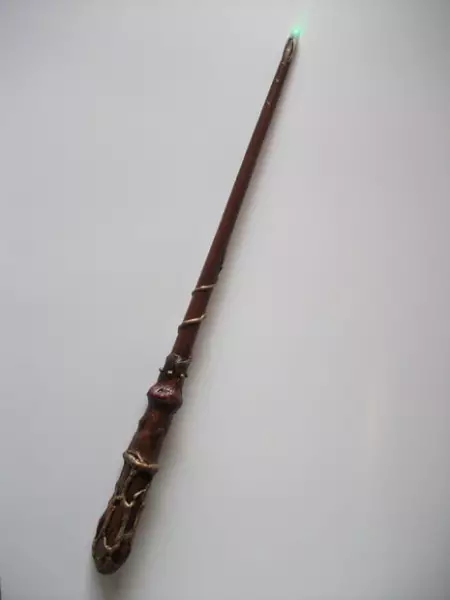
Magic wands have become especially popular in children after the screening of the book Joan Rowling. Make such a child or with it easily. Materials for this need the simplest one for this. A little more work and funds will have to invest if you want the wand to become truly magical and glowing in the dark. How to make a magic wand, we will tell in this master class.
Materials
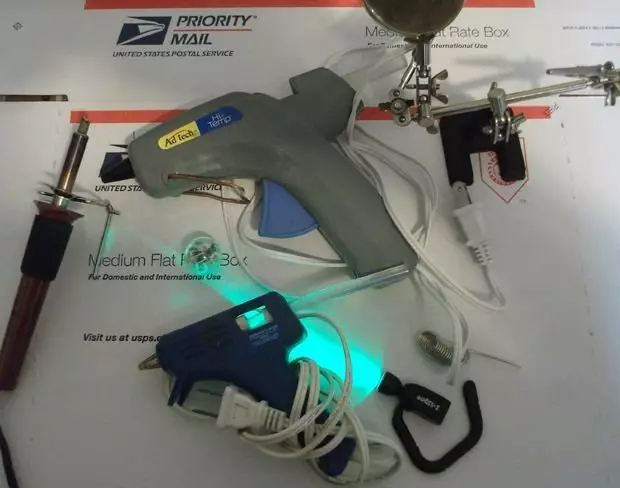
To create a magic wand capable of glowing in the dark, you will need:
- 2 - 3 dense leaf for drawing;
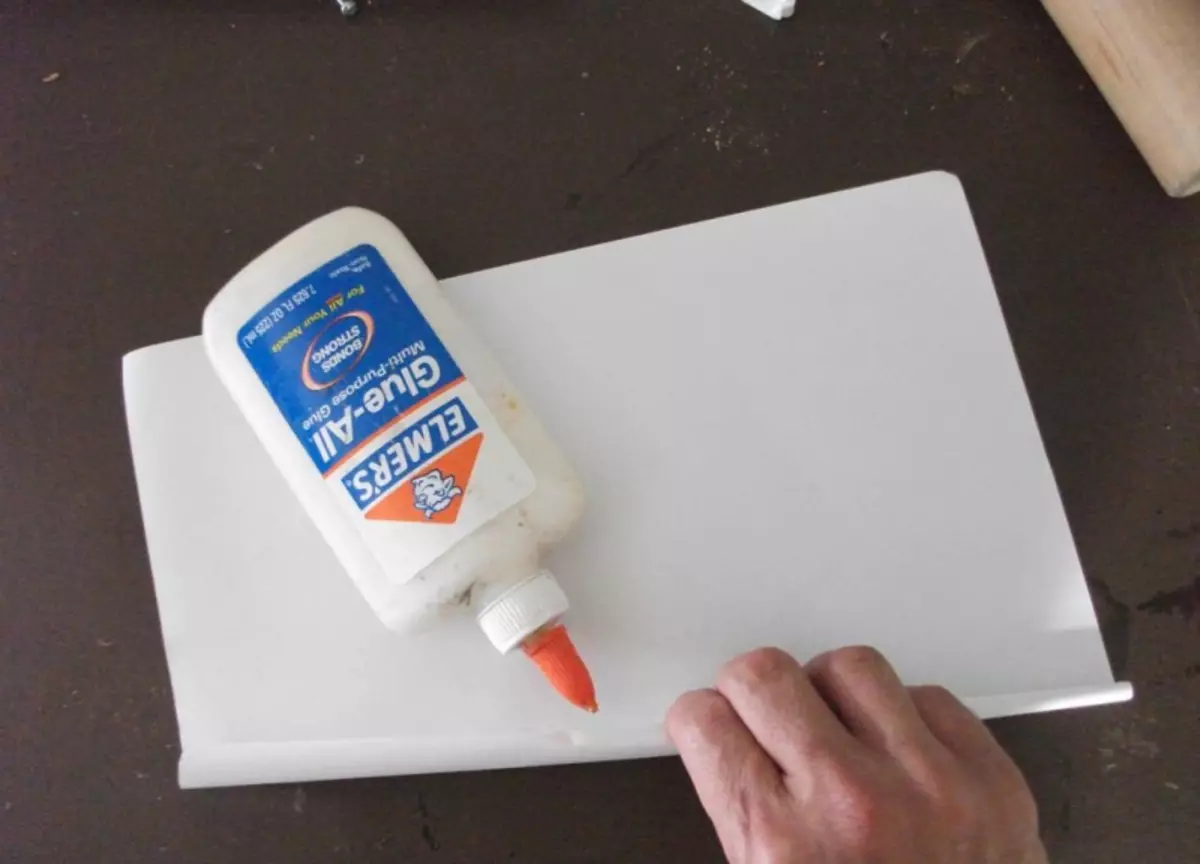
- PVA glue; stationery knife;
- chopsticks of hot glue and gun;
- acrylic paints;
- wet wipes;
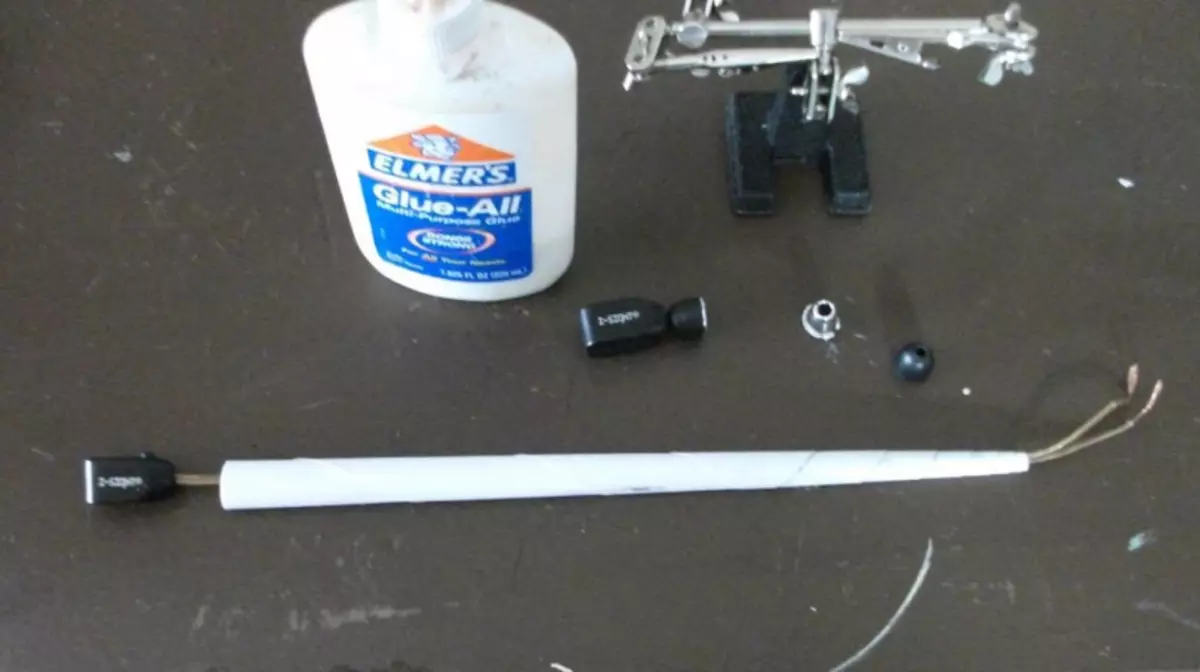
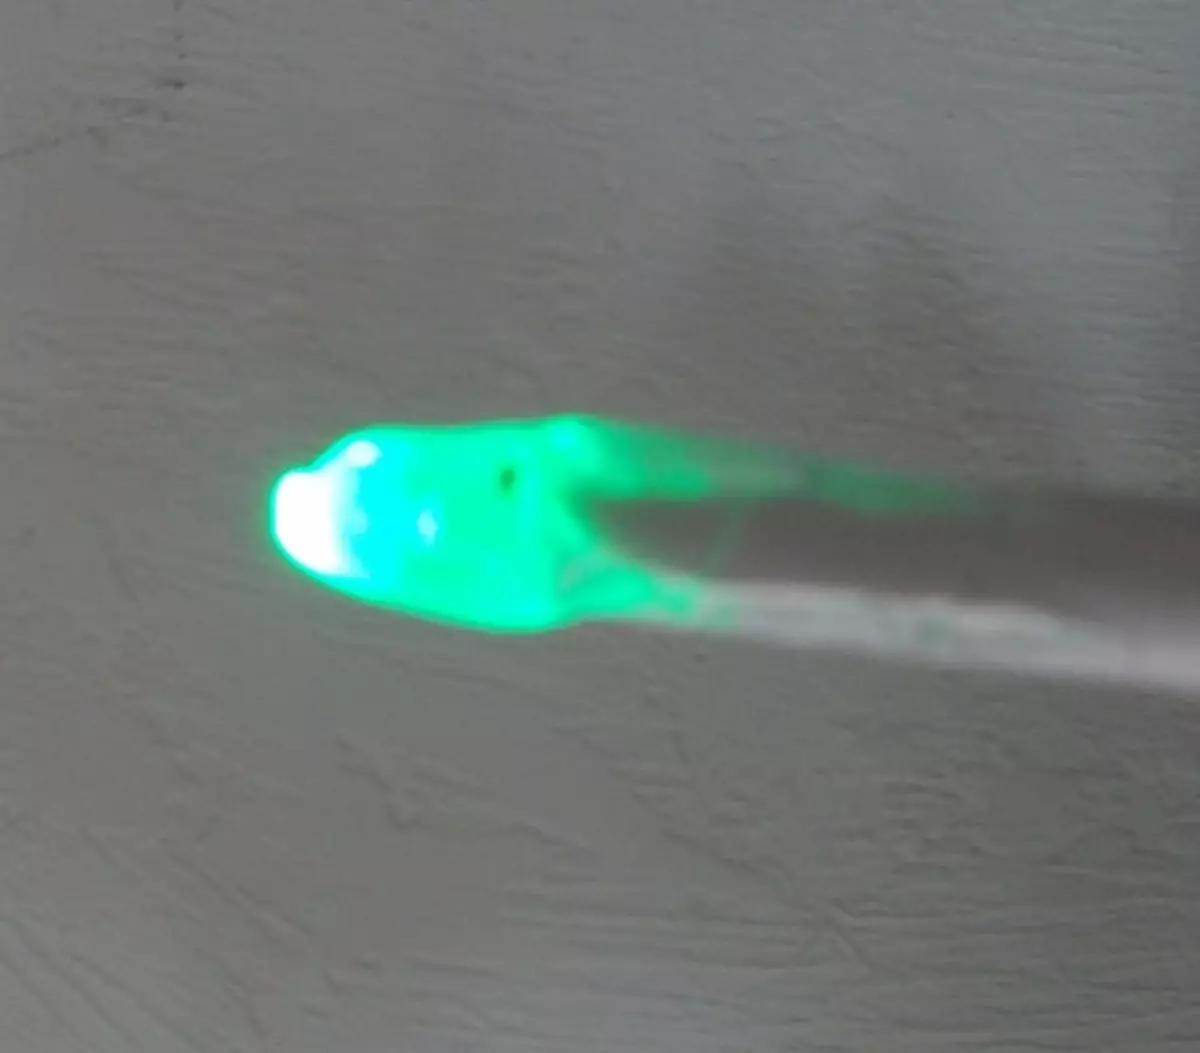
- A small lantern with a LED light bulb;
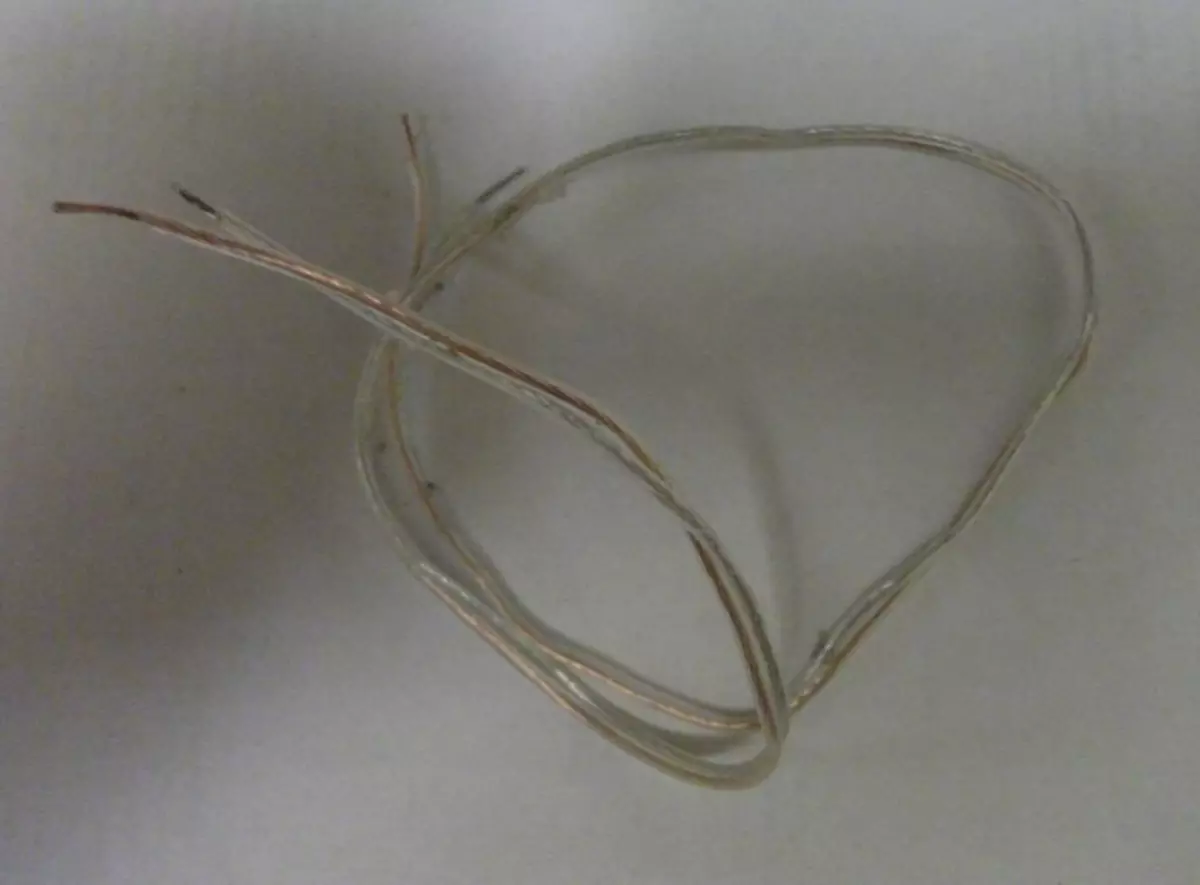
- wiring;
- blowtorch.
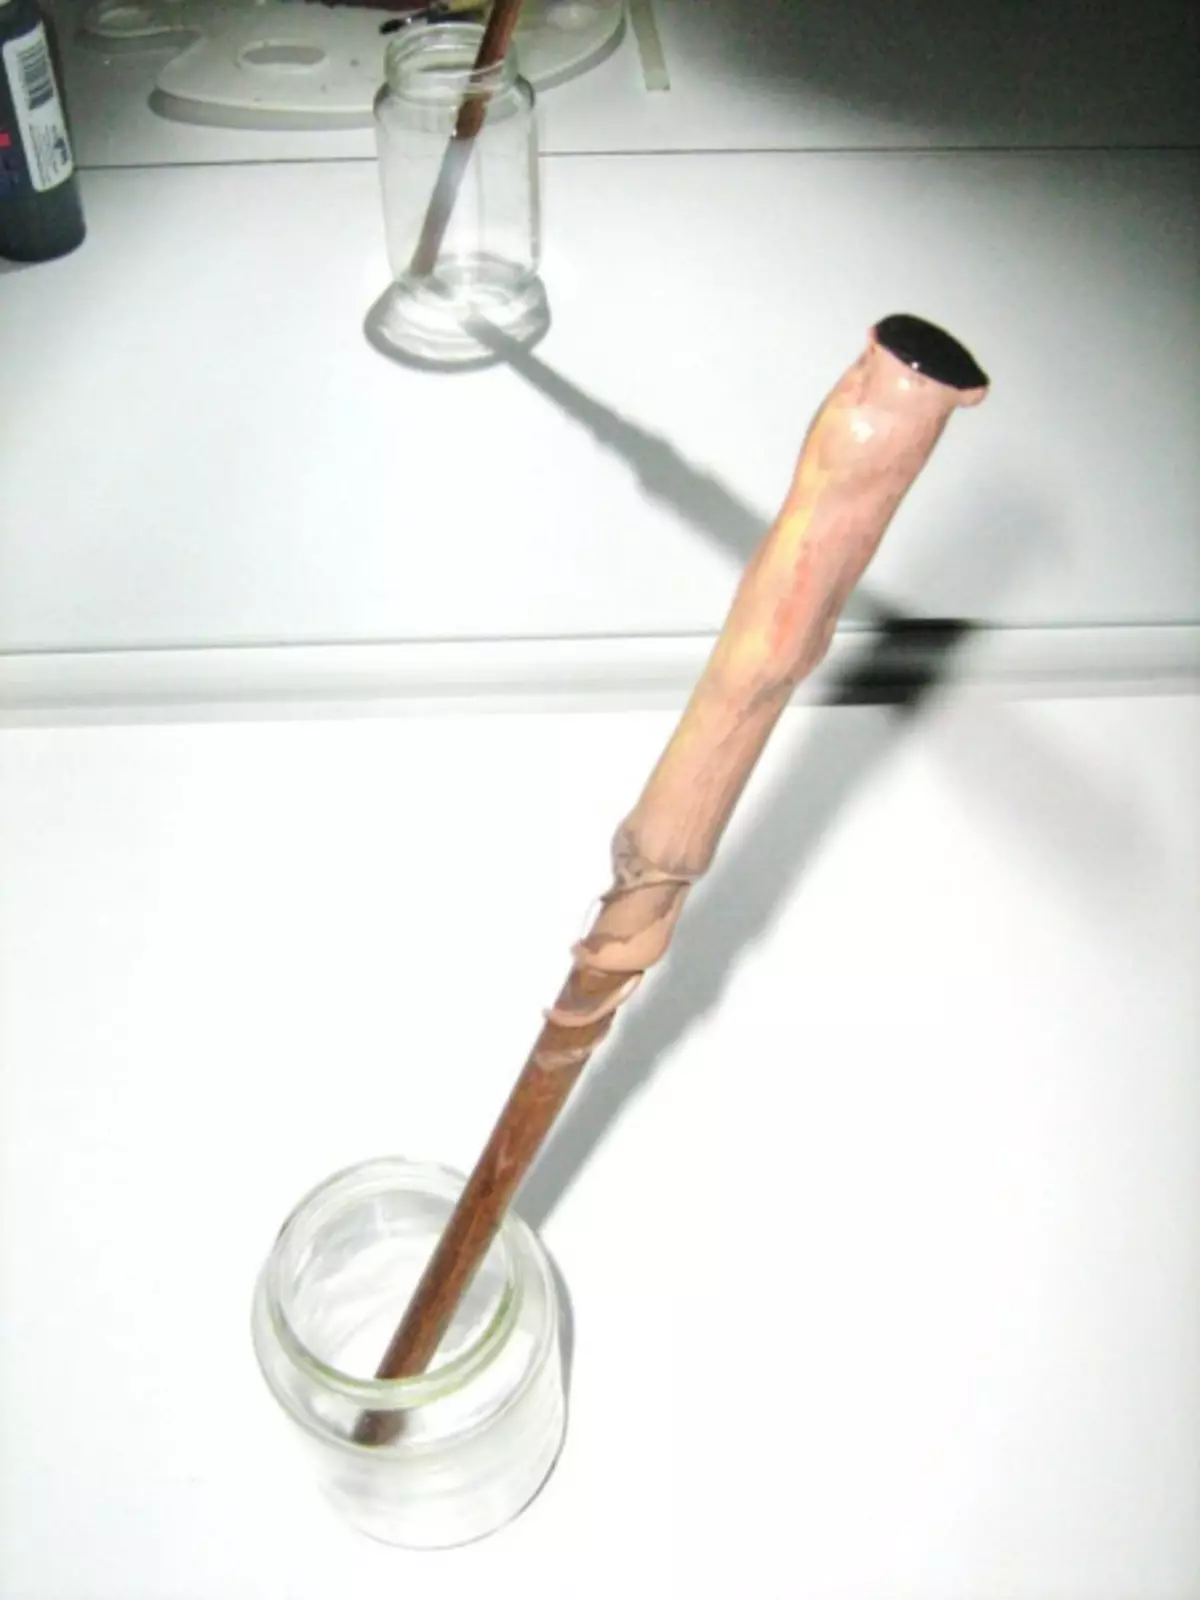
Step 1: Collect LED backlight for sticks
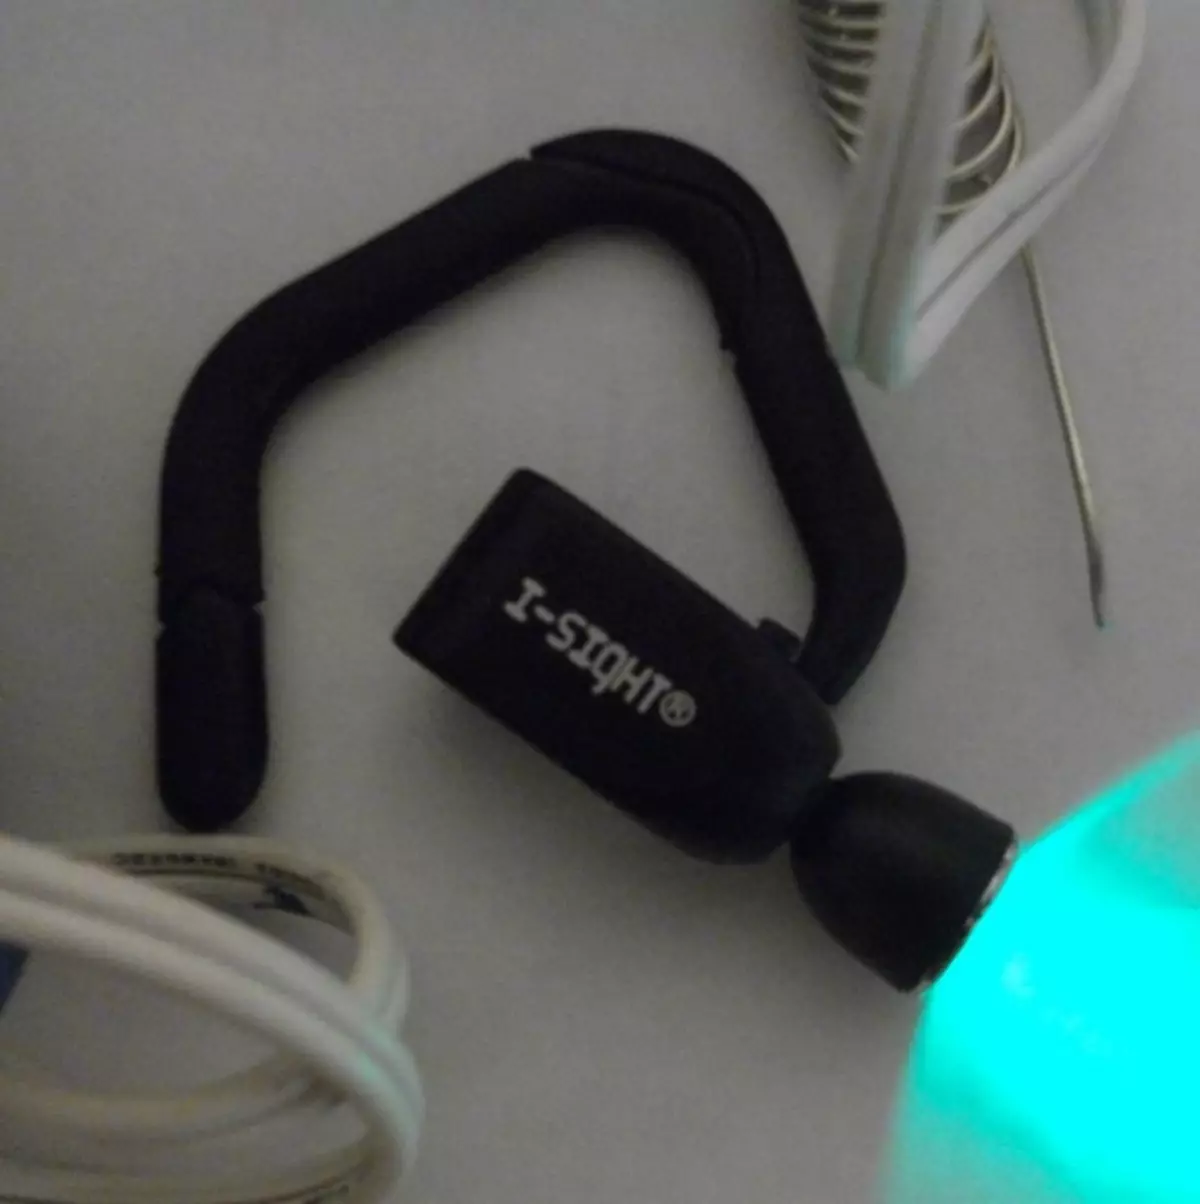
Well, if you managed to get a small flashlight with a LED light bulb. In this case, you have less work.
Remove the light bulb from the flashlight itself, remove all the superfluous from it (body, handles, etc.), leaving the switch.
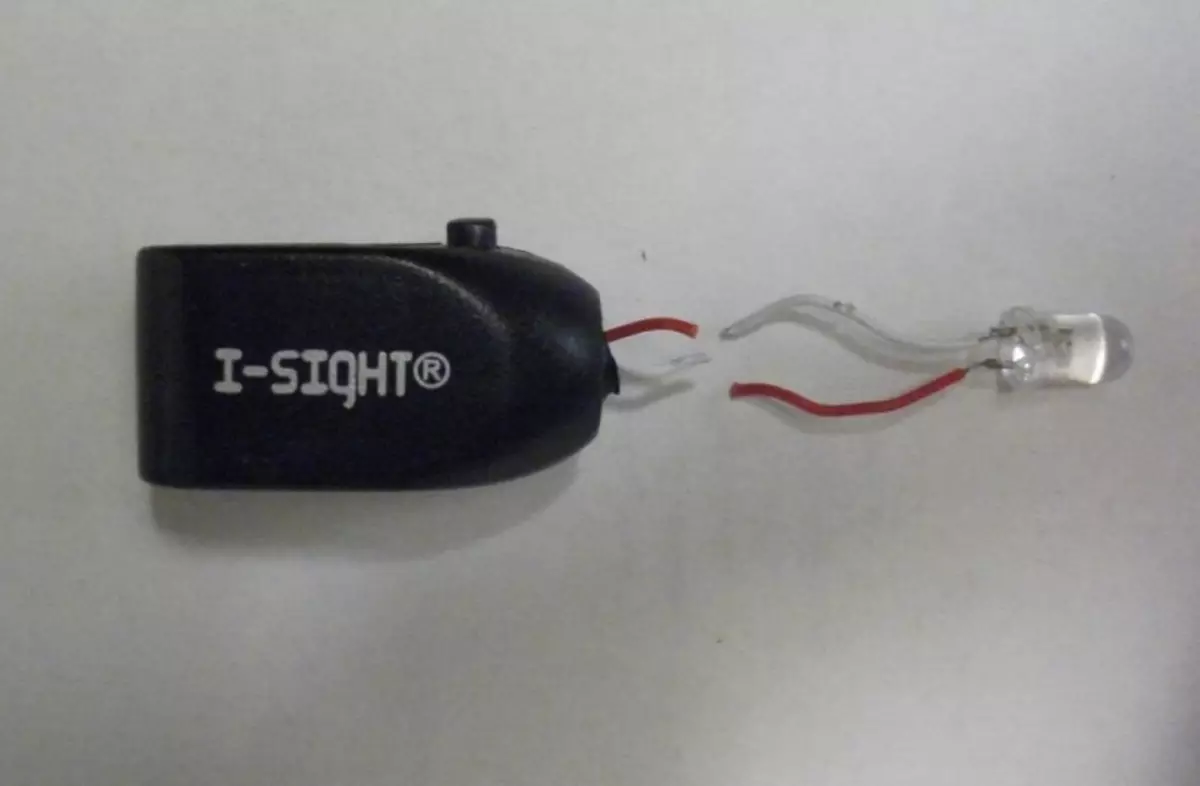
With the help of a solderingler, collect part of the design from the switch and long wiring. Set it down.

Step 2: Blank Basics of Magic Stand
For a conventional magic wand there will be enough two sheets of thick paper for drawing. They must be collapsed into the cone. One sheet of paper may turn out to be a little - a wand will be short. Therefore, twist two cones and insert one into another. Since the stick will be an additional decor, try to minimize the cone as already as possible. So that it does not fall apart, secure the free ends of the cones with PVA glue.
Article on the topic: String art for beginners with schemes: Master class with photos and video
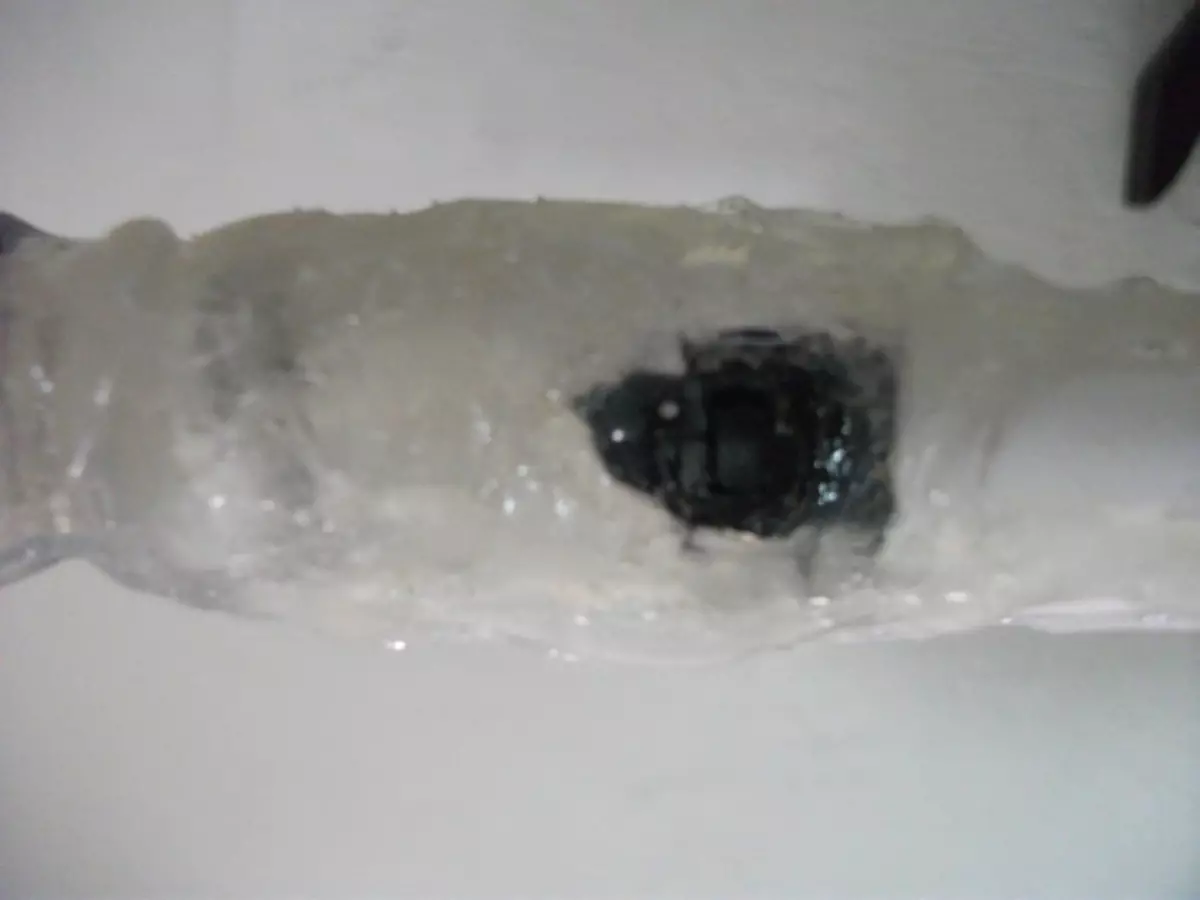
After the cone is ready to pass through it, so that the switch is in the cone handle.
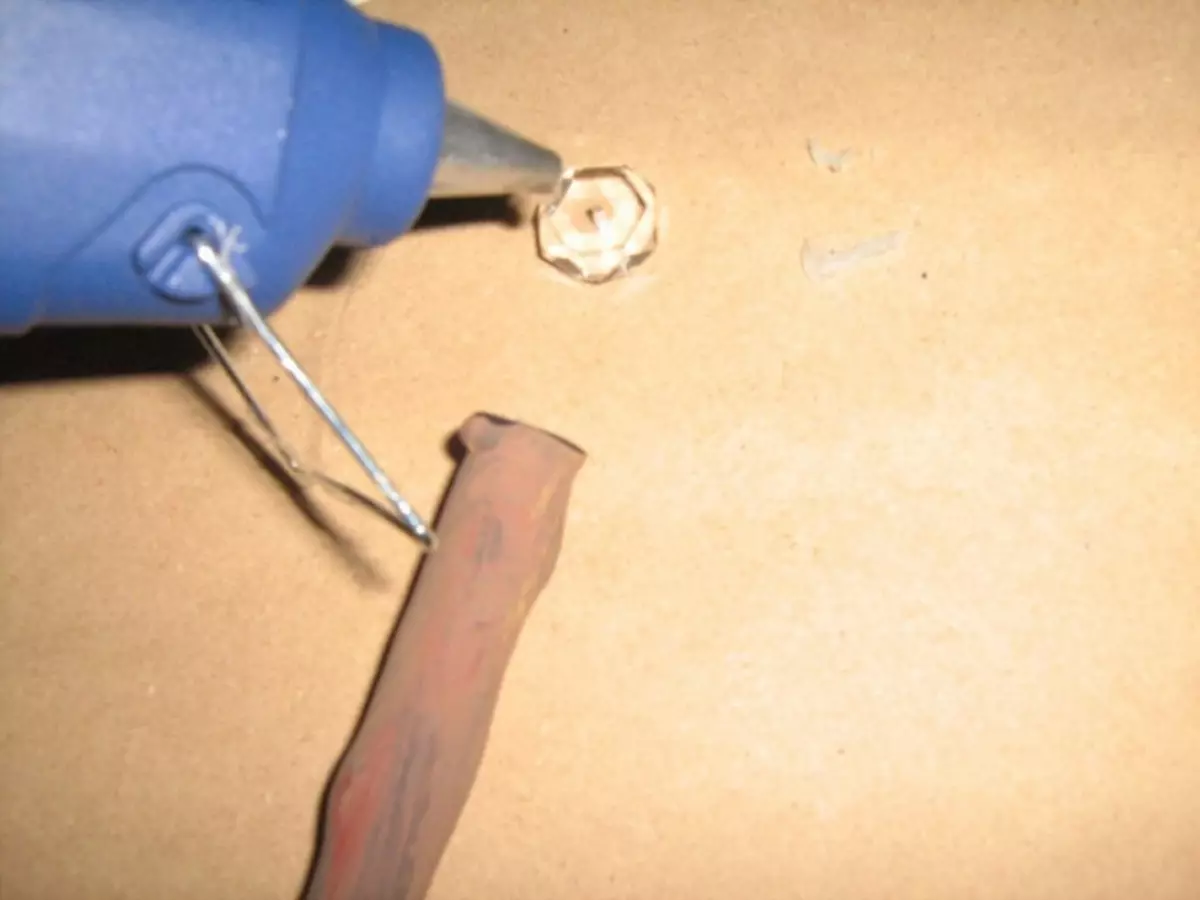
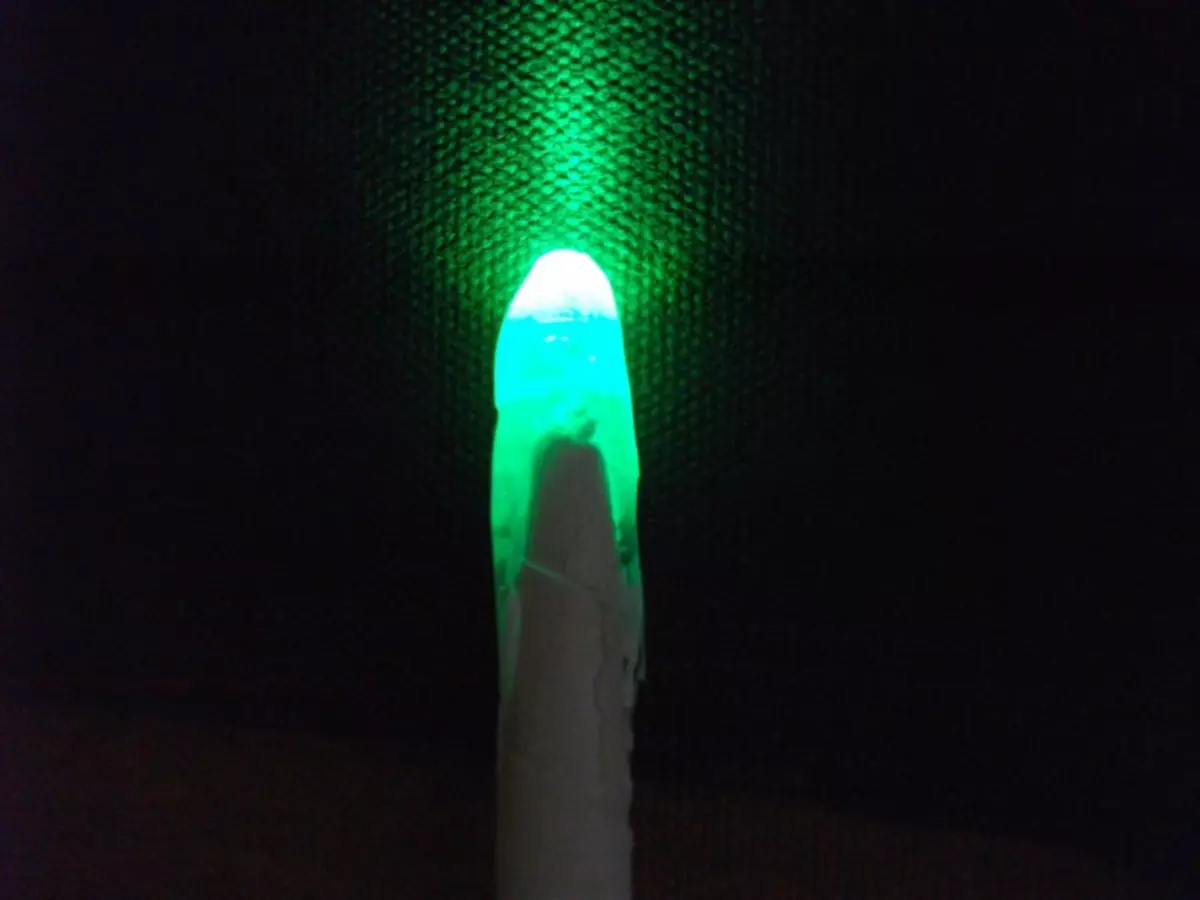
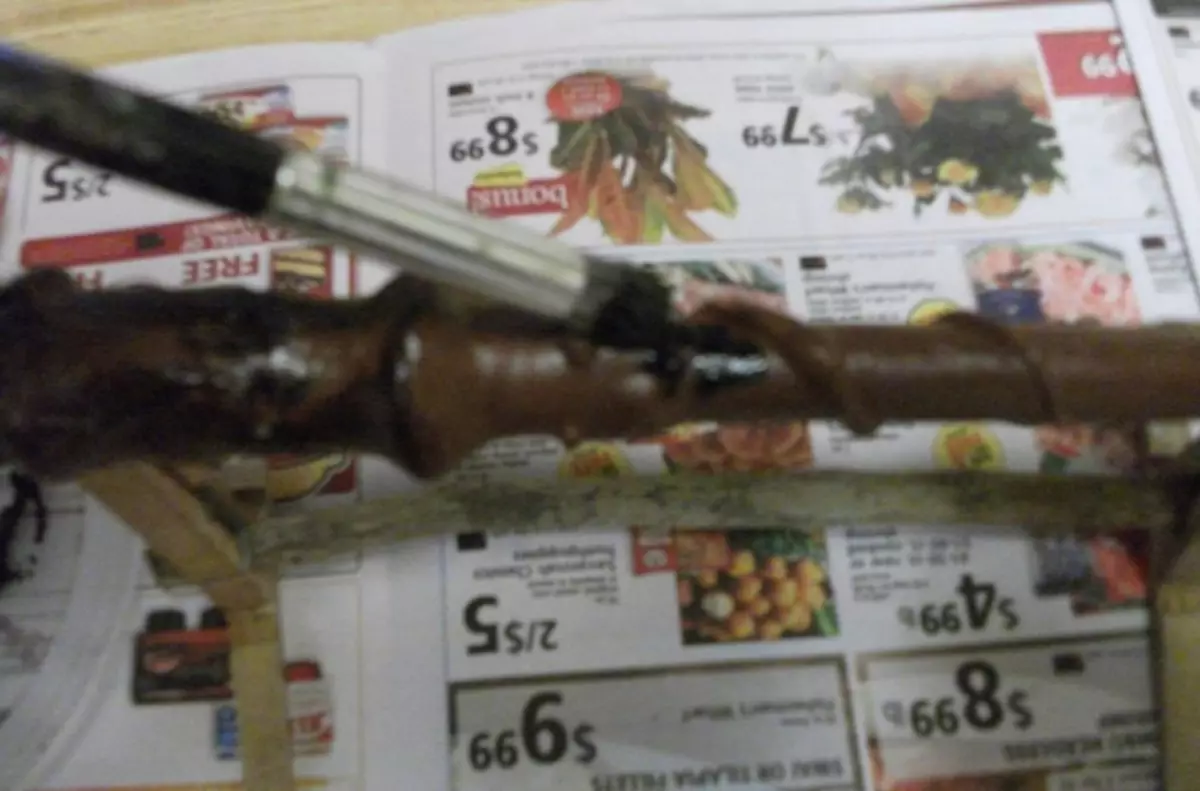
Cut the excessive length of the wiring and solder the contacts of the LED light bulb. As a result, she should be clearly fit at the end of the stick. At the location of the switch, the stationery knife cut the hole for the switch.
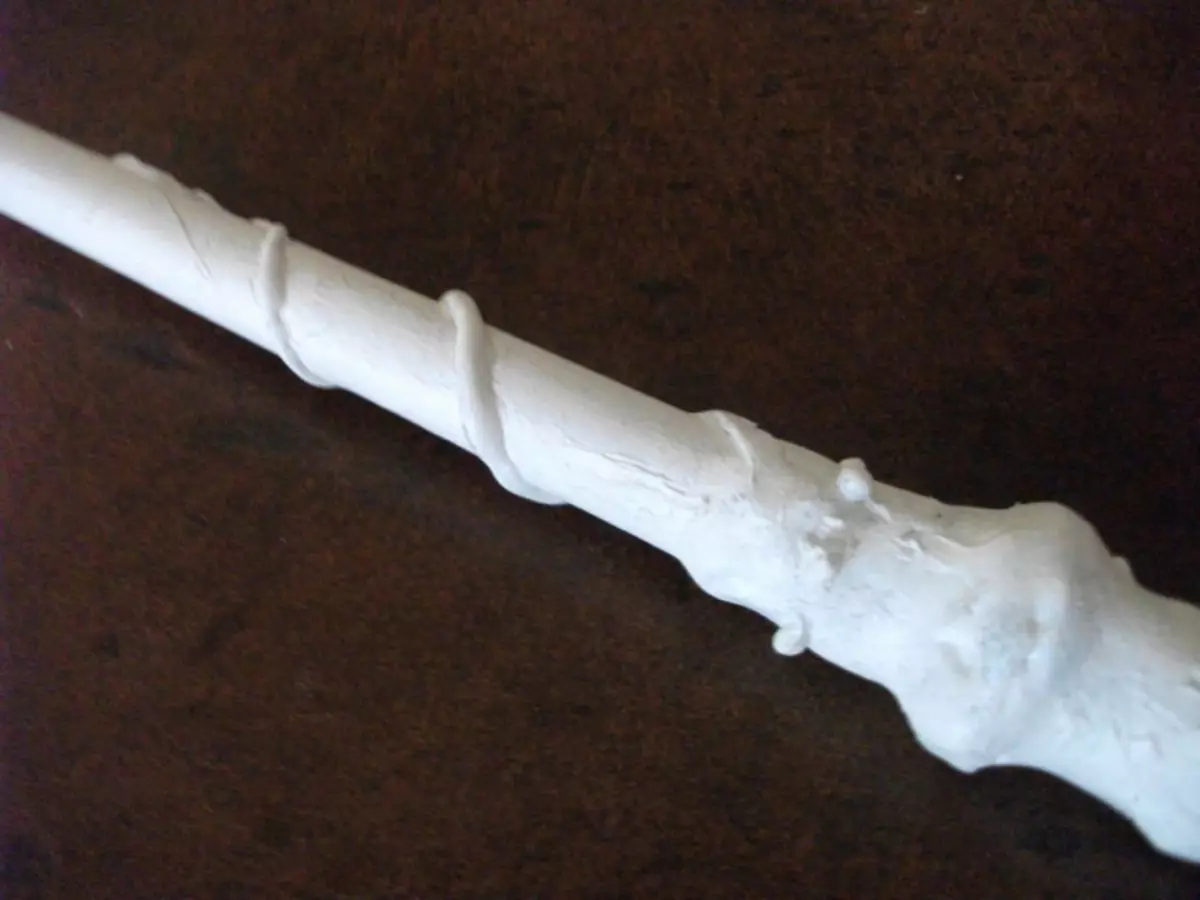
The cone itself neatly fill in hot glue. Secure them light bulb outside at the end of the magic wand and switch. Do this work yourself. Working with hot glue requires skill. In addition, they are easy to burn. Filling a cone, work with glue stages, periodically giving it to cool completely.
Working with glue outside, form it after it will cool down a little. So the wand will look careful.
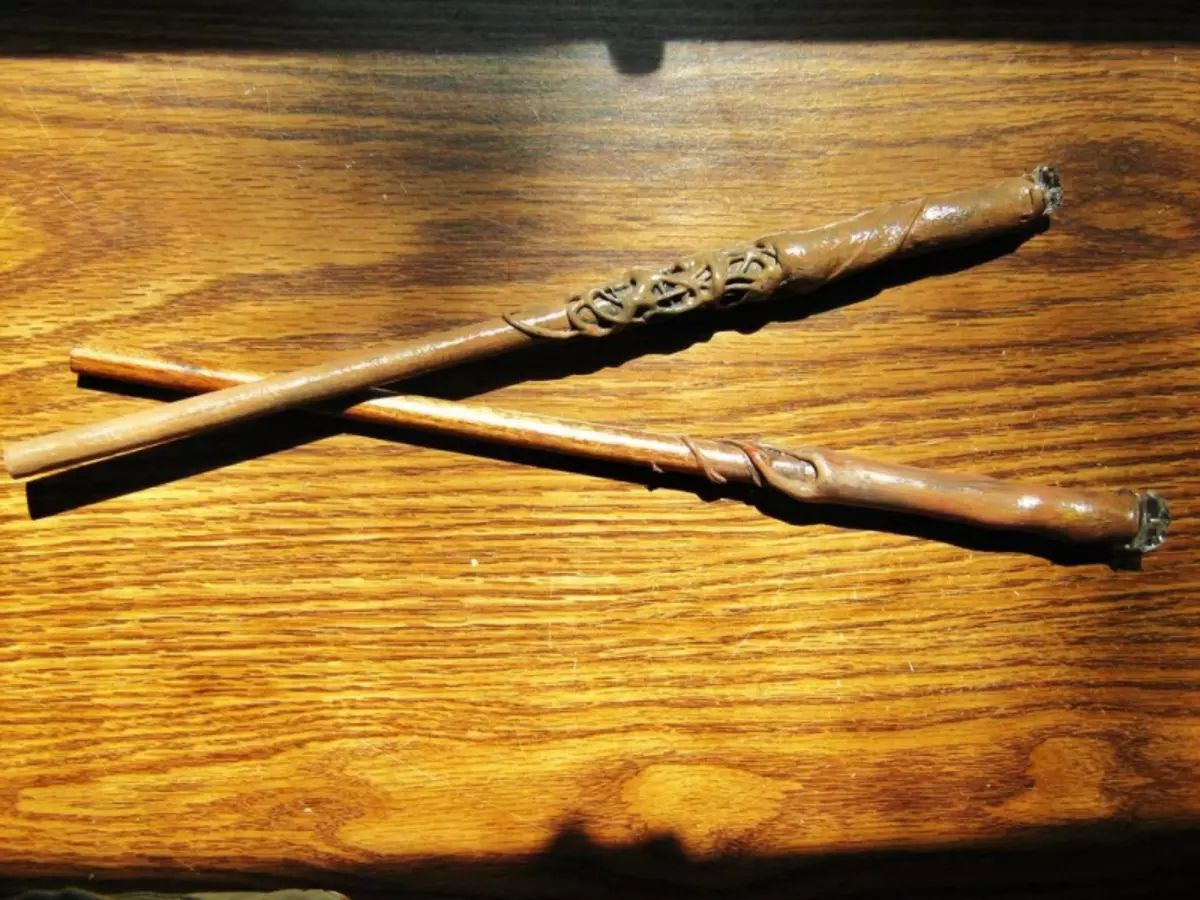
Step 3: Creating a form and preparation for painting
After the glue is dry, they also draw the bulk patterns from the outside.
As the adhesive drying, it is necessary to prepare the surface. In the perfect version you need to apply white primer. If there is no, the usual white acrylic paint will come down.

Step 4: Painting and Edition
All the wand with brushes are painted in brown. After the paint dried, you can give a magic wand. An authentic vintage look.
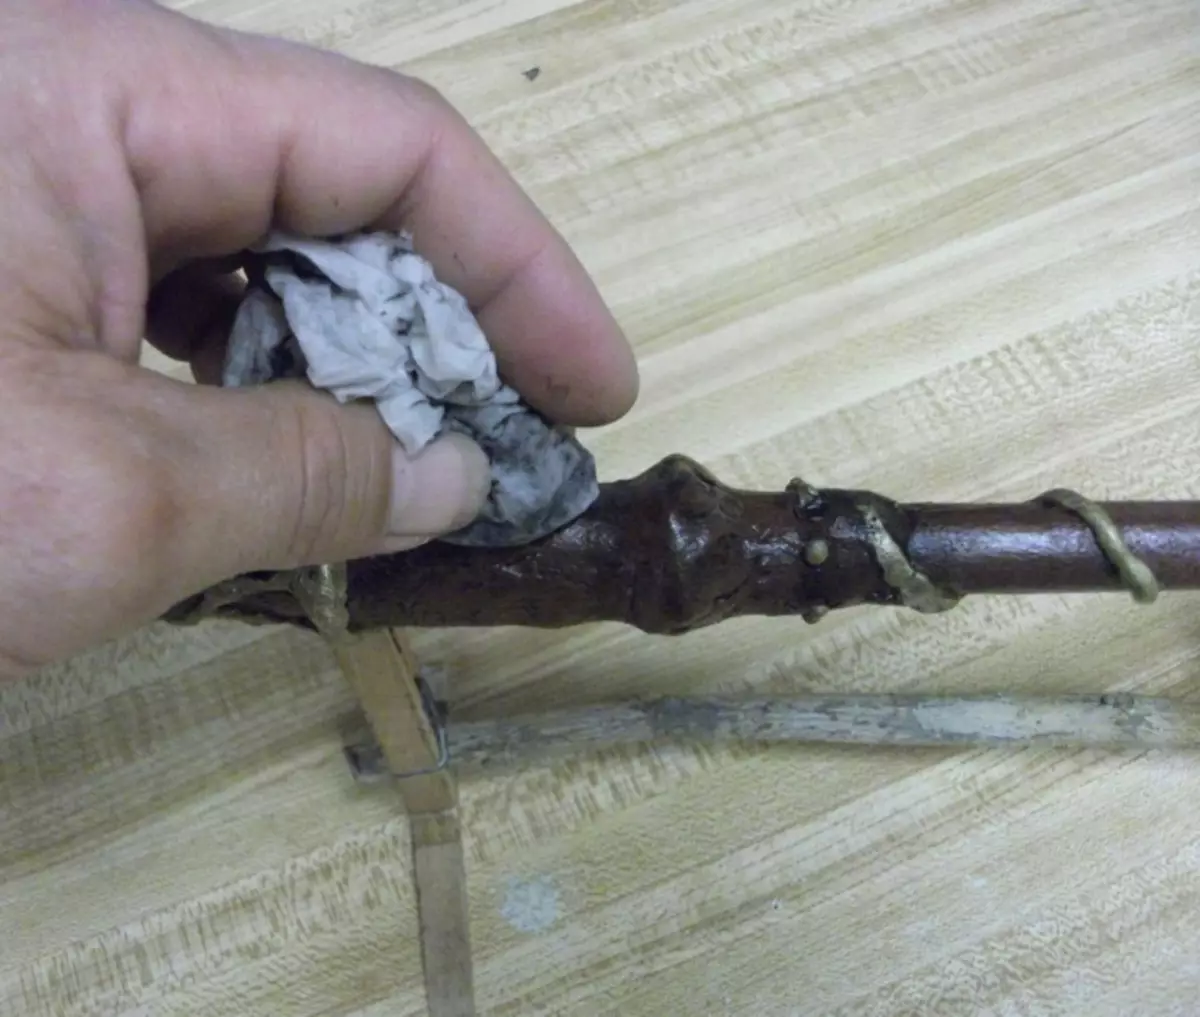
Take a black acrylic paint to spread it a bit and with the help of a brush, drive it into a wand.
Wet napkin wipe the main convex parts of the stick. As a result, such manipulations, black paint will remain in irregularities on the surface, giving visually depth.
Convex patterns cover gold paint and also with a napkin part of the paint remove. Leave your wand until complete drying.
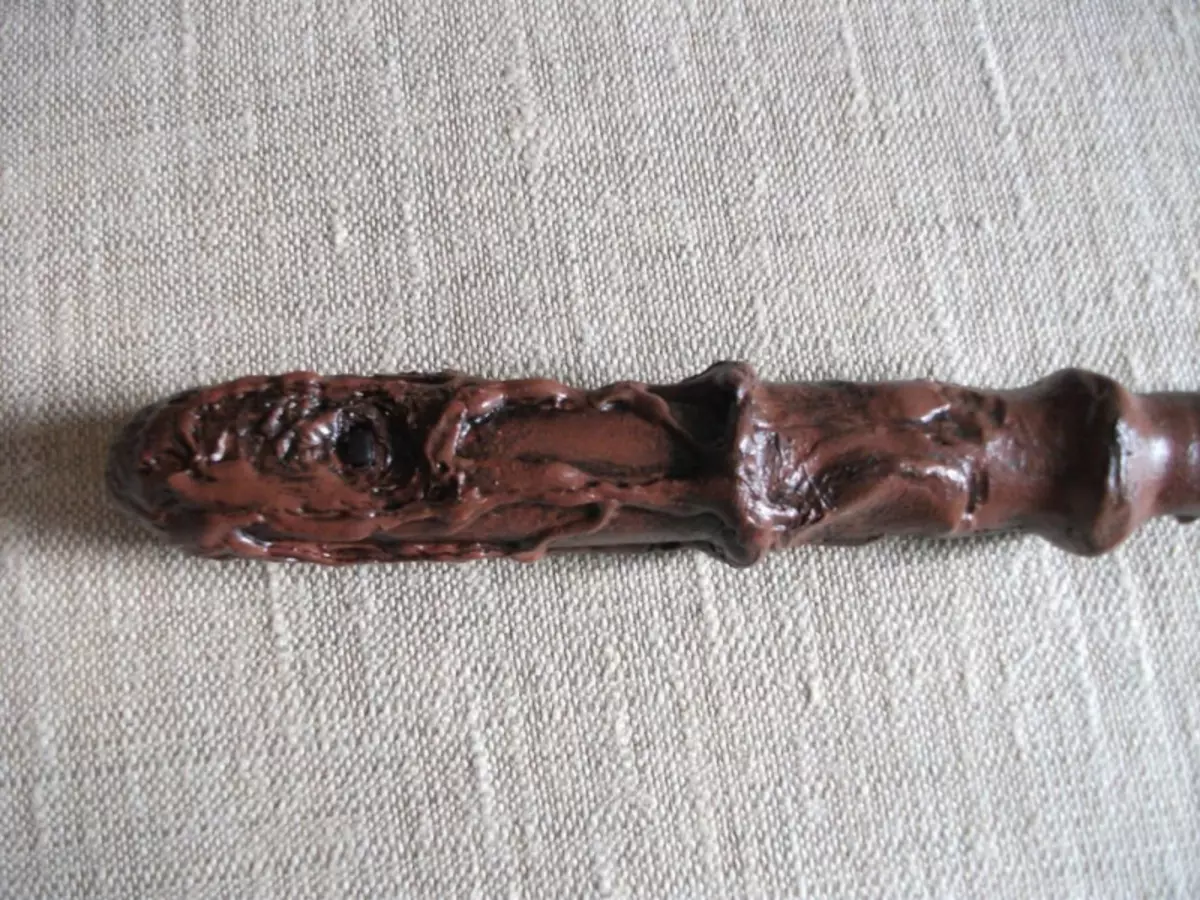
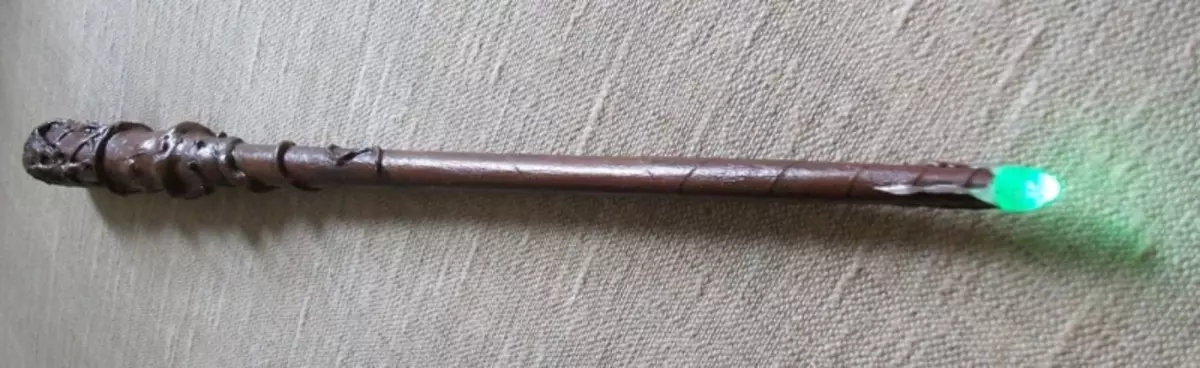
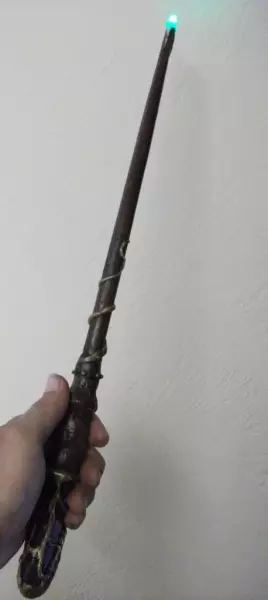
Magic wand ready!
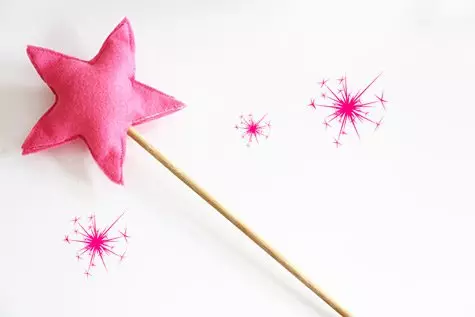
Master Class # 3: Magic Fairy Wand do it yourself
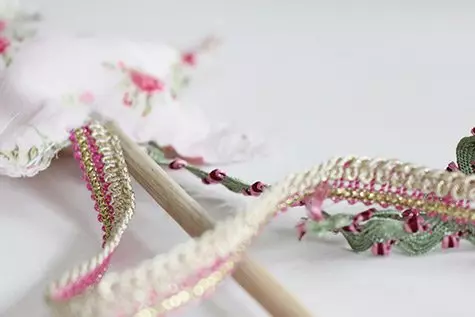
A magic wand near the fair should be more sophisticated and pleasant. A pair of trifles do it yourself and do it yourself. It will be necessary for this to do scribe materials, and the wand itself can be decorated with an additional decor, for example, ribbons, rain rhinestones and other things.
Article on the topic: How to fold things in a bag or a suitcase not to remember
Materials
So that you have a magic wand fairies with your own hands, prepare:
- pieces of fabric;
- pencil;
- scissors;
- threads;
- needle
- a little cotton;
- Wooden skeletal;
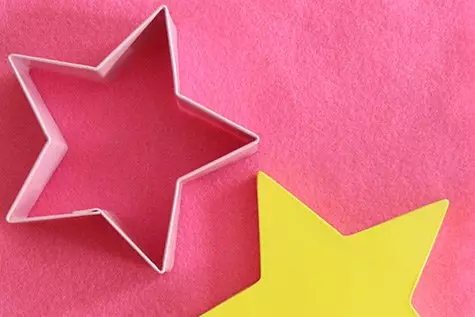
- The form for cookies in the form of an asterisk;
- glue for fabric;
- clothespins;
- Decor for decorating a stick.
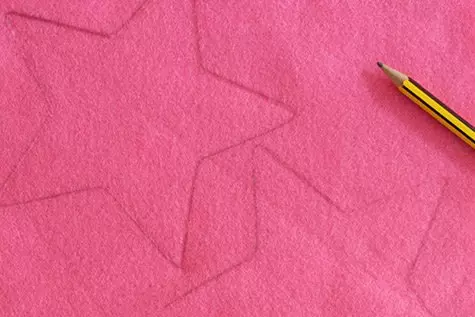
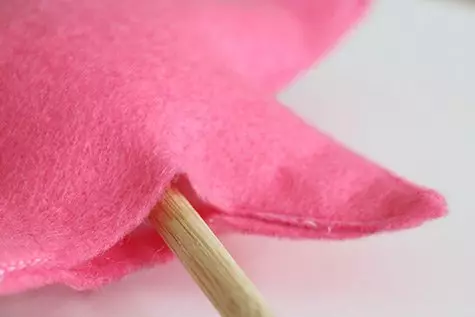
Step 1 . Make blanks for a magic wand from the fabric. To do this, turn a piece of fabric fabric to the desktop and attach a form for cookies to it. The contour of the asterisk circle a pencil and cut it out. Make two such blanks.
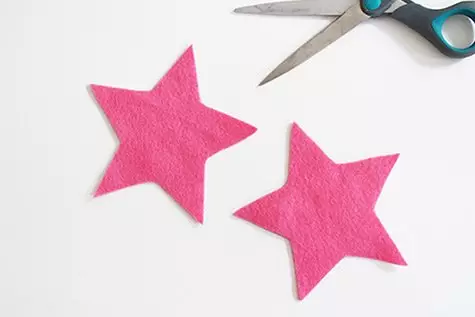
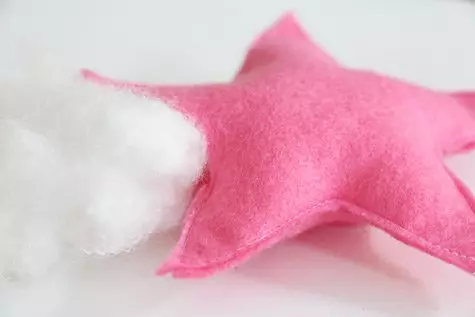
Step 2. . Fold two stars from the fabric together and place them around the edge, leaving a small gap to fill the sprocket by filler.
Step 3. . Wheel with a wool and insert insert a wooden skeleton into that hole.
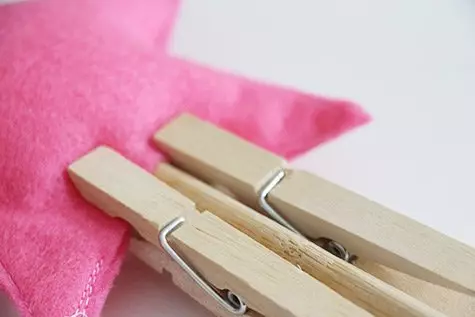
Step 4. . Clean the unpripted parts of the asterisk and the spiner itself with glue for the fabric and clamp these parts with clothespins. Remove the clothespins themselves after the complete drying of the glue.
In fact, the wand for the fairy-wizard is ready, it remains only to decorate. You can decorate it with pieces of braid, a bow or beads.