
No yard in the village do without such a bird like a rooster. In this article we want to tell you about how to make a magnificent rooster from plastic bottles with your own hands.
Go to the lesson
The process of manufacturing the proud rooster can be traced on the example of the master class. Phased creation Petushka is described in detail and shown in the photo.
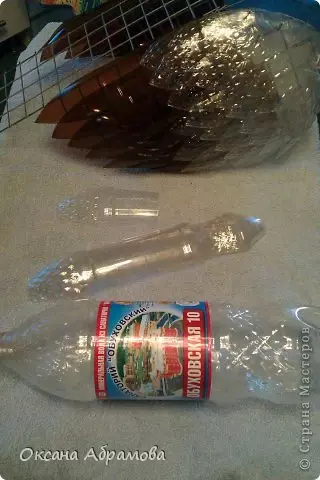
In order to make a cockerel, take the canister (5l volume), a plastic bottle (five liters volume), a pair of plastic bottles for the legs (volume of one and a half liters), a metal-plastic pipe, scissors, a screwdriver, a stationery knife, self-tapping screw.
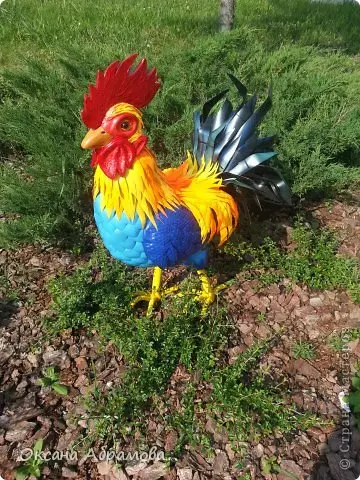
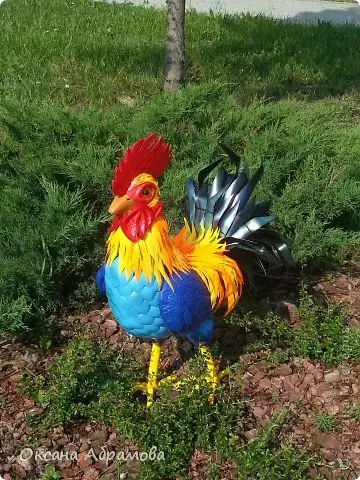
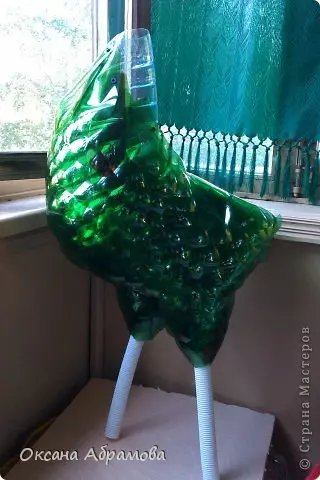
The photo shows the model of the cock.
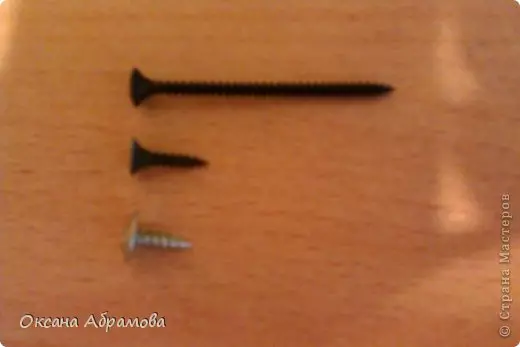
In order to bore the product, you need to use screws. They can be bought in specialized construction stores. Length of small screws - about one and a half cm, and large - five to six cm. Little use to bore the throat, and large - for fastening the head.
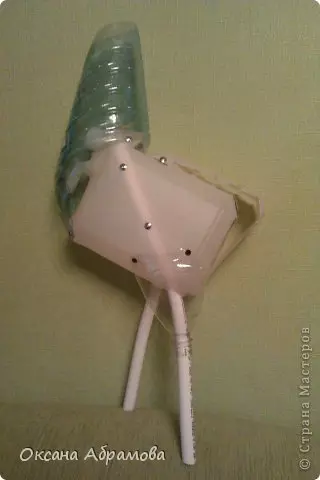
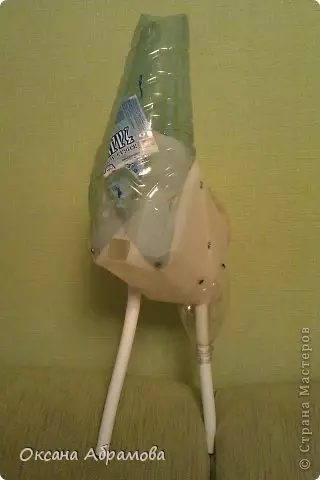
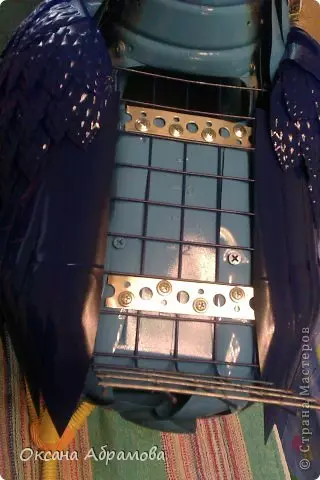
The first step we will make a carcass rooster. To do this, we move the upper part of the canister for three cm. Then we give the shape of the foot with a metalplastic pipe. In our case, the rooster will walk, so one leg is advanced forward. It is necessary to fix it on the self-tapping screw to the canister. In order to make a cervous cake, we turn the converter and fasten the screws. Then cut out of small bottles of ham and secure them on the tapping screw to the canister. Here is such a torso:
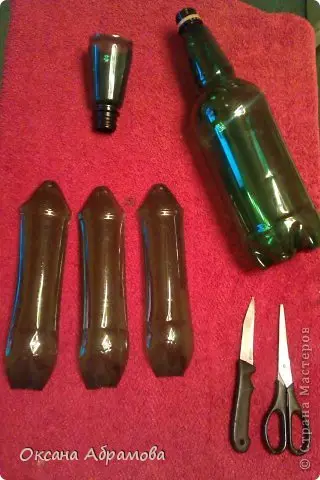
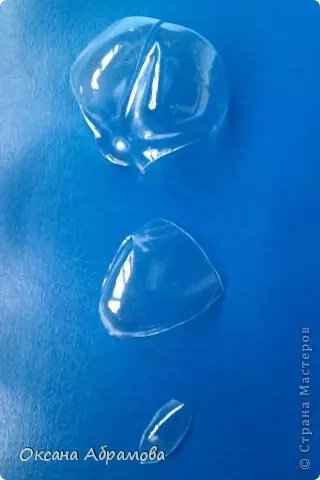
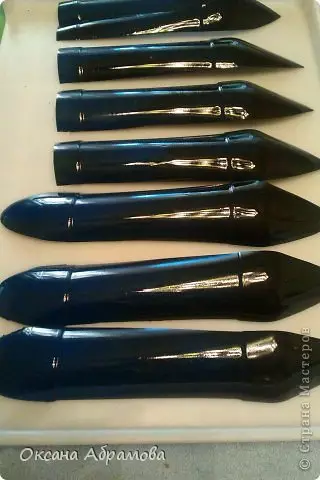
In order to make a ponyths of a rooting, we will use bottles from under beer (the form is shown in the photo). It is necessary to cut off the long throat and cut a bottle into five parts. Focus best on the bottom. We will use only the top.
Now go to the process of the bolding of the body. Start working with legs. To make it more convenient, you can disconnect them from the body. At the neck of the bottle, attach corrugated paper, and then use the wire to attach the feathers.
Article on the topic: We sew pillows with your own hands
After the feet have made the legs, we again attach them to the body.
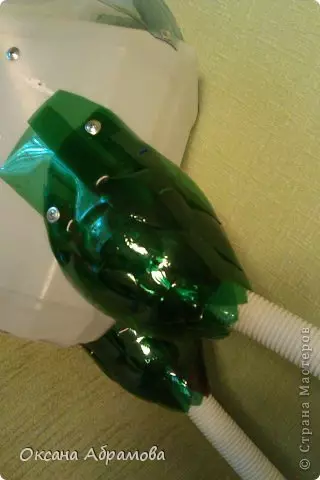
Well, now exactly accumulating the torso with flippers, starting from the back. All parts are needed with flipping, except the back. It is also necessary to leave the open and the back of the cervix at the cockerel. As mentioned above, it is necessary to mount the features on small screws.
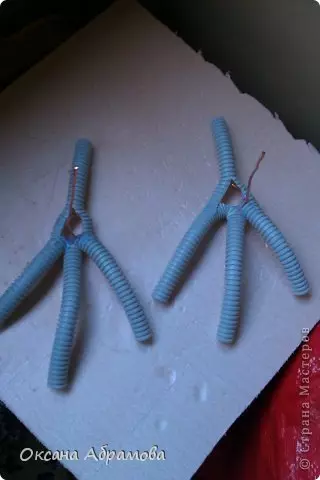
Then we need to make legs. Take copper wire (two and a half mm thick). You can take any other wire that bends, but not stal. I wipe the shape of the paws from this wire. Then take corrugated paper and create skin effect. The tail, which remained, must be inserted between the corrugated paper and the metal-plastic pipe. In order to absorbed anything, flush the bottom with glue for strength.
Then take the bottom of the bottle and cut out claws from it. Claws should be the most narrow and long, as shown in the photo. With the help of torque glue, we attach them to the legs.
Conventional paint from the canopy of the canister and legs of the cockerel.
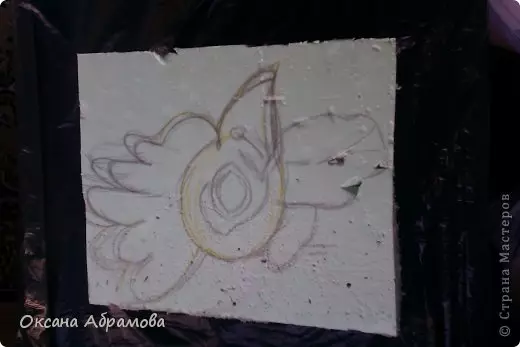
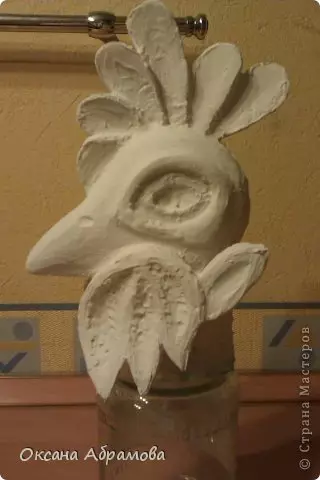
From the construction foam, we cut the head Cockerel. We use the stationery knife so that the sections are obtained as sharp.
If you do not all go smoothly, then you can cut all the details individually, and then glue them with glue.
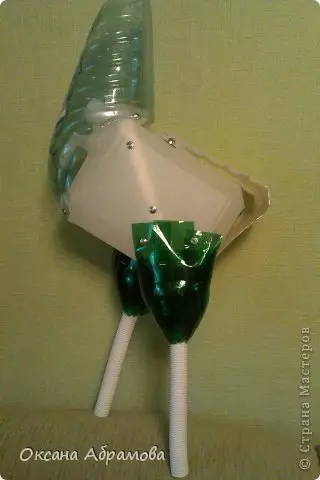
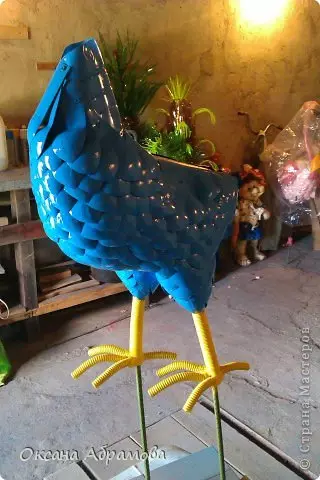
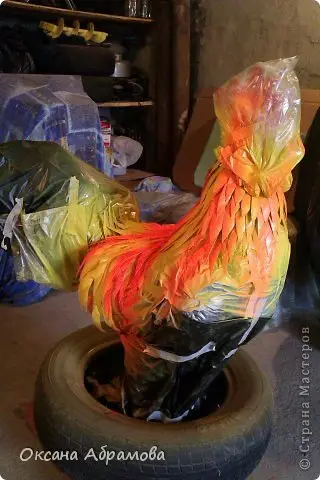
That's what happens at this stage:
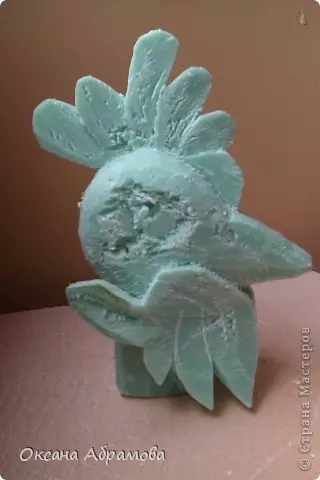
The second photo also shows the head Cockerel:
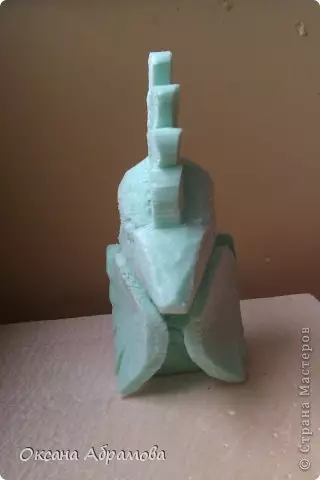
And the third, but already from the new angle:
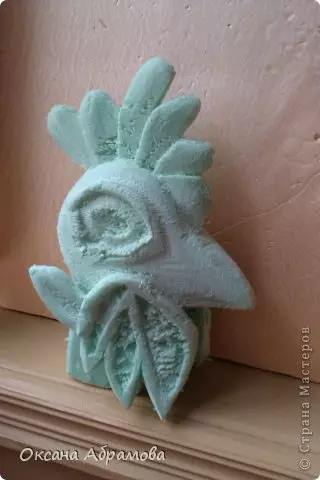
This form was made using the emery paper of medium stiffness.
Acrylic smear or any other coating the surface of the head. Then we need to wait until complete drying and only then reincarnate again to perfect smoothness. The next step we treat the surface using conventional PVA glue. It is necessary for the paint well lay down in the future.
Article on the topic: Romanian lace crochet: schemes for beginners, models with detailed master class and video
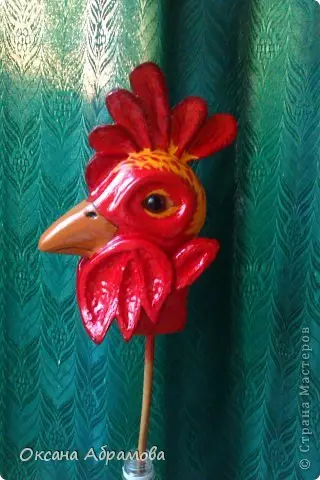
Acrylic paints (or by any other) deactivate the cockerel's head. After that, glue the eyes. They can be done by themselves, but you can buy in a specialized store. The next step, we need to prepare the shape of the wings, and then cut them with the help of booths.
Breeping long wing features using ordinary wire, the back must still remain open.
You can close the top with corrugated bottles. The last row should go inside the wing, to bend.
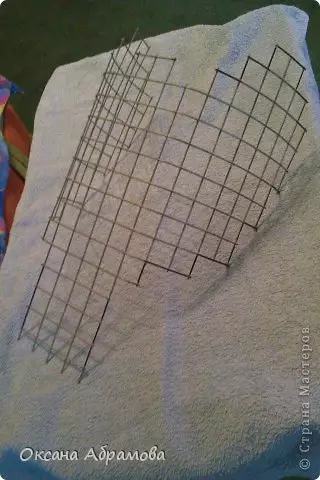
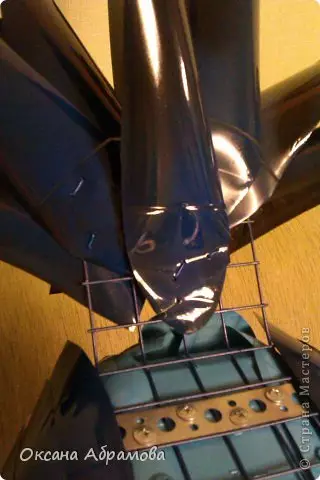
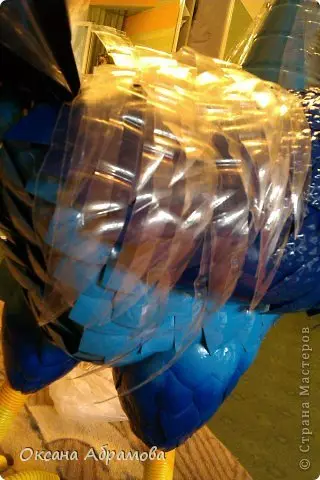
Cove the surface of paint and wait until the product dry. Then we attach the wings to the body and prepare the grid for the tail. The longer the grid, the magnificent tail.
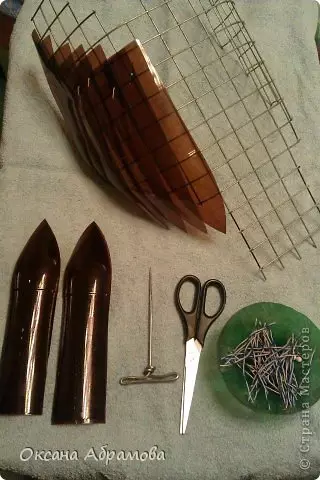
Feathers for the tail must be cut from bottles of 2.5 or two liters. Collect Now we need every feathelter with two parts.
Attach the feathers to the tail. They can be cut in half.
From transparent bottles, cut a feathers of different lengths for the back. Their width is about two and a half, see them on the body with self-draws at once a few pieces. Do not forget to paint in yellow.
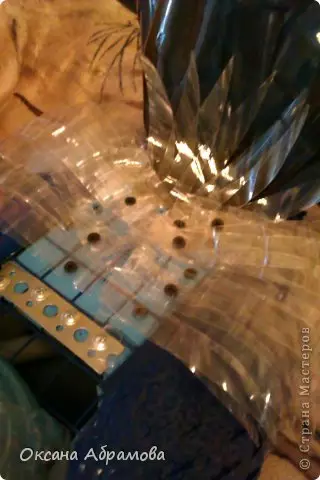
That's what it turns out:
The last series of features must be glued in order to not be seen self-tapping screws.
We appline the yellow paint on this part of the work and let it dry.

Add a couple of bright stripes.
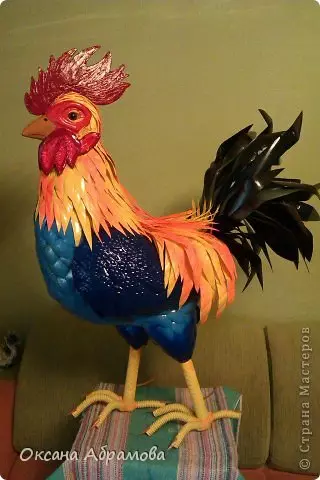
Cover the product with a transparent varnish (can be gloss). That's ready the rooster, which will be joyful for everyone.
Video on the topic
We offer to see a selection of colorful video lessons for the manufacture of a beautiful rooster of plastic bottles with their own hands.