
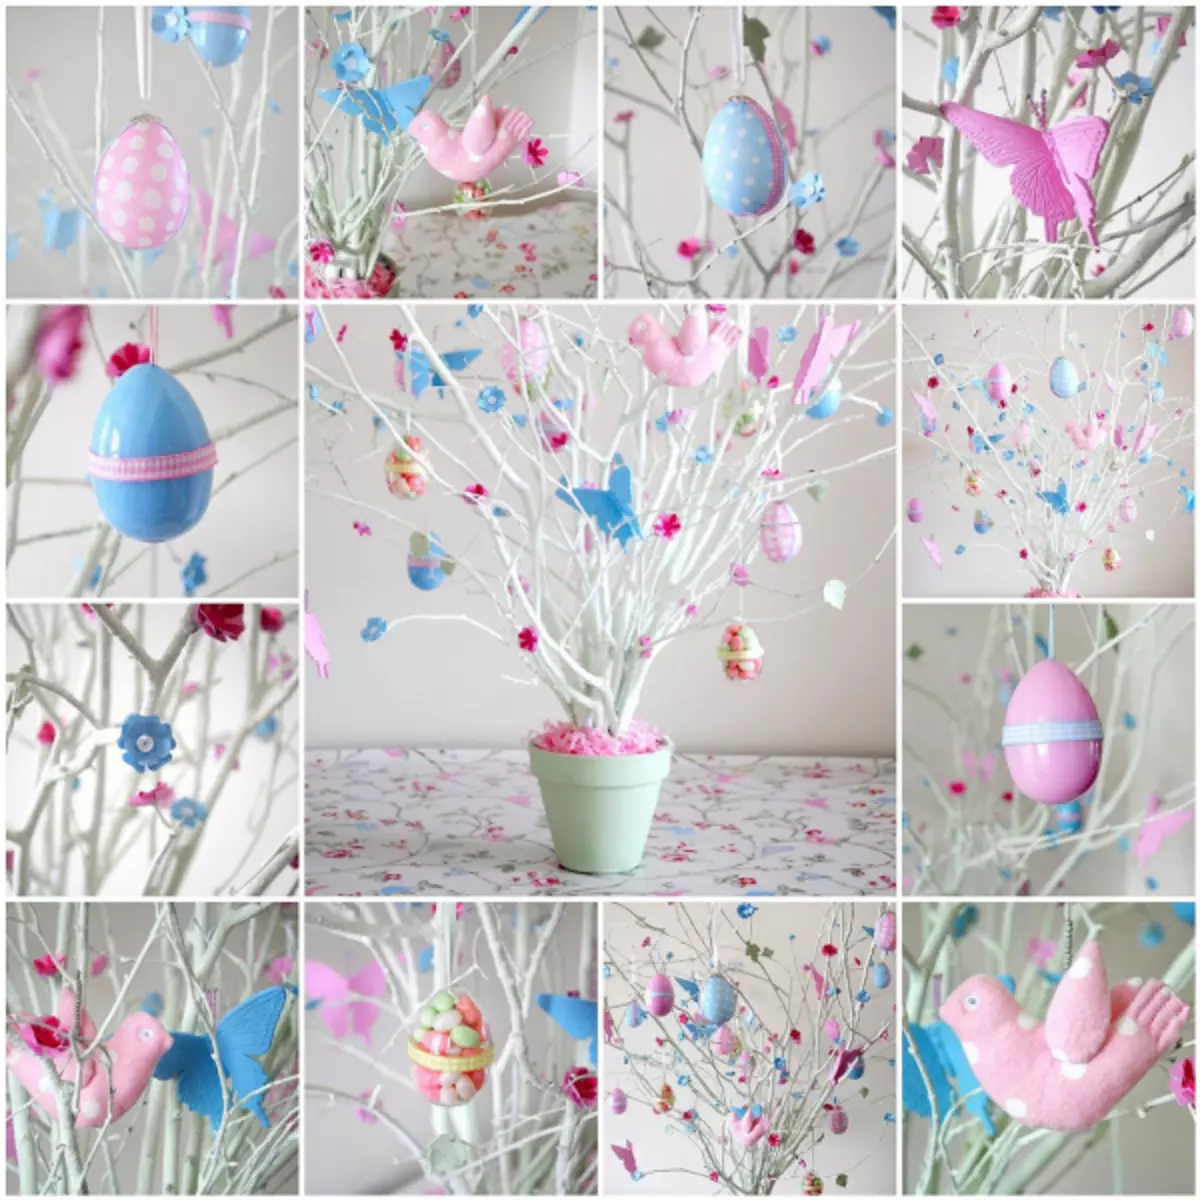
Easter holiday is the most long-awaited for all believers and especially magical for children. One tradition came from Europe to us, which accounted for many people to decorate and create an Easter tree. The tradition of decorating such a tree came initially from Germany. The decoration of the Easter tree is the same event as the decoration of the New Year tree for Christmas and for the New Year. If you live in a private yard, you can decorate a tree in the garden, decorating it with eggs, toys, and there is no such opportunity in the apartment, so it will be better to make an Easter tree in the apartment, or it will be a toopiary, or some other composition on Easter theme.
Another joy will make such a tree with their own hands. The decoration and the creation of an Easter tree can be a good family tradition, which will give even greater importance to the approaching holiday. I really like the children to work on creating such trees. Children love to make creativity together with their parents, it combines and brings closer.
Stages of creating a tree
So, soon Easter and we need to make our Easter tree. But first, we should prepare the necessary materials for this. When the materials are ready, let's start our master class.
We will need such materials:
- a vase or a container that is suitable;
- Salt, water or pebbles for fixing branches;
- 5-6 sprigs taste (if you want the branches to be white, they can be painted with acrylic white paints);
- Chicken eggs are raw (quantity depends on desire), you can take quail;
- Toothpick and a thin needle;
- tank for yolk and protein;
- paints and brush;
- PVA glue;
- sequins;
- stickers for eggs;
- food coloring;
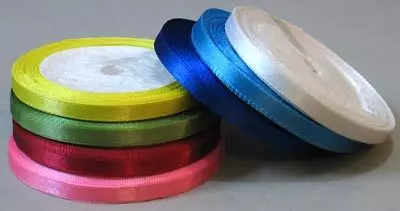
- Beautiful ropes or ribbons;
- napkins for decoupage;
- White acrylic paints.
Article on the topic: French regulated knitting needles: Jamper Scheme with Video
After all materials are prepared, you can start creating.
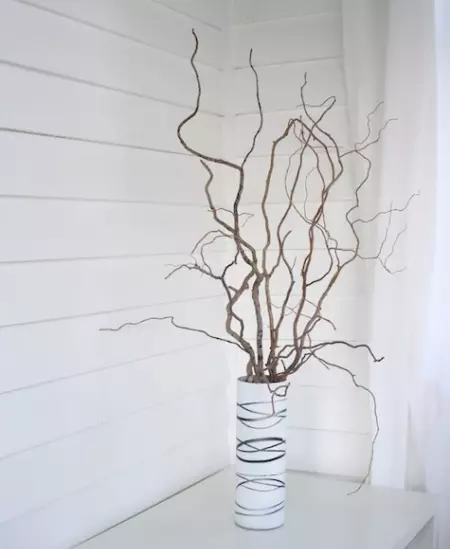
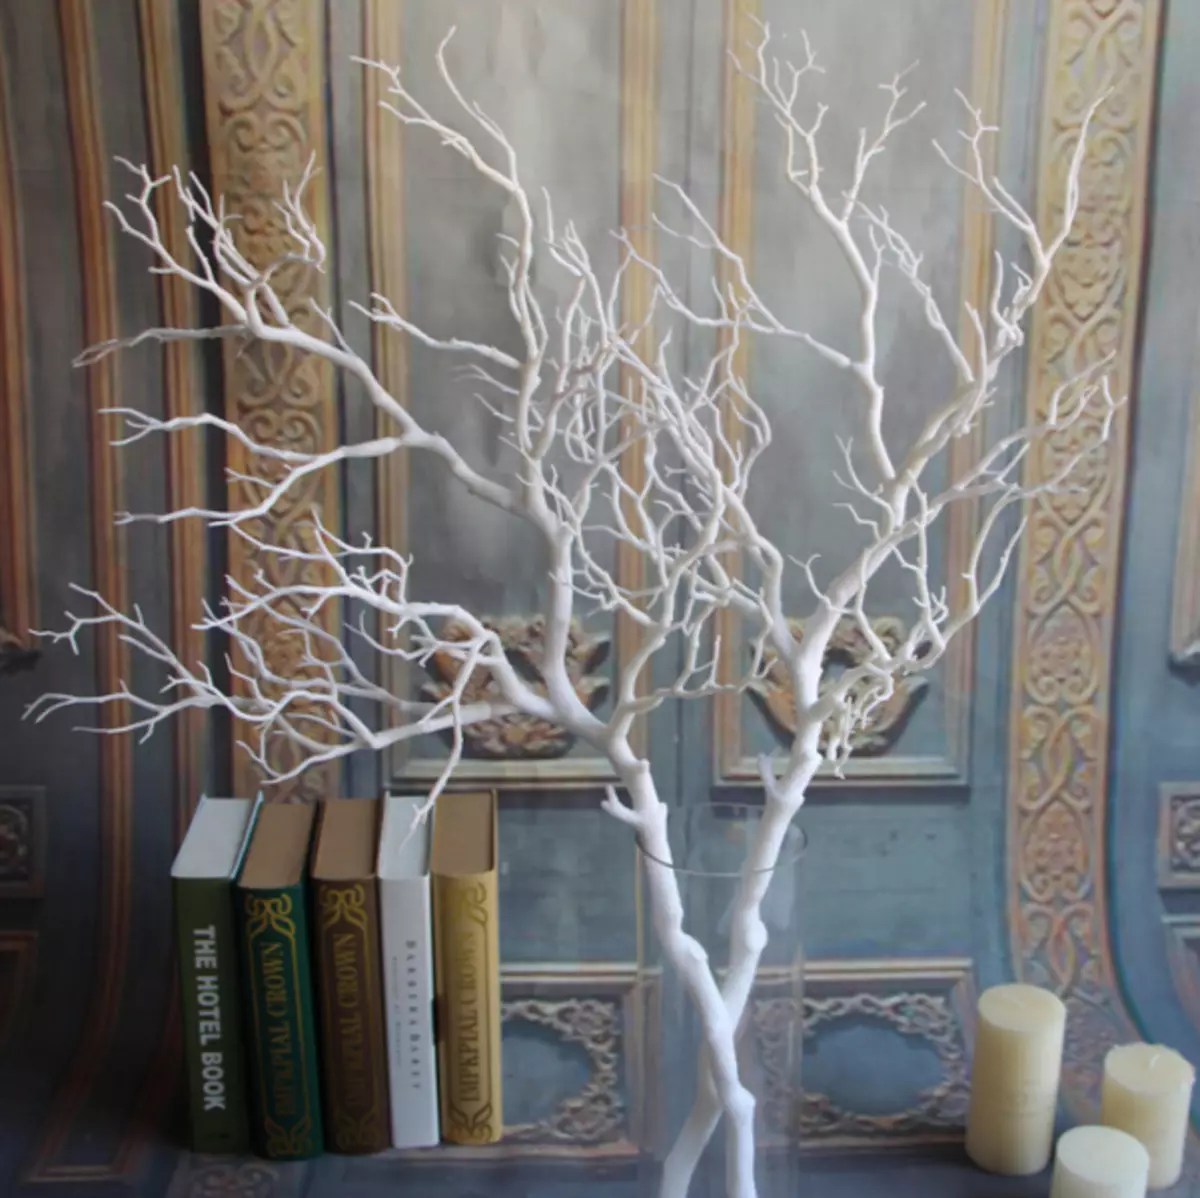
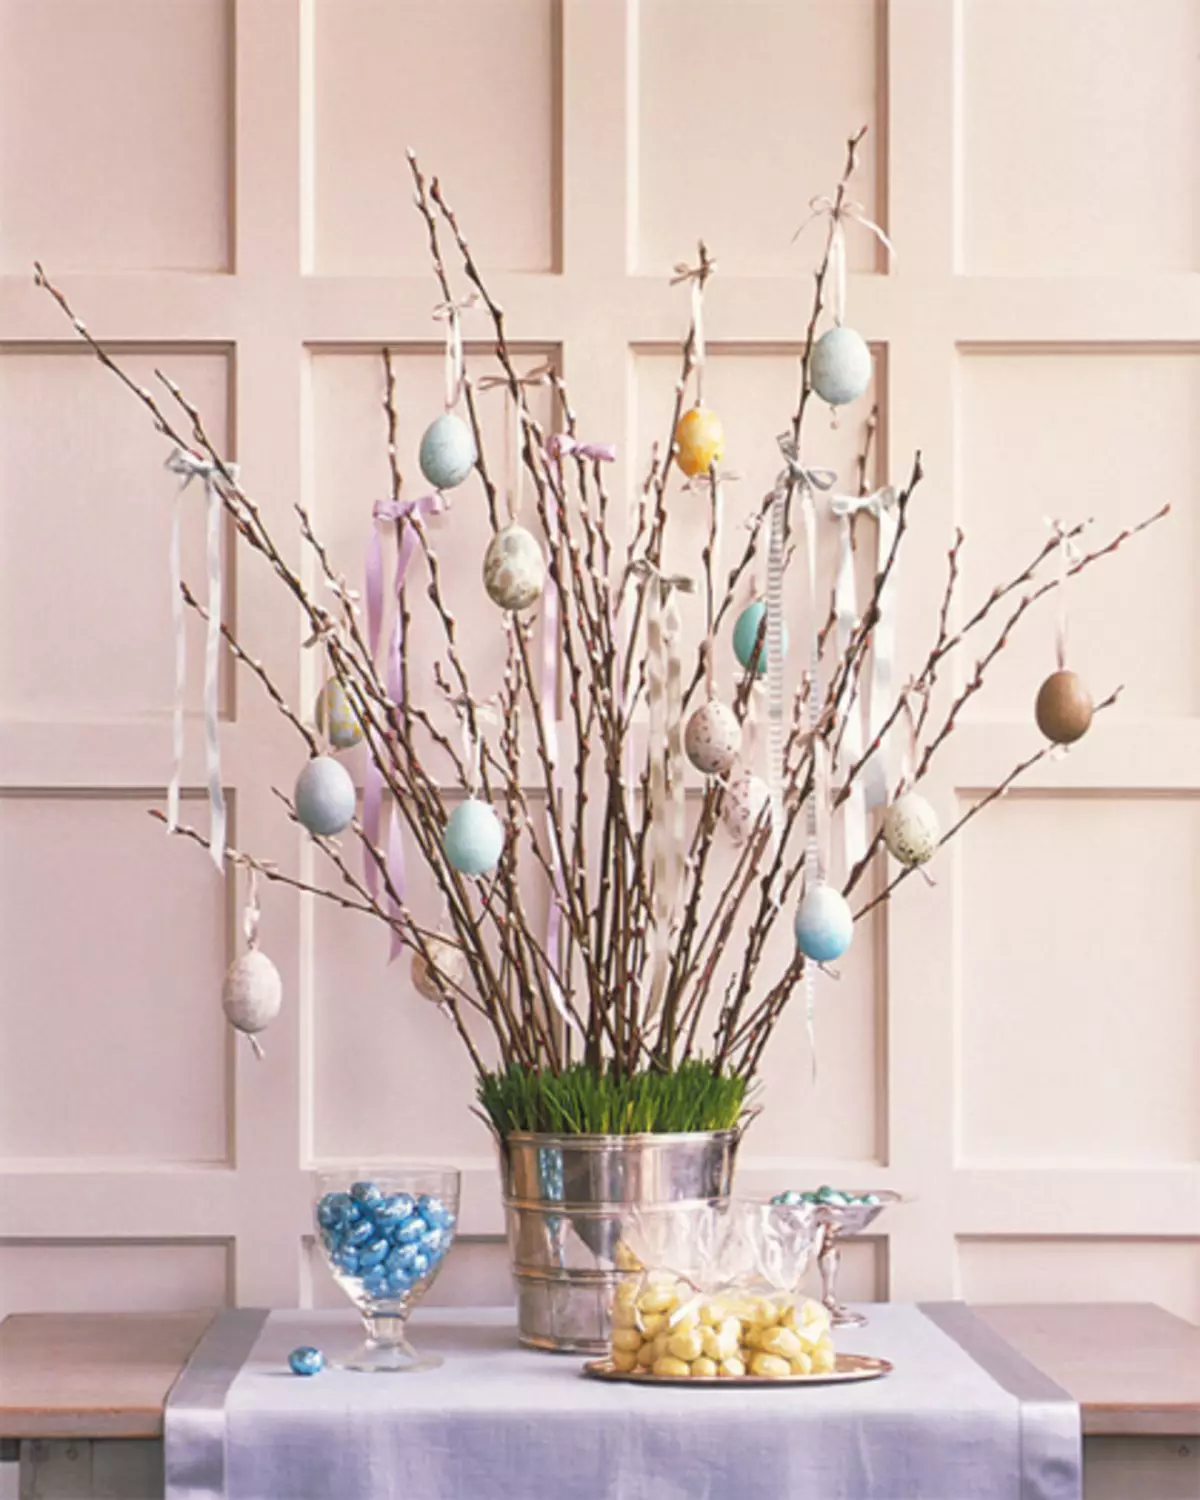
Cooked twigs need to be put in the vase. For these purposes, the twigs of the cherry are well suited, although if you like the twigs of other trees, it will also be fine too. Then we will hang on the twigs already made and decorated eggs. The length of the branches, their number, appearance - everything will be dependent on your taste directly. Someone likes the sprigs of natural color, and someone souls so that they were white. If you like white twigs, but you need to take a white acrylic paint and paint our branches. The paint dry pretty quickly until we decorate and prepare eggs.
Already dry twigs need to be put in a vase and fall asleep with salt. Salt will not give the branches to stagger, the whole design will be stable. You can fall asleep pebbles, such as pebbles, or other filler: rice, beast, in the extreme case you can pour water into a vase.
Photo for example:
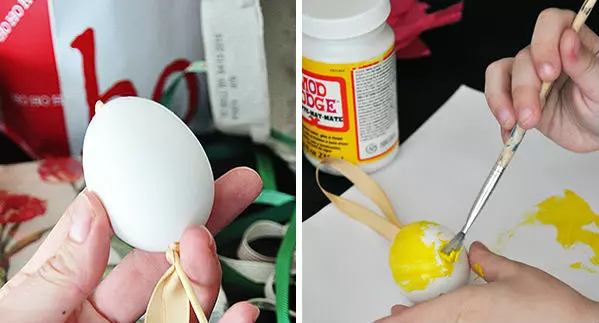
Wash eggs thoroughly with soap under water. Do on both sides with a needle neatly 1 hole. With the help of toothpicks, the yolk should be pierced and bring the egg to the lips. Pulse into the hole on one side the contents of the egg in the pre-prepared container.
On a note! Yolk and protein in this case can not be thrown away, but to use in the kitchen in preparation.
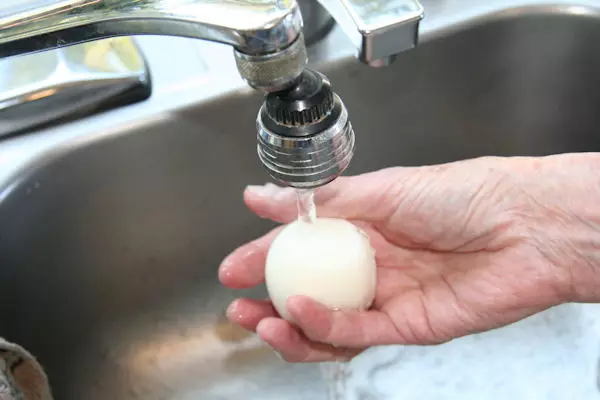

Now the eggs need to wash again with soap, give dry. We often use for a faster wipe and hairdryer. So eggs dry faster.
After thorough drying of our eggs, take a satin ribbon and cut a small piece, about 25 cm. Moving in half and taped at the end of the nodule. Now we sell through the bottom hole folded with a tape with a nodule at the end, helping to fill the tape with the toothpicks. Wake up a ribbon through the egg, the nodule will not give the tape to slip out and remain inside the shell.
Article on the topic: Jars for spices do it yourself with photos and videos
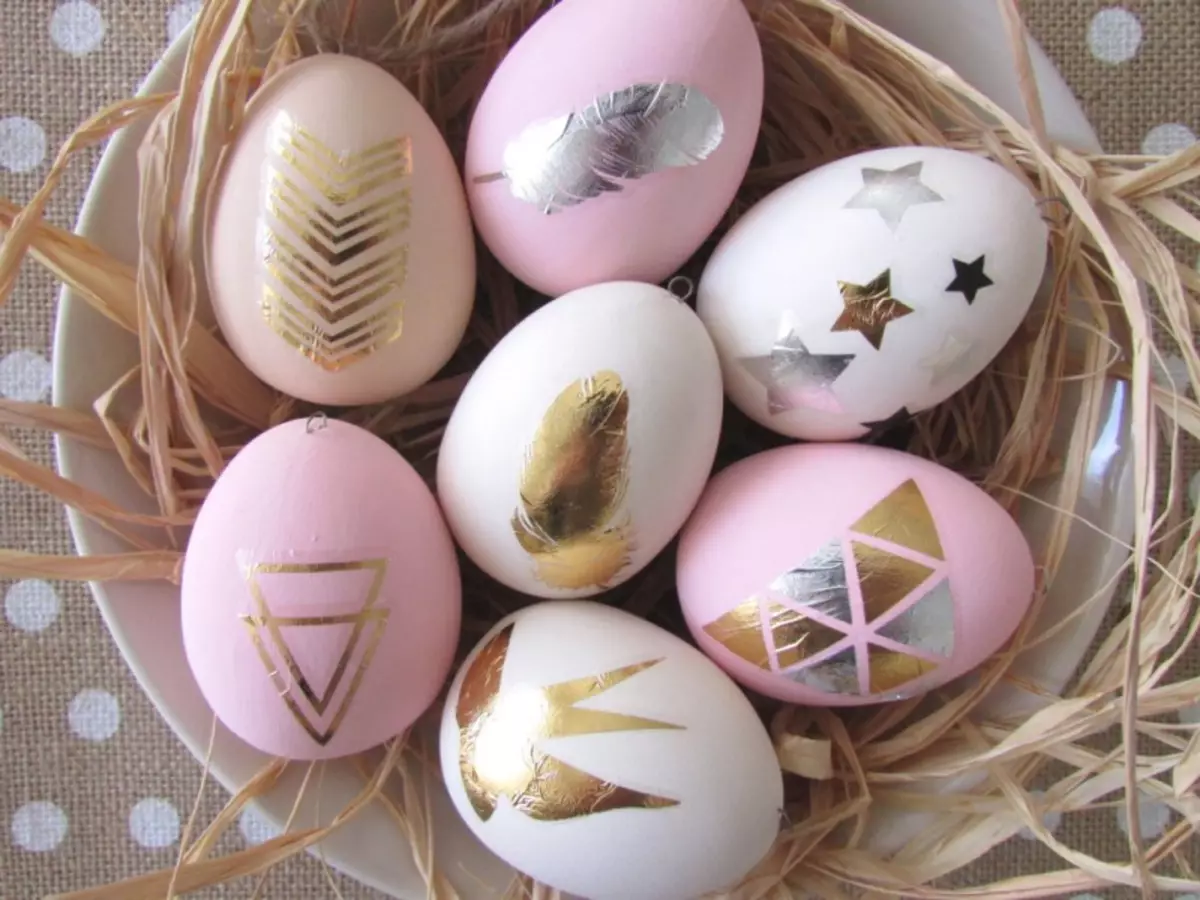
Now proceed to the decoration of our eggs, it is already possible to give the will of all its fantasy, because we all have a different taste. Next you can see a few ideas to choose from.
Take an egg and a brush. Apply PVA glue with the brush on the egg. Then on fresh glue apply sequins. You can combine sequins of different colors, it is possible to apply the glue to the pattern and sequins will also be piping on the egg.
When using napkins for decoupage, it is necessary to separate the fragment from the substrate and apply an egg on the melted glue, the napkin is also losing with glue and leave dry.
Using decoration stickers, you can get original patterns.
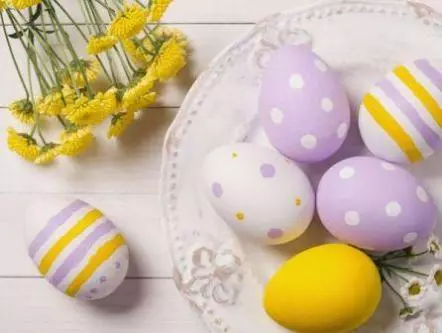
You can make decor with food paints, diversify all eggs or do everything in one color. Food paints dilute according to the instructions and dip in the liquid.
The longer the egg will be in liquid with the dye, the more intense and rich color will turn out.
Wipe the eggs on the tree, you can add various soft toys in the form of birds or bunnies, and the tree is ready. We will put it on a prominent place or in the center of the festive table.
Video on the topic
You can see a selection of video on the topic of Easter Tree: