
Crafts from unnecessary discs, for example, Owl made by hand, can become an excellent decoration in the interior or an unusual Christmas tree toy. In addition, it will help to get rid of unnecessary CDs, which in recent years have almost come out of everybody. In this material we will analyze how to make owls from disks with your own hands.
Bird is one of the simplest products in this technique that even children can do. Of course, for this they will need some help of parents when preparing disks to work, but they will be able to assemble the final version on their own. The following is a detailed master class on the manufacture of such decoration.
Unusual decoration
For work you will need:
- Old CDs (at least 6);
- Scissors;
- Glue (the more reliable, the better);
- Yellow and black cardboard either paper;
Optional:
- Foil;
- Unnecessary handle or any other wand is the same length.
So that the owl looked fluffy, on each disk you need to cut the fruit. To do this, it is necessary to make cuts with a length of about 1-2 centimeters, moreover, it is not necessary to cut all the disks.
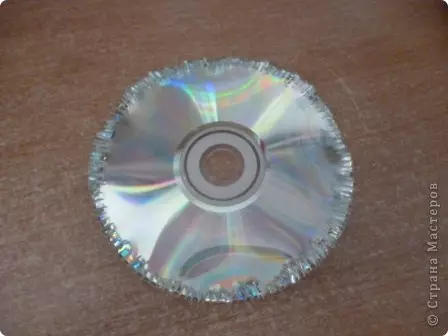
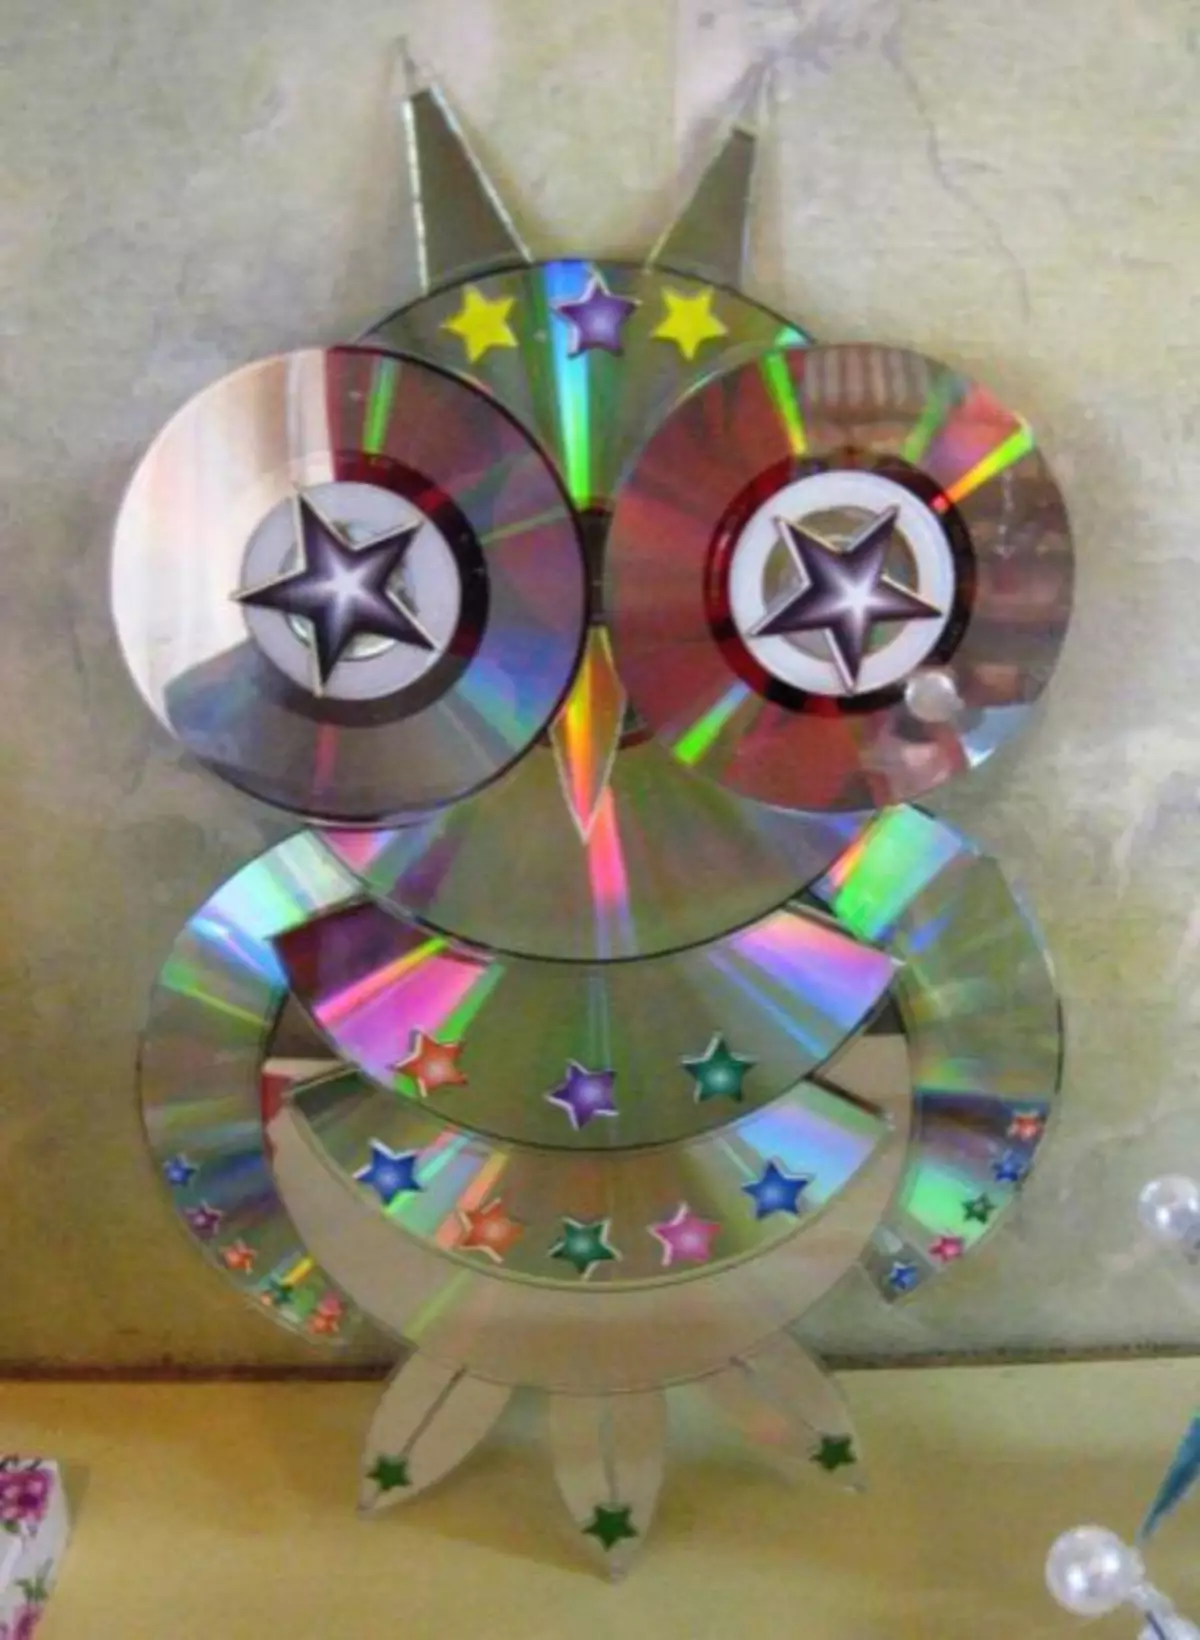
To build owls you need at least six disks, in the foreground there are two. The remaining four can only be cut in those places that will be visible after assembling the product. To understand what part it is necessary to process, it is enough to assemble the owl, as in the photo:
It is important to remember that certain efforts are needed for cutting discs, and during non-accurant work, the cut pieces may unexpectedly bounce aside, so this part of the work is better not to trust small children. In addition, discs are often cracking, therefore it is better to have spare.
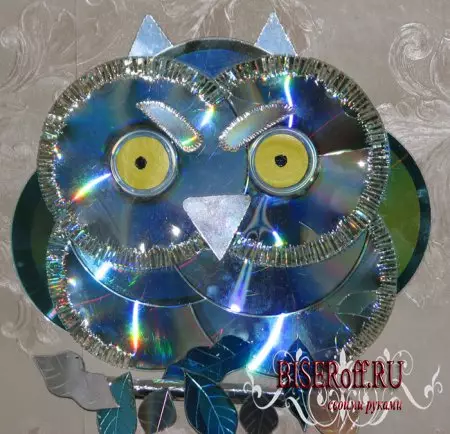
Two disks, which are framed by fringe along the entire length of the circumference, form the head of the owl. They need to be glued to the mustache so that the edge of the upper disk does not block the hole in the center of the other, but it was close as possible to it.
Article on the topic: Cap from a newspaper with a visor for repair: Schemes with video and photos
The next stage will be eyes - they need to be cut out of yellow or white dense paper, through which the mirror surface of the disk or the color of the plastic will not be transmitted in its center. The eye diameter should be greater than the holes in the disk - precisely on top of them the blanks are glued, to which - pupils with a diameter of a smaller diameter of black paper. It can be replaced by large beads or simply draw a marker.
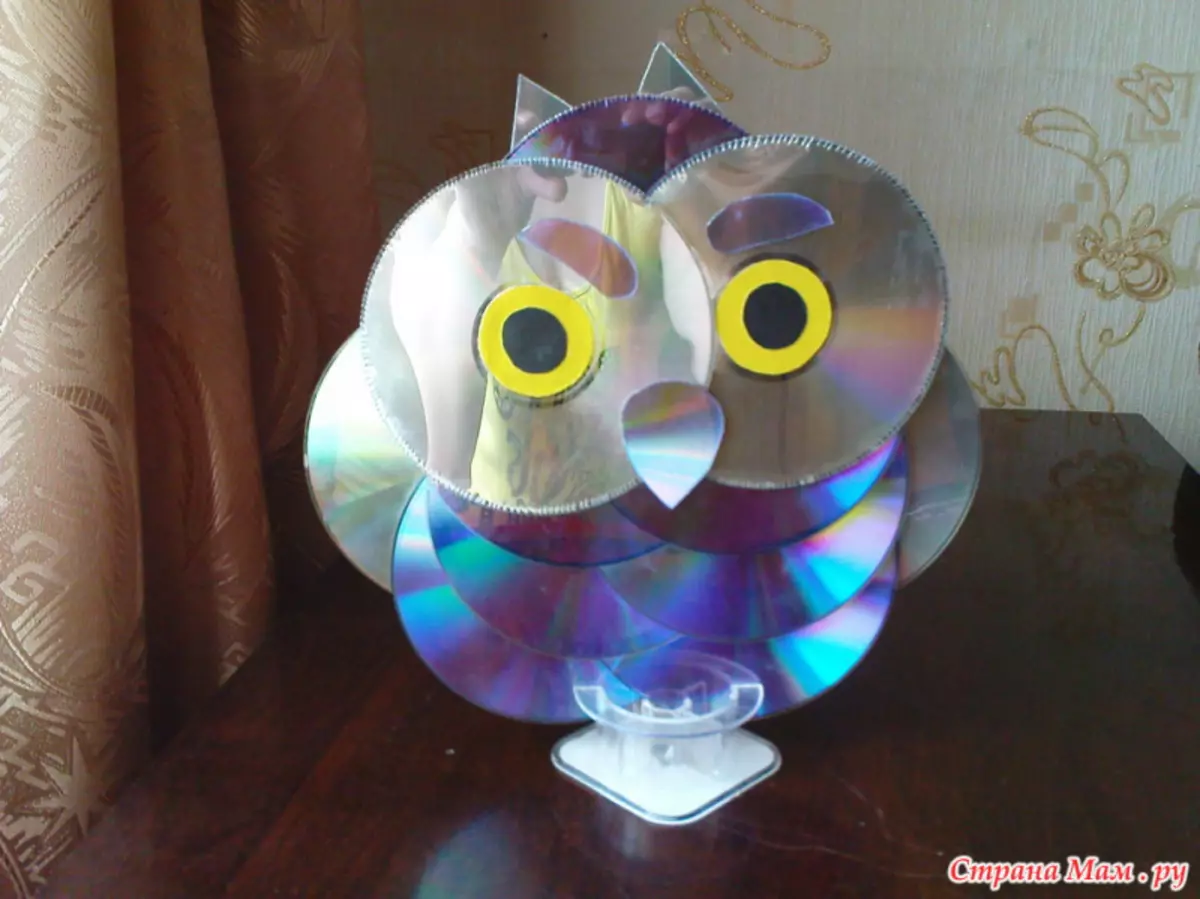
From the remaining disks, the body of owl is formed, the size of which will depend on the amount of material. If there are only four disks, the torso will consist of two rows of two disks. You can use seven - then the two tops of the torso will make up two disks, and the lower - three.
When forming the body, it is important to adhere to the sequence: the top row should be glued under the head of the owls so that the holes in the disks are not visible from the front side, only their mirror surface. The lower layer is glued under the top and so on. The main thing in this process is to comply with the proportions: the torso in its upper part should be slightly wider heads and expand to the bottom, but without sharp changes. So the drawing will be more reminding the real owl. If the fringe on the disks was carved in advance, you need to carefully follow the workpiece - such feathers should be visible on the front side of the product and are not required to be rear.
In the final there should be another disk, from which it is necessary to cut decorative elements - paws, wings and beaks. If unnecessary disks are even more, you can cut and leaves for decorating the branch, on which the owl will sit. If you wish, you can try to make wings and paws are so realistic as much as the material allows: cut two "forks" and two ovala decorated with fringe. If the craft is made by the child, there are two triangles and two semicircles, on which you can scratch the necessary elements, or simply draw them with a thin marvel. Paws, beaks and wings are glued over the base of owls.
Article on the topic: Snowman from cotton disks Step by step with photos and video
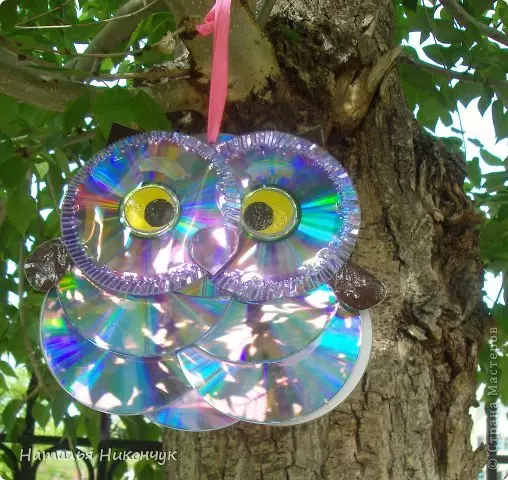
A complement to the mirror owl can be a twig on which it sits. Make it easy: it is enough to wind the unnecessary handle, a pencil or dried felt-taper foil. It can be glued to the leaves from disks, prepared earlier. After that, the branch is glued to the lips of owls from the reverse side. Also, the product can be decorated with eyebrows or small triangles ears.
If the product is planned to be used as a suspension toy, a tape or rope can be glued to the owl from the back side or incur in the initial stage between the discs forming the head. In the same case, if you need to make a bilateral owl, you can collect the product according to the same scheme, changing only the model of the head.
The most realistic option for the opposite side of the bird head will be a multi-layer plumage. For this, two disks glued in the same way as those that have formed the face of owls should be pasted with carved feathers - suitable as simple triangles and semicircles. It is necessary to glue them from the bottom up, so that each new layer masked the joints of the previous one. The top can be hidden by gluing one of the feathers horizontally. Torso is added to this billet, also collected by the same scheme as the first part. Then half of the owls are connected by colored sides of the discs inside. If desired, the back can be decorate with a small tail.
When working with disks, it is absolutely not necessary to strictly follow the instructions. For example, instead of cutting the fringe, you can enclose the discs with chirop men's tinsel or cut triangles. To decorate the bird, you can use puppet clothes, trimming fabrics and colored paper or any other remedies.