

Undoubtedly, many of us have old furniture, which it has long been time to write off. Of course, you can throw it on the garbage, or try to reanimate a little and update with your own hands. Such furniture in the future is the opportunity to continue to use at home, or take to the cottage. In any case, it will already be beautiful, comfortable and cozy.
Reloing Tips for Old Wall
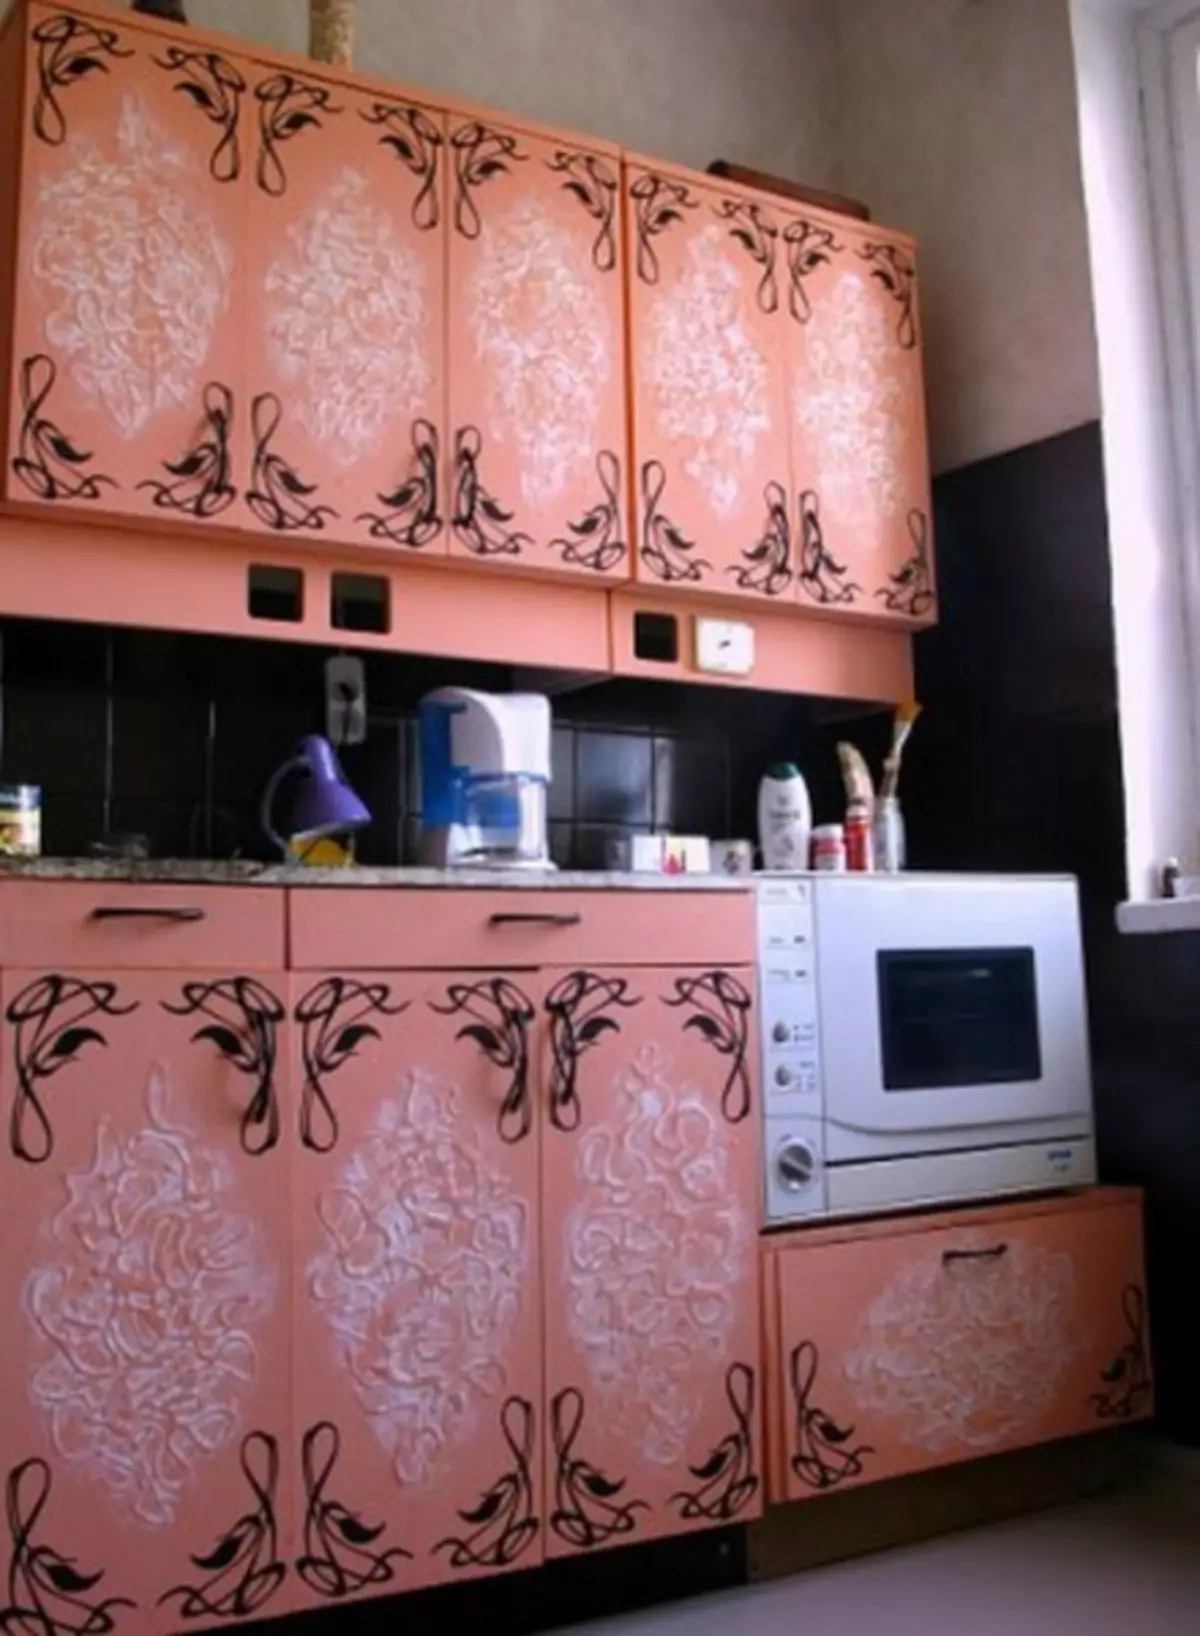
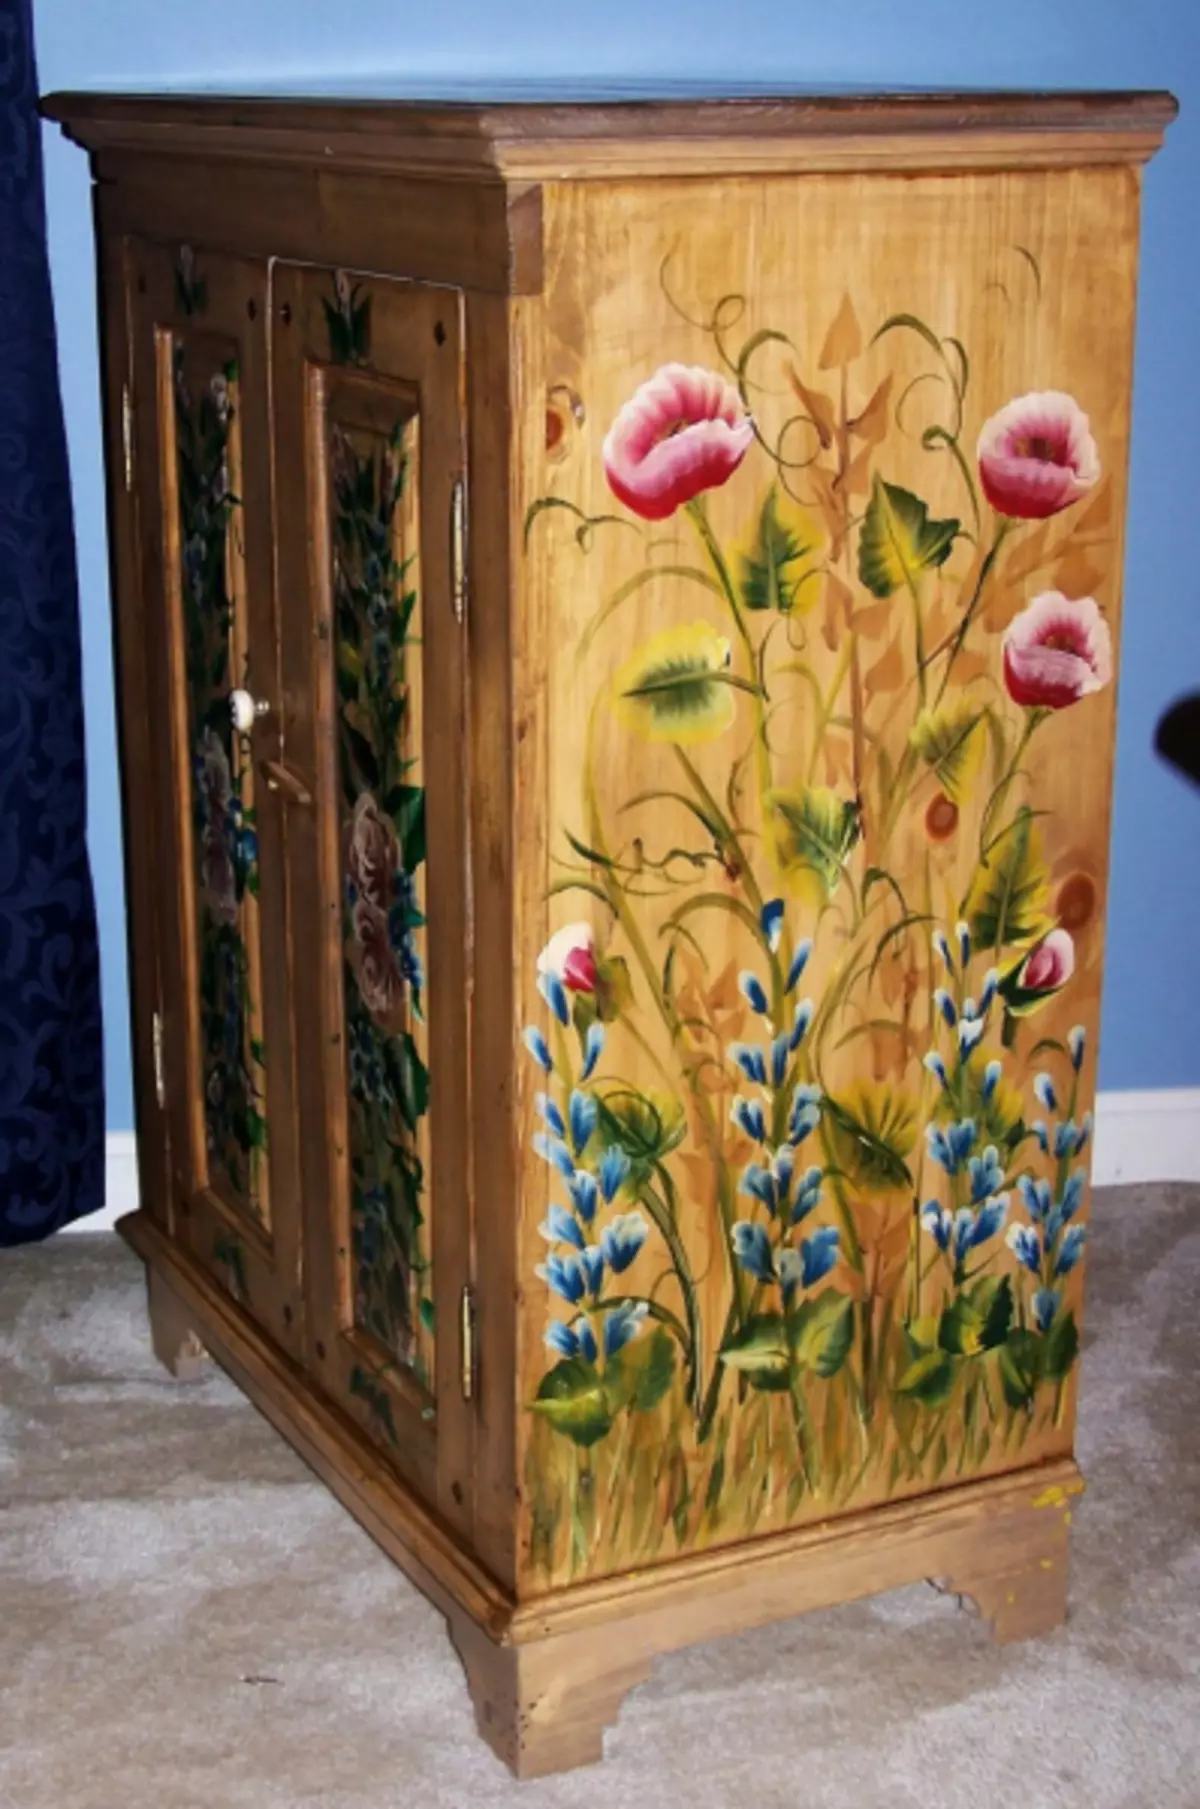
One of the easiest options to make old furniture more new is to paint. Thus, it will gain an attractive appearance, moreover, work does not take you a lot of time.
- In order to start work, we will need to choose a certain kind of paint. If the furniture is made of simple material, it is quite acceptable to use absolutely any paint. In the case when in the final result, I want to get shine - take enamel varnish paint. To achieve a matte shade of the surface, an oil option is used.
One of the best options for painting is acrylic (preferably on a water basis). Aerosol cans were well established for homework conditions with furniture. In the work they are good and smoothly fall on the surface, and also do not create flutters.
- If you are engaged in the colorful old garden furniture, then it is recommended to use paintwork materials. They are well suited for metal objects, while do not forget to draw your attention to the fact that they have an anti-corrosion effect.
When painting aluminum items, buy a special paint for them.
In order not to confuse anything in the types of material and paints - it is best to check before buying a consultant who choose a product.
- In order to start work, we will need to choose a certain kind of paint. If the furniture is made of simple material, it is quite acceptable to use absolutely any paint. In the case when in the final result, I want to get shine - take enamel varnish paint. To achieve a matte shade of the surface, an oil option is used.


- Speaking directly about the applix of the paint - here you can use a tassel, roller or paint. Please note that before applying paint, it will be necessary to deflect the furniture and carefully examine it on any breakdown. If necessary - replace accessories, locks or knobs before starting work. Next, get rid of the old varnish and set the sandpaper all the surface. It is best for this work to take fine-grained paper. Alternatively, you can use the grinding machine instead. It will also be perfectly able to cope with the task.
Article on the topic: Staircase for a concrete porch: how to make a formwork and pour concrete?
- Another important point before applying paint will be the work on applying the primer. If necessary, use the putty to eliminate problem areas. When the primer is completely dry, apply alcohol or vodka to the surface to completely degreasing the item.
- The final stage will apply paint to the surface. This is done well and neatly, the color itself is carried out in one direction of the brush. It is best to apply several layers of paint - then the result will be much better. Painted furniture is recommended to use no earlier than a week after work.
How to lacquate old furniture?
- The first and important point in this work will be the right selection of the premises. It must necessarily ventilate well and is strictly not allowed to be nearby places with open fire.
Before starting work, the old varnish is removed, all disadvantages associated with cracks, depressions or other nuances are completely eliminated by putty and grinding.
- After the prepared surface, we definitely apply primer. Next, a thin layer is applied with a varnish, while using a brush or spray to speed up the process of work and reduce the costs of forces. If you have chosen the option of the spray, it is recommended to practice on some old wood sheet to understand the principle of its work and subtleties.
- The first and important point in this work will be the right selection of the premises. It must necessarily ventilate well and is strictly not allowed to be nearby places with open fire.
- Spraying varnish is carried out at a distance of about 25-30 centimeters from the surface that is processed. At the same time, the movements should be in the horizontal direction.
- It is important to know that the drying time of the varnish is approximately 48 hours if some other time is specified on the product packaging.
- Remember that the first layer of varnish is first applied, after which it is neatly processed by shallow emery paper. All dust that occurs during the work is removed using a conventional wet napkin.
Next, we apply the second layer and give the surface to dry completely. Only if necessary, we can apply the third layer, but such situations are extremely rare. Usually two varnish layers are quite enough for a beautiful appearance and quality.
Article on the topic: We use sand-colored curtains in the interior
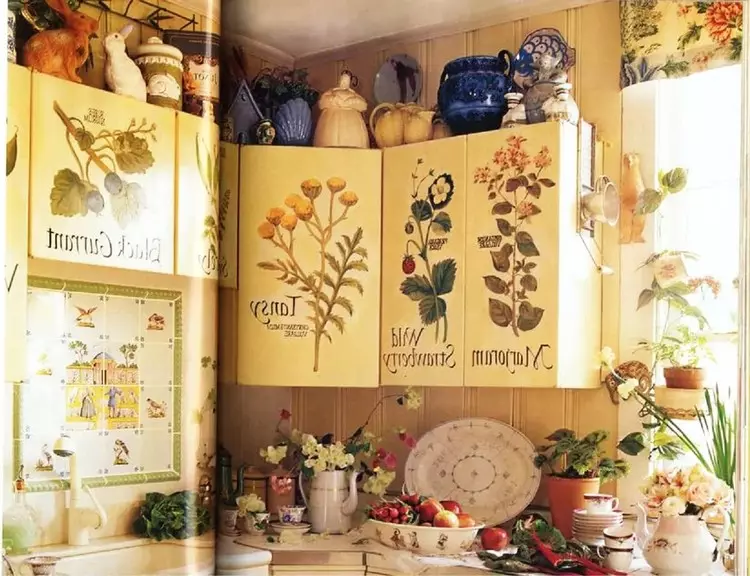
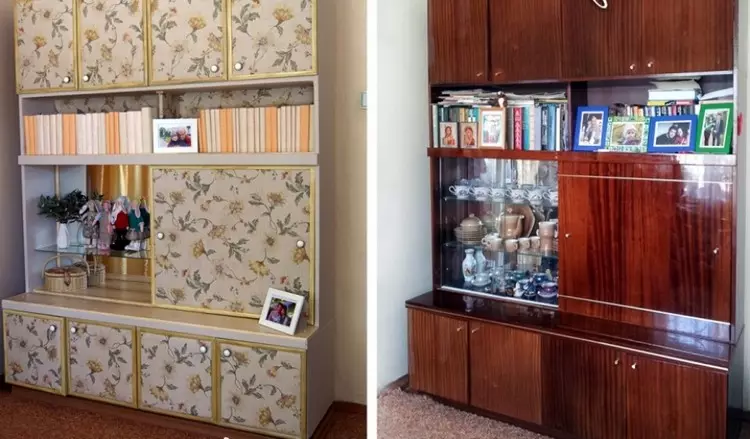
Ideas for updating the old wall and other things
Since the principle of operation with the surface of the old furniture will be approximately the same - it is not necessary to stop exclusively on it. So you can return to life and other important items.
Here are some useful ideas that can come in handy in work.
- After working a little over the surface of the old couch, you can give her a new life, while such a new job will be a beautiful subject in your interior of the house.
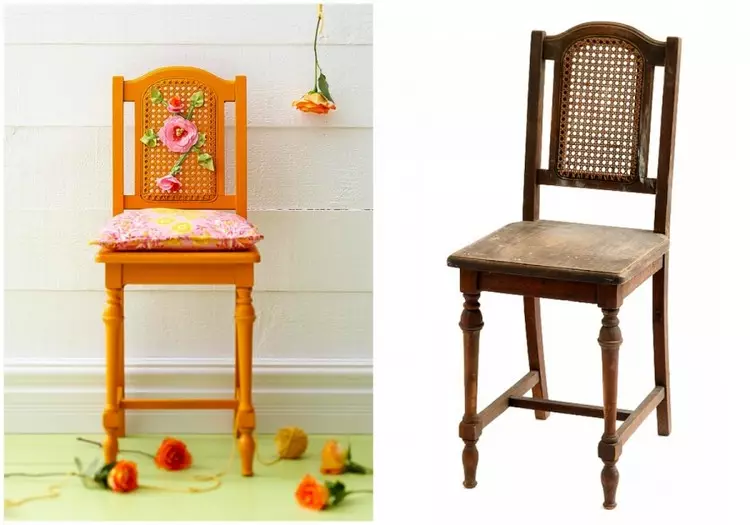
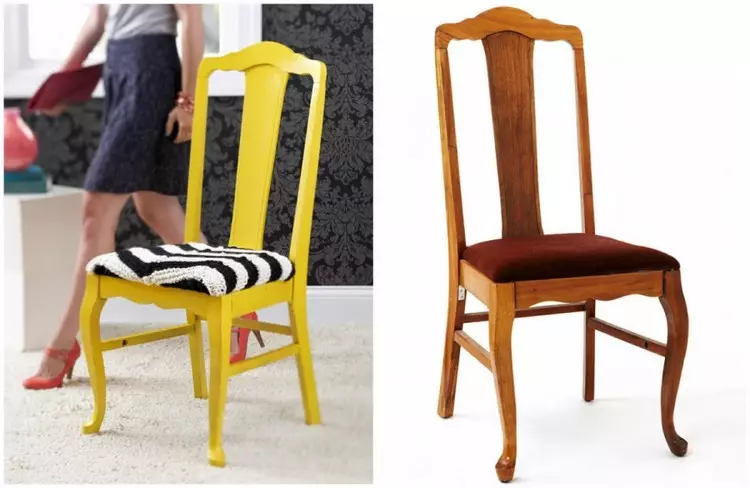
- Here is such an old chair will be a bright accent in the design and design of the house.
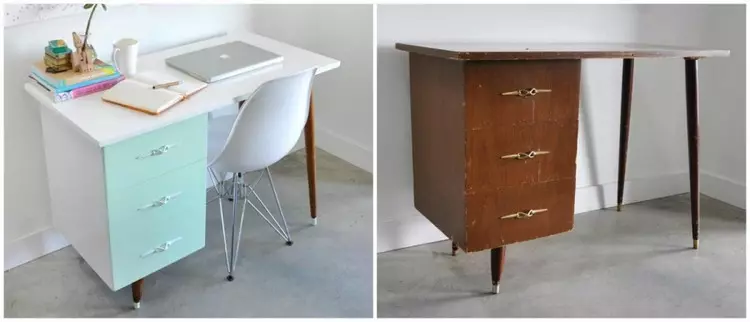
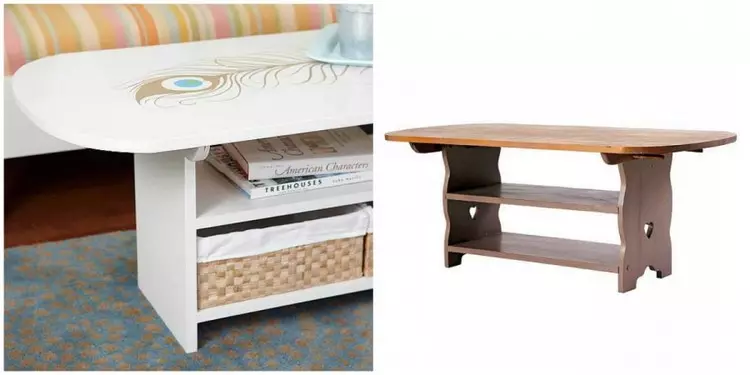
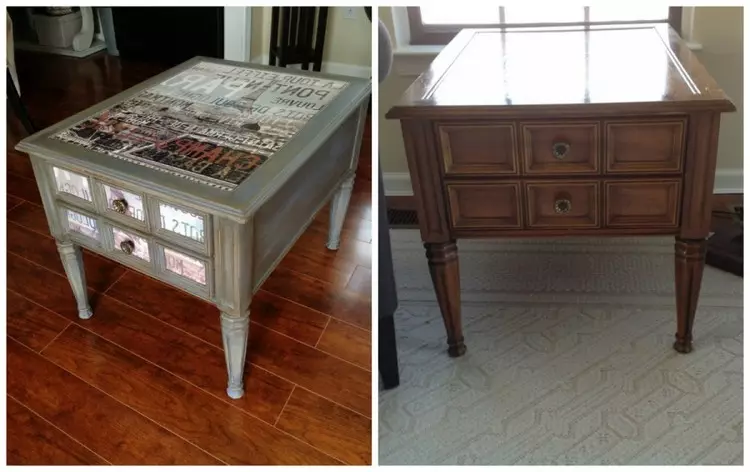
- Table with drawers, which has not been used for a long time, will turn into a modern workplace. It can be issued in his personal taste.
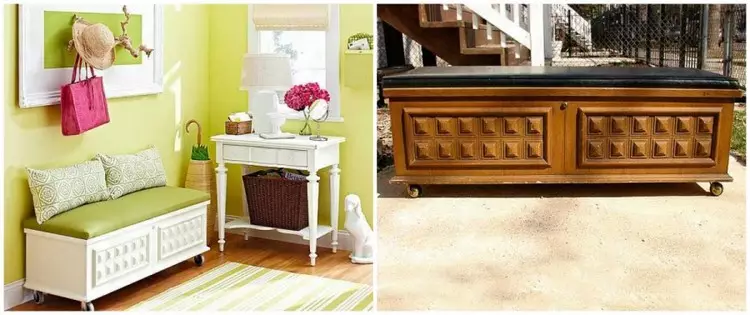
- The bulky sofa will be able to turn into a beautiful and convenient soft tacht, which can be easily located in the hallway room.
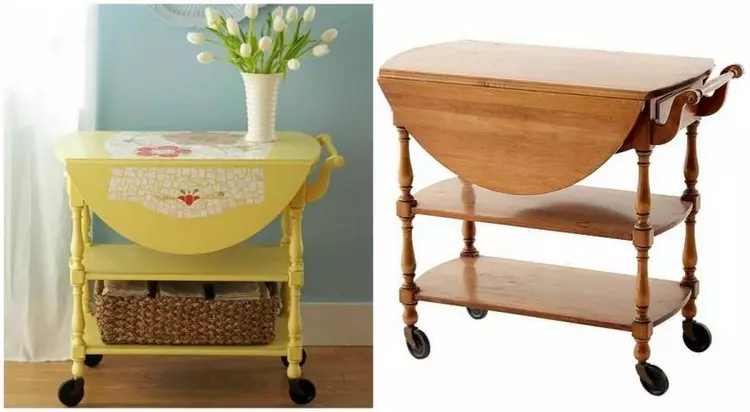
- The former table on wheels will be a fashionable stylish tab, which is the ability to move to any desired point at home.
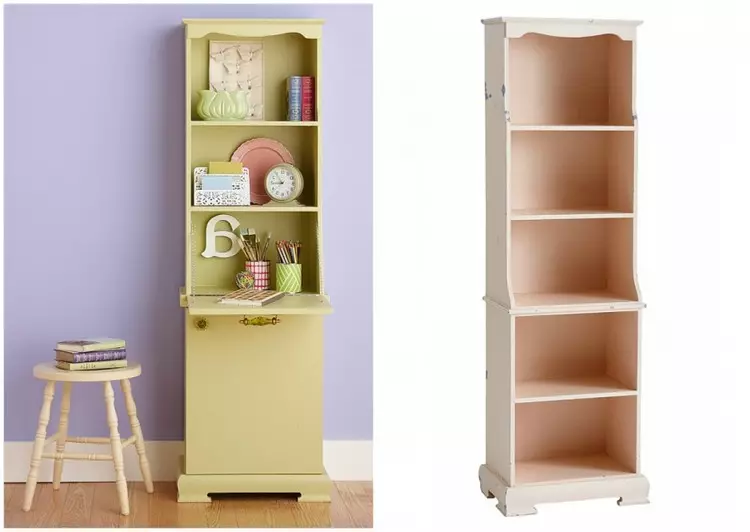
- Even earlier, rude and unwashed chest after sticking will be a modern light and functional interior item.
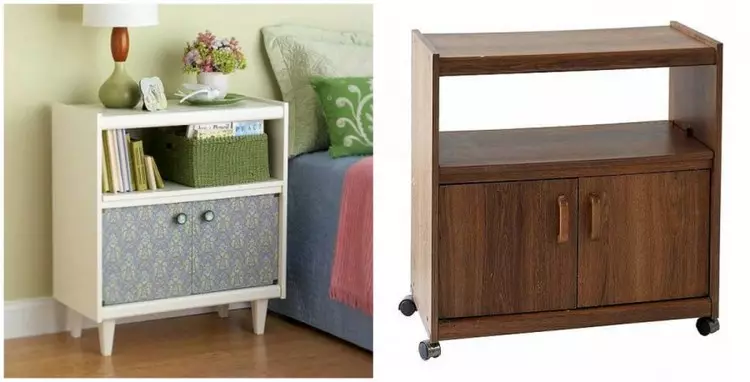
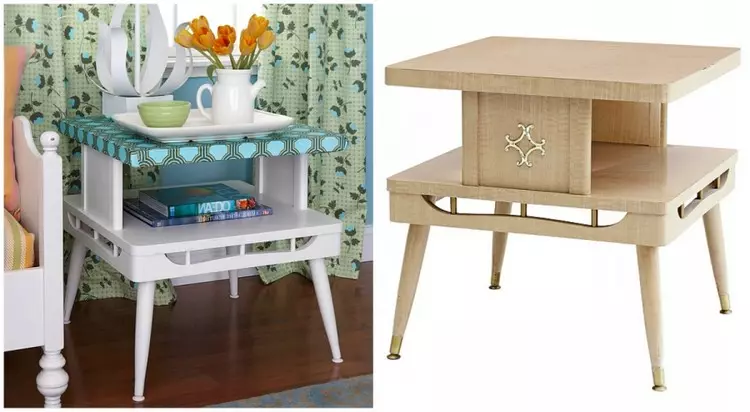
- From the old, already seemingly no one unnecessary stands, it turns out a wonderful bedside table, which will decorate the design of your bedroom.
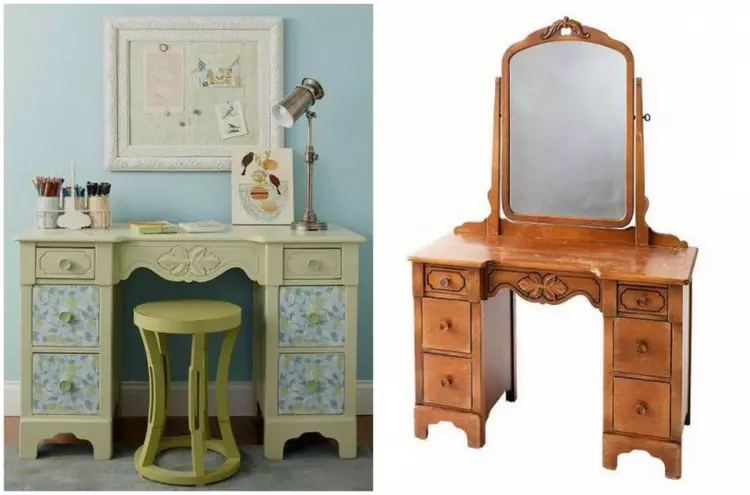
- The trumpex, which you first could simply write off, will be an excellent desktop, and with the presence of bedside tables.
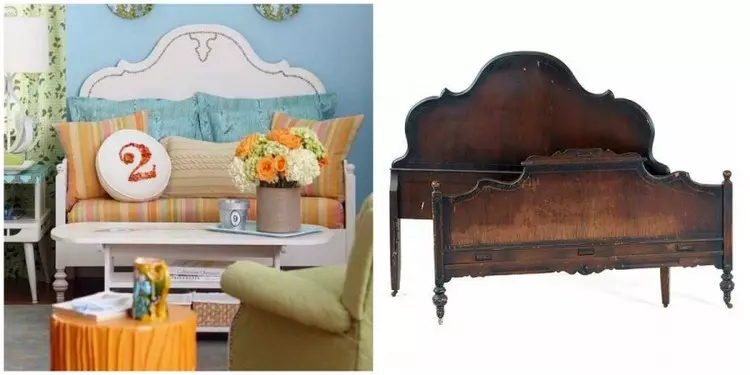
- A slightly working with the old carved back of the sofa in the end you can get a wonderful addition to the mini-sofa.
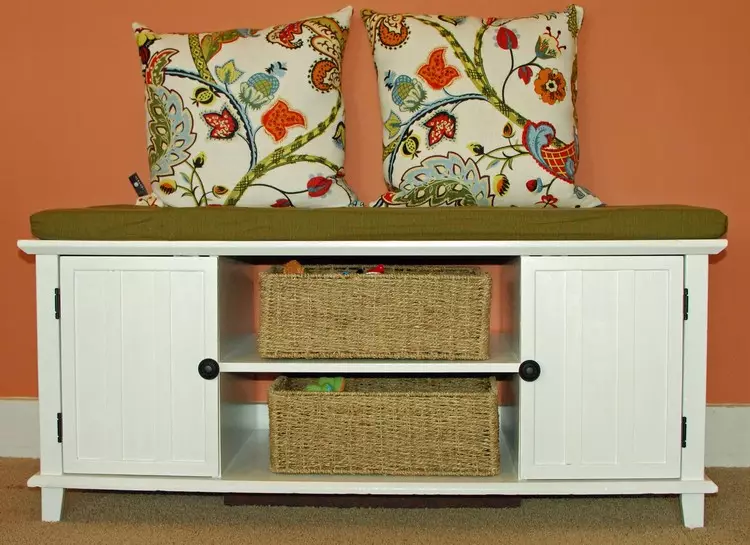
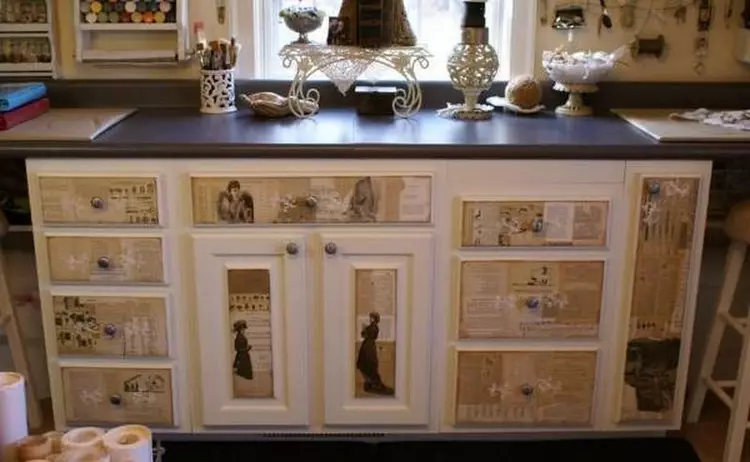
- A rigorous locker decorate the tabletop and the door - there will be a good and useful full cabinet for various items.
- An unnecessary coffee table with the help of paints will turn into a real work of art with unforgettable oriental motifs.
- If you have a little cloth and the old chair - feel free to turn it into a new design project, which is undoubtedly crowned with success.
- Work with a nondescript bedside table, after which it will be a highlight in the interior design of one of your rooms.
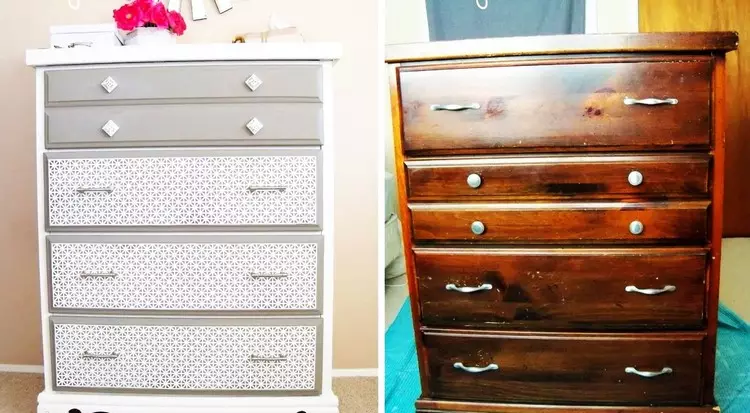
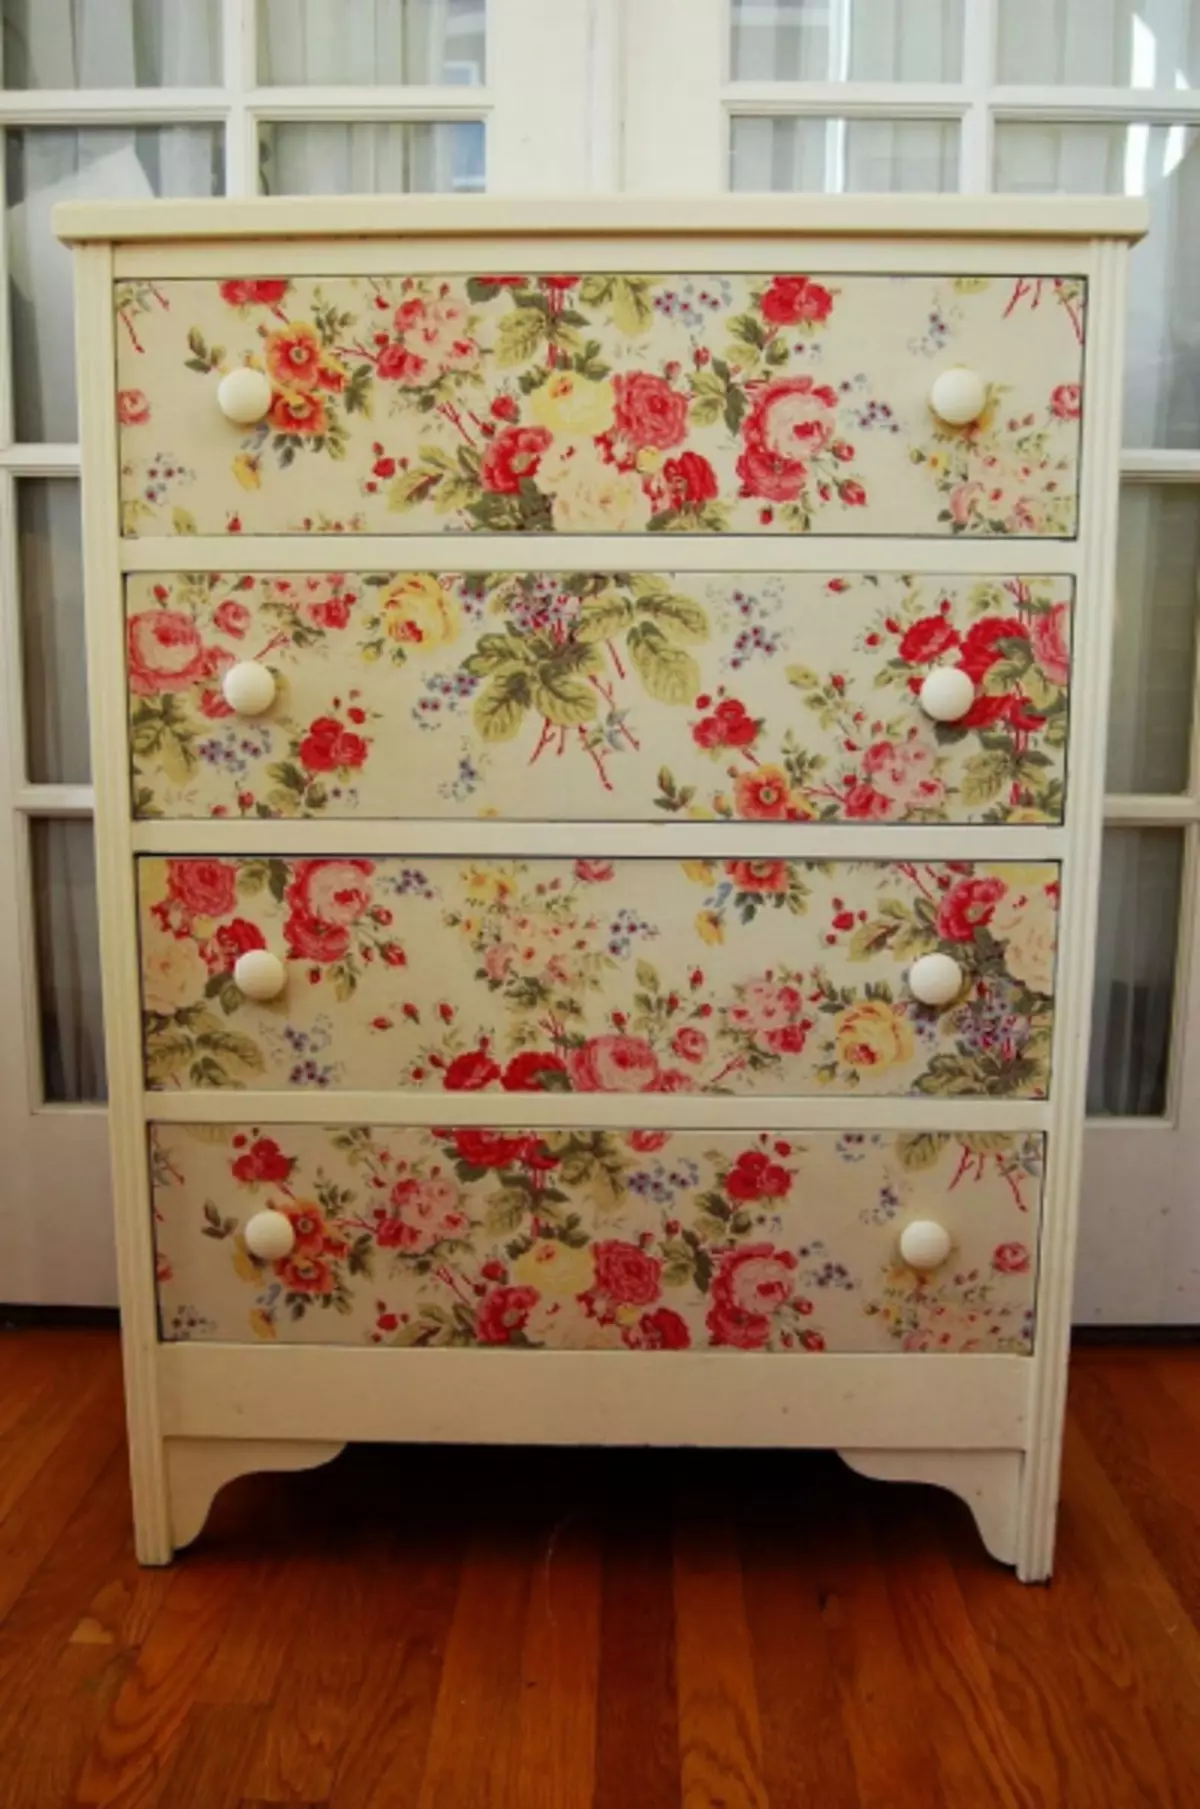
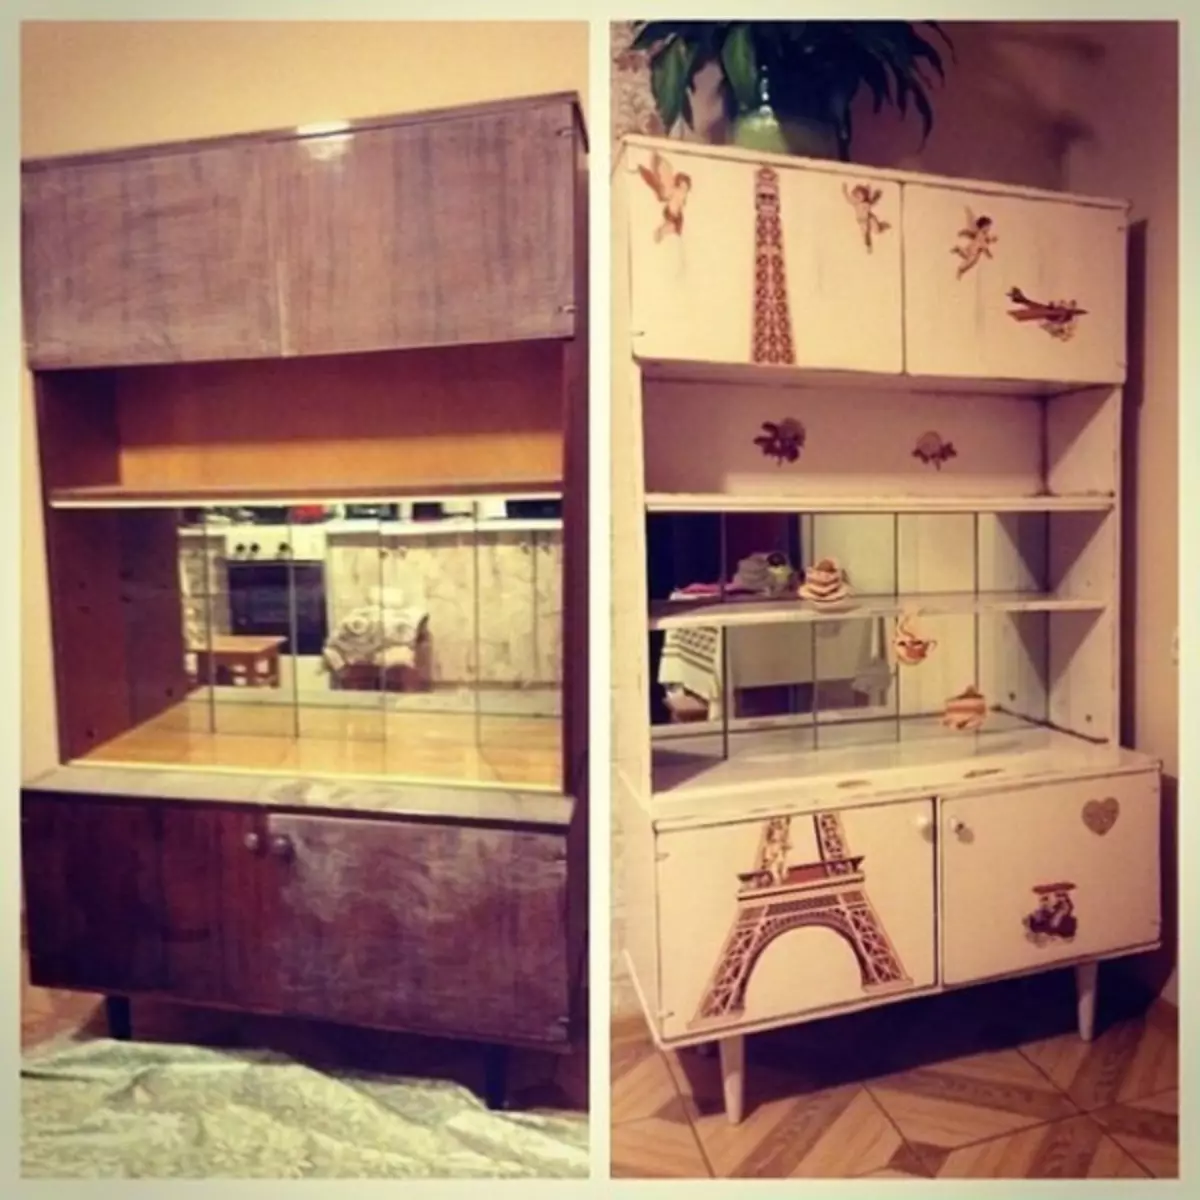
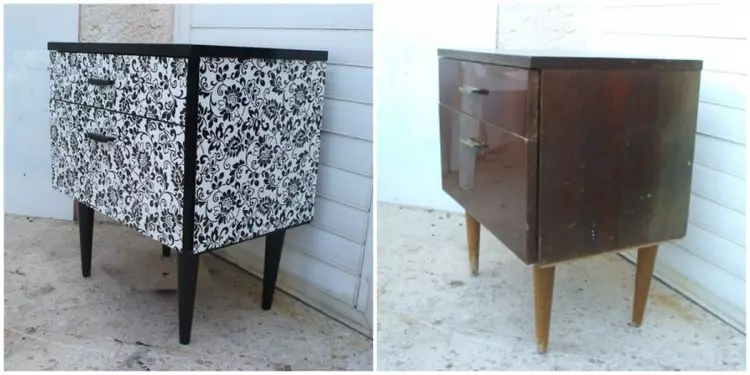
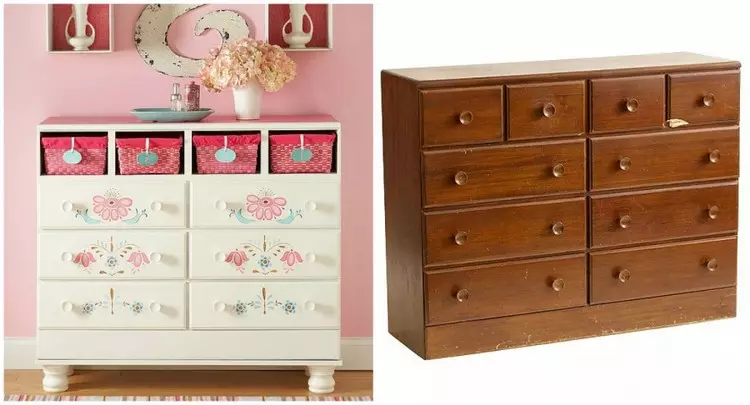
- The large-scale dresser can easily be updated and remade one of the French motifs.
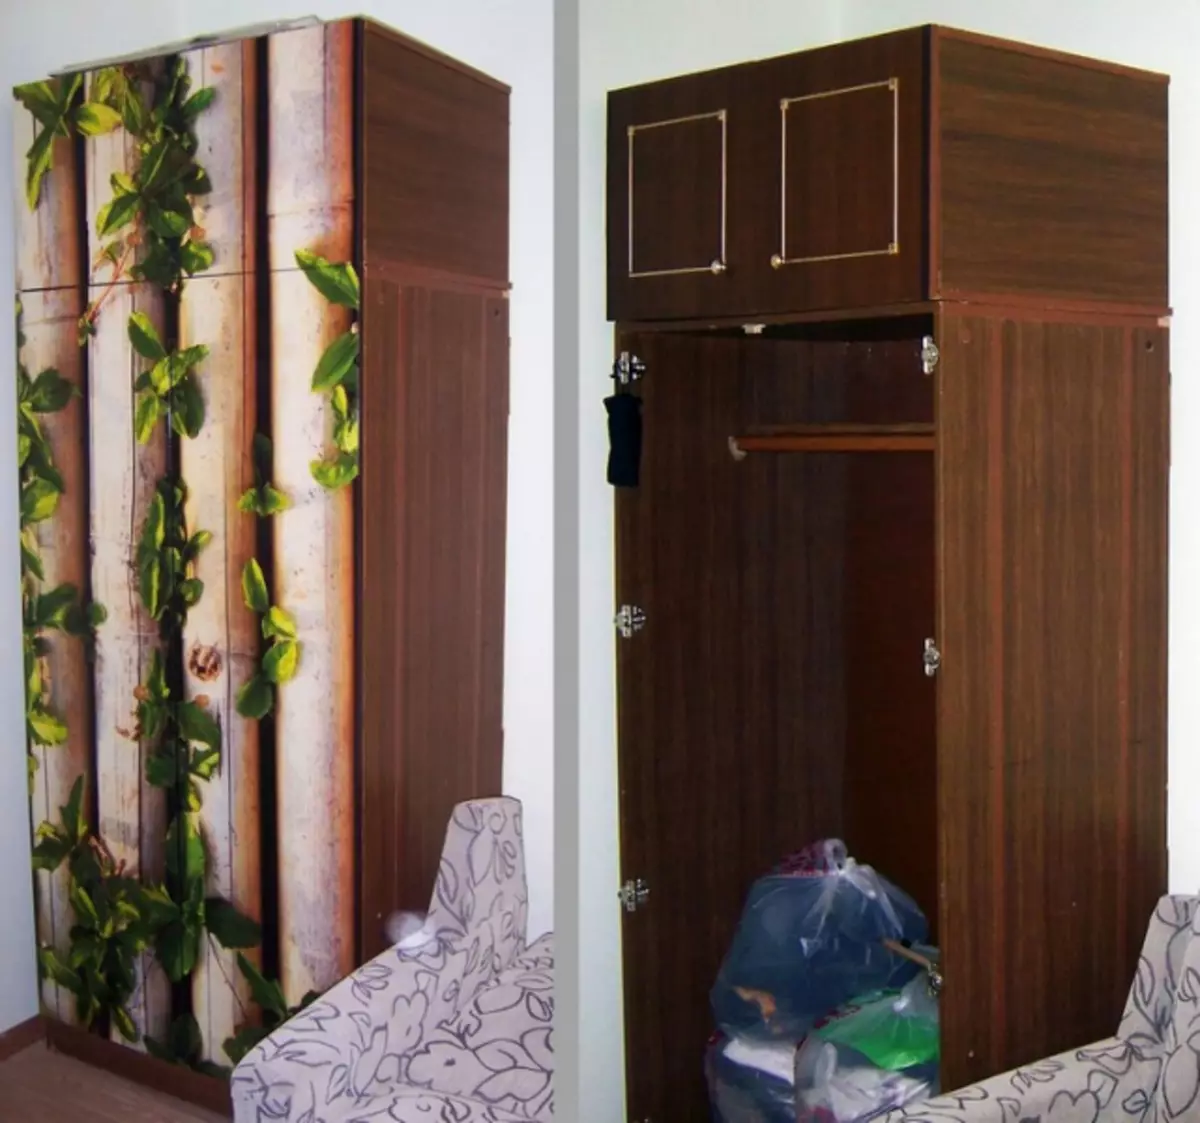
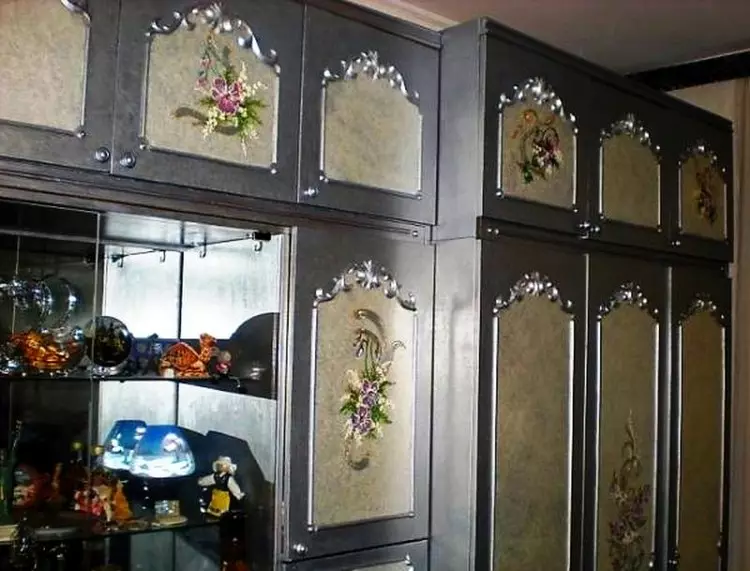
- Old cabinet grandparents remade the modern motif without any problems using the usual wallpaper.
Article on the topic: Italian wallpapers: for walls, photo in the interior, Zambaiti Parati, Sirpi, Emiliana Parati, Decori, Portofino, Limont, Emere from Italy, video
Master class "Chest update"
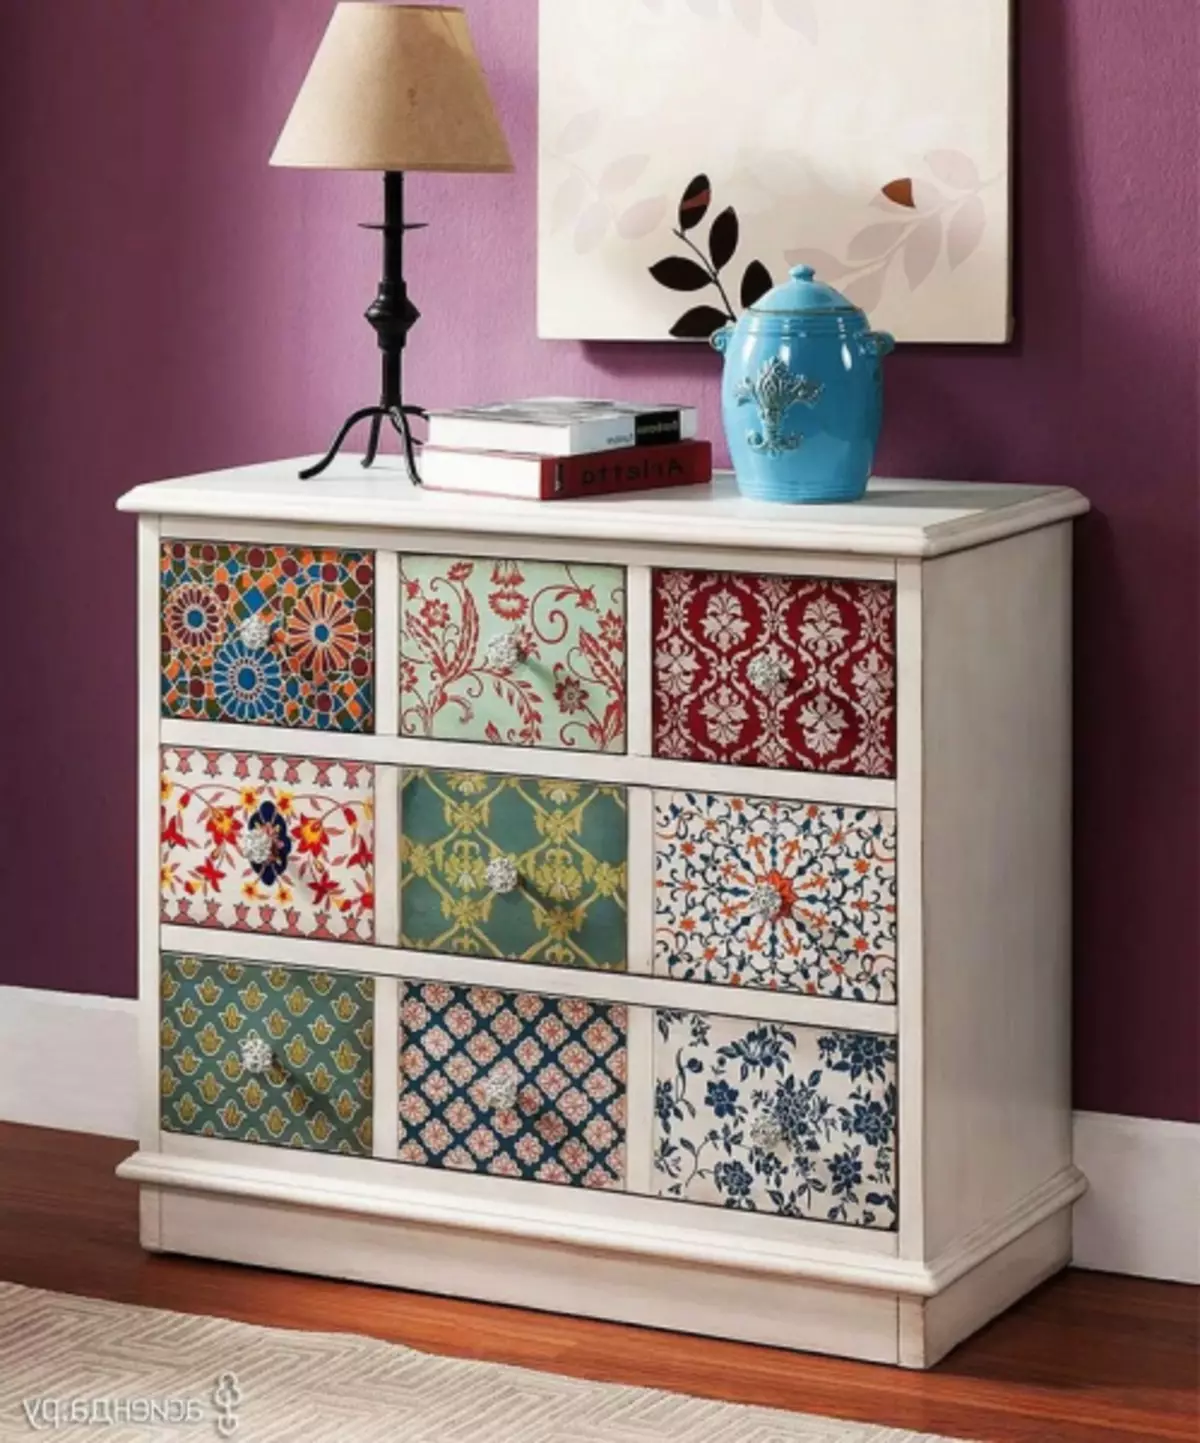
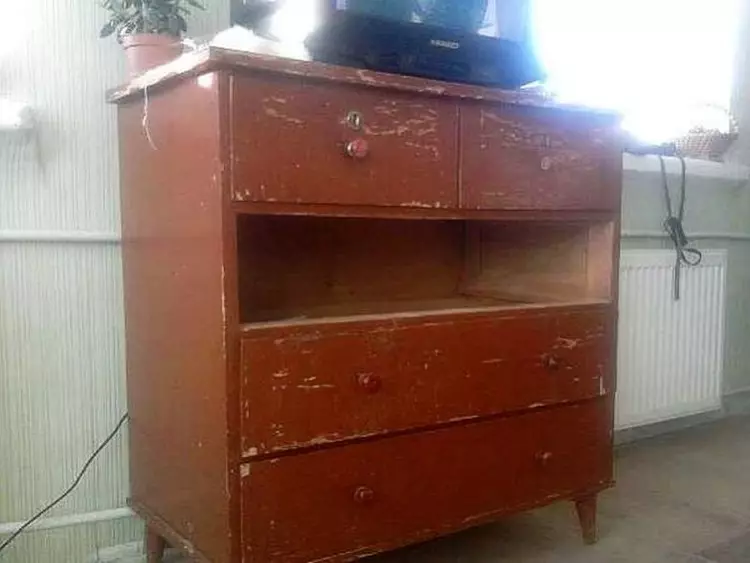
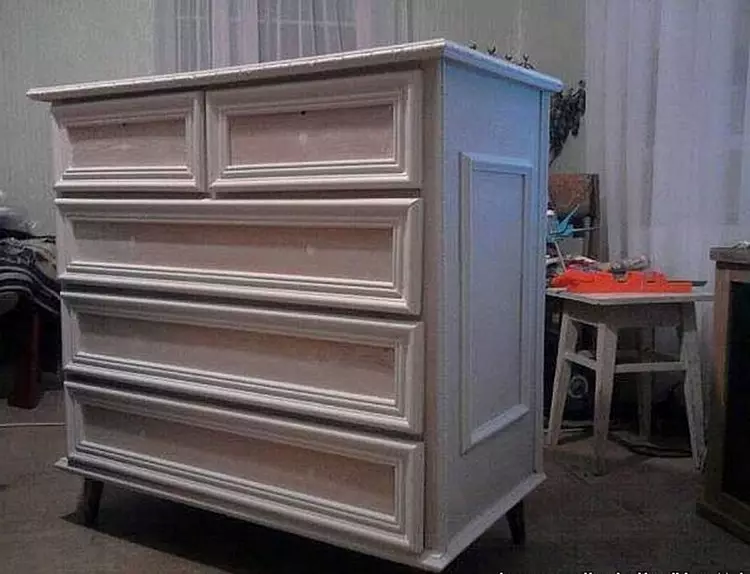
One of the items of the old wall is often a chest of drawers, which usually looks not the best way. Do not despair, but try to highlight a bit of your free time so that it can be converted to a new beautiful home object.
Progress:
- In order to start working with the old chest, we will need to completely remove the old fittings, as well as the coating than it was painted. After working with scratches and irregularities, they smear the shplanyow on the wood and wait until everything is dry. At the first stage, it will be necessary to clean the skin, which has a fine grain.
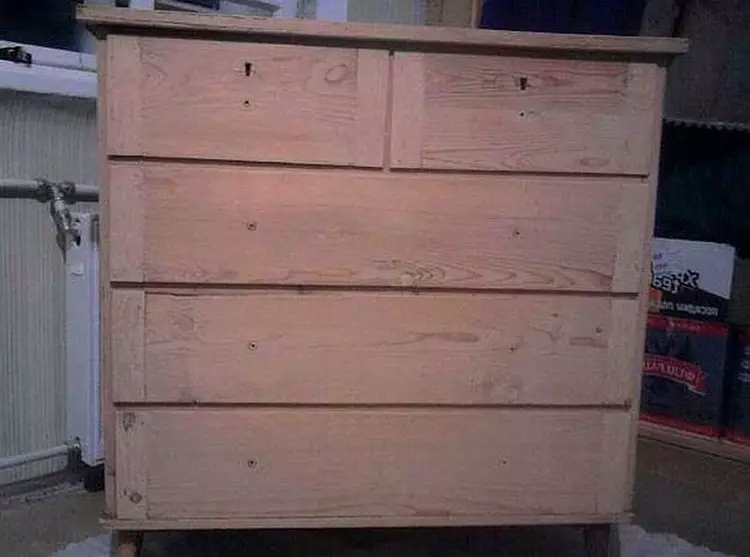
- Further, we need to establish molding from polyurethane. It is recommended not to choose too voluminous and thick options, as they will look rude and absolutely ugly.
It is best to take not wider than 5 cm and as much as possible. At the same time, they must be washed at corners under 54 degrees in order to ideally coincide the drawing.
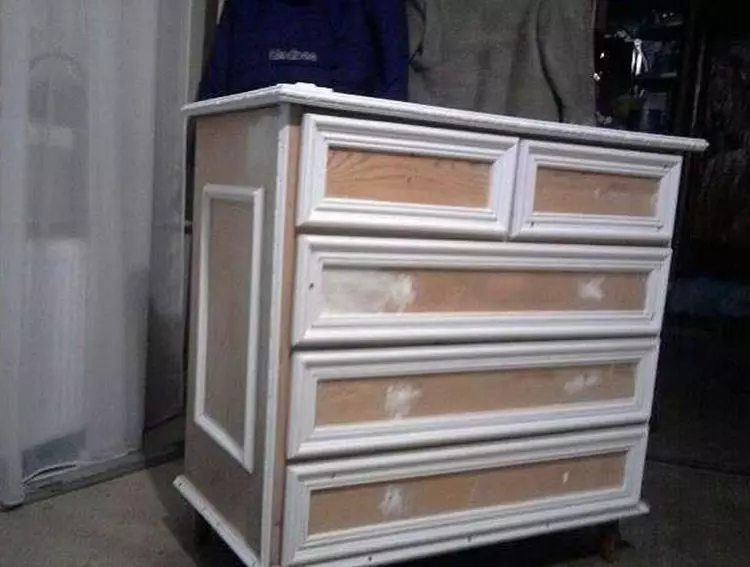
You can glue them on PVA glue, additionally strengthened with self-made with a wide hat.
- The third stage will be the processing of primer. Alternatively, it is possible to use a solution, diluted with water in a ratio of 1: 2 PVA glue. When the primer is completely dry, proceed to staining the surface. It is best to use acrylic paint on a water basis.
- Further, we need to establish molding from polyurethane. It is recommended not to choose too voluminous and thick options, as they will look rude and absolutely ugly.
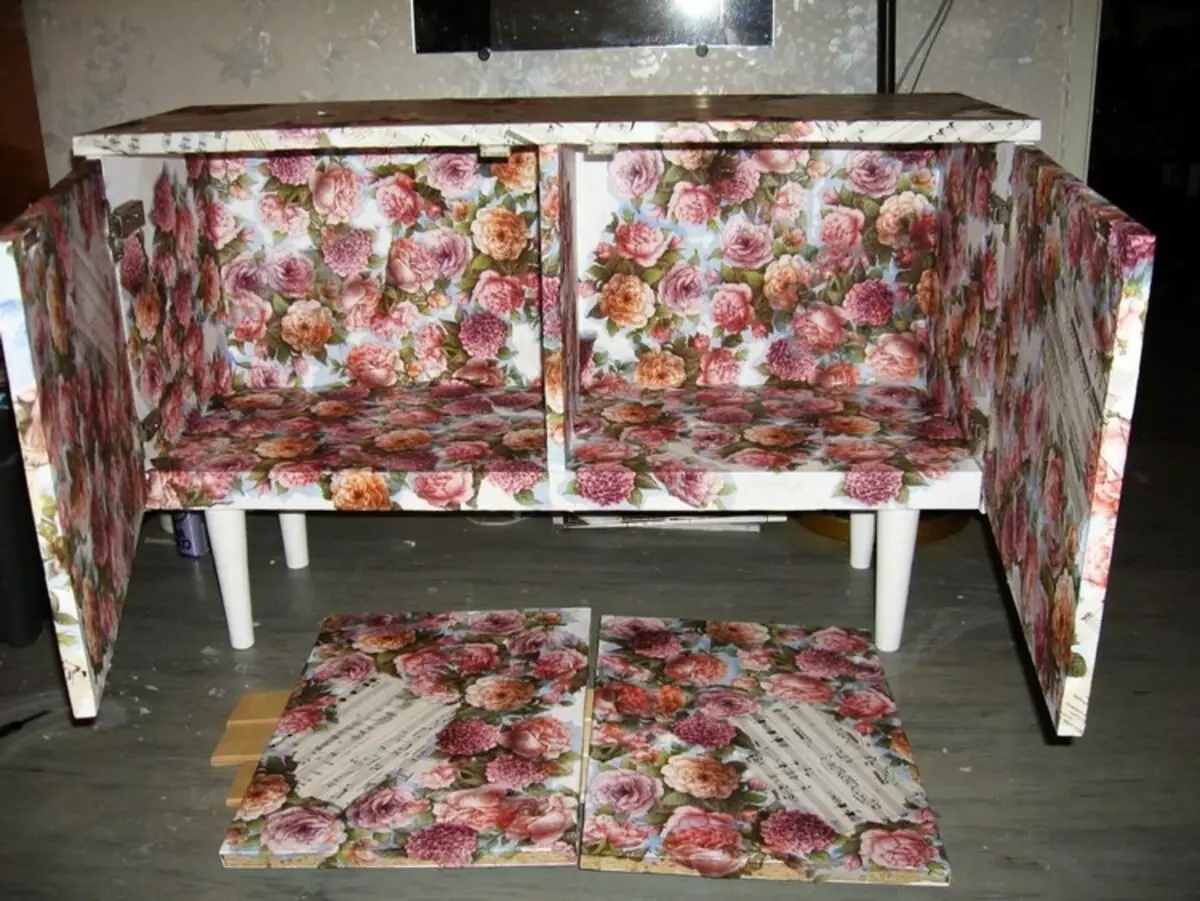
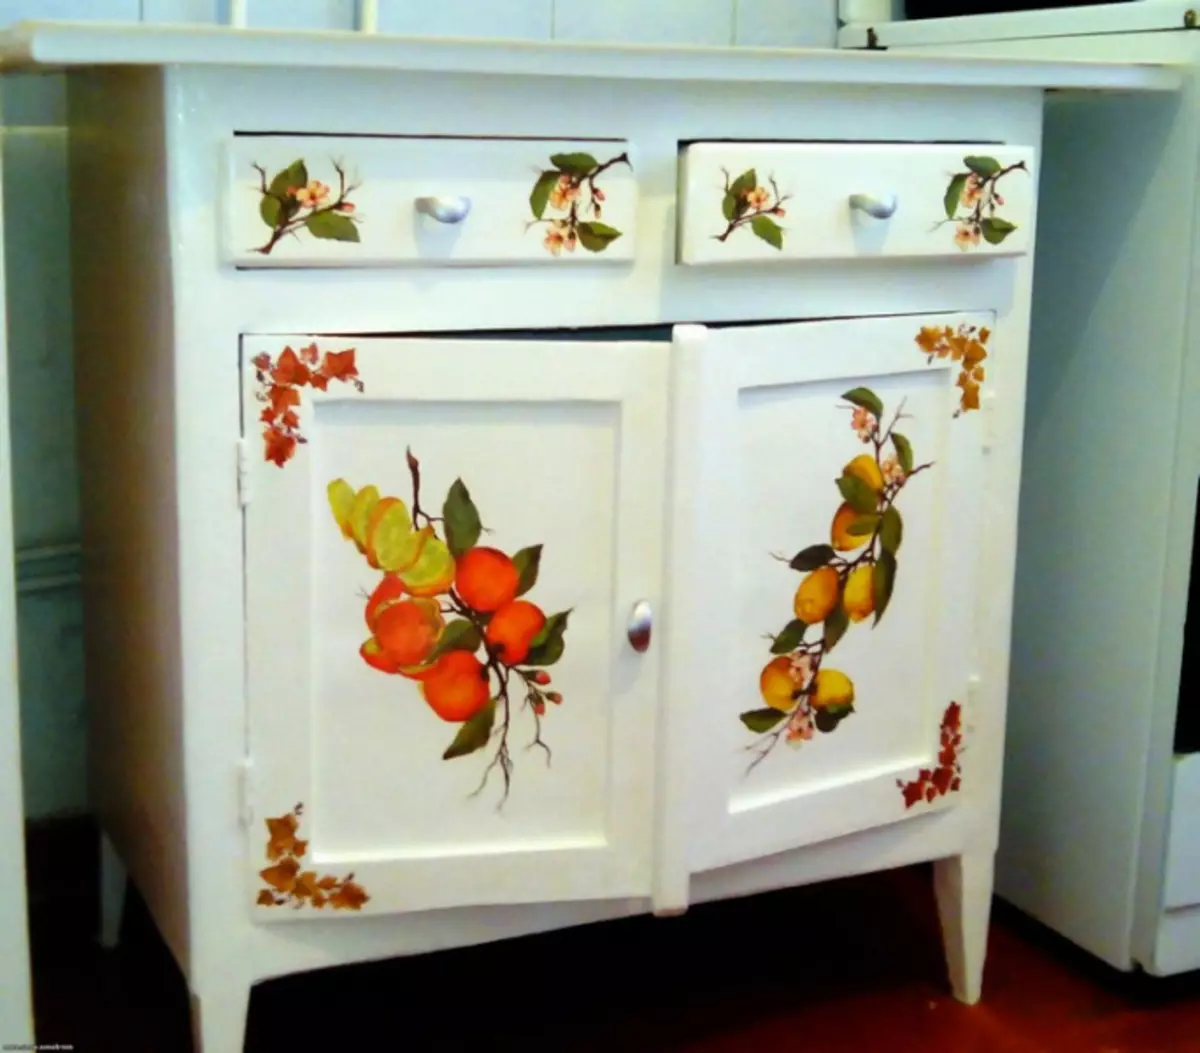
- The last other step will decorate our chest. For this, the beautiful wallpapers that will be used in work are bought. Since the choice of the material assortment is large enough - you can choose absolutely any option that you like.
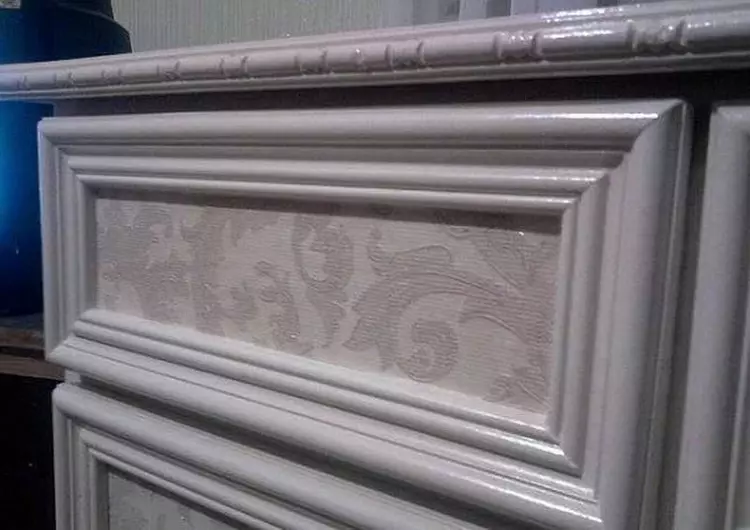
We will need to cut smooth pieces, the dimensions of which will coincide with the inner part of the frame. Gently glue them to PVA glue and, after complete grazing, twice cover the dresser varnished water based.
- The final step will be the mounting of the legs, handles and other chest accessories.
- The last other step will decorate our chest. For this, the beautiful wallpapers that will be used in work are bought. Since the choice of the material assortment is large enough - you can choose absolutely any option that you like.
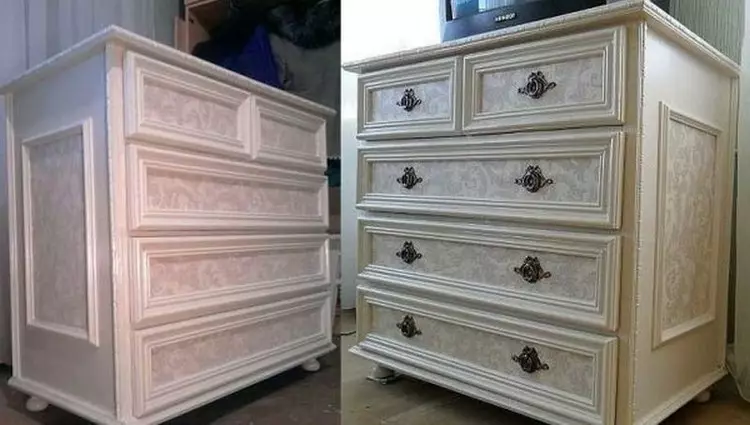
As you can see, the principle of processing the surface of the old wall for its update is quite simple, and the result comes out beautiful and designer. The main thing is that all these moments we can make our own hands without resorting to the ceases.