
Table of contents: [Hide]
- Preparation for work
- Step-by-step instructions for removing wallpaper and bliss
- The order of removal of paint and fatty spots
- Elimination of existing defects
- Primer surface ceiling
In order for the interior of the room is beautiful and harmonious, you need not only to choose the appropriate furniture, equipment and decor elements, but also to perform high-quality floor repair, walls and ceiling. One of the most important stages is the preparation, because It is from it that it depends on how high-quality the final result will be. One of the most common options for finishing the ceiling is painting. There is nothing complicated in painting the ceiling, but it is very important to properly prepare the surface to this work.
Painting the ceiling is the most inexpensive and easy way to finish.
Preparation for work
Before you begin painting the ceiling with your own hands, you need to free the room from furniture and technology or cover all with a polyethylene film. To prepare the surface under painting with your own hands, you need to make the ceiling with water, so before starting work it is necessary to de-energize the wiring. Remove or as a last resort, close de-energized lamps. Also, it is also necessary to close the floor, windows and door blocks, because In the future, the spray of the finishing material will be quite difficult to launder. Jump gloves and headdress. Primary preparation of the ceiling under painting is performed using the following tools:
- stepladers;
- brushes and rollers;
- spatula;
- Water pelvic.
Preparation of the ceiling can be performed in different order. It depends on the specific type of surface.
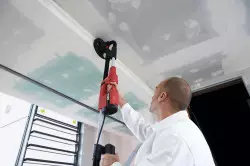
The fastest way to remove the paint from the ceiling is to use the grinder or grinding machine.
For example, the procedure for preparing a plate requiring a pre-putty, or a ceiling with an old putty or whitewash will differ. If the repair is done in an old private house, then a clay ceiling may well be in it, requiring an individual approach. Also for finishing the ceiling can be used drywall sheets, working with individual features. Thus, the surface of the ceiling may be the most different. The above types of surface are the most popular.
Depending on which materials were previously used to finish the ceiling, you will need to use different ways to remove them. It is recommended to start the ceiling decoration only after the surface is carefully cleaned, washed and completely dried.
Back to the category
Step-by-step instructions for removing wallpaper and bliss
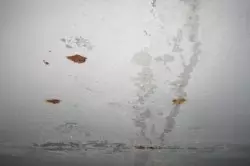
To remove bold foot from the ceiling, you can use washing powder, gasoline, turbid.
Article on the topic: Laying of a parquet board on Faneru do it yourself: Instruction (video)
If you have to prepare for painting the ceiling, which before it was saved by wallpaper, the surface must be carefully eliminated from the old coating. To make it as quickly as possible and easier, it is plentiful to impregnate wallpaper with warm water. This will help you a roller or sponge. Then the finish can be removed using a spatula.
If the surface is whitening lime, it needs to be blurred. It should be attached to the maximum effort to completely remove the old bliss. First, rinse the ceiling with soda with a water with soap or a solution of ammonic alcohol, and then with clean water.
To remove the blurred layer, use the steel spatula. In some cases, this operation has to be repeated several times. To remove lime residues, use a wet sponge.
Wash the lime blots very carefully until you reach the layer of putty under it. The quality of the adhesion of the new coating with the base depends on the proper execution of this work. Even a slight amount of bliss that remains in the process of preparing the ceiling can significantly worsen the grip, as a result of which bubbles will appear on the painted surface.
Back to the category
The order of removal of paint and fatty spots
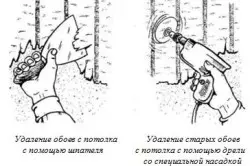
Options for removing old wallpapers from the ceiling: spatula and drill.
To remove from the ceiling, old water-emulsion paint will have to make more effort. Such formulations after drying are not dissolved with water, so that completely remove them from the surface is extremely difficult. If without removing the old paint layer, you can not do, you can use the folk method. Start some paper on the ceiling (old newspapers are excellent), and after the glue dries, remove it. As a result, old paint separated from the ceiling paper.
Cleaning the surface of the ceiling, decorated with water-level paint, with the help of a conventional spatula is not the easiest and most interesting job. So at least a little simplify it, weanly moisten the surface with water. It needs to be done 2 times: before starting work and after 15-20 minutes. After that, the room will need to make drafts. As a result, the water-emulsion paint, swelling under the influence of water, swell, and you can easily remove it with a spatula. Do it as quickly as possible, because If the paint begins to dry, it will be more difficult to separate it from the surface. Instead of water, you can apply a mixture of asbestos dust, chalk, caustic soda and water to the ceiling. For cooking such a paste should be used hot water.
To remove fat stains from the ceiling surface, use a 2-3% hydrochloric acid solution or a 5% solution of soda. Treat stains with these solutions, then rinse the surface with water and remove the paint using a spatula.
Article on the topic: homemade crane-beam for the garage
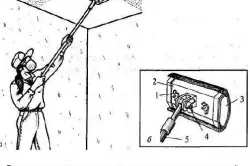
TERKI design: 1-across the nut; 2 - clamping plate; 3 - plate with grinding skirt; 4 - axis; 5 - handle.
There are such cases when one washing does not allow to get rid of oily spots. In this case, you will have to remove the washed areas. Formed depressions should be primed, plastering, dry well and paint the joints around the new plaster with oil paint. Then the surface will then remain, and you can proceed to the finish finish.
As for fatty spots, it should be said that to hide them with the help of water-level paint will not be able to. If you are planning to use the ceiling to finish the ceiling, it is necessary to paint the enamel paint before starting work.
To remove the adhesive paint from the surface, it is necessary to apply 1-2% solution of chloroic acid. Under the influence of acid, the old coating will be fastened, and it can be easily removed enough. After cleaning the ceiling you need to thoroughly rinse with clean water.
An old oil paint can be removed using a self-made solution consisting of 1 part of the potash and 3 times less than water. The solution must have a consistency of sour cream. Treat the surface with this solution and leave for about 12 hours. Then remove it from the ceiling along with the old paint.
Back to the category
Elimination of existing defects
When you remove an old coating from the ceiling, all available disadvantages are noticeable - irregularities, cracks and grooves, large chips, etc. To eliminate these defects, you will need the following:
Ceiling putty diagram.
- putty;
- brush;
- Different spatulas;
- plaster;
- cuvette;
- sealant;
- pin.
Take a spatula, deepen them with existing cracks, treat them with primer, and then - putty. If there are non-welltic adjunctions of the ceiling and walls on the ceiling, take the chisel or hammer, remove the entire plaster from these places, moisten them with water. Then, without waiting until the surface is driving, prepare the plaster mix and close the places of the adjoining the resulting solution, then let the ceiling dry.
Small chips and cracks also need to close. If you do not eliminate them, then after the finish painting they will become very noticeable and spoil the overall appearance. For sealing such cracks, it is best to use an acrylic sealant. This material perfectly penetrates into cracks, it can be painted in any color. It is most convenient to work with acrylic sealant with a manual pistol. It is enough to squeeze a substance from the tube and apply it to the surface. Use a wet brush to remove excess mixtures. Try so that the seam is as neat and smooth.
Article on the topic: Plaster foam blocks: Features and subtleties
Next, you will need to separate the surface of the ceiling by plaster, carefully clean it from dust and rebuilt again. After that, the ceiling should be given to dry, and you can proceed to putty. The procedure for applying putty can be performed in different ways. It depends on the complexity of the repair. If you have completed plastering, first of all you need to sharpen these areas of the base putty, give it to dry, apply plaster and rejuvenate again. The finish putty is applied to a smooth layer of a small thickness. She needs to give a completely dry, stupid, and then clean the surface from garbage and dust.
Back to the category
Primer surface ceiling
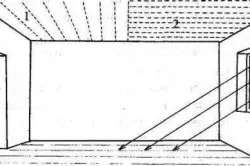
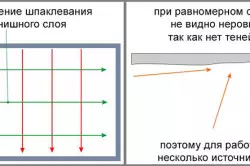
The sequence of applying primer layers on the ceiling: 1-first layer; 2 -tel layer; 3 - direction of beams of light from the window.
At the end of the preparation, the ceiling primer is performed. Select suitable material simple enough. In the current market of building materials, a large range of primer mixtures is presented. They can be on an alkyd or water basis.
The primer is applied to a clean and dry surface. In the process of applying primer, the ceiling must be made abundantly, but not allowed the appearance of puddles.
Applying primer is performed in 2 layers. The second layer can be applied only after the first will dry out. The drying time of the primer is usually indicated on the package and on average is 2-4 hours. It depends on temperature and humidity level in the room. The most optimal temperature is the gap from +5 and to +20 degrees. It is better that the humidity of the air does not exceed 75%. After drying the primer, the surface should be smooth to the touch and slightly sticky. If you perform the repair of the whole room, then the walls can be used only after the surface of the ceiling is treated.
If the ceiling will be aligned with plaster, after drying it, the primer is applied again. The surface that does not have cracks and irregularities can not be placed and immediately after the primer dries, apply putty. The finishing layer of primer before the painting ceiling must be applied to a dry putty.
When you complete all the work, thoroughly wash the tools used. If after the primer is applied, you will have to do a relatively long break, the resumption of work begins with the primer. Be sure to take into account these important nuances, and you can prepare the ceiling to paint correctly and efficiently. Now you know how to independently prepare the ceiling under painting. Good luck!