
If you have long been interested, how to weave from tubes for weaving, then this is an article about this - reveal the secrets. In order to learn a needlework, you need to be patient and just enjoy. Weaving does not take much time. Although the beginners are worth highlighting the hour or two to create masterpieces.
How to work and what tools are needed? You can get answers below for these questions.
From simple to complex
The history of the appearance of the tubes is very interesting. In the 50s, the 20th century in France was the performer. He wrote a song with an interesting name Scoobid. But do not confirm the dog or cartoon. This song was so popular that she sang literally at every step. The performer had many fans. They thought that he was to give and decided to make a bracelet from colored tubes, which would like to remind him of their limitless love. Then it was called products from Zhurbid's flames. To this day, such a name has been preserved. Now weaving has a lot of techniques, products, it is used not only as an accessory on hand, but also as home-made items - boxes, caskets.
Such tubes are very high quality. They serve for a long time, practically do not break and fit for beginners.
So what's need to work? Usually fantasy, mood and several tools.
Take the pipes of Scoobid - there are a lot of them in the package, enough for several products. Flares of different colors and sizes, so I perfectly construct the product. Also a knife or scissors. In principle, all, but for complex products we use a wire or thread.
Let's try to make baubles. There is an interesting weaving from the 4 tubes. Before starting work, it is necessary to make the initial node in the photo:
Article on the topic: Bead flowers for beginners: Weaving schemes simple roses with video tutorials
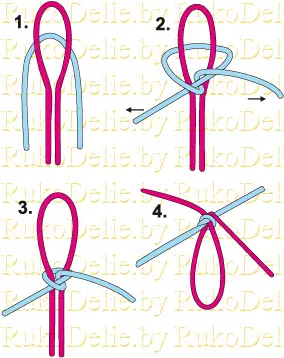
Begin:
- Folding the cords in half, the first put around the second, we make a nodule.
- Highly hide the nodules, we get a hollow for hanging.
- I turn over the product with a loop up, we have 4 end of the cords of the cross and weave the round weaving.
Such weaving is simple, very often used in working with tubes.
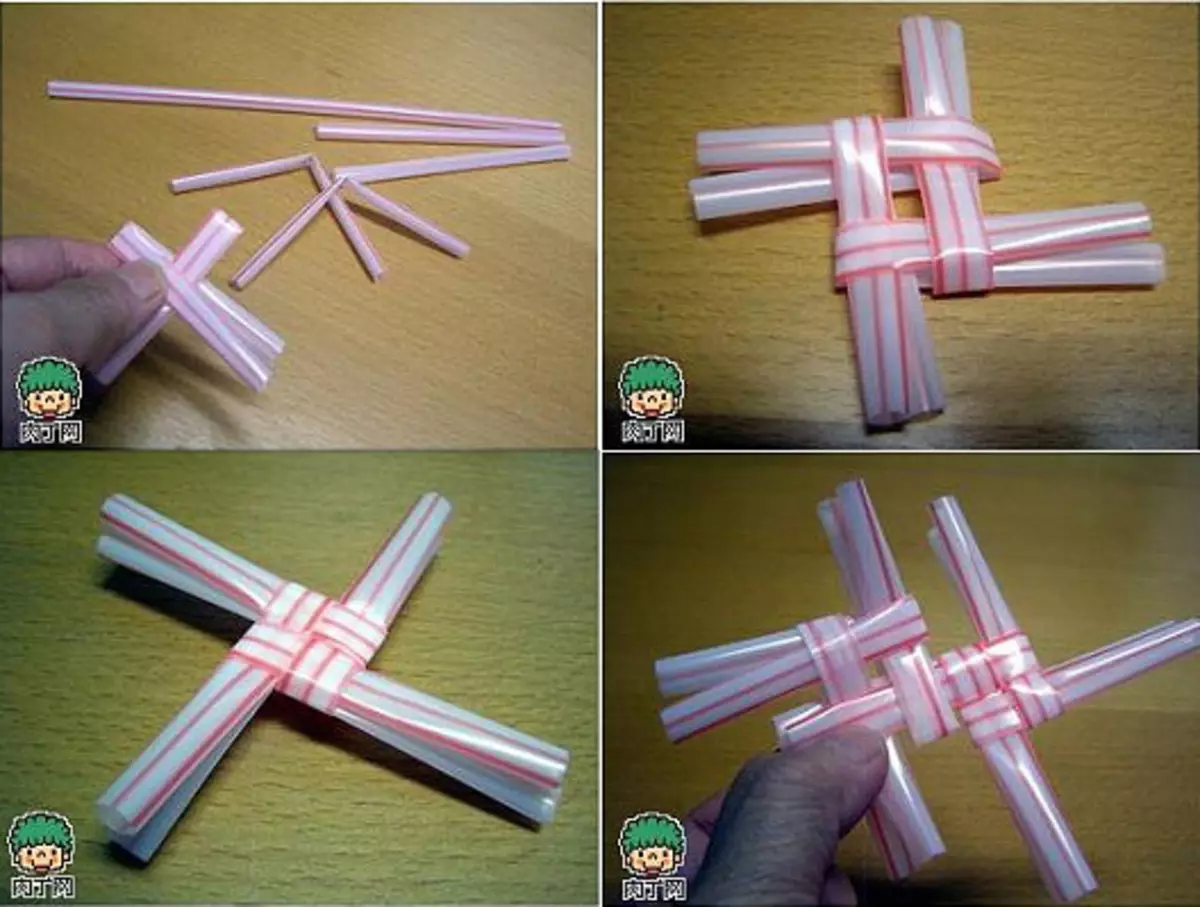
Consider step by step:
- We take 2 long lace. Divide all the ends in numbers or letters. For example, 1,2,3 and 4. or A, B, B, G.
- The first end is put down at the end of b - we get a loop.
- Bottom end b put up left on V.
- End in put up up on city
- As a result, I will put the right, to sell in a loop, which is formed by the end A - our harnesses are fixed.
- We finish the product as follows - tighten all the ends. We repeat the steps of work 1-5 to the desired size.
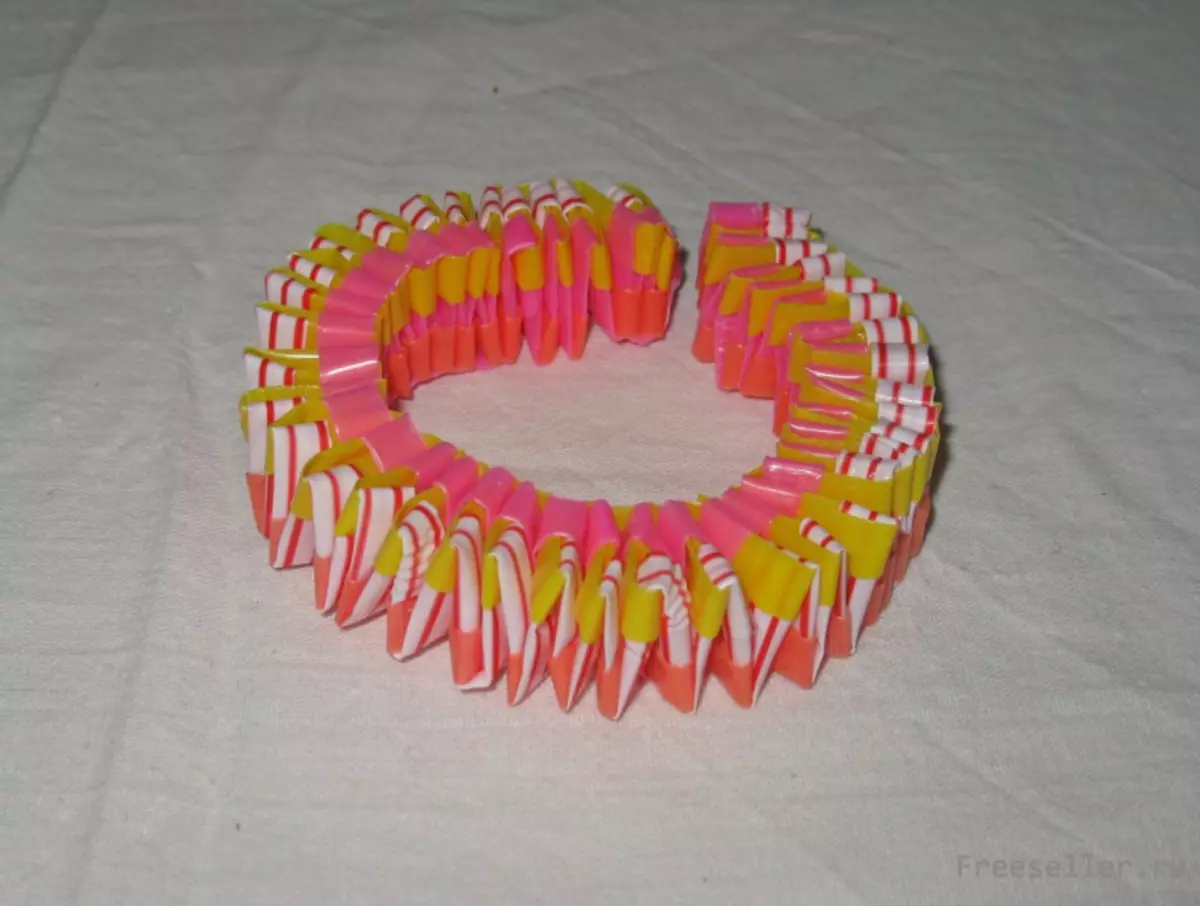
This is the result of:
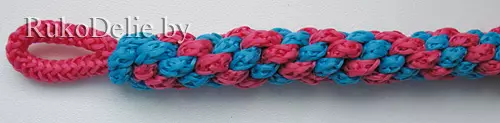
And so the square weaving looks:
Utility for life
By the way, you can make a lot of useful things from the tubes. Of course, these are key chains, bracelets, earrings, but even bags, caskets, etc. Many doctors believe that such an occupation is developing children. Because it is necessary to combine colors, control the process, to properly distribute time. In addition, when working with a soft material, the child develops a motor picture of fingers. Basically, any kind of needlework is very important. And the next lesson is suitable for adults who want to make an original and original product.
A modern decoration for the house has long been considered baskets that rub from tubes or paper. They are convenient because they fit perfectly into the interior of the house, they can put the necessary things in them - flowers, sweets, tools, paper, etc.
For the master class you will need flavors from 30 pcs, about 50 cm.
- We make frame-bottom for a product of 10 pieces. Moving their crosswise. Another tube we bind several races. Tip - Check the start of work with a felt-tip pen or a handle to not get confused.
For the product there are schemes for which you need to work. By the way, they are identical for different materials.
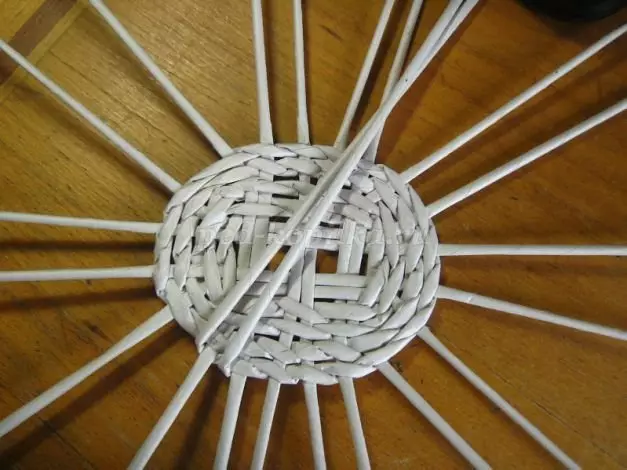
- Now we will determine the pairs of rays by our main tube. You need to weave two rows, returning to the initial stage.
- The third and fourth row - we fly away every flagellum.
- We finish work. You need to beat flagelts by the middle of the bottom. Weave the walls, the fatted every tube, as in the photo:
Article on the topic: Snow Maiden Crochet: Master Class with Schemes and Description
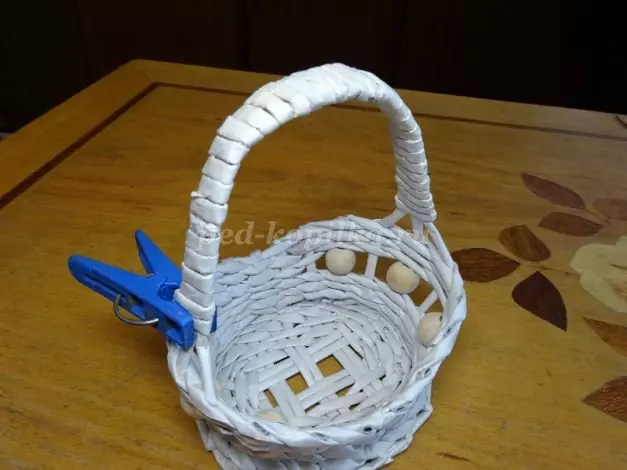
As a result, you can insert a few beads or let the ribbon for beauty. The product can be painted, but it will look more interesting if the tubes are multi-colored.
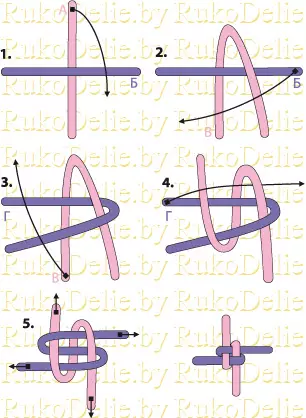
Rectangular weaving
Such a weaving is a bit more difficult, but it looks brighter and stylish. Re-remember the cord spelled.
- Ends and b put down down. They must be placed on the left of the lower ends.
- B and g put up.
- D We run through the 1st and 2nd loop. We spend over 3, we draw in the 4th.
- We carry out the same actions with E.
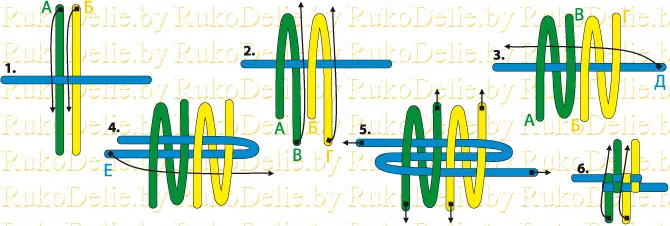
- Tighten the ends tighten. Previous steps perform to the desired product size.
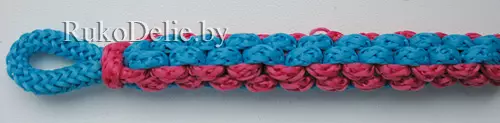
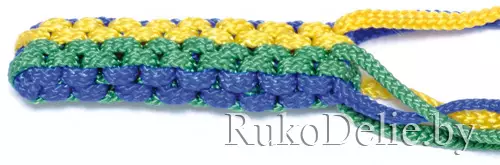
Here is the result:
Video on the topic
For high-quality learning, it is better to watch video lessons where all stages of work are told in more detail. Looking through them, all movements are better remembered. The masters advise not to despair if the first products do not work. We need to be patient and re-train.