
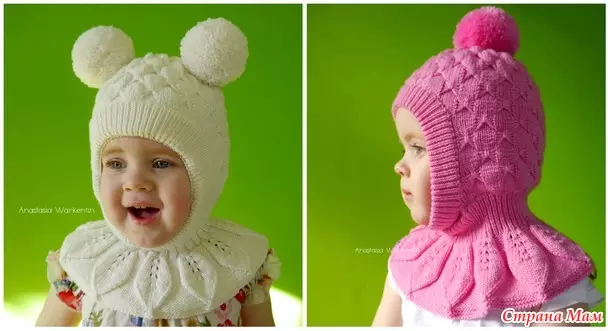
When the cold occurs, everyone strives to warm up with warm things. In addition, at this time, the knitting of various items is relevant. Parents are very trying to acquire things that protect children from cold and shrill winds. So, the hat-helmet for the girl is one of these options for hats, which not only warm in the booms, but also decorate the baby's head. Such caps warm not only head, but also perfectly close the neck, almost two in one.
Such caps are suitable not only to children, but also those who are engaged in high-speed sports - a motorcycle ride during the cold season. Such a headdress is very convenient when equipping the helmet on the head, while protects against the cold. This model fit easily, for girls you can use gentle colors and decorate with various decorative elements. Such caps are very comfortable in the sock and in knitting, which will allow even a beginner needlewoman to cope with this task.
Interesting option
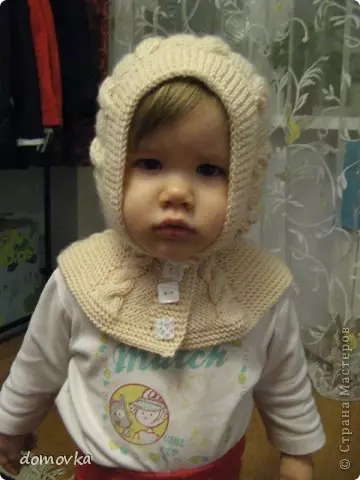
This is a wonderful hat for the girls knitted, while decorated with braids, and on the collar you can find big buttons. Looks like a similar headdress without difficulty, but you have to gain patience and allocate time. In addition, for small beauties, you can decorate the caps with all sorts of patterns, ribbons and beads, the flight for fantasy is big. This master class is designed for newbies, therefore a detailed description will be presented.
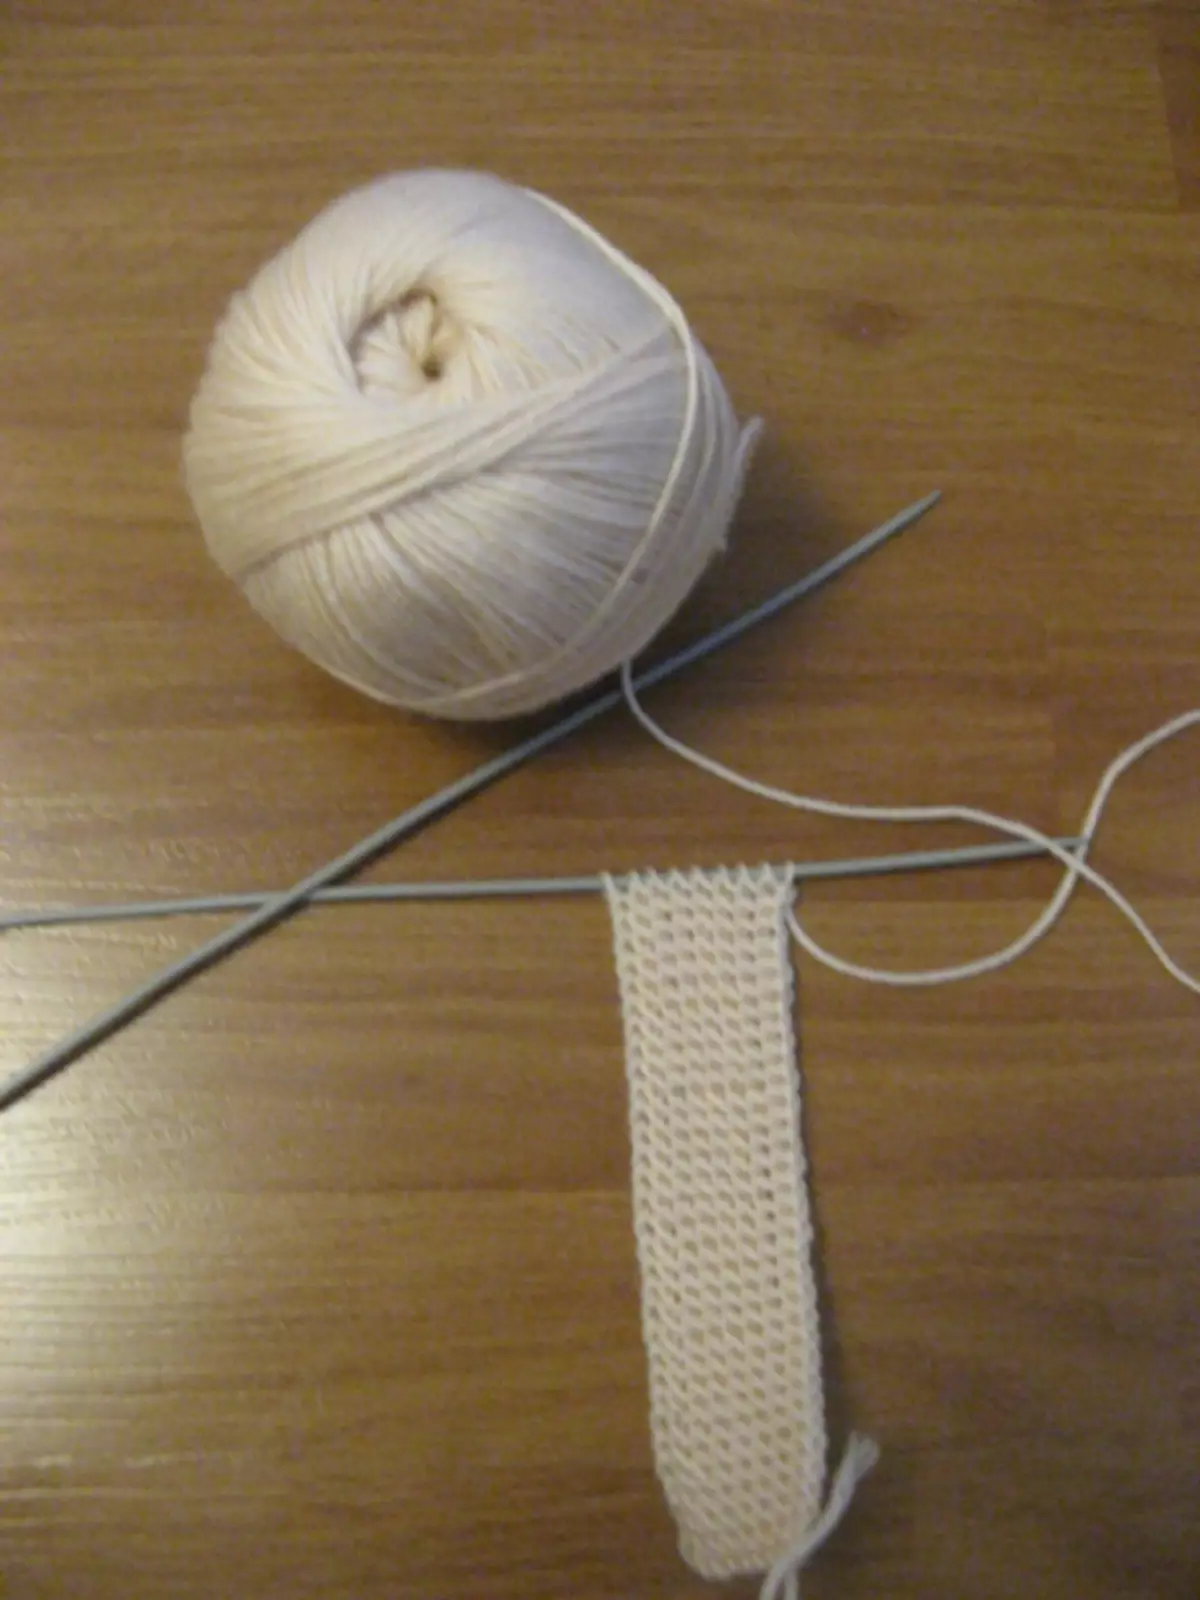
What do we need:
- woolen thread;
- Spokes circular number 3;
- Spokes having number 3 and 4;
- Crochet numbers 3.
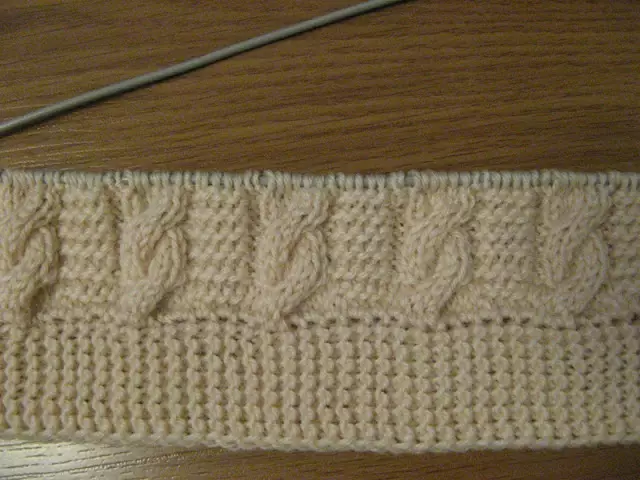
Knit such patterns: stocking and sweeper mating; Spit, which we are tied out of 6 loops.
The 1st row is all the viscous on the face. 2nd row: Insert the buttercups. 3rd: 3 Button We need to be transferred to the needle, which is additional, and subsequent three in the facial. Further knit with the spokes of the fifth, in this way, the loops that were crossed off. 4th row: inquiring involutions. 5th row: knit facial. 6th row: overcoming again. 7th row: facial.
Article on the topic: Stencils for wall decor do it yourself: download templates for free with photos
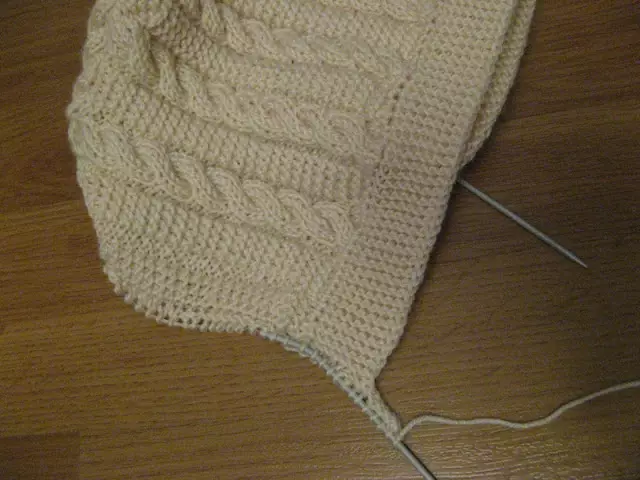
Now proceed to knitting the caps. On the number 3, we need to dial 7 loops and a handful, you need to check 125 rows, it will be a plank head. When the desired number of rows, the loops are closed and cutting up. Further, the scheme indicates that it is necessary to cross in the sequence, where only 63 loops, and you need 106, to peck a number of columns without using nakidov, then we alternate 2 buttons and 3 - from one butter need two. After the knitting needles at number 4, they score 106 looped length on the side.
Next, we make one edge, after 2 butt sweatshirt, and now * two butterfly facial buttercups, now we make a braid, 2 facial puretles, 4 buttermilts *, 2 facial, 2 boilers, edge. We repeat so to the end of a row **. Thus, they see 43 row.

Now the loops must be divided into three parts, where the side will be 35 loops, and in the middle 36 it will be a cap.
44th row: 35 loovers need to be knitting taking into account the pattern, while continuing to make braids, 4 loops close two in each pigtail, and 36 knit unchanged in the pattern. On the other side, we also make a decrease. 45th row: All 35 knit the pattern, and in the middle of 36 we are two in one. 46th: We remove the edge, then 35 knit taking into account the picture, but the 36th we need to check together with the next and knitting to flip. We see our product acquires the shape of a hood.


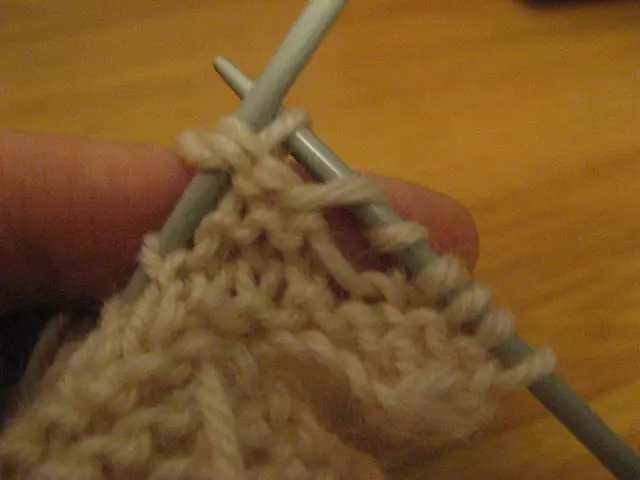
Next knit taking into account the scheme, but already in the 51-52th row, we begin to make the outbreak in the middle part of the header. So in every sixth row we need to subsoine 2 buttons - on each side we reduce one from the median braids.
Please note that we do not need to touch the median braid, as well as two near her, but only the following can already be taken.
So we reflect until the moment until only 14-16 loops remain in the middle. It is necessary to knit until the buttercups end with the side. Button closed, and cut the string.
Article on the topic: Baby suspenders do it yourself
Now we knit the collar, for this, the spokes number 3 are gaining buttercups at the bottom edge: 5 air, it is best to do it with a crochet, and in the amount there should be 74 buttons, and then 5 more air for the plank. Next, it is necessary to remove the edge, 6 loopback mating, * 2 facial, 6 braids, 2 facial, 5 boilers * and we repeat four times, after 2 facial, braids of 6 loopers, 2 facial, 6 boilers and edge.


The buttercups in the lower line of the bar and add another 5 loopers for the plank. On one of the planks, we make a button on buttons, at the very beginning of the row you need to check 3 buttermilts with a handful, and then make 2 nakida. We look at the photo, as it should look, and then close two butterms. A hole is formed with two nakida. In the next row, when we return, out of 2 nakids we need to plug two buttons, taking into account the drawing - a boil, and so it turns out the first hole for the button. So we do with each loop.
Now I knit 16 rows, but already without additives, after starting to change the needles to Number 4, and also make an increment. The buttercups must be added from the side of the pattern and from the wrong butt. So we have 5 braids, and then add on the loop on each side of the pigtails, we will eventually get 10 loops in a row. In the middle of the knitting of the boilers, we begin slightly increase the quantity. It is important that the loops we add at 17, 19, 22, 24, 27 rods and then until I add 8 loovers from each side. Next, we have another 6 rods with a handful viscous, but do not make an increase. Now the loops need to close. On the desired side, sew butt bugs. All, the hat is ready.


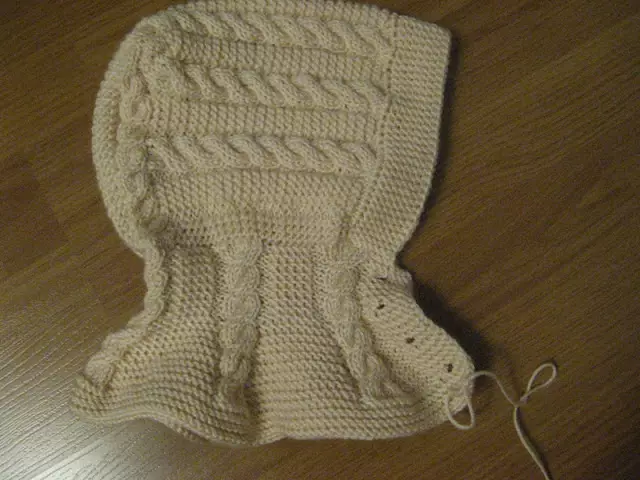
Such caps can still be decorated with other patterns, as well as children knit with pompon or two. It depends on the preferences of the needlewoman.
Article on the topic: Step-by-step algorithm for conducting general cleaning
Video on the topic
This article presents video with which you can learn to knit beautiful hats for girls.