
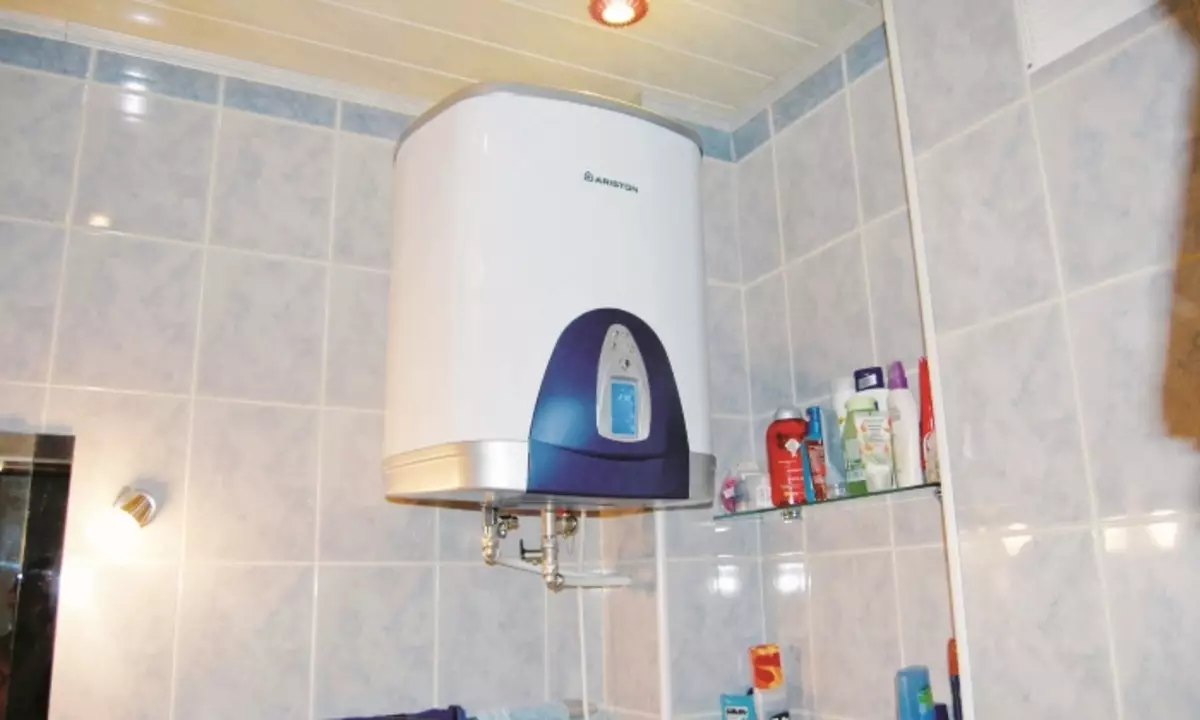
The water heater is an indispensable household appliance designed to heat the water to the desired temperature. Therefore, it is no secret for anyone that for one reason or another, he may fail. To determine the cause of the breakdown and how to eliminate it will be able to any person who has the elementary skills of plumbing and sanitary work and knows how to disassemble the water heater.
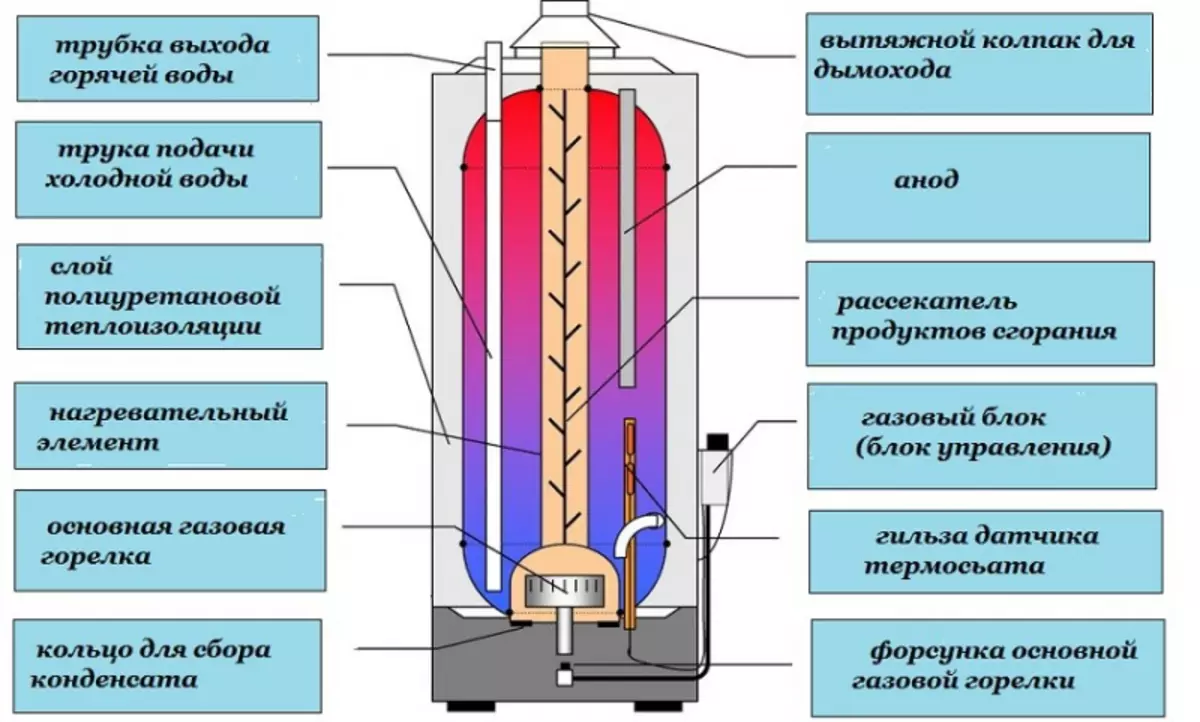
Gas water heater scheme.
Features of water heaters
Before considering this question in detail, it is necessary to learn in detail about the varieties of water heaters, each of which has its own characteristics.
All heaters can be divided into the following types:
- Water heater with ten;
- Economy water heater;
- Medium-class boiler;
- Water heaters with flat tank.
To disassemble a boiler, the following tools and devices will be required:
- key;
- bucket;
- rubber hose;
- a pen;
- Magnesium anode.
Getting Started with a disassembly of any water heater, a paramount task is to drain water. To merge water from the tank, you need to block the valves of hot and cold water.
Under the boiler is substituted with a bucket and start unscrewing the check valve and the hose that supplies cold water.
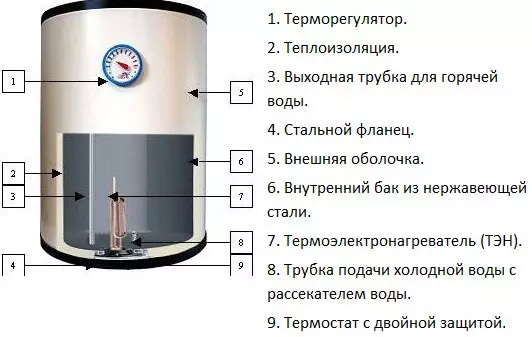
The diagram of the electrical water heater device.
The rejected hose is removed, and the rubber hose is screwed into its place, one end of which is lowered in a bucket.
After that, the crane is opened, which adjusts the supply of hot water from the water heater, and the same crane in the kitchen. Thus, the drain of water begins. To check whether all the water merged, it is necessary to fit into the hose to eliminate the plug that prevents its care.
Then the thermostat along with the electrical part is disconnected, and the wires are pasted on the wires, which will be easy to determine at the time of assembly, which and where it should be. The boiler is substituted under the boiler, and on the metal cover of the water heater very gently unscrew the bolts and drain the remnants of water.
Article on the topic: Tumben under the washbasin
It is very important to clean the inner surface of the tank and determine the presence of a magnesium anode inside the heater, an externally resembling an electrode for welding.
If this element is absent or it is less than 15 cm, then it should be purchased in a specialized store, after determining the diameter of the thread. The magnesium anode is installed in the right place, and then you can start assembling the boiler.
How to disassemble a water heater with ane
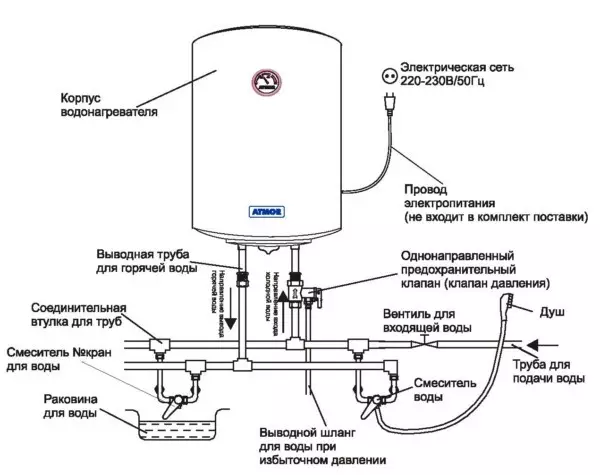
Electric flow heater scheme.
This is a relatively inexpensive view of the boiler, which has a TEN attached to the nuts. This device, as a rule, has no outer adjustment. Its distinctive feature is the presence of a hex flange, which is spinning which is a key to 55 or a conventional gas key.
Algorithm for the discharging of the water heater with Tan:
- The device is disconnected from the network, drain water and dismantle the check valve, which will only make it difficult to work;
- The boiler lid is removed, which is screwed to the screws closer to the nozzles;
- The thermostat is dismantled;
- under the water heater substituted the container into which the remnants of dirt, water and scale will be merged;
- Split flange counterclockwise (existing dirt and scale can complicate work, so they are neatly written to a wooden or plastic knife; as soon as the thread ends, the flange is carefully removed);
- In order to remove the TEN, remove scale in the bends of the heating element and, gently swaying to the left and right, pull out the lower part of the element.
How to Disassemble Water Heater (Boiler) Economy
Economy water heaters are distinguished by an oval shape of the flange, therefore, the principle of their analysis has some features.
Economy Boyler Paper Stages:
- The device is disconnected from the power supply, drain water and, if necessary, unscrew the check valve;
- There are two screws near the pipes and the bay, which should be unscrewed and removed the water heater cover;
- The thermostat is shot down with a sharp movement and access to the flange, which is attached to the body to the body through the plank; After the nut is cleaned, you can remove the flange.
Article on the topic: Repair of cracks acrylic bath do it yourself
How to disassemble a water heater of the medium class
Medium-class water heaters have an average price category. The set with the device includes flanges that are attached directly to the neck with 6 bolts.
The process of parsing this water heater is as follows:
- The device is turned off, water is drained and the check valve is dismantled;
- To remove the lid, the screws find and spin them (the location of the screws can be different);
- After that, it is necessary to extract or remove the thermostat (depending on whether it is connected with a token wire or inserted into it);
- All the necessary screws or nuts are unchecked.
How to disassemble a plane tank water heater
Action plan:
- The boiler is disconnected from the power supply, drain the water and unscrew the check valve;
- unscrew the nut-plug;
- Plastic shields are dismantled;
- In the center of the plastic cover, the screw is unwinding, which is most often sealed with a sticker;
- The bottom cover is removed and access to a complex circuit of electrocomponents (before it is disassembled, it is advisable to photograph the design, sketch and sign each component, it will help then all right and quickly assemble);
- The following time of the disconnection of the water heater with a flat tank will be disconnected of the control board and thermal protection, for which all the screws and nuts and nuts of the ground bracket are unscrewed (it should be remembered that thermal protection and e-board are afraid of water, so it is very important to protect them from its impact);
- from the electronic control board disconnect the connector that comes from the outdoor board;
- To dismantle the TEN, which is attached to the flange, you should unscrew the nuts (the work may be complicated if the Ten is covered with scolding, remove it slowly, with extreme caution).
Sometimes it is necessary to dismantle both internal and external control fees, which is from the outside of the water heater body. Before you remove it, a plastic sticker is removed from the front panel and unscrew the bar.
Everything is simple. Everyone can perform a similar job with their own hands, without attracting the help of specialists.
Article on the topic: how to glue wallpaper on the ceiling: rules and tips