
Plasterboard - universal building material for wall decoration. Today, very fashionable and beautifully use gypsum for finishing surfaces. The demand for this material is growing every day. This material has high elasticity and elasticity, it is these qualities that allow you to create various unique structures on the surfaces, and many people will be able to do it yourself. With the help of drywall, you can remove all irregularities from the wall, while it makes it as smooth as possible. In this article, I will teach you how to mount plasterboard to the wall.
The mounting of plasterboard to the wall is a whole science, which, at the same time, allows you to create magnificent arches, built-in wardrobes, partitions, niches under TV and many other interesting scenery. Consider three basic ways to create a new design in your home.
Frameless way
In this embodiment, the mount occurs directly on the wall, which must be prepared. This option will allow to hide irregularities on the wall. This method is the easiest compared to other methods.So, let's wonder how to mount drywall to the wall with a frameless way with the help of glue.
The process of preparing walls
An important point before the start of work is the preparation of walls. In order for the sheets well attached to the bottom, it needs to be processed well. It is necessary to carefully extort from the old coating: wallpaper, paints, whitewings. We are looking for irregularities on our wall and somehow note them (can be chalk). We apply a primer on the wall (the primer must be applied in several layers, which would have a good adhesion) and let it dry well.

From drywall, you need to cut strips with a width of 10 cm (for cutting you can use a regular stationery knife). On one of the sides we applied primer and wait for it drying. While the primer dries, in a separate bucket you need to knead the glue glue. It is best to use a drill with a special nozzle - it is very convenient and will save you time. The consistency of the finished glue should be like a consistency of sour cream.
Article on the topic: Clinker Thermopanels: Description, Benefits of Material and Installation Material
Immediately I warn you, the glue is not necessary to interfere, it quickly dries. Therefore, it will have to work with him quickly. Returning to our prepared stripes. We apply glue on them and glue vertically on the prepared wall - one back to the floor, and the second also to the ceiling.
The next step is the sticker of the same strips is only horizontally. Strips will be interrupted in those places that are marked as irregularities, and begin with them. Thus, we can align all defects on the wall. Now it is already clear how smooth the wall will be. So, everything is ready, it remains only to punish sheets.
Fastening to the wall
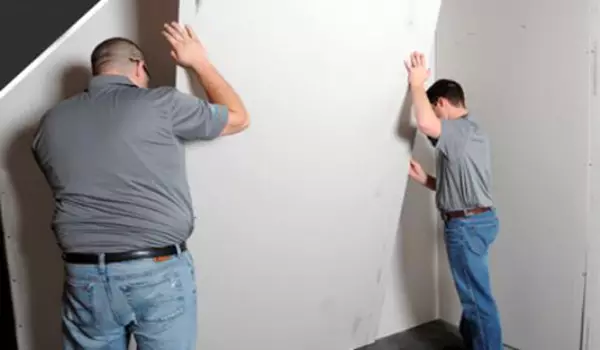
We apply to the leaf of the primer and wait for complete drying - it will provide good adhesion of the material. After complete drying of the primer we apply glue on a sheet. It is very important when applying glue to follow the rule: in places where the material will lay down to strips, which are already on the wall, glue with a spatula with a tooth (increasing adhesion).In the remaining sections of adhesive material to be applied in the form of "Lyapov". After applying glue to the sheet, it must be tightly glued to the wall. And so each subsequent sheet. So there is a frameless gluing.
Metal frame
This installation option is very complicated, since it is necessary to perform many consecutive actions for its execution. The advantage of this method is that it is possible to level large irregularities on the walls, and there is also an opportunity to use heat insulation between plasterboard sheets and a wall. Applying a metal profile to create a frame, we increase the service life of our design. This installation method is best suited if you decide to make a niche for a TV from drywall.
Getting started on a drywall design, which over time will become a wardrobe, a shelf for books or even a TV, first of all, you need to measure the walls in order to have a clear picture - at what distance to place a profile and suspensions (as a rule, 60 cm from each other). On the perimeter of the walls are attached, with the help of dowels, guide profiles. They need to be exhibited using a level (we create a flat surface).
Article on the topic: Connecting the refrigerator to the mains
By installing the upper profile, from it, with the help of a plumb, dowels and screws, install the lower. Next, the side profiles are installed and the suspensions are attached. Carrier carriers are installed in guides. Plaster sheets will hold on the carrier profiles.
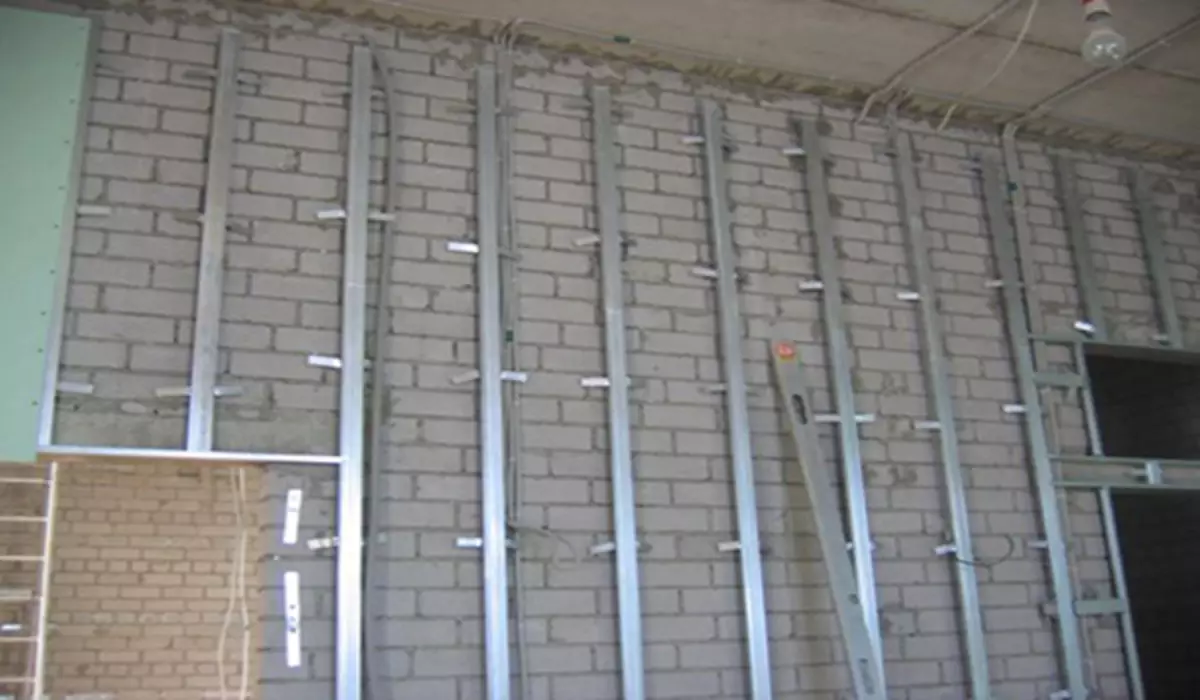
As a result, we should get a curtain wall created by profiles and suspensions. Knowing that the width of the sheet is 120 cm, the carrier profile must be set up so that there were three of them on one sheet.
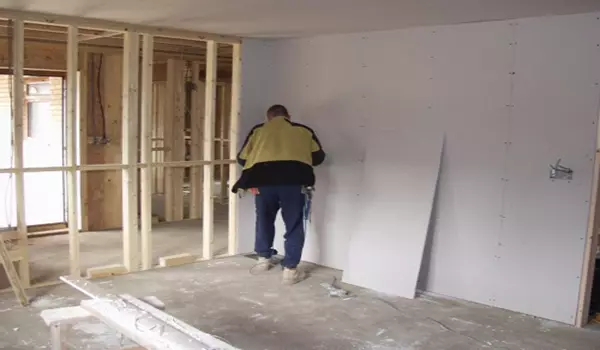
To ensure good noise insulation and thermal insulation, the insulation is placed between the plaster and the wall. So, the frame is fully ready, you can mount the sheets of plaster. It is fastened with the help of self-tapping screws (black 3.5x25 mm), whose hat is topped. It should not be stitching, otherwise it will interfere with further processing plaster.
It is important to remember whether the sheets must be attached so that their junction is on one profile. Stitches and fastening pits need to scream.
Wooden rails
The third method of fastening plasterboard sheets on the wall has a number of advantages. It is cheap, as wooden bars are used here, and not a metal profile. It is much easier, but, it means there is a time saving. Applying this method, you can also get rid of the irregularities of the walls. The difference from the method with metal profiles is that the fastener of a wooden bar occurs, directly, to the wall itself, and not to the ceiling and floor.
First of all, it is necessary to visually determine the lowest point of the ceiling, it will be a starting point. A bar is attached to the ceiling, you need to set exactly with a level. Further from him rushes a plumb, it will determine the plane. In the event that the plane does not match, under the bottom of the bar you need to put the lining or a little scarf cut.
Having understood with the lower plot, go to the side guides. It's a little simpler if the plane is already installed, they remain only to be adjusted to the level. The bar on the contour is set, it is time to start the crate. For the crates, two types of timber are used: 40x40 mm and 80x40 mm. It is necessary to observe an important rule: three bar must be used for each sheet, one in the middle (40x40mm) and one for each edge (80x40 mm).
Article on the topic: Designers advise: how to choose beautiful curtains for two windows
It is necessary to withstand so that the sheets of sheets fall on one bar. The lamp is made as follows: on the frame you need to screw the longitudinal wooden rei. Fasteners need to be performed only by self-draws. They need to be set according to the level.
The longitudinal are rotated transverse. So they created a crate. Again, do not forget about the distance between the Ray (no more than 60 cm). Now you can spend work on the insulation of the wall, for this, between the frame and sheets of drywall, the insulation must be consolidated.
The penultimate stage is the mounting of the gypsum to the wooden frame. Here everything is simple: we apply the sheet and screw it with self-draws. Hats of self-tapping screws need to be dried in plaster by 2-5 mm. It will simplify further work on the wall of the wall by plaster.
Self-samples, seams and other defects (if any) need to be smeared with putty. The only minus is that the wooden frame will last much less than the frame from the metal profile.
When choosing plasterboard, as material for alignment of the walls, you provide not only the perfect surface of the walls, but also the ability to create a new design of your apartment. I would like to hope that this article will help people learn how to fix plasterboard to the wall using any and the above methods.
Video "Niche under a TV from plasterboard"
The video will show how to make a niche for a TV from drywall using a metal frame mounting method.