
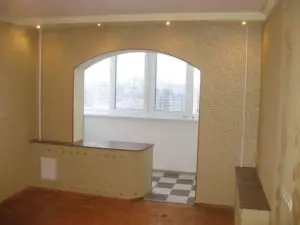
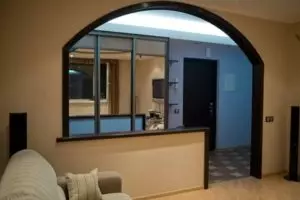
The arch on the balcony is a magnificent option to issue the input of the insulated balcony. Such a design is capable of radically change the interior design, giving it a unique grace, as well as visually expand the inner space due to the smooth bentness of the lines of the proof and the absence of visual restriction in the form of an inlet balcony group.
Many it seems that the creation of balcony arches do it yourself is a matter of very difficult. In fact, with a similar task, any homemade master can cope with the tool in their hands. All that this will require is accuracy and the desire to create your own hands really unique design of the apartment.
Selection of material for arches
Arches are made of drywall
Arched structures today have become a very popular architectural element of our apartments. In the form of an archer, interroom doorways and even input groups are performed. Material for this design mainly serve plasterboard, plastic sheets and panels, as well as wood (or LDSP, MDF).
The most democratic of them is a drywall sheet (GLC). It is easy enough to process and at the same time is available at a price. With the help of drywall, you can create almost any elements of the interior, ranging from the ceilings of a complex design and ending with interroom partitions. Arch the balcony in the form of the arch will be best of all with the help of GLC sheets.
Preparation of Piece
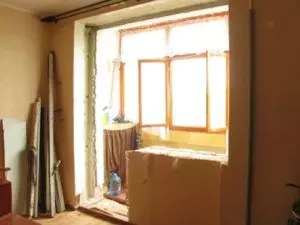
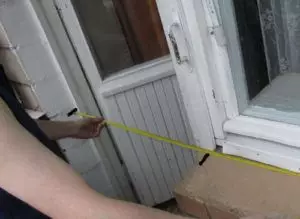
Before mounting the arch, you need to remove the entire window block along with the door
Balcony arches are constructed only if you want to create a single living space, combining the warmed balcony and internal rooms.
First of all, preparatory work should be carried out - it will be necessary to dismantle the balcony input group.
Article on the topic: Using burgundy wallpaper in the interior of the bedroom
At the same time we remove the windows and doors along with window and door blocks.
It should be remembered that to dismantle capital wall structures is strictly prohibited by the rules of the use of residential premises. Therefore, to remove the bottomroom brick simpleness or try to expand the balcony, it is extremely not recommended due to possible problems with the management organization.
Despite such prohibitions, it is still not to be upset - the capital elements can be organically enter into the design of the future arched loyalty.
So the windowspace can play the role of the tabletop or bar counter, and the side congestion can be arranged as a column or pilaster.
Required toolkit
The next step is proceded by the construction of the elements of the arched design of plasterboard. To work, we will need the following tools:
- Perforator;
- a hammer;
- stationery knife;
- Lobzik;
- roulette;
- screwdriver;
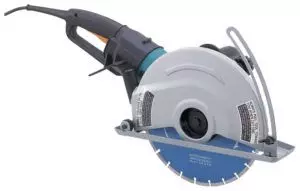
- Bulgarian or scissors for metal.
For the manufacture of the main arched elements - the semicircles measure the balcony, its height and width. Arch design can be different: pointed, rounded and ellipsed.
The easiest way to build a round arch, so we will stop at this option.
When designing, it should be taken into account that the arched construction will take off the discount, at least 10 -15 cm. Therefore, if its height is less than 2 m, then it is better to refuse the arch in this case.
Production of structural elements
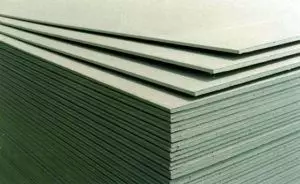
12 mm plasterboard suitable for arranging
For the manufacture of semicircles, we take a wall plasterboard with a thickness of 12 mm, and the internal elements connecting semicircles and the closing cavity between them, we make from a special "arched" GCC. It has a thickness of only 6 mm and is nervous better than the wall.
In order to cut a semicircle from a sheet of plaster, measure the width of the day and divide it in half. Then we take a sheet of wall Glk and celebrate it middle. In the middle of the sheet, retreating from the edge a couple of centimeters, tighten the self-tapping screw. One end to a self-tapping screw is a piece of twine, a length of 0.5 width of the balcony loan, to another end of its end tie a pencil. Holding a twenty sword, draw a pencil semicircle on a sheet.
Article on the topic: Installation of bidets do it yourself
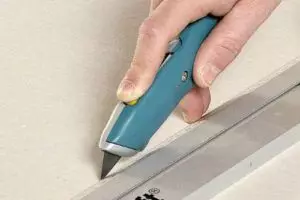
In the same way, place the second item on another sheet. With the help of the jigsaw, we cut the curvilinear blanks of the future arch.
Then we measure the thickness of the wall in the balcony, and from the arched plasterboard, we cut the internal strips.
Montage Karcasa
Plasterboard sheets mount on profile
To do this, use standard framework profiles for GCL sheets. First fastened to the wall on both sides of the wall profile. With the help of a grinder or scissors for metal, we cut the guide profiles of the desired length and secure them with a dowel around the perimeter of a turn in two threads along both edges.
To the guide profile, we attach the prepared segments of the carrier element to which the plasterboard billets will be attached. Detailed process of mounting Arches from drywall Look in this video:
When building a frame, it is necessary to strictly observe the dimensions so that the gypsum parts lay down exactly as it was planned.
Fastener of plasterboard and finishing work
After mounting the frame, we proceed to the installation of gypsum design elements. With the help of self-tapping screws from two sides to the frame elements of semicircular blanks. After that, with the help of a strip of curved arched plasterboard, we sew the inner space of the arch. Councils of professional installation Arches See this video:
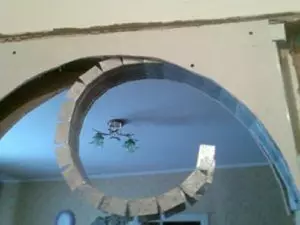
As a result, we obtain the arched outlook, which remains only to bring to mind - to sharpen the gaps and joints, paint, go with decorative elements or to produce other works that the planned interior design will need.