
My friend and we usually spend all the repair work together. Then I help him glue wallpaper, then he plaster me with a wall. And once again, leading in order the walls in the house of Kolya, before us stood a very important stage - grinding the surface of the aftershort. It is at this stage that it is impossible to allow an error, otherwise the subsequent decoration may be unsuccessful. Unless of course, you will be covered with walls with wallpaper, then minor flaws will hide, but it will not be patient! The grinding procedure is simply mandatory, since even the finishing layer of putty is not able to give the perfect smoothness. Today I will talk about the methods of grinding and materials for this type of work.
Wall grinding process after putty
What tools are suitable for work
When all plaster works for walls are carried out on their own and at home, the manual method is unambiguously used. But I will tell a little about the method of mechanized wall processing, when putty was put on it.
Important! Grinding of walls should be performed on putty, so do not think to apply a layer of primer after spitting.
Grinding of walls
For surface treatment, apply:
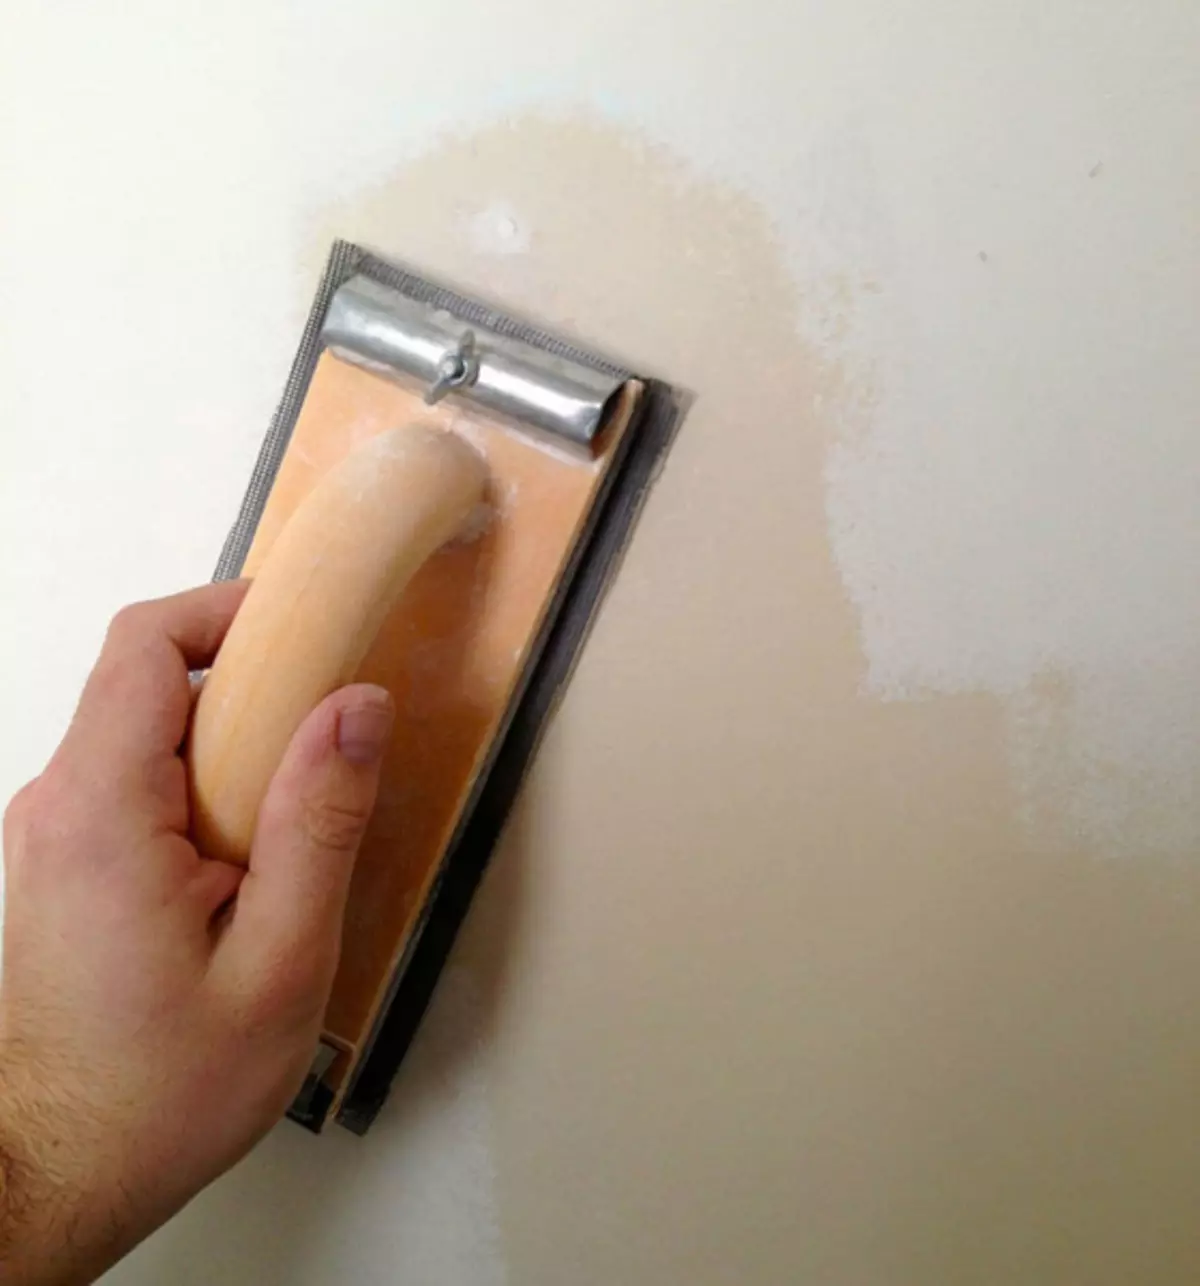
- Manual Schocroter
- Grinding sponge, which covers the angles, allows you to get to hard-to-reach places on the wall
- Sand paper or grinding net
- For that work, it is simply necessary for good lighting, so a portable lamp is useful or a searchlight to be installed to the wall at an angle
- Table and stepping
- Little spatula
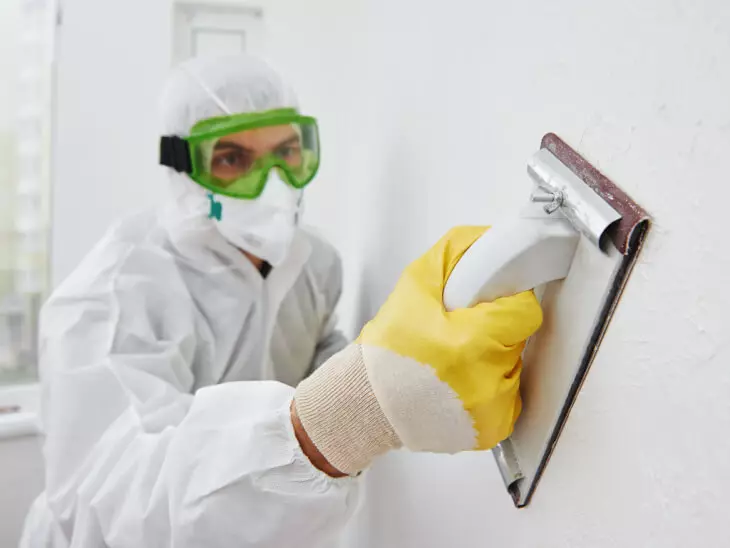
- Many refuse a mask or respirator, but this is a stupid solution, the Breath authorities must be protected from construction dust.
Grinding of walls after putty
The grindset has a different cell area and during grinding is not so clogged with garbage, like ordinary sandpaper. However, the cost of emery is less and in self-grinding, it is also suitable perfect. If it is planned to grind on putty on a large area, then you must often change the material. By the way, her graininess is also different, so I prepared the table labeling and grain material:
Article on the topic: How fast and just make a bird feeder from a plastic bottle?
| Purpose | Marking according to GOST 3647-80 | FEPA P Marking (ISO-6344) | FEPA F Marking | Grain size, microns |
| Coarse | ||||
| Very rough work | 100-N. | P20 | F20. | 900-1100 |
| 80-N. | P22, P24 | F22, F24 | 800-1000 | |
| 63-N. | P24, P30 | F24, F30. | 630-800 | |
| 50-N. | P36. | F36 | 500-630 | |
| Rough work | 40-N. | P40 | F40, F46. | 400-500 |
| 32-N. | P46, P50 | F50, F54 | 315-400 | |
| 25-N. | P60 | F60 | 250-315 | |
| Primary grinding | 20-N. | P80 | F70 | 200-250 |
| 16-N. | P90. | F80, F90. | 160-200 | |
| 12-N. | P100 | F100 | 125-160 | |
| 10-N. | P120 | F120 | 100-125 | |
| Final grinding of putty and soft wood | 8-N. | P150 | F150 | 80-100 |
| 6-N. | P180 | F180 | 63-80 | |
| Final processing of solid wood and between overlappings | 5-N. | P220 | F220 | 50-63 |
| 4-N. | P320, P360. | F240, F280. | 40-50 | |
| Smallozing | ||||
| Final grinding for solid wood, between coatings | M63. | P240, P280. | F230. | 50-63 |
| M50 | P320, P360. | F240 | 40-50 | |
| Polishing final coatings, between paintings, wet grinding | M40. | P400, P500 | F320 | 28-40 |
| M28. | P600, P800 | — | 20-28. | |
| Metal grinding, plastics, ceramics, wet work on grinding | M20 | P1000, P1200. | — | 14-20. |
| Even more thin grinding, polishing | M14 | P1500 | — | 10-14 |
| M10. | P2000 | — | 7-10. | |
| M7 | P2500 | — | 5-7 |
Grinding the walls after putty do it yourself
And here is another table with the size of the abrasive grain, the skin:
| Compliance of standards for the size of abrasive grain grinding skins | |||
| FEPA grain size | Grain size GOST P52381-2005 | Grain size GOST 3647-80 | The average grain size in the ICM |
| P12. | P12. | 160. | 1815. |
| P16 | P16 | 125. | 1324. |
| P20 | P20 | 100 | 1000. |
| P22. | P24 | 80. | 800. |
| P24 | P30 | 63. | 764. |
| P30 | — | 642. | |
| P36. | P36. | fifty | 538. |
| P40 | 40. | 425. | |
| P50 | P50 | 32. | 336. |
| P60 | P60 | 25. | 269. |
| P80 | P80 (approximately) | twenty | 201. |
| P100 | P100 | sixteen | 162. |
| P120 | P120 | 12 | 125. |
| P150 | P150 | 10 | 100 |
| P180 | P180 | eight | 82. |
| P220 | P220 | 6. | 68. |
| P240 | M63. | 58,2 | |
| P280. | 52,2 | ||
| P320 | M50 | 46,2 | |
| P360 | 40.5 | ||
| P400 | P400 | M40. | 35. |
| P500 | P500 | 30.2 | |
| P600. | M28. | 25.8. | |
| P800 | 21.8. | ||
| P1000 | M20 | 18.3. | |
| P1200. | 15.3. | ||
| P1500 | M14 | 12.6 | |
| P2000 | 10.3. | ||
| P2500 | M10. | 8,4. | |
| P12. | P12. | 160. | 1815. |
Article on the topic: how the toilet is arranged
Grind the walls after putty
Thanks to the table, everything is extremely clear - if the number is greater, the skin will be smaller, and if the number is less, then the skins are coarser.
We carry out work on grinding wall
Now you need to remember the main rule during the grinding of the wall of the post -packing wall: first you need to use coarse-grained skins, and at the last stage - fine-grained.

Grinding after putty
So this work is in such a sequence:
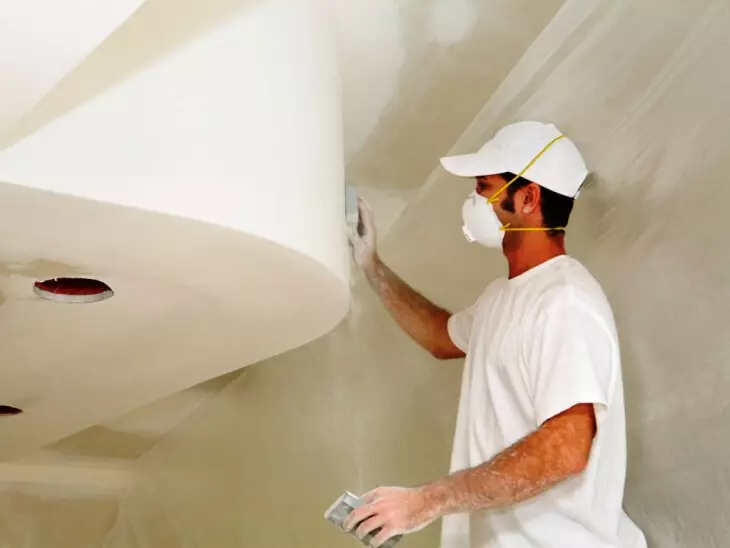
- To begin, it is necessary to wait until the previous layer sucks completely dry and then prepare good lighting and put on a protective mask with glasses
- It is necessary to choose the emery with the right graininess, so the acquired material in the store will not be superfluous to purchase several types of skins. But it comes to understand or not, you can, if you walk with it on a small area of the wall being processed - if the scratches on the putty remain, then we take a big number. Do not worry, after these scratches will disappear
- I have already said that if you want to go around the room with wallpaper, then these defects are not necessary to correct, but it is necessary to get rid of painting from them
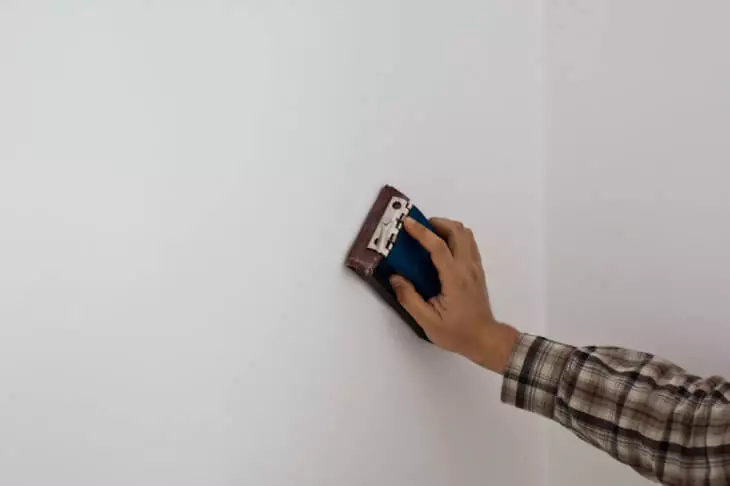
- After the emery is selected, fix it on the grinding bar and proceed to the grinding of the surface after putty
- Movements must be circular and uniform. You can still make up-down or left-right - choose a more convenient way for you. The bar must be pressed a little, and in no case do not delay the wall on some kind of wall, otherwise, after that, the putty will appear a new defect
- If you notice the removal on the wall surface, then skip this site, and later apply the required amount of putty and after repeat the grinding again
- All hard-to-reach places of walls and corners should be treated at the very end - a grinding sponge with beveled corners will come to the rescue. Skotroter is not suitable for grinding the corners, as it is rude enough and may need to be needed
- Next, we carry out wet cleaning and view the entire surface, then we apply another layer of putty - the finish putty, and wait until the wall dries
- Now the work on grinding occurs with the help of fine-grained skins. Do not forget that for this you choose the large number of abrasive! The grinding technology has not changed, and all work on the wall is carried out by the same principle as when starting grinding. But there are small nuances: the light is better to put closer, and the movements do not do not smear and more accurate
Article on the topic: Did the door shine? How to fix?
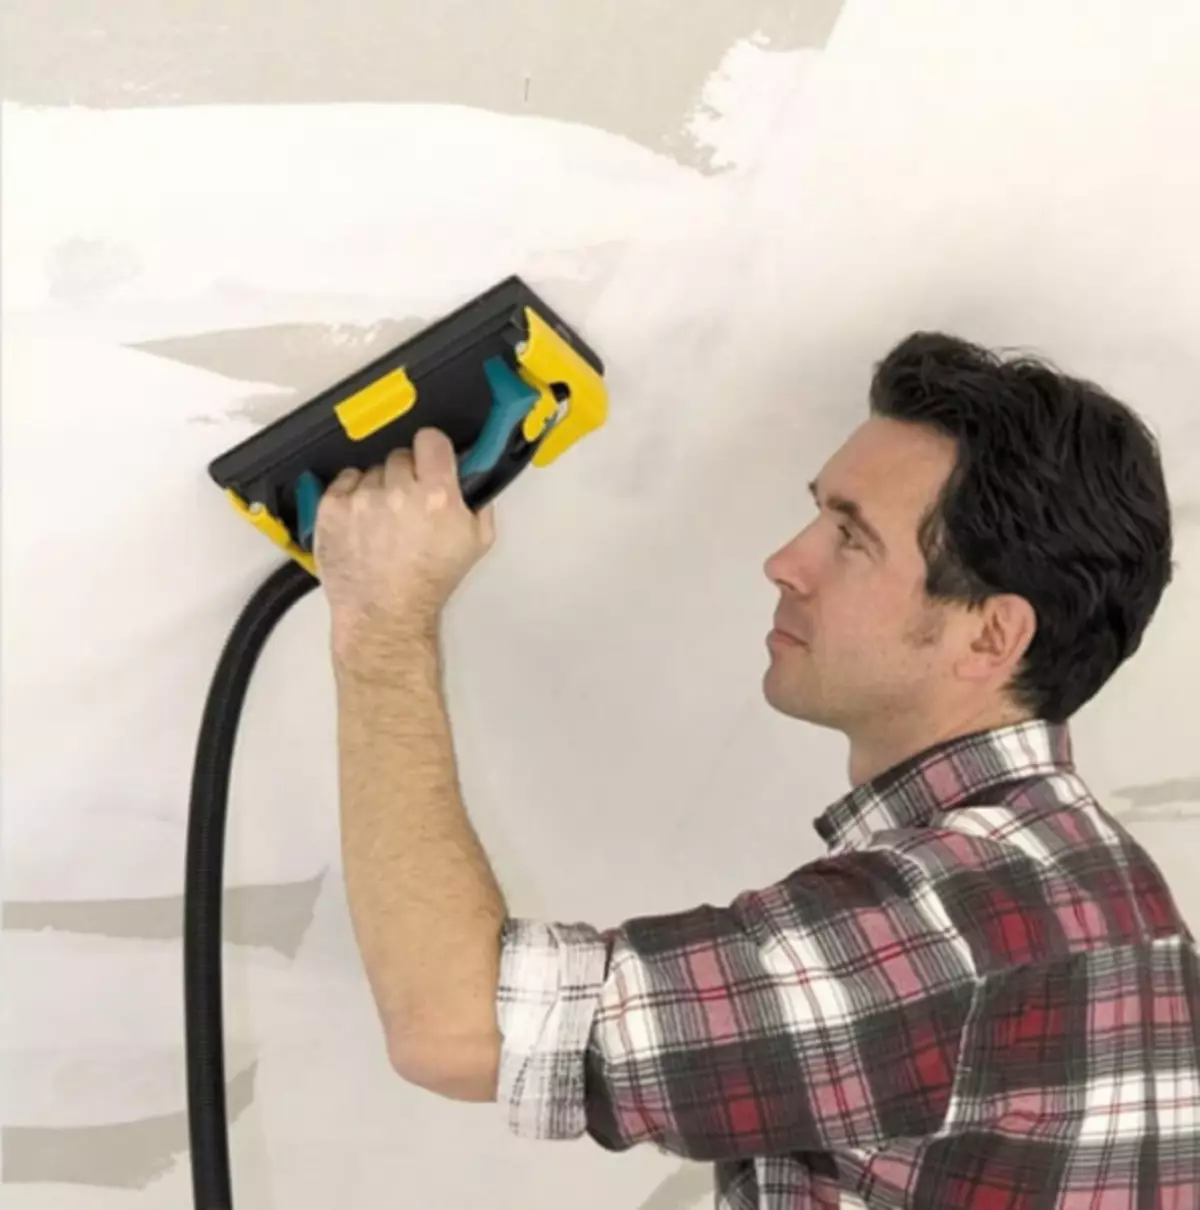
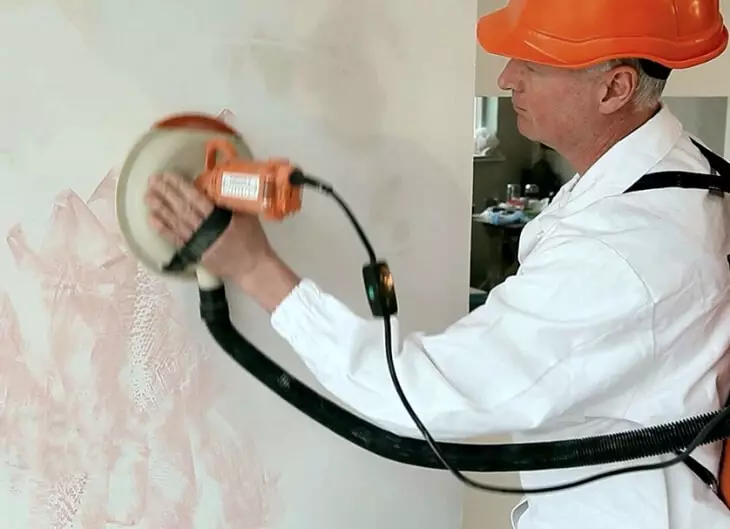
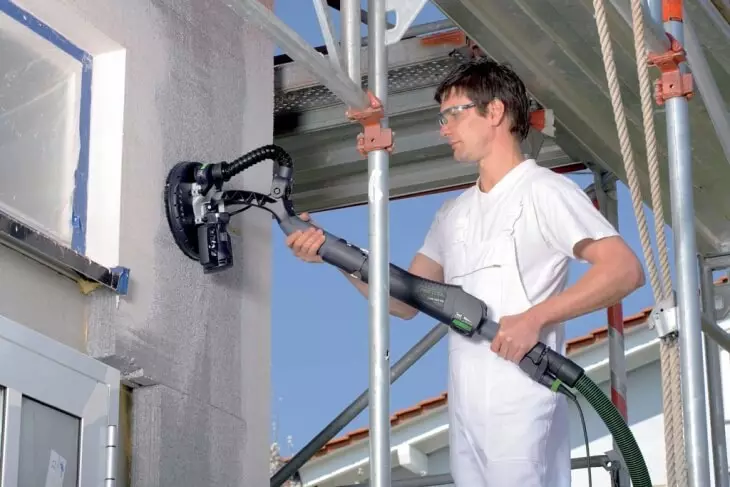
Mechanized grinding method
The process of grinding the wall
Even the home processing of the wall after applying putty can be performed using an electric grinding machine. And if you have it, the process will be accelerated. But do not forget that in any case the procedure should be carried out after complete drying of putty on the wall. And no less than 24 hours after applying the mixture.
Such machines can be divided into:
- Ribbon - suitable for finishing a thick layer of material. If you need to correct the finishing layer, then it is better not to use
- Flat Vibration - Universal Machine
- Orbital eccentric - thanks to it you can carry out work in the corners
Grind the wall in the house after putty
What kind of grinding method choose your business. If you want to learn polishing and putty, then start with the manual method, and then go to the use of the machine. In any case, anyone who is used to carry out repairs in their housing must learn how to fulfill both, at first glance, not very complex actions.