
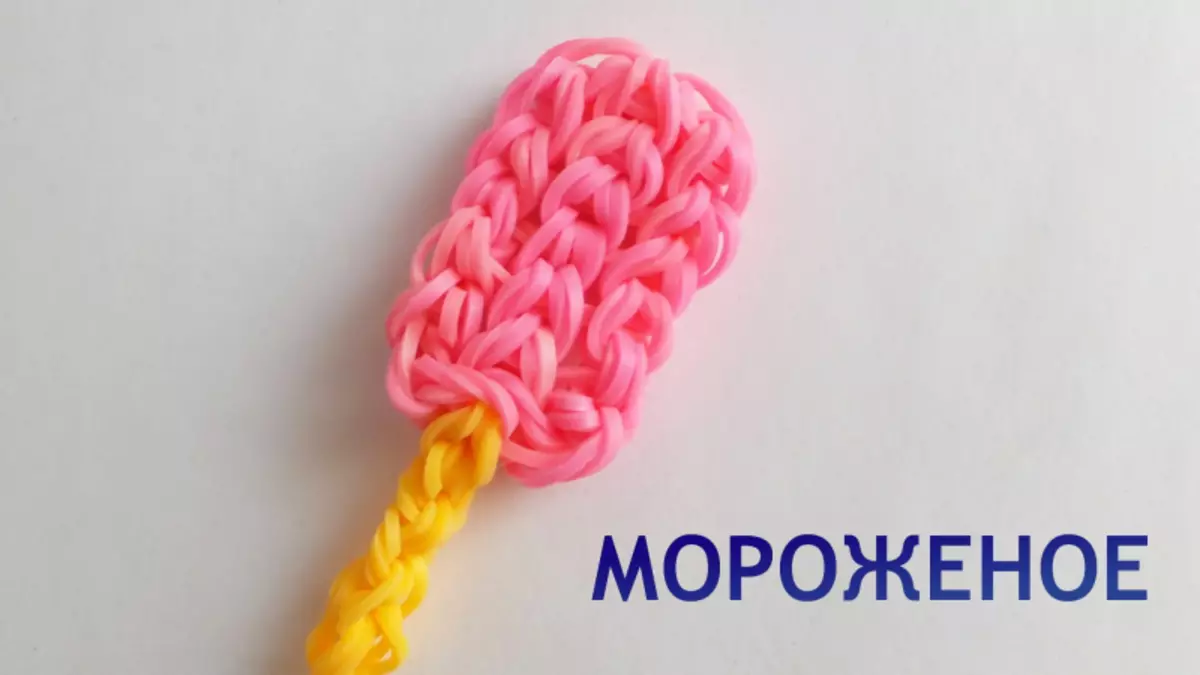
Weaving from the gum is popular among children and adults. In children, it develops creativity, fine motility of hands, attentiveness and prerequisite. Adults, such a pastime helps to calm the nerves, distract from workers' worries and bustle, and, perhaps, gives the way to earn on your own hobby. Master class on how to weave the ice cream gum, suitable for both children and adult amators.
Instructions for weaving
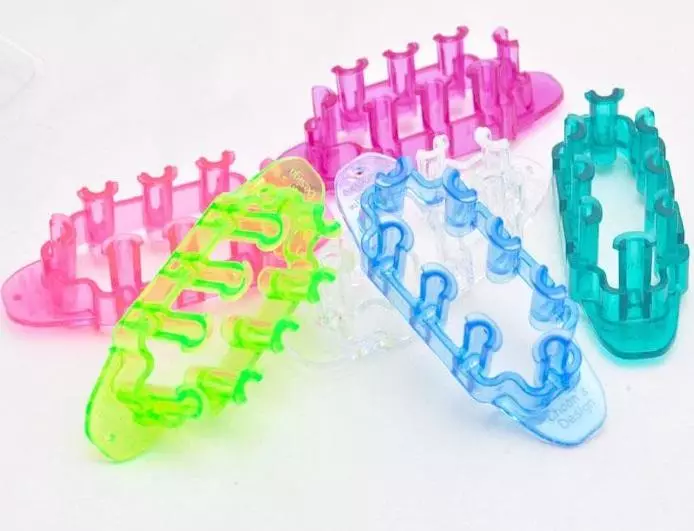
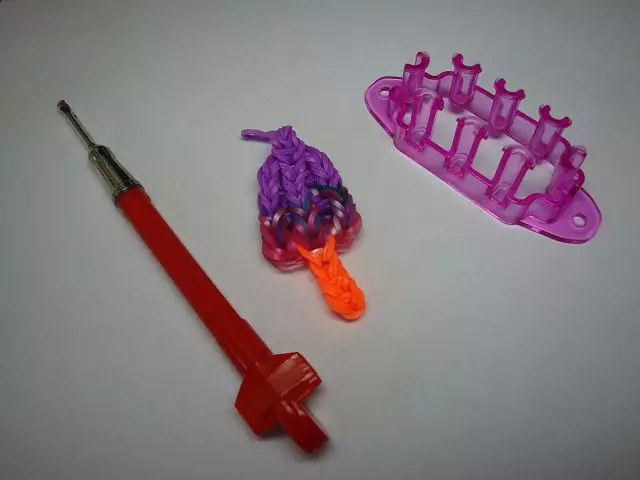
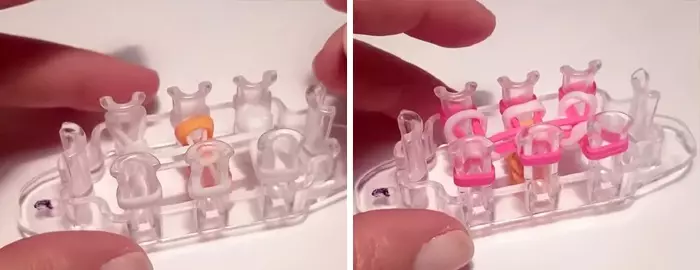
To create a toy, we need a set of rubber band with a machine for weaving Monster Tale. This is a reduced copy of the standard large machine for weaving. With it, you can create a variety of figures.
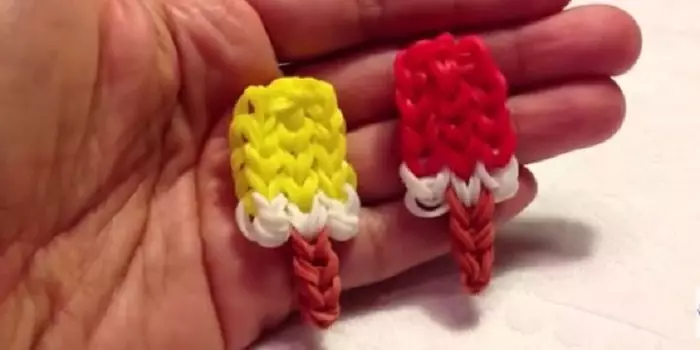
We will need elastic bands of three colors: the main color is ice cream body, one for a layer, one more for a stick of popsicle. You need to start a weaving with a stick. Photo gradually demonstrate the process of creating a block. For the leg, 7 gum will be required:
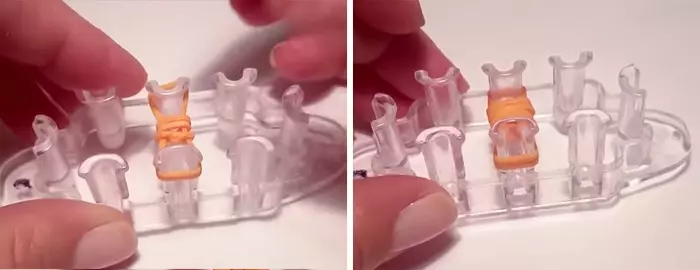
- The first loop is thrown three medium vertical stripping machine.
- Then two new elastic bands are taken and dress up for adjacent columns without twisting.
- The first elastic band in 3 layers is tightened in the middle.
- On top there are two more elastic bands, the lower two on the sides are tightened over and echoed in the center. Then again we repeat with another pair of rubber. Total 3 finished loops are obtained.
- Next, the layer is fruit. On this part you need 9 elastic bands. There are 2 elastic bands of another color, and in exactly the same way they attacked the central columns, and the lower gums are shifted to the center.

- One rubber band clings horizontally for three upper teeth on the machine. On the opposite side, they are wound on one elastic band on the extreme columns. You need to hide in 4 turns. Now they are taken two pairs of the colors of the layer and wear on the extreme pegs, as when weaving wands. Horizontal gum and twisted loops on the sides are dragging in the center. The next stage is weaving the basic body of ice cream.
- For this, one elastic band is also taken, it puts on horizontally on three columns. And further on all three vertical columns, two elastic bands are attached, as when weaving legs. Following the horizontal and two bottoms from the previous layer.
- So repeats exactly three times. On the fourth loop of the basic body of ice cream, the horizontal gum is thrown into three columns on either one, and for two adhesion - eight. It is necessary in order for throwing the ends to yourself when throwing into the center, thereby giving a figurine the cone-shaped form of ice cream.
Article on the topic: Lotus made of paper napkins: master class with step-by-step instructions
Video master class visually demonstrates all the details:
Rubber sweet
If there is no appropriate set with a machine at hand, you can try to weave the rhotka figurine. From the tools you will need only a slingshot, hook and working material.
The first elastic band is thrown on a slingshot column of 3 turns. Following 2 things, which are put on two columns. And the first wound 3 times the rubber band turns into the middle, thus forming an initial loop. Next, 2 elastories are thrown out and the bottoms are thrown into the middle. Repeat the process - the wand is finished.
The main part of the ice cream will be fruitful:
- In an absolutely similar way, two elastic bands of ice cream layer, one loop is formed.
- Then there are three loops of the base ice cream, each of the two stuff of material. The main backbone on it is over.
- The finished piece must be transferred from the left column to the right. A new pair of rubber band is taken and stretched in a hook in the layer color loop. The second end of the rubberry picked up with a crochet and puts on with the left column.
- Two rubber bands of the main ice cream are pounced again, all 4 end of the layer of the layer color from the left column are dragged into the center.
- Three times pounce two rubberbers, alternately inserted - the bottom layer from two columns moves to the center. All the ends are moving on one column to propagate ice cream from the second side.
- The action is repeated, starting from paragraph number 3 and to №5 inclusive. It is necessary to find the central laying of the layer, to turn it and have two more elastic bands and the resulting loop to throw on the adjacent empty column of slingshot.
The product ends already on the hook. On both sides of the slingshot in one layer, there is a rubber band, all the ends are transferred to the middle. The resulting loop is removed with a crochet and tightly tightened, stretching one end through another. Ice cream is ready.
Article on the topic: Large paper snowflakes: Schemes and patterns for cutting
On two forks
There is a third opportunity to make a horn - weaving on the fork. In this case, the function of slingshot columns perform the flails. The initial loop is formed using a hook. A rubberry is taken and thrown into two turns to the instrument, forming three rings. Next, the new two rubberbies are captured with a crochet and stretch through the rings. Both ends of the new shells are put on the hook.
The hinges from the hook gently outweigh the forks, on each side to two teeth. The weaving process is repeated as on the machine, the columns protrude. The order is the same - three loops of the sticks and one layer loop are inserted. One horizontal gum is attacked on the teeth of only one fork. Side loops are formed on the hook. A rubber band is thrown into the layer, and then the loop is stretched out of two rubberbers. The ends of the loop wear on the extreme teeth of the forks. Next, still the same loop is formed and put on the other end of the teeth. Horizontal rubber shifts in the center.
The final stages of weaving occur as in paragraphs No. 7 and No. 8 of the first method of weaving on the device from the set. So three levels are tied. At the fourth level, two gums are attached only to the extreme teeth. After their interlacing, the side loops are transferred to the central rows of teeth, both on the same fork and on the other.
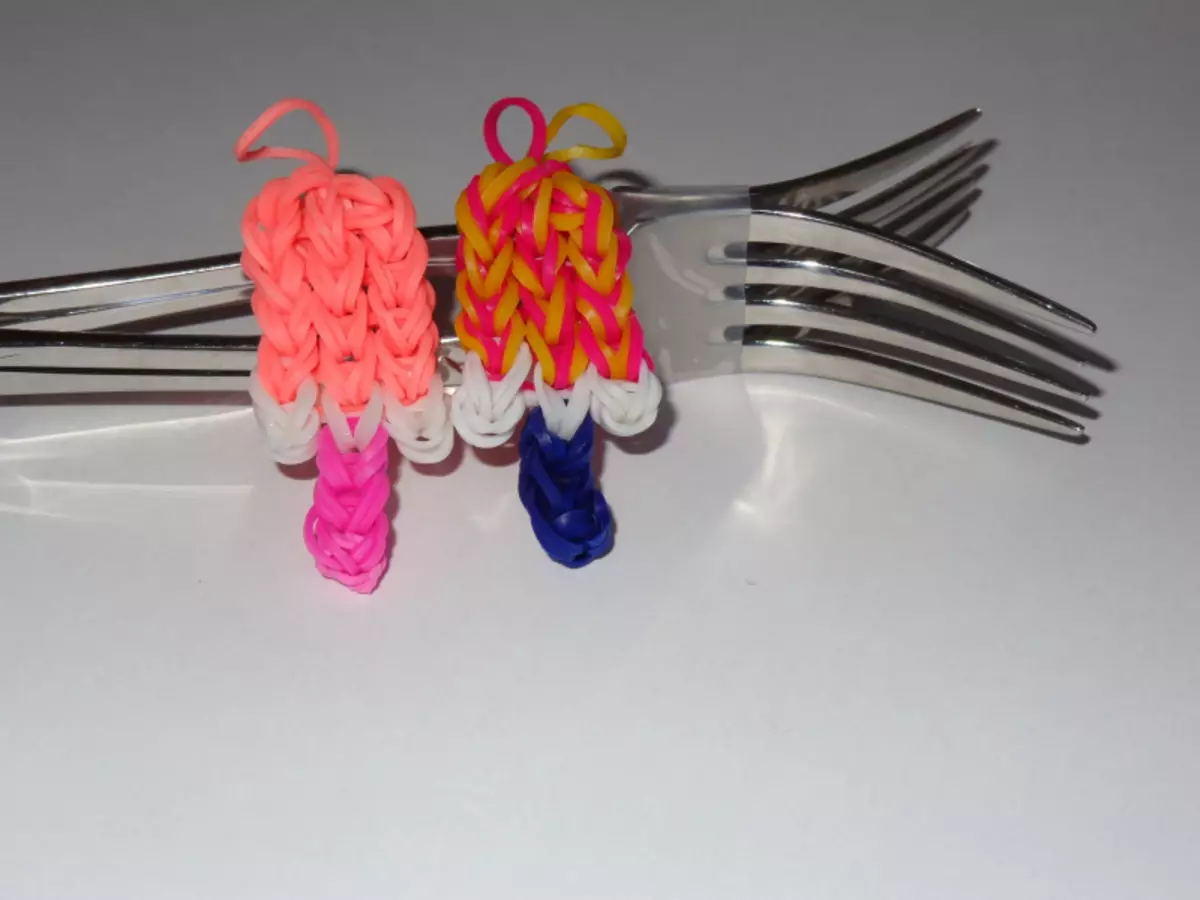
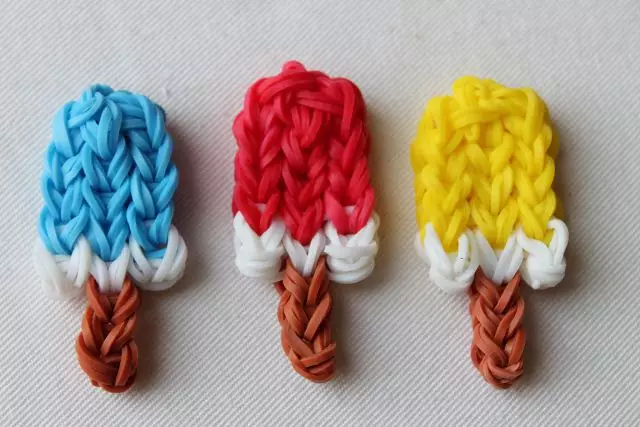
After the end of the weaving, it is necessary to give a product to straighten and give the appropriate shape of the ice cream.