
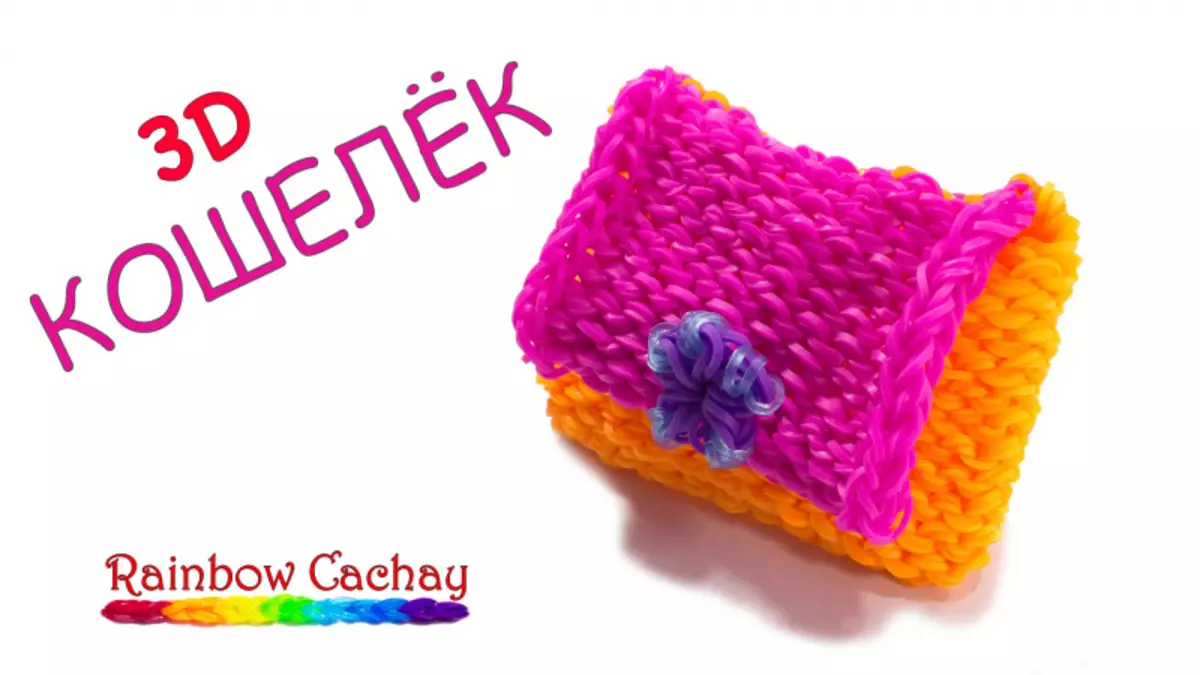
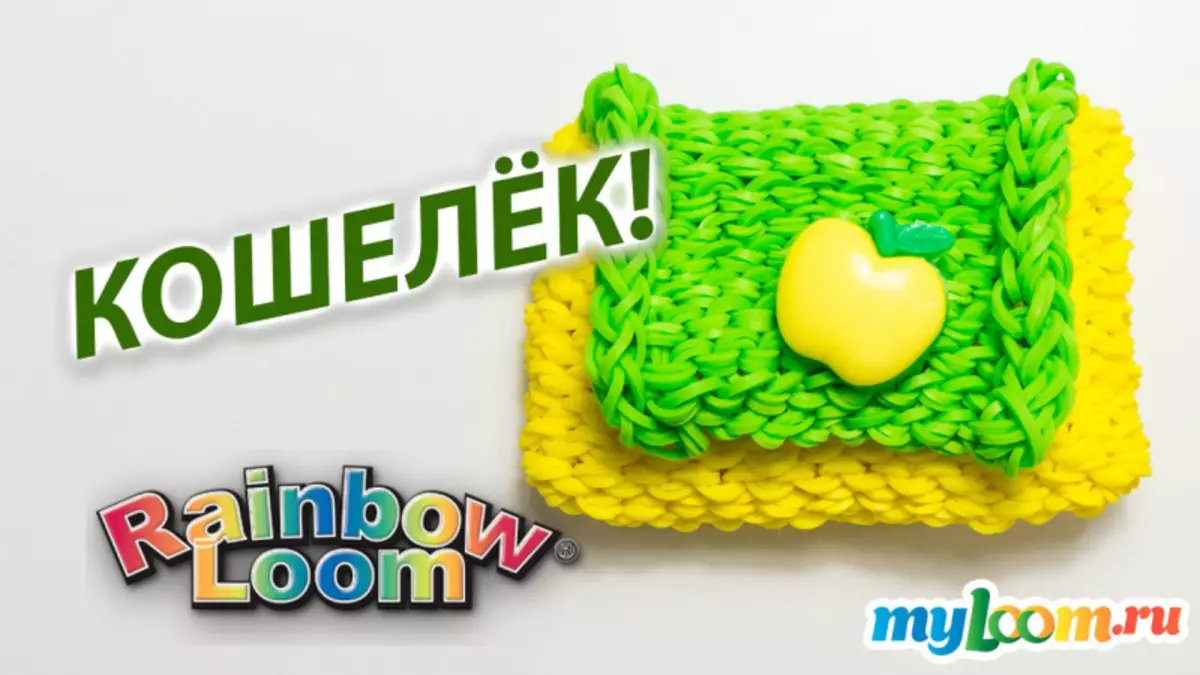
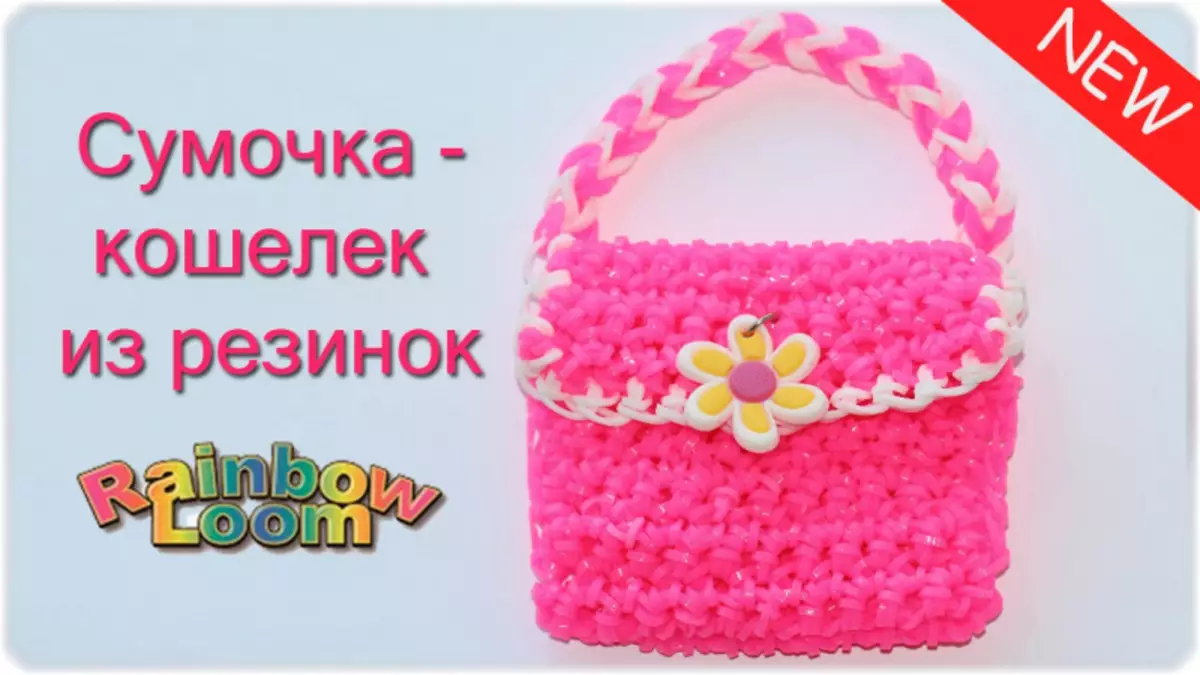
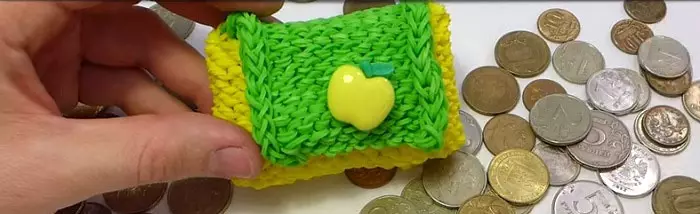
It turns out that from the rubber bands are not only all sorts of baubles, but also very useful accessories: bags, covers, cases, belt. The principles of creating such products can be perfectly considered on the Weave Bag Wallet. The most convenient way to weave the wallet rubber is to take advantage of a large machine.
There are weaving methods and without a machine. At the end of the master class, video lessons of such schemes will be given.
Main part
The central row of columns is understandable, and work goes on two extreme rows. The open part of the near-row columns rotates to the right, and the distant on the contrary - to the left. You can take both different colors for the basic body of the wallet and the lid and the same. Newcomers are more suitable for discern, as it will be easier to navigate in the loops, where the beginning, and where the end.
1) Weaving begins with a nose wallet. The gums are attached diagonally, the near row is the first column, the distant range is the second column. The number of rubber bands - on the desired length of the wallet or the maximum possible on the machine.
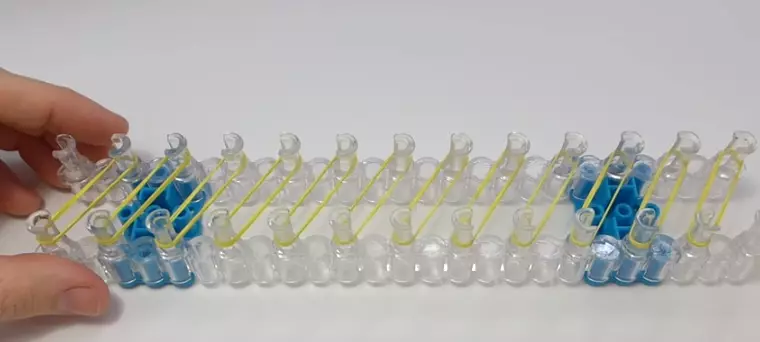
2) The same scheme is repeated for a long range, only on the contrary, so that the rubber points go crosswise. Such an interweaving of the letter X will serve the bottom of the wallet.
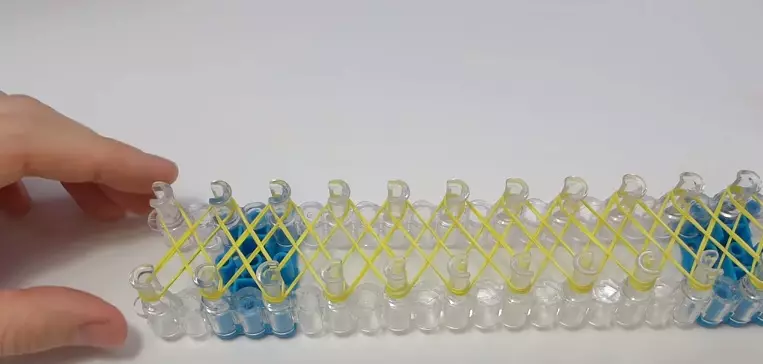
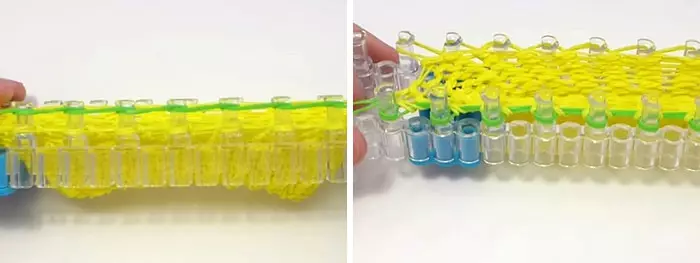
3) Then the walls themselves are flown. You need to wear elastic bands by the usual overlay along the perimeter of the machine: from the first column engages for the second, from the second - for the third, from the third - in the fourth and so to the end. From the last column of the Middle Ages, the gum is attached to the far, weaving continues in the opposite direction and closes at the end on the other side.
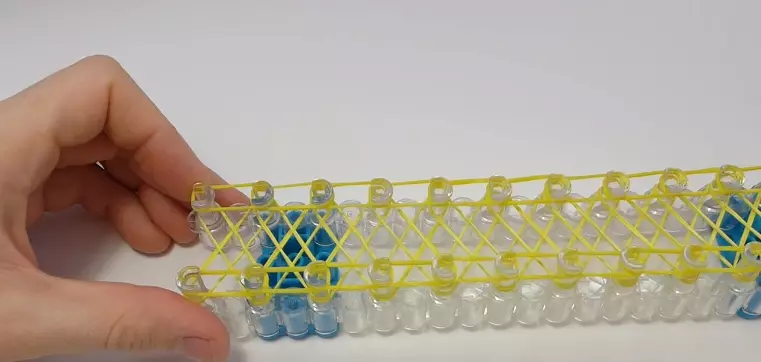
4) On each column under the top elastic, there are 4 loops (except extreme, there are only two of them). All lower loops on both sides are tightened through the top and move to the center. Next again on the perimeter wear single gums. And the process is repeated. In this way, 14 rows should be weave.
Article on the topic: how to sew a baby cap with their own hands: Pattern with description
As the layers increase, the woven part can be pushed to the central opening down so that it does not interfere with the hands and did not occupy the place between the columns. 14 rows are quite enough for a small standard wallet.
It may seem that the woven wallet turned out to be a small, but this is just because the product is in a stretched position. In completed form, it will acquire the necessary shape and length.
Walfning of the lid
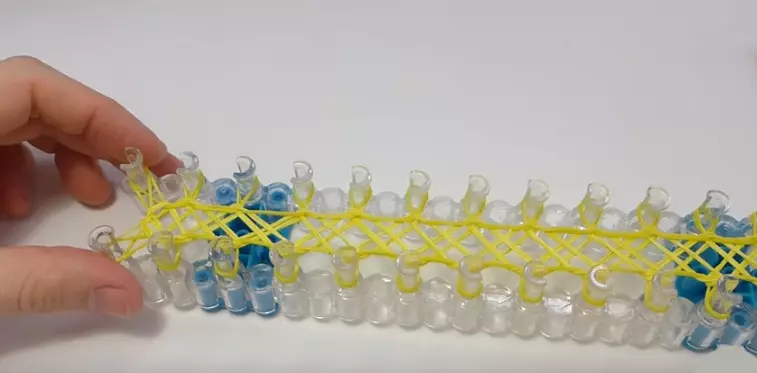
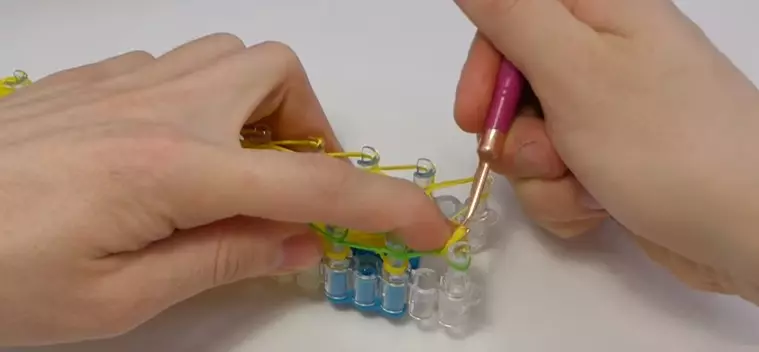
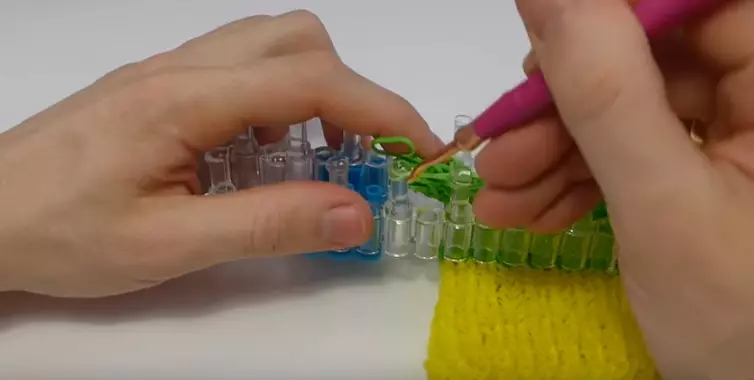
There is a weaving in the near row of columns, and another color gums continue to be frightened for a wallet cap. To complete the first wall of the wallet, you need to gradually roll off the loops on the adjacent columns. In this process, it is desirable to have a hook.
From the extreme column of the right column, all elastic bands on the left column are thrown out. Now the hook is captured by the lower two elastic bands from the inside, stretched through the top and transferred to the next adjacent column. In this way, the entire row is inserted to the other end of the product. Rubberies from the last column are then thrown to the working distant row. Thus, the front side closed, then the work will continue with it.
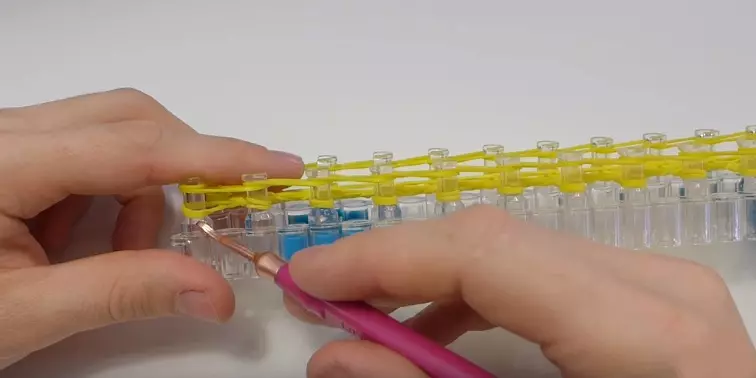
On the working rear edge of the machine you need to penetrate a piece of other color (if the wallet was chosen with two-color): from the first to the second, from the second to the third and so to the end. For the convenience of work you can already turn the closer range. Now you need the bottom layer from each column to throw inward. So repeat 10 layers - one eraser pairly on the adjacent columns and the lower loops are dropped into the center. After each carrier row, the wallet falls down slightly down to be a place for new looping.
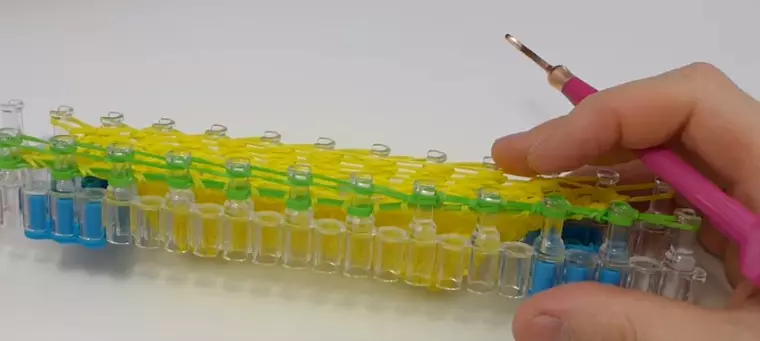
After the second woven row, you can already remove the finished first side, it will not break, as the ends will be well ventured further into the lid.
Article on the topic: A variety of lamps in the style of Provence
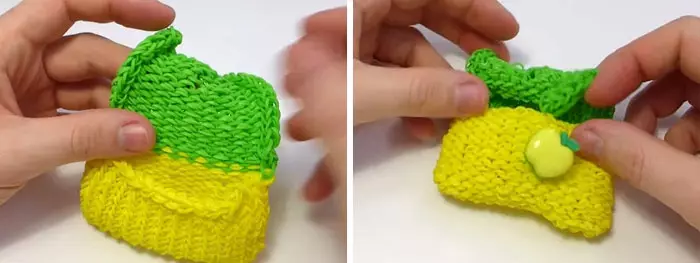
If you need to make some kind of decoration or add an intelligence so that the walields are closed, then you need to simply remove the loops in the selected place and redo the adjacent column. In this case, the loop will be in the middle, the loops from the central column are removed. Then another level of single elastic rubber is thrown. But now the main thing is not to forget that in the first layer, which will go after the slot for the buttons, you need to throw the band with a slot to the slot with the slot, so that it goes the cross. Further, all the lower (except for the button for buttons) loops from columns in the middle are also dropped. Further another 3 layers are created with the usual way.

This option wallet has no handle. But if there is a desire to attach it, then the easiest way to weave the ribbon on the slingshot.
The last step is the carrier of the end of the cover so that the wallet does not break. This is done in the same way as in case of completion of one side of the wallet. The extreme right loop moves to the adjacent column, the lower loop is raised on the hook and stretches through the top inward, and then throws over the next column. And so to the end of the row. In the last loop on the extreme left column with the help of a hook, one gum is used and tightly tightened. Work can be removed. In the end, it remains only to attach an intelligence to the base.
A twisted halver is drawn into the button and a loop is created. From the inside the wallet at the level of the slot cover with a crochet is raised by the loop on the button and stretches inside. Then, with the front side, retreating a little from the fastener, the elastic band stretches back forward and thrown over the adhesion to the button.
Video on the topic
If after reading there were still some questions, the visual video of the entire process will help to navigate.
In the following selection provided master classes for needlewomen who lack some devices. For example, the option of weaving the handbag-wallet. It will take only 414 rubber bands and one hook.
Article on the topic: 5 ways to preserve ginger at home
Such purses figures can be created only on your fingers and hook.