
When buying an embedded oven, sellers recommend entrusting the connection of equipment to professionals. But this service even if there is a normal posting, there is about 1,500 rubles (about $ 25), which has already been a lot. And if you have to pull the line from the shield, the cost is still increasing, and solid. But the ordinary person who knows how to keep a screwdriver can connect the ovenslock. With the installation of a separate power supply line, the case is a bit more complicated, but can also be cope. The only minus such actions - you will not be filled with a corresponding graph in the passport. Based on this, you may refuse warranty repair if a warranty will come suddenly. So the choice is yours.
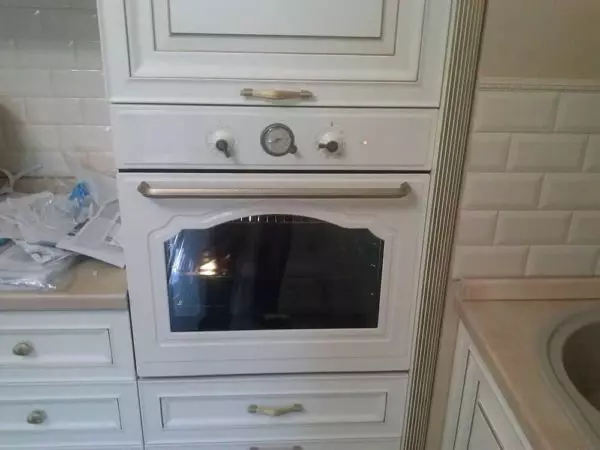
An independent oven can be installed in the penalty
Electric brass cabinets are two species - dependent and independent. Dependent go with a cooking panel and connected with it to one power source. They should be nearby, usually a cooking surface over the oven. Between themselves, they are connected by cables, since the position of the oven controls affects the work of the cooking panel. All requirements are written in detail in the instructions and they must be performed exactly.
Independent brass cabinets are completely autonomous devices that are connected independently. The choice of place of their installation is also arbitrary. Therefore, probably such models are more popular.
Connection order
Regardless of the type of device, the connection of the oven occurs in several steps:
- It is necessary to evaluate the existing wiring. You can connect the oven only if its condition is good, the cross section is not less than the required and on the line there is a circuit breaker or at least a switch that can be deranged to deraid the equipment during an emergency. If the available wiring does not comply with the requirements, it is necessary to pave a new track from the shield to the intended location for installing the oven. On this line it will be necessary to put an automatic machine of a suitable nominal. We will talk further about the cross section of the wires and the nomines of the machine guns.
- Prepare oven to connect to the power grid. On the oven can have a network cord. Sometimes it ends with a three-pin fork (with grounding), sometimes no forks. Depending on the connection method, you can install the plug on the cord, and you can do without it. You can even change the cord - it does not even affect the guarantee. The whole thing is which method of connection you will choose - traditional through a three-pin socket with a fork or through a terminal block. Depending on the selected connection method, make a connection of electrical wires (about it in more detail below).
In some cases, a network cord with a fork is already connected to the oven
- Prepare a place to install an embedded oven. Typically, manufacturers recommend that the cold air arrived at the back and below for ventilation. If there is a rear wall in the furniture, it makes a hole in it or at all it is cut as far as possible. To ensure air flow from below, it is possible to lay the linings with a height of several centimeters on the sides (it is important that the air gap remains up between the oven and the worktop also. In addition, the side racks of the cabinet must be fitted under the size of the oven - it must be fixed to the sores of screws.
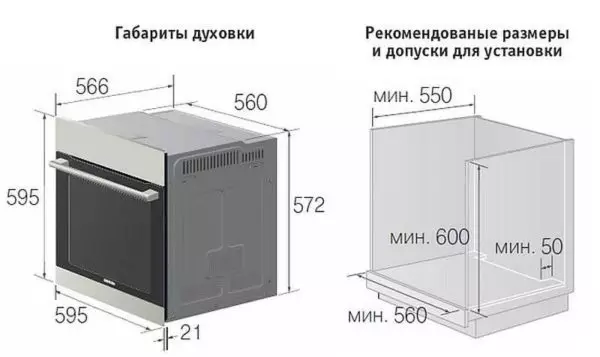
This Watch Plan will be in your instructions with accurate mounting dimensions.
- The built-in overall cabinet is installed in place, check the verticality and horizontalization of the installation by the construction level, if necessary, corrected. Open the door, on the side boards there are holes, install the screws that will keep the oven in place. So that when screwing into the walls of the furniture, they do not break down, pre-hole the hole, using the drill with a diameter of a little less than the diameter of the self-press.
On this, actually, everything. Connect the oven closet already connected, but not all the nuances are clear to the end and, most likely, there are a lot of questions on the electrical part. About them and talk further.
Connecting to electricity
If you are fine with your wiring, it has been laid recently, there is a separate line for connecting with a working ground, and the oven is not very powerful - about 2.5 kW, there are no questions - put the plug, turn on everything. But if the wiring has been for more than ten years, in what state you do not know what section the wire is unknown, it is better to stretch a separate line, to do everything according to the rules and only then connect the oven. In this case, you do not have to be afraid that something happens to the wiring.
Connect the built-in oven can be in a normal line. Better so that it is allocated - only for this unit
Conductor cross section and nominal protection machine
The latest models of wind cabinets have become not very "voracious" - the struggle for savings gives its results. If you see their characteristics, the average mounting power for the embedded oven is within 2.6-3 kW. But this is a speech of fairly expensive products. The equipment in a cheaper segment may have significantly greater power. Also more powerful will be models with pyrolytic cleaning.That is why to connect the oven is recommended for a selected line with a large cross section of the conductors, on which the protection machine is installed. The recommended section is 6 mm2. Such a conductor maintains a long-term load of 10 kW, which is more than enough. This line is recommended to install a class protection machine with 32. This is a very large margin of strength - lines with such parameters often put on entering the cottage or to a house in the village. Its gasket will require solid investments - and the cable is not cheap and the machine is enough.
| Copper wire section | Permissible long load current | Maximum load power for single-phase network 220 V | Nominal Protective Current | Protective Machine Current | Approximate load for single-phase chain |
|---|---|---|---|---|---|
| 1.5 square meters. MM. | 19 A. | 4.1 kW | 10 A. | 16 A. | Lighting and alarm |
| 2.5 square meters. MM. | 27 A. | 5.9 kW | 16 A. | 25 A. | Outlet groups and electric warm floor |
| 4 sq.mm. | 38 A. | 8.3 kW | 25 A. | 32 A. | Air conditioners and water heaters |
| 6 sq.m. | 46 A. | 10.1 kW | 32 A. | 40 A. | Electric stoves and brass cabinets |
| 10 square meters MM. | 70 A. | 15.4 kW | 50 A. | 63 A. | Introductory lines |
If your ovens has a power much less than 8 kW (even with the simultaneous inclusion of all available devices), you can lay a cable with a cross section of 4 kV. MM, and put the machine with 25. It will not be less reliable, but more economical. By the way, for greater security, when installing a brass cabinet, it is recommended to use bipolar protective machines. When they trigger, they will turn off not only the phase, but also zero, that in some cases it is important (when testing isolation).
Cable You can use WGG or NYM. Parameters, respectively, 3 * 4 or 3 * 6. Just when buying, be sure to measure the conductor diameter - too often manufacturers in attempts to make products cheaper, saved on copper. As a result, instead of the stated 4 square meters, we have 3, and this is already unsafe - wiring can warm up, which can lead to a short circuit and fire. So, check the conductor diameter. For cable with a cross section of 4 square meters. MM It must be 2.26 mm, for 6 square meters. mm - 2.76 mm. Read more about how and how to measure how to count on, read here.
Uzo - need or not?
On the line to which you can connect the oven, except the protective automaton, it is recommended to install also the RCD. The machine protects the wiring from overheating and short circuit currents, and the RCO is a protective grounding device - will protect users. When testing isolation to earth or in case of touching the phase wire, it will turn off the power supply. The electrician is the area in which it is better to be restrained and the UZO is usually reinsurance, but better if it is. Safer.

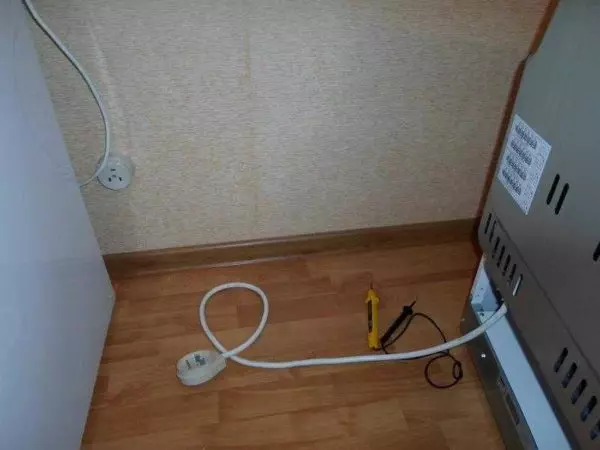
So looks like a connection of the oven
The selection of the parameters of the Uzo is simple - its nominal one step is higher than the nominal protection machine. That is, if you installed a 25 A automatic machine, you take 32 A, if the packet is 32 A, the UDO will be needed at 40 A. The second parameter is the cut-off current. With it, everything is simple - for the lines to which one device is connected to 10 mA.
We still have to discuss the type. It is better to set the class B (b 25, for example), but class A (A 25) is also suitable. But you should not take the class AC. They, though cheaper, but do not provide a proper degree of security.
Once again: if you want to connect the oven correctly and securely, use a large-seen wire, automatic protection and RCD. This installation will guarantee the long-lasting and safe operation of the equipment.
Socket or shoe
Connecting a brass cabinet to the power line is possible in two ways: using the power plug and sockets with suitable parameters (selected at maximum current, which should be specified in the specifications) or in the "Safe operation" section. If we talk in general, then with a power of 3-3.5 kW, you need a plug and a socket with a maximum current 15 A, for a glass cabinet with a capacity of up to 5 kW, a rosette with a fork for 32 A.
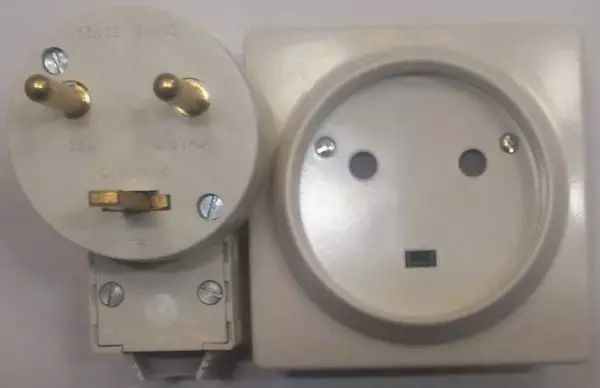
Power plug with a power outlet calculated on 32 A
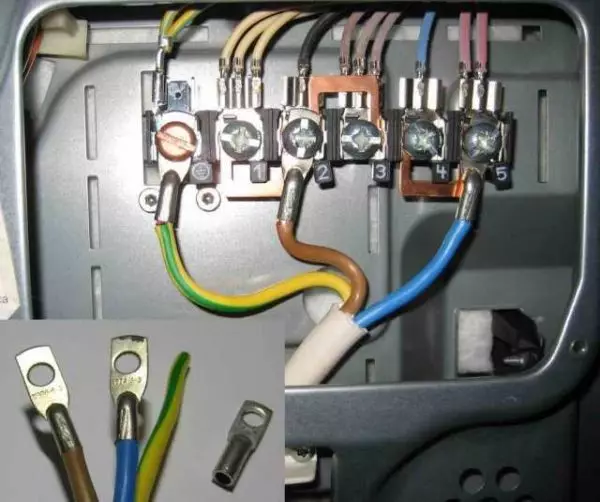
Ground wire (usually yellow-green) is connected to the lower connector, to two other phases and zero (blue or blue). When connected, do not confuse - the phase and zero on the outlet and the plug must match.
Second connection option - terminal block. This is a way simple and reliable. There is a plate of heat-resistant plastic, on which several pairs of contact plates and screw clamps are mounted. The wires of two cables are connected from two opposite sides. When connected, the color marking is observed: the yellow-green wire is "earth". These conductors are connected strictly one opposite the other. The same with the wires of blue color is neutral or "zero". The remaining wires are a phase and they are also connected one opposite the other.
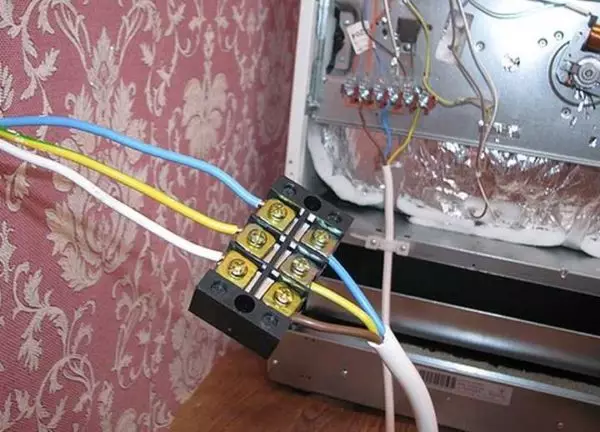
Using a terminal block for electrical connection of the oven
It is necessary to work, naturally, it is necessary when the voltage is disconnected - to translate the machine to the "off" position. The wires are connected simply - stripped by 7-9 mm. The conductor is inserted under the top plate. It can be pre-weaken - to turn the clamping screw to a pair of revolutions. After that, the screw is clamped, providing good contact. After the screw was dragged, several times in a sufficient effort to twist for the conductor - make sure it is well fixed.
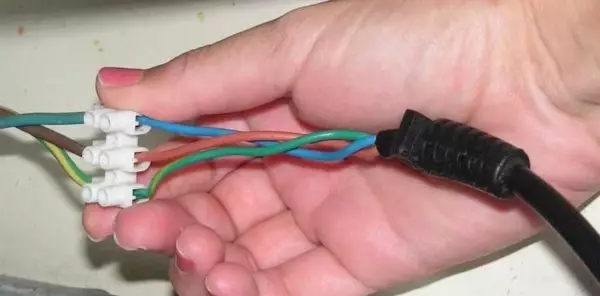
You can use such terminal blocks, but they must withstand the corresponding current (15 A or 25 A) depending on the power of the oven
In order for the terminal block with the wires is not open, it can be (and very desirable) to pack into the housing. You can use a conventional mounting box, and you can a small plastic mounting cabinet, in which you can pack everything very carefully.
Jumper
In most cases, the store is delivered to the brass cabinet with an already attached network cord. Naturally, in this case, jumpers are already installed in accordance with what network you have are single-phase or three-phase. But if there is no cord, you need to put jumpers on your own.
If you look around, you will see that the jumpers are already standing. These are copper plates, similar to the letter "P"
It is not at all difficult. On each device and in the instruction manual there is a table in which what jumpers are drawn for which networks. An example of such a table in the photo below. In this case, it is crushed on the back cover, but can be glued near the place where the conclusions come from the oven and where the cord is mounted.
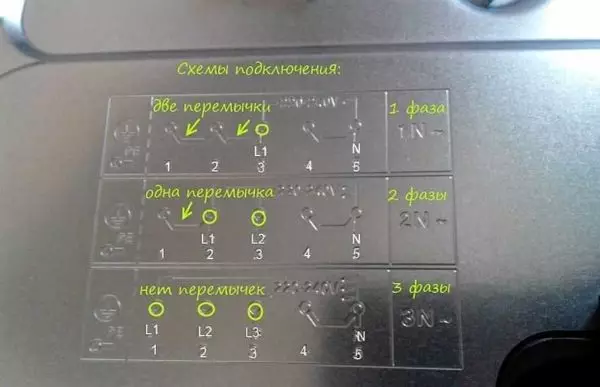
Sample table for installing jumpers on the oven when connecting an electrical cable
As follows from this scheme, the first diagram is suitable for a single-phase network of 220 B. It signed 1n. It is shown that in this case it is necessary to connect three outputs signed 1, 2 and 3. To do this, you need to install two jumpers. Please note that the output of "Earth" in this model is on the right. A yellow-green conductor should be approached to it, we also connect there and from the cable / cord.
The extreme left is the output to connect neutral or "zero." Please note that there should also be a jumper. It usually stands by default (always), but check does not interfere. To this output, the blue wire is suitable, the same color conductor is connected from the cable.
The remaining reason is phase. By installing two jumpers for the remaining three contacts, connect this wire. It can be any color except yellow, green and blue. Most often has a black, brown or red color, but not necessarily.
If you have a three-phase input (380 V) in your home or apartment, then in addition to the jumpers on the wires neutral, others are not needed. In this case, it is also better to connect the protective wires first - grounding and neutral - and then already phase. The procedure for connecting phase wires is not important, but it is desirable that they have been connected in the same order as on the electric fork. Just the less confusion, the better.
Article on the topic: How to make an openwork lambrequin from the cord: stages of the technological process