
The envelope for the doll will bring great joy to the child. Work will take quite a bit of time, and the children will be happy and satisfied. This article provides two master class on working on the envelope for the doll with their own hands, knitting needles, and over the envelope created from denim.
Knit spokes
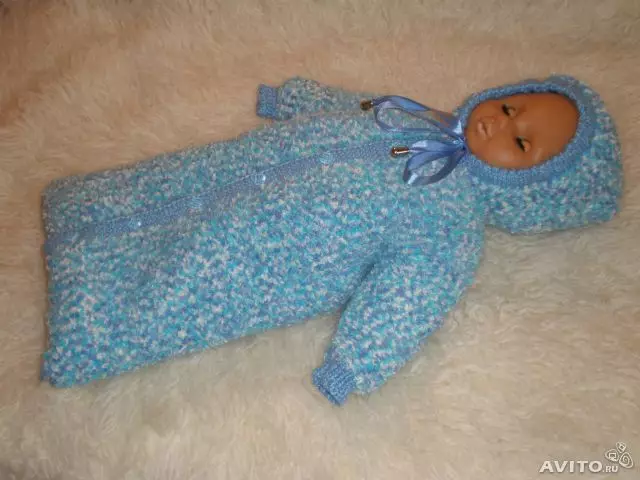
Warm envelope can be created in a short time. The color scheme of the product can be different at the discretion of the needlewoman. To such an envelope, the phased scheme of which is located below, you can connect the cap and mittens for the kit. The work is easily accomplished, therefore is available as novice needlewomen and craftsmen.
Materials:
- acrylic beige thread;
- thread acrylic blue shade;
- Spokes number 3.5.
For a doll, which has a neck 21 cm, you need to dial 38 loops. Then these loops are divided into three parts:
- Back;
- Two sleeves;
- Two shelves.
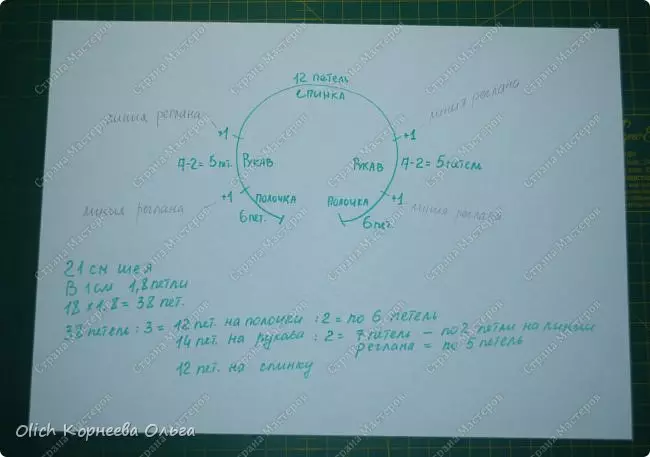
Please note that when the hinge is set, you must definitely add 1 loop for the regulated.
On the knitting needles, 38 loops of the blue thread are recruited.
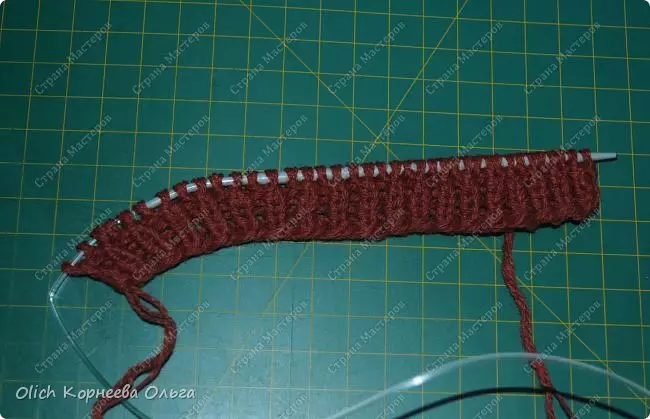
There are 5 rows of gum (1 individuals., 1 isna.) Without adding loops. Blue thread changes to beige. Begins a barn bits. On the front rows, before and after the lines of the regulated, add 1 loops (4 × 2 = 8 loops). There are no additions for the insoluble row. Plank height - 7 cm without gum.
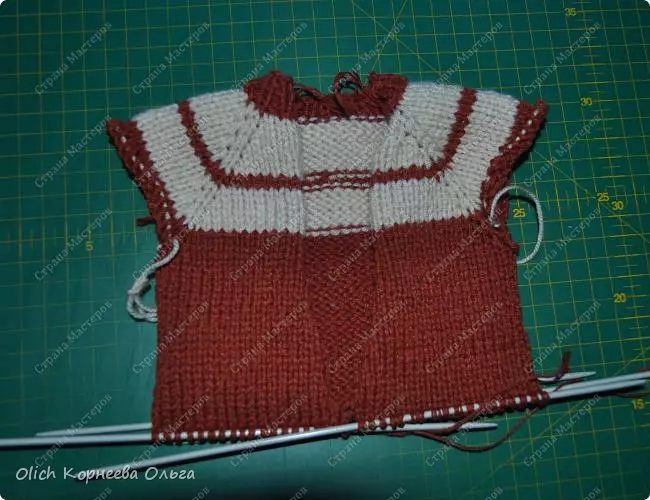
Applying mating to the doll, you can control the length of mating. When the work was tied to the armpits toys, loops intended for the sleeves are removed on other knitting needles.
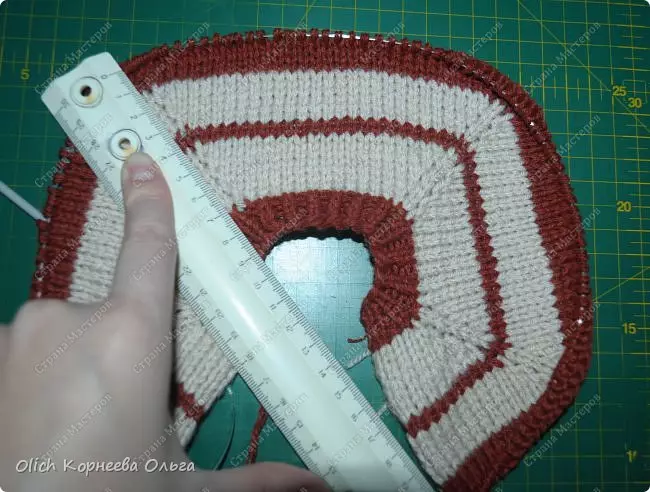
The knitting of the backs and shelves is further without adding. Loops sleeveless are waiting for their turn.
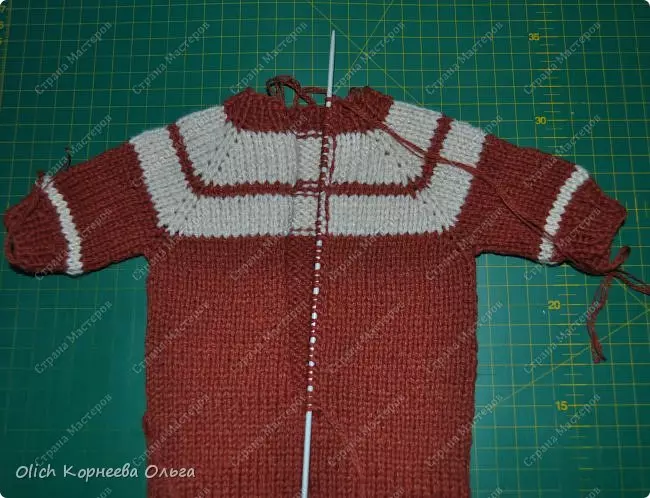
The envelope further knives more centimeters 18, after which it connects to the circle. The cutout length is to control the doll so that it is free to enter the product. The length of the envelope takes the growth of the doll. The loops are closed.
Article on the topic: Coffee tree do it yourself from grains with step-by-step photos and video
Next is carried out knitting sleeves. From the 27 remaining loops, one is reduced in the field of armpits.
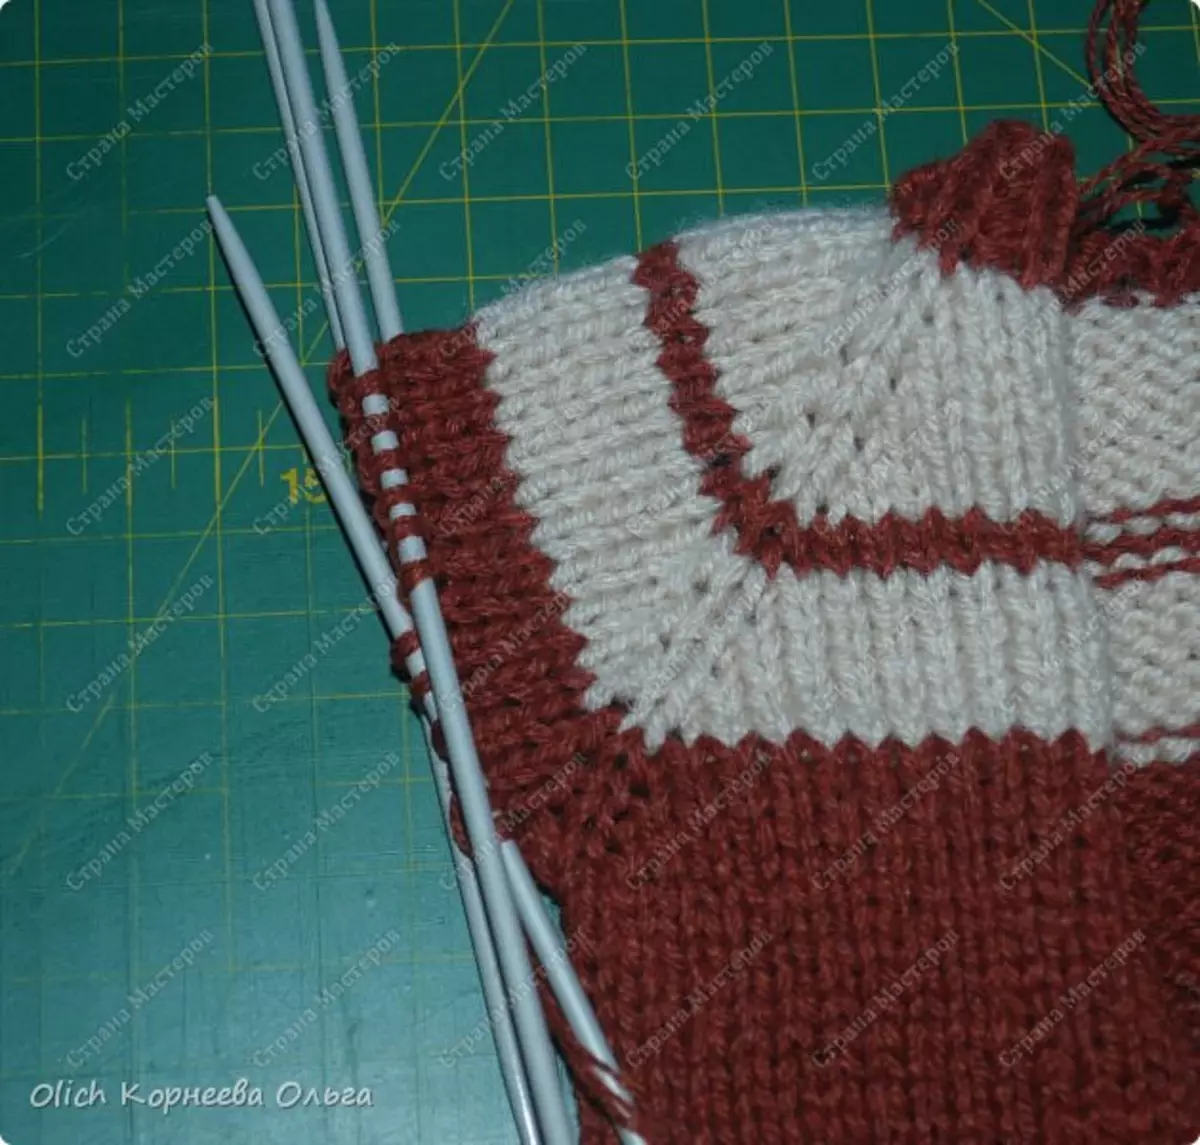
The remaining 25 loops are pronounced by 15 rows, changing the color. Saving 16 row, 6 loops are reduced. Final 20 loops are tied with a rubber band, about 15 rows. For the second sleeves, the diagram is repeated.
For the cutting line, a plank with a set of 40 loops is told. On the bar, hole holes are tuned. To do this, it is written by a rubber band of 3 rows (1 individuals., 1 isna.). On the fourth row, in places where buttons will pass, 3 loops are closed.
When a row with holes under the buttons are finished, it is necessary in the next row of these 3 loops to dial, with the help of a simple Nakid. 3 rows of rubber band and loops are closed. The end of the plank is sewn to the envelope.
On the spot opposite to the holes under the buttons, the buttons themselves are sewn. The bottom of the product is stitched.
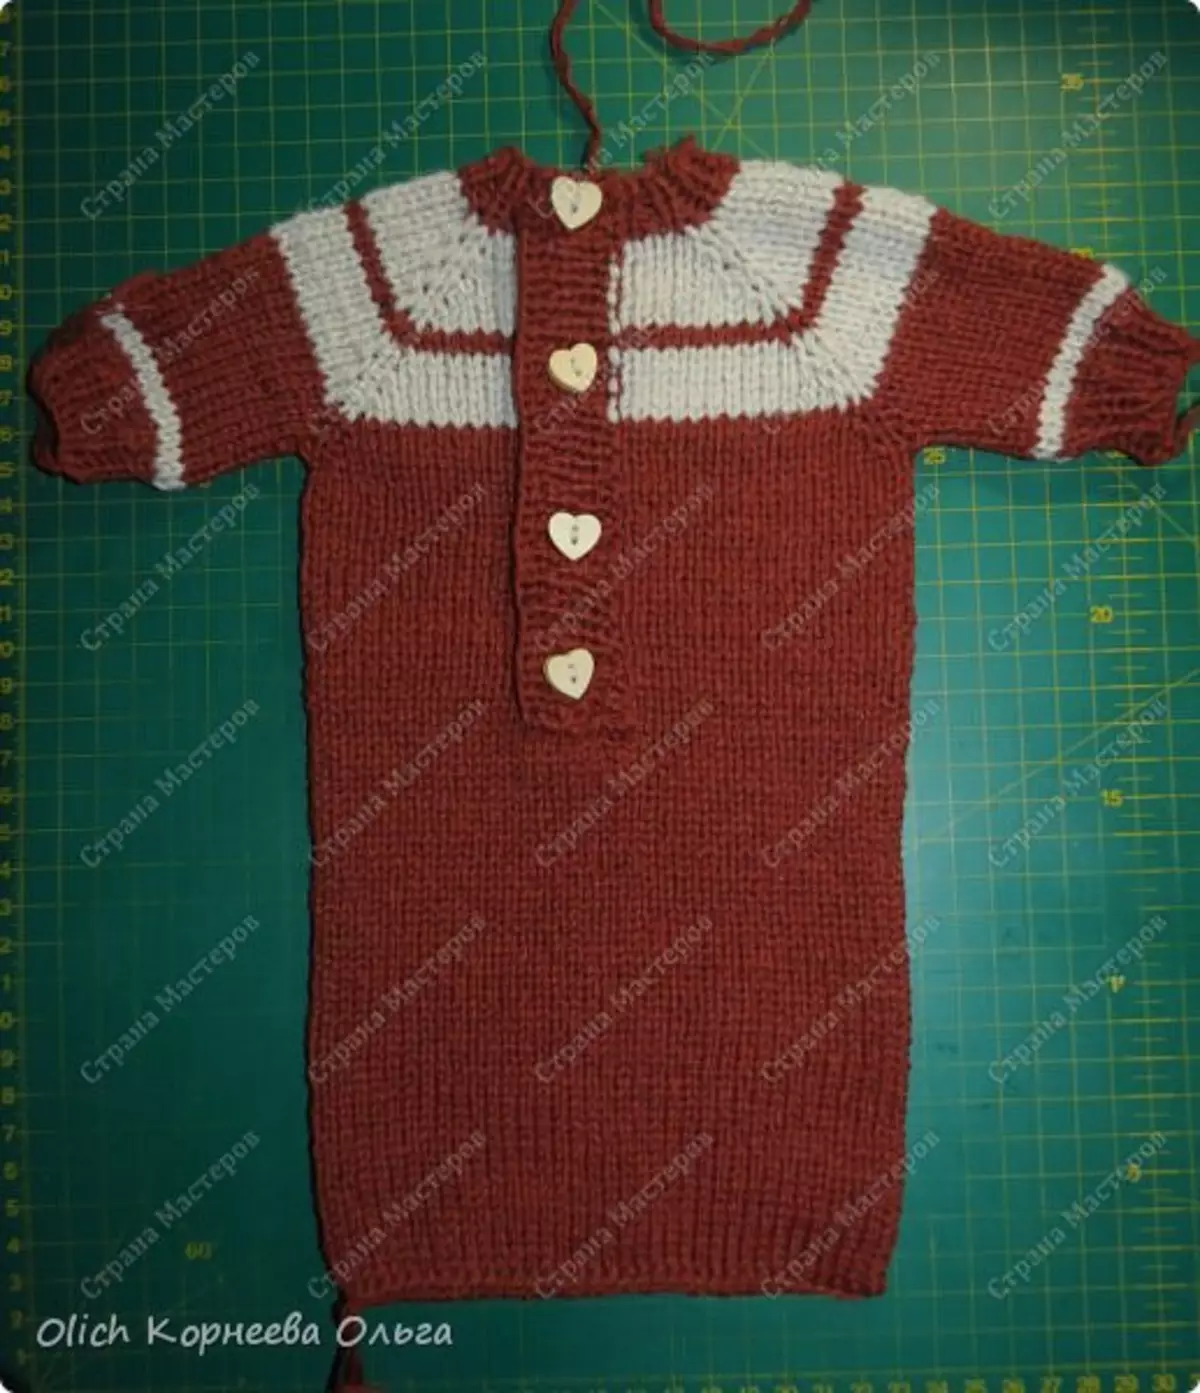
That's all, the envelope for Baby Bon is ready.
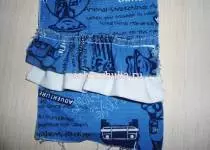
Jeans tissue sew
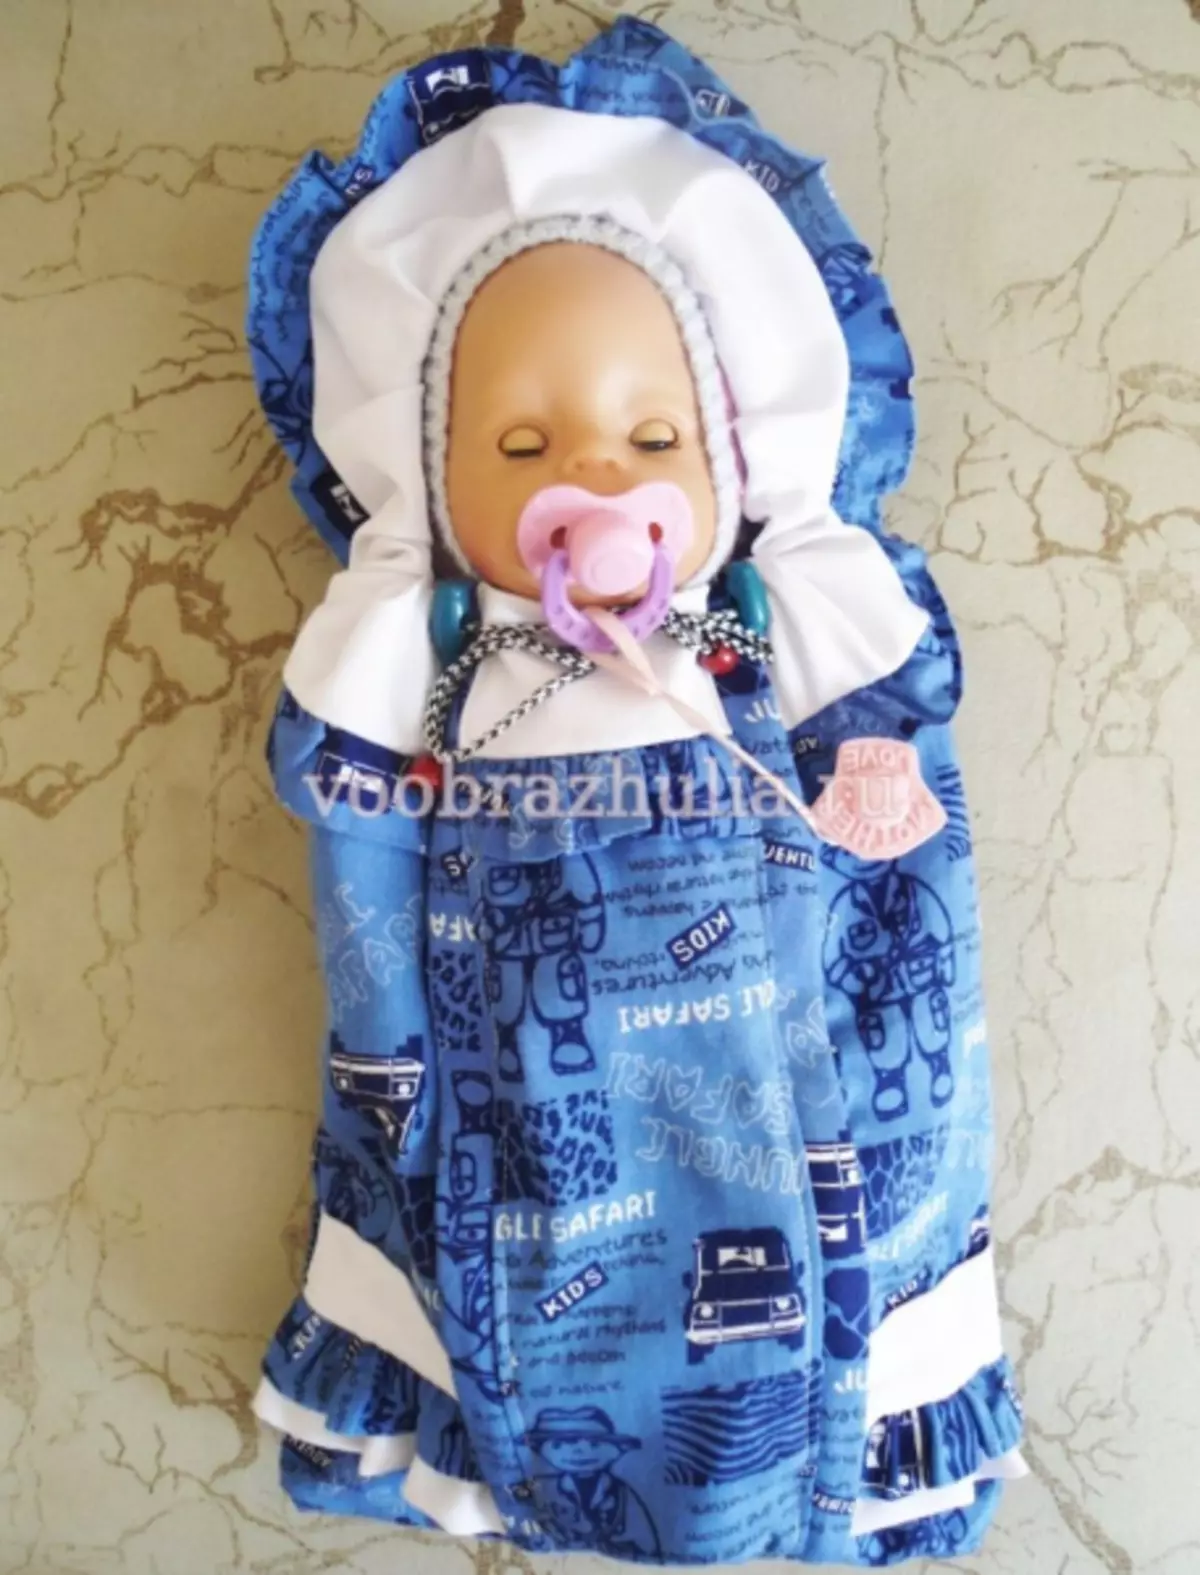
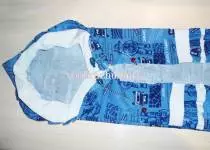
The proposed product with white finishes and denim assembly is an excellent option for winter clothes for your favorite baby toy.
Required toolkit:
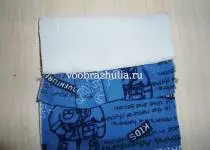
- Denim fabric (DT) 1 m * 75 cm;
- Gabardine white (GB) 1 m * 75 cm;
- cord 90 cm;
- 2 zippers up to 40 cm;
- Locker clamps 2 pcs.;
- meter and chalk;
- Sewing threads.
To create a masterpiece, you will need no more than 2 hours.
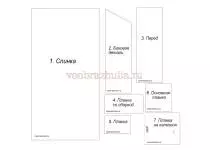
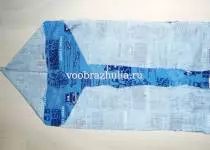
The prepared pattern is necessary for clipping accurate contours and envelope size.
DT serves as the basis for two lateral parts, one back, one detail of the transfer, two slats 38.1 * 4.1 cm, one plank 95.1 * 4.1 cm and three ordinary planks from GT one plank for a hood is created, two strips Simple and two strips with assembly, one main plank.
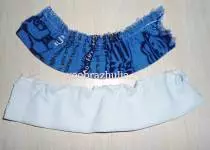
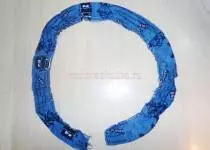
The planks with the assembly of DT and GT are folded in half and stitched at a distance of 0.5 cm from the edge. The threads at the beginning and at the end of the plank are tightened and fixed by the node. The length of the finished part is 11.6 cm.
Article on the topic: Cross embroidery scheme: "For bed linen" free download
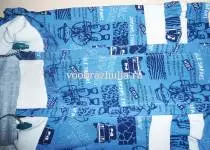
White plank from GT is sewn from bottom to 7 cm to the side part.
Side parts are sewn from DT from Niza by 9 cm, closing the seam of the plank from GT.
The plank from GT is superimposed on Dt bar facet, combining sections and passing seam at a distance of 1 cm.
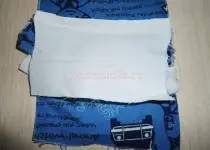
The upper slice of the strip of GT, made above, is cooled by 3 cm, sewn to the side part.
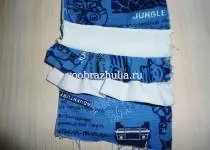
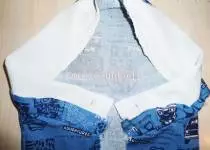
The back of DT is folded in half so that the facial side is inside, and the upper sections come together.
Finished lateral parts are superimposed on the back. All items featured inside. Stitched.
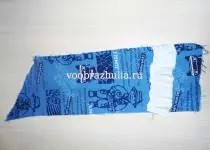
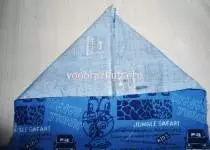
Planck from Dt sizes 95.1 * 4.1 cm folded in half and is going.
Plank from GT to a hood is prepared for inserting shoelaces. To do this, we need to strip holes for ties.

Planck from Dt 95.1 * 4.1 is superimposed on the side parts and the back, then the plank from GT for a hood, folded in half. Seam is stitched, combining all the edges of the fabrics.
In the prepared loops, the lace is inserted, fixed by the retainers and terminals.
On the front side of the part, at the top of the transfer, the plank is superimposed with the assembly of DT and GT, after which the main plank from GT, folded in half. Seam is stitched, combining all the edges of the fabrics.
Planck is superimposed on the main part of DT 38.1 * 4.1 cm, folded in half.
Lightning is sewn on the side cut of the main detail, over a bar of denim.
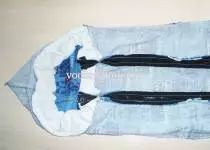
The envelope must be turned on the wrong side and perform the connecting seam of all parts.
The product turns on the front side.

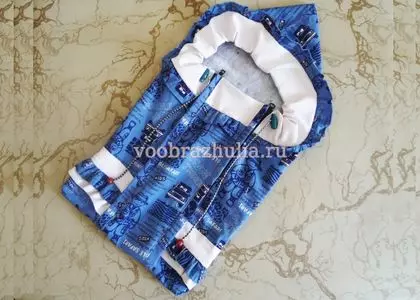
Chic envelope for doll ready!