Such a simple thing like a knitted hat occupies a special place in the fashion trends of this time. The most famous designers and fashion designers add them to their unique collections, extinguishing the stereotype that they do not go to someone. Knitted caps with knitting needles with schemes on the Internet are a huge set, and among them you can find unique schemes of popular masters. Create a memorable image is simply, the main thing is to find a model that is suitable for the form of the face and the color. It is important to prefer with high-quality natural yarns, such as such as cashmere, wool and semide, mohair. Such caps will serve not one season and will look worthy.
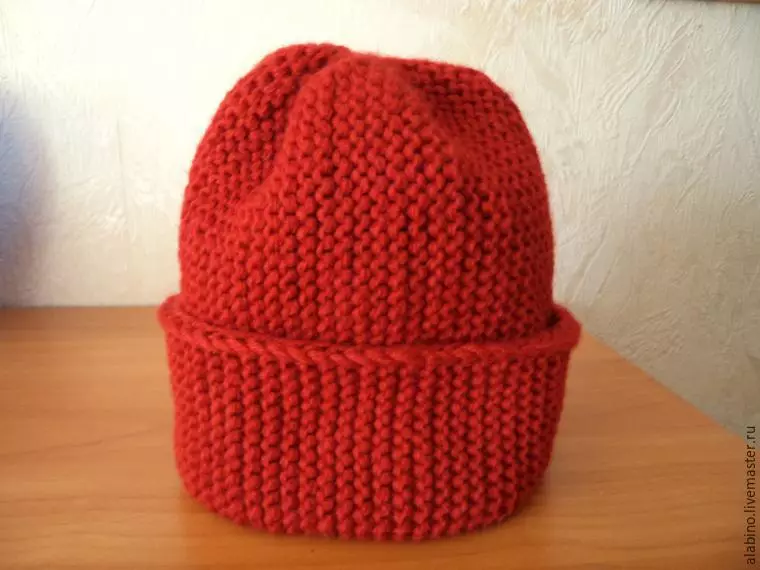
One of the most popular species was the bulk hat, as if released from a grandmother's spokes. A large rubber band or ornament on the header - and the podium image is provided.
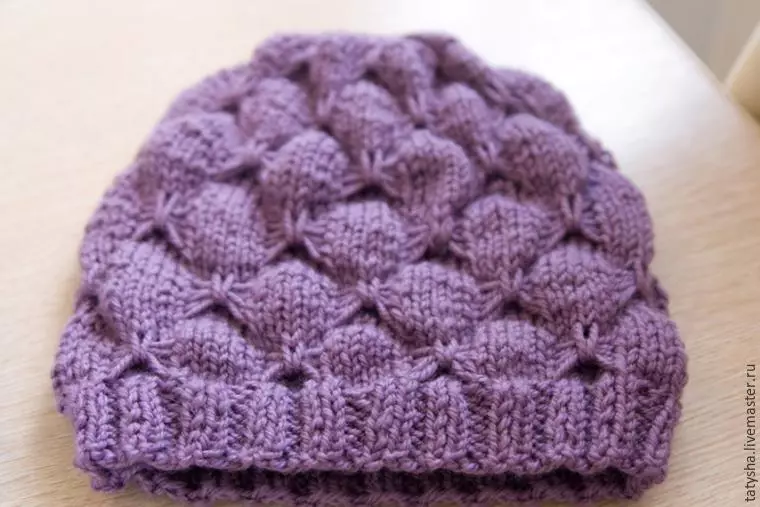
Pattern "Butterflies"
To knit such a cap, the yarn will need (NORD 48% wool, 52% acrylic, 100g = 116m), knitting needles No. 4.5.
Screw to the needles of 92 loops (the number of loops should be multiple 10 + 2 edge loops). Knit with a rubber band 2 × 2, i.e. 2 Facial loops and 2 Pouring - 4 cm. After the rubber band, continue to knit the "butterfly" pattern.

Pouring rows to stick with hinges. Thus, you need to associate 5 facial rows.
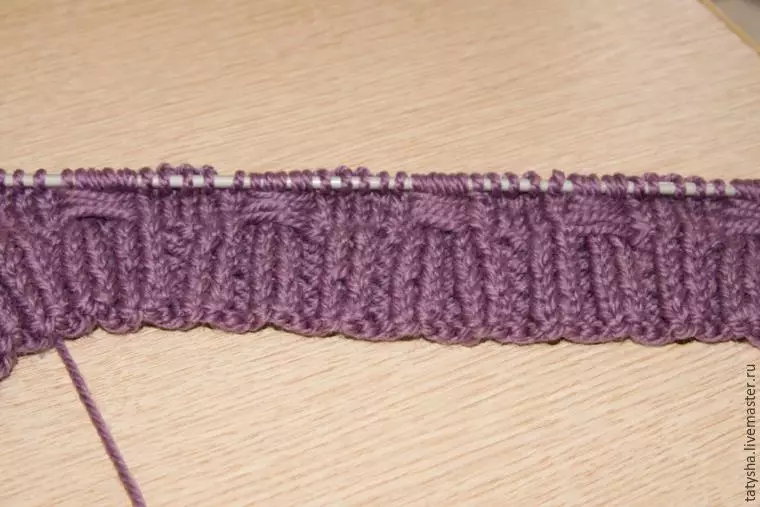
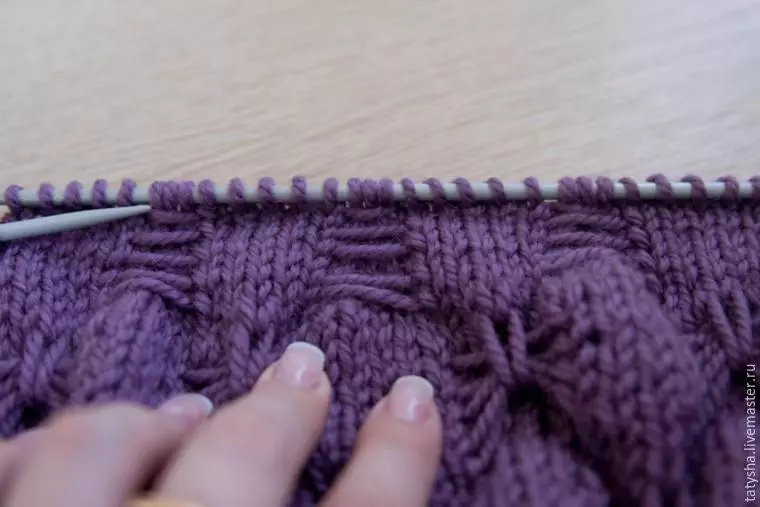
After 5 facial rows are accuited, there are strips from unheated threads. On 6 facial row you need to make such "butterflies".
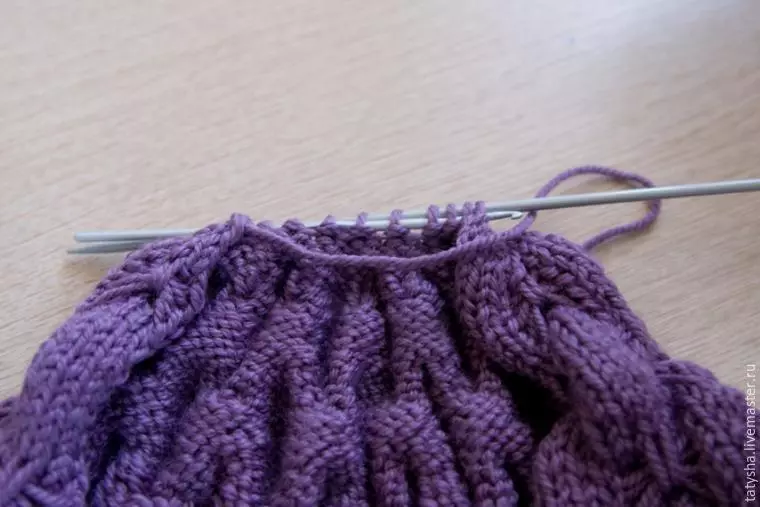
Knit 1 edge loop, remove, 5 facial loops, then "butterfly", 2 facial hinges, turn the needle under 5 unbound threads and check with 3 front loops, 2 facial and so on again 5 facial, "butterfly", so to the end.

Now in 3 loop to prick the front.
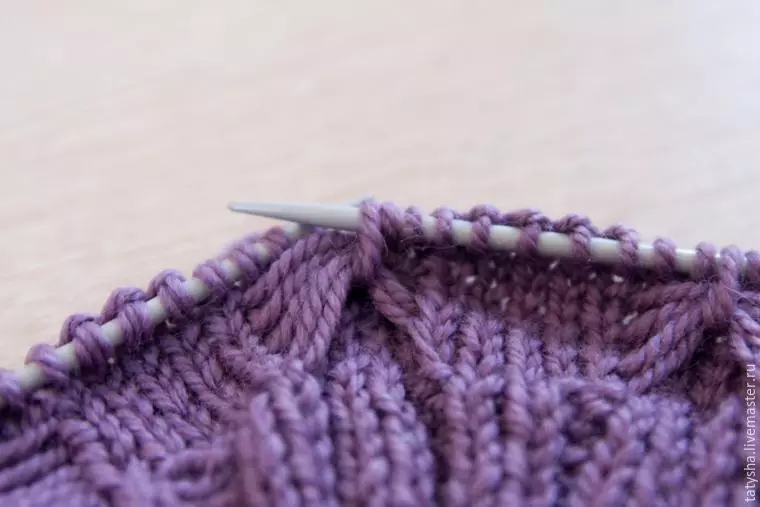
Continue knitting on, only after the first finished Pattern of the "Butterfly", in the next facial row to penetrate 1 edge, 5 loops to remove, put the thread before work, then 5 facial, and so on, at the end of 1 edge. Thus, it turns out that the pattern is located in a checker order.
Article on the topic: Pyramids for a gift for a gift
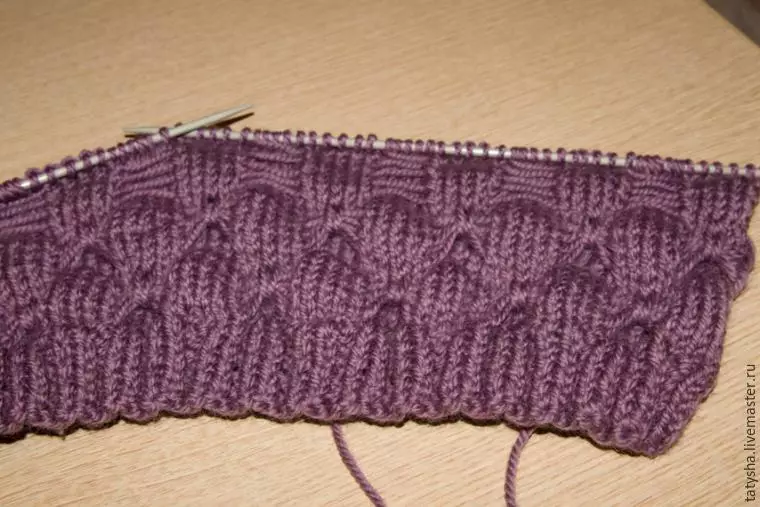
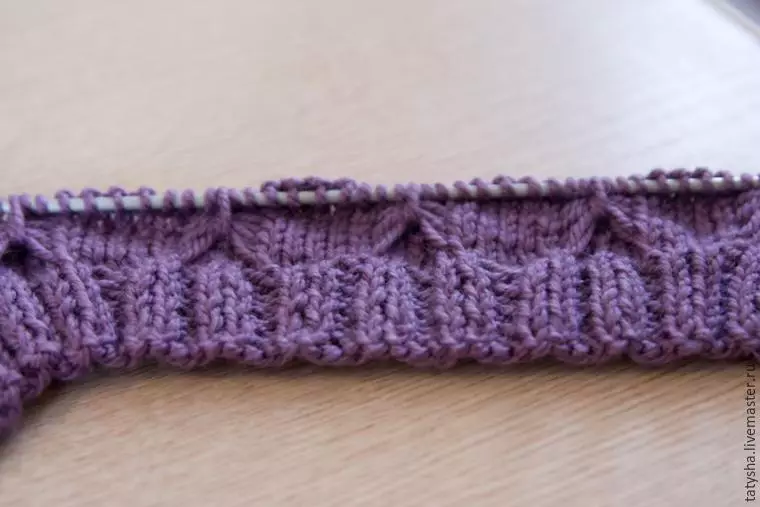
So knit 14 cm after gum. In general, it is about 18 cm. Next to start the relevant. All devices go through the involving side, and they will be hidden in the pattern itself, at the end of the roughening the butterfly will consist of 3 loops.
1 row: 1 edge, 5 facial, leave the thread before work, 5 facial, repeat to the end, 1 edge.
2 row: All invalid.
3 row: as 1 row.
4 row: all invalid.
5 row: as 1 row.
6 row: 1 edge, 2 hinges together Pouring, 3 Pouring is a butterfly wear, 5 outbreaks, again 2 Breakdown, 3 Pouring, 5 Inslare. So knit until the end. It turns out 83 loops.
7 row: 1 edge, 5 facial, thread before work 4 loops remove, so knit to the end.
8 row: 1 edge, 2 loops together, 2 Pointing together, 5 wrong, so until the end of the row. It turns out 74 loops.
9 row: 1 edge, 5 facial, thread before work 3 loops remove, knit to the end.
10 row: all invalid.
11 Row: 1 edge, 5 facial, 1 facial, butterfly, 1 facial (now it consists of 3 loops).
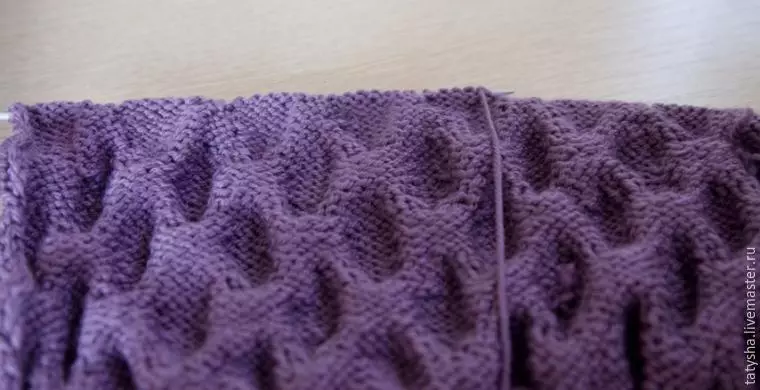
All accurates can be viewed in the photo:
And so the starve looks like:
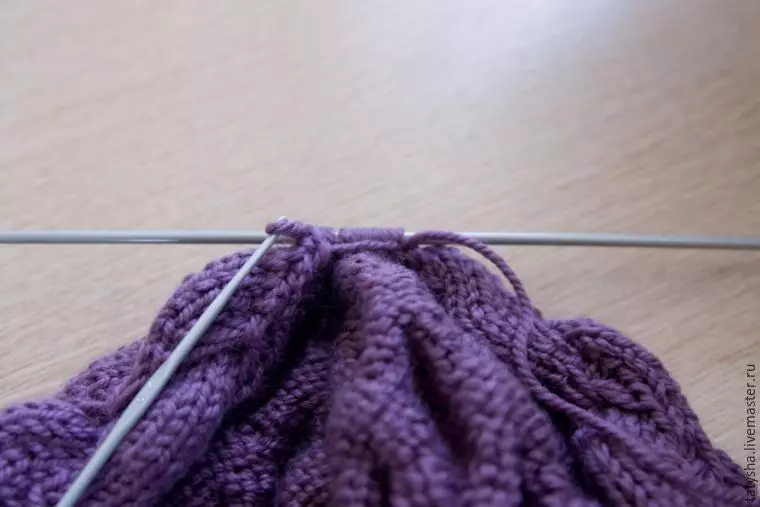
Now make another output:
1 row: 1 edge, thread before working 5 loops to remove, 3 facial, and so on to the end of the row.
2 row: All invalid.
3 row and 5 row: as 1 row.
4 row: all invalid.
6 row: 1 edge, 3 Pouring, 2 hinges of the vulnerable, 3 wrong and so to the end. It turns out 65 loops.
7 row: 1 edge, thread before work 4 loops remove, 3 facial. Knit so until the end of the row.
8 row: 1 edge, 3 Pouring, 2 loops together with an invalible, 2 wrong and so until the end of the row. It turns out 56 loops.
9 row: 1 edge, thread before work 3 loops remove, 3 facial.
10 row: all invalid.
11 Row: 1 edge, 1 facial, butterfly, 1 facial (now it consists of 3 loops), 3 facial, so to the end.

Now the accumulation needs to be done in each row:
1 row: 1 edge, 4 irons, reduction (2 bottled), so until the end of the row. It turns out 47 loops.
Article on the topic: Summer Hats for Women Crochet: Description with Schemes and Video
2 row: 1 edge, reduction (2 facial), 3 facial and so to the end. It turns out 38 loops.
3 row: 1 edge, 3 wrong, reduction (2 bottled). It turns out 29 loops.
4 row: 1 chrome., Underbought (2 facial), 2 facial. TOTAL 20 loops.
5 row: 1 edge, 2 irons, reduction (2 bottled). Output 11 loops.
It is important to ensure that the accurates were over the other, and the loops watched one way.
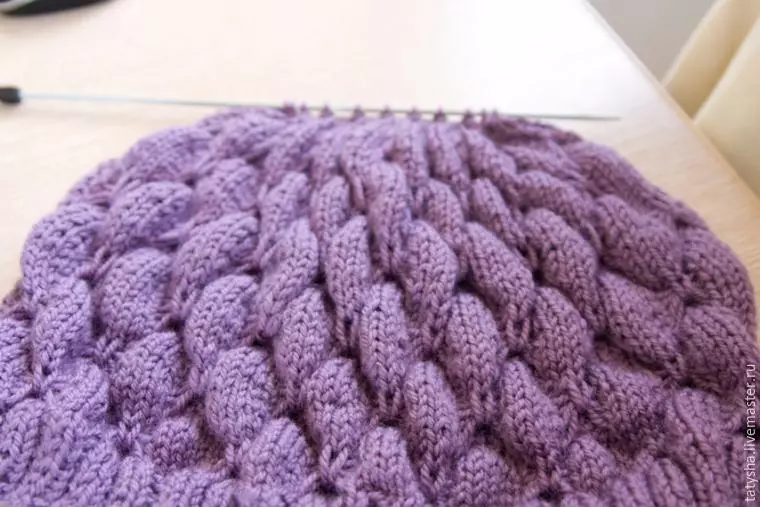
Now leave the thread to have something to sew. Turn the hook after 11 loops, capture the thread and stretch all the loops. Step them and carefully sew.
Cap is ready!
In trends today, in addition to the volume hats, miniature simple models, tightly tight heads. The so-called Bini caps will be understood even for beginner knitters. They will suit both an addition to bright images and classic outfits.
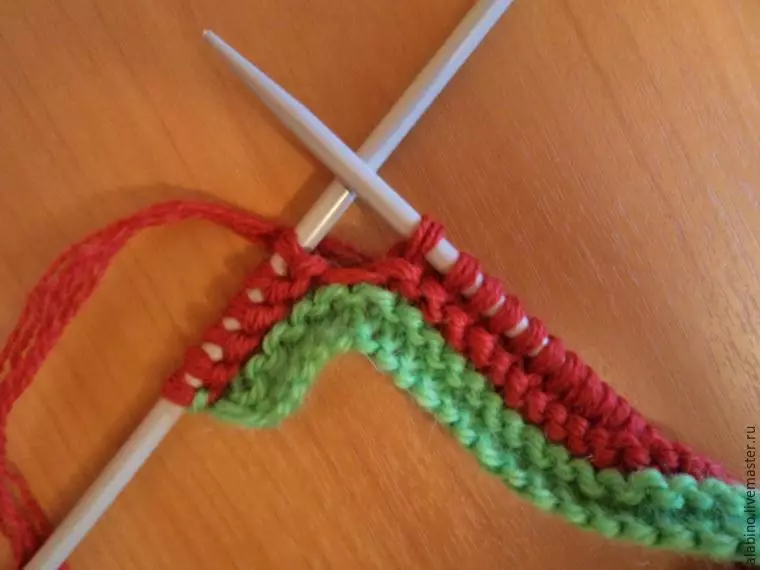
"Bini" for fashionista
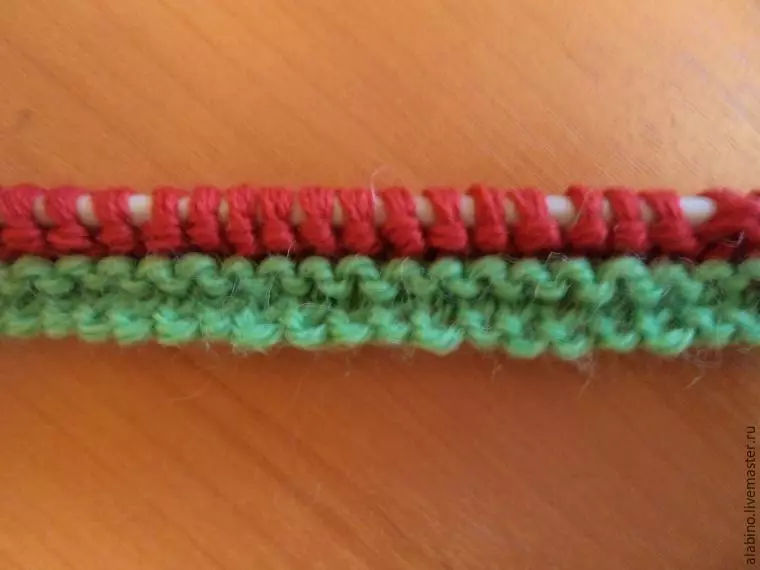
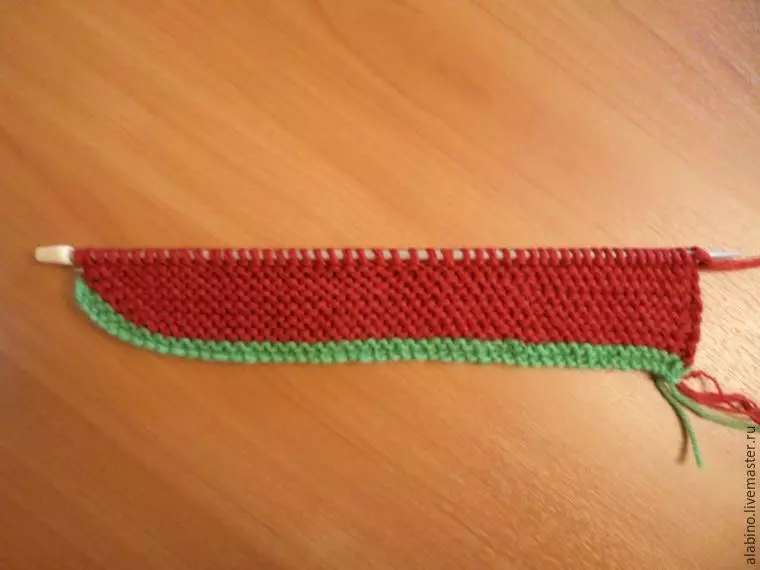
On the knitting needles number 5, dial 50 hinges with auxiliary thread and penetrate the front 2 rows. Cut off then it will need to dissolve . Next, knit 2 rows of the main (in the photo it is red) thread from beginning to the end, and then knit short-range rows (they are needed for the rounding of the crown).
For this, the edge loop to remove and penetrate a row from the beginning to the top of the top, the last 6 loops do not take it.
Rotate knitting and knit in the opposite direction, but if we do it, we will have a hole in the place of rotation.
So that the hole does not appear at the end of the turn, you need to drive out of the 6-remaining 6 loops.
It is necessary to do this as follows: remove the loop from the left knitting needles on the right, working thread at the bottom, under the left needle.
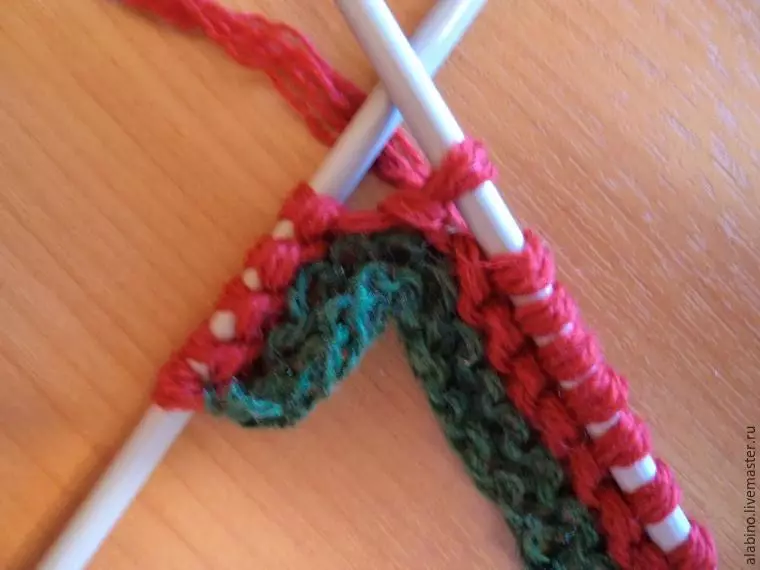
Put the working thread so that it is above the left needle.
Return the removed loop on the left needle - the loop is wrapped.

Then turn knitting.
Article on the topic: Buryat patterns and ornaments with stencils, templates and photos
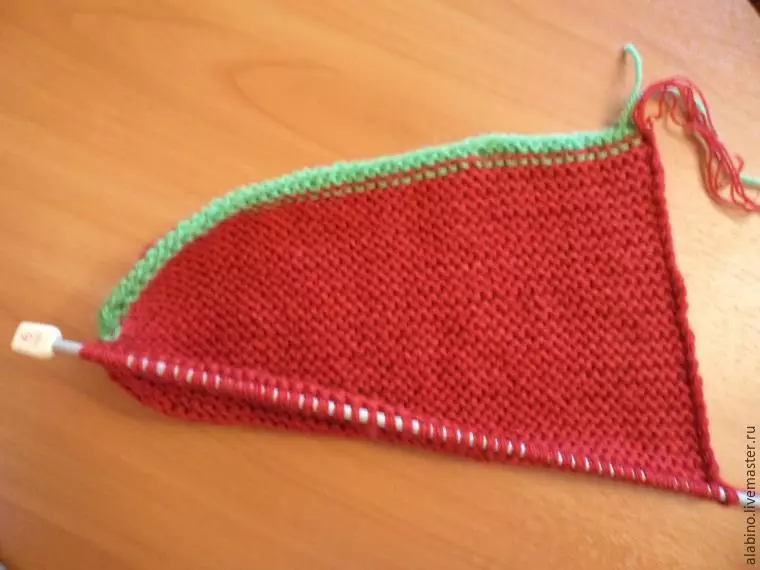
I ship the loop not to touch and knit the next row from the top to the beginning. The last loop in this row is also facial. Thus will be associated with the first shortened series
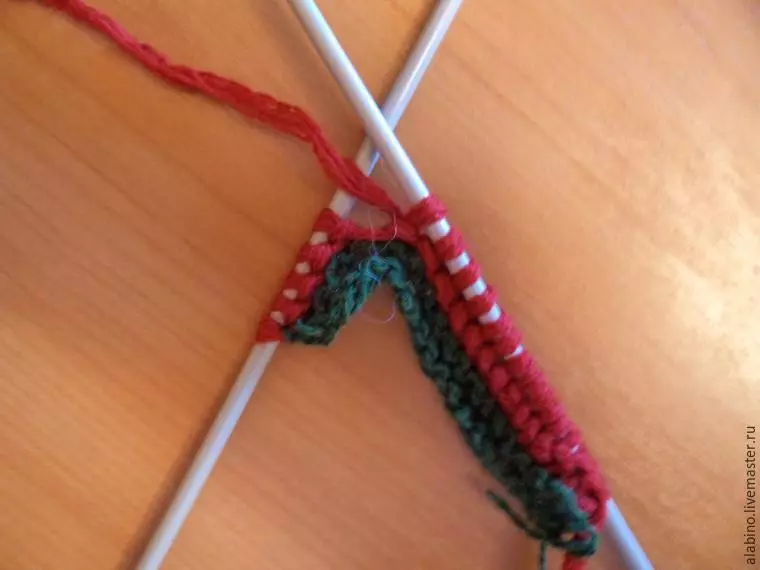
In the next row, it is also crushing 5 loops, then 4 and so on. So you need to crush all 6 loops. It will turn out to be a wedge of 12 rows, narrowed to the top of the Makushka.
Second wedge and all subsequent knit in the same way.
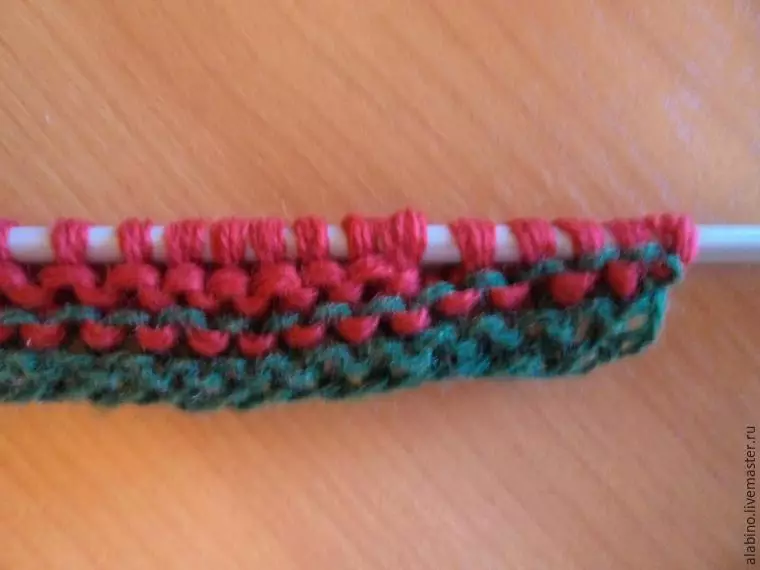
In an unstarted form, the diameter of the hat 52 cm, on 54-55 the size of the head. Height caps about 32 cm. To the edge of the caps, which will go on oval of the face, was not stretched, you need an edge loop and adjusting to it very tight.
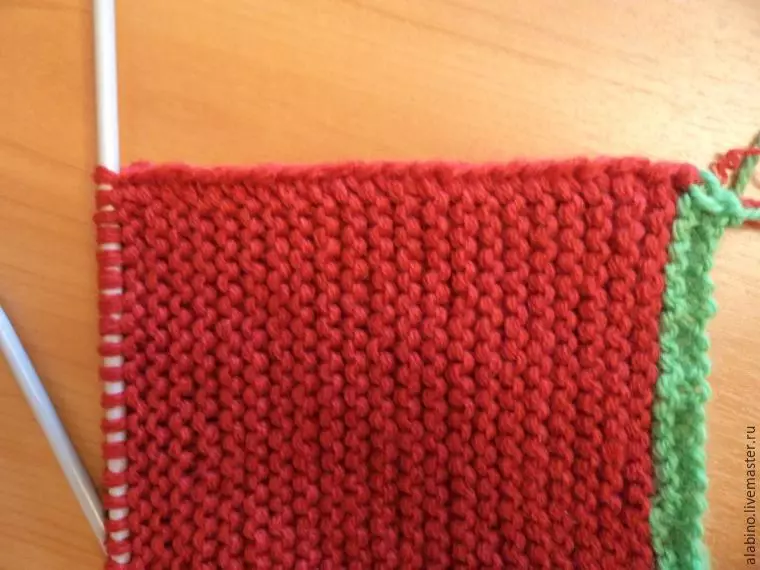
The hat is connected. It remains to sew. To do this, dissolve the auxiliary thread, and sew all open loops with a loop in a loop or a common seam for stitching.