
Prepare Sani in the summer ... This proverb, how can not reflect better
the fact that it is never too late to think about the warming of the house is never too late
early.
As evidenced reviews, among the types of insulation, as
private houses, cottages and cottages and multi-storey (apartment) houses,
Lidges outdoor insulation. And among the materials of the unconditional favorite - foam.
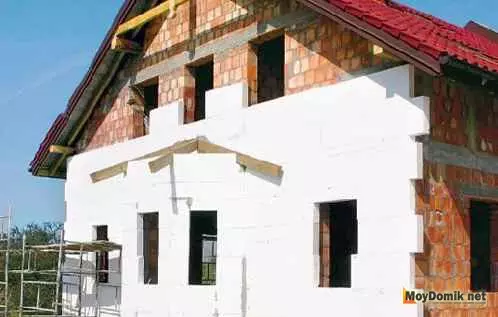
We propose to figure out what is due to the high efficiency of the insulation of the walls of the foam outside.
Advantages of outdoor insulation
- The first and most important, displacement of the dew point beyond the wall
(see photo). What is it good? The fact that the house will always have a dry outer wall.
The problem with its freezing will disappear by itself. In addition, moisture, not accumulating
In the wall, will not destroy it. This will allow the bearing design of "Old" on
The order is slower.
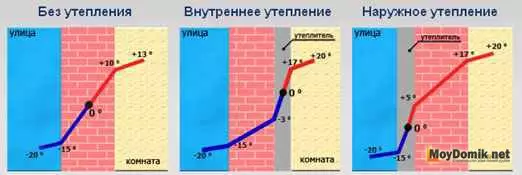
- Second, the wall will accumulate heat. So after
ventilating apartments in winter, it will quickly restore normal
temperature. After all, the walls will give part of the accumulated heat back to the room, and
Not on the street.
- Third, work can be performed at any time. Their holding
not fraught with long and expensive internal repair, and arrangement
Additional ventilation.
Advantages of foam
- the smallest thermal conductivity rate among the knowncontemporary insulation;
- Low price material;
- Small labor cost of attracted professionals;
- the opportunity to warm up with their own hands;
- Easy installation of foam and much more.
The technology of insulation of walls by foam is quite simple. But
Perform work with high quality, you can only know some nuances and features.
Consider step by step, how to insulate the wall outside the foam,
And what pitfalls can meet at each of the stages.
Instructions for the insulation of walls by foam outside
1 stage - material selection
Warming of the outer wall with foam - this is a device
Multilayer design. Such a cake gives insulation additional
Properties, in the form of strength and aesthetic. And also allows you to protect the material
from the destructive impact of the external environment.

For outdoor insulation, it is better to choose the PSB-C-25 foam foam.
Nuance: such a choice is due to two factors - durability and
heat insulating properties. Of course, material with a density 15 will be better
Hold heat. Since it has more air. But, PSB-S-15 foam foam
more fragile.
Disadvantages of PSB-S-15 foam
(When used in outdoor insulation)- It crumble greatly when working;
- difficult to cut smoothly;
- The sheet is almost impossible to lure the grater;
- Plaster lies badly;
- The plastered surface of the wall is easy to sell.
The thickness of the sheet of foam depends on:
- required effect;
- region (calculated temperature in a cold month, force
and wind direction);
- The material from which the wall is made.
Nuance: Brick Wall Warming Outside Foam Plastic
Puts even more requirements for the accuracy of calculating sheet thickness. Because thin
a layer will lead to the fact that the dew point will not shift towards the foam, and
Will remain in the wall. Then, moisture that will be collected in the brick will increase
The speed of its destruction. And if the layer of foam will be too thin, then in winter
Moisture will turn into ice. As a result, bubbles are formed on the wall, and the sheet is simply
River.
Article on the topic: Decorating walls of premises by plasterboard
Tip: If the required sheet thickness is 100 mm, it is better to buy two
50 mm. And mount their flashes. So eliminate cold bridges in places
The junction of sheets.
Material for outdoor insulation walls of foam
- sheets (plates) of foam;
- Starting profile;
- glue construction;
- Dowels with a wide hat (fungi, umbrellas).
The concrete base of the dowel length should be at least 90 mm for brick -
not less than 120 mm. Dowel must enter the wall at least 50 mm.
- Perforated corner with reinforcing grid;
- polymer reinforcement grid;
- profile for slopes;
- plaster;
- Paint for facade works.
2 Stage - Preparation of the Surface
The wall is inspected for the presence of defects (cracks, detachment,
Biological education - moss, fungus). Protruding parts will be in the future
Sheltered by foam, and those that are poorly fixed are knocked down. If from the wall
Fits (peeled) Old stucco, it also needs to be removed.
Sometimes, Moss is found on the walls - it needs to scraping it. The paint is also removed if
This is available. And any other layer having zero vapor permeability.
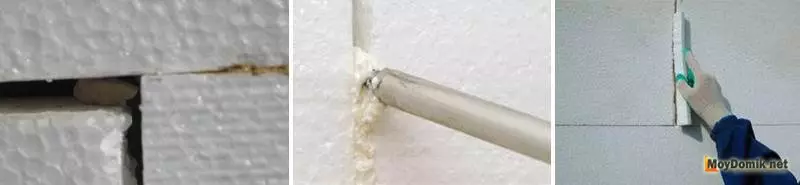
If there are deep cracks on the wall need to be embedded. For
This needs to be expanded. The resulting V-shaped channel is primed. Then
Earn. Sand-cement mortar, foam glue for sealing
or construction foam.
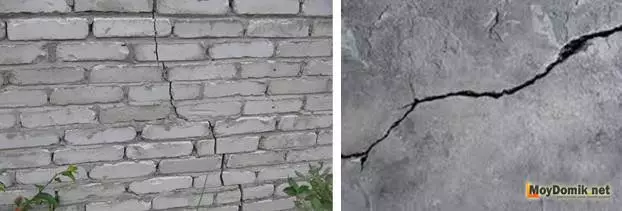
Cracks in the walls
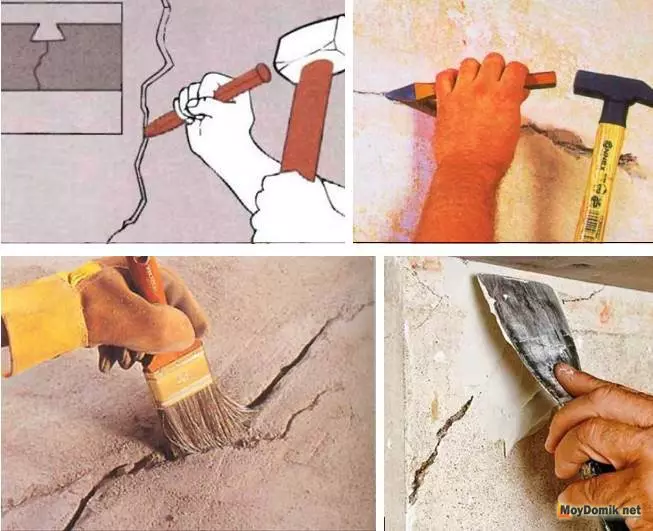
Cracked seal technology in the walls
The prepared surface of the wall is ground.
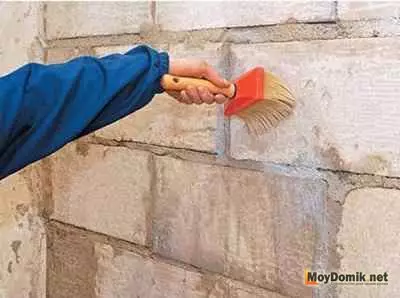
Primer Stander Primer Use Universal Breast Solution
Deep penetration. It will protect the wall from fungus and other biological
Activity, as well as increase the adhesion of the surface.
Tip: Surface fitness can be checked as follows.
way. Foam block with a size of 10x10x10 mm is glued onto a glue solution
to Wall. Three days later, it is broken. If the block breaks completely, it means that
The wall is not suitable and requires further stripping. If the block is broken, but
It holds, you can proceed to work.
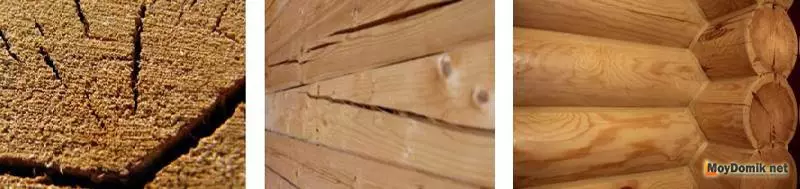
Is it possible to insulate the walls of the wooden house wall?
Warm wall insulation outside foam plastic is better not
spend. This is due to the fact that wood has a natural humidity. For
that she had the opportunity to give moisture to the external environment needed
Insulation with a porous structure. Ideal in this case will be
mineral wool.
From a practical point of view, Wooden wall insulation
Polyfoam is possible. Provided if there are no serious slots in the tree. IN
otherwise, before proceeding to work, you need to close them natural
insulation - moss, felt or special acrylic sealant allowing
Close up even the most minor defects and interventic seams. Moreover,
The installation of foam is made only with the application of the framework method.
Warming of wooden walls outside the foam - for and against
3 Stage - Marking
In this case, the markup does not mean that you need to applyDrawing on the whole wall. Such a grid will only confuse, because sheet
Polyfoam has a permissible deviation of 10 mm. per 1 mp
But, measuring the horizontal and the vertical is simply necessary. because
that equal to the corner is not always obtained, because Wall may have
Minor deviations.
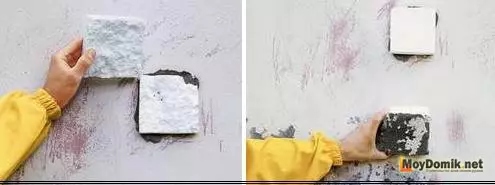
4 Stage - Installation of foam on the wall and facade
Council of beginners - start working from the wall that
It is noticeable to the least, it will be your training ground.
The foam device on the wall begins with mounting
starting profile. Its width is equal to the thickness of the foam sheet. Sometimes for these
goals UW-50 or 100 profile is used. These are the most popular for insulation
The dimensions of sheets.
Nuance: Special Starter (Socular) Profile
use better because It has a perforation that allows fasteners
reliably fix the profile, and at the same time allows its movement due to
thermal expansion.
Article on the topic: Bunk assembly scheme: Requirements and fastening
The starting profile is mounted on the markup previously applied.
Its use allows you to absolutely flatly lay the first row of sheets. Besides
In the people, there is an opinion that the metal starting profile will allow
Protect sheet from rodents.
For the leveling of thermal expansion of the metal, between
Neighbor profiles need to leave a gap, about 5 mm.
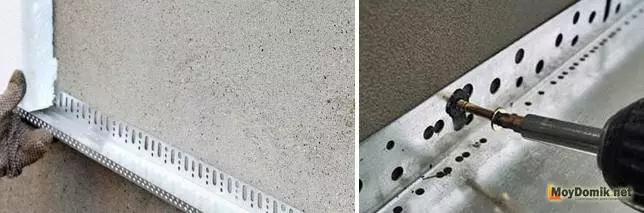
Fastening profile under the insulation of foam
Angle arrangement is shown in the photo

Corner device under the insulation of foam
Methods for fastening foaming
Foam installation technology has several
modifications. To lock the sheet on the wall you can choose one of three
Options:
- apply glue to the edge of the sheet and make several modeling
Leaf Square. This method is suitable for uneven wall;
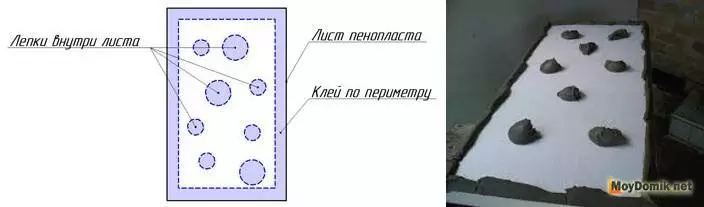
Method of fastening foam on uneven wall
- Apply the glue with a toothed spatula throughout the leaf. Option for
relatively smooth wall;
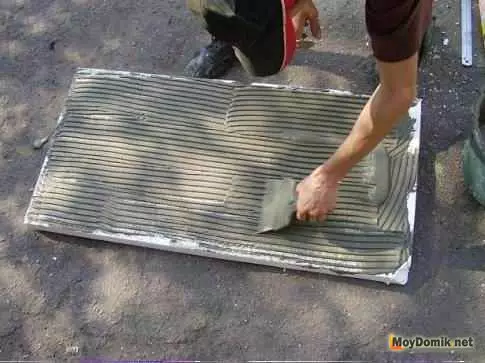
Method of fastening foam on a flat wall
- Apply special glue from the cylinder. Such glue is similar
Construction foam. At the same time, it is much easier to work with him than with adhesive
solution. Plus, it does not need to be kneaded, it firmly secures a sheet to the wall.
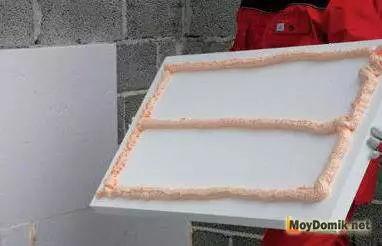
Fastening foam for glue from the balloon
Next, the foam plate is attached from the bottom angle according to
applied markup.
The second row of sheets is placed with the displacement, as shown
below. This scheme makes the installation more reliable and reduces the likelihood of appearance.
Cracked.
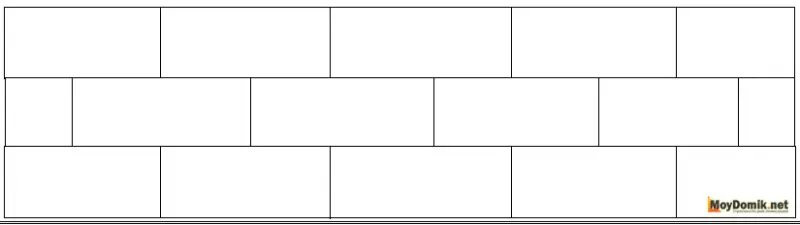
Scheme of fastening foam with displacement
So in order all the rows are stacked until the last.
Tip: In order for glue to grab completely, the wall,
Oblated by foam should be standing 3-4 days. If you are insulation
Polyfoam with his own hands, then by the end of the work, the first site usually time
Stand up the right time.
Particular attention should be paid to the trim, because it
Also a source of heat loss. The process of finishing in the photo.
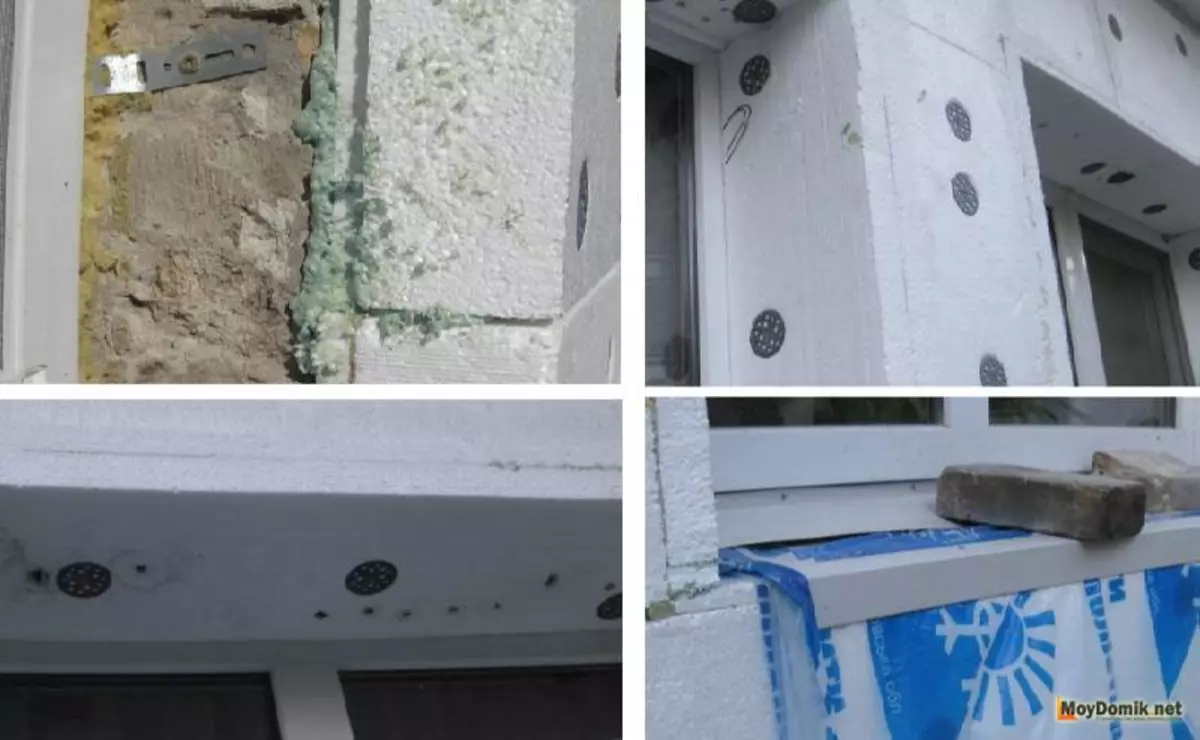
Device device when insulating foam
Window tide after the installation of foam will have to be replaced.
In order to be in places of insulation of the insulation to the frame
Metal-plastic window or door there was no heat loss, you need to install
Special window profile. Due to the fact that the profile has a self-adhesive
The strip is easily installed in the window frame. Installation process in the photo.
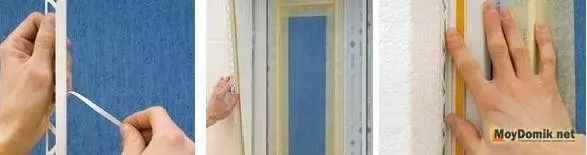
Installing the window profile when insulating foam plastic
The profile installation guarantees the absence of deformations and the finished appearance.
Do not assume that after the insulation of the foam house
turn into the same box. Variating sheet thickness or laying and
Securely locking them into several layers, you can create any wall configuration.
5 Stage - Additional fastening of foam plastic for wall
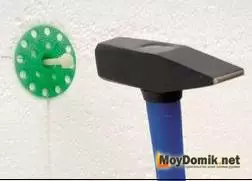
Dowels umbrellas (fungi) for fastening foam fixation are capable of providing special plastic dowels umbrellas (fungus) for fastening foam, which do not "fall" into the sheet, and reliably fix it.
Mounting "umbrellas" can be in two ways, as shown in the figure.
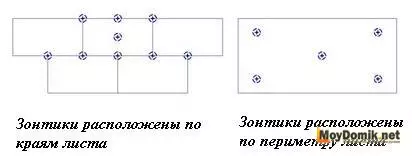
The first option is suitable for smooth junctions. If between
Sheets have significant gaps, then you need to use the second option.
Nuance: the first option will save a dowel, but
takes time to fit the sheets in size.
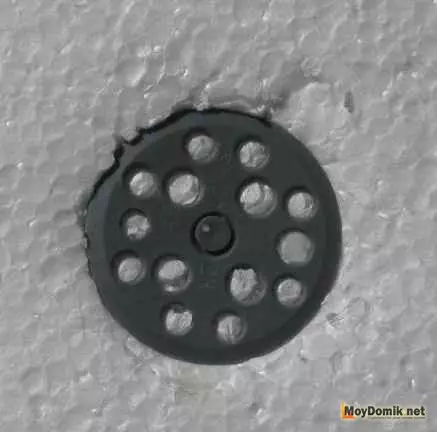
A fixed dowel umbrellanting a dowel, make sure that it is a little recessed into the sheet.
It is worth noting that in the classic version of the umbrella
Mounted as shown in the photo. However, since such installation takes
a lot of time, and plastic dowel does not create cold bridges, this rule
Even experienced builders neglect.

Method of fastening foam with "drowning" Hats Dowel-Umbrella
Gaps formed at the junction of two sheets close up
foam. In the gap of a width of more than 20 mm, the slot is sealed by the crunch of foam.
For greater reliability, the rear side of the trimming is smeared with glue or foam.
Article on the topic: Decorative plants and flowers for shady garden: how to make a flower garden in the shade
Seeling shells at the place of foam joints

After the seal of all the cracks, they start trimming protruding
Parts of the sheet that are found in the corners.
Next, the surface of the walls grind the grater for foam.
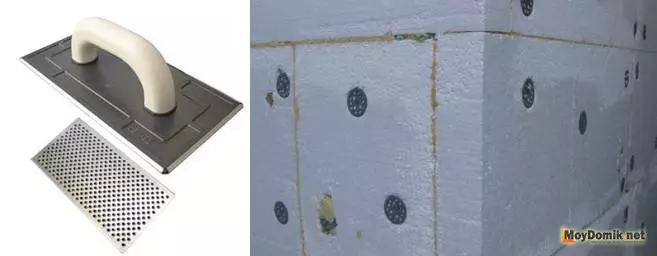
Foam grinding grater
Tip: If the wall decorated with foam, stood more
2 weeks without finishing, it will be completely grinding, because Ultraviolet already
damaged the surface layer of the insulation.
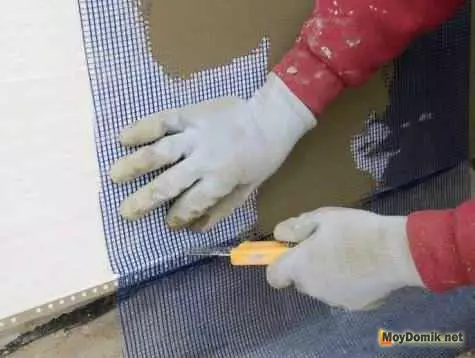
6 Stage - finishing corners and slopes by foam
Perforated corner with reinforcing network chores at home or slopes need additional protection against shock. In addition, ensure the required grid is difficult here. Yes, and it is difficult to cut perfectly foam. Therefore, for them is provided
Special perforated corner with reinforcing grid.
It is attached to glue and tightly pressed with a special corner spatula on the outdoor or inner corner of the house, or slightly.
The process of installing foam plastic on the corners is shown in the photo. Inside the slope as already
Special corner said.
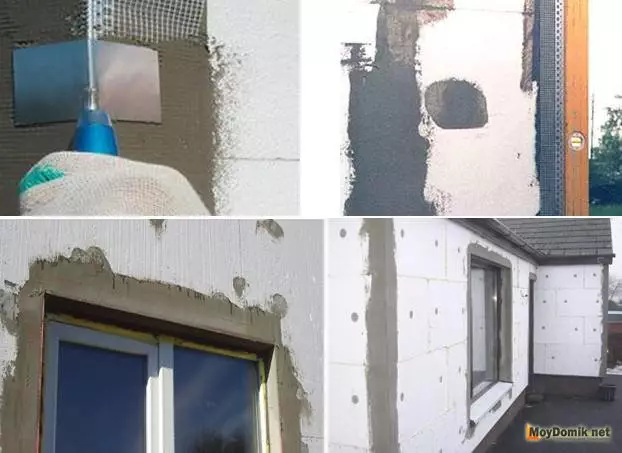
The process of installing foam on corners and slopes
At this stage, the house is ready for further finishing.
7 Stage - Farm Plaster Front Plaster
The outer insulation of the walls of the foam allows you to protect the house
From heat loss. And what will take care of the protection of the insulation itself? Finish
(facade, decorative) plaster, siding, lining or any other
Finishing material. In our example, it is plaster.
Its basis is a polymer reinforced grid for
Polyfoam with cell 3x3, 4x4, 5x5. Mesh density is within
140-160 g / m.kv. Appointment of reinforcing grid - ensure integrity
Wall surfaces and prevent cracks.
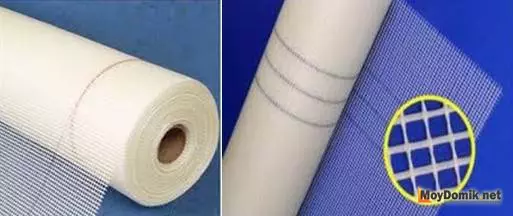
Tip: Do not seduce at the low cost of the grid - in this
case, saving is inappropriate. High-quality grid is covered with a special solution,
which protects it from the effect of alkalis and acids, which are contained in adhesive
solutions. The poor-quality grid "dissolve" in the glue.
How to mount the grid on the foam?
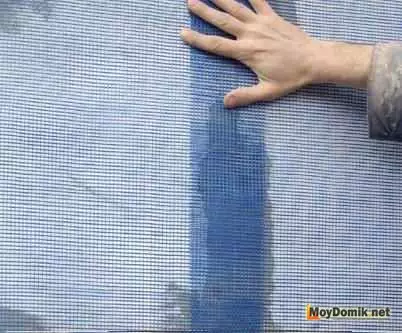
Fastening the mesh on the foam 1 fixes the grid for glue. The one who was foaming foam. Special marking is applied on the grid. A red strip shows how many canvas must be laid. This is approximately 100 mm.
If there are no labeling, try to withstand a smooth launch at all the length of the strip.
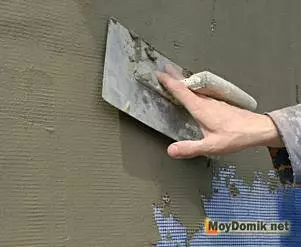
Fastening the mesh on the foam-2-fold mesh fastening: a mesh strip of the desired length is cut, plus 250-200 mm. Glue is applied to the top of the wall. The area of the glue band is approximately 100x10 mm. The grid is stacked and pressed. Rough
Speaking, the grid must drown in the glue.
Trimming unnecessary sets: Watch the grid is not going to harmonic. Align her spatula. But, do not overdo it, otherwise you will pull down the entire strip. At the bottom of the surplus grid is cut.
So that the putty closes the grid over the entire surface of the wall, her
You need to apply in two layers. One thick layer will cover microcracks. Harm
It will not bring, but visually the defect will be noticeable. Consider the previous layer
Must dry completely.
Tip: Do not work with putty in windy weather.
Otherwise, the layer will quickly dry out, which will also lead to the appearance of microcracks.
8 Stage - primer and finishing finish
As follows from the title of the stage, the main works are related here
With the priming of the surface of the wall. And then proceed to applying the finish
Putty and / or staining.
More visual information on how to perform insulation
Outdoor wall foam contains video instructions
Ignoring foam installation rules when performing
The outer insulation of the walls can lead to impartial consequences.
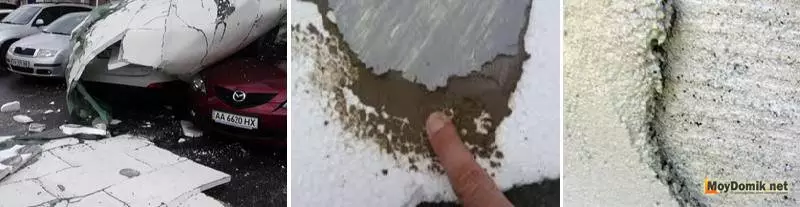
The consequences of poor-quality installation of foam
Conclusion
We hope that this instruction will allow you to insulate
The outer wall of the foam qualitatively and without problems.