
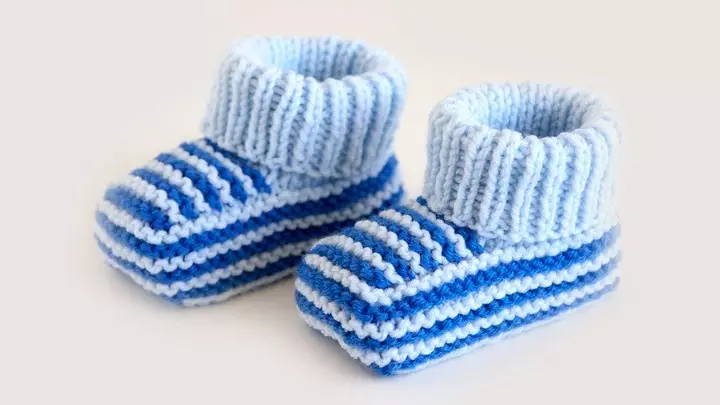
Booties in our time are called the most comfortable and useful shoes for small children, who later learned to go. They retain small legs in warmth and make them even more beautiful. Due to the fact that the booties do not have a solid sole, they love their kids so much. It is booties that become the first full-fledged shoes for children. In this article we will tell how to make booties for novice needles, as well as about a suitable yarn and size.

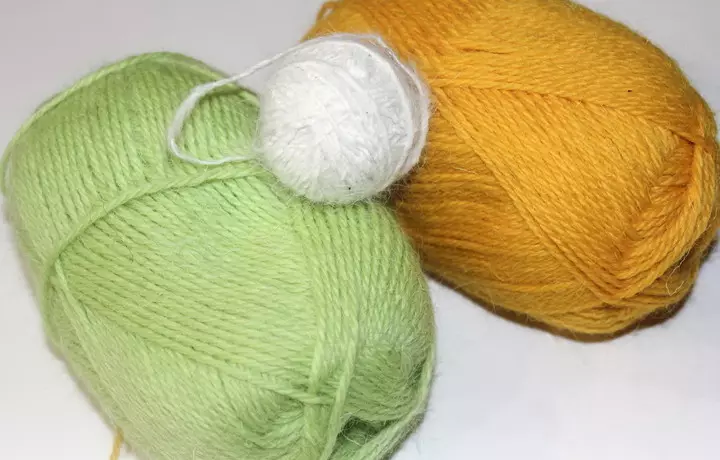
The best material for booties is yarn. But what exactly choose? The yarn must be hypoallergenic, as well as the name should be indicated by any word associated with children: "Kroha", "Fidget", "Bebi."

It is also worth understanding that for kids it is necessary to pick up natural yarn (wool, cotton, acrylic). Do not choose the yarn of very distrend and bright colors, better pastel tones of green and yellow tones.
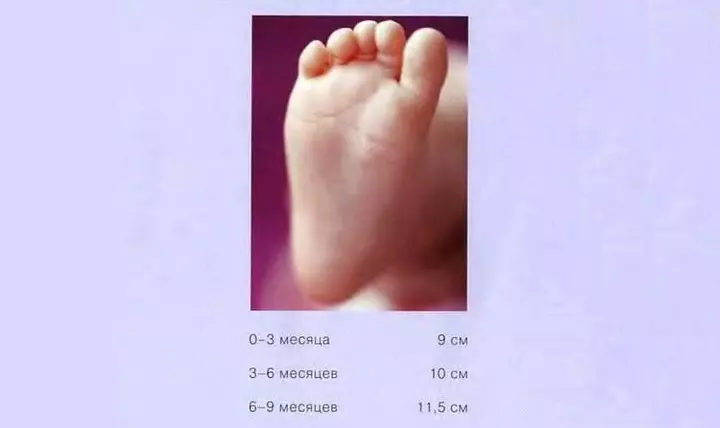
And the next photo shows a table of the size of a small feet of the baby. It is clear that the length of the foot of your baby may differ slightly, but the table shows the average size.
Simple option
The process of manufacturing simple and warm booties with latch 2 knitting needles can be traced on the example of the master class. This method is perfect for both experienced craftsmen and beginners. If you wish, this shoes can be reappeted as uggs or kedics.
In order to tie baby booties, you need to take a woolen, half-wing or acrylic yarn and needles (№2 or №3).
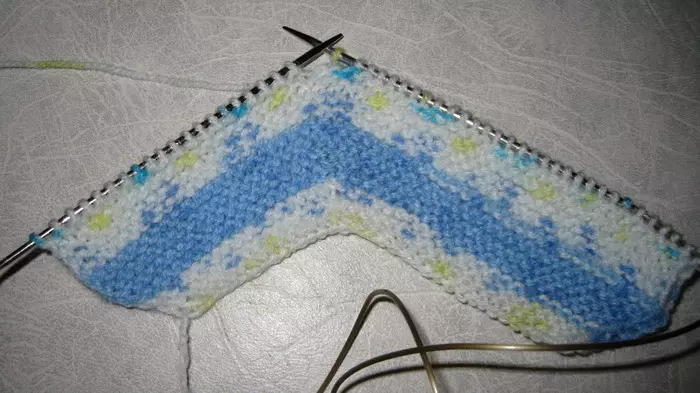
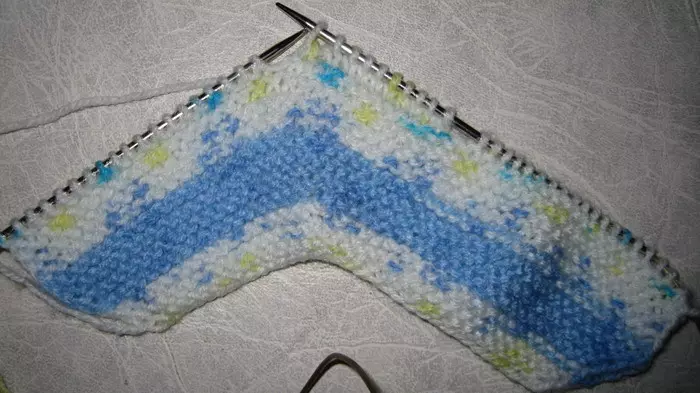
Start knitting. First you need to decide on the number of loops. For a three-month baby, you will need to make 35 loops, of which two edges. If the toddler's leg is greater, then you increase the initial number of loops.
We remove the edge loop in the first row and insert the entire line of the face loops. In the second row, we re-remove the edge loop again, then we make an attachment, fifteen facial loops, nakid, then three facial loops and again make a nakid, after which they again prone 15 facial loops and make the last Caida, and then insert the edge loop. As a result, we already had 39 loops. The next line, like the rest of the unpaired rows (5,7,9), again we will only be facial. But in the fourth row, we again make an increase, we are signed by the Nakid according to the following scheme: - 16 - 5 - 16 -. At the site of the dash should be Nakid. As a result, it turns out for forty-three loops.
Article on the topic: Turkish shawl on a crochet card: schemes with photos and videos
In the sixth row again add the number of loops, but already according to the following scheme: - 17 facial - 7 facial - 17 facial -. It turns out forty seven kettles. After the eighth row, it should be fifty-one loops, and we make Nakida in exactly the same places, but instead of 17 we take eighteen loops, and instead of seven - nine facial loops. In the ninth row we are checking twenty-five facial loops, then we make a nakid and further the remainder of the lines knit facial. We encourage wedge for rounding.

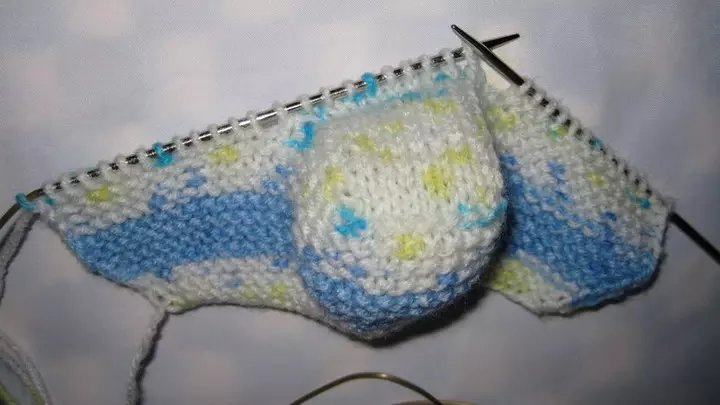
With the next step, we are facial loops inhibit the rise in ten rows height. At the same time, in this case, the first edge loop is removed, and the latter is facial. Go to knitting the upper part of the product: For this, we divide the workpiece into three parts - twenty one loop on the sides and ten in the center.
At the twenty-first row, we first remove the edge loop first, then knit twenty-nine facial capeners, after which the next two loops are arranged and turn the product.

In the next line of knitting for the rear wall, remove the first loop, then we make eight outbuilding loops, and then two loops together with an insanity. I turn over the product again.
23 The row is tied in this way: remove the loop for the front wall, we make eight facial loops, then two in the face together. Take a turn again. But at the twenty-fourth line, we remove the first loop for the rear wall, we make eight outbreaks, and then we connect two centions. Turn over the product. We alternate 23 and 24 rows and sway six paired lines (up to 36 rows).
In the thirty-seventh row, we remove the first loop for the front wall, then you are tied by the front loops and at the end we make the edge loop. As a result, we should have thirty-six kettops.
Article on the topic: Tie socks with knitting: Schemes with video and photos on light and rapid knitting of original socks

In the next line, we again in line with facial loops (edge separately), and the following twenty rows (from 39 to 58) are knotted with a rubber band one to one (1 facial, 1 wrong loop). Close loops.
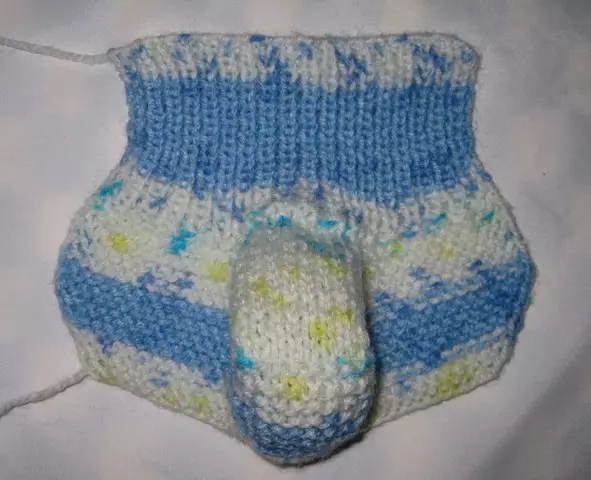
We sew thread with a needle on the back wall of the boot. We bring the outward gum.
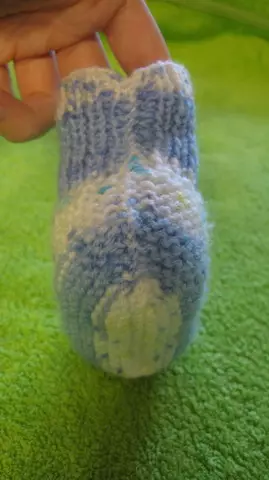
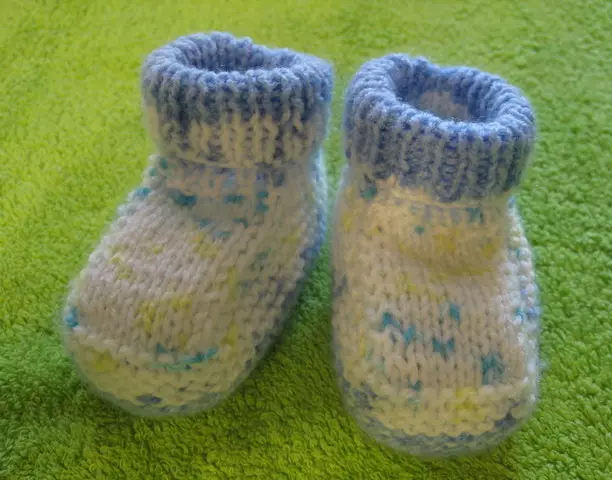
Using the scheme, insert the second boot. This is such beautiful shoes for newborns.
Video on the topic
We offer to see a selection of video for more accurate perception of the entire knitting process.