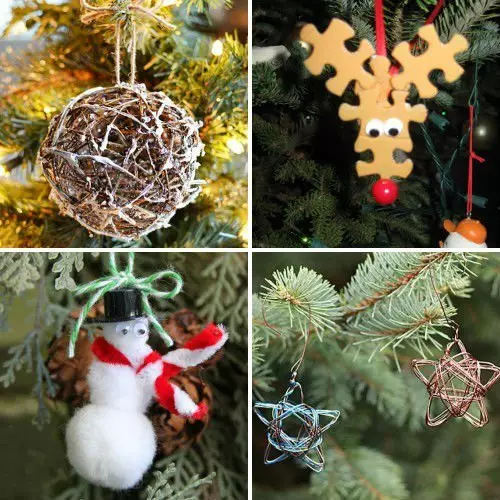
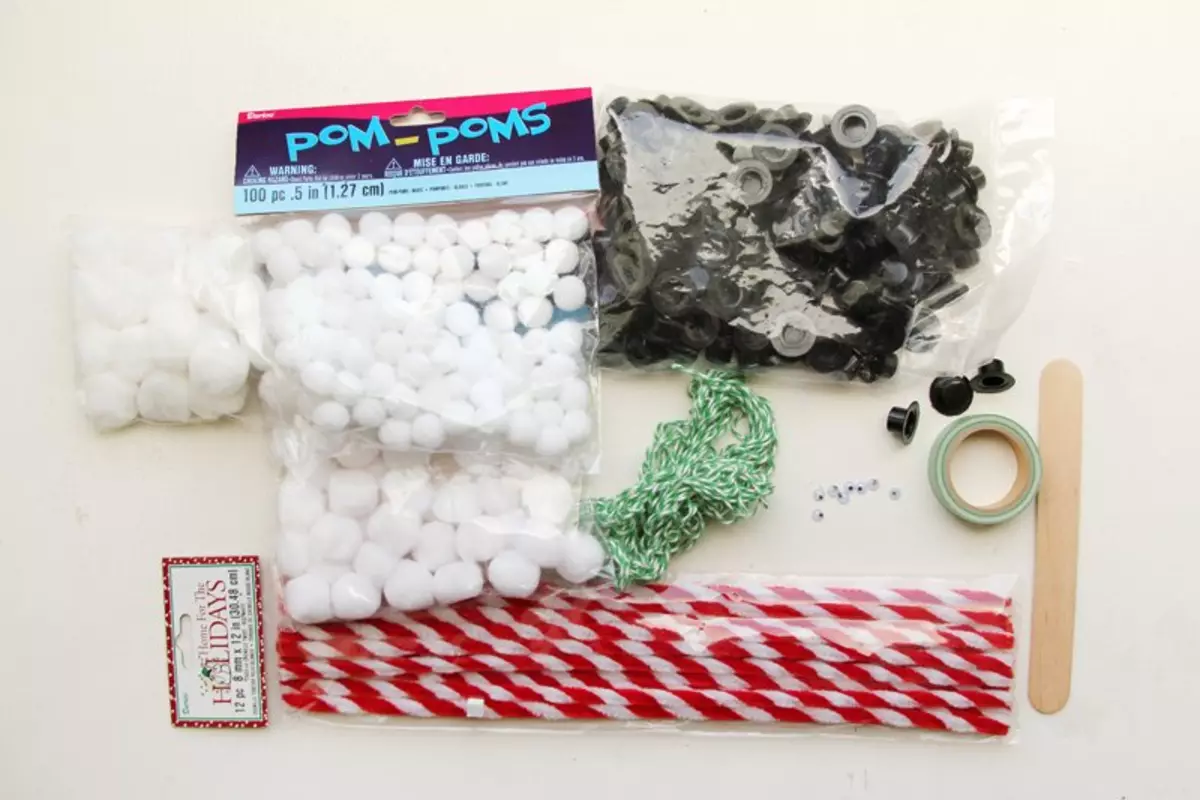
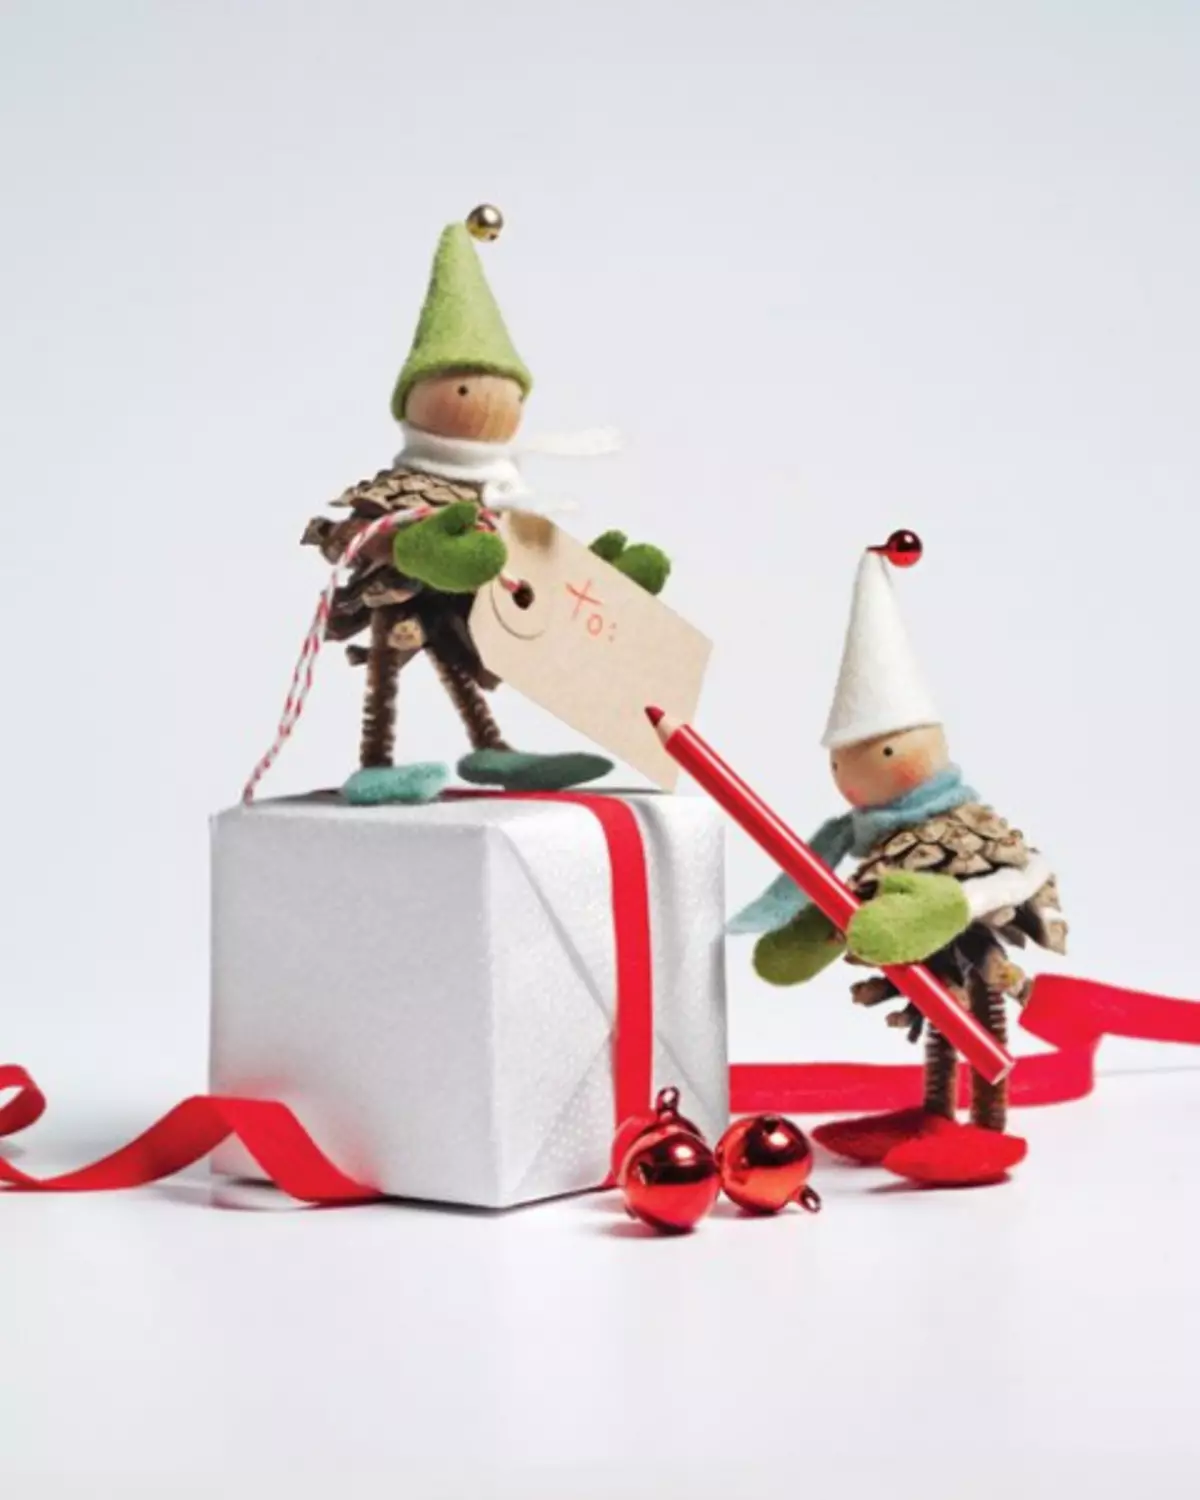
Decorate the Christmas tree with toys made by personally, maybe everyone. To do this, you will not need special materials or tools, the needlework skills will not need. Just follow the step-by-step instructions and, in the end, your Christmas tree can decorate fabulous gnomes, superheroes bears, flickering snowflakes with LEDs and much more.
Master class number 1: Toy deer from puzzles

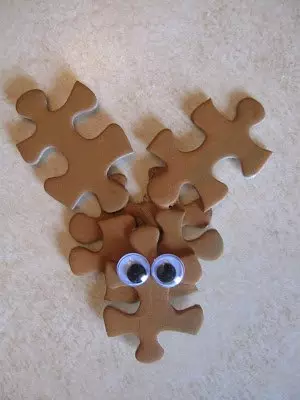
Budget and interesting toy on the Christmas tree can look very festive. Especially the process of its manufacturer in the soul of those who have puzzles, more precisely, parts from them.
Materials
To make a deer toy from puzzles with your own hands, prepare:
- pieces of puzzles;
- paint brown;
- glue;
- Small red pompon or bead;
- eyes on self-adhesive basis;
- newspapers;
- Red satin ribbon.
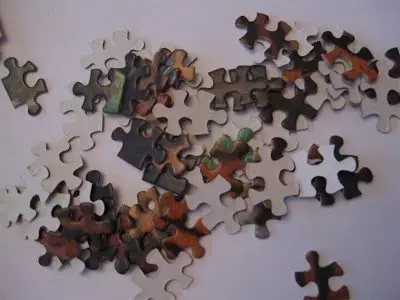
Step 1 . To form a deer face, you need to take six pieces from puzzle. They must be of the same size and in the form of the letter "H". Slices of puzzles fold, as shown in the photo, and lubricate them with glue. Wait until the glue is grabbing.

Step 2. . The working surface is made with a newspaper or paper and paint the design of brown paint puzzles. You can take the paint acrylic or ordinary in the cans. Apply it tight so that the puzzle pattern is not visible through it. You can do and a little different way, applying the basis of paint white and only after brown. Leave this workpiece to complete paint drying.

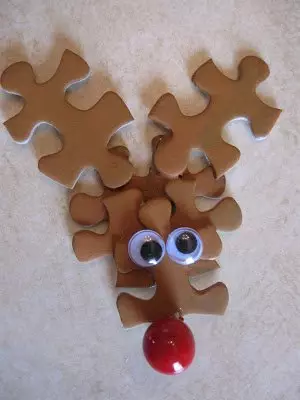
Step 3. . Stick to the face of the eye of the eyes.
Step 4. . At the tip of the muzzle, glue a bead or pompon suitable size.
Step 5. . Fold the tape with a loop and stick it to the back of the Christmas decoration.
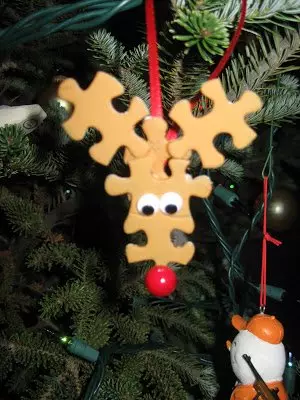
Deer from puzzles is ready. You can decorate the Christmas tree.
Master class # 2: Polymer clay superhero bear

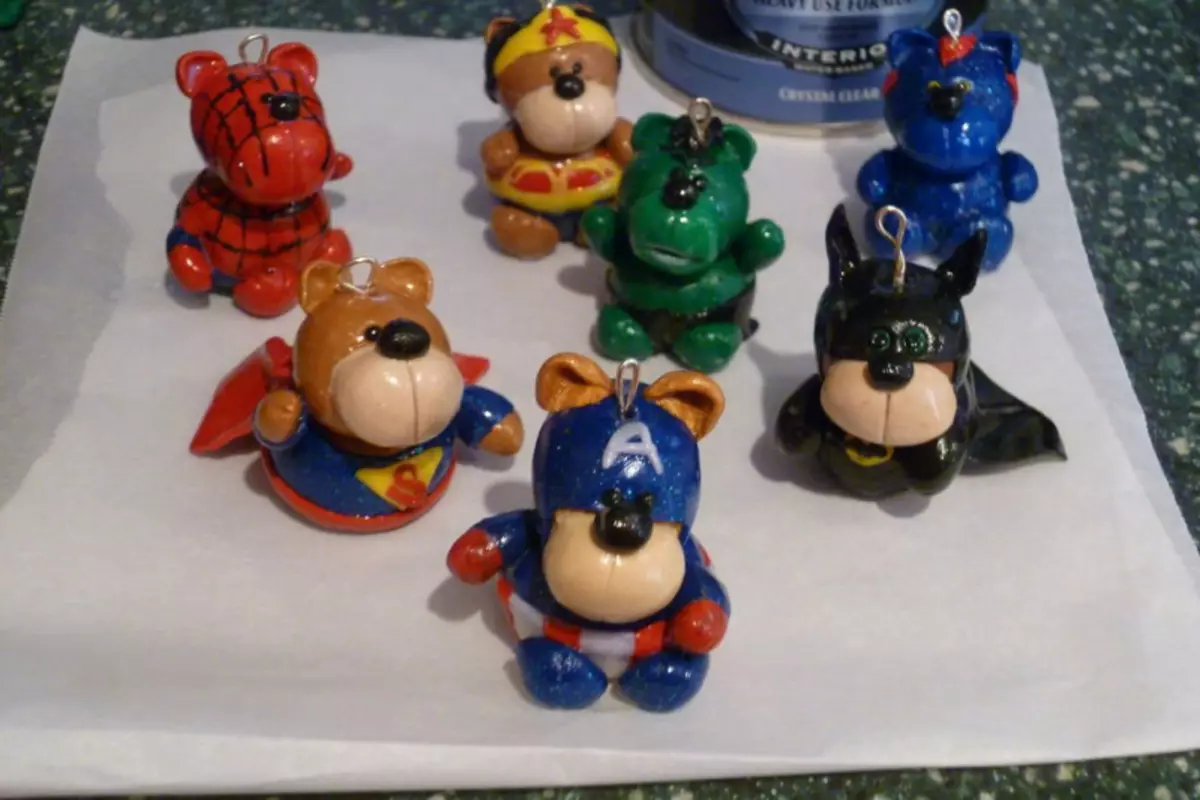
The usual feature of the polymer clay bears can be played in a new way, pleased with the appearance on the Christmas tree not only you, but also a child. To do this, you need to make the basis of the toy and after coloring it with paints, stylizing a bear under a popular character. As a result, you can get a spider bear, Betman, Mishk Hulk and other heroes.
Materials
To make a polymer clay bear, prepare:
- polymer clay of different colors;
- rope for clay;
- acrylic paints;
- Tools for working with polymer clay (you can replace with hooks and needles);
- varnish or glaze;
- brush;
- wire;
- Circumgars.
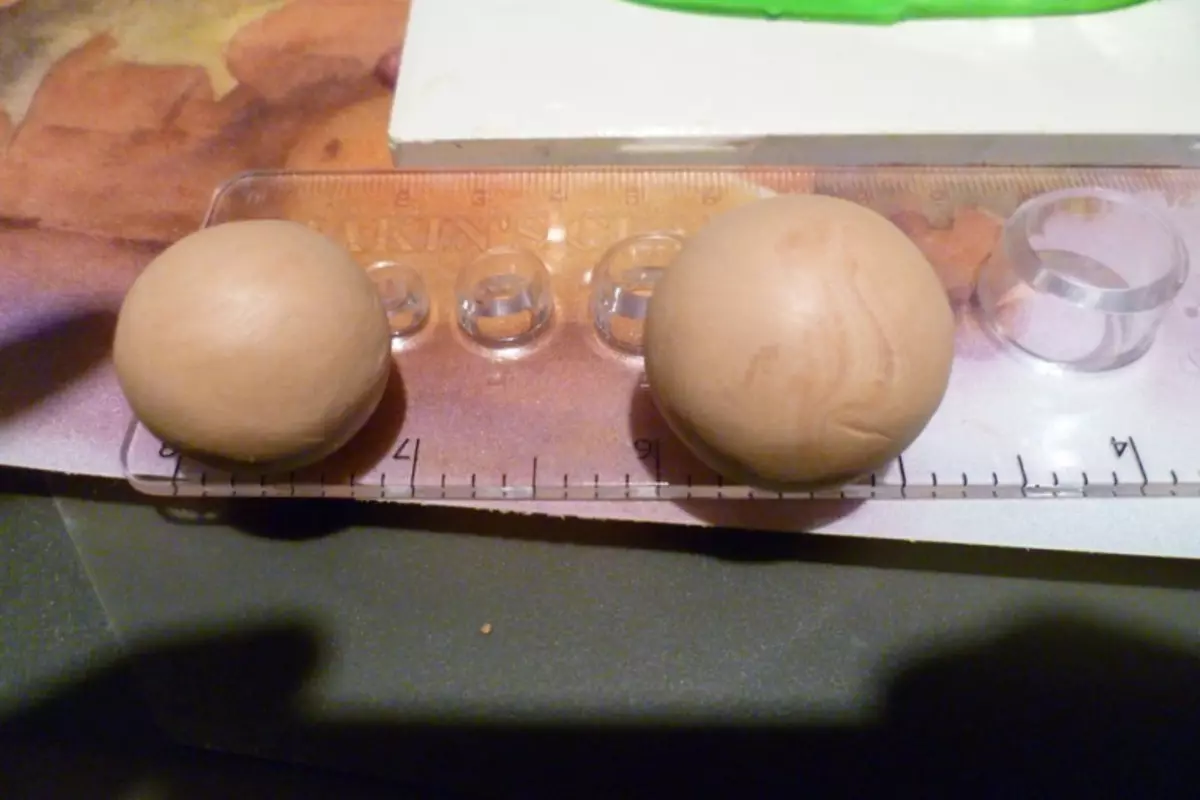
Step 1 . Shot from a polymer clay light brown color two balls of different diameters. One of them is a torso of the bears, and the second is his head.
Article on the topic: Cross embroidery scheme: "Wolves and a couple of wolves" free download
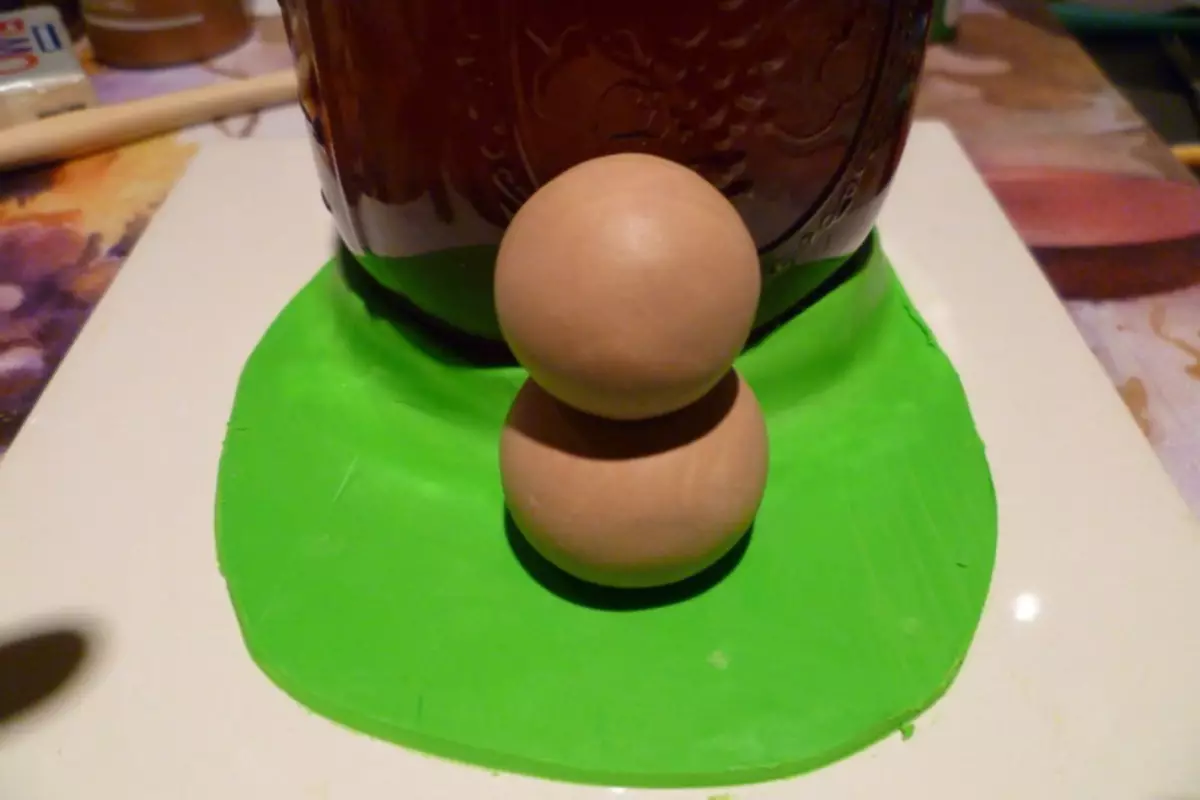
Step 2. . Large ball press away with a finger, making a depression for mounting the head. Secure the last, and for the reliability of the attachment you can use a piece of wire. In this case, the toy will be a Christmas tree, and therefore carry a larger wire than the Bear itself. At the end of her round hinges.
Step 3. . From the ball of clay brighter, make a bear face, slightly giving it in the middle. Make the eye recesses. Attach the nose and eyes from the black polymer clay to the face of the bear.

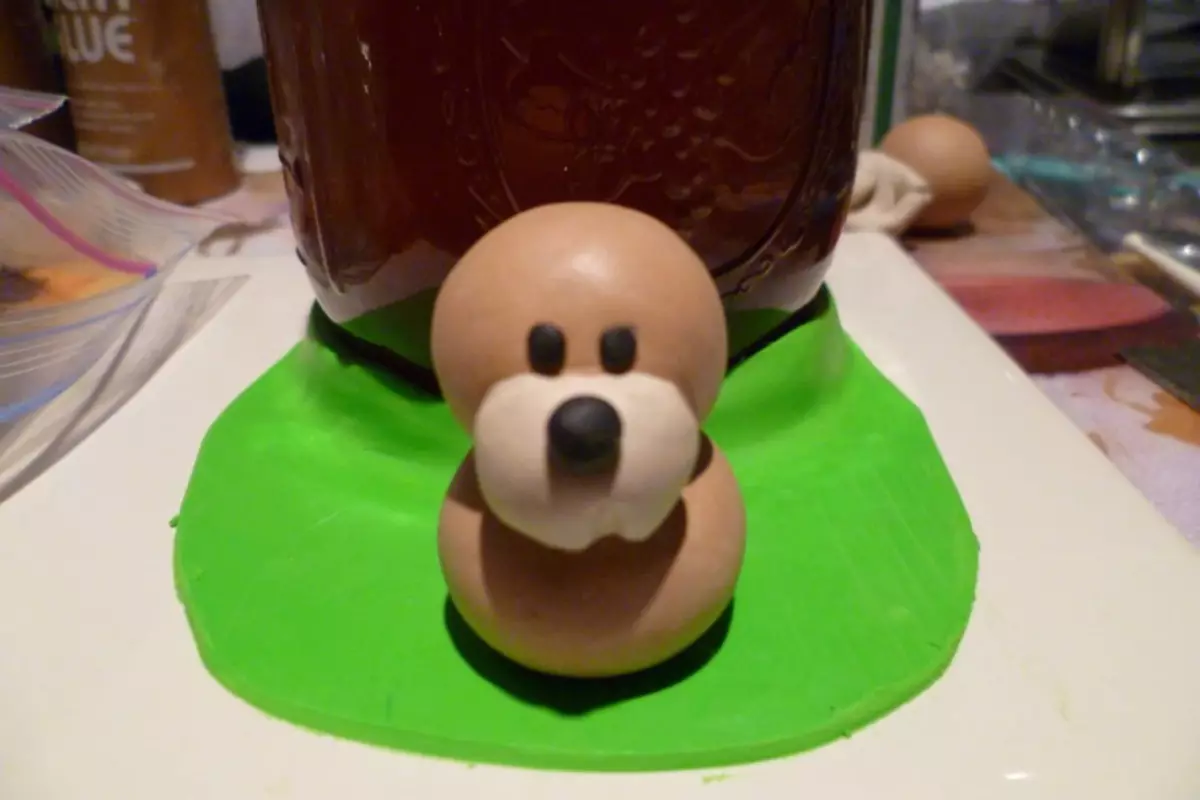
Step 4. . Craw your ears and paws. Attach them to the main figure.
Step 5. . Send a figurine to be baked. And after coloring it and cover with several layers of varnish or special icing for polymer clay.
This is the base of the Bear Figurine. You can make any character from it, quite after baking to paint it into characteristic colors or modify some details at the production stage. For example, for the superman figurines, you need to make a raincoat from polymer clay and give the teddy's characteristic posture, for Batman, you need to cut out others in the form of the ears, etc. As a result, you can get a whole collection of superhero bears. To the attachment, tie ribbons and can decorate the toys of the Christmas tree.
{Google}
Master Class # 3: Snowman from Pomponov DIY

A snowman from pumps is done quickly and easily. Screw materials will rise as the additional elements of the decor. You can use a snowman figure not only as a Christmas tree toy, but also as a bookmark for books.
Materials
Before making a snowman from pumps, prepare:
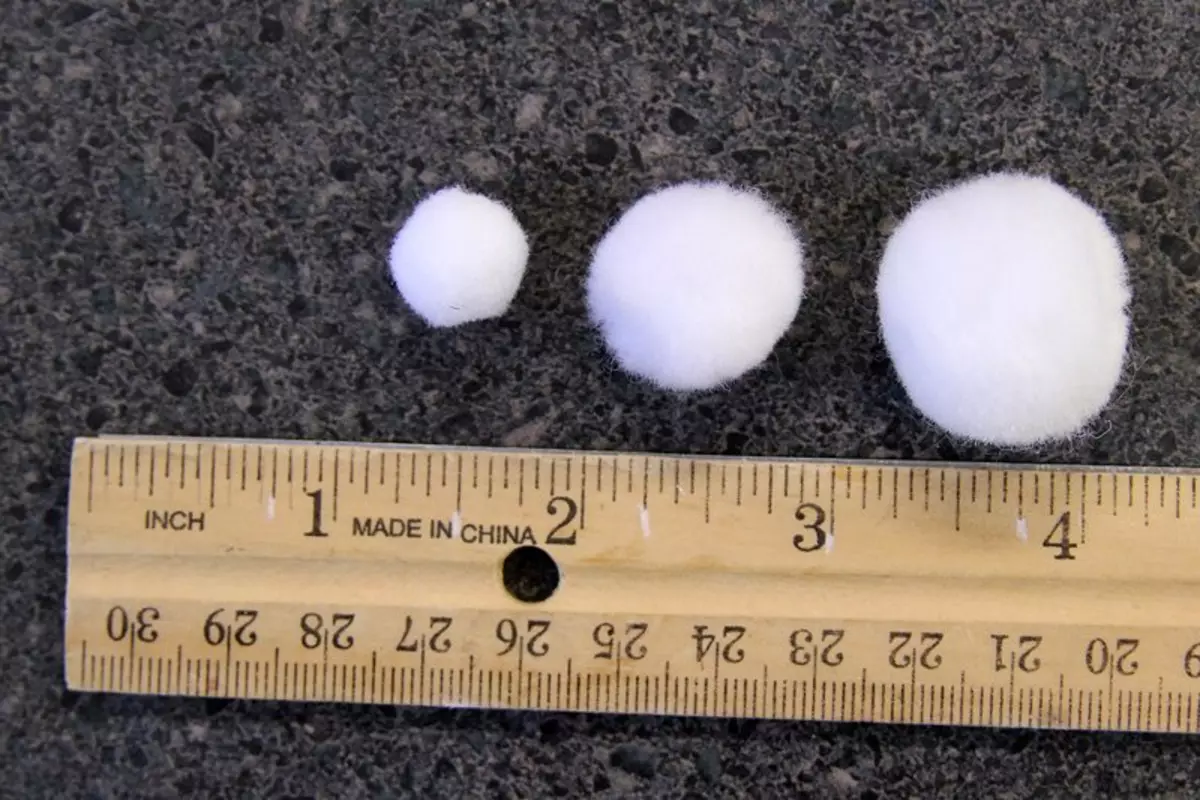
- White pumps of different diameters;
- self-adhesive eyes;
- lace or tape;
- scissors;
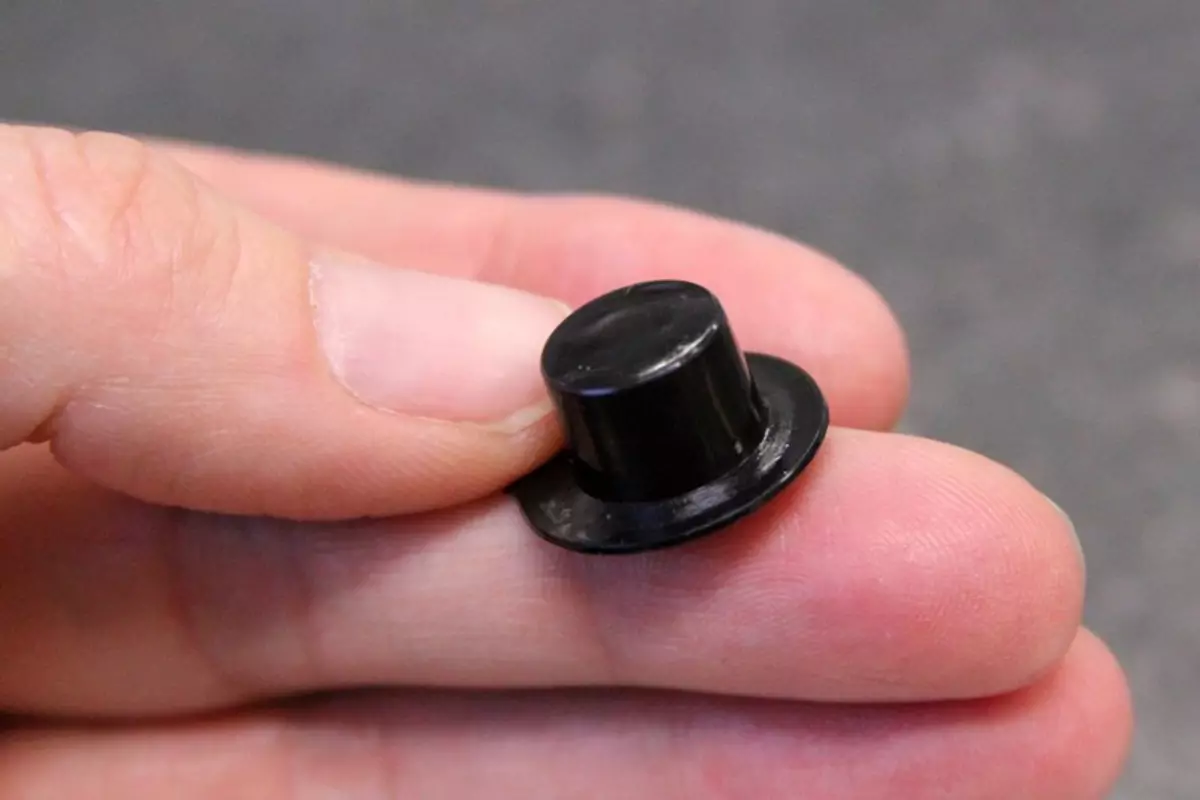
- plastic cap from cream;
- hot glue;
- Ice cream sticks;
- Scotch with color ornament.
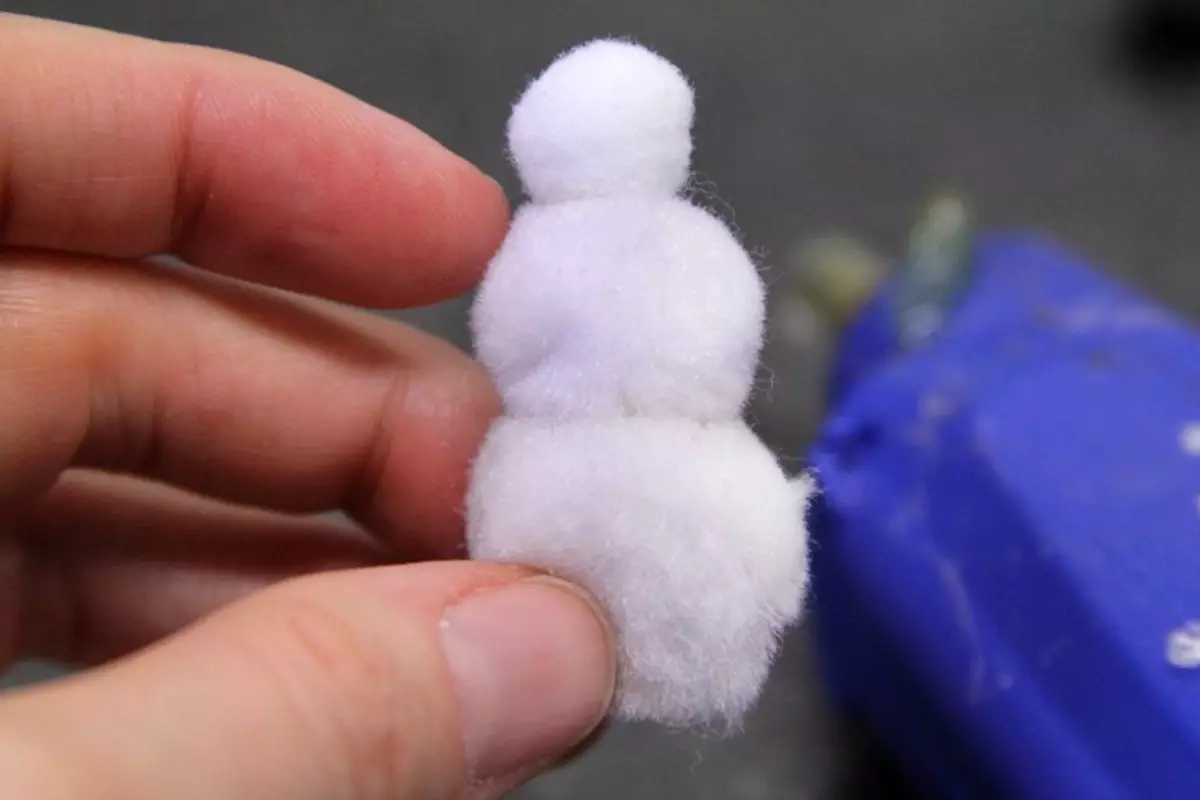
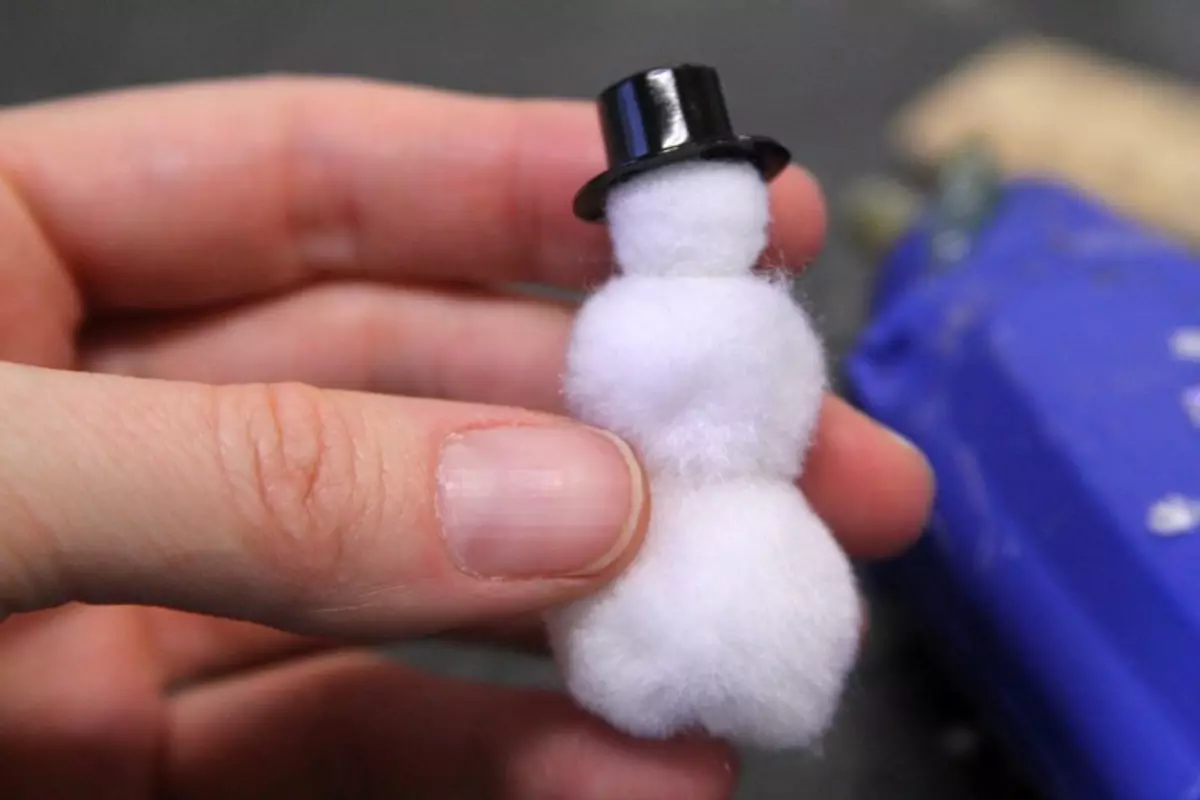
Step 1 . From pumps of different diameters, collect a snowman torso. Details of the popute to each other with hot glue.
Step 2. . To the head of the snowman, glue the cap from the cream. It will be a hat figurines.
Step 3. . Lace or ribbon Tie around the neck of a snowman using them as a scarf toy.
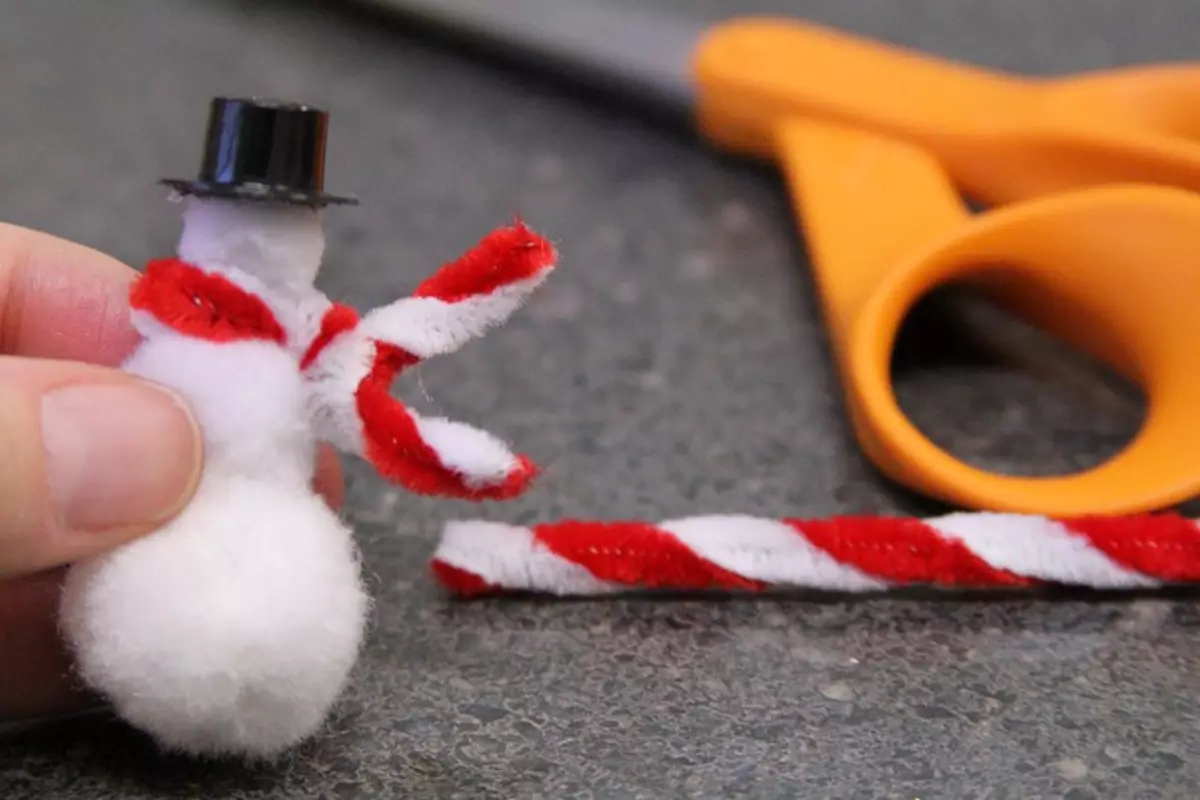
Step 4. . Shack your head.
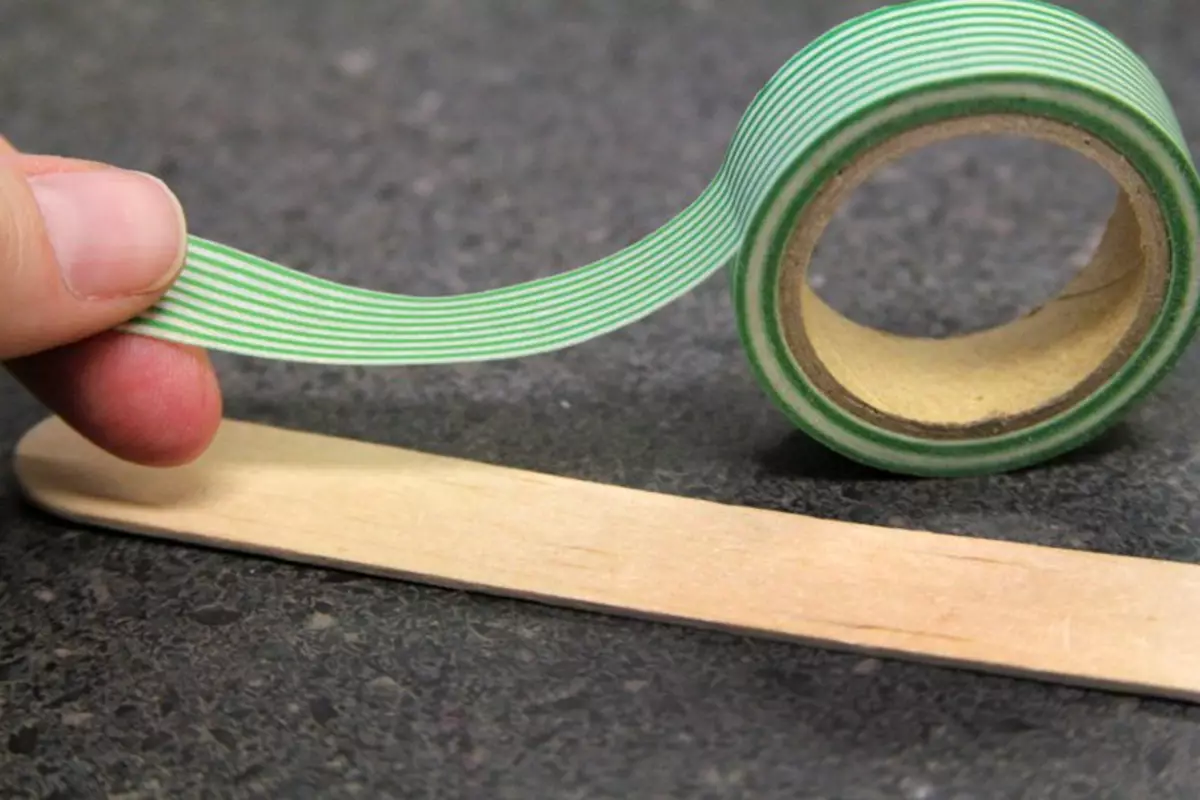
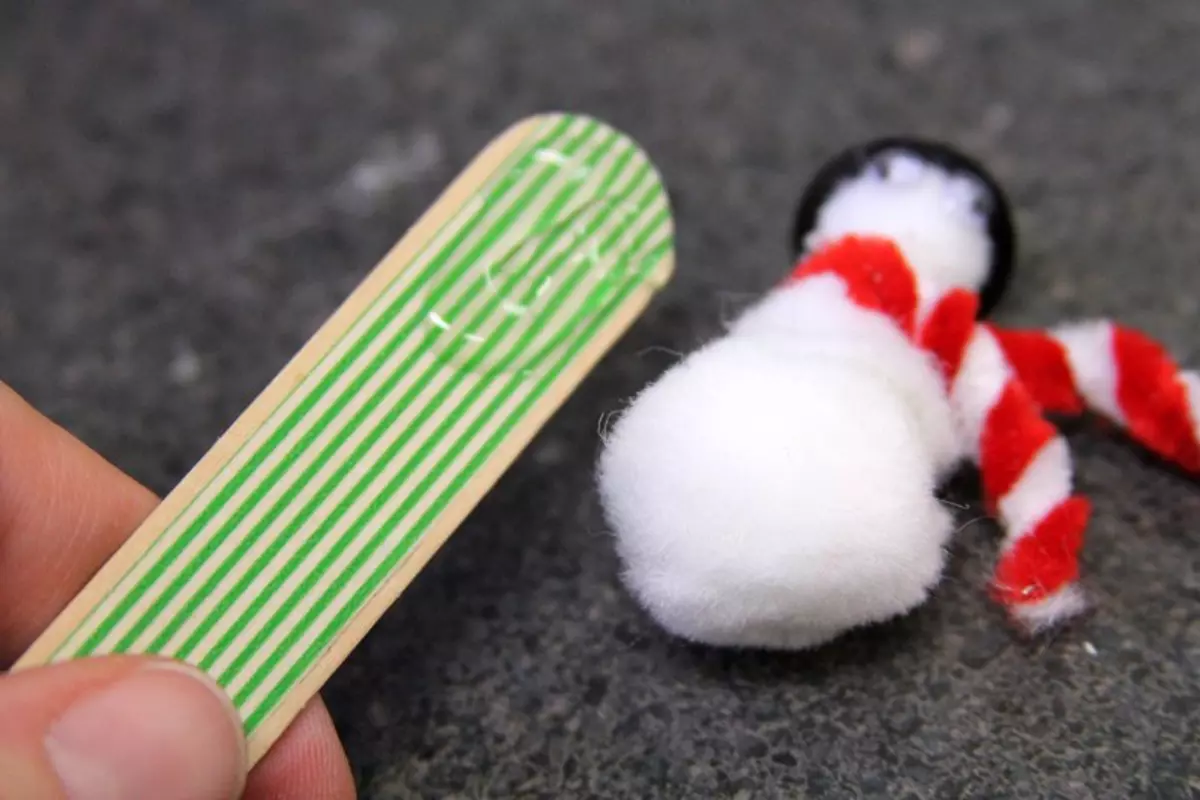
Step 5. . If you want to make a bookmark for a book from a snowman, stir up on a wand for ice cream strip of color tape, and lubricate it with glue. To this area, the fingers gently press the figure and wait until the glue is grabbed.
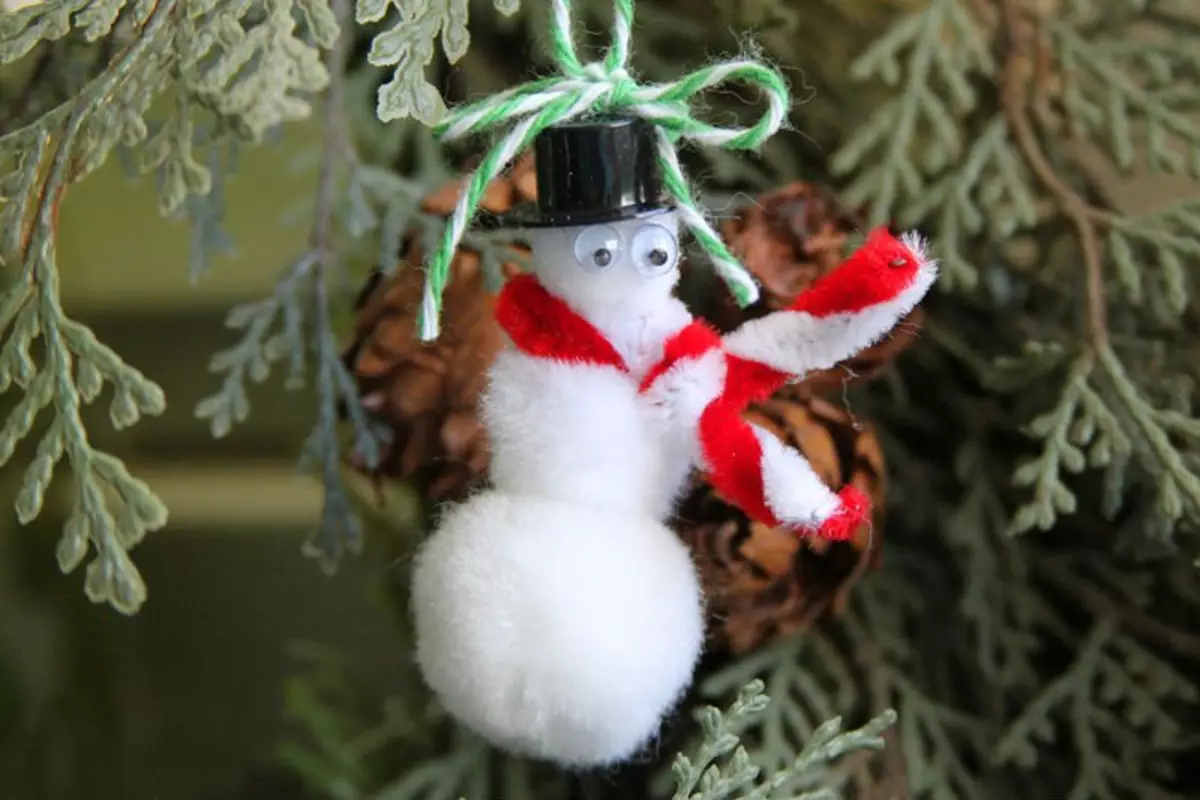
Step 6. . For a Christmas tree toy to a snowman's hat, you need to stick the thread tied in the form of a loop with a bow at the end.
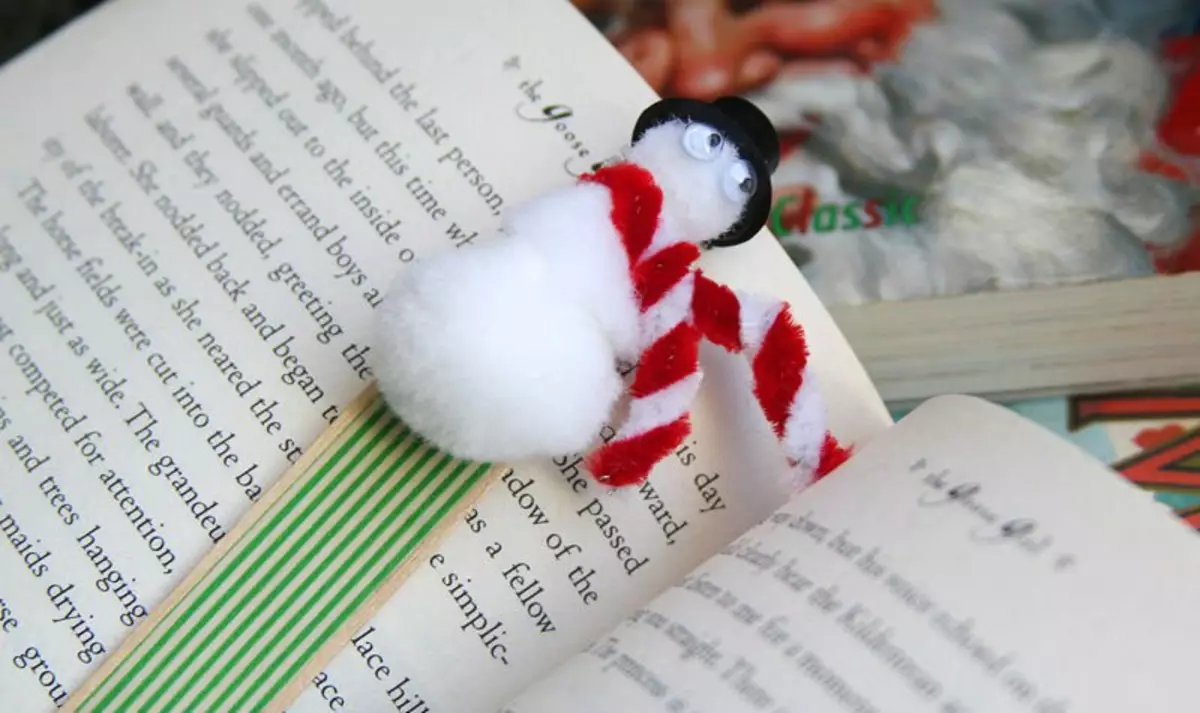
Toy-snowman is ready!
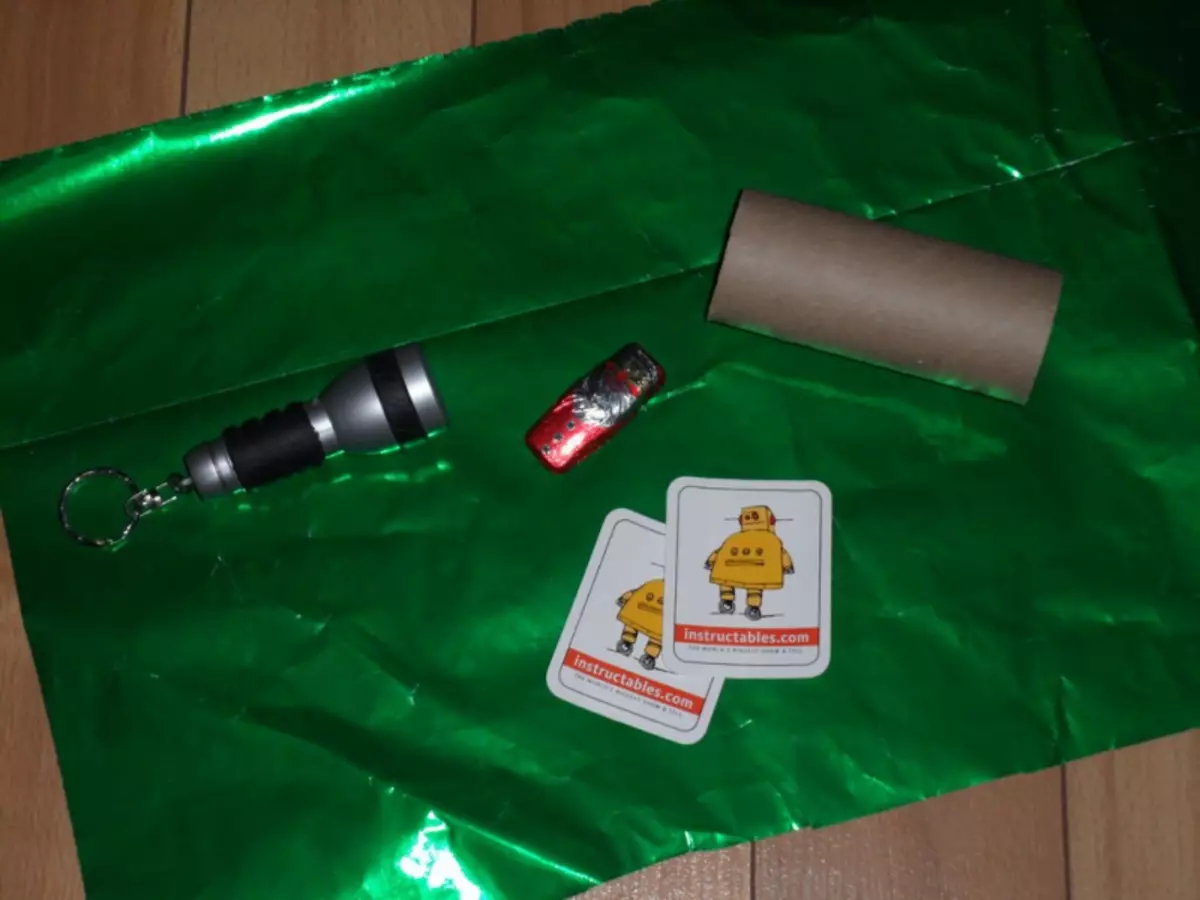
Master class number 4: candy-gift with your own hands
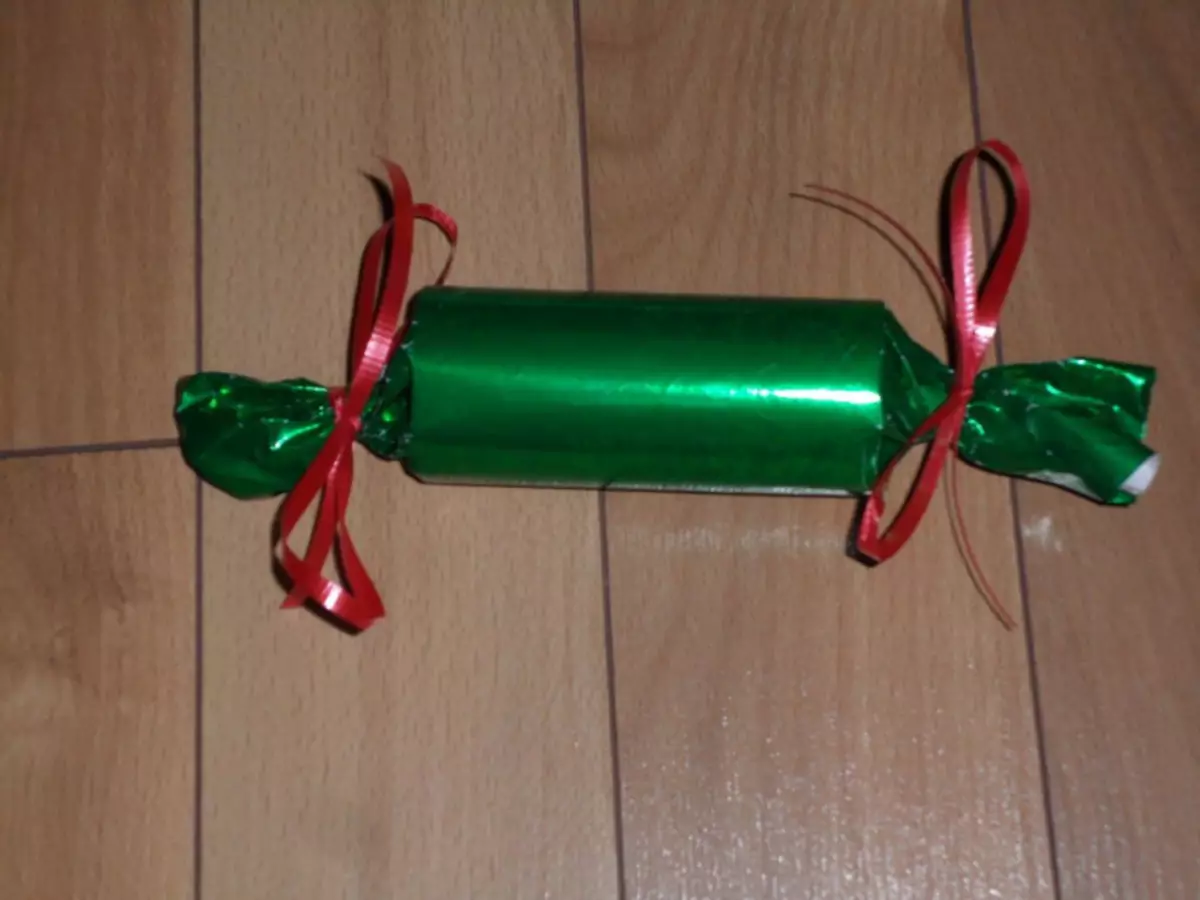
You can decorate the New Year tree and a gift if he is not big. So that such a package looked at the Christmas tree appropriately, it is necessary to make it right. In this master class, we suggest you make candy-gift with your own hands.
Article on the topic: Crochet scarf: Scheme for beginners with description and video
Materials
Before you start work:
- cardboard sleeve from paper towels;
- wrapping paper;
- a small gift itself;
- scissors;
- Scotch;
- ribbon.
Step 1 . Expand the packaging on the table by turning it face down. On the paper at the very edge, put the cardboard sleeve.
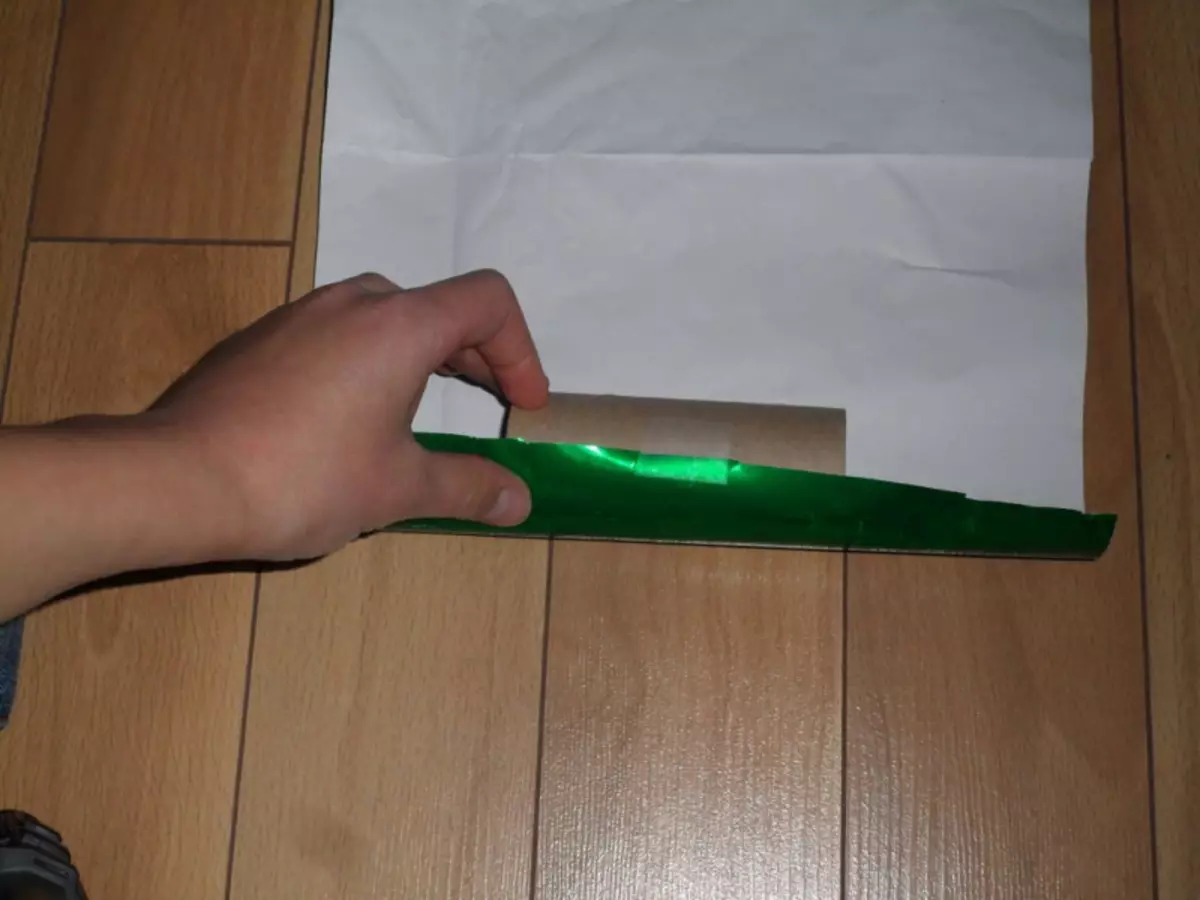
Step 2. . Start twisting it, capturing the edge of the wrapping sheet. Make a few revolutions and paper scissors cut. Paper edges on the sleeve secure a small piece of scotch.
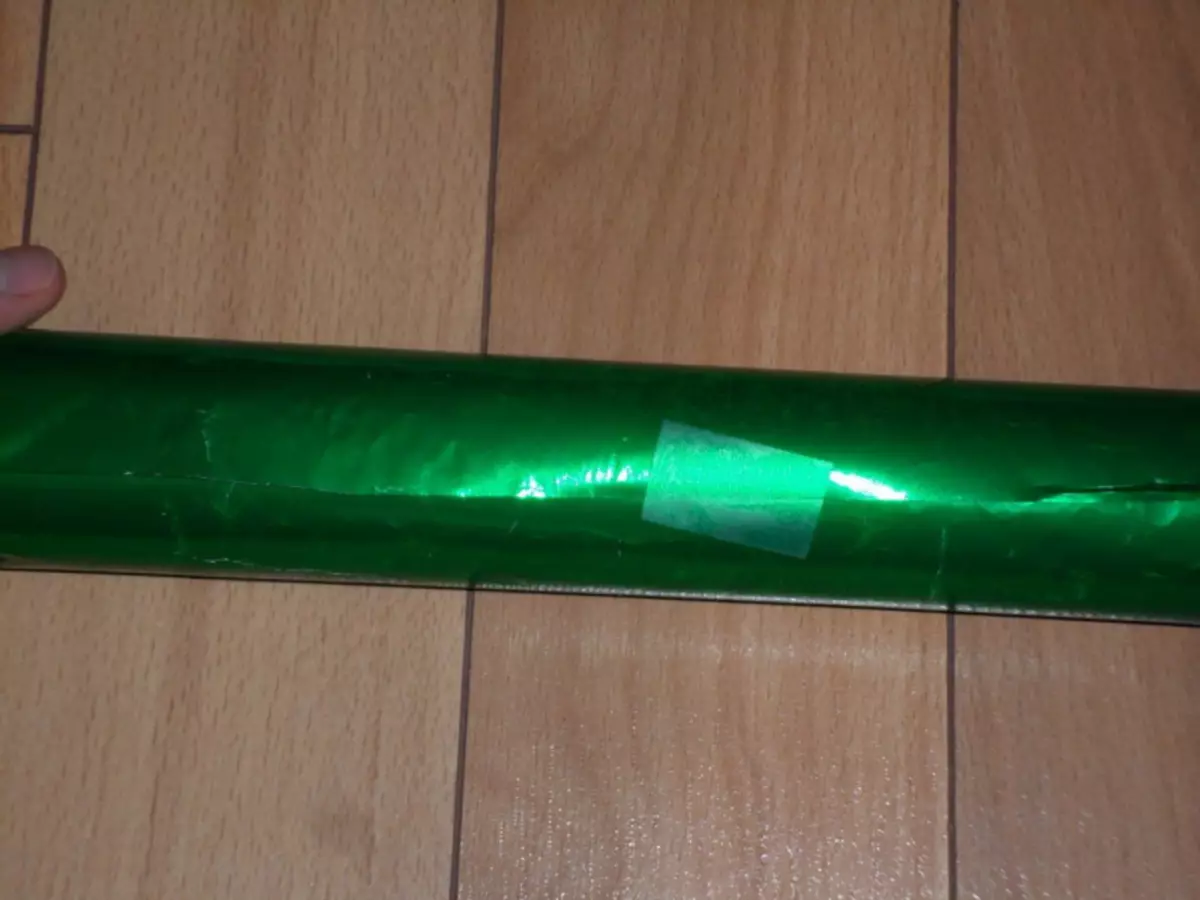
Step 3. . Put gifts or sweets in the sleeve.
Step 4. . Wrap paper around the edges from the bushings, wrap, forming candy.

Step 5. . So that the edges of the gift candy are not promoted, tie them with ribbons.

From the tape you can additionally make a loop and hang a gift for the Christmas tree.
Master class number 5: Christmas balls from grape vines do it yourself
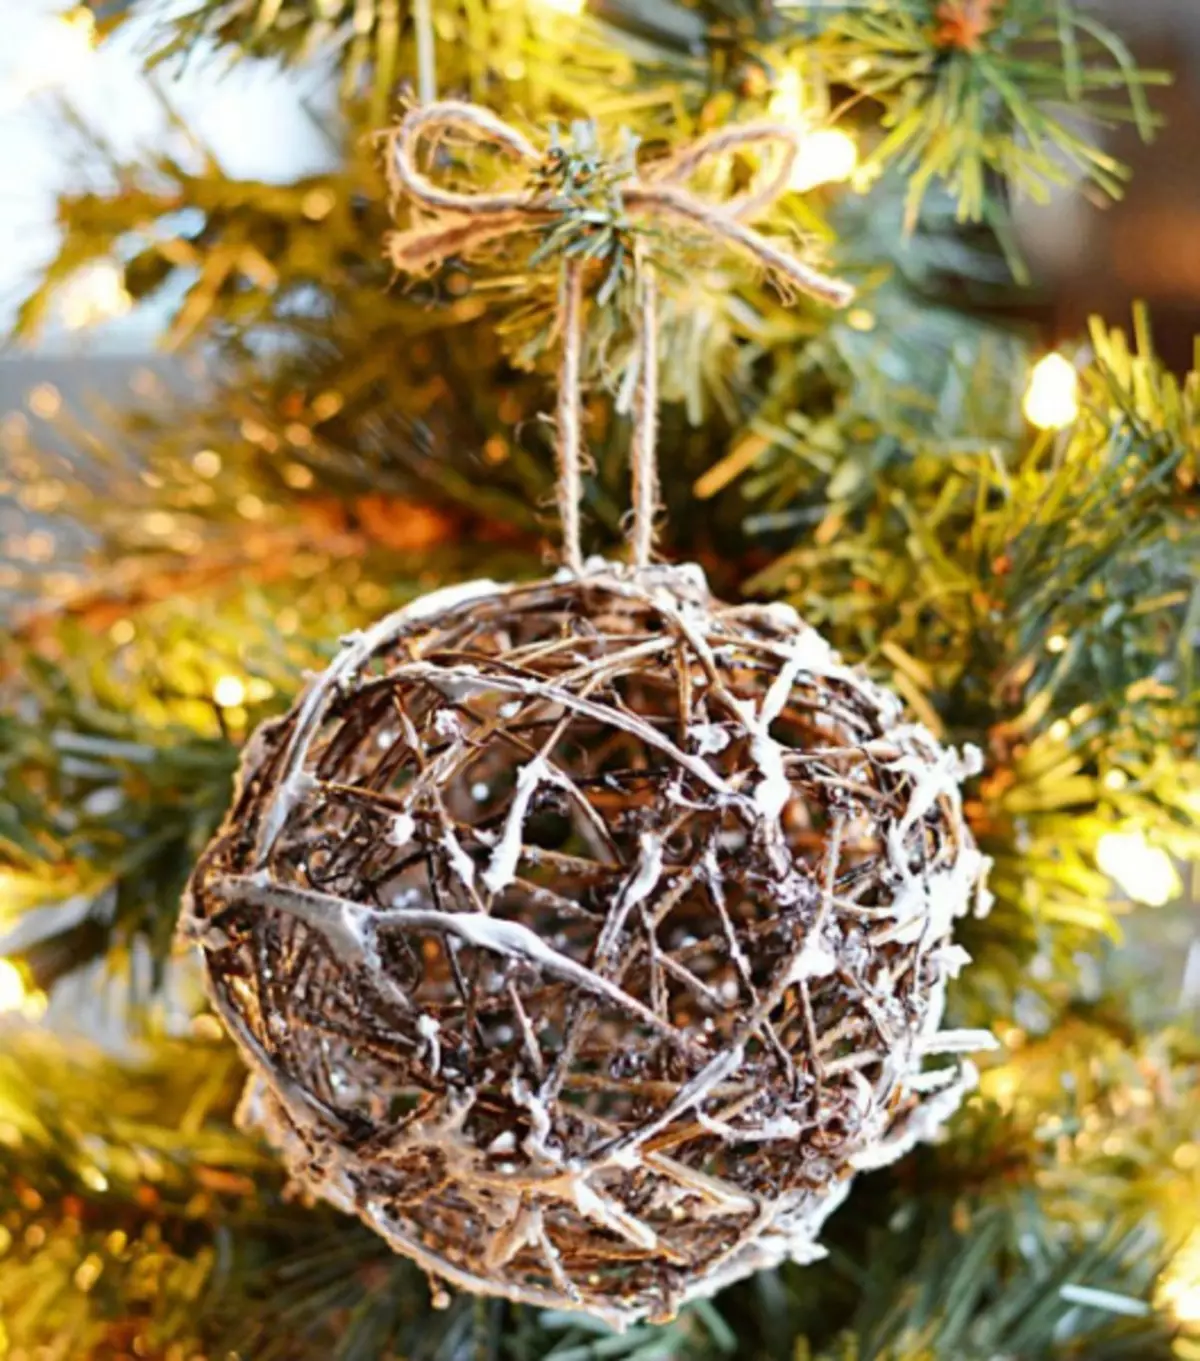
Balls from natural material will look at the Christmas tree are not worse than factory. Artificial snow and lacquer will help them to give them a festive New Year's gloss.
Materials
Before making Christmas balls from grape vines with your own hands, check availability:
- thin grape twigs;
- hot glue;
- scissors;
- varnish in the can
- Mike twine;
- Artificial snow or sequin.
Step 1 . From the vine you need to make balls. To do this, simply cut the branches of grapes into small pieces and glue them with each other, causing pointless hot glue. If you are afraid that a smooth ball will not work, you can use a foam ball as the basis. It is formed on it two halves and after their drying, remove the basis and finally scrape them.
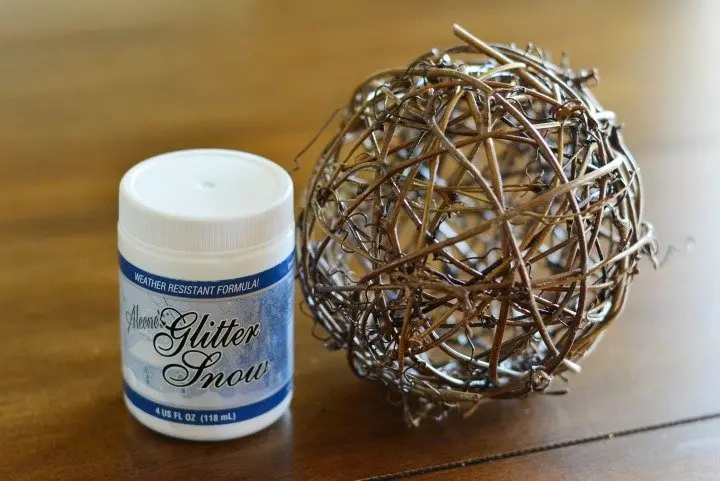
Step 2. . Decorate the ball with artificial snow. Cover them separate twigs. Instead of snow you can use glue and dry sparkles. Surplus the latter do not forget after drying the glue to flick.

Step 3. . Cover the ball with a varnish of the canister to give it a shine and fix the decor applied earlier.

Step 4. . Attach a piece of twine knocked down to the Christmas decoration.
Christmas ball ready!
Master Class No. 6: Dwarves from cones with their own hands
Figures of funny dwarves will also like you and your guests. They can be decorate not only the Christmas tree, but also New Year's gifts, attaching them as a souvenir.
Materials
Before making gnomes from cones with your own hands, prepare:
- pieces of felt of different color;
- scissors;
- needle with thread;
- hot glue;
- pine cone;
- wooden bead;
- acrylic paints;
- brush;
- brushes for cleaning the tubes;
- Beads with a metal flares.
Step 1 . Clean the bump from dust and garbage. The bump must be discontinuous and durable. Turn it up to the bottom to the top and stick to the last wooden bead. She will be to become a toy.
Step 2. . Brushes for cleaning brown tubes cut into two equal parts. Stick them with one end, inserting into the bump. It will be the legs of the gnome. You can make hands from the felt strips stitched in the form of small cylinders.
Article on the topic: Master class on butterflies of plastic bottles: Templates of crafts
Step 3. . From the felt of different colors cut the patterns of the mobs, slippers, cap and scan of the gnome. Mittens, slippers and cap sew. To the head leukery, visiting the metallic shade bead.
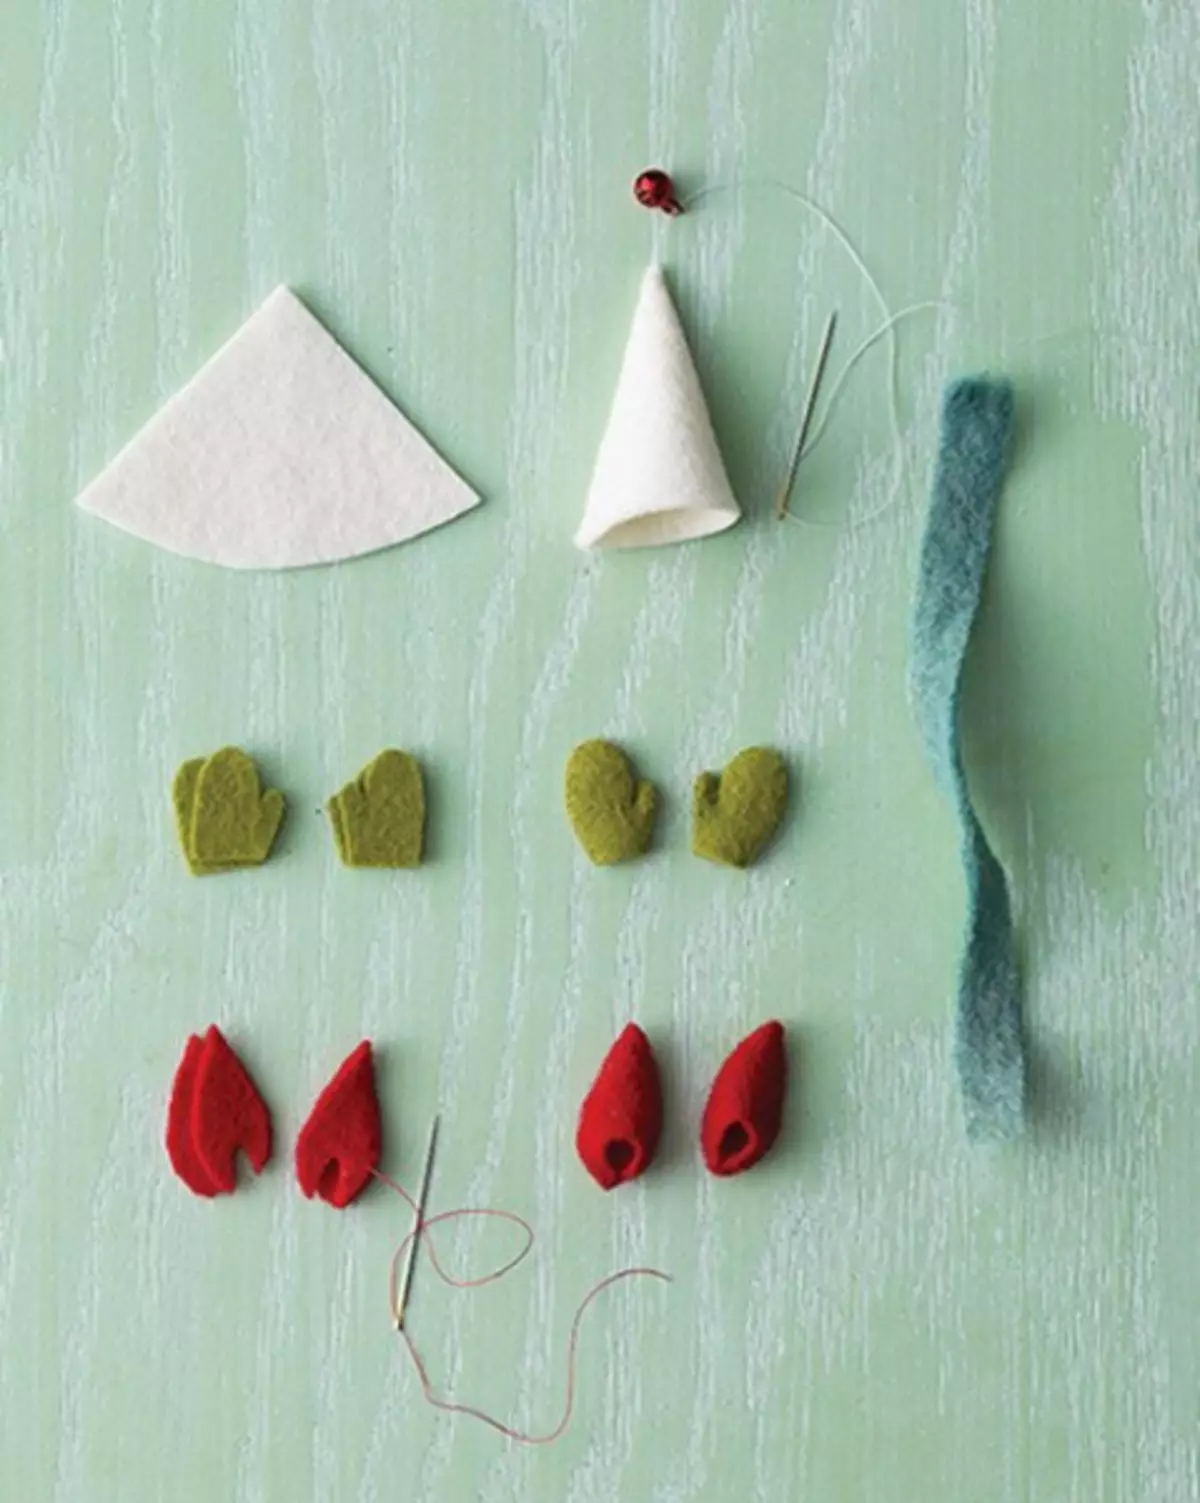
Step 4. . Stick all the clothes to the dwarf. Acrylic paints draw it face.
Gnombic ready!
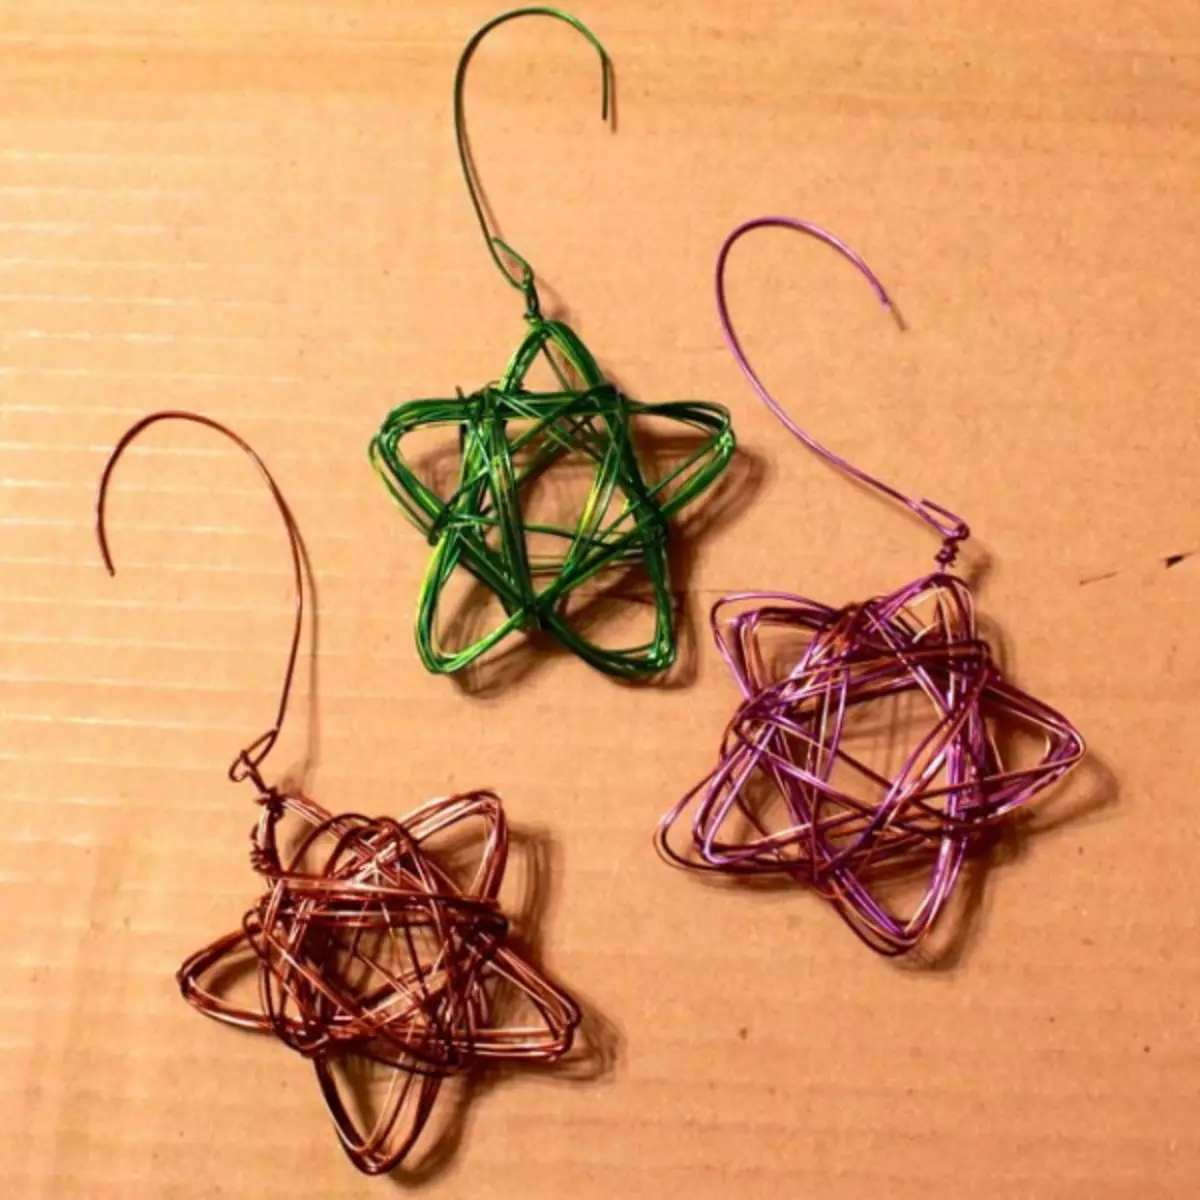
Master Class number 7: Surround star from wire with their own hands
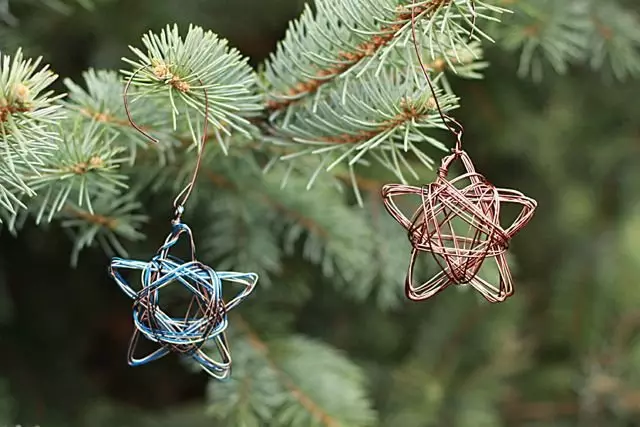
Another budget version of the Christmas decoration looks no less interesting. We are talking about a surround star from the wire. Naturally, you need to pick up a beautiful colored wire and to prepare the template for which even children will be able to make the star.
Materials
For the manufacture of a surround star from a wire with their own hands, you will need:
- Motions of colored wire;
- nippers;
- round-rolls;
- a piece of wood;
- paper;
- drill;
- nails;
- Scotch;
- a pen.
Step 1 . On paper draw a star. Secure the paper itself on a flat wooden bar.
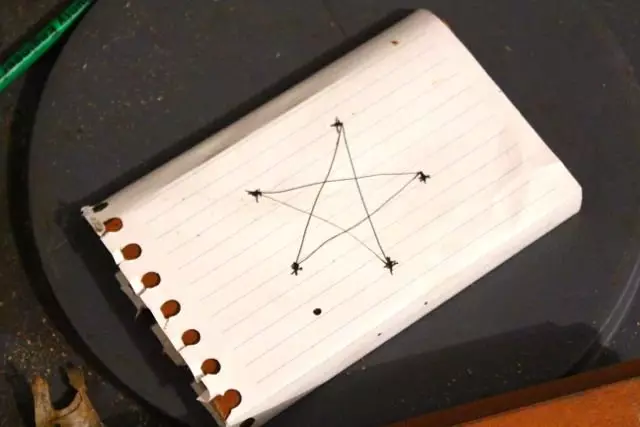
Step 2. . In Brousa drill drill small holes. Maching the adhesive tape on the drill, it will become a kind of stupor so that you do not drill a bar through. Drill take a little smaller size than nails. Holes will need six. Five are the rays of the stars, and the sixth is a fastening for the wire itself.
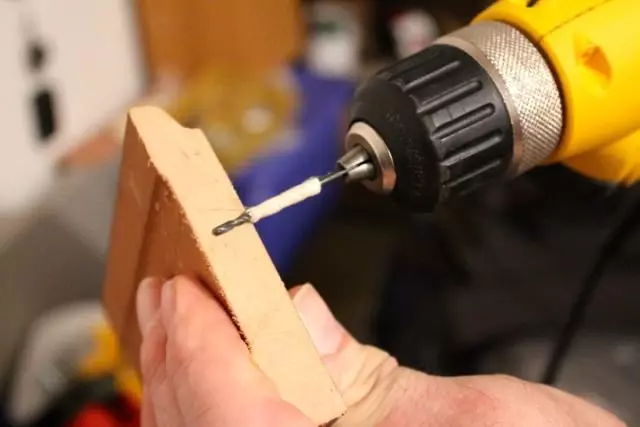
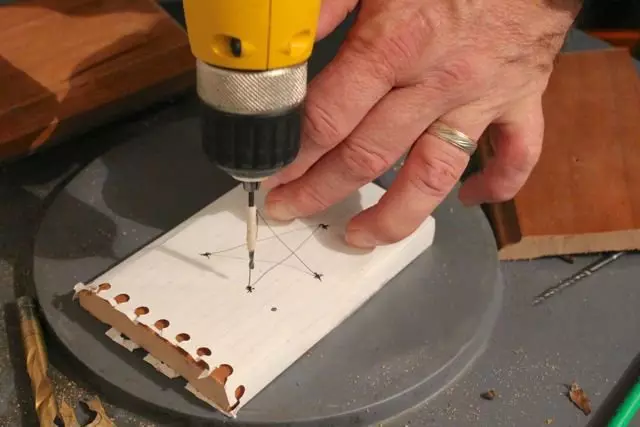
Step 3. . Drive the nails in the bar, remove the paper from the resulting workpiece.
Step 4. . The end of the wire fasten on the sixth carnation, and start winding it, forming a star.
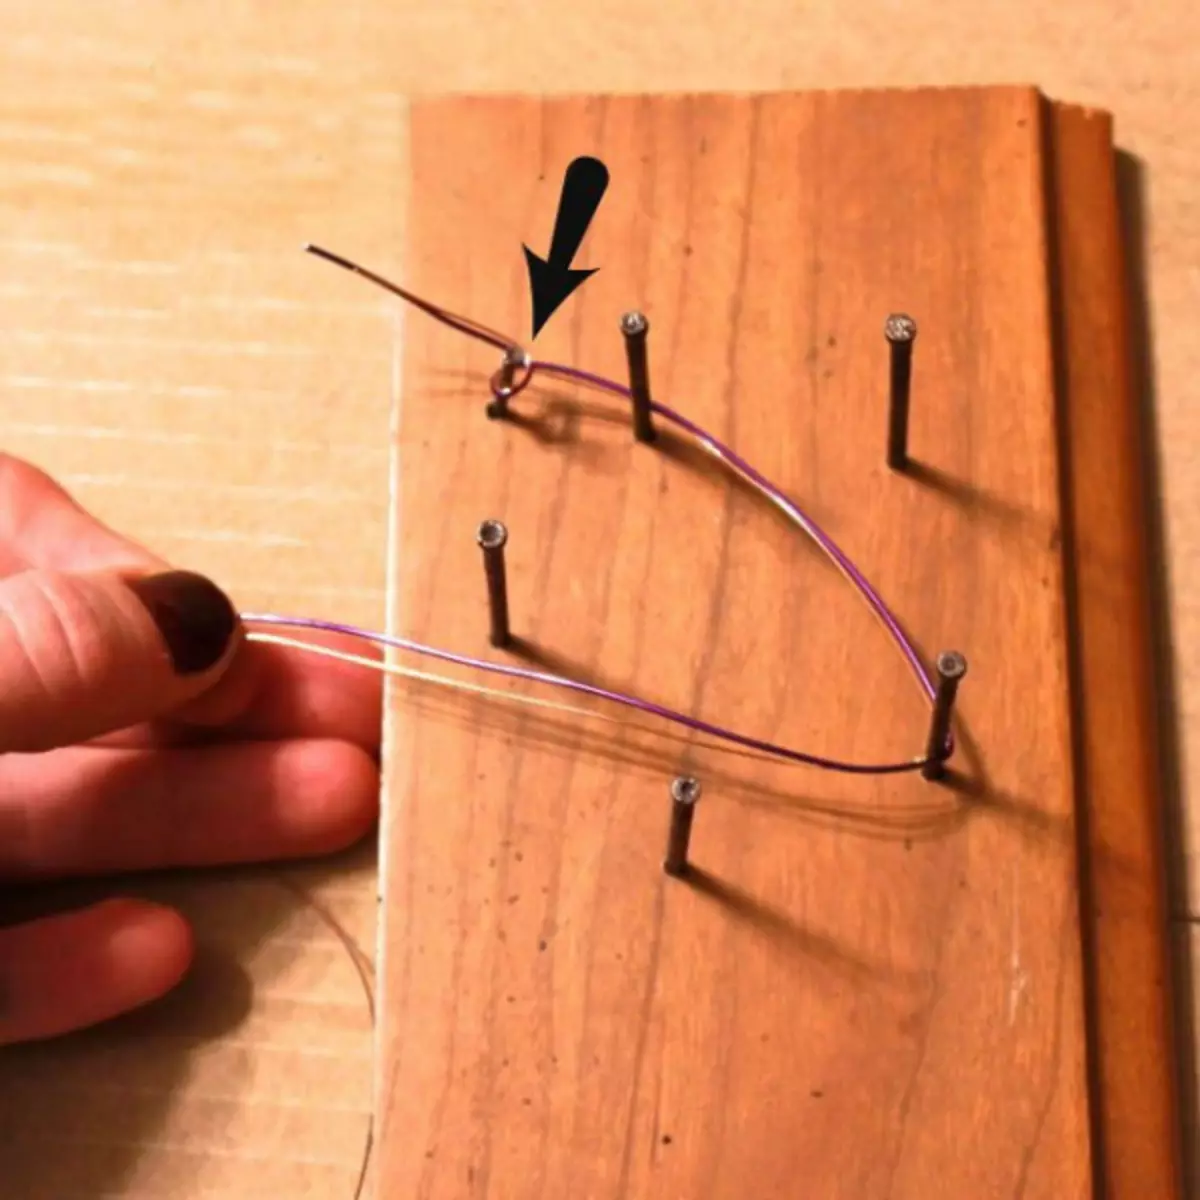
Step 5. . By making several turns, lift the toy up nails and wrap it between the rays. Cut the wire and remove the star from the bar.
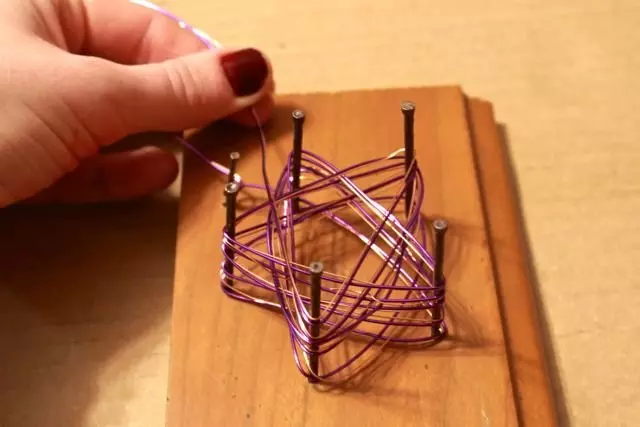
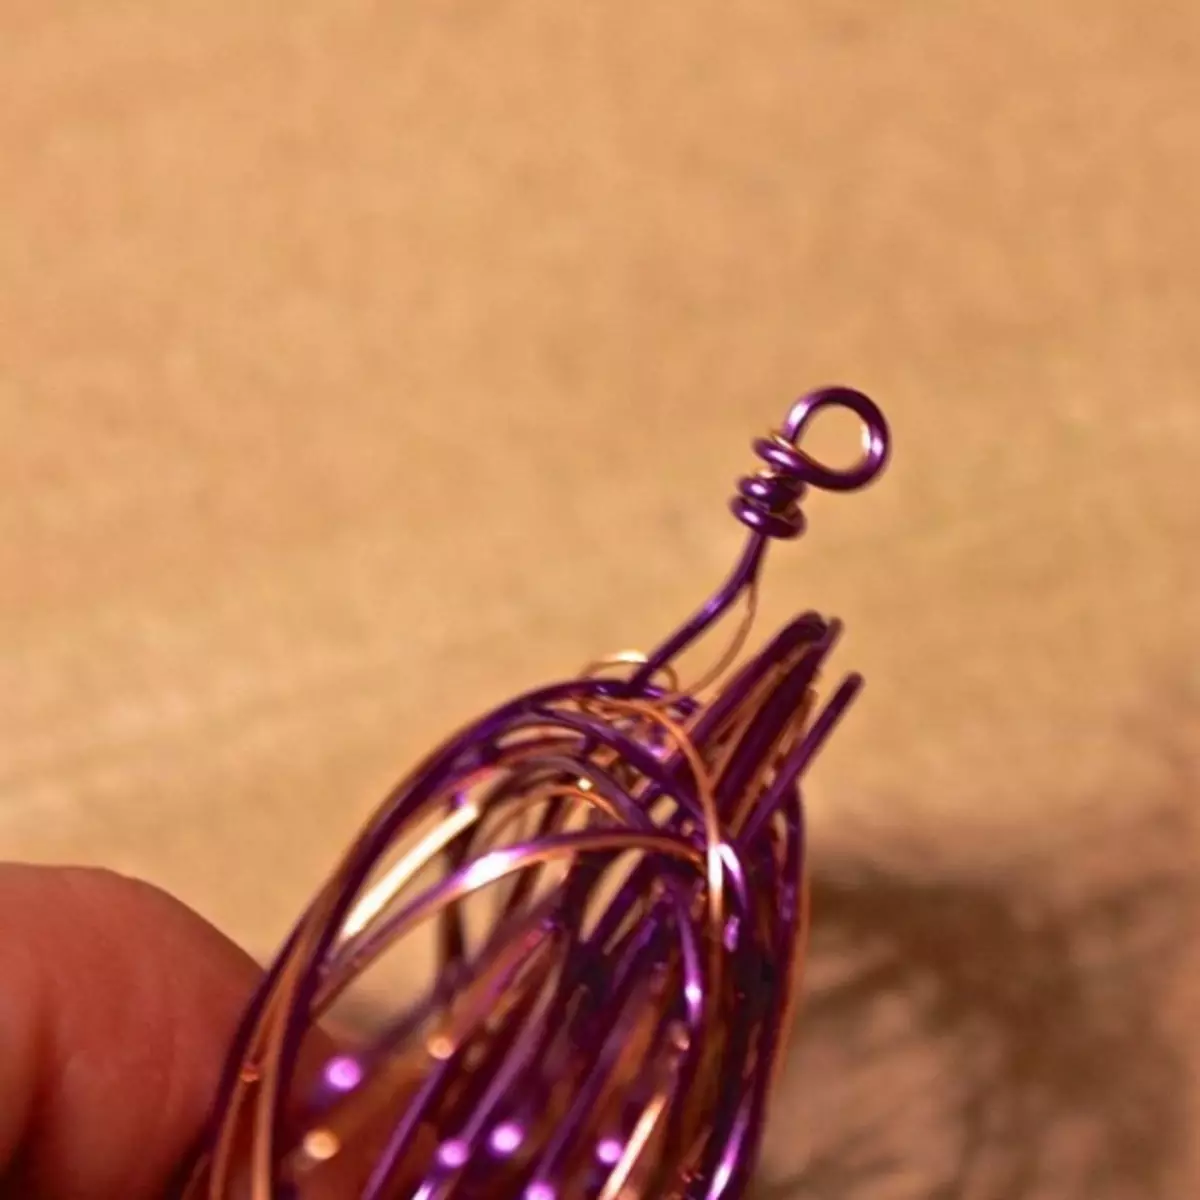
Step 6. . From a piece of wire, make a mount for a toy. The surround star for the Christmas tree is ready!
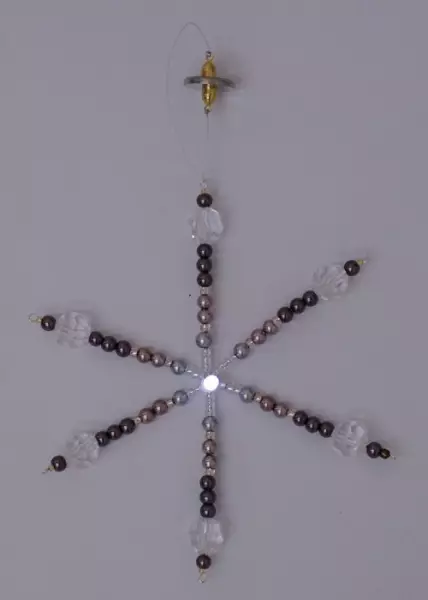
Master class number 8: LED snowflake do it yourself

If the snowflakes from paper or beads for the Christmas tree seem boring you, you can make a more original toy by simply adding the LED element. So, your snowflakes on the Christmas tree will be beautifully flicished.
Materials
Before proceeding with the manufacture of LED snowflakes with your own hands, take care of availability:
- wire;
- bustard;
- fine insulated wire;
- magnetic lock;
- batteries;
- different beads with a wide entrance;
- solder;
- soldering clothes;
- LED.
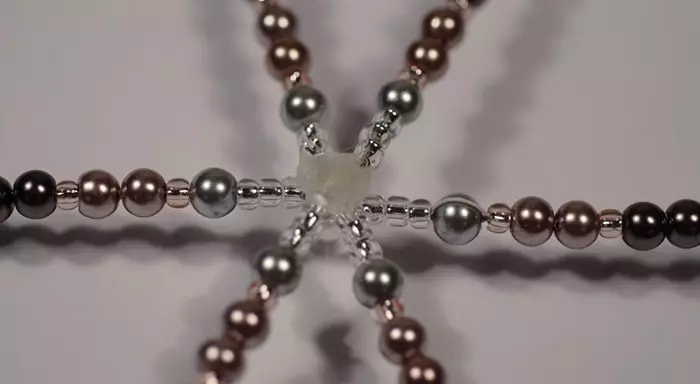
Step 1 . Cut six pieces of wire equal length. Stay on them beads in the same sequence. One end of the wire is rebuild the loop so that the beads do not appear.
Step 2. . Through two wires, skip a thin insulated wire. One wire will be held through both rays and beads, connecting them, the second is only through the top.
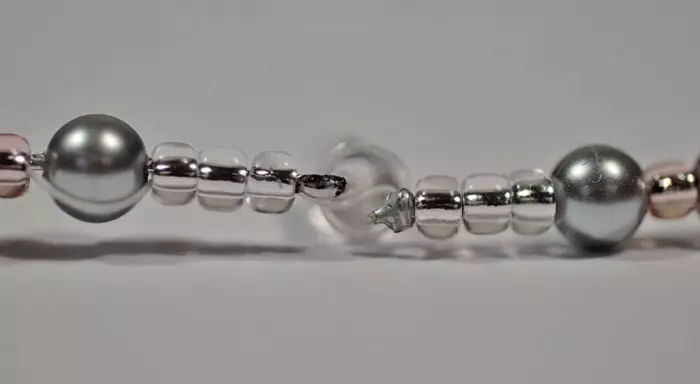
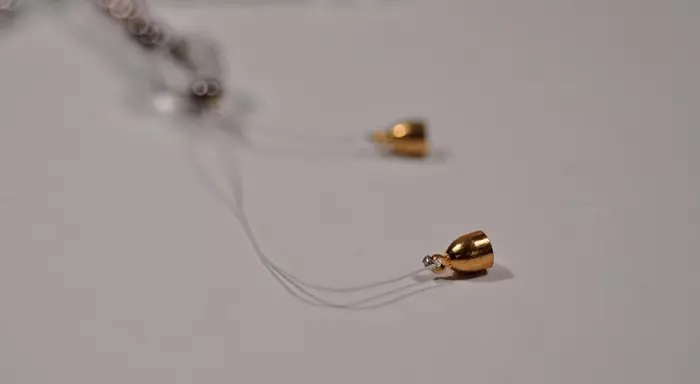
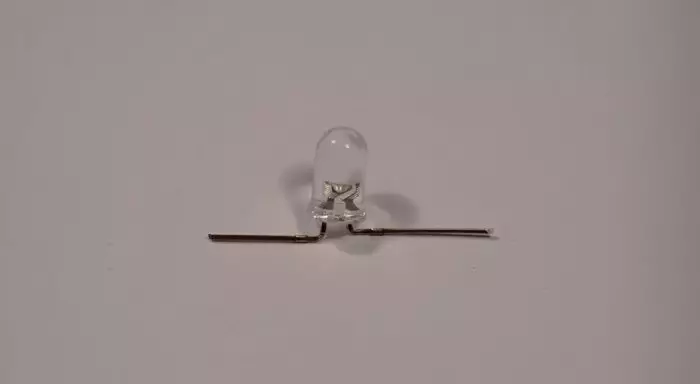
Step 3. . On the median bead, secure the LED. Ends Sleep it to the wires. At the end of the wires, fasten the magnetic fastener.
Step 4. . The remaining rays of snowflakes are glued to the median bead with hot glue.
Step 5. . Insert the battery in the magnetic clasp. Snowflake is ready. Now, when turning magnetic halves, the LED will light up.