
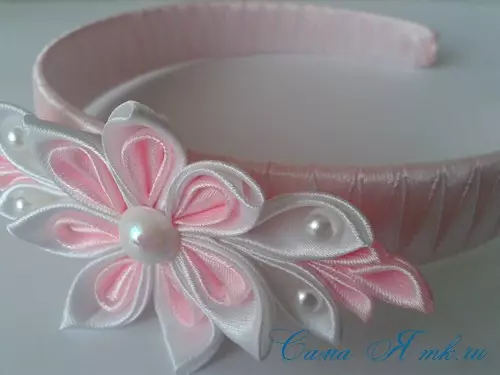
Very soon the new year, which means that there will be a pre-New Year fuss and problems. You need to decorate the house, prepare a festive table and gifts, pick up the outfit for winter holidays and decorations to it. It is about the last we will talk in this article, namely about the rods from the ribbons with their own hands.
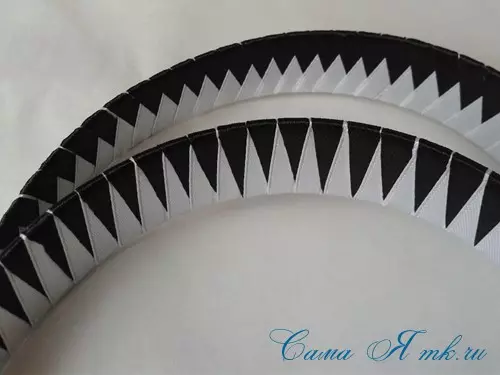
Gear product
The manufacturing process can be traced on the example of the master class. This article presents two weaving schemes of this rim.
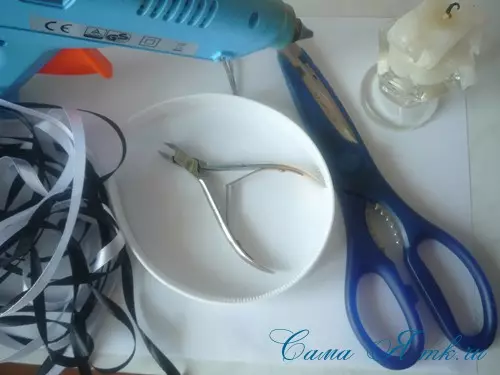
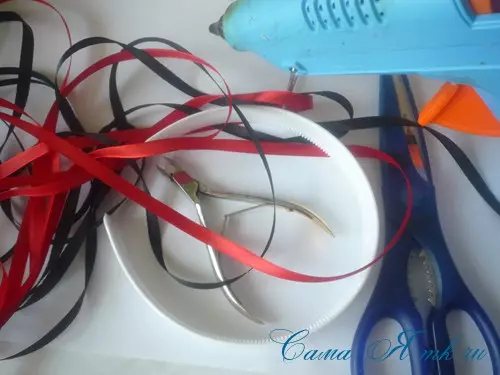
In order to make the decoration, it will take the base - plastic hoop, a narrow satin ribbon, scissors and candles, a glue gun.
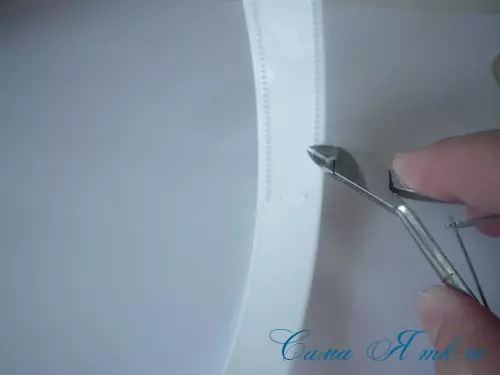
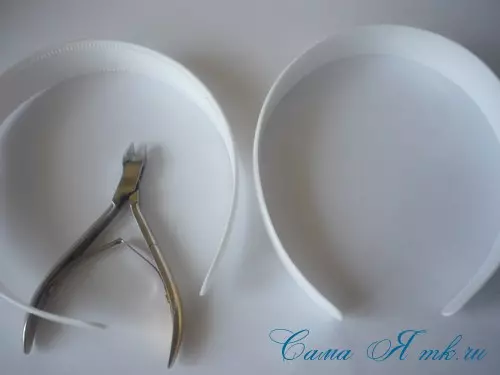
With the basics of hoop with manicure scissors or buns, you need to remove all the teeth.
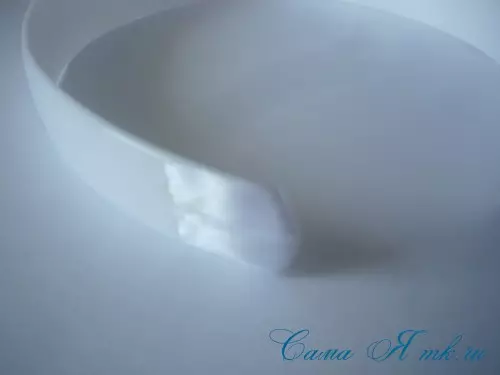
We close the edge of the hoop.
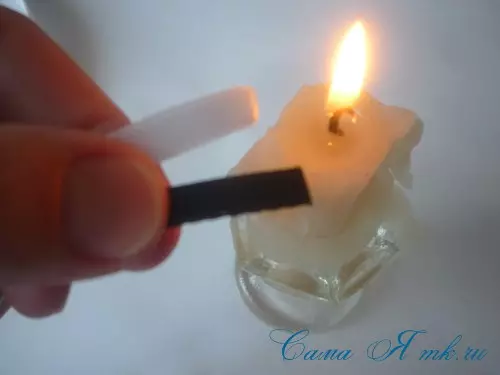
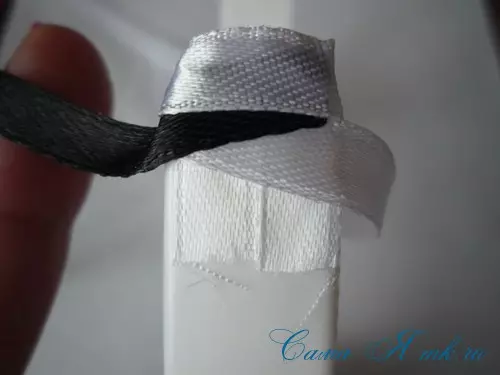
We prepare the tapes: we fall on the edges with fire from the candle or matches.
On the adhesive gun glue a ribbon from the wrong side.
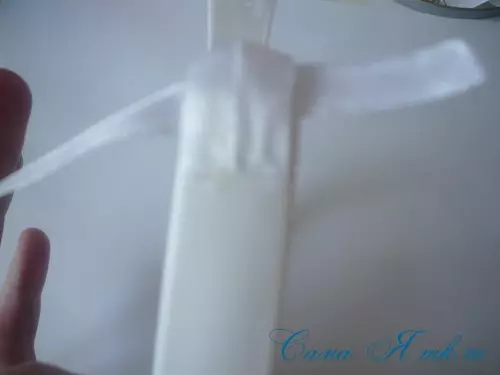
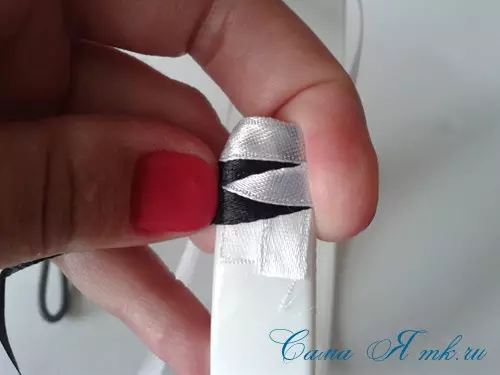
On the front side, we make a ribbon, leaving a small tail as shown in the photo.
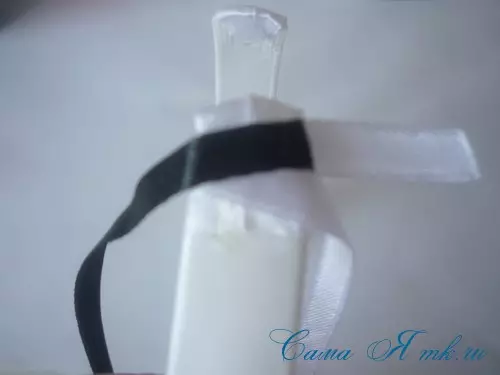
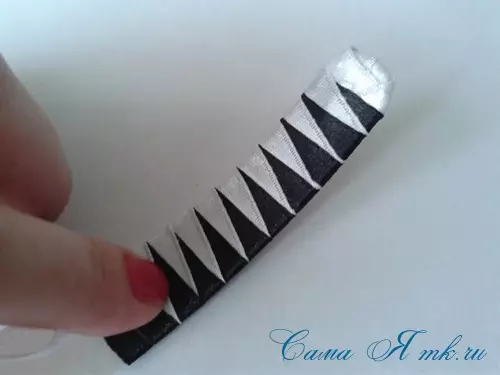
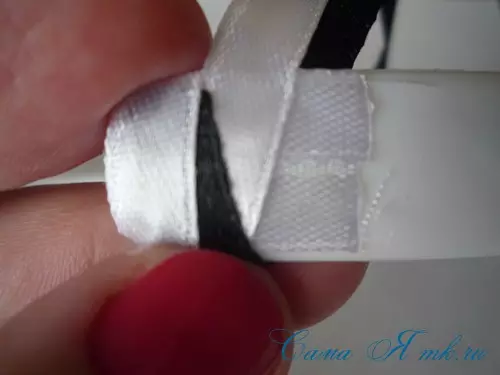
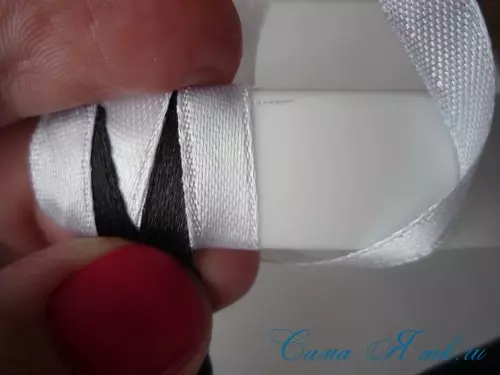
Cross stick a contrast tape over white.
Purchase over black tape white tail. The next step needs to raise the ribbon.

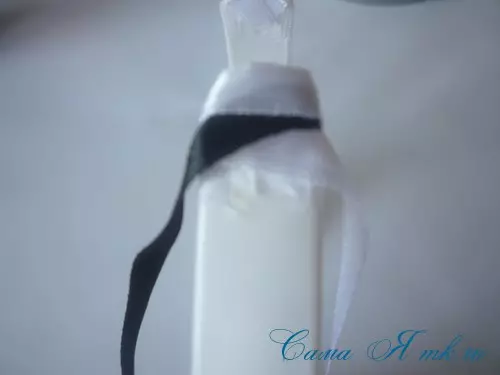
We pave a black tape under the white.
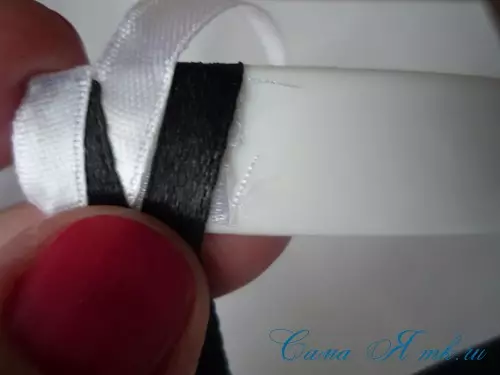
Pretty tight in turns begin to wind up two ribbons.
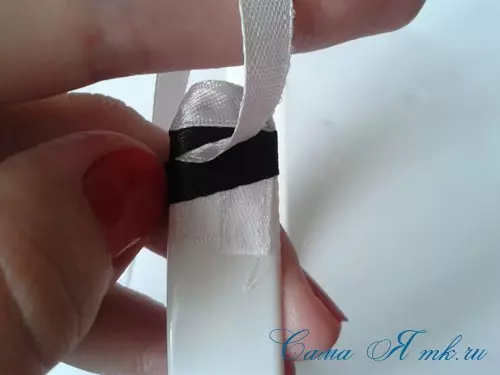
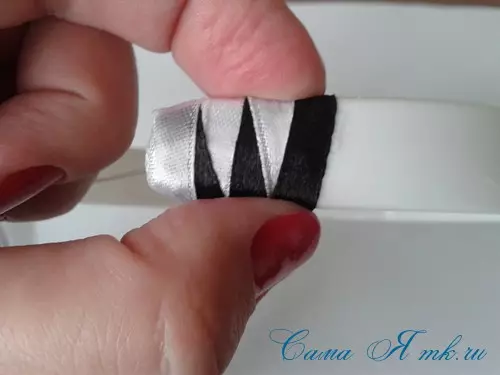
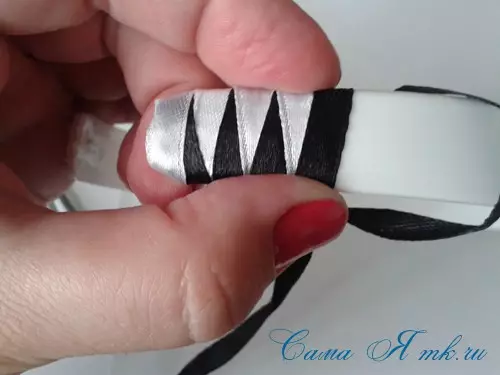
We continue to weave.
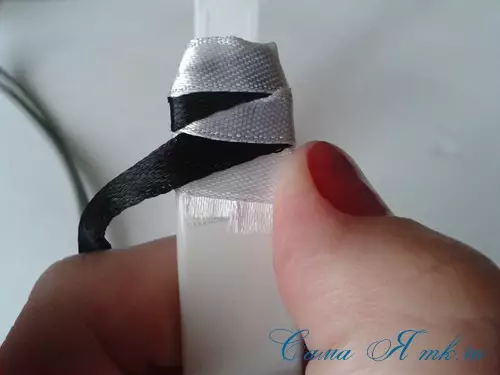
We alternate with each other.
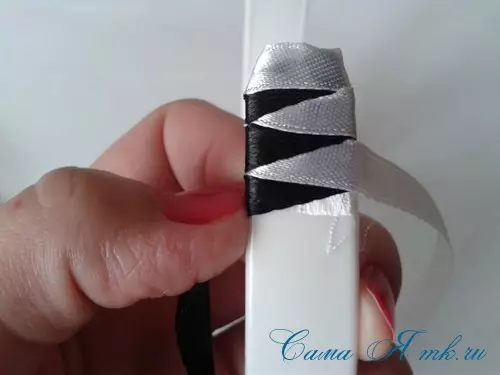
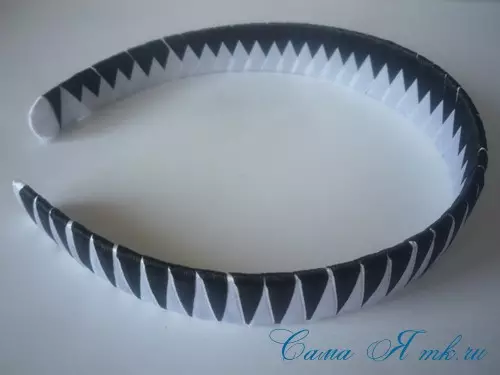
This is what the rim is obtained.
View from the wrong side.
We glue the ribbon turn.
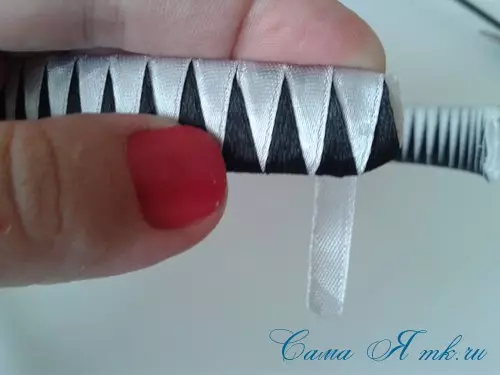
Then the white ribbon needs to close the edges of the rim and glued with hot glue.
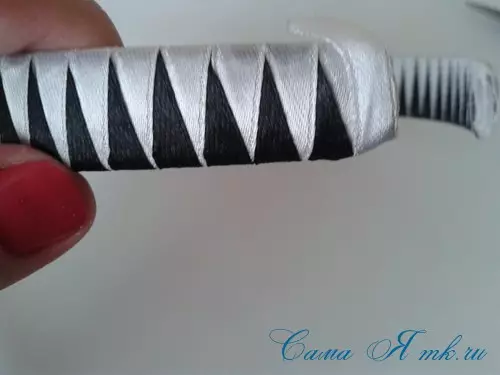
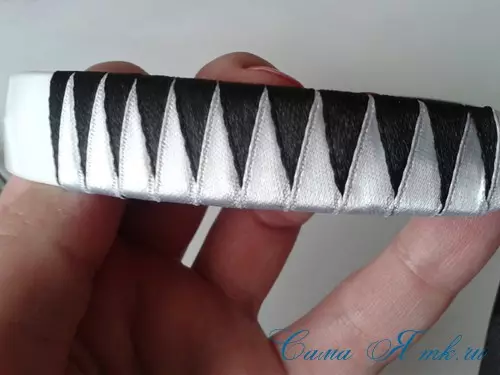
That's such a rim turned out.
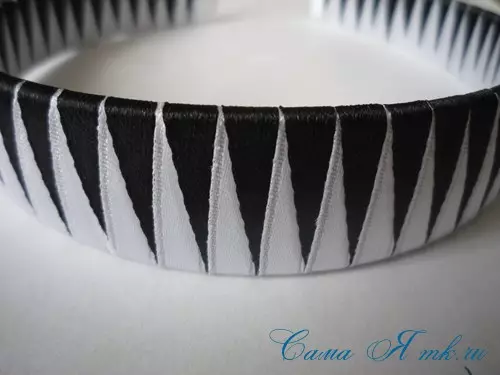
Using gentle contrasting colors, it turned out beautiful bezel for girls, which can be decorate with interesting colors.
There is a second way of weaving "teeth".
The initial process is similar to the first master class.
Place a black ribbon under the white.
Then overlapping a white tape.
We alternate black and white ribbons, imposing them on each other.
Article on the topic: Suit "Magician", made by hand
That's such a rim turned out.
The difference is the first only in the inside.
Weaving of the mastock
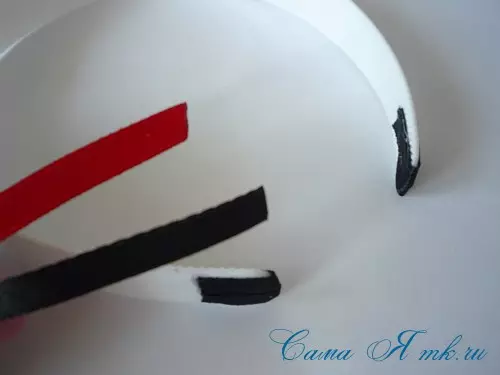
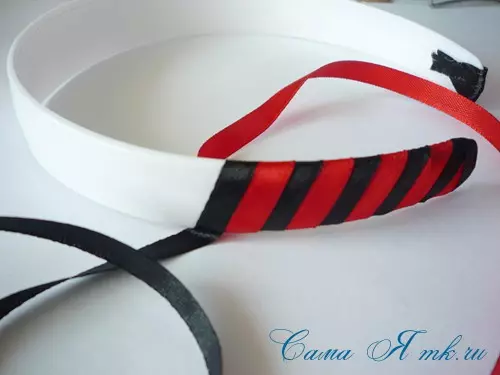
The next lesson shows the scheme of weaving diagonal for beginners.
To work, take plastic rim, narrow ribbons, scissors, nippers, candles and adhesive gun.
Again, with the help of buns, we free the hoop from the teeth.
Cut a couple of small tapes and stick them to each other on the edge of the rim.
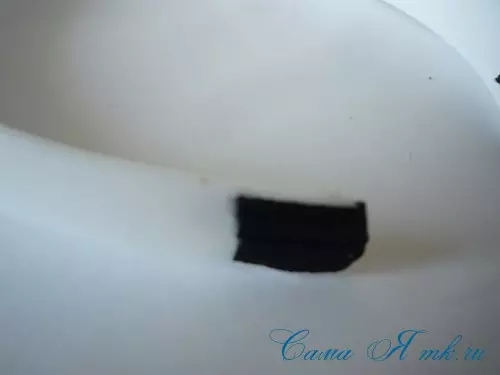
Again, as well as past master class, we fall the edges of the ribbons.
We glue a black ribbon, leaving a small tail.

Then hot glue capture a red ribbon.
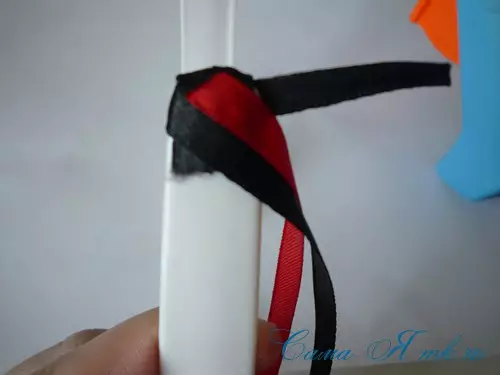
The tail is closing the edge of the rim and hiding it under the tape.
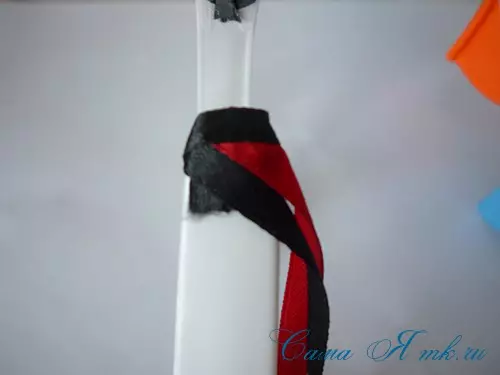
In parallel, we glue the hoop to each other, gradually fixing the tape by glue.
In turn, wind all the hoop.
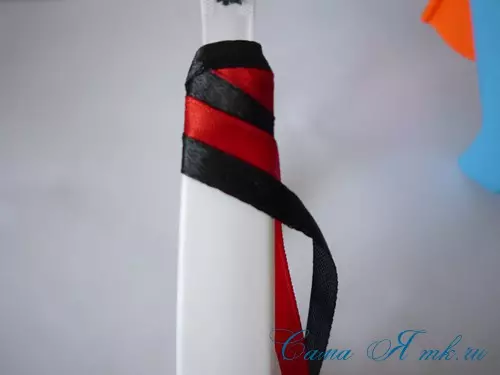
In the end, we need to cut off the red ribbon, fall out the tail and glue it to the adhesive gun.
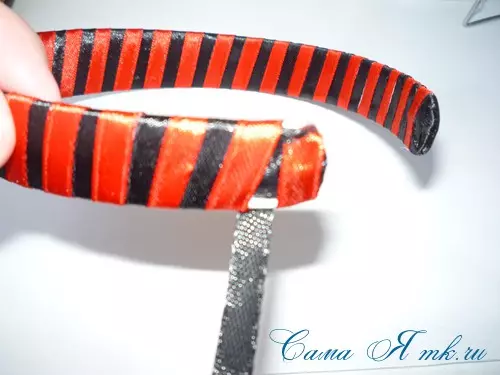
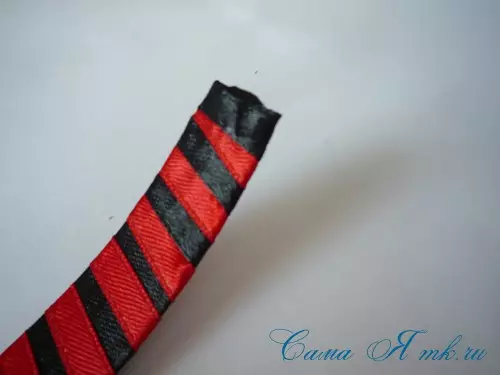
Black ribbon close the edge of the rim. And here he is ready!
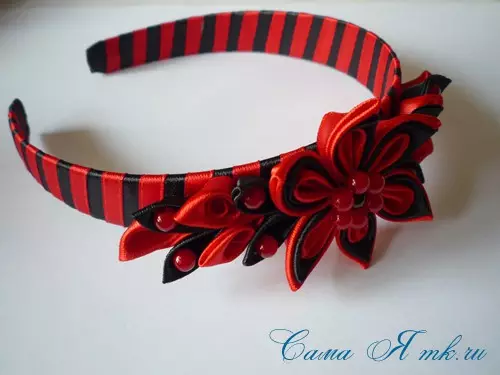
Decoration with roses
The manufacturing process can be traced on the example of a master class with a photo. In this step-by-step instruction, we will show the decoration for the head with roses in Kanzashi technique.

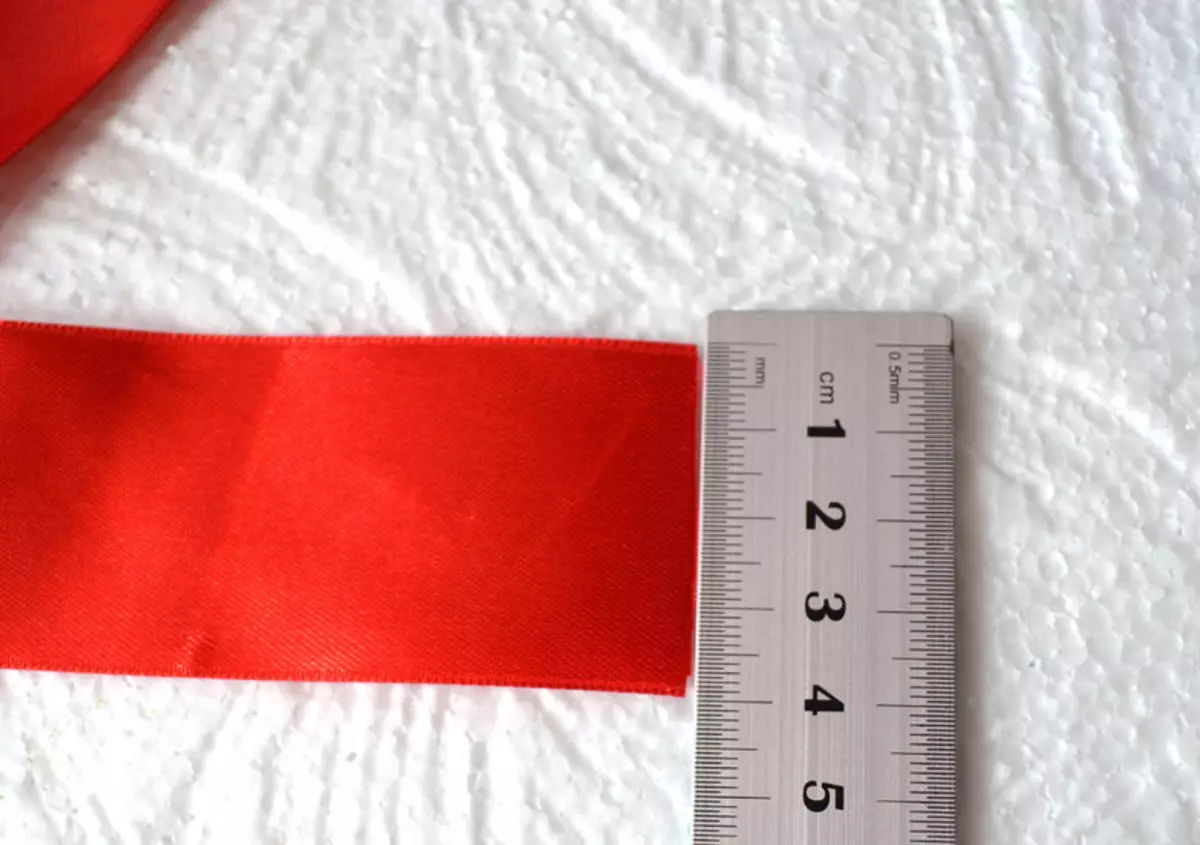
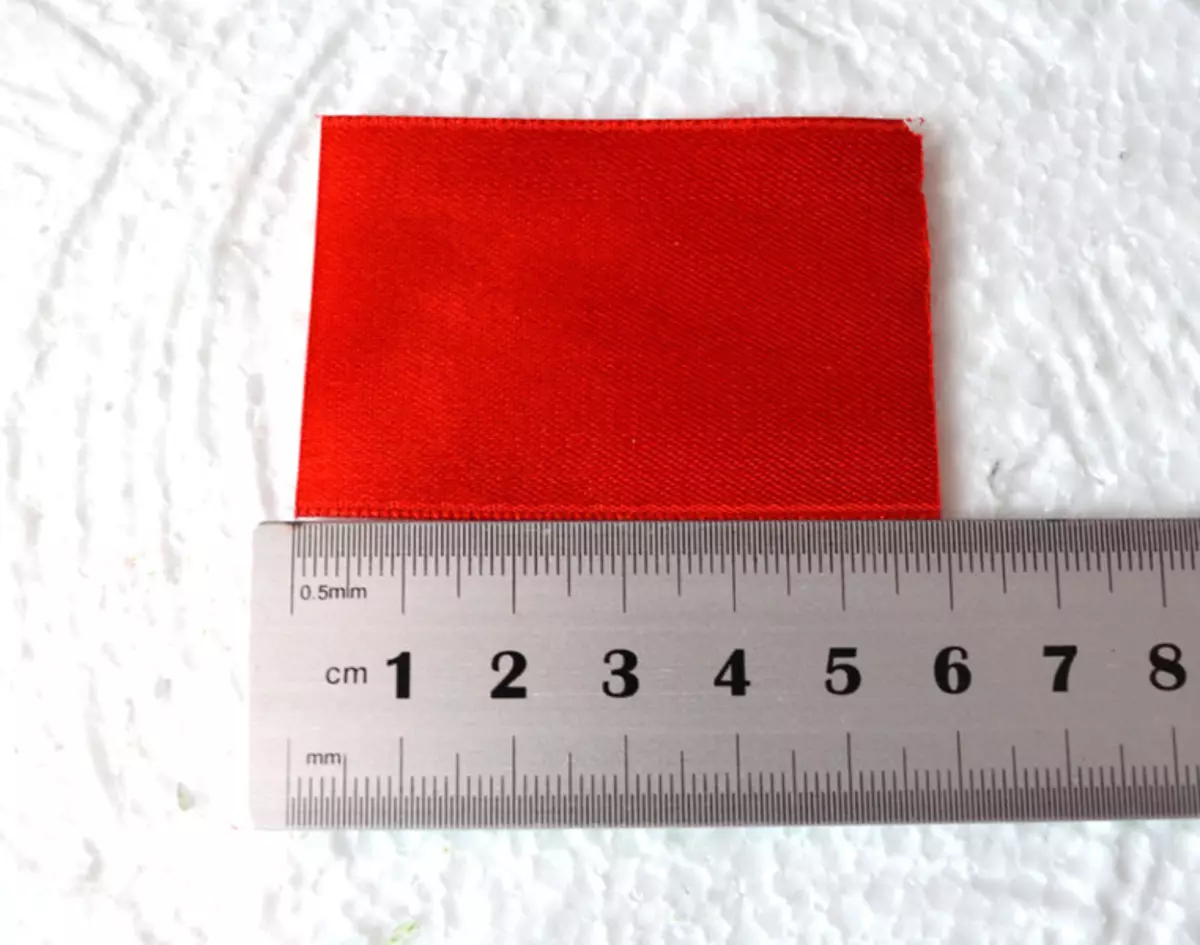
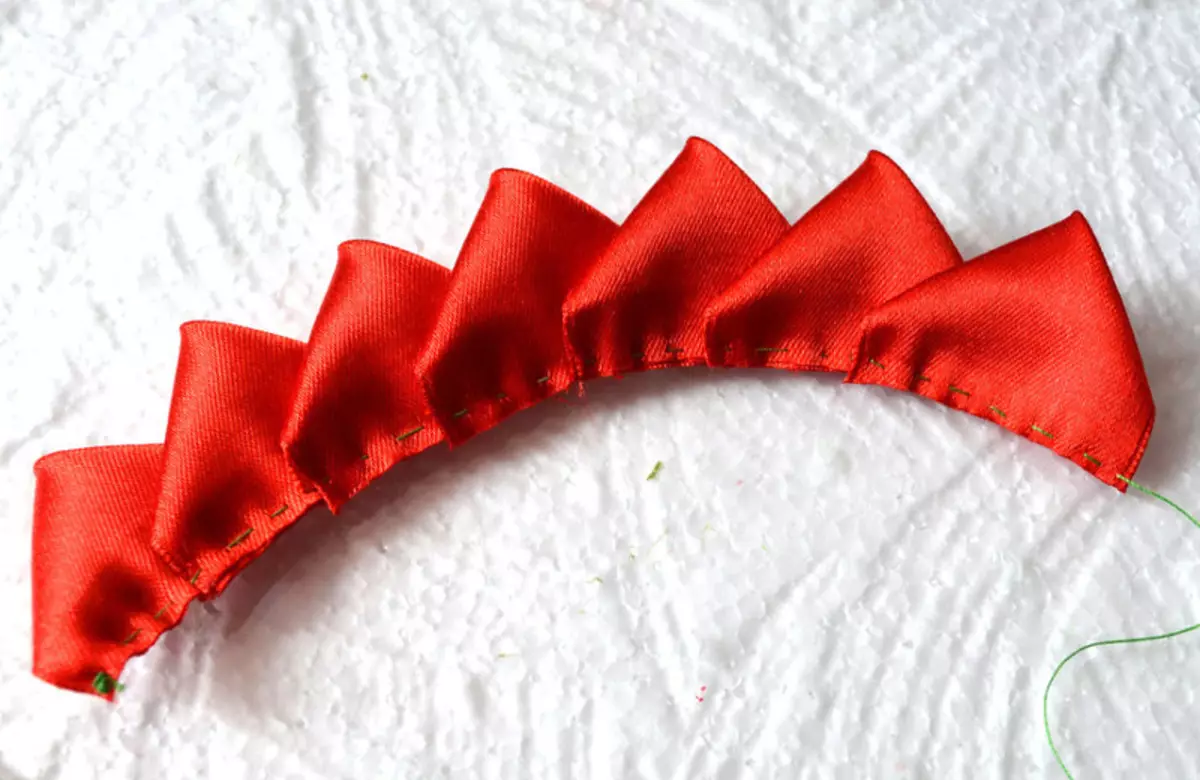
So, the first step needs to cut rectangles with a length of seven cm, and four cm width.
We make a small triangle, which stands, leaving a little place as shown in the photo.
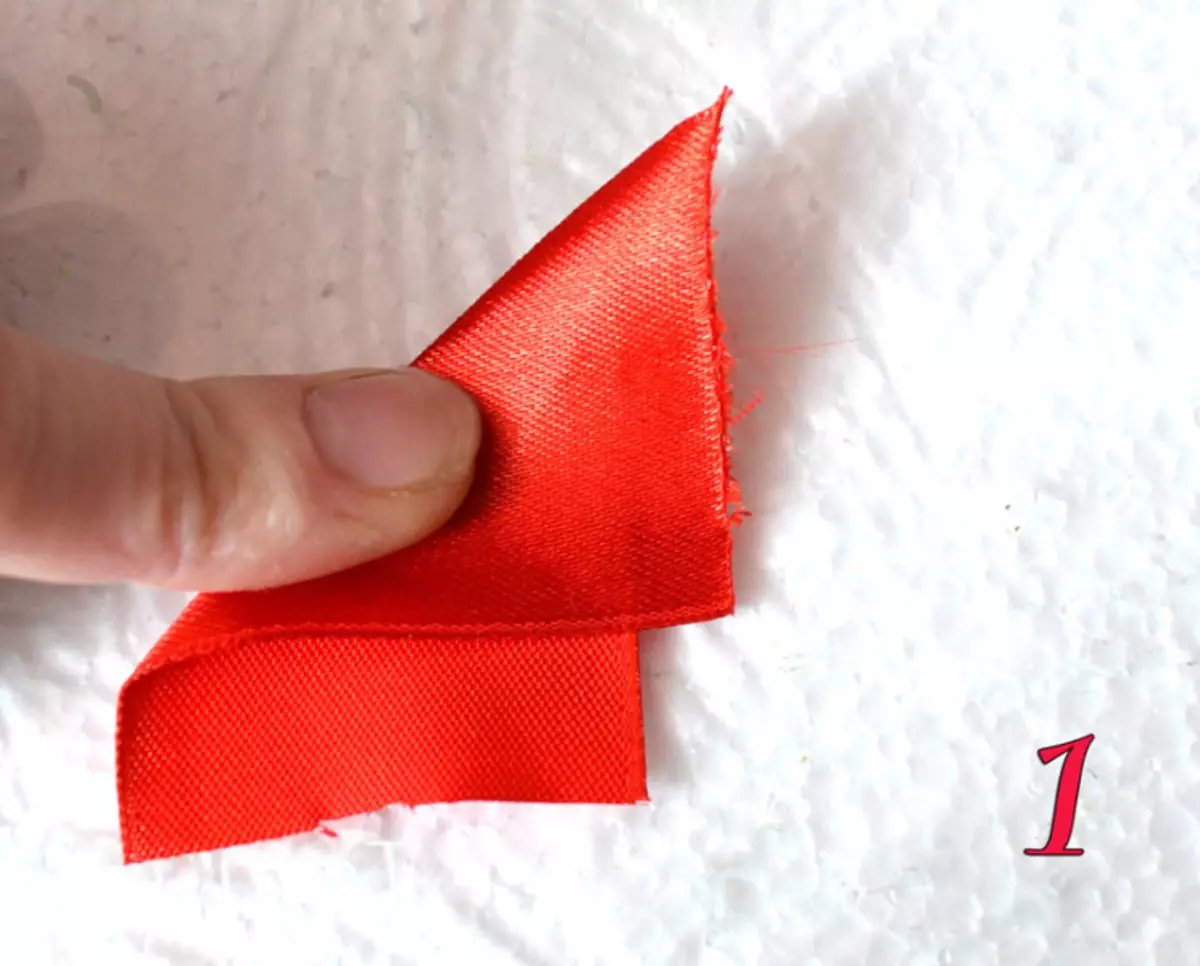
We make another triangle.

Here this figure should turn out in the end:
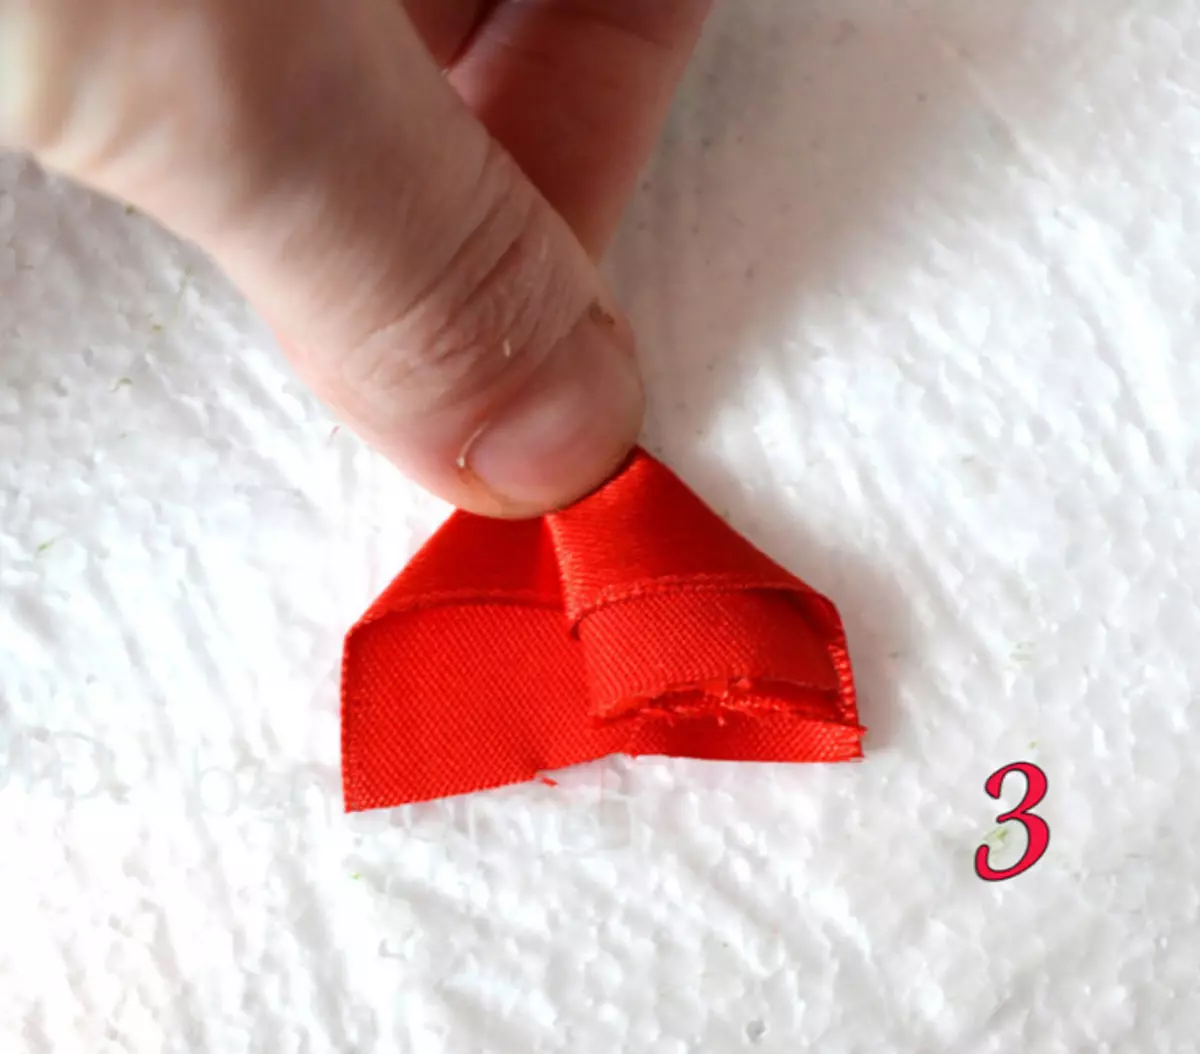
Thread sew the petals among themselves.
This is what the wrong side turned out.
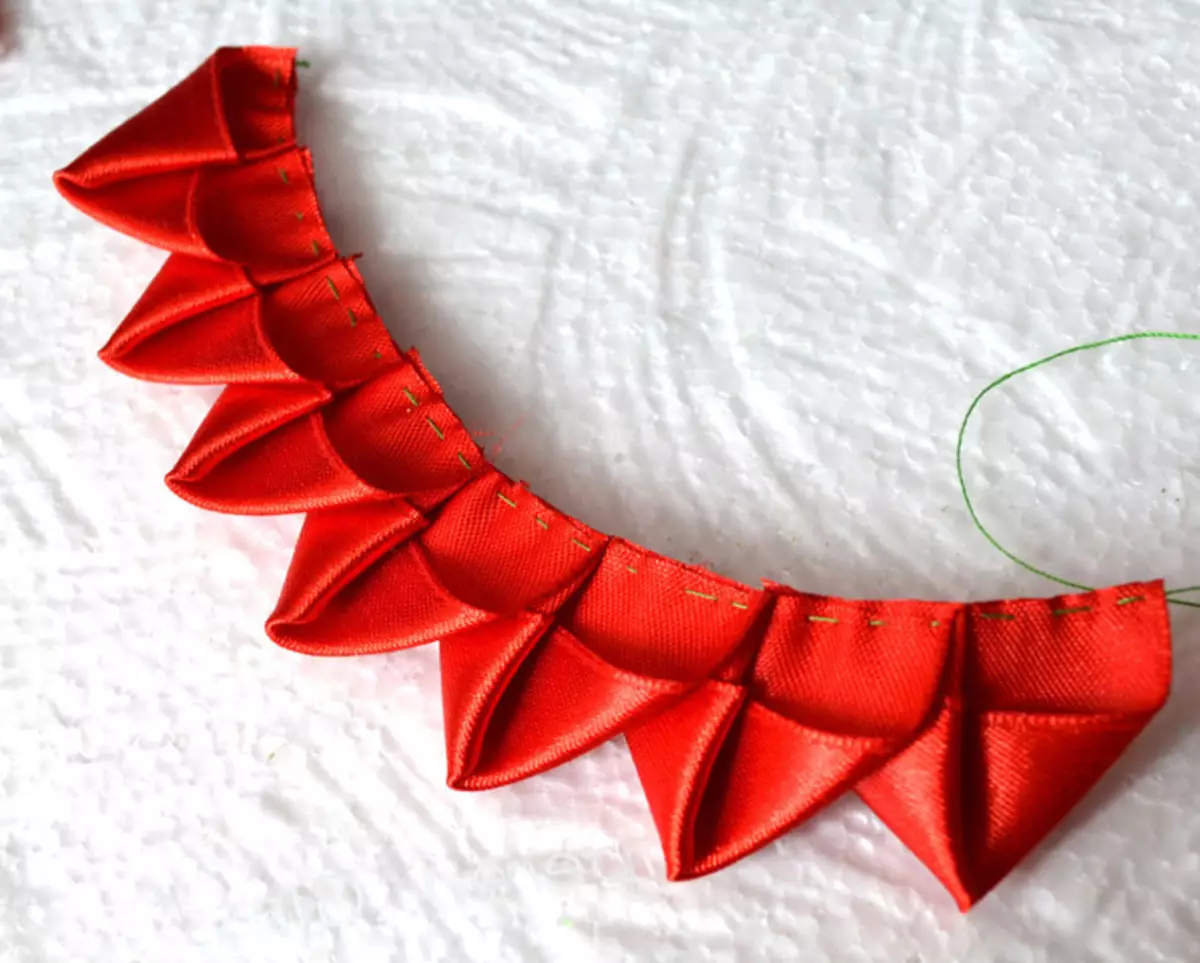
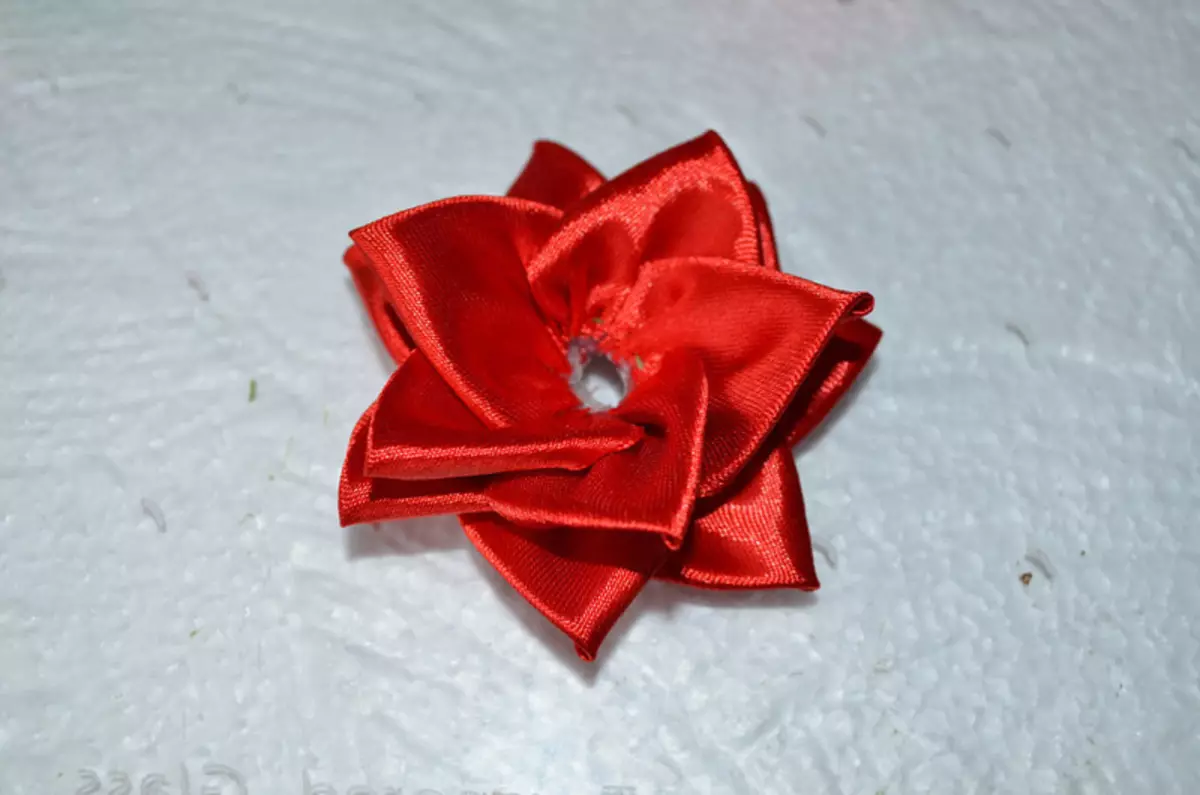
In the form of buds, we turn the petals in the flower.
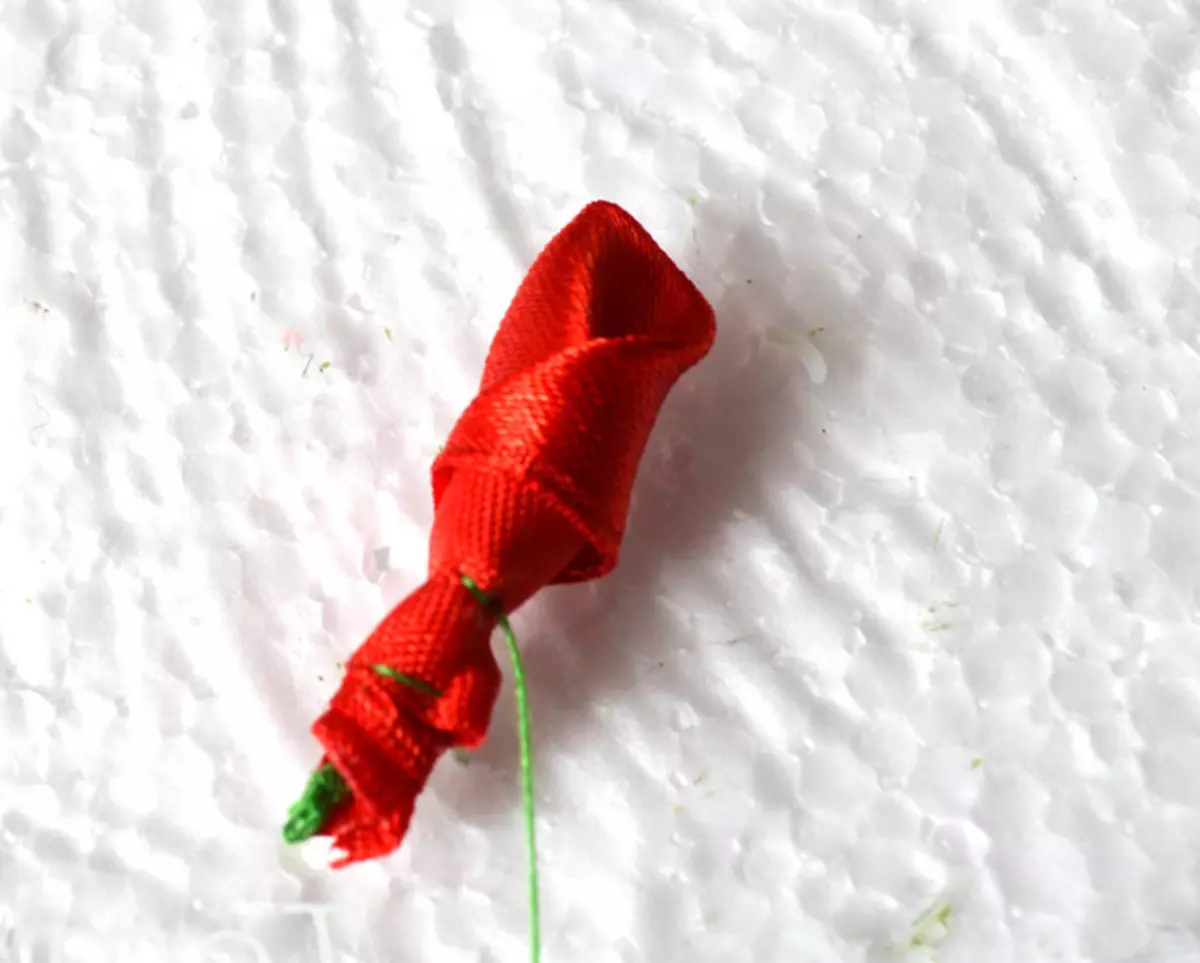
Early sew bud.

Decor flower.
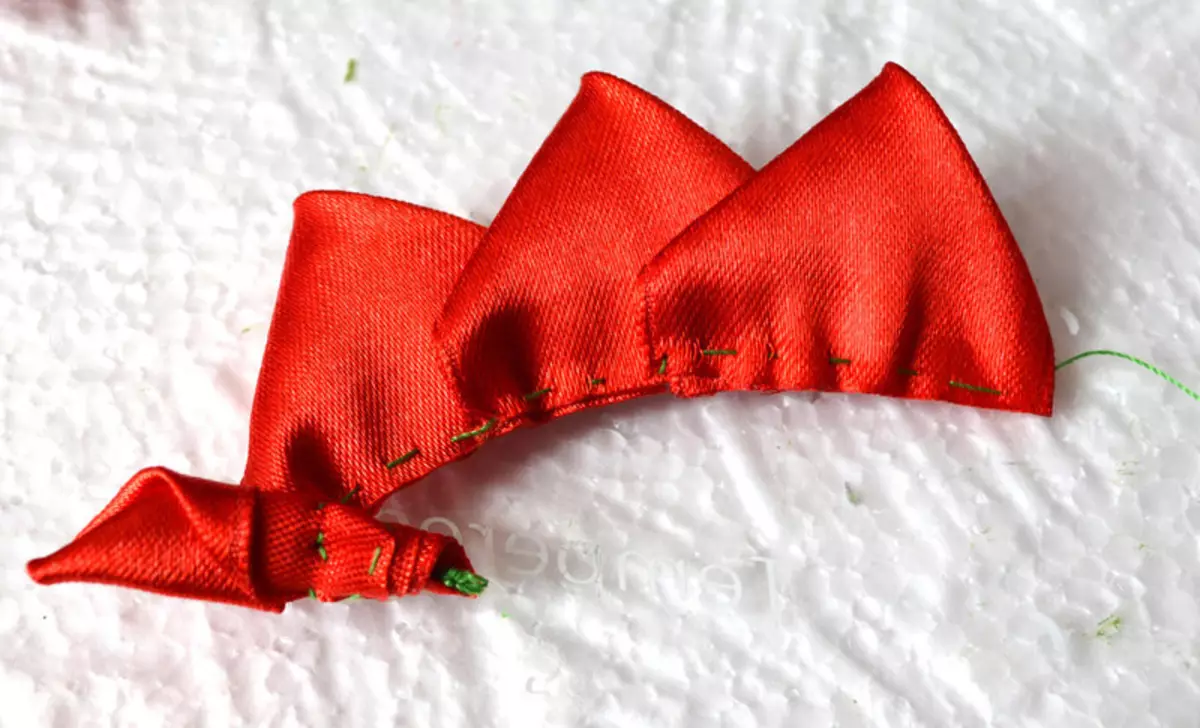
We make four blanks from a different number of petals.
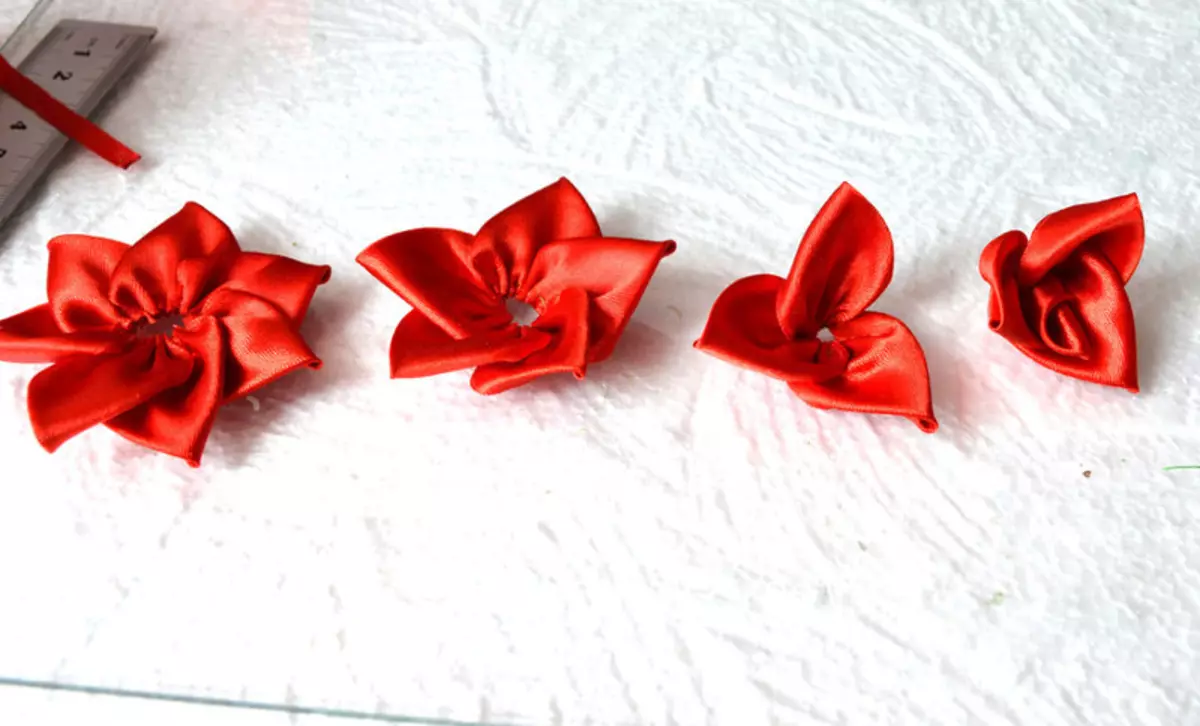
The next step is started to cross the billets.
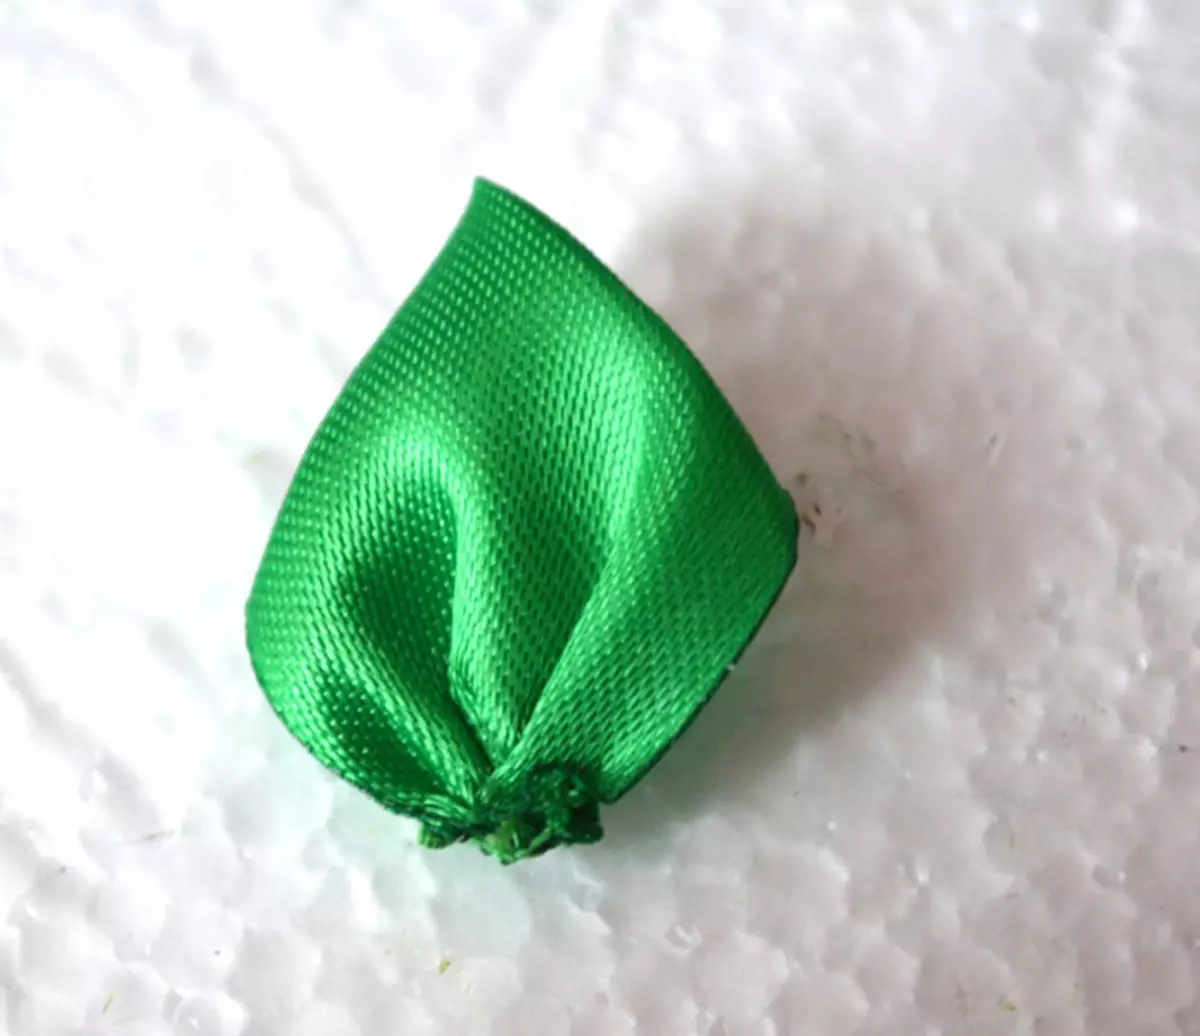
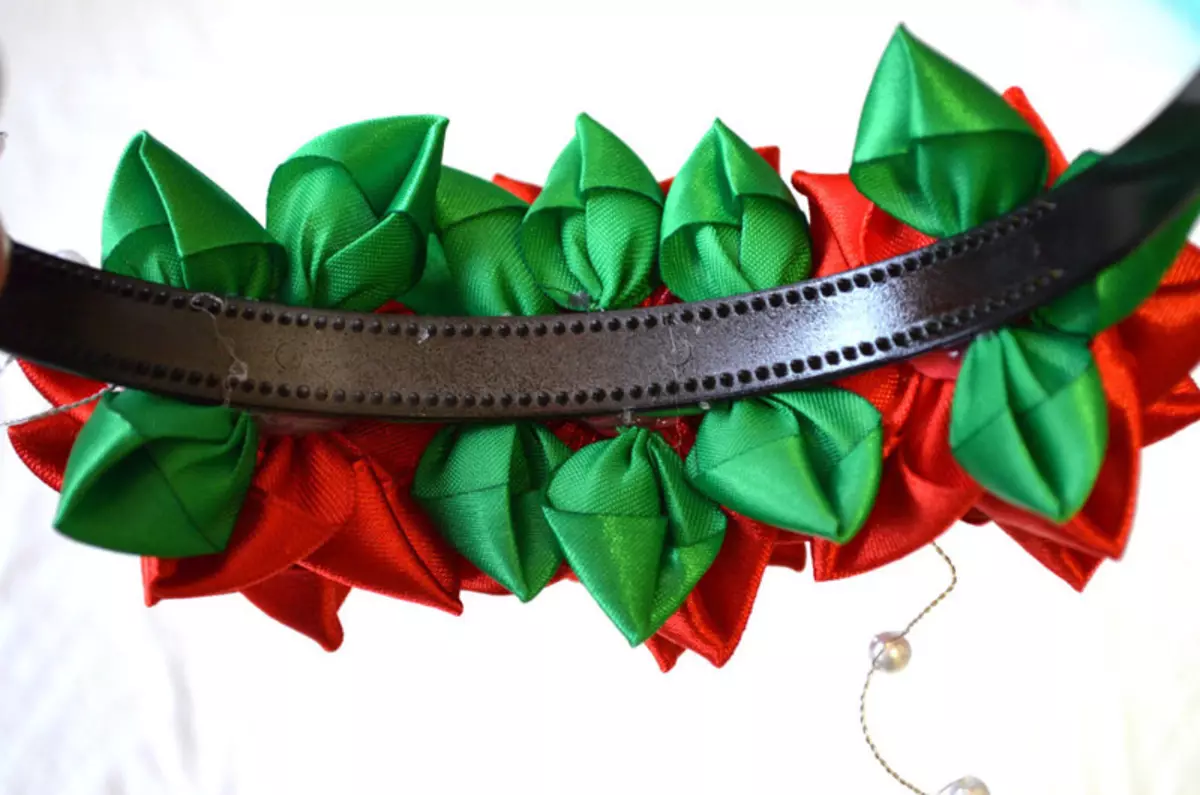
Then we make small leaves.
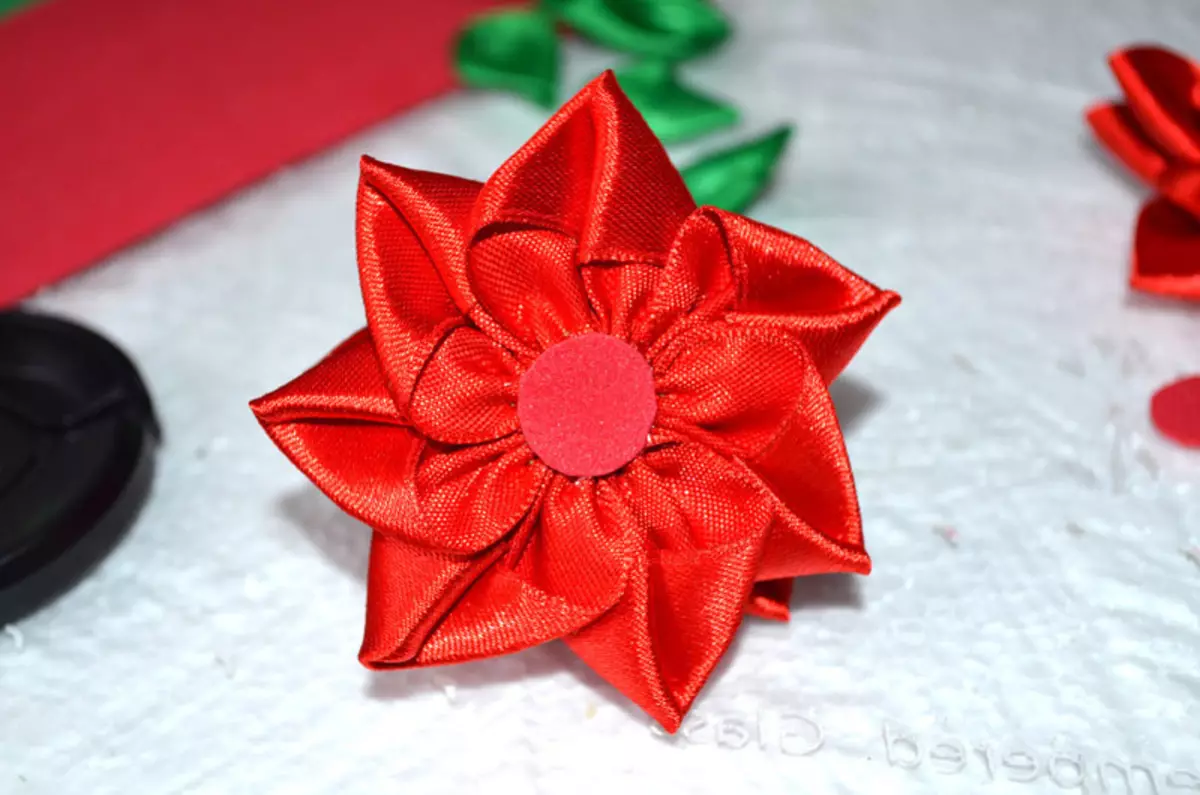
Cut small circles in order to close the petals.
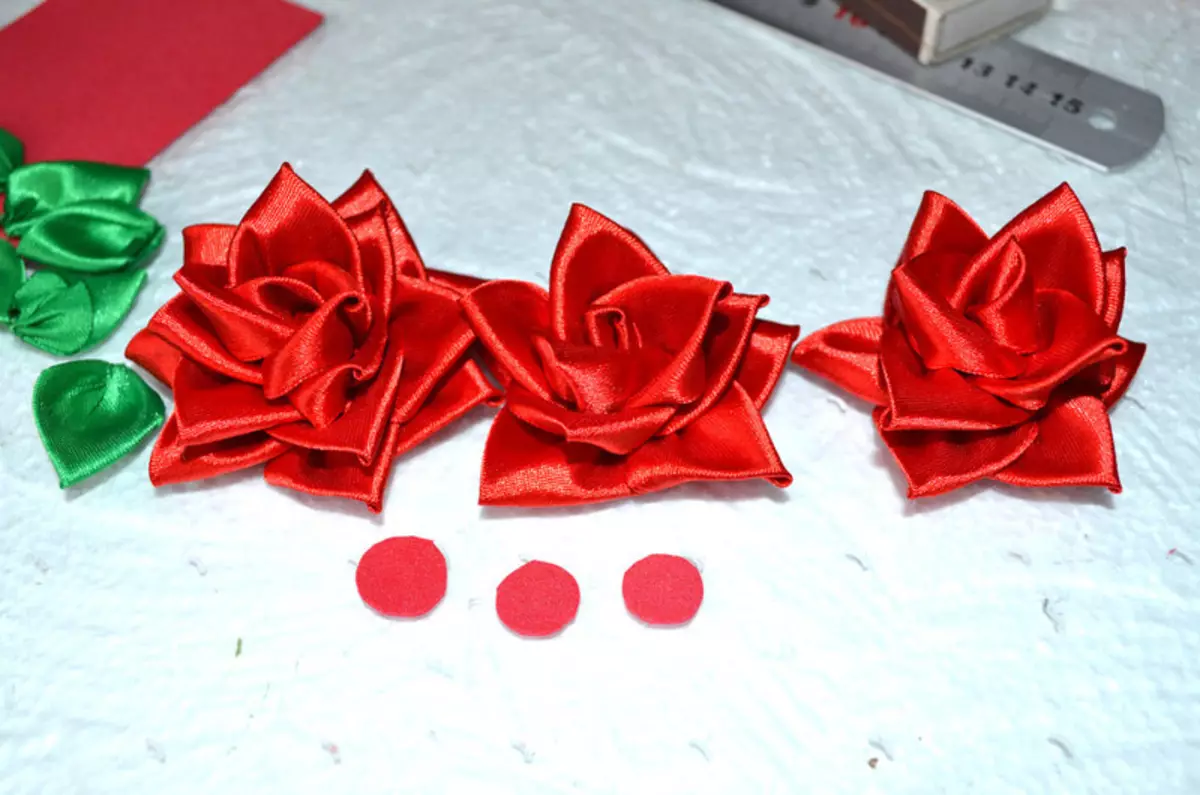
These circles need to close the seams.
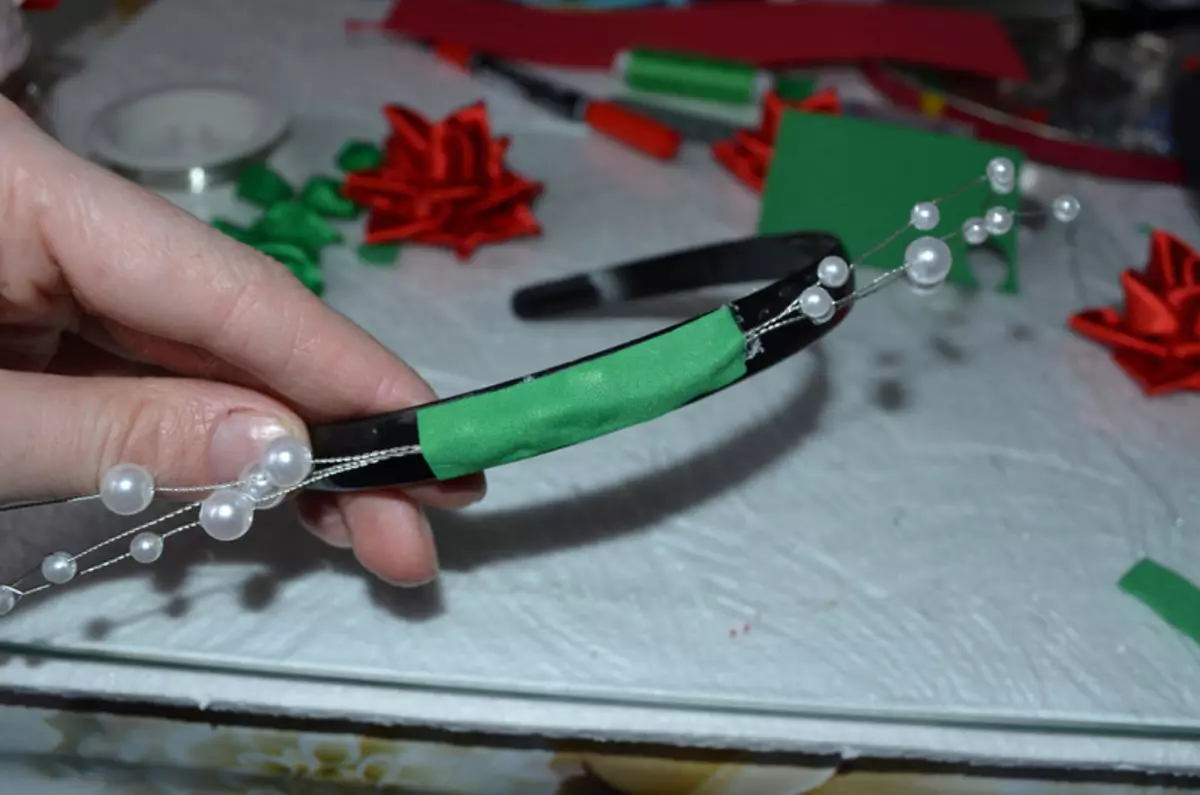
With the help of green ribbons, we fix beads.
Top stick flower.
Article on the topic: The handbag muffled the crochet for the doll
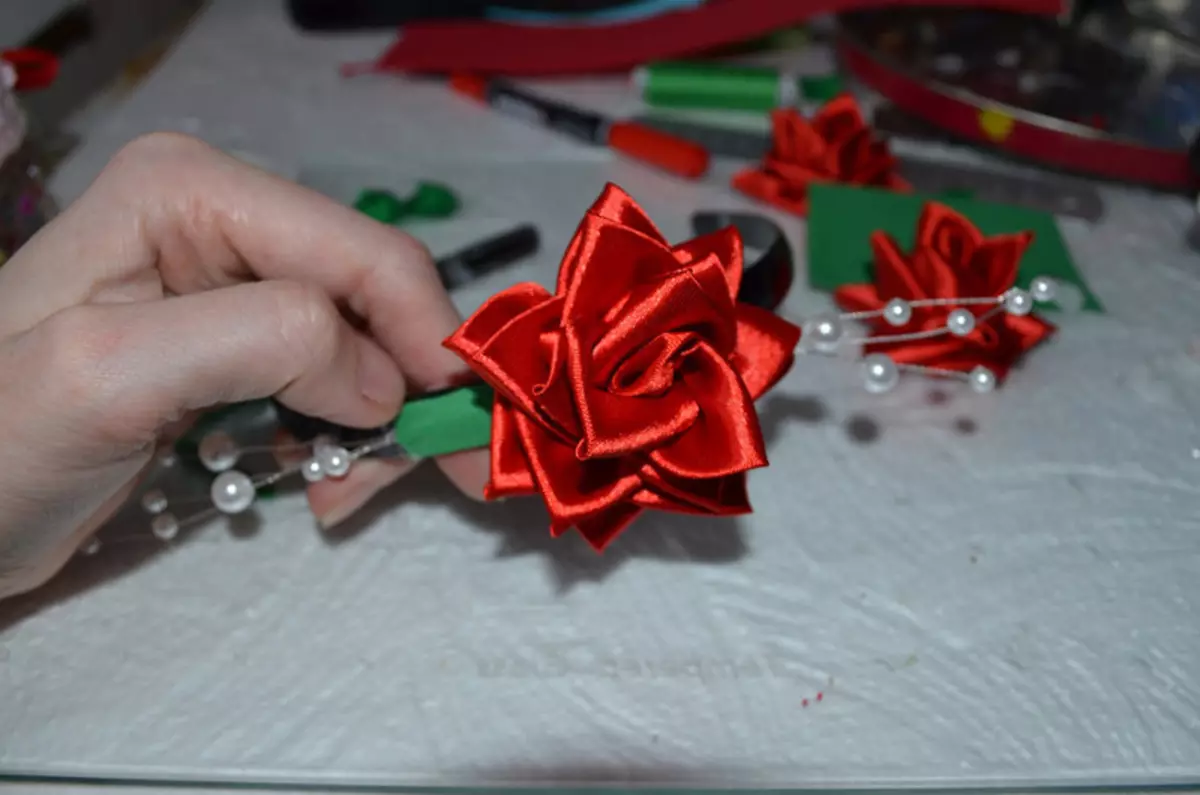
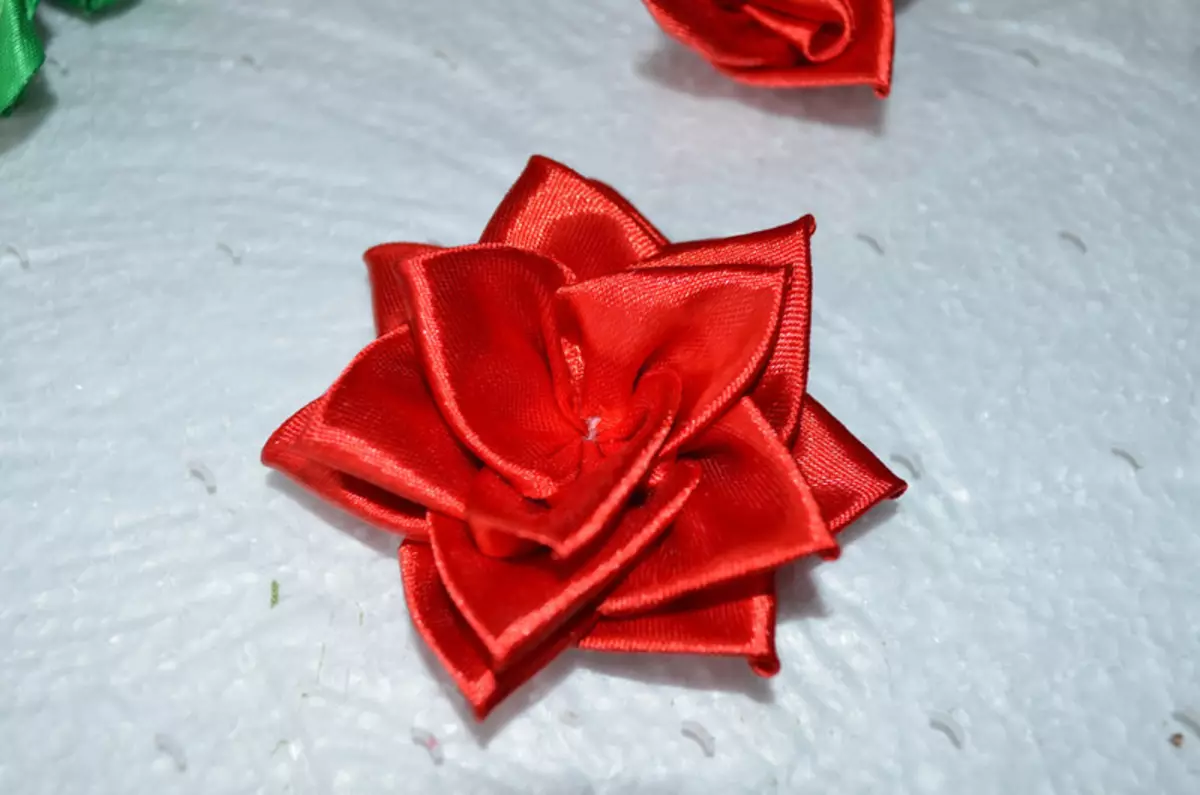
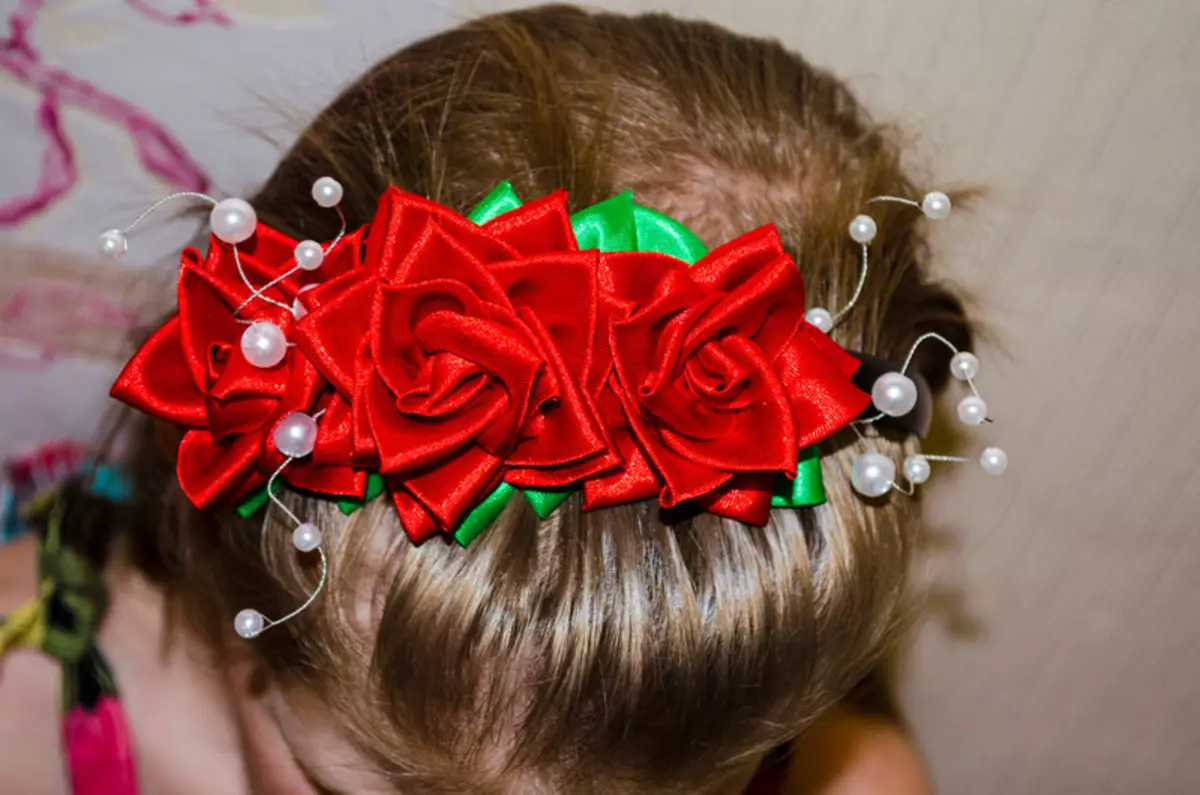
We glue all other flowers with petals.
Here is a beautiful decoration for girls it turned out.
Video on the topic
We suggest to consider a selection of video to create cute and original rims from satin ribbons with your own hands.