
In this master class, we will tell you how to perform wet felting for beginners. In this case, the process will be more interesting if the end is a funny product in the form of a toy.

To perform a wet fuel from the wool toys, it will take about fifty grams not a spinned wool of different colors, ready-made eyes, a piece of films with verses, kapron, polyethylene, a piece of an old towel, soap, as well as a needle and thread.
So, felting the wet is a master class.
First of all, it should be made of a leather of the future product, while its dimensions depend on how the wool bought. Thus, pre-steal a very small piece to navigate with the shrinkage of the material used.
In this case, fine wool is used, which is expanding as thin, so it sit down quite strongly, as a result of which the initial toy can turn out two times less.
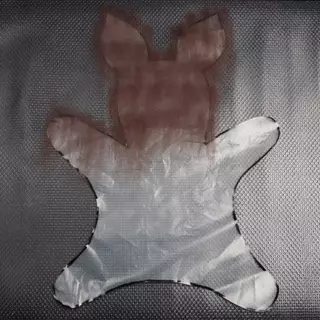
For example, it can be done with a slightly more than thirty centimeters high, and the width of about twenty centimeters. For molds, it is best to use polyethylene, which is sold in rolls, but it should not be strongly tough. When cutting the pattern, sharp angles and hard lines should be avoided, so that in the future work the wool layout was not damaged.
The muzzle is cut separately, for which the triangle is made, from which all the edges are rounded.
The most painstaking business is to lay wool based on. Be sure to do it qualitatively and carefully, from which the appearance of the already finished felt depends. It is necessary to use the ribbon, which should stick with the second hand. Whereas the first must be neatly pulling for its very tip. The most important thing is that all the strands should be the same thickness and size, to lay them must be needed. This location will help to avoid further emptiness. Since the toy is supposed to be volumetric, then the strands should be a little out of the pattern, there will be two or three centimeters.
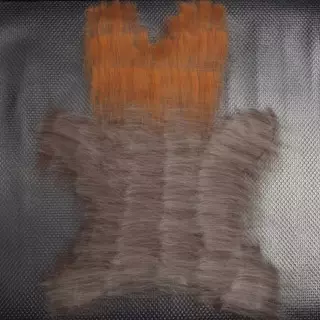
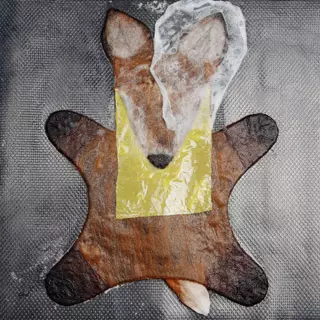
During the launching of the wool, you can think about the final design of the future product, experimenting with various variations and combinations of the colors used. In this case, three layers of decomposed strands are used, two of which lie vertically, and the average is horizontally. To give greater color realism in this case, the wool is used for chanterelles: the first layer is dark brown, the second - gray, and the third - redhead. All colors eventually mix and it turns out a beautiful shade approached to the real fox.
Article on the topic: Suspended balcony table with your own hands
After all the layers of wool on the milestone are posted, it should be put on a bubble rug, under which there is a towel or any other tissue. It is done so that it absorbs the soapy water solution and it did not grow on the table.
Layered wool layers should be mixed with warm water in which a soap solution is added. It should be accurately done so as not to move the layers, and the wool is completely soaked with water.
Now it follows on the leaf top to put another rug, after which everything turns over. Please note that if the wool performs for milestone, it should be carefully headted. With a clear excessive wool, it is allowed to remove it, but do it carefully.
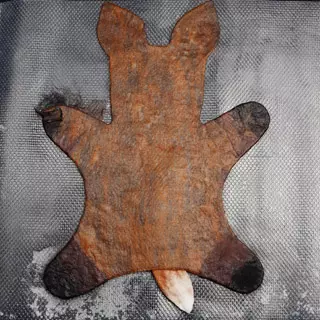
Ultimately, the edge of the workpiece in this case should be smooth and without lumps.
Similarly, we carry out all the work on this side from the layout of the wool in three layers to wetting and turning over the other side. Align the edges and from this side.
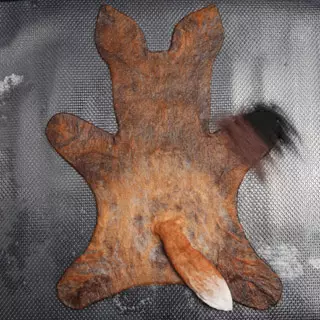
Next, the queue has reached the tail, which can either be sewn or privated. The second option is more complicated, but executable. To do this, tear off a piece of wool, the length of which will be twice as much of the finished tail and a few more centimeters to sprinkle it. This piece of wool should be folded twice after which the strands of different colors are wound on it and in different directions.
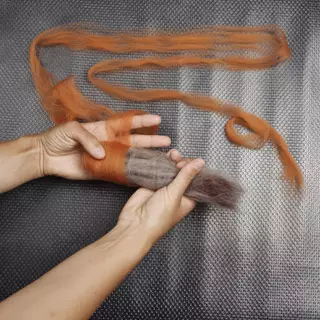
With your actions, form a tail to be a campaign on fox. Then the finished tail should be wetted with soap solution, carefully rubbed it between hands. In that part of the tail, which is designed for the applination to the body, do not need to be wedged with water. At this stage, you can leave the tail or make it to the finished state.
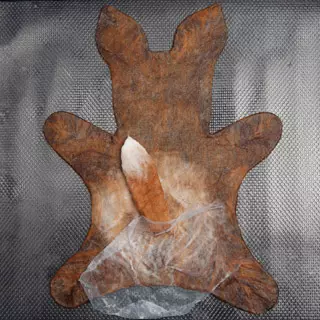
Now connect the tail with the body. Put in the opposite plane tail to your place and dry strands of the wool with a perimeter of the connecting circle. For better fixation, it is possible on top of putting some more wool, adjusting the place of the compound of the color gamut. This is followed by this part of the workpiece to moisten with a soap solution that must be warm. A piping mesh is put on top, after which it is possible to start the focus process using only light and tender movements.
Article on the topic: Weaving paper tubes for beginners: master class with video
They must be performed until the tail is securely enshrined in its rightful place. For better clutch of wool fibers, periodically wet the place of felting with soap solution.
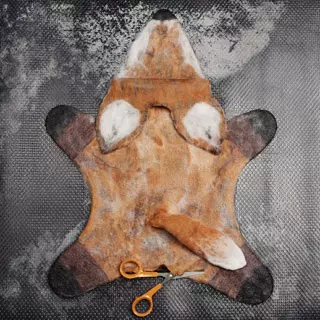
After the tail, you can proceed to the muzzle and the ears of the fox. By laying a piece of polyethylene, insert the face into the body of the product in advance.
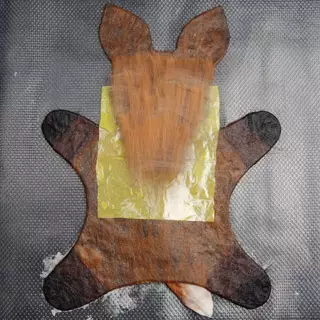
Next, we begin to lay woolen fibers on the face, withsting all the necessary color gamut. Do not forget to close the incision on the leaf body. We act similarly to laying the wool on the body: lay out, wet, turn over, equal, etc.
During the layout of strands of wool, use the photos of this fox, which will help you choose the color solutions. Also, do not forget about white inserts that are on the face and baby animal. While working should be mixed with white wool inserts in different directions, for a kind of light patches.
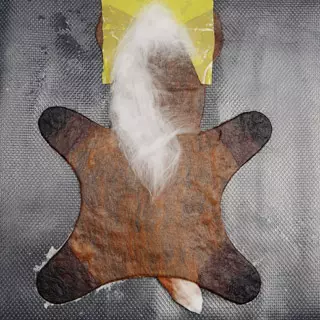
When the muzzle is completely laid out, you can moisten it with soapy and the grid to start taking it. Act soft and gently. Do not forget to take the tip of the nose using black wool.
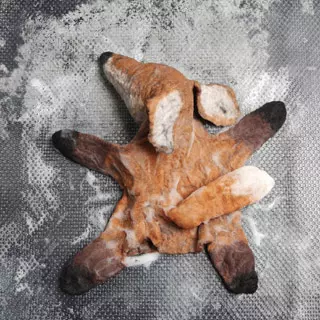
Now it reached the fox paws. They will need black and brown wool, which is mixed and folded on the paws.
The animal's legs are also assumed to be volumetric, so wool should be laid out on both sides, acting as when laying strands on the body. Do not forget to bend the surplus of wool along the edges of the paws. After the small elements of the fox are privated, you can start rolling toys completely.
Act gently, slightly pressing and periodically wet the surface with soap solution. It is recommended to move from extreme parts to the center of the toy.
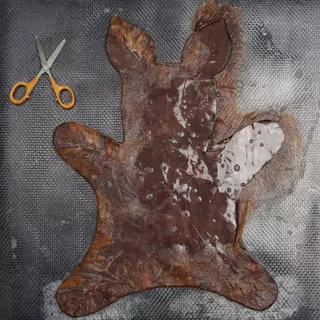
After the felting process is completed, that is, all woolen fibers are tightly fastened among themselves, it can be started to extract the pattern.
Article on the topic: Knitted toothless do it yourself
To do this, at the bottom of the toy should make a cut and gently remove the leaps.
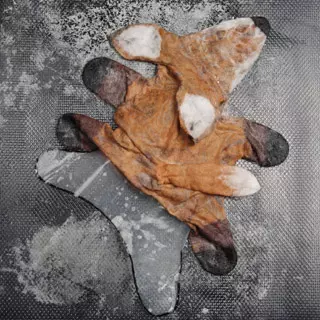
It should be done very carefully that the edges of the cut will not stretch. In this case, to avoid this, you can steal the edges before pulling out the pattern.
The first felting process is completed, there remained such steps as respect and shrinkage of the workpiece. For respect, only warm water should be used.
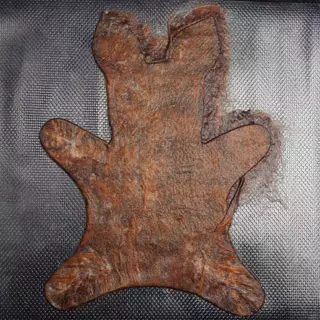
We put the workpiece and start stroking and rub it on the surface of the rug. In this case, the billet should be moistened with a warm soap solution. The ears of the fox should be used outside, as it is not hollow. The waller should be performed until you are satisfied with the quality of the received felt. And only after that the billet is clean using hot water for its further shrinkage. After that, the fox should be launched again and continue the dull to the desired size. To give the fox head, the right and smooth shape can be used a small rubber ball during the process of respect. At its end, a sufficient amount of polyethylene packages will push into the cavity of the face and head. Due to this, the shape of the head and face will be formed correctly.
At the final stage, the fox can be washed with hot, after which and cold water. After that, the "skirt" should be fifteen minutes to put in a weak solution of vinegar, which will make wool softer and remove the remains of a soap solution.
For drying "skins" suitable plastic bottle.
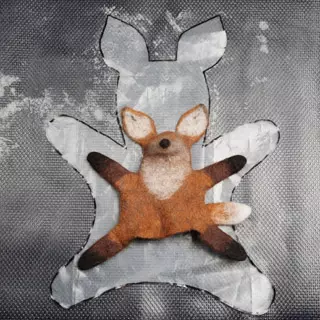
It remains only after drying to sew eyes and revitalize the fox, putting it on hand.

Posted by: Yaroslav Trojnich