
Swan - fabulously beautiful, faithful, noble and beautiful bird. Symbol of love, light and devotion. There are many different ways to make it a miracle of nature with their own hands. One of them is the art of origami. Style, suspended both adult and child. You can add origami figures using diagrams with instructions, but it's easier to a master classes system, with a photo. So how to make a step-by-step swan origami from paper?
Let's start with simple
You can start with the easiest.
You will need a square sheet of paper, black and red pencils and scissors.
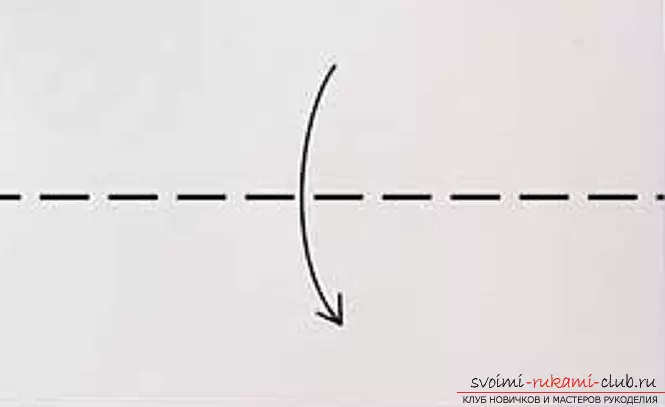
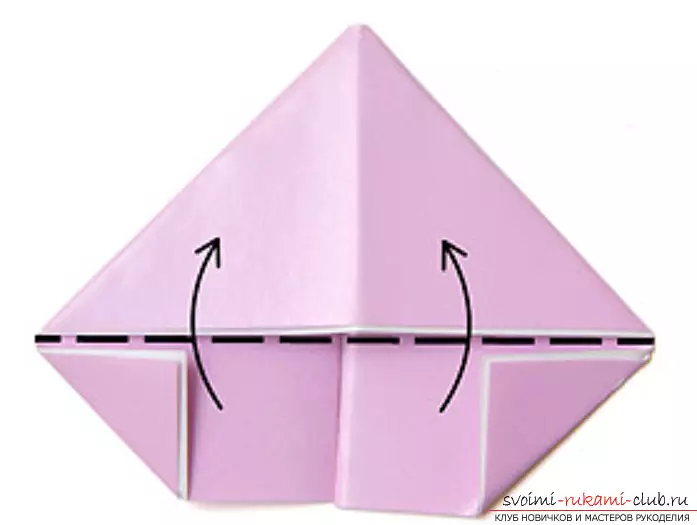
First, the simple square is put on Rhombic.

Then bends in half.

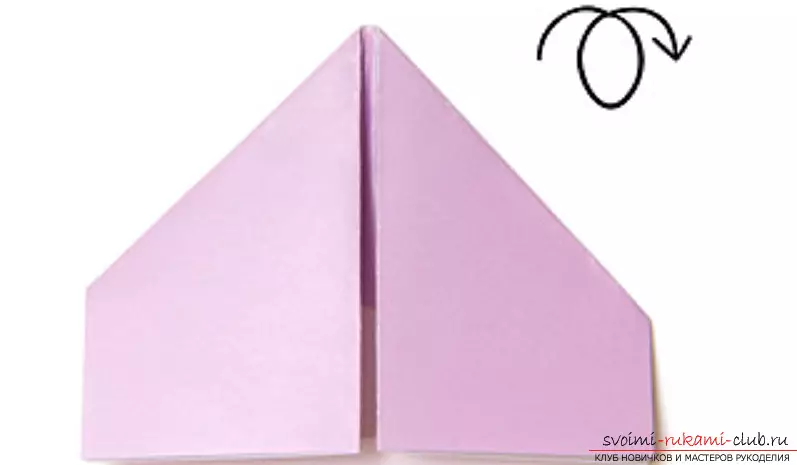
On the sides it is necessary to make suns and draw the head and neck of the swan, as in the photo.

Cut the head and neck in the middle of the square, neatly and symmetrically.
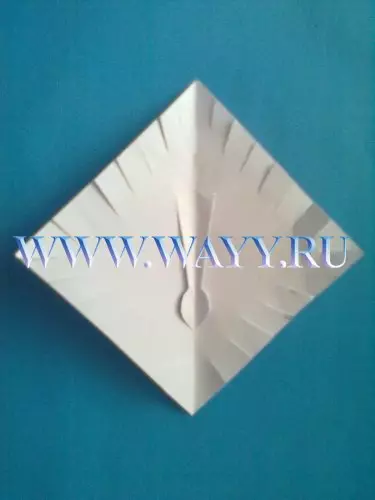
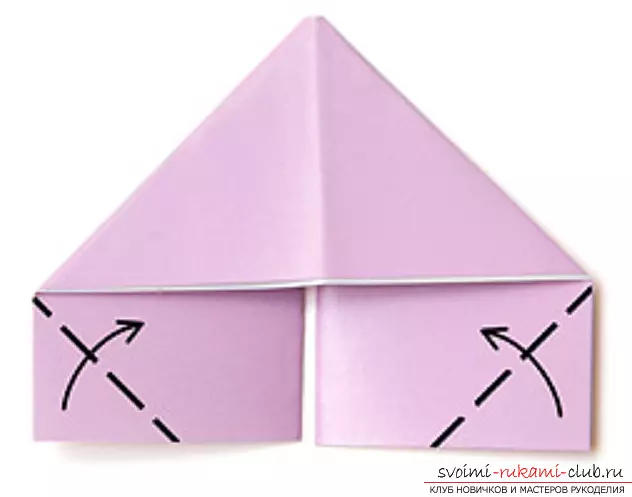
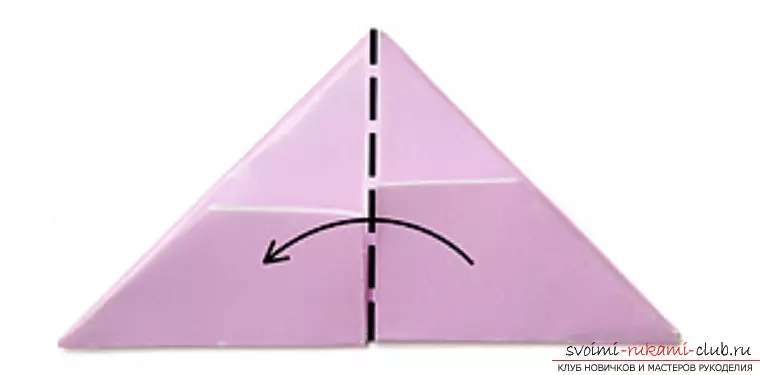
Take up the head and bend the leaf into the triangle, like this:
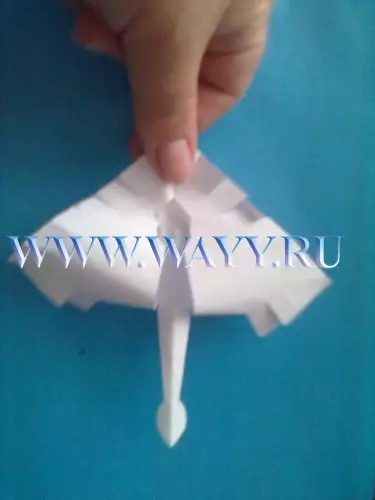
Gear slightly tail and draw black eyes and red beaks.
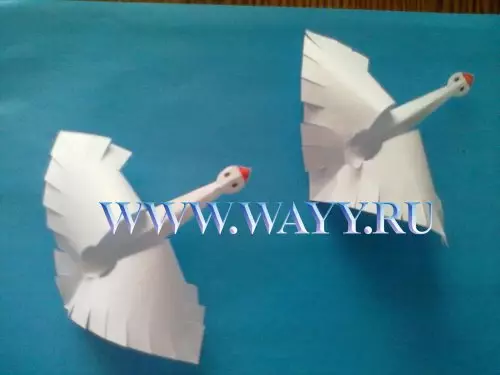
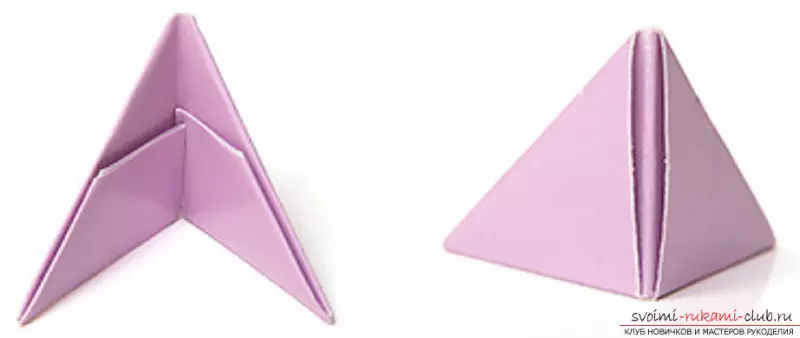
These are the birds. This swan origami scheme is suitable for the youngest children.
Beauty from serving napkin
This assembly scheme is also very easy. Such a craft can be used to design a festive table, for example.
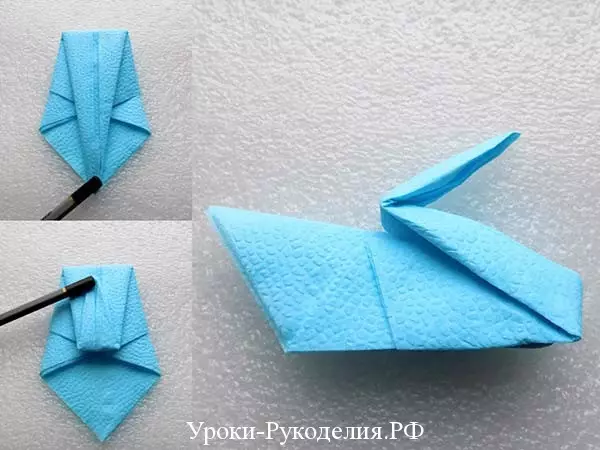
It will take a paper napkin with a size of 33 × 33 cm. It must be put in a rhombic, an angle with all the opening parties down. Folded the napkin in half and break back, thus taking a fold. Now the right corner must be bent inside. To the line of this fold.
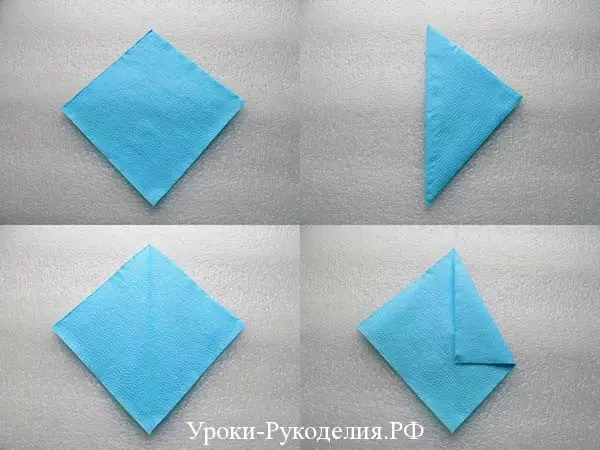
Also need to be done with the left corner. Then turn the workpiece. Right corner bend again to the middle. Just do it with the left. It should turn out like this:

The top corner bend down to the very edge, and then halfway back to top. It will be head. Bend it in half along.
Article on the topic: Lace do it yourself Crochet: Schemes with photos and video
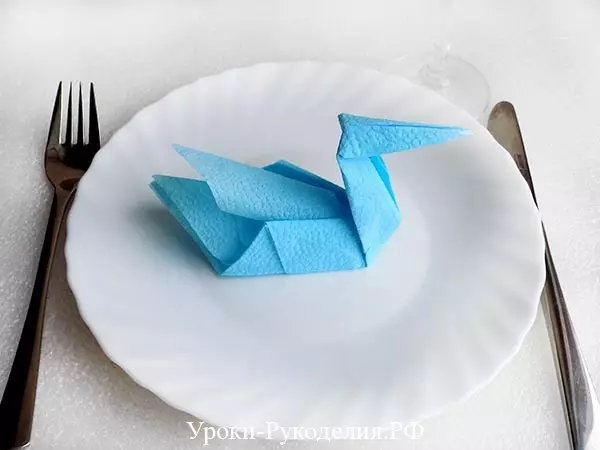
Straighten the swan neck. Spread the figure below so that it stands. Raise the head. In order to form the tail of the bird, you need to lift the top layer of napkins and straighten. Then also do with the rest of the layers. It will only be left to put a swan on a plate.
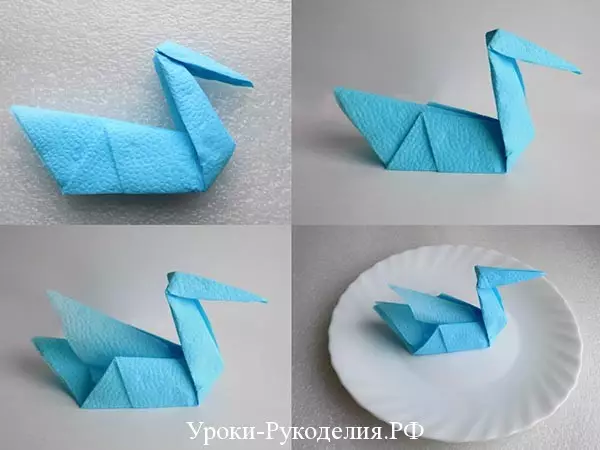
And on the table is not just a napkin, but also the decoration. Festive and beautiful!
Large rainbow swan
Modular origami is made from a variety of modules that are connected in the figure. Therefore, assistants will not interfere.
For modules you need small rectangles. You can make them by cutting a sheet of A4 format. So it turns out rectangles 53 × 74 cm.
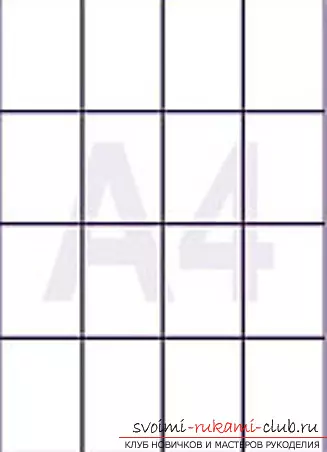
If you succeed in this way, it turns out the pieces of 37 × 53 cm.
You can also use squares from blocks for entries by sharing them in half. We proceed with step-by-step assembly.
Fold the rectangle in half, along.
Bend in half across, making a fold, break back.

Turn over and get angles inside, to the fold line.

Cut the lower edge a bit. Then flip over and cut down the lower corners upstairs, leaving the gap between the folded angle and the upper triangle.
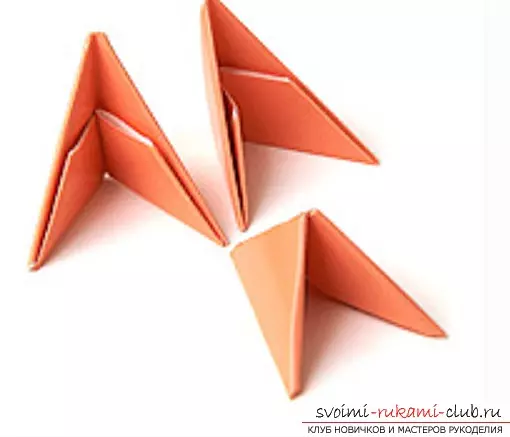
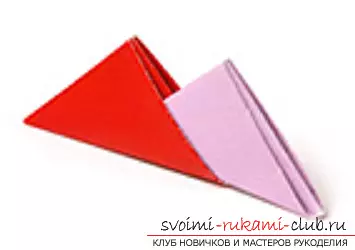
Lift the bottom to the top by forming a triangle.
Bend module in half.
Modules can be connected in different ways. They have two angle and two pockets. Here is one of the connection options:
Modules will be needed: 1 red, 136 pink, 90 orange, 60 yellow, 78 green, 39 blue, 36 blue, 19 purple.
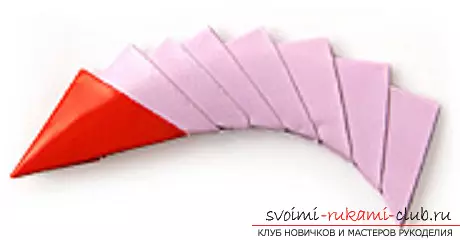
Take three pink modules and put like this.
Insert the angles of two modules in the third pocket.

Take two more modules and attach to the rest, so.
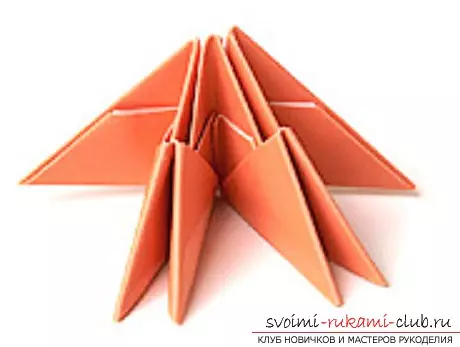
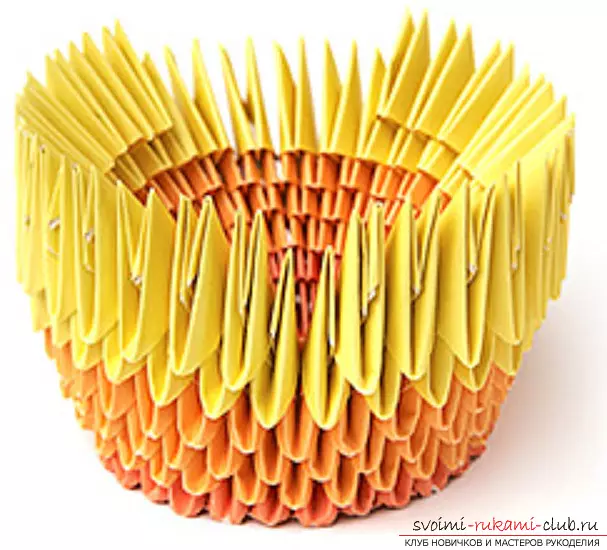
So you need to make the first ring. It consists of two rows. In the inner row modules on the short side, in external on the broad. Each row is 30 modules. Collect the ring chain and close the last module.
Article on the topic: Openwork pattern knitting needles for summer blouses: master class with video
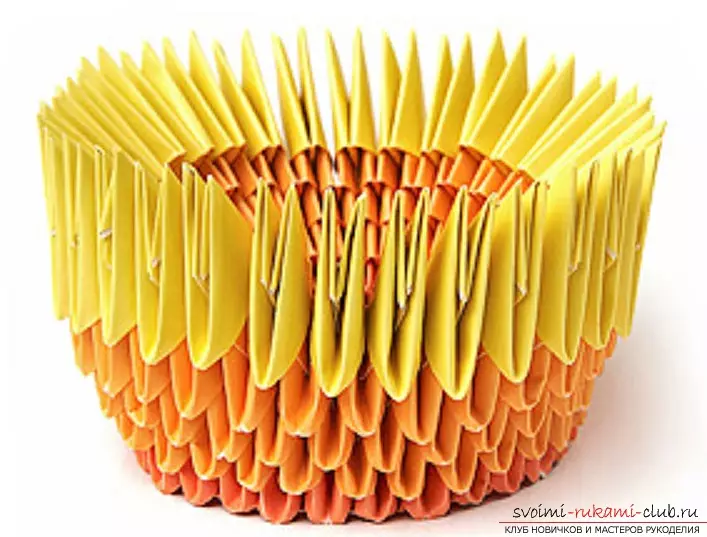
Take 30 orange modules and assemble the third row. Modules should be put in checker.
4 and 5 rows, 30 orange modules, we collect in the same way.
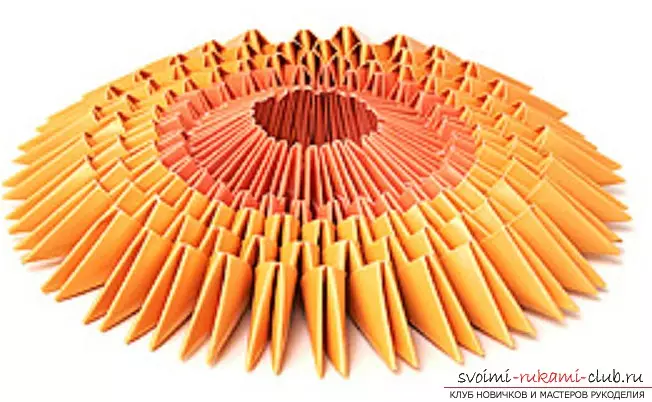
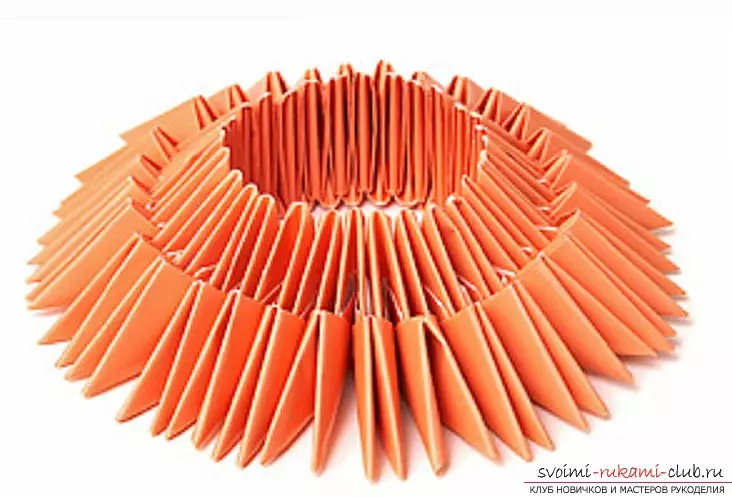
Take on the edges of the workpiece and how to twist it inside out to get a form like a bowl of the stadium.
So the billet looks from the back if it is turned over.
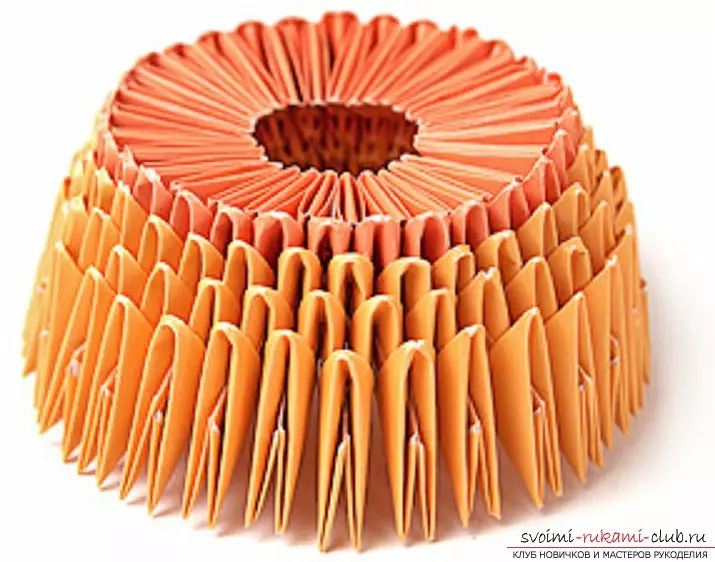
6 row consists of 30 yellow modules. We must wear them from above, placing exactly as in previous ranks.
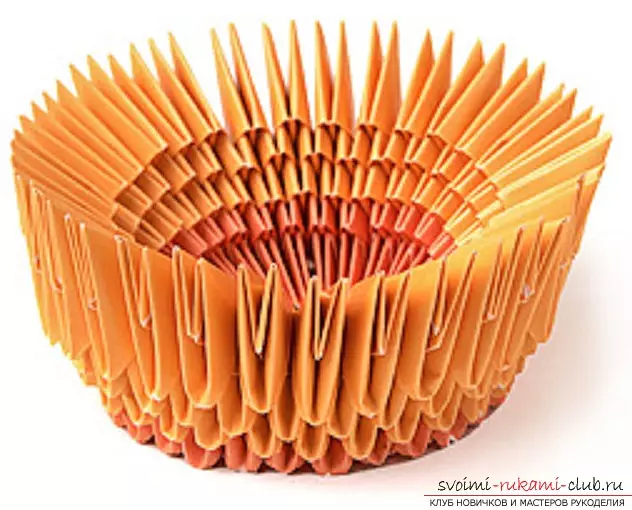
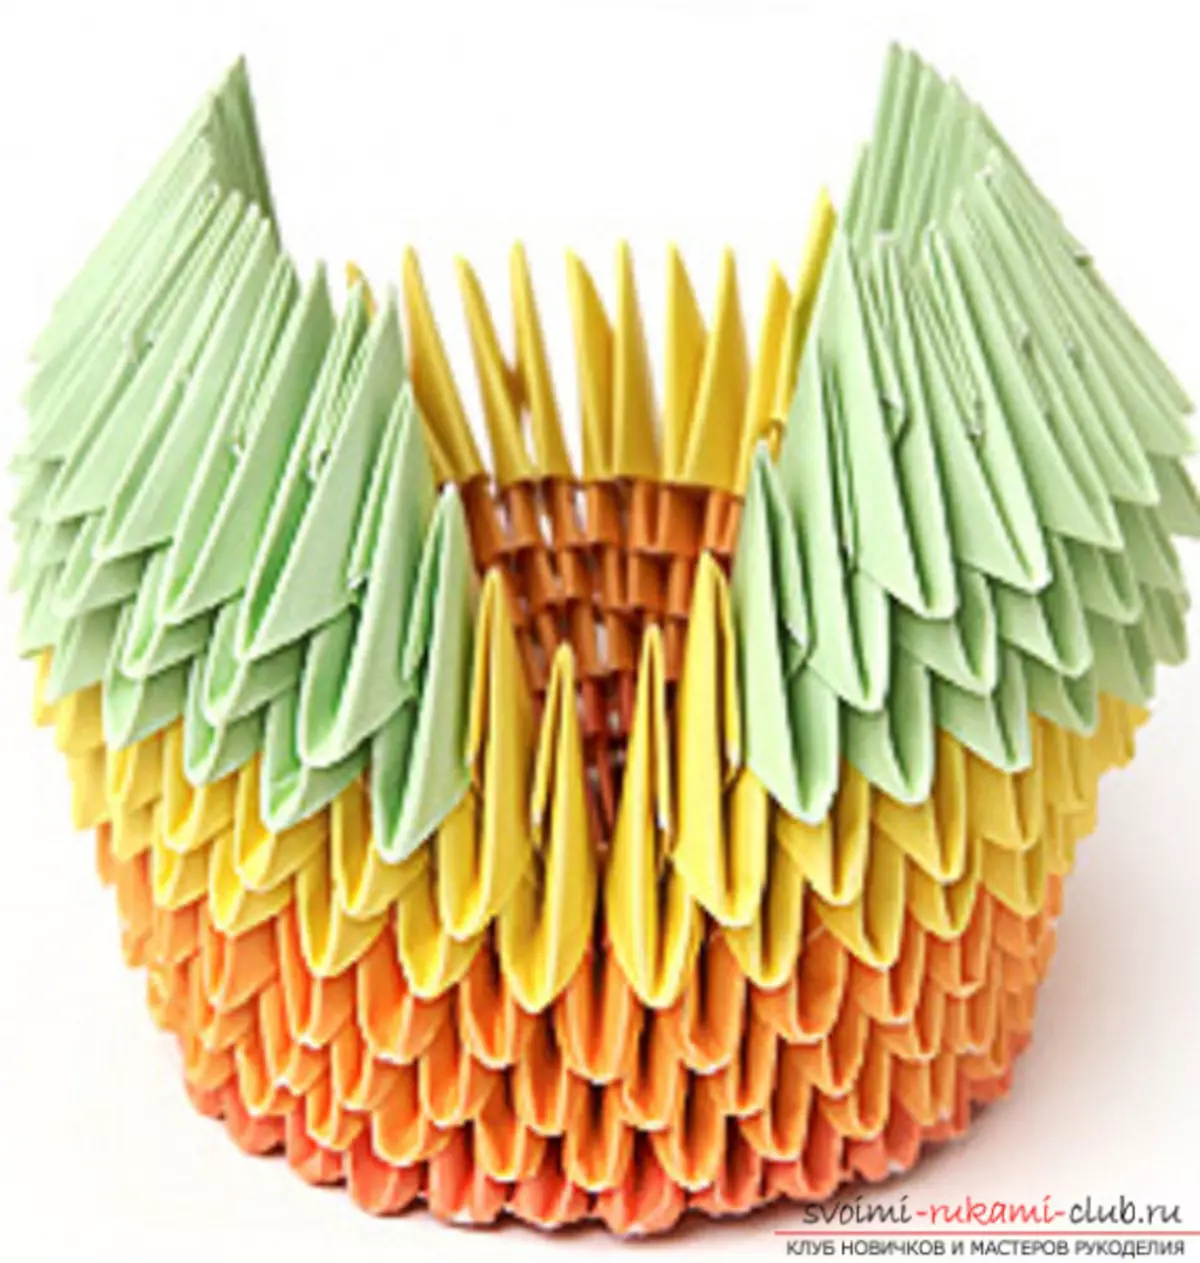
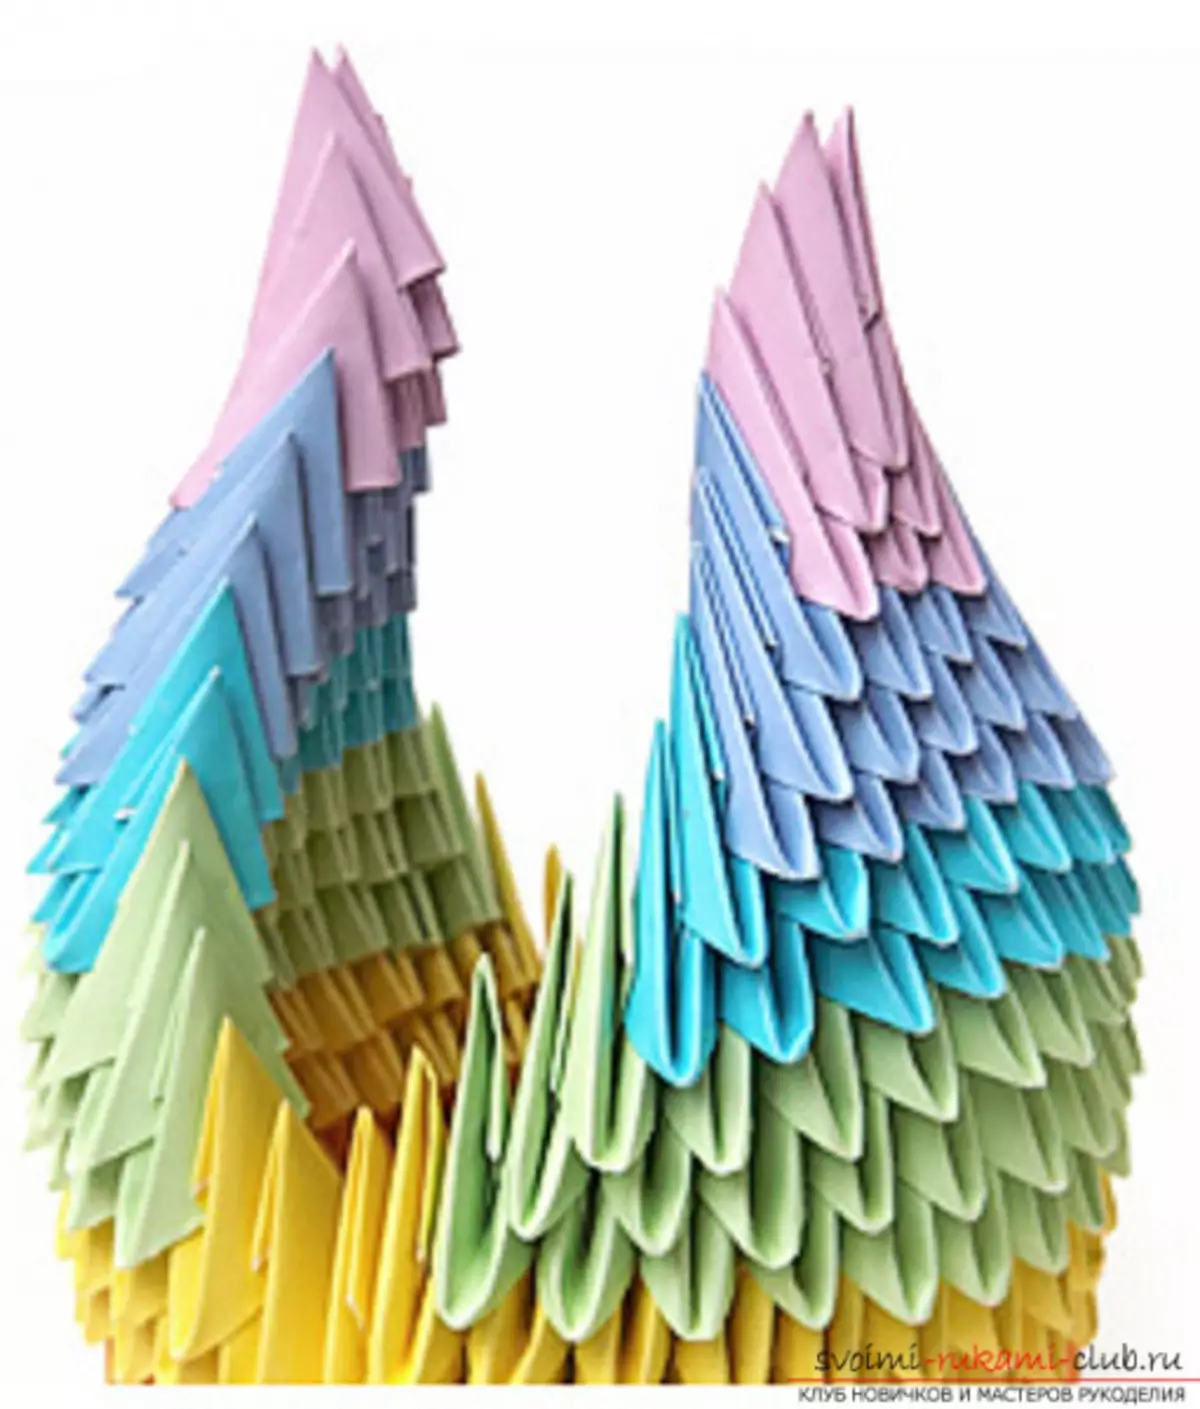
With 7 rows begins the assembly of the wings. We must choose the side where the bird's head is. Choose a couple of corners, there will be a neck. Right and left from these corners to make a number of 12 yellow modules.
It turns out that 7 series consists of 24 modules and there are two gaps in it.
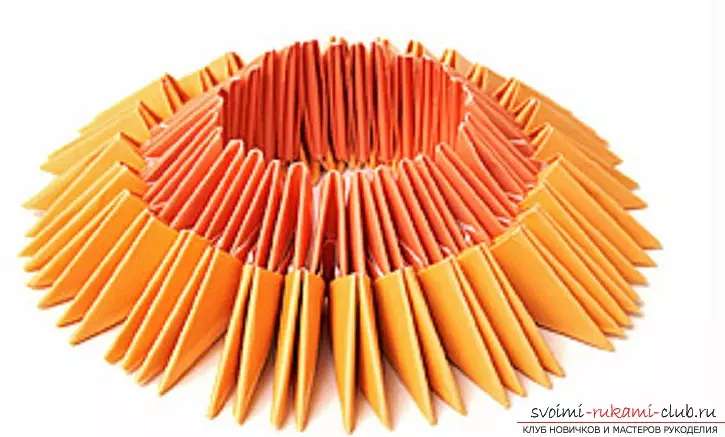
Continue making wings. Each row will now decrease by one module. 8 row consists of 22 green modules, two times 11. In 9 row included 20 green modules. In 10 row - 18 modules of the same color.
11 row - 16 blue modules. 12 row - 14 of the same modules.
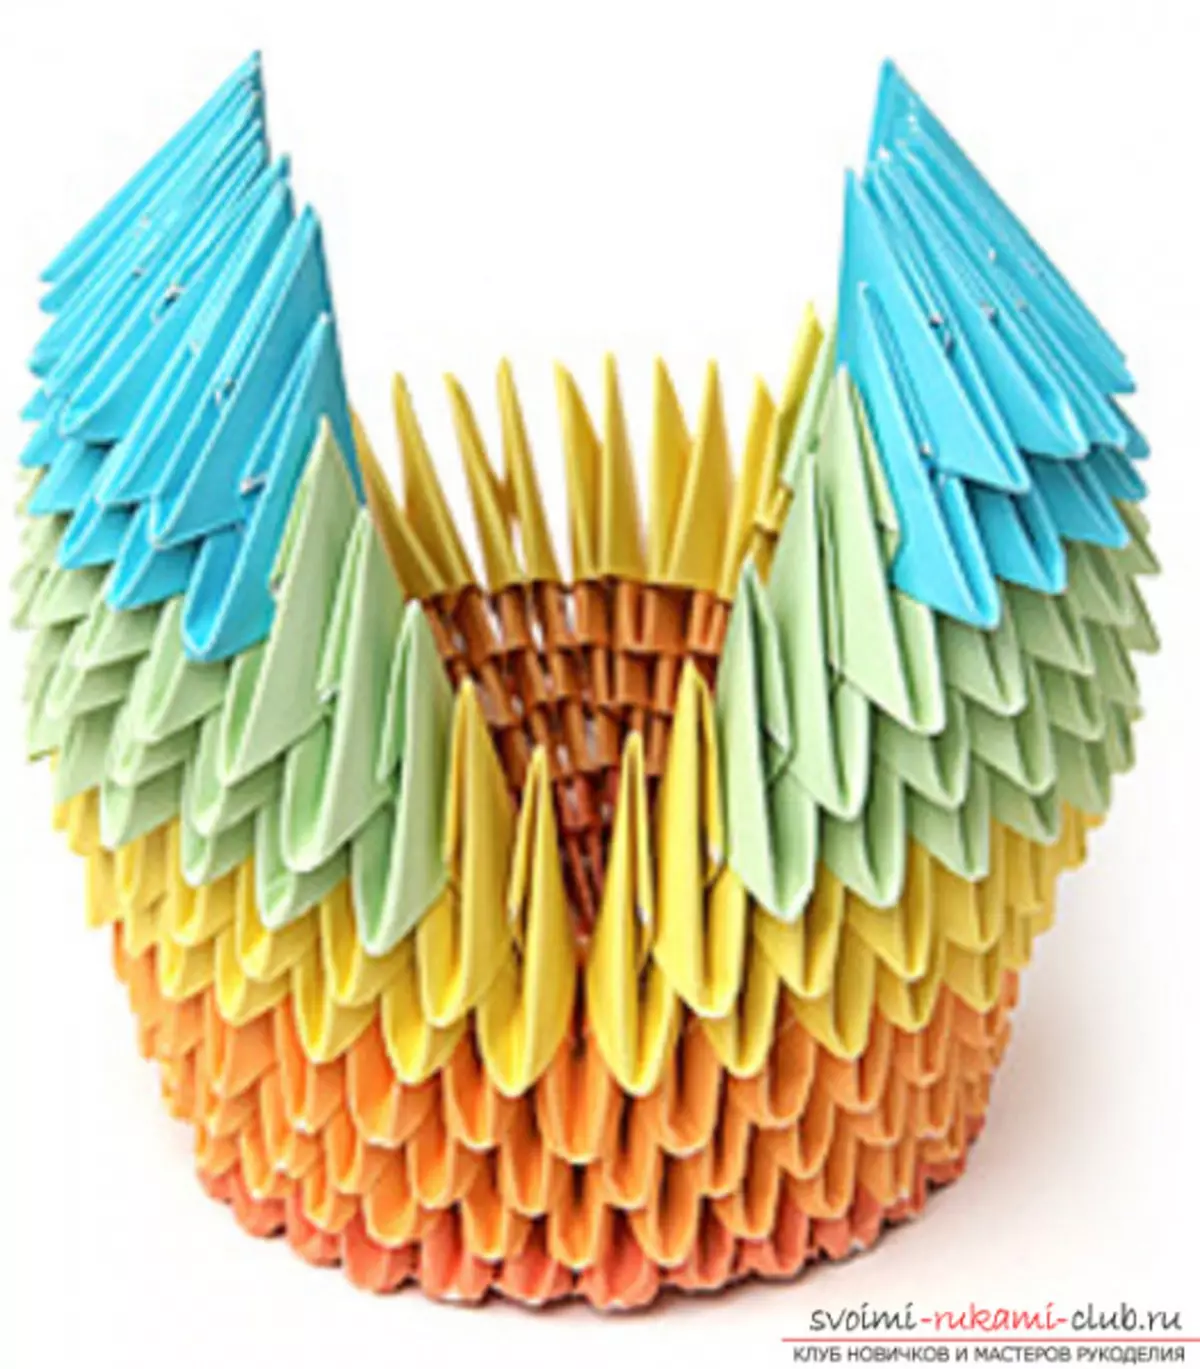
13 row - 12 blue modules. 14 row - 10. 15 row - 8 blue modules.
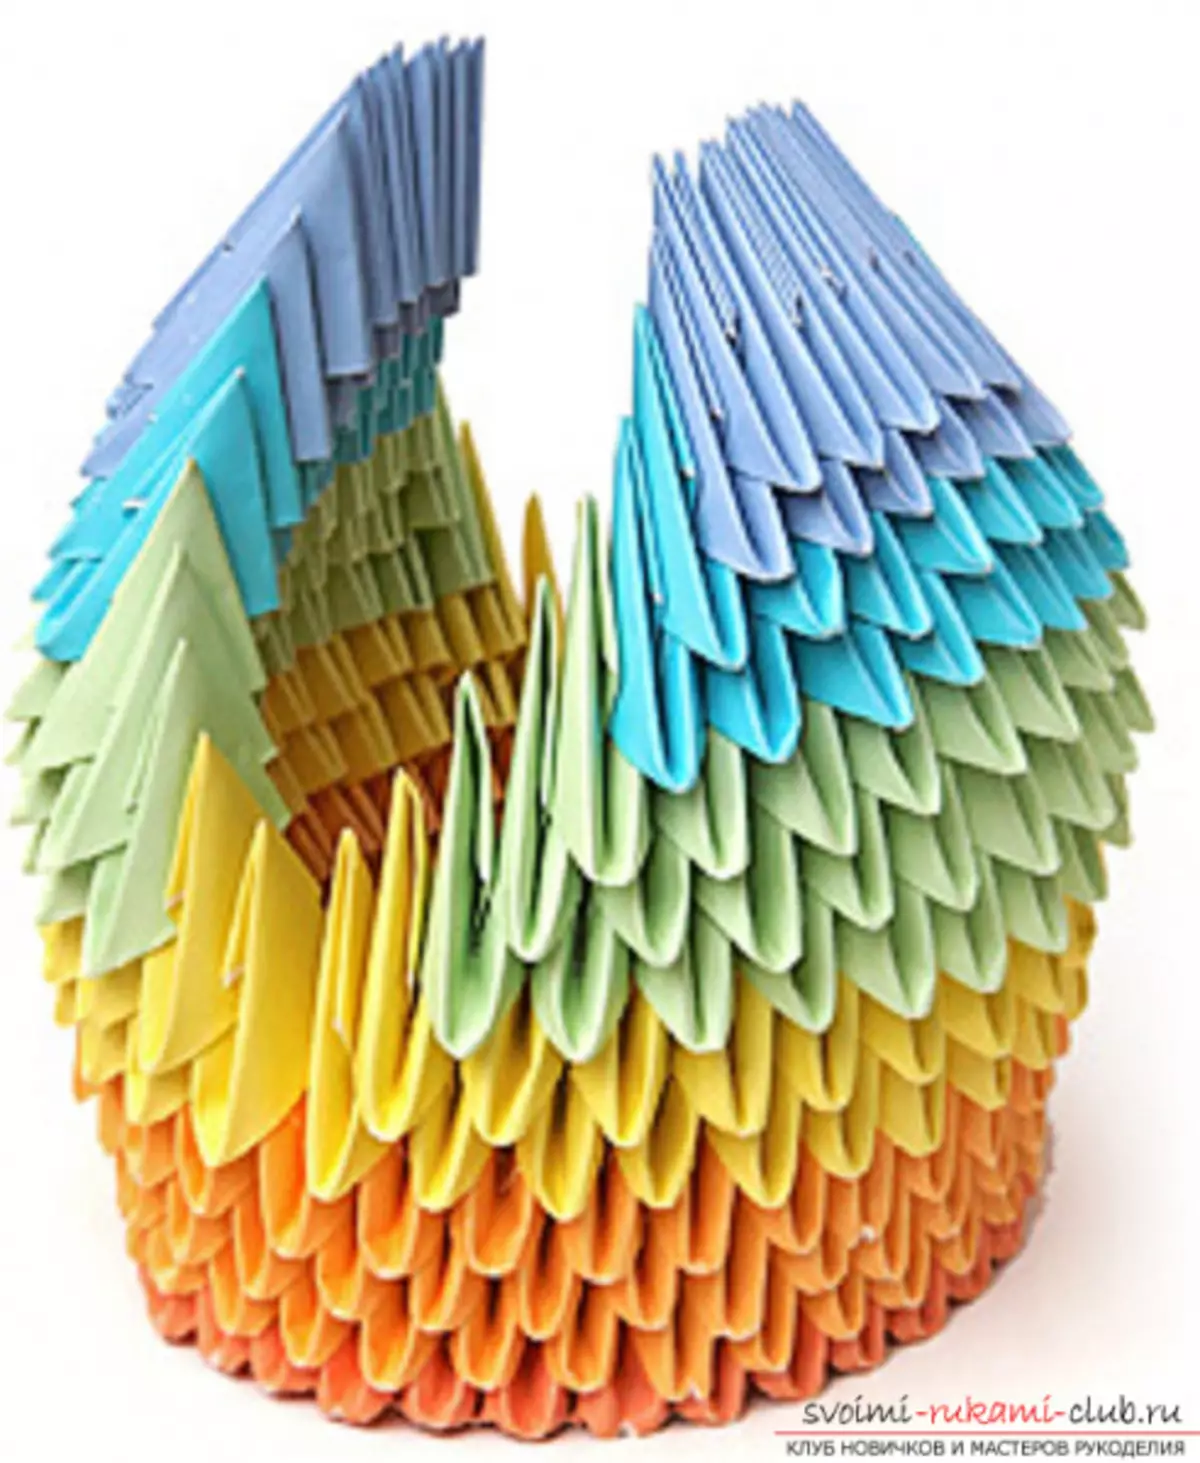
16 row - 6 purple modules, 17 row - 4 modules of the same color. 18 row - 2 purple module. Wings are collected. We must give them the form. They must be convex at the bottom and slightly bent up. Like this.
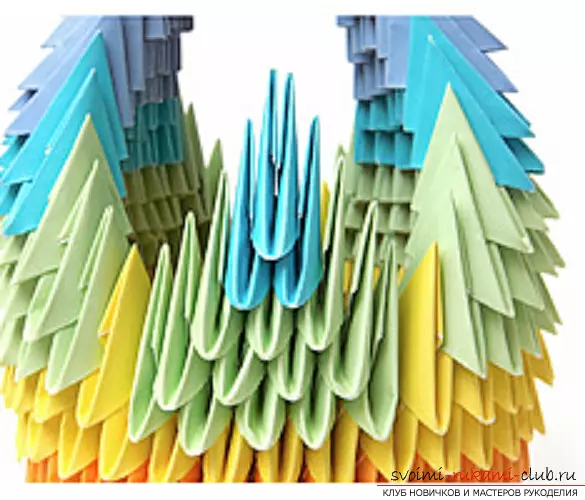
Now the tail. It has 5 rows. Each next row is less than one module. The tail will go to the tail: 12 green modules and 3 blue.
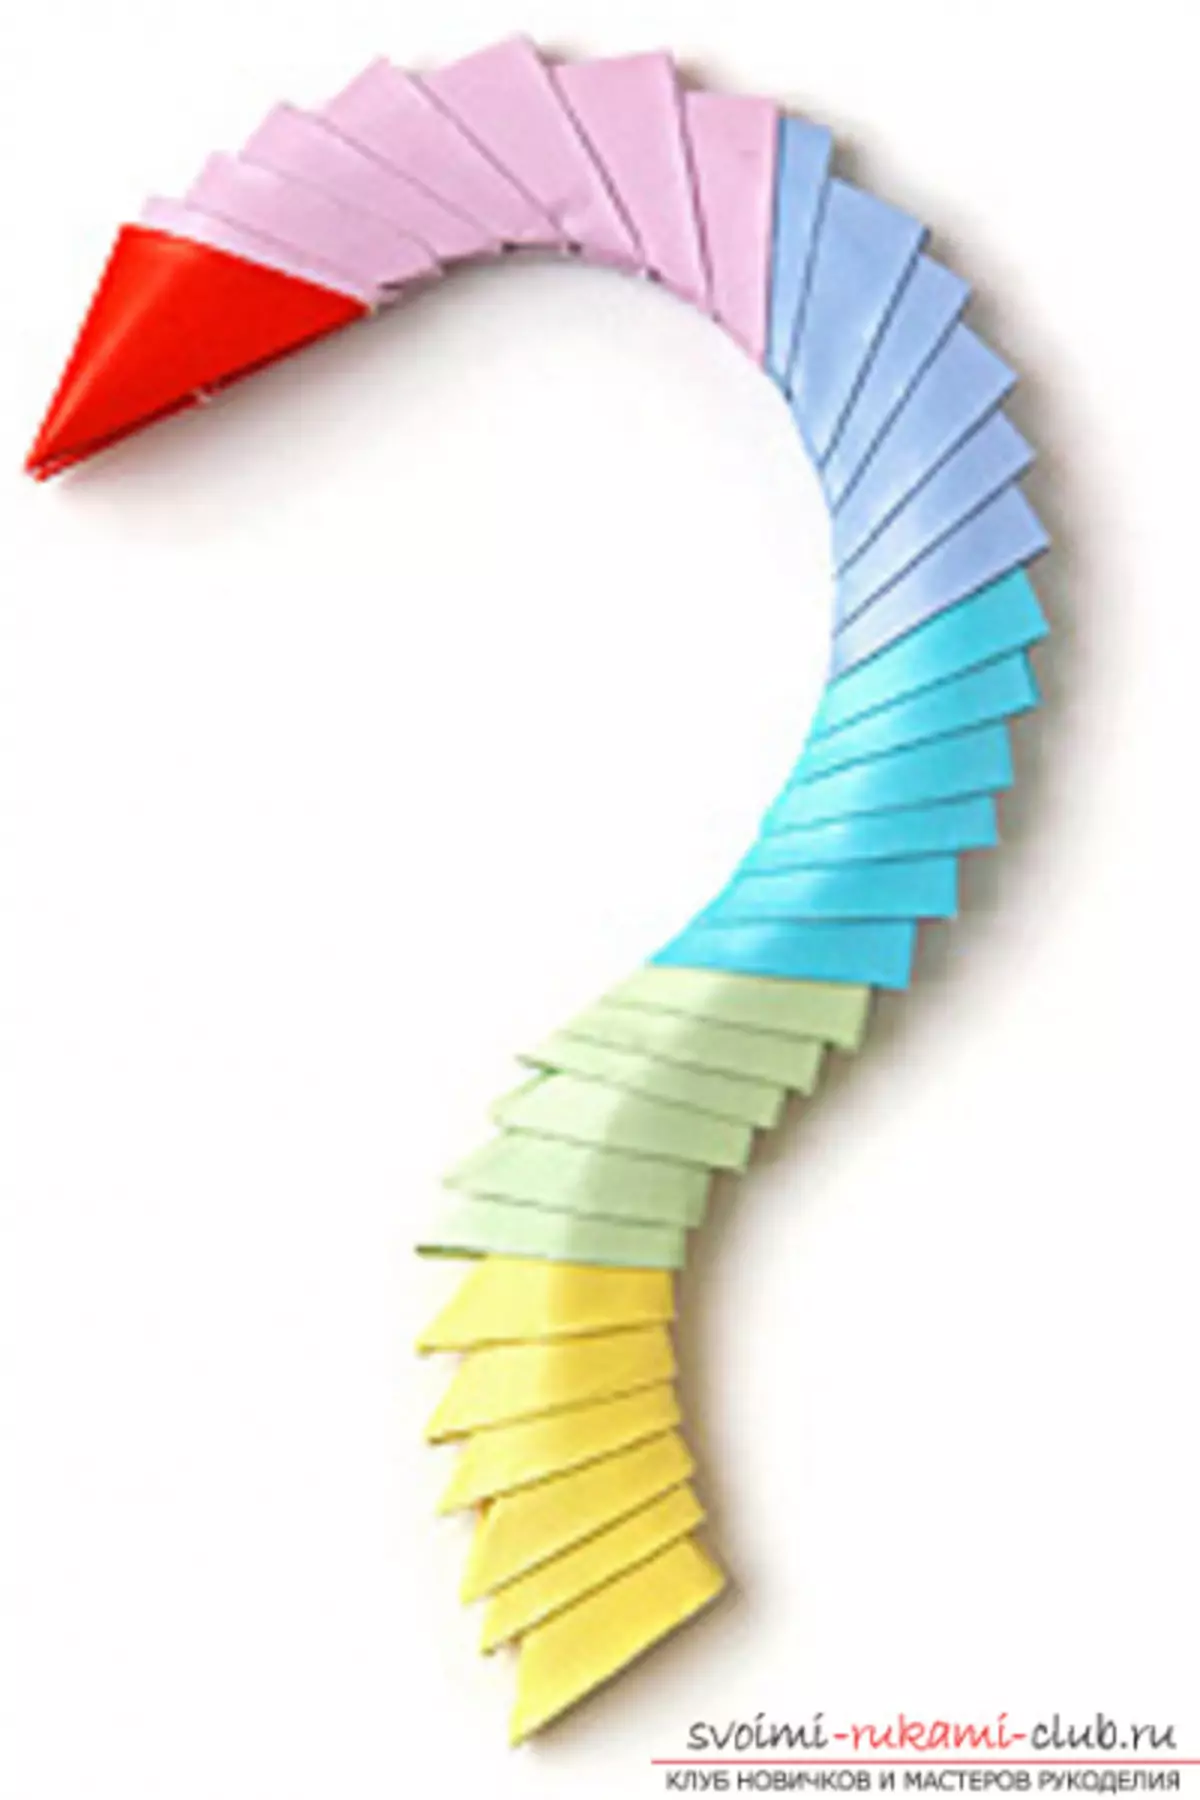
For the neck modules to collect otherwise. You need to insert two angle of one module in two pockets of the other.
Thus, to connect to the red module 7 purple, along the way trying to give the neck the desired bending. If I do not want the beak to diven, it is necessary to put it at the very beginning.
Article on the topic: Easter chicken chicken: master class with schemes and descriptions
Now attach: 6 blue, 6 blue, 6 green, 6 yellow modules. Protect the desired form.
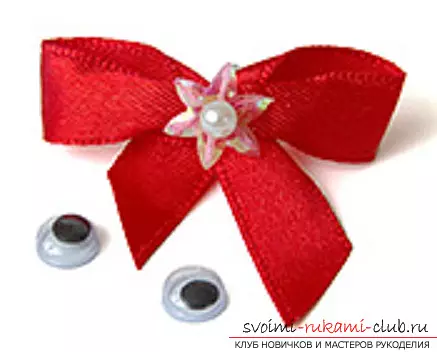
Well, two corners between the wings strengthen the neck. You can add eyes and a bow.
You should also collect a stand, from two rings. In one 36, in another 40 modules. Connection, as for the neck.
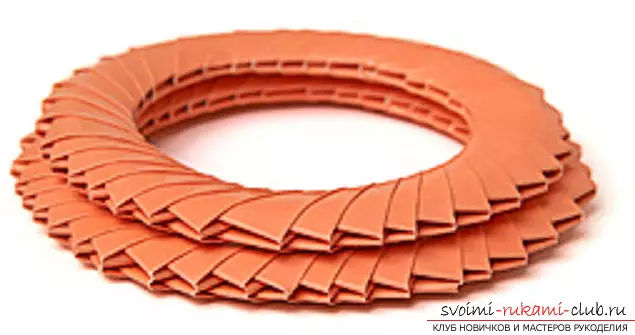
You can glue the rings and glue the swan to them.
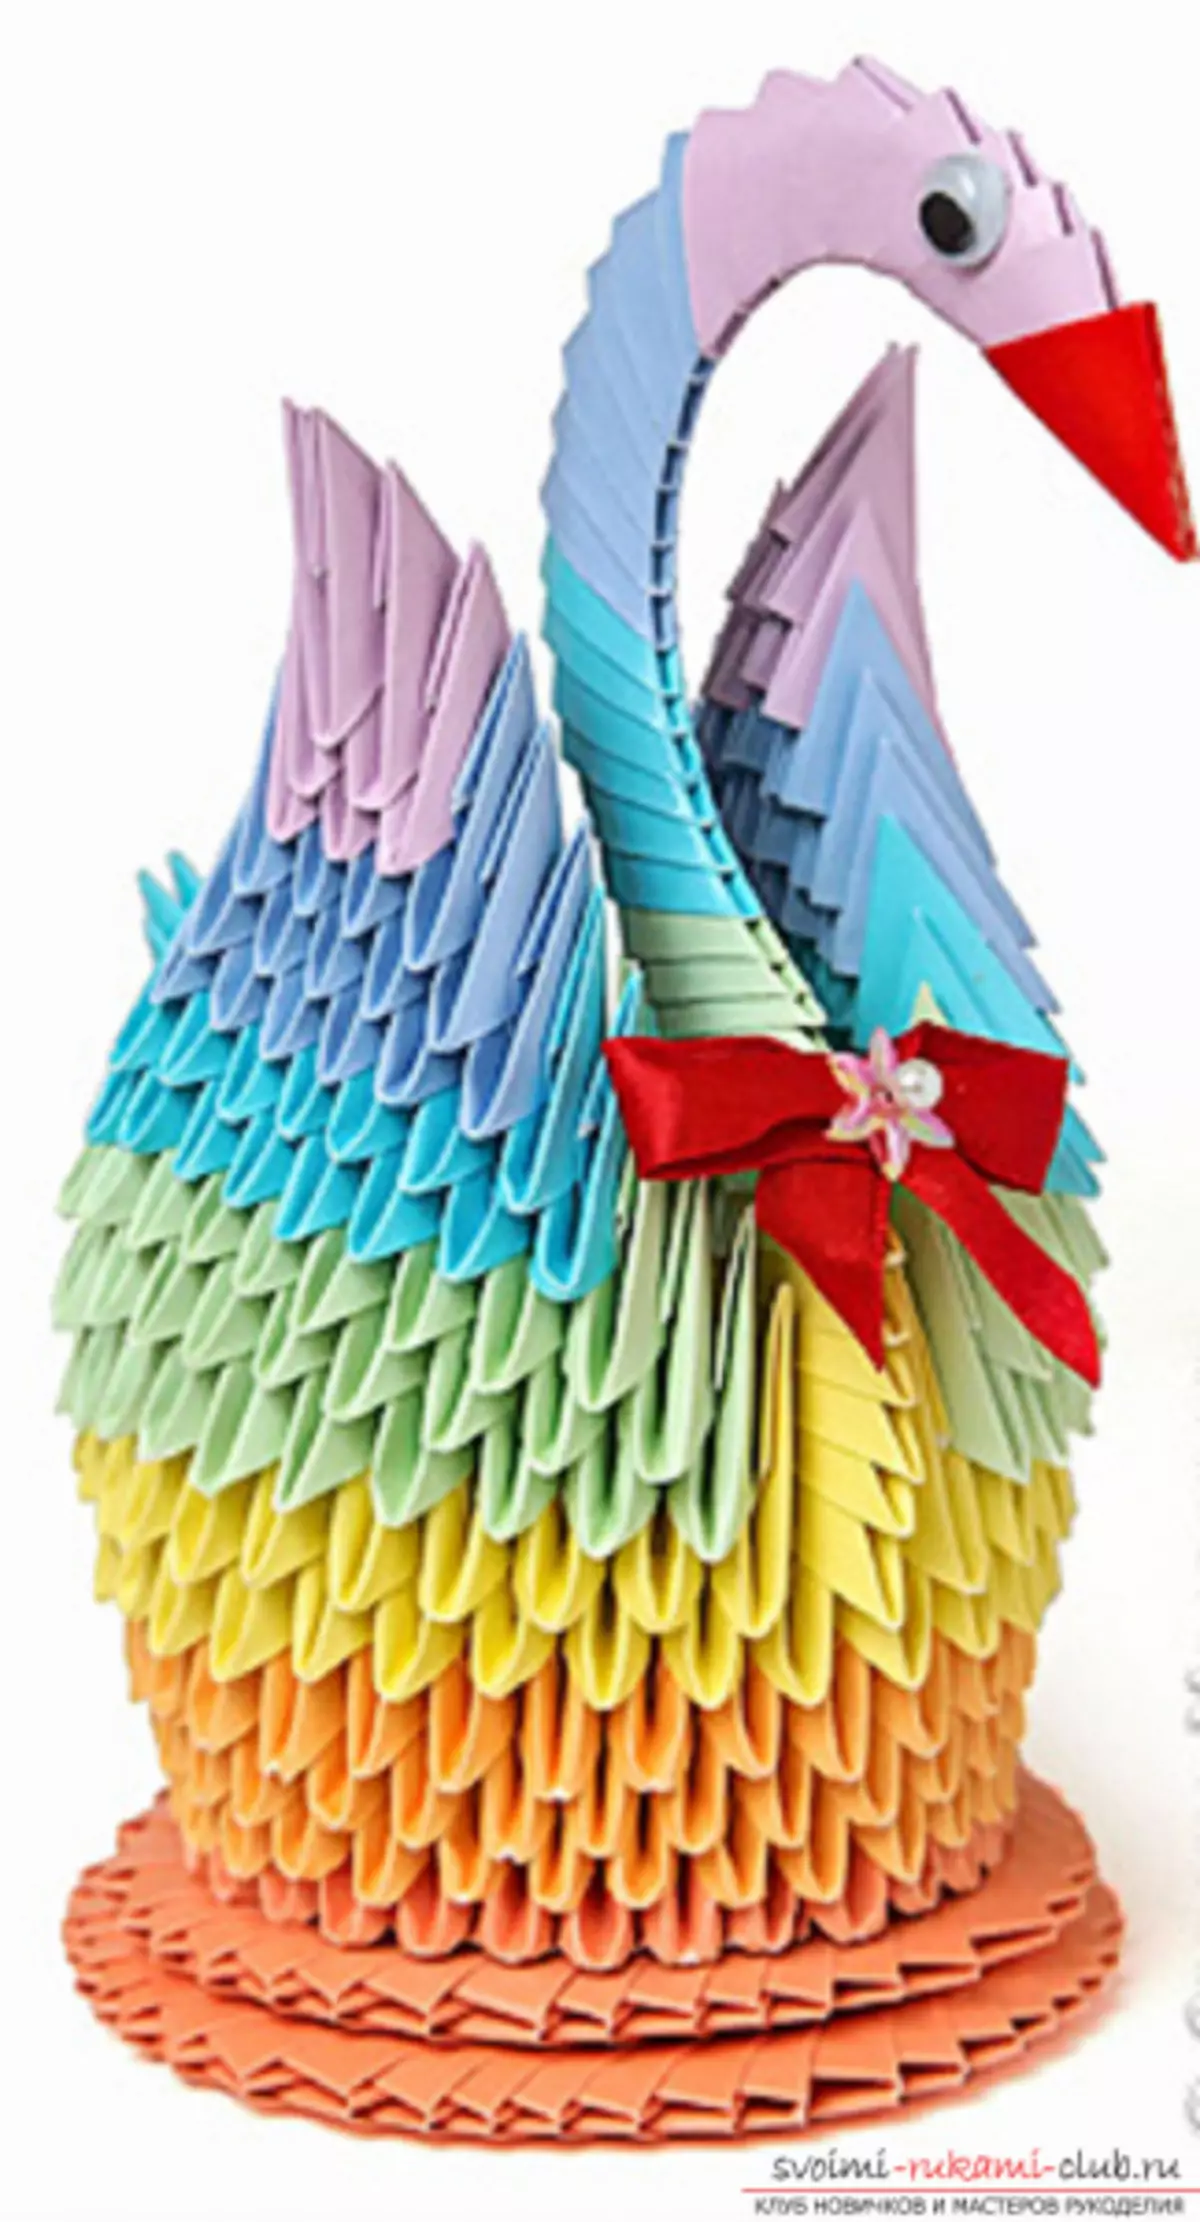
This is such a wonderful bird from the modules!
Video on the topic
Here you can watch videos with master classes of other models of the swan crafts.